manuals.online logo
Brands
  1. Home
  2. •
  3. Brands
  4. •
  5. Sauder
  6. •
  7. Indoor Furnishing
  8. •
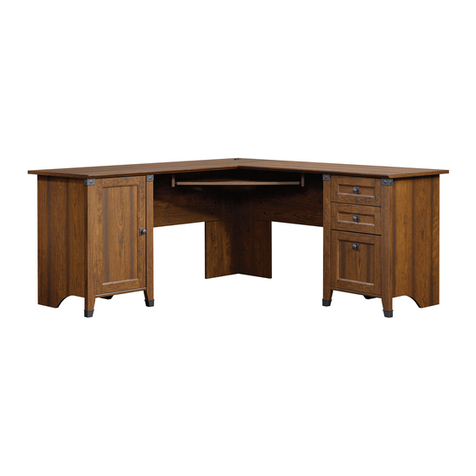
  9. Sauder Carson Forge 412924 User manual

Sauder Carson Forge 412924 User manual

NOTE: THIS INSTRUCTION
BOOKLET CONTAINS IMPORTANT
SAFETY INFORMATION.
PLEASE READ AND KEEP FOR
FUTURE REFERENCE.
Enlish p 1-22
Français p 23-25
Español p 26-28
Lot # 386798 12/14/15
Purchased: __________________
Be sure to ive us a rin before
makin any returns. 1-800-523-3987
Writin Desk
Carson Fore Collection | 412924
Need help? Visit Sauder.com to view video assembly tips or chat with a live rep.
Prefer the phone? Call 1-800-523-3987.
Share your journey!
sauder.com
Somethin to write
home about.
åWhile not all parts are labeled, some of the parts will have a label or an inked letter on the ede
to help distinuish similar parts from each other. Use this part identification to help identify similar parts.
A RIGHT END (1)
B LEFT END (1)
C UPRIGHT (1)
D TOP (1)
D333 DRAWER BOX FRONT (2)
D361 DRAWER SIDE (2)
D606 DRAWER BOTTOM (1)
F MODESTY PANEL (1)
G BACK (1)
H BRACE (1)
I RIGHT REAR LEG (1)
J LEFT REAR LEG (1)
K RIGHT FRONT LEG (1)
L LEFT FRONT LEG (1)
M BACK SKIRT (1)
N SIDE SKIRT (2)
O DRAWER FRONT (1)
T KEYBOARD FRONT (1)
U KEYBOARD SHELF (1)
Table of Contents Assembly Tools Required
2-3
4-5
6-22
23-25
26-28
29-30
31
Part Identification
Hardware Identification
Assembly Steps
Français
Español
Safety
Warranty
Hammer
Not actual size
No. 2 Phillips Screwdriver
Tip Shown Actual Size
412924 www.sauder.com/servicesPae 2
Part Identification
Part Identification
412924www.sauder.com/services Pae 3
A
B
C
D
F
G
H
I
JK
L
M
N
O
D361
D606
T
U
D333
N
D333
D361
Hardware Identification
åScrews are shown actual size. You may receive extra hardware with your unit.
METAL FRAME - 1
25M
PULL - 1
53K
8E CORNER ACCENT - 2FOOT - 4
10E
CAM COVER - 6
12P
CORD CLIP - 3
4P
12E TACK GLIDE - 4
WOOD DOWEL - 10
15F
KNOB - 1
52K GLUE - 1
54M
HINGE - 2
12H
412924 www.sauder.com/servicesPae 4
45BA CABINET RIGHT - 1 45BD DRAWER LEFT - 1
45BC DRAWER RIGHT - 1
45BB CABINET LEFT - 1
40AW CABINET RIGHT - 1 40AX CABINET LEFT - 1 40AY DRAWER RIGHT - 1 40AZ DRAWER LEFT - 1
METAL BAR - 2
26M
HIDDEN CAM - 28
1F
CAM SCREW - 16
8F
CAM DOWEL - 12
2F
Hardware Identification
åScrews are shown actual size. You may receive extra hardware with your unit.
412924www.sauder.com/services Pae 5
BLACK 7/8" LARGE HEAD SCREW -2
17S
SILVER 1/2" MACHINE SCREW -2
38S
SILVER 7/8" MACHINE SCREW - 1
42S
BLACK 1-1/4" FLAT HEAD SCREW - 4
7S
15S SILVER 5/8" MACHINE SCREW - 2
BLACK 2-1/4" FLAT HEAD SCREW - 1
26S
18S BROWN 1" FLAT HEAD SCREW - 4
3S GOLD 5/16" FLAT HEAD SCREW - 12
SILVER 5/8" FLAT HEAD SCREW - 4
23S
SILVER 9/16" LARGE HEAD SCREW - 2
54S
BROWN 9/16" LARGE HEAD SCREW - 17
40S
Step 1 Look for this icon. It means a
video assembly tip is available at
www.sauder.com/services/tips
å Assemble your unit on a carpeted floor or on the empty
carton to avoid scratchin your unit or the floor.
å Push twenty-eiht HIDDEN CAMS (1F) into the ENDS (A
and B), UPRIGHT (C), BACK (G), BRACE (H), and
SKIRTS (M and N). Then, insert the metal end of
twelve CAM DOWELS (2F) into the HIDDEN
CAMS in the ENDS, UPRIGHT, BACK, and BRACE.
412924 www.sauder.com/servicesPae 6
Arrow
Arrow
Do not tihten the HIDDEN CAMS in this step.
(12 used)
(28 used)
Arrow
Insert the metal end of the CAM
DOWEL into the HIDDEN CAM.
Arrow
A
B
C
G
H
M
N
N
Arrow
The arrow in the HIDDEN
CAM must point toward the
hole in the ede of the board.
Hole
Do not insert CAM
DOWELS into these
HIDDEN CAMS.
Do not insert CAM
DOWELS into these
HIDDEN CAMS.
Do not insert CAM
DOWELS into these
HIDDEN CAMS.
1F
1F
1F
2F
Scan this QR code or go to this address:
http://qr.sauder.com/?ID=1743
to watch a video on how to assemble your unit.
å Turn sixteen CAM SCREWS (8F) into the LEGS (I, J, K, and L).
å NOTE: Be sure to use the exact holes shown.
Step 2
412924www.sauder.com/services Pae 7
I
J
K
L
Remember:
Rihty tihty.
Lefty loosey.
8F
8F
8F
(16 used)
Step 3
å Fasten a CORNER ACCENT (8E) to each FRONT LEG (K and L).
Use two SILVER 5/8" MACHINE SCREWS (15S).
412924 www.sauder.com/servicesPae 8
8E
8E
K
L
Anled ede
SILVER 5/8" MACHINE SCREW
(2 used in this step)
15S
å First, fill the hole in the ede of each LEG (I, J, K, and L)
1/4 to 1/2 full with GLUE (54M). Then, insert four
WOOD DOWELS (15F) into the holes. Wipe away the
excess GLUE.
å Now, fill the holes in the SIDE SKIRTS (N) 1/4 to 1/2 full
with GLUE (54M). Then, insert the WOOD DOWELS in
the LEGS (I, J, K, and L) into these holes. Wipe away the
excess GLUE.
å NOTE: Be sure the CAM SCREWS in the LEGS insert into
the holes in the SIDE SKIRTS (N).
å Fasten the LEGS (I, J, K, and L) to the ENDS (A and B)
and SIDE SKIRTS (N). Tihten twelve HIDDEN CAMS.
Step 4
412924www.sauder.com/services Pae 9
Fill the holes 1/4 to 1/2 full with GLUE.
Inspect the parts thorouhly before
assemblin. Disassembly of lued
parts is extremely dicult.
Caution
!
54M
15F
15F
12
Ede and surface
with HIDDEN CAMS
Ede and surface
with HIDDEN CAMS
Finished ede
Surface with
HIDDEN CAMS
Finished ede
Surface with
HIDDEN CAMS
Anled ede
Anled ede
Anled ede
A
B
I
J
K
L
N
N
Step 5
å Fasten the CABINET RIGHT (45BA) to the RIGHT END (A)
and the CABINET LEFT (45BB) to the UPRIGHT (C). Use
four GOLD 5/16" FLAT HEAD SCREWS (3S) throuh
holes #1 and #4.
412924 www.sauder.com/servicesPae 10
A
C
K
Roller end
Roller end
Surface without
HIDDEN CAMS
Finished ede
1
2
3
4
4
3
2
1
45BB
45BB
45BA
45BA
GOLD 5/16" FLAT HEAD SCREW
(4 used for the RAILS)
3S
Surface with
HIDDEN CAMS
å Carefully flip the UPRIGHT (C) over.
å Fasten the CABINET RIGHT (40AW) to the UPRIGHT (C) and
the CABINET LEFT (40AX) to the LEFT END (B). Use four
GOLD 5/16" FLAT HEAD SCREWS (3S).
Step 6
412924www.sauder.com/services Pae 11
B
L
C
Roller end
Roller end
Finished ede
GOLD 5/16" FLAT HEAD SCREW
(4 used for the RAILS)
3S
40AW
40AW
40AX
40AX
Surface with
HIDDEN CAMS
Surface with
HIDDEN CAMS
Step 7
å Wrap the METAL FRAME (25M) around the MODESTY
PANEL (F). Then, fasten the METAL FRAME to the
MODESTY PANEL. Use eiht BROWN 9/16" LARGE
HEAD SCREWS (40S).
å Cross the METAL BARS (26M) and line up the center
holes in the BARS. Then, fasten the METAL BARS to the
MODESTY PANEL (F). Use five BROWN 9/16" LARGE
HEAD SCREWS (40S).
412924 www.sauder.com/servicesPae 12
F
26M
26M
25M
25M
Surface
with holes
BROWN 9/16" LARGE HEAD SCREW
(13 used in this step)
40S
å First, fill the hole in the ede of each REAR LEG (I and J) 1/4 to 1/2 full with
GLUE (54M). Then, insert two WOOD DOWELS (15F) into the holes. Wipe away
the excess GLUE.
å Now, fill the holes in the BACK SKIRT (M) 1/4 to 1/2 full with GLUE (54M). Then,
insert the WOOD DOWELS in the REAR LEGS (I and J) into these holes. Wipe
away the excess GLUE.
å NOTE: Be sure the CAM SCREWS in the LEGS insert into the holes in the
SIDE SKIRTS (N).
å Fasten the BACK (G), BRACE (H), and BACK SKIRT (M) to the ENDS (A and B),
REAR LEGS (I and J), and FRONT LEGS (K and L). Tihten eiht HIDDEN CAMS.
Step 8
412924www.sauder.com/services Pae 13
Fill the holes 1/4 to 1/2 full with GLUE.
Inspect the parts thorouhly before
assemblin. Disassembly of lued
parts is extremely dicult.
Caution
!
54M
15F
Surface with HIDDEN CAMS
Surface without HIDDEN CAMS
Ede with
HIDDEN CAMS
Unfinished ede
Rounded ede
Start Tighten
Arrow
Minimum
190 derees
Caution
Risk of damae or
injury. HIDDEN CAMS
must be completely
tihtened. HIDDEN
CAMS that are not
completely tihtened
may loosen, and parts
may separate. To
completely tihten:
Arrow
Maximum
210 derees
A
B
G
H
I
J
K
L
M
Step 9
å Fasten the MODESTY PANEL (F) to the BACK (G) and
BACK SKIRT (M). Use four BROWN 9/16" LARGE HEAD
SCREWS (40S) throuh the METAL BARS (26M) on the
MODESTY PANEL.
412924 www.sauder.com/servicesPae 14
F
G
M
Surface without
METAL BARS
26M
26M
BROWN 9/16" LARGE HEAD SCREW
(4 used in this step)
40S
Hey! It's startin to look
like somethin!
å Fasten the UPRIGHT (C) to the TOP (D). Tihten two
HIDDEN CAMS.
Step 10
412924www.sauder.com/services Pae 15
Arrow
Minimum
190 derees
Maximum
210 derees
C
D
Surface with holes
Curved ede
Finished ede
Surface with
HIDDEN CAMS
Step 11
å First, fill the four holes in the TOP (D) 1/4 to 1/2 full with GLUE (54M). Then, insert
four WOOD DOWELS (15F) into the holes. Wipe away the excess GLUE.
å Place a drop of GLUE (54M) on the WOOD DOWELS (15F) located in the corners
of the TOP (D).
å Carefully turn your unit over and fasten the ENDS (A and B) and BACK (G) to the
TOP (D). Tihten six HIDDEN CAMS.
å NOTE: Be sure the WOOD DOWELS in the TOP insert into the holes in
the LEGS (I, J, K, and L). Wipe away the excess GLUE.
å Fasten the BRACE (H) to the UPRIGHT (C). Use a BLACK
2-1/4" FLAT HEAD SCREW (26S).
412924 www.sauder.com/servicesPae 16
Fill the holes 1/4 to 1/2 full with GLUE.
Inspect the parts thorouhly before
assemblin. Disassembly of lued
parts is extremely dicult.
Caution
!
54M
15F
15F
15F
A
B
G
H
I
J
K
L
Arrow
Minimum
190 derees
Maximum
210 derees
C
D
Curved ede
Surface with HIDDEN CAMS
BLACK 2-1/4" FLAT HEAD SCREW
(1 used in this step)
26S
å Push a FOOT (10E) over the bottom ede of each LEG (I, J, K, and L).
å With a hammer, tap a TACK GLIDE (12E) throuh the holes of
the FEET (10E).
å Turn two CORD CLIPS (4P) into the BACK (G).
å NOTE: The CORD CLIPS are used to hold your keyboard cords
aainst the BACK.
Step 12
412924www.sauder.com/services Pae 17
G
I
J
K
L
4P
12E
10E
Step 13
å Fasten two HINGES (12H) to the KEYBOARD FRONT (T).
Use four SILVER 5/8" FLAT HEAD SCREWS (23S).
å Fasten the HINGES (12H) to the KEYBOARD SHELF (U).
Use two SILVER 9/16" LARGE HEAD SCREWS (54S).
412924 www.sauder.com/servicesPae 18
T
U
12H
SILVER 5/8" FLAT HEAD SCREW
(4 used for the KEYBOARD FRONT)
23S
SILVER 9/16" LARGE HEAD SCREW
(2 used for the KEYBOARD SHELF)
54S
Finished surface
Finished ede
å Fasten the DRAWER RIGHT (40AY) and the DRAWER
LEFT (40AZ) to the KEYBOARD SHELF (U). Use four
BROWN 1" FLAT HEAD SCREWS (18S).
å Fasten a PULL (53K) to the KEYBOARD FRONT (T). Use
two SILVER 1/2" MACHINE SCREWS (38S).
å Turn a CORD CLIP (4P) into the KEYBOARD SHELF (U).
å NOTE: The CORD CLIP is used to hold your keyboard
cord aainst the KEYBOARD SHELF.
Step 14
412924www.sauder.com/services Pae 19
4P
T
U
53k
BROWN 1" FLAT HEAD SCREW
(4 used for the SLIDES)
18S
SILVER 1/2" MACHINE SCREW
(2 used for the PULL)
Roller end
Roller end
40AZ
40AZ
40AY
40AY
38S
Step 15
å Fasten the DRAWER SIDES (D361) to one of the DRAWER BOX
FRONTS (D333). Use two BLACK 1-1/4" FLAT HEAD SCREWS (7S).
å Insert the other DRAWER BOX FRONT onto the DRAWER BOTTOM (D606).
Then, slide the DRAWER BOTTOM (D606) into the rooves in the
DRAWER SIDES (D361) and DRAWER BOX FRONT (D333).
å Now, fasten the DRAWER BOX FRONT (D333) to the DRAWER
SIDES (D361). Use two BLACK 1-1/4" FLAT HEAD SCREWS (7S).
412924 www.sauder.com/servicesPae 20
D361
Finished surface
Groove
BLACK 1-1/4" FLAT HEAD SCREW
(4 used in this step)
7S
7S
D361
D361
D361
D606
D333
D333
D333

Other Sauder Indoor Furnishing manuals
Sauder worksense BERGEN CIRCLE 427464 User manual

Sauder

Sauder worksense BERGEN CIRCLE 427464 User manual

Sauder Linen Tower 414819 User manual

Sauder

Sauder Linen Tower 414819 User manual

Sauder 414764 User manual

Sauder

Sauder 414764 User manual

Sauder Worksense MASON PEAK 427827 User manual

Sauder

Sauder Worksense MASON PEAK 427827 User manual

Sauder Carson Forge 414444 User manual

Sauder

Sauder Carson Forge 414444 User manual

Sauder Cottage Road L Desk 431264 User manual

Sauder

Sauder Cottage Road L Desk 431264 User manual

Sauder North Avenue 422097 User manual

Sauder

Sauder North Avenue 422097 User manual

Sauder Dakota Pass 419440 User manual

Sauder

Sauder Dakota Pass 419440 User manual

Sauder Shoal Creek 418662 User manual

Sauder

Sauder Shoal Creek 418662 User manual

Sauder International Lux 421434 User manual

Sauder

Sauder International Lux 421434 User manual

Sauder 414724 User manual

Sauder

Sauder 414724 User manual

Sauder 408726 User manual

Sauder

Sauder 408726 User manual

Sauder Dakota Pass 418268 User manual

Sauder

Sauder Dakota Pass 418268 User manual

Sauder Manhattan Gate 429250 User manual

Sauder

Sauder Manhattan Gate 429250 User manual

Sauder Pallada Series 411843 User manual

Sauder

Sauder Pallada Series 411843 User manual

Sauder DESIGNER'S IMAGE 430616 User manual

Sauder

Sauder DESIGNER'S IMAGE 430616 User manual

Sauder 535782 User manual

Sauder

Sauder 535782 User manual

Sauder Edge Water Lift-Top Coffee Table 414856 User manual

Sauder

Sauder Edge Water Lift-Top Coffee Table 414856 User manual

Sauder Shoal Creek 409733 User manual

Sauder

Sauder Shoal Creek 409733 User manual

Sauder Cannery Bridge 429510 User manual

Sauder

Sauder Cannery Bridge 429510 User manual

Sauder OfficeWorks AFFIRM 426279 User manual

Sauder

Sauder OfficeWorks AFFIRM 426279 User manual

Sauder 415137 User manual

Sauder

Sauder 415137 User manual

Sauder OfficeWorks AFFIRM 427413 User manual

Sauder

Sauder OfficeWorks AFFIRM 427413 User manual

Sauder Portage Park 426281 User manual

Sauder

Sauder Portage Park 426281 User manual

Popular Indoor Furnishing manuals by other brands

Coaster 121181 B1 Assembly instructions

Coaster

Coaster 121181 B1 Assembly instructions

Whalen WMCXL-2 manual

Whalen

Whalen WMCXL-2 manual

Argos Puerto Rico 658/3129 Assembly instructions

Argos

Argos Puerto Rico 658/3129 Assembly instructions

FURNITUREBOX COMBI 3 Assembly instruction

FURNITUREBOX

FURNITUREBOX COMBI 3 Assembly instruction

World Market Kamron Windsor 601058 Assembly instructions

World Market

World Market Kamron Windsor 601058 Assembly instructions

Powell 697-432T2 Assembly instructions

Powell

Powell 697-432T2 Assembly instructions

convenience concepts MILAN 227650 Assembly instructions

convenience concepts

convenience concepts MILAN 227650 Assembly instructions

Office Star Products EM59722 operating instructions

Office Star Products

Office Star Products EM59722 operating instructions

namesake Crewe 22286 Care and maintenance

namesake

namesake Crewe 22286 Care and maintenance

Honey Can Do GAR-01121 Assembly instructions

Honey Can Do

Honey Can Do GAR-01121 Assembly instructions

LAMS 700630 quick start guide

LAMS

LAMS 700630 quick start guide

Teknion Transit KSB Installation guides

Teknion

Teknion Transit KSB Installation guides

American Standard YORKVILLE 3120.019 Specification sheet

American Standard

American Standard YORKVILLE 3120.019 Specification sheet

Palace Imports 5661 Assembly instructions

Palace Imports

Palace Imports 5661 Assembly instructions

Furniture of America YNJ-17906C17 Assembly instructions

Furniture of America

Furniture of America YNJ-17906C17 Assembly instructions

nardi CLIP 70 manual

nardi

nardi CLIP 70 manual

WENATEX Wenaflex Premium M operating instructions

WENATEX

WENATEX Wenaflex Premium M operating instructions

Broyhill ASHEVILLE GB22-813 Assembly instructions

Broyhill

Broyhill ASHEVILLE GB22-813 Assembly instructions

manuals.online logo
manuals.online logoBrands
  • About & Mission
  • Contact us
  • Privacy Policy
  • Terms and Conditions

Copyright 2025 Manuals.Online. All Rights Reserved.