manuals.online logo
Brands
  1. Home
  2. •
  3. Brands
  4. •
  5. Saxby Lighting
  6. •
  7. Lighting Equipment
  8. •
  9. Saxby Lighting SIGHTPRO 108087 User manual

Saxby Lighting SIGHTPRO 108087 User manual

www.saxbylighting.com
Instruction manual
108087
SIGHTPRO
Battery Replacement
We recommend cleaning with a soft dry cloth. Do not use solvents or abrasive cleaners as these could damage the finish.
For your safety, always switch off the power supply before cleaning.
Care and Safety
Technical data
220-240 V~, 50 Hz
Supply
Voltage:
The light source of this luminaire is not replaceable; when the light source reaches its end of life the whole
luminaire shall be replaced.
If after routine operation check, the lamp does not remain lit for the three hour period, a new battery pack may be required.
• Switch off the electricity at the mains, both switched and permanent supply.
• Allow batteries to fully discharge then reconnect to supply and allow to charge for 24 hours.
• Test again for 3 hours, if light does not remain lit change the battery pack as follows:
- Disconnect from the mains supply both permanent and switched supply.
- Undo two screws at the end of the product to separate the clear front cover and the rear casing. Keep screws in safe place for
refitting later.
- Pushing the two quick release tabs holding the gear tray and fold down.
- Unplug the battery lead from the lead coming from the PCBA. Remove any cable ties around the cables.
- Remove the battery pack and lift the battery pack out of the fitting. Waste electrical products should not be disposed of
with household waste. Please recycle where facilities exist. Check with your local authority or retailer for recycling advice.
- Replace the battery with a Ni-Cd 3.6V, 600mAh only. Use of a different type of battery will damage the product.
- Write current date on the new battery pack.
- Fit new battery pack in position. Refit the cable ties in position and then plug battery pack into the PCBA.
- Re-clip the gear tray in place and re-secure the clear front cover using the screws.
- Restore power and allow to charge for 24 hours.
- Perform full operation check and update test record.
Conformity with all relevant EC Directive requirements.
The power supply is Double Insulated and does not require connection to an Earth circuit.
Waste electrical products should not be disposed of with household waste. Please recycle where facilities
exist. Check with your Local Authority or local store for recycling advice.
Live Voltages may be present in this unit even when turned off or when completely disconnected.
This bulb is protected by a shade. This part must be replaced immediately should the shade become
cracked or damaged. This fitting must not be used without the shade in place.
Replace Cracked Shade
Conformity with all relevant UKCA Directive requirements.
V1 26/06/2023
EU Manufacturer: Brilliant AG,
Brilliantstrasse 1, D-27442 Gnarrenburg
UK Manufacturer: BH17 7BY
Bulb
Type:
3.8W LED (SMD), 6500K
Duration: 3 hours (180 minutes)
Maximum Operatin Humidity: 10%-90%
Change over Time: Approximately 1s
This product is rated at IP65.
IP
65
Battery Specification: Ni-Cd 3.6V, 600mAh
Battery Charge Time: 24 hours
Battery warranty: 5 years
Operating Temperature: 0-45ºC
Warning
Please read these instructions carefully before commencing any work
This unit must be fitted by a competent and qualified electrician.
Install in accordance with the IEE Wiring regulations and current Building Regulations.
Check the pack and make sure you have all the parts listed.
To prevent electrocution switch off at the mains supply before installing or maintaining this fitting. Ensure other persons
cannot restore the electrical supply without your knowledge. If you are in any doubt, please consult a qualified electrician.
This light fitting should be connected to a fused circuit.
If replacing an existing fitting, make a careful note of the connections.
These products should not be fitted to PIR circuits or short duration timed switches.
This product is not suitable for dimming.
Do not mount in hazardous locations, or near gas or electric heaters; Do not let power cords touch hot surface; Do not use this
equipment for other than intended use.
Equipment should be mounted in locations and at heights where it will not be subjected to tampering by unauthorized personnel.
The use of accessory equipment not recommend by the manufactuer may cause an unsafe condition.
Allow battery to charge for 24 hours before first use.
Waste electrical products should not be disposed of with household waste. Please recycle where facilities exist. Check with
your local authority or retailer for recycling advice.
Thank you for purchasing this light fitting. Please read the instructions carefully before use to ensure safe and satisfactory
operation of this product. Please retain these instructions for future reference.
Layout
This light fitting is double insulated and does
not require connection to an Earth circuit.
Plan the desired layout of these fittings carefully, ensuring the cables will reach the distances between each light fitting.
Avoid locating any cables in positions that would cause a hazard. Position cables away from areas where they may be
at risk from being cut, trapped or damaged
The mains supply cable must have a minimum cross section area of 1.0mm2.
This product is designed to be fitted into a suspended ceiling or wall mounted.
This product has special protection against the ingress of moisture and is IP65 rated.
Wiring
• This product is double insulated and must not be earthed. If there are any incoming earth cables, they must be joined together
and well insulated with good quality insulation tape. This is to ensure earth continuity throughout your property.
• Having correctly identified the wiring from your existing light fitting, connect to the quick fit connection block in the following
way.
LIGHT FITTING
SUPPLY
INSERT CABLE
PUSH DOWN
Check that...
• You have correctly identified the wires.
• The connections are tight.
• No loose strands have been left out of the connection block.
L N
PERMANENT LIVE
NEUTRAL BLUE(N)
BROWN(L)
LIGHT FITTING
SUPPLY
Installation
Existing fittings must be completely removed before installation of a new product. Before removing the existing fitting, carefully
note the position of each set of wires.
Note that the switch is turned off before installation.
After deciding the layout of the light fittings ensure that the cables are long enough to connect to desired positions.
• Undo two screws at the end of the product to separate the clear front cover and the rear casing. Keep screws in safe place
for refitting later.
• Pushing the two quick release tabs holding the gear tray and fold up.
• Choose the cable entry holes on the rear casing and drill out the conduit knockouts accordingly.
• This unit can be mounted on the wall or ceiling. After deciding the mounted way accordingly, Using the rear casing as a
template mark the position to drill out the fixing holes. Take care to avoid damaging any concealed wiring and pipes.
The correct fixings should be used, depending upon the surface to be mounted.
• Pull the cable through the cable entry hole and seal using the waterproof gland to maintain the IP rating. Fix the rear casing
into the position with the plastic anchors, screws and washers (supplied).
• Wire as detailed Wiring Diagram and plug battery pack into the circuit board.
• Re-clip the gear tray in place and re-secure the clear front cover using the screws. Ensure that the seal is correctly fitted.
• Replace fuse or circuit breaker and switch on. Your light is now ready for use.
1
6 7
8
2
4 5
3
or or
or
or
See wiring diagram
Connect
the battery Maintained working mode,
"PM1" jump connected.
Non-maintained working mode,
"PM2" jump connected.
•If using maintained working mode, keep "PM1"
jump connected.
•If using non-maintained working mode, keep "PM2"
jump connected.
Washers Washers (silicone)Drywall screwsPlastic anchors
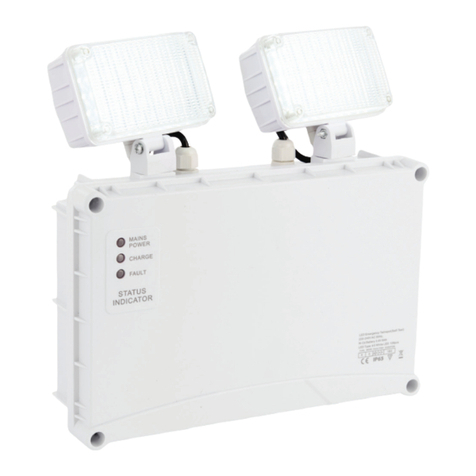
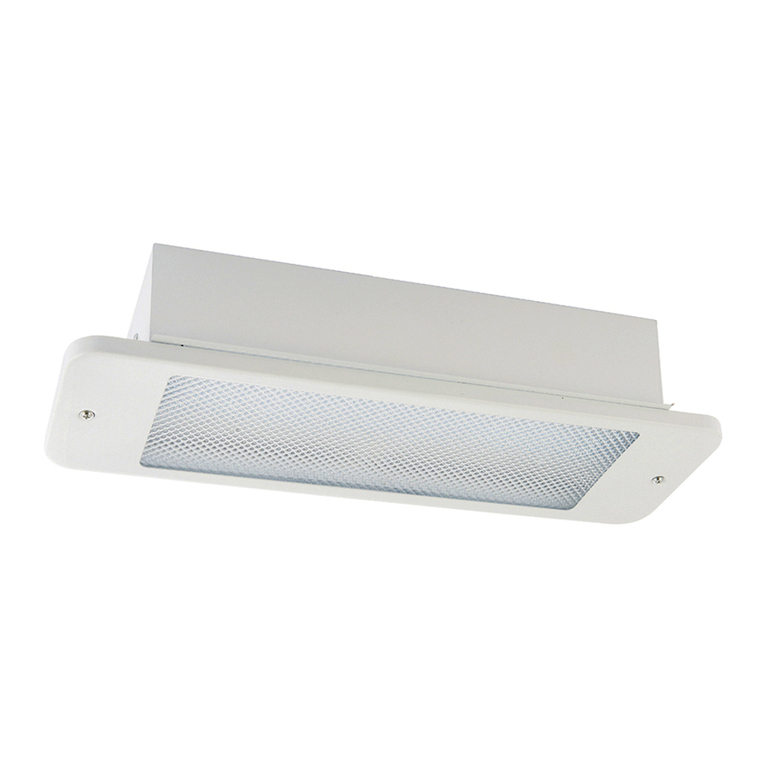
Emergency bulkhead
Waterproof gland
Seal the cable entry hole
For maintain the IP rating

Other Saxby Lighting Lighting Equipment manuals

Saxby Lighting HeroPro CCT Emergency User manual

Saxby Lighting

Saxby Lighting HeroPro CCT Emergency User manual

Saxby Lighting 14008 User manual

Saxby Lighting

Saxby Lighting 14008 User manual

Saxby Lighting 1818PIR Manual

Saxby Lighting

Saxby Lighting 1818PIR Manual

Saxby Lighting EL-20079 Manual

Saxby Lighting

Saxby Lighting EL-20079 Manual

Saxby Lighting shieldLED 400 Manual

Saxby Lighting

Saxby Lighting shieldLED 400 Manual

Saxby Lighting Scoop Rectangular Recessed Manual

Saxby Lighting

Saxby Lighting Scoop Rectangular Recessed Manual

Saxby Lighting 75145 Manual

Saxby Lighting

Saxby Lighting 75145 Manual

Saxby Lighting 72641 Manual

Saxby Lighting

Saxby Lighting 72641 Manual

Saxby Lighting 43810 Manual

Saxby Lighting

Saxby Lighting 43810 Manual

Saxby Lighting 78965 User manual

Saxby Lighting

Saxby Lighting 78965 User manual

Saxby Lighting Hero CCT User manual

Saxby Lighting

Saxby Lighting Hero CCT User manual

Saxby Lighting 97818 User manual

Saxby Lighting

Saxby Lighting 97818 User manual

Saxby Lighting RULAR CCT User manual

Saxby Lighting

Saxby Lighting RULAR CCT User manual

Saxby Lighting 75272 Manual

Saxby Lighting

Saxby Lighting 75272 Manual

Saxby Lighting Odyssey Bollards ST501228 User manual

Saxby Lighting

Saxby Lighting Odyssey Bollards ST501228 User manual

Saxby Lighting 73721 Manual

Saxby Lighting

Saxby Lighting 73721 Manual

Saxby Lighting Odyssey 78667 User manual

Saxby Lighting

Saxby Lighting Odyssey 78667 User manual

Saxby Lighting 73347 User manual

Saxby Lighting

Saxby Lighting 73347 User manual

Saxby Lighting Sight 3 in 1 Manual

Saxby Lighting

Saxby Lighting Sight 3 in 1 Manual

Saxby Lighting HeroPro CCT Microwave Emergency User manual

Saxby Lighting

Saxby Lighting HeroPro CCT Microwave Emergency User manual

Saxby Lighting Orion20 User manual

Saxby Lighting

Saxby Lighting Orion20 User manual

Saxby Lighting 73666 Manual

Saxby Lighting

Saxby Lighting 73666 Manual

Saxby Lighting Icarus Twin Wall EL-40054 Manual

Saxby Lighting

Saxby Lighting Icarus Twin Wall EL-40054 Manual

Saxby Lighting 43787 Manual

Saxby Lighting

Saxby Lighting 43787 Manual

Popular Lighting Equipment manuals by other brands

Laserworld Evolution Series ES-800S RGB 3D Manual guide

Laserworld

Laserworld Evolution Series ES-800S RGB 3D Manual guide

Generac Mobile CUBE+ owner's manual

Generac Mobile

Generac Mobile CUBE+ owner's manual

ADJ ENCORE LP12IP user manual

ADJ

ADJ ENCORE LP12IP user manual

Iluminarc Colorist POD 18Qa Quick reference guide

Iluminarc

Iluminarc Colorist POD 18Qa Quick reference guide

Godox LED126 instruction manual

Godox

Godox LED126 instruction manual

American DJ Mega Bar RGBA User instructions

American DJ

American DJ Mega Bar RGBA User instructions

Philips SL ePAR 180 LED Luminaire user manual

Philips

Philips SL ePAR 180 LED Luminaire user manual

Griven Dune MK2 instruction manual

Griven

Griven Dune MK2 instruction manual

SGM Giotto spot 1200 user manual

SGM

SGM Giotto spot 1200 user manual

H+H LED 48 quick start guide

H+H

H+H LED 48 quick start guide

ExPelec XLIGHT 340 LED user manual

ExPelec

ExPelec XLIGHT 340 LED user manual

luminii Katana KAT installation instructions

luminii

luminii Katana KAT installation instructions

Chauvet Hurricane 900 user manual

Chauvet

Chauvet Hurricane 900 user manual

Elation RGB Lamp user manual

Elation

Elation RGB Lamp user manual

Twinkly TWPLUS-C-4P-23EU installation guide

Twinkly

Twinkly TWPLUS-C-4P-23EU installation guide

MAGIS Linnut Sulo S Booklet

MAGIS

MAGIS Linnut Sulo S Booklet

iGuzzini TRICK RGB manual

iGuzzini

iGuzzini TRICK RGB manual

Flash F7100752 user manual

Flash

Flash F7100752 user manual

manuals.online logo
manuals.online logoBrands
  • About & Mission
  • Contact us
  • Privacy Policy
  • Terms and Conditions

Copyright 2025 Manuals.Online. All Rights Reserved.