3. OPERATION
Use your bleeder only as directed. Read these directions completely before starting. The apparatus is intended for use only by individuals
experienced with bleeding and servicing hydraulic systems. If you are unsure about your ability or experience, consult a trained professional.
Always follow vehicle manufacturer’s directions when bleeding hydraulic systems.
3.1. Ensurethatthebleederiscleanandfreefromdebrisandoldhydraulicuid.
3.2. Removehydraulicuidreservoircapfromthevehicle.Ifolduidiscontaminated,syphonitoffandrellreservoirwithfreshuid.
DO NOTpumpcontaminateduidthroughthehydraulicsystem.
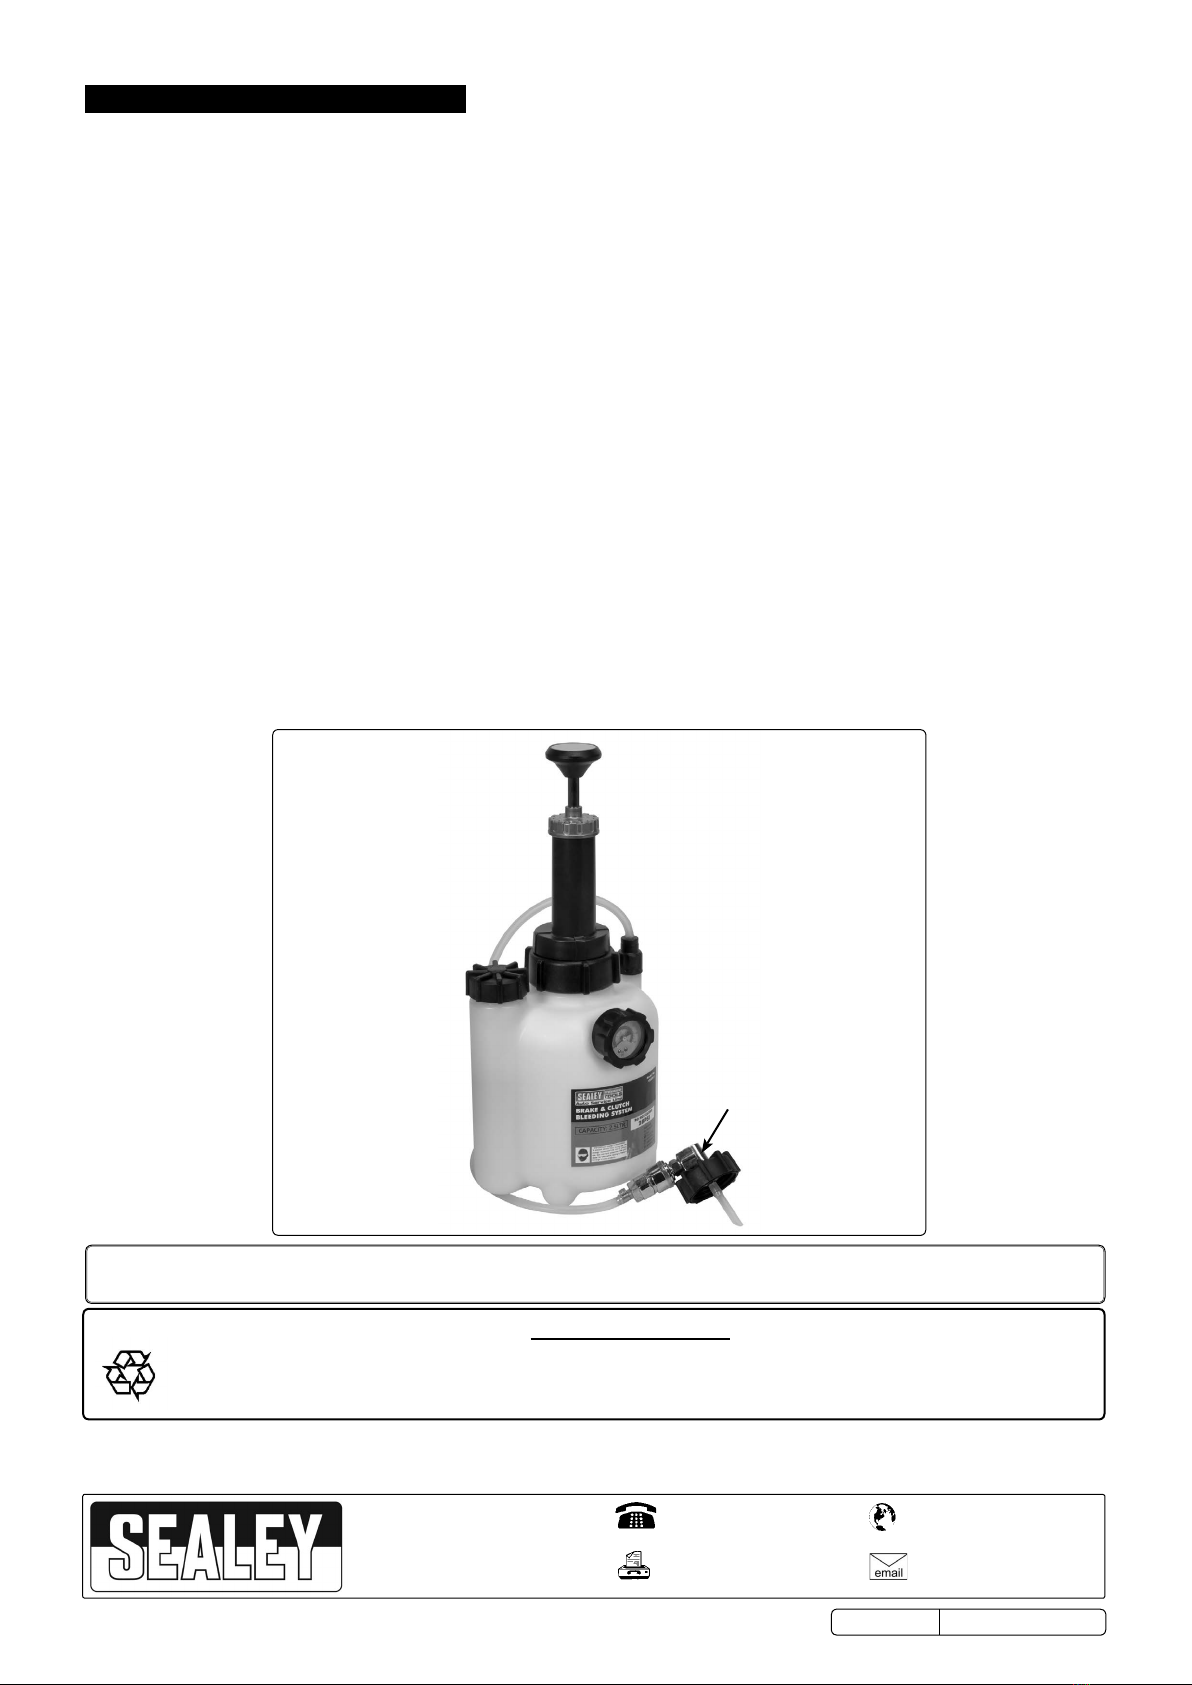
3.3. Firmlyattachthebleedercaptothevehicleuidreservoir,ensuringthatthegasketseatsproperlyandisnotwornorcracked.
3.4. Tightenpumpcapontoemptybleederandpressuriseto10psi(0.7bar).Checkforleaksattheuidreservoirandatthebleeder
uidhoseconnections.Ifreservoircaporhoseconnectionsareleaking,releaseaccumulatedpressureinthebleederreservoirby
gently unscrewing the pump cap.
DO NOT remove the cap before depressurising the bleeder reservoir. Reattach the bleeder reservoir cap or tighten hose connections
and once again pump the tank to 10 psi (0.7bar) and check for leaks.
3.5. Ifnoleaksarefound,gentlyunscrewpumpcapandaddnewhydraulicuidfromasealedcontainer.Useonlythetypeofhydraulic
uidrecommendedforyourvehicle.
3.6. Tighten the pump cap and pressurise the bleeder to the level recommended in the vehicle service manual.
DO NOT exceed 20psi (1.4bar). Higher pressures may damage your vehicles hydraulic system and could result in serious injury.
3.7. Determinethecorrectbrakebleedingsequencefromyourvehiclesservicemanual.Attachbleedtubetobleedvalveattherst
cylindertobebled,openendinasuitableuidreceptacle.Openbleedvalveandbleeduntiluidrunsclearandfreeof
bubbles.Tightenbleedvalvetothetorquespeciedinyourvehicleservicemanual.
3.8. Repeat on each bleed valve. Pump additional pressure into bleeder if necessary.
3.9. Ifuidremainsinthebleederreservoirwhennished,tipthetankawayfromuidpickuptubeandopenbleedvalveclosesttothe
mastercylinder.Allowairtoowintouidreservoiruntiluidlevelfallsjusttothemaximumlllevelonyourreservoir.Closethe
bleedvalveandtightentospeciedtorque.
3.10. Whencomplete,releasepressurebyslowlylooseningthepumpcap.Removethecapfromtheuidreservoir,takingcaretoavoid
spillinganyuidthatremainsinthetube.
3.11. Replaceuidreservoircaponyourvehicle,checkingthattheuidlevelisatthemaximumlevelindicatedonthevehiclereservoir.
3.12. Before driving your vehicle, carefully check for leaks and test for proper brake operation.
3.13. DO NOTstorehydraulicuidinbleeder.Alwaysdisposeofexcessuidproperlyinaccordancewithlocalauthorityregulations.
90° elbow
connector
NOTE: It is our policy to continually improve products and as such we reserve the right to alter data, specications and component parts without prior notice.
IMPORTANT: No liability is accepted for incorrect use of this product.
WARRANTY: Guarantee is 12 months from purchase date, proof of which will be required for any claim.
Sole UK Distributor, Sealey Group.
Kempson Way, Suffolk Business Park,
Bury St. Edmunds, Suffolk.
IP32 7AR
www.sealey.co.uk
sales@sealey.co.uk
01284 757500
01284 703534
Web
Environmental Protection
Recycle unwanted materials instead of disposing of them as waste. All tools, accessories and packaging should be
sorted, taken to a recycling centre and disposed of in a manner which is compatible with the environment.
When the product becomes completely unserviceable and requires disposal, drain off any fluids (if applicable)
into approved containers and dispose of the product and the fluids according to local regulations.
Parts support is available for this product. To obtain a parts listing and/or diagram,
please log on to www.sealey.co.uk, email sales@sealey.co.uk or phone 01284 757500.
VS820.V4 Issue:2(I) 23/09/15
Original Language Version
© Jack Sealey Limited


