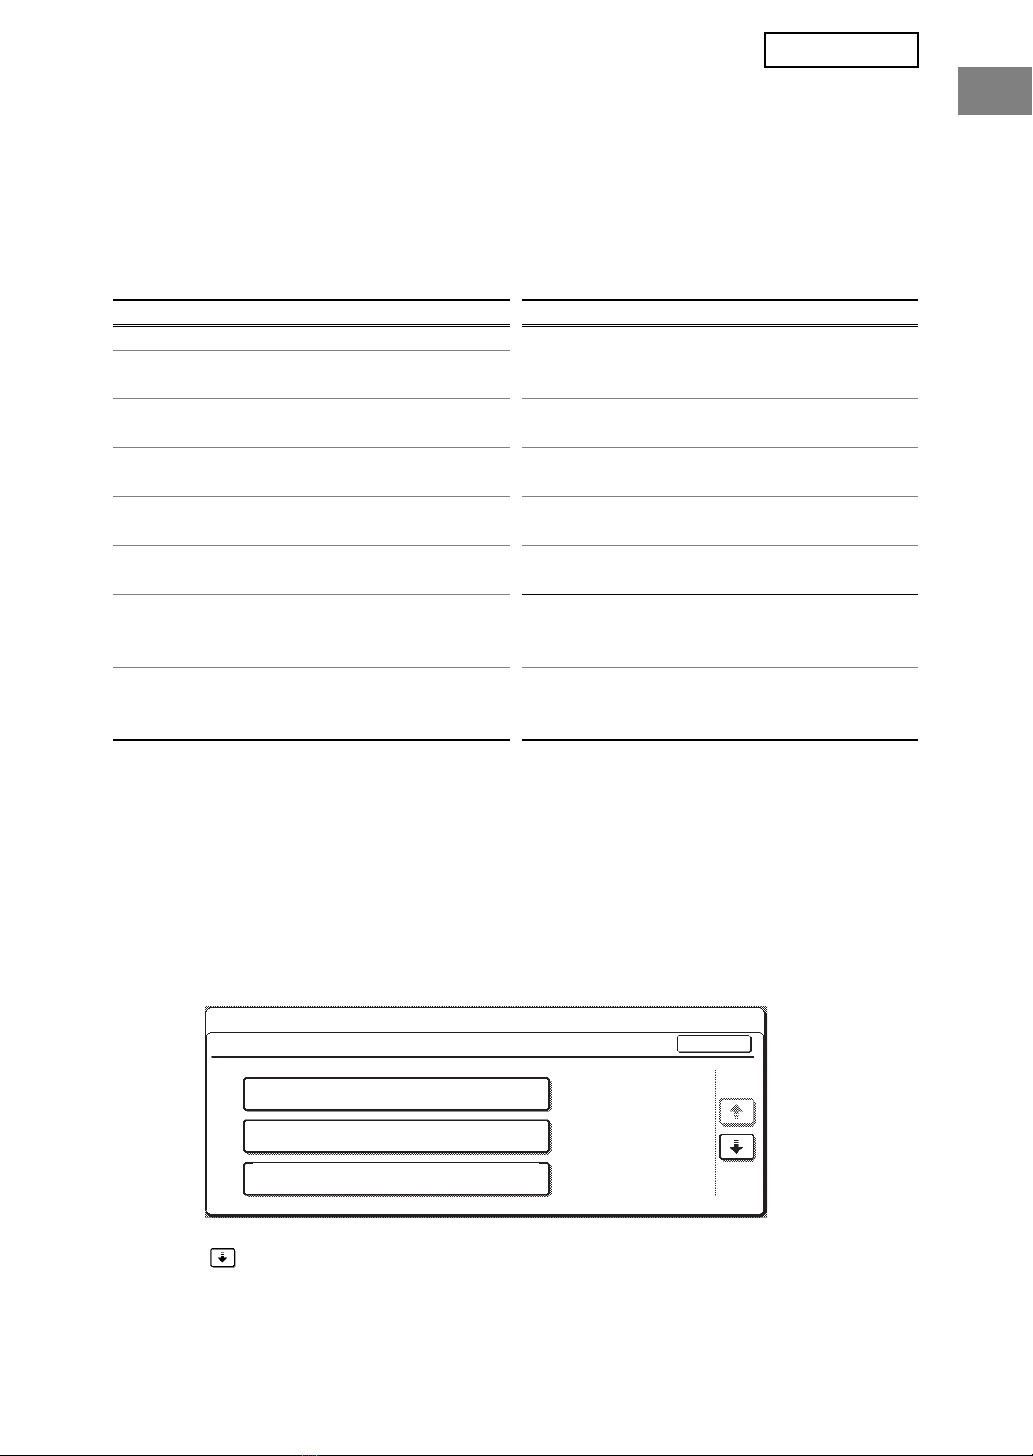
Sharp AR-FR22 U User manual

This manual contains very important
information. Please keep the manual in a
safe place where it will not be lost.
ENGLISH
Data Security Kit
OPERATION MANUAL
ESPAÑOL
Kit de seguridad de datos
MANUAL DE INSTRUCCIONES
Daten-Sicherheitspaket
BEDIENUNGSHANDBUCH DEUTSCH
FRANÇAIS
Kit de sécurité des données
MANUEL D'UTILISATION
ITALIANO
Kit di protezione dei dati
MANUALE DI ISTRUZIONI
NEDERLANDS
Gegevensbeveiligingskit
GEBRUIKSAANWIJZING
SVENSKA
Datasäkerhetsprogram
ANVÄNDARMANUAL
NORSK
Datasikkerhetsprogram
GENERELL BRUKERVEILEDNING
SUOMI
Tietoturvan ylläpitotyökalut
KÄYTTÖOPAS
DANSK
Data sikkerhedssæt
BETJENINGSVEJLEDNING
POLSKI
MAGYAR
ČEŠTINA
AR-FR22 U
APPLICATION
NUMBER
MACHINE SERIAL
NUMBER
PRODUCT KEY
AR-FR22 U
This Class B digital apparatus complies with
Canadian ICES-003.
Get appareil numérique de la classe B est
conforme à la norme NMB-003 du Canada. PORTUGUÊS
kit de segurança de dados
MANUAL DE OPERAÇÃO
—ŒÃ¤À⁄
‚ͬÓÏ ÙÍÛÊÚ˜ Í˝˝˜‰
—ȈÓËÓÁÚËÓ Ô˛ ÎÓÔÒÙÓËÍÚ¯Ô˛
AR-FR22 U
2004M DSC1
CINSZ2876FC51
PAINETTU JAPANISSA
TRYKT I JAPAN
PRINTED IN JAPAN
IMPRESO EN JAPÓN
IMPRIMÉ AU JAPON
GEDRUCKT IN JAPAN
STAMPATO IN GIAPPONE
GEDRUKT IN JAPAN
TRYCKT I JAPAN
TRYKKET I JAPAN
‚œ–›·œ◊œ‚” Õ „–”‚ÀÀ
IMPRESSO NO JAPÃO
This manual contains very important
information. Please keep the manual in a
safe place where it will not be lost.
ENGLISH
Data Security Kit
OPERATION MANUAL
ESPAÑOL
Kit de seguridad de datos
MANUAL DE INSTRUCCIONES
Daten-Sicherheitspaket
BEDIENUNGSHANDBUCH
DEUTSCH
FRANÇAIS
Kit de sécurité des données
MANUEL D'UTILISATION
ITALIANO
Kit di protezione dei dati
MANUALE DI ISTRUZIONI
NEDERLANDS
Gegevensbeveiligingskit
GEBRUIKSAANWIJZING
SVENSKA
Datasäkerhetsprogram
ANVÄNDARMANUAL
NORSK
Datasikkerhetsprogram
GENERELL BRUKERVEILEDNING
SUOMI
Tietoturvan ylläpitotyökalut
KÄYTTÖOPAS
DANSK
Data sikkerhedssæt
BETJENINGSVEJLEDNING
POLSKI
MAGYAR
ČEŠTINA
AR-FR22 U
APPLICATION
NUMBER
MACHINE SERIAL
NUMBER
PRODUCT KEY
AR-FR22 U
This Class B digital apparatus complies with
Canadian ICES-003.
Get appareil numérique de la classe B est
conforme à la norme NMB-003 du Canada.
PORTUGUÊS
kit de segurança de dados
MANUAL DE OPERAÇÃO
—ŒÃ¤À⁄
‚ͬÓÏ ÙÍÛÊÚ˜ Í˝˝˜‰
—ȈÓËÓÁÚËÓ Ô˛ ÎÓÔÒÙÓËÍÚ¯Ô˛

1
ENGLISH
Contents
Introduction ...........................................................................................................................1
When the data security kit is installed ...................................................................................3
●Restrictions on tandem copying and tandem printing......................................................3
●Security settings in the Web page...................................................................................4
KEY OPERATOR PROGRAMS............................................................................................5
●KEY OPERATOR PROGRAM LIST................................................................................5
●Using the key operator programs ....................................................................................5
●SECURITY SETTINGS ...................................................................................................5
●PRODUCT KEY.............................................................................................................11
Introduction
The AR-FR22 U adds a security function to the SHARP Laser Printer. When the copy
function, printer function, network scanner function, or fax function of a SHARP Laser
Printer with the security function is used, the image data that is generated for the job is
encrypted, and when the job is finished, the encrypted data is immediately erased from
memory.
Note:
To ensure that the data security function of the data security kit provides maximum security,
please observe the following:
●
The key operator plays an important role in maintaining security. Exercise appropriate care in
selecting the person that will assume the job of key operator for the data security kit.
●Be sure to change the key operator code immediately each time a new person takes over
as key operator.
●Change the key operator code on a regular basis (at least once every 60 days).
●During the procedure for changing the key operator code, the current key operator code
and new key operator code appear in the display. Be sure to complete the procedure
promptly.
●Do not select a number for the key operator code that can be easily guessed.
●The key operator programs are very important for security management. If it becomes
necessary to leave the machine during use of the key operator programs, be sure to
press the [CA] key to exit the key operator programs. The administrator of the machine
should inform users that they are not to access the key operator programs without
permission.
●The customer bears responsibility for control of documents copied and faxes received
using the data security kit.
●Even when the data security kit is installed, note that fax data in the public memory box
used by the facsimile expansion kit (AR-FX12) can be read.
ページ 00年月日 金曜日 午後時7分

2
ENGLISH
■
■■
■About passwords for the Web page
If incorrect "user" and/or "admin" passwords are entered a total of three times in a row
when attempting to access the Web pages of a machine that has the data security kit
installed, access to pages that require entry of the "user" or "admin" password will be
prohibited for 5 minutes.
NOTE
Some of the procedures for operating the machine change when the data security kit is
installed. The "OPERATION MANUAL (for general information and copier operation)"
explains the procedures for operating the machine when the data security kit is not
installed. This manual explains the changes to those procedures when the data security
kit is installed.
ページ 年月日 水曜日 午後7時分

3
ENGLISH
When the data security kit is installed
When the data security kit is installed, the following icon
appears on the touch panel. Touch the icon ( ) to view
information on the data security kit version.
When the data security kit is installed, data remaining in the machine is automatically
erased after each copy and fax job.
When data clearing begins, the following message appears for 6 seconds*.
* The duration of the message display can
be changed with the key operator
program, "MESSAGE TIME SETTING".
(See page 10 of the key operator's guide.)
Restrictions on tandem copying and tandem printing
Tandem copying and tandem printing operate as shown below based on the configuration
of the server machine and client machine (whether or not the data security kit is installed).
NOTE
If the machine power is turned off before jobs are finished, the data may not be
completely erased. If you do not wish to leave partially cleared data when the power is
turned off, it is recommended that you use the key operator program, "CLEAR ALL
MEMORY" (page 6 of this manual), to complete data clearing before turning off the
power.
Client machine
Data security kit: Yes Data security kit: No
Server
machine
Data security kit:
Yes
The tandem function can
be used. Data is cleared
from both the server and
client machines.
The tandem function
cannot be used.
Data security kit:
No
The tandem function can
be used. Data is cleared
from the client machine.
The regular tandem
function can be used.
DATA IS BEING CLEARED.
ページ 年月日 水曜日 午後7時分

4
ENGLISH
Security settings in the Web page
When the machine is used as a network printer and the Pull Print function is used, the data
security kit enables authentication of the user by means of a "USER NAME" and
"PASSWORD". (The Pull Print function allows a file on a previously stored FTP server to be
printed directly from the operation panel of the machine without using the printer driver; see
"Directly printing a file on an FTP server" on page 3-7 of the "OPERATION MANUAL (for
printer)".)
User authentication is enabled by selecting the "Enable User Authentication" checkbox in
the machine's Web page for Pull Print function settings. (This checkbox appears when the
data security kit is installed, and is initially selected (a checkmark appears)).
System requirements and the procedure for accessing the Web page containing this
checkbox are explained in "REMOTE OPERATION VIA A NETWORK" on page 3-2 of the
"OPERATION MANUAL (for printer)". The checkbox appears in the screen shown in step 2
of "■ Storing an FTP server" on page 3-7 of the "OPERATION MANUAL (for printer)".
■
■■
■Procedure for directly printing a file on an FTP server when
user authentication is enabled
Your user name and password must be entered following selection of the FTP server
that contains the file to be printed from the touch panel of the machine.
When the FTP server is selected in step 3 of "■ Printing a file on an FTP server from the
operation panel of the machine" on page 3-7 of the "OPERATION MANUAL (for
printer)", a screen will appear prompting you to enter your user name and password for
the FTP server.
Press the [USER NAME] key to enter your user name and the [PASSWORD] key to
enter your password. A letter entry screen will appear in each case. When you have
finished entering your user name/password, touch the [OK] key.
After entering your user name and password, continue from step 4 on page 3-8 of the
"OPERATION MANUAL (for printer)".
USER NAME
PASSWORD
OKCANCEL
ENTER THE USER NAME AND PASSWORD FOR FTP SERVER.
ページ 年月日 水曜日 午後7時分

5
ENGLISH
KEY OPERATOR PROGRAMS
Among the key operator programs used by the key operator for the data security kit, this
section explains the programs that are related to the security function.
The following explanations assume that the machine has the printer, fax, and network
scanner functions.
KEY OPERATOR PROGRAM LIST
Using the key operator programs
Follow the procedure on pages 4 and 5 of the key operator's guide to configure the settings
in the key operator programs.
When the data security kit is installed, entry of the key operator code will be prohibited for 5
minutes if an incorrect key operator code is entered 3 times in a row.
For explanations of each of the settings, see the following pages.
SECURITY SETTINGS
When the data security kit is installed, the [SECURITY SETTINGS] key is added to the key
operator program menu screen. Touch this key to display the security settings menu.
The security settings menu consists of several screens.
Touch the key in the lower right corner of the screen to move to the next screen.
Program name
Page
Program name
Page
SECURITY SETTINGS
CLEAR ALL MEMORY 6 SETTING FOR PRINT-HOLD
DISABLING 9
CLEAR ALL DATA IN JOB STATUS
JOBS COMPLETED LIST
7 DISABLING OF LIST PRINT 9
CLEAR ADDRESS BOOK DATA/
IMAGE SEND REGISTERED DATA
7
JOB STATUS JOBS COMPLETED
LIST DISPLAY SETTINGS
10
NUMBER OF TIMES DATA
CLEAR IS REPEATED 7 DISABLING RESEND KEY 10
POWER UP AUTO CLEAR 8
RELEASE THE LOCK ON PRINT-HOLD
DATA MANIPULATION
10
NUMBER OF TIMES POWER UP
AUTO CLEAR PROGRAM IS
REPEATED
8
PRODUCT KEY
NUMBER OF TIMES AUTO
CLEAR AT JOB END PROGRAM
IS REPEATED
8 DATA SECURITY KIT 11
CLEAR ALL MEMORY
CLEAR ALL DATA IN JOB STATUS
JOBS COMPLETED LIST
CLEAR ADDRESS BOOK DATA/
IMAGE SEND REGISTERED DATA
OK
KEY OPERATOR PROGRAMS
SECURITY SETTINGS
1/4
ページ 年月日 水曜日 午後7時分

6
ENGLISH
CLEAR ALL MEMORY
This program is used to manually clear all data from the memory and hard disk of the
machine.
Note, however, that the following types of data are not cleared with this program. Use the
"CLEAR ADDRESS BOOK DATA/IMAGE SEND REGISTERED DATA" program on page 7
to clear the following types of data
●INDIVIDUAL/GROUP/PROGRAM/RELAY BROADCAST MEMORY BOX*
●SENDER CONTROL LIST
●POLLING MEMORY/CONFIDENTIAL MEMORY BOX*
●SENDER DATA
●ALLOW/REJECT RECEPTION SETTING DATA (INCLUDING POLLING PASSCODE
NUMBER)
* The image data stored in the MEMORY BOX is cleared to execute this program (CLEAR
ALL MEMORY).
Touch the [CLEAR ALL MEMORY] key. The following screen appears asking you to confirm
your selection ("YES" or "NO").
[Clear screen 1]
●To return to the "SECURITY SETTINGS"
menu screen, touch the [NO] key.
●To clear all memory, press the [YES] key.
"PLEASE WAIT." appears, and then the
following screen is displayed.
[Clear screen 2]
●While data clearing takes place, the
percentage of data cleared is displayed.
●When the data has been cleared, the power
briefly turns off and then automatically turns
on again.
NOTE
In the event that the data security kit or the machine with the data security kit installed
will be disposed of or ownership will change, the key operator should be sure to run this
program. When running the program, the key operator should not leave the machine
until it has been verified that data clearing has been completed.
If you wish to cancel after data clearing has begun
Touch the [CANCEL] key. The key operator code entry screen will appear. Enter the key
operator code with the numeric keys. As soon as the correct key operator code is
entered, data clearing will stop and the power will turn off briefly and then turn back on
automatically. Note that any data cleared prior to entry of the key operator code will not
be restored (this data is lost).
CLEAR ALL MEMORY.
(EXCLUSIVE OF ADDRESS BOOK/
SENDER LIST DATA.)
NO YES
100%50%0%
(50.0%)
CLEARING ALL MEMORY. AUTO REBOOT IS
IMPLEMENTED AFTER CLEARING.
CANCEL
ページ 年月7日 金曜日 午前時9分

7
ENGLISH
CLEAR ALL DATA IN JOB STATUS JOBS COMPLETED LIST
This program is used to clear all data (printer user names, fax/image send destinations,
received fax sender information) that appears in the JOBS COMPLETED list in the job
status screen (page 1-15 of the "OPERATION MANUAL (for general information and copier
operation)"). To clear the data, touch the [CLEAR ALL DATA IN JOB STATUS JOBS
COMPLETED LIST] key. A message asking you to confirm the clear ("YES" or "NO") will
appear. Touch the [YES] key to begin clearing the selected data. During clearing, progress
will be shown as a percentage. When data clearing is finished, the power of the machine
will turn off temporarily and then turn on again automatically.
CLEAR ADDRESS BOOK DATA/IMAGE SEND REGISTERED DATA
This program is used to clear the items indicated below, which cannot be cleared or
initialized using the "CLEAR ALL MEMORY" program (page 6) or "RESTORE FACTORY
DEFAULTS" (page 13 of the "KEY OPERATOR'S GUIDE") program.
●INDIVIDUAL/GROUP/PROGRAM/RELAY BROADCAST MEMORY BOX*1
●SENDER CONTROL LIST*2
●POLLING MEMORY/CONFIDENTIAL MEMORY BOX*3
●SENDER DATA*1
●ALLOW/REJECT RECEPTION SETTING DATA (INCLUDING POLLING PASSCODE
NUMBER)*3
*1. Can only be selected when the fax or network scanner function is enabled.
*2. Can only be selected when the network scanner function is enabled.
*3. Can only be selected when the fax function is enabled.
Select the checkboxes of the items that you wish to clear. (There are two screens. Touch
the or key to move between the screens.) To clear the data, touch the [CLEAR] key.
A message asking you to confirm the clear ("YES" or "NO") will appear. Touch the [YES]
key to begin clearing the selected data. During clearing, progress will be shown as a
percentage. When data clearing is finished, the power of the machine will turn off
temporarily and then turn on again automatically.
NUMBER OF TIMES DATA CLEAR IS REPEATED
This program is used to enhance the security function. The number of times data clearing is
repeated when "CLEAR ALL MEMORY", "CLEAR ALL DATA IN JOB STATUS JOBS
COMPLETED LIST", or "CLEAR ADDRESS BOOK DATA/IMAGE SEND REGISTERED
DATA" is executed can be set to any number from 1 to 7. The factory setting is 1.
Touch the [NUMBER OF TIMES DATA CLEAR IS REPEATED] key, and set the desired
number of times with the or key.
When finished, touch the [OK] key.
(See "About the repeat setting" on page 8 of this manual.)
ページ 年月日 水曜日 午後7時分

8
ENGLISH
POWER UP AUTO CLEAR
This program is used to automatically clear all data in the machine when the power switch is
turned on. The following selections are available for the data to be cleared: "ALL
MEMORY", "DATA AREA FOR JOB PROCESSING (INCLUDING HOLD PRINT DATA)",
"JOB STATUS JOBS COMPLETED LIST". Select the checkboxes of the data that you wish
to have automatically cleared when the power switch is turned on. After selecting the data
to be cleared, touch the [OK] key.
No checkboxes are initially selected.
NUMBER OF TIMES POWER UP AUTO CLEAR PROGRAM IS REPEATED
This program is used to enhance the security function. The number of times "POWER UP
AUTO CLEAR" is repeated can be set to any number from 1 to 7. The factory setting is 1.
Touch the [NUMBER OF TIMES POWER UP AUTO CLEAR PROGRAM IS REPEATED]
key, and set the desired number of times with the or key.
When finished, touch the [OK] key.
(See "About the repeat setting" on page 8 of this manual.)
NUMBER OF TIMES AUTO CLEAR AT JOB END PROGRAM IS REPEATED
This program is used to enhance the security function. The number of times auto clear is
repeated after each job is printed can be set to any number from 1 to 7. The factory setting is 1.
Touch the [NUMBER OF TIMES AUTO CLEAR AT JOB END PROGRAM IS REPEATED]
key, and set the desired number of times with the or key.
When finished, touch the [OK] key.
NOTE
When there is a stored image send job (fax, network scanner, or Internet fax job)*,
automatic clearing will not take place when the power is turned on.
*
This includes received faxes and Internet faxes that have not yet been printed; however,
it does not include data in a fax memory box (except confidential memory box).
If you wish to cancel after data clearing has begun
See the explanations in "Clear screen 2" and "If you wish to cancel after data clearing
has begun" in "CLEAR ALL MEMORY" on page 6 of this manual.
NOTE
This program is only enabled when the "POWER UP AUTO CLEAR" checkbox is
selected.
About the repeat setting
When the repeat setting (number of repetitions) is increased to enhance the security
function, the time required for data clearing increases. It is recommended that you
select repeat settings for "NUMBER OF TIMES DATA CLEAR IS REPEATED",
"NUMBER OF TIMES POWER UP AUTO CLEAR PROGRAM IS REPEATED", and
"NUMBER OF TIMES AUTO CLEAR AT JOB END PROGRAM IS REPEATED" that are
suitable for your security needs and conditions of use.
ページ 年月日 水曜日 午後7時分

9
ENGLISH
SETTING FOR PRINT-HOLD DISABLING
This program can be used to prohibit the storage of print jobs that are not protected by a
pass code when the print hold job function of print mode is used. The program can also be
used to prohibit the printing of print jobs that do not use the print hold job function.
• [FILES WITHOUT PASS CODE ARE NOT ALLOWED FOR STORE JOBS]
To prohibit the storage of print jobs that are not protected by a pass code, touch the
[FILES WITHOUT PASS CODE ARE NOT ALLOWED FOR STORE JOBS] checkbox
so that a checkmark appears.
When this function is enabled, print hold jobs that do not have a pass code will not be
stored in the machine. To use the print hold job function, configure the [Pass Code]
setting in the [Retention Settings] of the printer driver (page 2-12 of the OPERATION
MANUAL (for printer)).
The factory default setting is enabled (a checkmark appears).
• [DISABLING OF PRINT JOBS OTHER THAN PRINT-HOLD JOB]
If a printed document is left on an output tray after being printed in printer mode, it is
possible that another person might take the document and leak sensitive information.
This program is used to disable all print jobs other than print jobs that require printing to
be initiated from the operation panel of the machine. To prohibit jobs that are not print
hold jobs, touch the [DISABLING OF PRINT JOBS OTHER THAN PRINT-HOLD JOB]
checkbox so that a checkmark appears. To print a job when this program is enabled,
select "Hold Only" in the "Retention" field of the printer driver and then execute the print
command. To print a print job that is held using this setting, call up the stored job from
the operation panel of the machine and perform the "HOLD JOB LIST" procedure of the
print hold job function (page 5-2 of the OPERATION MANUAL (for printer)). When
printing is performed using the "Hold After Print" or "Sample Print" setting, the job will
not be printed. Instead it will be held and can be printed using the same method as
when "Hold Only" is selected.
The factory default setting is disabled (a checkmark does not appear).
DISABLING OF LIST PRINT
This program is used to disable printing of any of the following lists that are printed using
"LIST PRINT" in the custom settings (page 2-14 of "OPERATION MANUAL (for general
information and copier operation)").
"ALL CUSTOM SETTING LIST", "SENDING ADDRESS LIST"*1, "SENDER CONTROL
LIST"*2,
*1. Can only be selected when the fax or network scanner function is enabled.
*2. Can only be selected when the network scanner function is enabled.
Select the checkboxes of the lists for which you wish to disable printing and then touch the
[OK] key.
ページ 5年月7日 月曜日 午後7時分

10
ENGLISH
JOB STATUS JOBS COMPLETED LIST DISPLAY SETTINGS
This program is used to select whether or not the JOBS COMPLETED list is displayed in
the job status screen of the touch panel (page 1-15 of the "OPERATION MANUAL (for
general information and copier operation)"). (The setting can be selected separately for
"PRINT JOB", "E-MAIL/FTP", "FAX JOB", and "INTERNET-FAX" modes.) The JOBS
COMPLETED list stores and displays printer mode user names, fax/image send
destinations, and received fax sender information. If you do not wish to display this
information for security reasons, use this program to disable display of the list.
To display the JOBS COMPLETED list in a mode, touch the checkbox of the mode so that a
checkmark appears. To disable display of the list, remove the checkmark from the
checkbox so that a checkmark appears and then touch the [OK] key.
DISABLING RESEND KEY
When the fax or network scanner function is enabled, this program is used to disable
display of the [RESEND] key, which is used to transmit to the last destination transmitted to.
To disable display of the [RESEND] key, touch the checkbox so that a checkmark appears.
When the [RESEND] key is disabled, it will not appear in the main screens of fax mode and
scanner mode (page 1-4 of the Facsimile Expansion Kit AR-FX12 manual and page 9 of the
"OPERATION MANUAL (for network scanner)"). (Normally the key appears in these
screens.)
RELEASE THE LOCK ON PRINT-HOLD DATA MANIPULATION
This program can only be used when there are print hold jobs that are locked because an
incorrect pass code was entered. To release all locked print hold jobs, touch the
[RELEASE] key in the "RELEASE THE LOCK ON PRINT-HOLD DATA MANIPULATION"
screen. When there are no locked jobs, the [RELEASE THE LOCK ON PRINT-HOLD DATA
MANIPULATION] key in the "SECURITY SETTINGS" menu screen is grayed out.
1 ページ 5年月日 水曜日 午後5時分

11
ENGLISH
PRODUCT KEY
To initially enable the security function, you must use a key operator program to enter the
product key (password). The name of the key operator program used for this purpose is
"DATA SECURITY KIT". Please ask your dealer for the product key.
Touch the [DATA SECURITY KIT] key, enter the product key with the numeric keys, and
then touch the [ENTER] key.
●
●●
●If an incorrect number is entered...
A message will appear instructing you to check the product key number again.
●
●●
●If the correct number is entered...
A message will appear instructing you to turn the power off and then on. Touch the [OK]
key when you have finished reading the message. Turn first the power switch and then
the main power switch off. The security function will be enabled when the power is turned
on again.
Once the security function is enabled, the [DATA SECURITY KIT] key will no longer
appear in the product key entry screen.
ページ 年月日 水曜日 午後7時分

12
ENGLISH
The CE mark logo label is affixed on an equipment in case that the directives described in
the above sentence are applicable to the product. (This sentence is not applicable in any
country where the above directives are not required.)
This equipment complies with the requirements of Directives 89/336/EEC and 73/23/EEC as amended by 93/68/EEC.
Dieses Gerät entspricht den Anforderungen der EG-Richtlinien 89/336/EWG und 73/23/EWG mit Änderung 93/68/EWG.
Ce matériel répond aux exigences contenues dans les directives 89/336/CEE et 73/23/CEE modifiées par la directive
93/68/CEE.
Dit apparaat voldoet aan de eisen van de richtlijnen 89/336/EEG en 73/23/EEG, gewijzigd door 93/68/EEG.
Dette udstyr overholder kravene i direktiv nr. 89/336/EEC og 73/23/EEC med tillæg nr. 93/68/EEC.
Quest’ apparecchio è conforme ai requisiti delle direttive 89/336/EEC e 73/23/EEC, come emendata dalla direttiva
93/68/EEC.
Este equipamento obedece às exigências das directivas 89/336/CEE e 73/23/CEE, na sua versão corrigida pela directiva
93/68/CEE.
Este aparato satisface las exigencias de las Directivas 89/336/CEE y 73/23/CEE, modificadas por medio de la 93/68/CEE.
Denna utrustning uppfyller kraven enligt riktlinjerna 89/336/EEC och 73/23/EEC så som kompletteras av 93/68/EEC.
Dette produktet oppfyller betingelsene i direktivene 89/336/EEC og 73/23/EEC i endringen 93/68/EEC.
Tämä laite täyttää direktiivien 89/336/EEC ja 73/23/EEC vaatimukset, joita on muutettu direktiivillä 93/68/EEC.
ページ 年月日 水曜日 午後7時分

1
ESPAÑOL
Contenido
Introducción...........................................................................................................................1
Si el kit de seguridad de datos está instalado.......................................................................3
●Restricciones en el copiado en tándem y la impresión en tándem .................................3
●Configuración de seguridad en la página Web................................................................4
PROGRAMAS DE OPERADOR PRINCIPAL .......................................................................5
●LISTA DE PROGRAMAS DE OPERADOR PRINCIPAL.................................................5
●Utilizar los programas de operador principal ...................................................................5
●CONFIGURACION DE SEGURIDAD..............................................................................5
●CLAVE DE PRODUCTO ...............................................................................................11
Introducción
El AR-FR22 U incorpora una función de seguridad a la impresora láser SHARP. Cuando se
emplea la función de copiadora, de impresora, de escáner de red o de fax de una
impresora láser SHARP con la función de seguridad, los datos de imagen generados para
el trabajo se cifran y, una vez finalizado el trabajo, los datos cifrados se borran
inmediatamente de la memoria.
Nota:
Para garantizar que la función de seguridad de datos del kit de seguridad de datos ofrece la
máxima seguridad, siga las siguientes indicaciones:
●El operador principal desempeña un papel muy importante en el mantenimiento de la
seguridad. Tenga máxima precaución a la hora de escoger a la persona que asumirá la
tarea de operador principal para el kit de seguridad de datos.
●Asegúrese de cambiar el código del operador principal inmediatamente cada vez que una
persona nueva pase a ocupar esta función.
●Modifique el código del operador principal regularmente (al menos una vez cada 60 días).
●Durante el proceso de modificación del código del operador principal, el código actual y el
nuevo aparecen en la pantalla. Complete el procedimiento con rapidez.
●No defina un código para el operador principal que pueda adivinarse fácilmente.
●Los programas de operador principal son fundamentales para la administración de la
seguridad. Si resulta necesario abandonar la máquina durante el uso de los programas
del operador principal, no olvide pulsar la tecla [CA] para salir de los programas del
operador principal. El administrador de la máquina debería informar a los usuarios de que
no deben acceder a los programas de operador principal sin permiso.
●El cliente asume la responsabilidad del control de los documentos copiados y de los
faxes recibidos utilizando el kit de seguridad de datos.
●
Aunque esté instalado el kit de seguridad de datos, observe que los datos de fax de la placa
de memoria pública utilizada por el kit de expansión de facsímil (AR-FX12) pueden leerse.
ページ 00年月日 金曜日 午後時8分

2
ESPAÑOL
■
■■
■Acerca de las contraseñas para la página Web
Si introduce una contraseña incorrecta de "user" o "admin" tres veces consecutivas al
intentar acceder a las páginas Web de una máquina que tiene instalado el kit de
seguridad de datos, el acceso a las páginas que requieran la introducción de una
contraseña de "user" o "admin" quedaráprohibido durante 5 minutos.
NOTA
Algunos de los procedimientos para utilizar la máquina cambian cuando estáinstalado
el kit de seguridad de datos. El "MANUAL DE INSTRUCCIONES (información general y
funcionamiento de la copiadora)" detalla los procedimientos de funcionamiento de la
máquina cuando el kit de seguridad de datos no estáinstalado. Este manual describe
los cambios en los procedimientos cuando el kit de seguridad de datos estáinstalado.
ページ 年月日 火曜日 午前時分

3
ESPAÑOL
Si el kit de seguridad de datos estáinstalado
Si el kit de seguridad de datos estáinstalado, se mostrará
el siguiente icono en el panel táctil. Pulse el icono ( )
para ver la información sobre la versión del kit de
seguridad de datos.
Si el kit de seguridad de datos estáinstalado, los datos presentes en la máquina se
borran automáticamente tras cada trabajo de copia y fax.
Cuando comienza el borrado de los datos, aparece el siguiente mensaje durante 6 segundos*.
* La duración del mensaje que aparece en
pantalla puede modificarse mediante el
programa de operador principal,
"CONFIGURACIÓN DE LA DURACIÓN
DEL MENSAJE". (Vea la página 10 del
Manual del operador principal).
Restricciones en el copiado en tándem y la
impresión en tándem
El copiado y la impresión en tándem funcionan según se describe a continuación de
acuerdo con la configuración del equipo servidor y el equipo cliente (tanto si estáinstalado
el kit de seguridad de datos como si no).
NOTA
Si la máquina se desconecta antes de que se finalicen los trabajos, los datos no se
borrarán por completo. Si no desea que los datos queden parcialmente borrados
cuando se desconecta la alimentación, se recomienda utilizar el programa de operador
principal, "BORRAR TODA LA MEMORIA" (página 6 de este manual), para completar
el borrado de datos antes de desconectar la alimentación.
Máquina del cliente
Kit de seguridad de datos: Sí
Kit de seguridad de datos: No
Equipo
servidor
Kit de seguridad
de datos: Sí
Puede utilizarse la función
tándem. Los datos se
borran en los equipos
servidor y cliente.
No puede utilizarse la
función tándem.
Kit de seguridad
de datos: No
Puede utilizarse la función
tándem. Los datos se
borran del equipo cliente.
Puede utilizarse la función
tándem regular.
LOS DATOS SE ESTAN BORRANDO
ページ 年月日 火曜日 午前時分

4
ESPAÑOL
Configuración de seguridad en la página Web
Cuando la máquina se utiliza como una impresora de red y se emplea la función Activar
impresión, el kit de seguridad de datos habilita la autenticación de usuario mediante un
"NOMBRE DE USUARIO" y una "CONTRASEÑA". (La función Activar impresión permite
imprimir directamente un archivo de un servidor FTP almacenado previamente desde el
panel operativo de la máquina sin utilizar el controlador de la impresora; consulte "Imprimir
directamente un archivo de un servidor FTP" en las páginas 3-7 del "MANUAL DE
INSTRUCCIONES (para la impresora)").
La autenticación de usuario se habilita activando la casilla de verificación "Habilitar
autenticación de usuario" en la página Web de la máquina para las opciones de la función
Activar impresión. (Esta casilla de verificación aparece cuando el kit de seguridad de datos
estáinstalado, y estáactivada de manera predeterminada).
Los requisitos del sistema y el procedimiento para acceder a la página Web que contiene
esta casilla de verificación se explican en el apartado "CONFIGURACIÓN DE LA
IMPRESORA EN RED" en las páginas 3-2 del "MANUAL DE INSTRUCCIONES (para la
impresora)". La casilla de verificación aparece en la pantalla mostrada en el paso 2 del
apartado "■ Registrar un servidor FTP" en las páginas 3-7 del "MANUAL DE
INSTRUCCIONES (para la impresora)".
■
■■
■Procedimiento para imprimir directamente un archivo de un
servidor FTP cuando la autenticación de usuario estáhabilitada
El nombre de usuario y la contraseña deben introducirse tras seleccionar el servidor
FTP que contiene el archivo que va a imprimirse desde el panel táctil de la máquina.
Cuando se selecciona el servidor FTP en el paso 3 del apartado "■ Imprimir un archivo
de un servidor FTP desde el panel de control de la impresora" en las páginas 3-7 del
"MANUAL DE INSTRUCCIONES (para la impresora)", apareceráuna pantalla que le
solicitaráque introduzca el nombre de usuario y la contraseña para el servidor FTP.
Pulse la tecla [NOMBRE USUARIO] para introducir el nombre de usuario y la tecla
[CONTRASEÑA] para introducir la contraseña. Apareceráuna pantalla de introducción
de caracteres en cada caso. Una vez haya introducido el nombre de usuario/
contraseña, pulse la tecla [OK].
Una vez introducido el nombre de usuario y la contraseña, continúe en el paso 4 en las
páginas 3-8 del "MANUAL DE INSTRUCCIONES (para la impresora)".
NOMBRE USUARIO
CONTRASEÑA
OKCANCELAR
INTRODUCIR EL NOMBRE DE USUARIO Y LA CONTRASEÑA PARA EL SERVIDOR FTP.
ページ 年月日 火曜日 午前時分

5
ESPAÑOL
PROGRAMAS DE OPERADOR PRINCIPAL
De entre los programas del operador principal utilizados por el operador principal para el kit
de seguridad de datos, esta sección explica los programas que están relacionados con la
función de seguridad.
En las siguientes explicaciones se presupone que la máquina posee las funciones de
impresora, fax y escáner de red.
LISTA DE PROGRAMAS DE OPERADOR PRINCIPAL
Utilizar los programas de operador principal
Siga el procedimiento de las páginas 4 y 5 del Manual del operador principal para
configurar las opciones de los programas de operador principal.
Cuando el kit de seguridad de datos estáinstalado, si se introduce un código de operador
principal incorrecto 3 veces consecutivas, la introducción del código de operador principal
no estarápermitida durante 5 minutos.
Para obtener una descripción de cada una de las opciones, consulte las páginas siguientes.
CONFIGURACION DE SEGURIDAD
Si estáinstalado el kit de seguridad de datos, la tecla [CONFIGURACION DE
SEGURIDAD] se añade a la pantalla del menúdel programa de operador principal. Pulse
esta tecla para mostrar el menúde configuración de seguridad.
El menúde configuración de seguridad consta de varias pantallas.
Pulse la tecla en la esquina inferior derecha de la pantalla para desplazarse a la siguiente pantalla.
Nombre del programa
Página
Nombre del programa
Página
CONFIGURACION DE SEGURIDAD
BORRAR TODA LA MEMORIA 6 AJUSTE PARA DESACTIVAR LA
IMPRESIÓN EN ESPERA 9
BORRAR TODOS LOS DATOS DE
LA LISTA DE ESTADO DE
TRABAJOS TERMINADOS
7DESACTIVAR LA IMPRESIÓN
DEL LISTADOS 9
BORRRAR DATOS LIBRETA DE
DIRECC./DATOS REGIST.
ENVIADOS
7
AJUSTES DE PANTALLA DE LA
LISTA ESTADO DE TRAB.
TERMINADOS
10
NÚMERO DE VECES QUE SE
REPITE EL BORRADO DE DATOS
7DESACTIVAR LA TECLA DE
REENVÍO 10
BORRADO AUTOMATICO AL
ENCENDER 8DESACTIVAR EL BLOQUEO
PARA MANIPULAR DATOS DE
IMPRESIÓN EN ESPERA 10
No. VECES QUE REPITE
PROGRAMA DE BORRADO
AUTOM. AL ENCENDER 8CLAVE DE PRODUCTO
No VECES QUE REPITE BORRADO
AUTOM. AL FINALIZAR TRABAJO
8 KIT DE SEGURIDAD DE DATOS 11
BORRAR TODA LA MEMORIA
BORRAR TODOS LOS DATOS DE LA LISTA
DE ESTADO DE TRABAJOS TERMINADOS
BORRAR DATOS DE LIBRETA DE DIRECCIONES/
DATOS REGISTRADOS DE IMÁGENES ENVIADAS
OK
PROGRAMAS DE OPERADOR PRINCIPAL
CONFIGURACION DE SEGURIDAD
1/4
ページ 年月日 火曜日 午前時分

6
ESPAÑOL
BORRAR TODA LA MEMORIA
Este programa se utiliza para borrar manualmente todos los datos de la memoria y el disco
duro de la máquina.
No obstante, observe que los siguientes tipos de datos no se borran con este programa.
Utilice el programa "BORRRAR DATOS LIBRETA DE DIRECC./DATOS REGIST.
ENVIADOS" de la página 7 para borrar los siguientes tipos de datos
●BUZÓN DE EMISIÓN RELÉ INDIVIDUAL/GRUPO/PROGRAMA*
●LISTA DE CONTROL DE REMITENTES
●MEMORIA POLLING/BUZÓN CONFIDENCIAL*
●DATOS DEL REMITENTE
●PERMITIR/RECHAZAR RECEPCIÓN DE DATOS DE AJUSTE (INCLUYENDO EL
NÚMERO DEL CÓDIGO DE ACCESO DE SOLICITUD DE IMPRESORA)
* Los datos de imagen almacenados en la PLACA DE LA MEMORIA se borran para
ejecutar este programa (BORRAR TODA LA MEMORIA).
Pulse la tecla [BORRAR TODA LA MEMORIA]. Aparecerá la siguiente pantalla solicitando
que confirme la selección ("SÍ" o "NO").
[Pantalla de borrado 1]
●Para regresar a la pantalla del menú
"CONFIGURACION DE SEGURIDAD", pulse
la tecla [NO].
●Para borrar toda la memoria, pulse la tecla
[SÍ]. Aparecerá el mensaje "ESPERE POR
FAVOR." y, a continuación, se mostrará la
siguiente pantalla.
[Pantalla de borrado 2]
●Mientras se efectúa el borrado de datos, se
muestra el porcentaje de datos borrados.
●
Cuando se hayan borrado los datos, la
alimentación se desconectará brevemente y
luego se volverá a conectar automáticamente.
NOTA
En caso de que el kit de seguridad de datos o la máquina en la que está instalado el kit
de seguridad de datos se venda o cambie de propietario, el operador principal deberá
encargarse de ejecutar este programa. Cuando ejecute el programa, el operador
principal no debería abandonar la máquina hasta haber comprobado que la eliminación
de datos ha finalizado.
Si desea cancelar después de que se haya iniciado el borrado de datos
Pulse la tecla [CANCELAR]. Aparecerá la pantalla de entrada del código de operador
principal. Nada más introducir el código correcto del operador principal, la eliminación
de datos se detendrá, se cortará brevemente la alimentación eléctrica para volver a
reanudarse automáticamente. El borrado de datos se detendrá en cuanto se introduzca
el código de operador principal correcto. Observe que cualquier dato que se haya
borrado antes de introducir el código de operador principal no podrá restaurarse (esos
datos se habrán perdido).
BORRAR TODA LA MEMORIA.
(EXCLUSIVO DE DATOS DE LIBRETA DE
DIRECCIONES/LISTA DE REMITENTES)
NO SÍ
100%50%0%
(50.0%)
BORRADO TOTAL DE MEMORIA.EJECUTANDO
REINICIO AUTOM. DESPUÉS DEL BORRADO
CANCELAR
ページ 4年月6日 木曜日 午後6時6分
Table of contents
Languages:
Other Sharp Printer Accessories manuals

Sharp
Sharp AR-PB8 User manual

Sharp
Sharp AR-S11 User manual

Sharp
Sharp AR-NS1 User manual

Sharp
Sharp AR-FX12 User manual

Sharp
Sharp MX-M260 User manual

Sharp
Sharp ARFX13 - Fax Interface Card User manual

Sharp
Sharp AR-D15 User manual

Sharp
Sharp AR-DU3 User manual

Sharp
Sharp AR-D24 User manual

Sharp
Sharp AR-P15 User manual