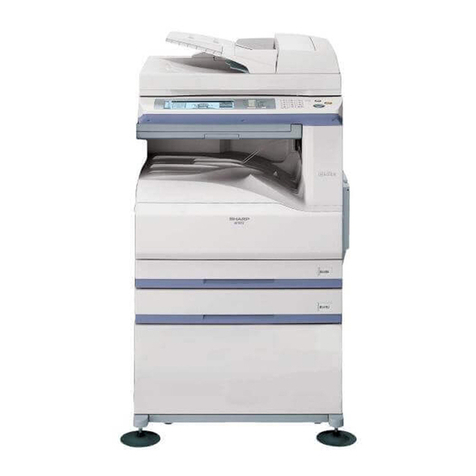
Sharp AR-PB2A User manual

MODEL
AR-BD14
DIGITAL COPIER
PRINTER EXPANSION KIT
OPERATION MANUAL
Page
•GETTING STARTED....................... 1
• PRINTING FROM A COMPUTER
IN THE Windows
ENVIRONMENT .............................. 5
• PRINTER DRIVER FOR
Macintosh..................................... 23
• USING THE OPERATION
PANEL .......................................... 29
• KEY OPERATOR’S GUIDE .......... 40
• PRINTER
TROUBLESHOOTING .................. 57
• SPECIFICATIONS......................... 63
• APPENDIX .................................... 64
MODEL
AR-PB2 A

List of the Applicable Models for the AR-PB2A Printer Expansion Kit
(as of December, 2000)
The details of the specifications, features, and options of the printer may vary with the printer
models. Some features described in this manual may not be available depending on the printer
drivers. See page 66.
Model Name AR-280 AR-285 AR-335 AR-250 AR-281 AR-286 AR-336 AR-405 AR-505 AR-287 AR-337 AR-407 AR-507
Hard disk drive Yes Yes Yes Yes Yes Yes Yes Yes Yes Yes Yes Yes Yes
Capacity 2GB*1 2GB*1 2GB*1 2GB 2GB 2GB 2GB 2GB 2GB 10GB 10GB 10GB 10GB
Reverse order
printing Yes Yes Yes No Yes No
Photo
enhancement
No No No Yes Yes Yes
Toner save/
smoothing No Yes Yes Yes Yes Yes
Confidential
print No No No No Yes Yes
Tandem
print No No No No No Yes Yes
Status/alert
by E-mail No No No No Yes Yes
Account
control No No No No Yes Yes
Network
scanner*2 No No No No Yes Yes
*1 Some units of the models may come with a 1 GB hard disk drive.
*2 Optional AR-NS1 is needed.
CINSE1992FC51

i
Warranty
While every effort has been made to make this document as accurate and helpful as possible,
SHARP Corporation makes no warranty of any kind with regard to its content. All information
included herein is subject to change without notice. SHARP is not responsible for any loss or
damages, direct or indirect, arising from or related to the use of this operation manual.
© Copyright SHARP Corporation 2000. All rights reserved. Reproduction, adaptation or translation
without prior written permission is prohibited, except as allowed under copyright laws.
Trademark Acknowledgments
Microsoft Windows, MS-DOS, and Windows NT are trademarks of Microsoft Corporation in the
U.S.A. and other countries.
Macintosh, Power Macintosh, Mac OS, LaserWriter, and AppleTalk are registered trademarks of
Apple Computer, Inc.
IBM, PC/AT, and PowerPC are trademarks of International Business Machines Corporation.
Pentium is a registered trademark of Intel Corporation.
PCL is a trademark of the Hewlett-Packard Company.
PostScript® is a registered trademark of Adobe Systems Incorporated.
NetWare is a registered trademark of Novell, Inc.
All other trademarks and copyrights are the property of their respective owners.
Conventions
The following conventions are used throughout this operation manual.
This indicates cautions that must be observed for the printer to work properly. If these are not observed,
the printer will not be damaged, but it will not operate or will operate in a way that is unexpected.
This indicates points which are not absolutely necessary for printer operation, but which are men-
tioned in order to show alternative ways of doing something, or for giving further information on
certain topics.
CAUTION
NOTE

ii
PRINTER EXPANSION KIT AR-PB2A
SOFTWARE LICENSE
PLEASE READ THIS LICENSE CAREFULLY BEFORE USING THE SOFTWARE. BY USING THE
SOFTWARE, YOU ARE AGREEING TO BE BOUND BY THE TERMS OF THIS LICENSE.
1. License. The application, demonstration, system and other software accompanying this License, whether on disk, in
read only memory, or on any other media (the "Software") and related documentation are licensed to you by SHARP.
You own the disk on which the Software is recorded but SHARP and/or SHARP’S Licensors retain title to the Software
and related documentation. This License allows you to use the Software on one or more computers connected to a single
printer and make one copy of the Software in machine-readable form for backup purposes only. You must reproduce on
such copy the SHARP copyright notice, the copyright notice of SHARP’S Licensors and any other proprietary legends of
SHARP and/or its Licensors that were on the original copy of the Software. You may also transfer all your license rights
in the software, the backup copy of the Software, the related documentation and a copy of this License to another party,
provided the other party reads and agrees to the terms and conditions of this License.
2. Restrictions. The Software contains copyrighted material, trade secrets and other proprietary material which is owned
by SHARP and/or its Licensors and in order to protect them you may not decompile, reverse engineer, disassemble or
otherwise reduce the Software to a human-perceivable form. You may not modify, network, rent, lease, loan, distribute or
create derivative works based upon the Software in whole or in part. You may not electronically transmit the Software
from one computer to another or over a network.
3. Termination. This license is effective until terminated. You may terminate this License at any time by destroying the
Software and related documentation and all copies thereof. This License will terminate immediately without notice from
SHARP and/or SHARP’S Licensors if you fail to comply with any provision of this License. Upon termination you must
destroy the Software and related documentation and all copies thereof.
4. Export Law Assurances. You agree and certify that neither the Software nor any other technical data received from
SHARP, nor the direct product thereof, will be exported outside the United States except as authorized and as permitted
by the laws and regulations of the United States. If the Software has been rightfully obtained by you outside of the United
States, you agree that you will not re-export the Software nor any other technical data received from SHARP, nor the
direct product thereof, except as permitted by the laws and regulations of the United states and the laws and the regulation
of the jurisdiction in which you obtained the Software.
5. Government End Users. If you are acquiring the Software on behalf of any unit or agency of the United States
Government, the following provisions apply. The Government agrees:
(i) if the Software is supplied to the Department of Defense (DoD), the Software is classified as "Commercial Computer
Software" and the Government is acquiring only "restricted rights" in the Software and its documentation as that term
is defined in Clause 252.227-7013 (c)(1) of the DFARS; and
(ii) if the Software is supplied to any unit or agency of the United States Government other than DoD, the Government’s
rights in the Software and its documentation will be as defined in Clause 52.227-19 (c)(2) of the FAR or, in the case of
NASA, in Clause 18-52.227-86 (d) of the NASA Supplement to the FAR.
6. Limited Warranty on Media. SHARP warrants the disks on which the Software is recorded to be free from defects in
materials and workmanship under normal use for a period of ninety (90) days from the date of purchase as evidenced by a
copy of the receipt. The entire liability of SHARP and/or its Licensors and your exclusive remedy will be replacement of
the disk which fails to meet the limited warranty provided by this Clause 6. A disk will be replaced when it is returned to
SHARP or a SHARP authorized representative with a copy of the receipt. SHARP will have no responsibility to replace a
disk damaged by accident, abuse or misapplication.
ANY IMPLIED WARRANTIES ON THE DISKS, INCLUDING THE IMPLIED WARRANTIES OF
MERCHANTABILITY AND FITNESS FOR A PARTICULAR PURPOSE, ARE LIMITED IN DURATION TO
NINETY (90) DAYS FROM THE DATE OF DELIVERY. THIS WARRANTY GIVES YOU SPECIFIC LEGAL
RIGHTS, AND YOU MAY ALSO HAVE OTHER RIGHTS WHICH VARY FROM JURISDICTION TO
JURISDICTION.
iii
7. Disclaimer of Warranty on Software. You expressly acknowledge and agree that use of the Software is at your sole
risk. The software and related documentation are provided "AS IS" and without warranty of any kind and SHARP and
SHARP’S Licensor(s) (for the purpose of provisions 7 and 8, SHARP and SHARP’S Licensor(s) shall be collectively
referred to as "SHARP") EXPRESSLY DISCLAIM ALL WARRANTIES, EXPRESS OR IMPLIED, INCLUDING, BUT
NOT LIMITED TO, THE IMPLIED WARRANTIES OF MERCHANTABILITY AND FITNESS FOR A PARTICULAR
PURPOSE. SHARP DOES NOT WARRANT THAT THE FUNCTIONS CONTAINED IN THE SOFTWARE WILL
MEET YOUR REQUIREMENTS, OR THAT THE OPERATION OF THE SOFTWARE WILL BE UNINTERRUPTED
OR ERROR-FREE, OR THAT DEFECTS IN THE SOFTWARE WILL BE CORRECTED. FURTHERMORE, SHARP
DOES NOT WARRANT OR MAKE ANY REPRESENTATIONS REGARDING THE USE OR THE RESULTS OF
THE USE OF THE SOFTWARE OR RELATED DOCUMENTATION IN TERMS OF THEIR CORRECTNESS,
ACCURACY, RELIABILITY, OR OTHERWISE. NO ORAL OR WRITTEN INFORMATION OR ADVICE GIVEN
BY SHARP OR A SHARP AUTHORIZED REPRESENTATIVE SHALL CREATE A WARRANTY OR IN ANY WAY
INCREASE THE SCOPE OF THIS WARRANTY. SHOULD THE SOFTWARE PROVE DEFECTIVE, YOU (AND
NOT SHARP OR A SHARP AUTHORIZED REPRESENTATIVE) ASSUME THE ENTIRE COST OF ALL
NECESSARY SERVICING, REPAIR OR CORRECTION, SOME JURISDICTIONS DO NOT ALLOW THE
EXCLUSION OF IMPLIED WARRANTIES, SO THE ABOVE EXCLUSION MAY NOT APPLY TO YOU.
8. Limitation of Liability. UNDER NO CIRCUMSTANCES INCLUDING NEGLIGENCE, SHALL SHARP BE
LIABLE FOR ANY INCIDENTAL, SPECIAL OR CONSEQUENTIAL DAMAGES THAT RESULT FROM THE USE
OR INABILITY TO USE THE SOFTWARE OR RELATED DOCUMENTATION, EVEN IF SHARP OR A SHARP
AUTHORIZED REPRESENTATIVE HAS BEEN ADVISED OF THE POSSIBILITY OF SUCH DAMAGES. SOME
JURISDICTIONS DO NOT ALLOW THE LIMITATION OR EXCLUSION OF LIABILITY FOR INCIDENTAL OR
CONSEQUENTIAL DAMAGES SO THE ABOVE LIMITATION OR EXCLUSION MAY NOT APPLY TO YOU.
In no event shall SHARP’S total liability to you for all damages, losses, and causes of action (whether in contract, tort
(including negligence) or otherwise) exceed the amount paid by you for the Software.
9. Controlling Law and Severability. For a portion of the Software related with Apple Macintosh and Microsoft
Windows, this license shall be governed by and construed in accordance with the laws of the state of California and
Washington, respectively. If for any reason a court of competent jurisdiction finds any provision of this License, or
portion thereof, to be unenforceable, that provision of the License shall be enforced to the maximum extent permissible so
as to effect the intent of the parties, and the remainder of this License shall continue in full force and effect.
10. Complete Agreement. This License constitutes the entire agreement between the parties with respect to the use of
the Software and related documentation, and supersedes all prior or contemporaneous understandings or agreements,
written or oral, regarding such subject matter. No amendment to or modification of this License will be binding unless in
writing and signed by a duly authorized representative of SHARP.

Table of Contents
iv
CHAPTER 1 GETTING STARTED
INTRODUCTION............................................................................................................................ 1
USING THIS MANUAL................................................................................................................... 2
For General Users ................................................................................................................... 2
For Key Operators ................................................................................................................... 3
CONNECTING TO THE PRINTER................................................................................................ 3
PARALLEL PRINTER INTERFACE............................................................................................... 3
Connection............................................................................................................................... 4
NETWORK INTERFACE ...............................................................................................................4
CHAPTER 2 PRINTING FROM A COMPUTER IN THE Windows ENVIRONMENT
INTRODUCTION............................................................................................................................ 5
AR-PB2A PRINTER DRIVERS AND UTILITIES............................................................................ 5
SELECTING THE BEST PRINTER DRIVER................................................................................. 5
Checking the Hardware and Software Requirements ............................................................. 6
INSTALLING PRINTER DRIVERS ................................................................................................ 6
Using the Installer in the CD-ROM (Windows 95/ Windows 98/ Windows NT 4.0) ................. 7
Windows 95 with Plug & Play (parallel connections only) ....................................................... 8
Windows 98 with Plug & Play (parallel connections only) ....................................................... 9
Windows 95/ Windows 98 without Plug & Play...................................................................... 10
Windows 3.1x ........................................................................................................................ 11
Windows NT 4.0 .................................................................................................................... 11
Making Floppy Disks from CD-ROM ..................................................................................... 11
Uninstalling Printer Drivers and Printer Utilities ..................................................................... 12
Deleting Printer Drivers.......................................................................................................... 12
INSTALLING DISPLAY FONT ..................................................................................................... 13
INSTALLING RESIDENT FONT INFORMATION
(PPD for Windows 95/Windows 98 only) ..................................................................................... 13
PRINTING A TEST PAGE FROM YOUR COMPUTER............................................................... 14
Windows 95, Windows 98 or Windows NT 4.0...................................................................... 14
Windows 3.1x ........................................................................................................................ 14
PRINTING DOCUMENTS FROM THE COMPUTER .................................................................. 14
Using the Auditing Mode........................................................................................................ 15
FONTS ......................................................................................................................................... 15
CONTROLLING PRINTER FEATURES FROM THE PRINTER DRIVER................................... 16
Windows 95/ Windows 98/ Windows NT 4.0 ......................................................................... 16
Windows 3.1x ........................................................................................................................ 16
PRINTER STATUS MONITOR .................................................................................................... 17
Checking the Hardware and Software Requirements ........................................................... 17
How to Install the Printer Status Monitor ............................................................................... 17
How to Set up the Printer Status Monitor .............................................................................. 18
How to Use the Printer Status Monitor .................................................................................. 19

TABLE OF CONTENTS
v
PRINTER ADMINISTRATION UTILITY ....................................................................................... 20
Checking the Hardware and Software Requirements ........................................................... 20
How to Install the Printer Administration Utility ...................................................................... 21
How to Use the Printer Administration Utility ......................................................................... 21
NW SETUP .................................................................................................................................. 22
Outline of the NW Setup ........................................................................................................ 22
Checking the Hardware and Software Requirements ........................................................... 22
How to Install the NW Setup.................................................................................................. 22
How to Use the NW Setup..................................................................................................... 22
CHAPTER 3 PRINTER DRIVER FOR Macintosh
INSTALLING THE PPD FILE ....................................................................................................... 23
Checking the Hardware and Software Requirements ........................................................... 23
How to Install the PPD File .................................................................................................... 23
Selecting the Printer .............................................................................................................. 24
Controlling Printer Features from the Printer Driver .............................................................. 26
AR-PB2A PPD UTILITY ............................................................................................................... 27
CHAPTER 4 USING THE OPERATION PANEL
INTRODUCTION.......................................................................................................................... 29
USES OF THE OPERATION PANEL .......................................................................................... 29
CONFIGURATION FROM THE OPERATION PANEL ................................................................ 30
Accessing the Printer Configuration Menu ............................................................................ 30
Using the Printer Configuration Menu.................................................................................... 30
Example Configuration Task.................................................................................................. 31
Printer Configuration Menus .................................................................................................. 31
Printer Settings ...................................................................................................................... 33
Interface Settings................................................................................................................... 34
Network Settings.................................................................................................................... 34
Print Test Page ...................................................................................................................... 35
Initialize and/or Store Settings ............................................................................................... 35
COPIER MODE AND PRINTER MODE ...................................................................................... 36
Selecting the Online Mode..................................................................................................... 36
TRAY SELECT AND JOB CANCEL ............................................................................................ 37
Tray Selection........................................................................................................................ 37
Interrupting and Canceling Print Jobs.................................................................................... 37
CONFIDENTIAL PRINT ............................................................................................................... 38
TANDEM PRINT .......................................................................................................................... 39

TABLE OF CONTENTS
vi
CHAPTER 5 KEY OPERATOR’S GUIDE
INTRODUCTION.......................................................................................................................... 40
KEY OPERATOR PROGRAMS................................................................................................... 40
Printer Exposure Level ..........................................................................................................42
Memory Reserved for Printer ................................................................................................ 42
Output Method When Memory is Full .................................................................................... 43
Set the Number of Confidential Print Jobs to Be Stored........................................................ 43
Enable Bypass-Tray Size Detection ...................................................................................... 44
Give Priority to Print Speed in Staple Mode .......................................................................... 44
Prohibit Notice Page Printing................................................................................................. 44
Prohibit Rotated Output .........................................................................................................45
Prohibit Bypass-Tray Selection ............................................................................................. 45
Prohibit Auto Tray Switching.................................................................................................. 45
Prohibit Test Page Printing .................................................................................................... 45
Prohibit Changes to Printer Settings...................................................................................... 45
Prohibit Changes to Interface Settings .................................................................................. 46
Prohibit Changes to Network Settings................................................................................... 46
Record Copy and Print Per Account...................................................................................... 46
WEB PAGE FEATURE ................................................................................................................47
Password Setting................................................................................................................... 47
E-mail Setup and Network Scanning Setup........................................................................... 49
STATUS/ALERT BY E-MAIL........................................................................................................ 52
Before Using the “Status/Alert by E-mail” function ................................................................ 52
Setting the “Status/Alert by E-mail” function .......................................................................... 52
Status/Alert Messages...........................................................................................................56
CHAPTER 6 PRINTER TROUBLESHOOTING
INTRODUCTION.......................................................................................................................... 57
NOTES ON PRINTING LENGTHY DOCUMENTS...................................................................... 57
NOTICE PAGE PRINTING .......................................................................................................... 58
Disabling Notice Page and Separator Sheet Printing ............................................................ 58
TROUBLESHOOTING .................................................................................................................58
CHAPTER 7 SPECIFICATIONS
SPECIFICATIONS ....................................................................................................................... 63
CHAPTER 8 APPENDIX
PRINT AREA................................................................................................................................ 64
FONT LIST................................................................................................................................... 65
PRINTER DRIVER FEATURES................................................................................................... 66
SUPPLEMENT............................................................................................................................. 68

Chapter 1 Getting Started
1
Introduction
The AR-PB2A Printer Expansion Kit adds high-speed, laser set-printing capability to the powerful
features of the AR-287/AR-337/AR-407/AR-507 copiers and other copiers of the same series to
provide a convenient, high-productivity document printing system easily controlled from a desktop or
networked computer. Note that throughout this operation manual, we will refer to AR-287,
AR-337, AR-407, AR-507 or any other digital copying machine of the same series in which the
AR-PB2A Printer Expansion Kit has been installed simply as the ‘printer’.
The many useful features and functions of the printer include:
•printing multiple sets of documents
•stapling documents (with an optional finisher)
•automatic booklet printing*
•automatic 2-sided (duplex) printing*
•printing multiple document pages on a single sheet (N-up printing)
•printing cover sheets (different first pages)
* For booklet printing and 2-sided printing, an optional duplex module is required in some models.
This operation manual assumes that the AR-PB2A Printer Expansion Kit has already been installed
in your copier and is ready to use with your computer. This chapter shows you how to check the
printer cable connections linking the printer with your computer. These tasks should be completed by
an authorized dealer service technician before the appropriate AR-PB2A printer drivers are installed
in your computer.
This operation manual describes only printer features. For a description of copier features, see the copier
operation manual. Refer to the copier operation manual for copier operation, supplies, maintenance, and
specifications for print media usage.
When connecting this printer through a network to computers, an optional network interface card (Print Server
Card) is needed. However, in some countries and regions, the network interface card is not available. In this case,
connect the printer to a computer through a parallel interface. If additional information is required concerning the
network interface card, consult your authorized Sharp Dealer.
NOTES

GETTING STARTED
2
Using This Manual
This operation manual, together with the on-line help files supplied with the printer drivers, provides
complete information on using this printer. The operation manual and on-line help files are intended
as operation guides for general users and key operators. The operation manual includes information
on:
•connecting the printer to a computer
•selecting and installing printer drivers
•using the operation panel to control printer functions
•troubleshooting printer problems
•printer specifications
The on-line help files include specific information on:
•configuring printer drivers
•adjusting printer driver settings
•using advanced printer features under specific printer drivers
The on-line help file for a given printer driver is automatically installed along with that printer driver,
and can be accessed by clicking the ‘Help’ button available in the printer driver dialog box (Windows
system).
The method of accessing the on-line help depends on the particular printer driver. With the PCL5e, PCL6, and
PostScript® drivers, the on-line help can be accessed by clicking the ‘Help’ button. With the Sharp-specific
PostScript® PPD driver, the on-line help can be accessed by clicking the help icon and then clicking the item for
which information is needed.
For General Users
General users should read the Getting Started, Printing from a Computer in the Windows
Environment, Printer Driver for Macintosh, and Using the Operation Panel sections of this operation
manual to become familiar with the available features and functions of this printer.
The on-line help files supplied with the printer drivers should then be consulted for specific
information on using particular printer features.
NOTE

GETTING STARTED
3
1
18
36 19
For Key Operators
In addition to the information recommended for general users, key operators should read the Key
Operator’s Guide section of this operation manual to become familiar with the key operator programs
and the web page feature.
The Printer Troubleshooting and Specifications sections can also be consulted for information that
will aid in operating the printer/copier smoothly and efficiently.
Connecting to the Printer
The computer communicates with the printer through a local parallel printer or optional network
interface that has been installed as part of the AR-PB2A Printer Expansion Kit by your authorized
Sharp dealer. The following section shows the location of the printer interface connection and
provides step-by-step procedures on how to connect the appropriate cable.
If you plan on moving the printer, contact your authorized Sharp dealer.
Parallel Printer Interface
The printer supports an IEEE 1284-compliant parallel printer interface. This interface requires an
IEEE 1284-compliant cable that connects to the rear of the printer to the computer (see Figure 1-1).
Do not attempt to connect the printer interface cable to the printer and/or computer with the power turned on.
Connecting the printer interface cable while power is applied can cause equipment damage.
Connector
36-pin DDK 57LE-40360-730B (D29) female connector or
equivalent connector
Cable
Shielded type bi-directional parallel interface
For best results, use a printer interface cable that is
IEEE1284 compliant.
NOTE
CAUTION

GETTING STARTED
4
Connection
1. Make sure both the printer and the computer are turned off.
2. Plug one end of the printer cable into the printer and the other end into the computer’s parallel
connector.
Figure 1-1. Connecting the Printer Interface Cable
In order to have best performance, make sure to use shielded parallel cable.
For specifications of the parallel interface of your computer, see its operation manual.
The printer sends and receives data bi-directionally and at high speed. Some switch boxes cannot support high-speed
bi-directional data transfer and using them might cause printing errors.
For further details on the specifications of the printer’s parallel interface, consult an authorized Sharp dealer.
Network Interface
The printer can also be connected to a network using an optional network interface card (Print
Server Card) supplied by authorized Sharp dealers. For details on network interface, see the
operation manual of the network interface card.
NOTES

Chapter 2 Printing From a Computer in the
Windows Environment
5
Introduction
A printer driver must be installed before the printer can be used to print documents created or stored
on a desktop or networked computer. This chapter describes the printer drivers and utilities supplied
with the printer for the Windows system. Information provided includes:
•Full descriptions of all supplied printer drivers
•Detailed information on selecting and installing printer drivers
•Detailed information on installing and using printer utilities
AR-PB2A Printer Drivers and Utilities
The following printer drivers and utilities are included in the CD-ROM supplied with the printer. Refer
to Table 2-1 to determine which driver or drivers are compatible with your operating system.
1. Windows PostScript®printer driver
2. Sharp-specific PostScript®PPD
3. Windows PCL5e printer driver
4. Windows PCL6 printer driver
5. Printer Status Monitor
6. Printer Administration Utility
7. NW Setup
8. Display font
Selecting the Best Printer Driver
Refer to Table 2-1 to select the printer driver that best fits your needs. Table 2-1 shows which printer
drivers are compatible with specific operating system software, i.e., WIN 3.1 or WIN 95/ WIN 98. The
features that can be used in this printer varies with the printer drivers and printer models. (See page
66.) Some features cannot be used depending on the printer drivers, printer models or operating
systems even if these are described in this manual.

PRINTING FROM A COMPUTER IN THE WINDOWS ENVIRONMENT
6
Table 2-1. Printer Driver Compatibility
NO. PRINTER DRIVER WIN 3.1 WIN 95/
WIN 98 WIN NT
1 Windows PS X X X
2 Windows PPD X X
3 Windows PCL5e X X X
4 Windows PCL6 X X
Users of Windows will obtain maximum functionality and better output quality by installing the Windows PostScript®
Printer driver. Alternatively, the Windows PCL5e driver will provide the best print speed.
Checking the Hardware and Software Requirements
You will need the following hardware and software in order to install the printer driver.
Computer
Type •IBM PC/AT or compatible computer equipped with a bi-directional parallel interface
Operating
System •Windows 3.1x, Windows 95, Windows 98, Windows NT 4.0
CPU •Windows 3.1/Windows 95: 486SX or better
•Windows 98: 486DX/ 66 MHz or better (Pentium or better is recommended.)
•Windows NT4.0: 486/ 25MHz or better
RAM •Windows 3.1/Windows 95: 8 MB or more (12 MB or more is recommended.)
•Windows 98: 16 MB or more (32 MB or more is recommended.)
•Windows NT 4.0: 16 MB or more
Installing Printer Drivers
A compatible printer driver must be loaded to enable a computer’s operating system to com-
municate with the printer.
The following procedures describe how to install each of the supplied printer drivers. To install multiple
Windows printer drivers, the installation procedure must be performed for each driver.
Printer utilities such as the Printer Status Monitor, Printer Administration Utility, and NW Setup are
also included in the CD-ROM. If you install these utilities, see their respective sections before
installing them (pages 17 to 22).
Before installing a printer driver, be sure to read the “Readme”file for the latest information.
NOTE
NOTE

PRINTING FROM A COMPUTER IN THE WINDOWS ENVIRONMENT
7
Using the Installer in the CD-ROM (Windows 95/Windows 98/Windows NT 4.0)
The PPD printer driver must be installed using the plug & play feature or from the Add Printer Wizard. See the
following sections.
1. Start Windows.
2. Insert the supplied PRINTER UTILITIES CD-ROM into a CD-ROM drive.
•If your computer is configured for auto start on the CD-ROM, proceed to step 5.
3. On the ‘Start’menu, click ‘Run’.
4. Enter the CD-ROM drive and setup command. Then click the ‘OK’button.
Example: If the CD-ROM drive is designated as drive Q, type “Q:\Setup.exe”and click ‘OK’.
5. The license agreement will be displayed. Read it and click ‘Next’if you accept the agreement.
6. Select English as a language for software to be installed and click ‘Next’.
•The printer drivers and utilities that can be installed from the CD-ROM will be displayed.
NOTE

PRINTING FROM A COMPUTER IN THE WINDOWS ENVIRONMENT
8
7. Select the desired printer drivers and utilities to be installed by clicking the check boxes.
•If a printer driver or a printer utility (except NW Setup and Display Font) is highlighted by clicking the
icon or the name part, you can select the ‘README display’button to display the information on the
highlighted driver or utility.
•Printer Administration Utility, Printer Status Monitor, and NW Setup can be used only if the printer is
used as a network printer. See the installation requirements on pages 17, 20, and 22 before
installing them.
8. Click the ‘Next’button.
•The list of the printer drivers and utilities to be installed will appear.
9. Click the ‘Start’button.
10. Follow the instructions on your screen to install the selected printer drivers and utilities.
11. When installation is complete, the message “Setup has finished installing your selected
package(s).”will appear. Click the ‘Close’button.
12. If restart of the computer is requested, click ‘Yes’.
•Restart of the computer may be needed depending on the program to be installed and the system
configuration.
Windows 95 with Plug & Play (parallel connections only)
When using Windows 95 with plug & play*, follow the procedure below.
* The plug & play feature is effective if both the computer and peripheral equipment are equipped
with IEEE 1284 compliant parallel interface.
1. Ensure that the printer cable is connected between your computer and the printer and then turn on
the printer.
2. Start Windows on your computer.
Before installing the printer driver, be sure to close all other open applications.
•If you use Windows 95 on a personal computer with the plug & play feature, the ‘Update
Device Driver Wizard’window will appear. If the ‘New Hardware Found’window appears,
follow the procedure below:
(1) Click the ‘Driver from Disk Provided by Hardware Manufacturer’button and then click ‘OK’.
(2) When the ‘Install From Disk’window appears, insert the PRINTER UTILITIES CD-ROM into
a CD-ROM drive. Specify the path shown in Table 2-2 and click the ‘OK’button.
•If your computer is configured for auto start, the license agreement will be displayed.
Click the ‘Cancel’button.
(3) Proceed to step 4.
NOTE

PRINTING FROM A COMPUTER IN THE WINDOWS ENVIRONMENT
9
Table 2-2. Printer Driver Path
Example: The CD-ROM drive is designated as drive Q.
Printer driver Operating system Path
PCL5e Windows 95/Windows 98
Windows NT 4.0
Windows 3.1x
Q:\Option\English\9x_pcl5e
Q:\Option\English\Nt_pcl5e
Q:\Option\English\3x_pcl5e
PCL6 Windows 95/Windows 98
Windows NT 4.0
Q:\Option\English\9x_pcl6
Q:\Option\English\Nt_pcl6
PostScript Windows 95/Windows 98
Windows NT 4.0
Windows 3.1x
Q:\Option\English\9x_ps2
Q:\Option\English\Nt_ps2
Q:\Option\English\3x_ps2
PPD Windows 95/Windows 98
Windows NT 4.0
Q:\Option\English\9x_psppd
Q:\Option\English\Nt_psppd
•If either the ‘Update Device Driver Wizard’window or the ‘New Hardware Found’window
does not appear, follow the procedure of Windows 95/Windows 98 without Plug & Play.
3. Insert the PRINTER UTILITIES CD-ROM into a CD-ROM drive, specify the path shown in Table
2-2, and click the ‘Next’button.
•If your computer is configured for auto start, the license agreement will be displayed. Click the
‘Cancel’button.
4. Highlight the desired printer driver and click ‘Next’to continue.
5. Ensure that ‘Yes’is checked to use the printer as the default printer. Click the ‘Next’button.
6. Follow the instructions on your screen to install the supplied printer driver.
Windows 98 with Plug & Play (parallel connections only)
When using Windows 98 with plug & play*, follow the procedure below.
* The plug & play feature is effective if both the computer and peripheral equipment are equipped
with IEEE 1284 compliant parallel interface.
1. Ensure that the printer cable is connected between your computer and the printer and then turn on
the printer.
2. Start Windows on your computer.
Before installing the printer driver, be sure to close all other open applications.
NOTE

PRINTING FROM A COMPUTER IN THE WINDOWS ENVIRONMENT
10
•If you use Windows 98 on a personal computer with plug & play feature, the ‘Add New
Hardware Wizard’window will appear. If the ‘Add New Hardware Wizard’window does not
appear, follow the procedure of Windows 95/Windows 98 without Plug & Play.
3. Click the ‘Next’button.
4. Ensure that ‘Search for the best driver for your device’is selected and click the ‘Next’button.
5. Insert the PRINTER UTILITIES CD-ROM into a CD-ROM drive, specify the path shown in Table 2-
2, and click the ‘Next’button.
•If your computer is configured for auto start, the license agreement will be displayed. Click the
‘Cancel’button.
6. Highlight the desired printer driver and click ‘Next’to continue.
7. Ensure that ‘Yes’is checked to use the printer as the default printer. Click the ‘Next’button.
8. Follow the instructions on your screen to install the supplied printer driver.
Windows 95/Windows 98 without Plug & Play
1. Ensure that the printer cable is connected between your computer and the printer and then turn on
your computer.
2. On the Windows 95/Windows 98 Start menu, highlight ‘Settings’, then highlight and click on
‘Printers’.
3. From the Printers window, select ‘Add Printer’to run the Add Printer Wizard. Then click ‘Next’.
4. If Windows 95/Windows 98 has been configured for network operation, it might be necessary to
select ‘Local Printer’or ‘Network Printer’. Select the appropriate option, and click ‘Next’to continue.
5. If ‘Network Printer’was selected, specify the appropriate Network Path or Queue Name and click
‘Next’.
6. The installation window will display a list of printer models and manufacturers. Click the ‘Have Disk’
button.
7. Insert the PRINTER UTILITIES CD-ROM into a CD-ROM drive. Specify the path shown in Table
2-2 and click the ‘OK’button. Highlight the desired printer driver, and click ‘Next’to continue.
•If your computer is configured for auto start, the license agreement will be displayed. Click
the ‘Cancel’button.
8. If ‘Local Printer’was selected in step 4 above, the installation window will display a list of possible
port assignments. Select the correct port, usually LPT1 for local printers and click ‘Next’.
9. Ensure that ‘Yes’is checked to use the printer as the default printer. Click the ‘Next’button.
•At this time, ensure that the printer has been turned on and has been connected to your
computer.
10. Follow the instructions on your screen to install the supplied printer driver.

PRINTING FROM A COMPUTER IN THE WINDOWS ENVIRONMENT
11
Windows 3.1x
1. Ensure that the printer cable is connected between your computer and the printer and then turn on
your computer.
2. From the Program Manager, double click on ‘Control Panel’located in the ‘Main’menu.
3. From the Control Panel, double click on ‘Printers.’
4. Click on ‘Add’and then ‘Install Unlisted or Updated Printer.’
5. Click on ‘Install.’
6. Insert the PRINTER UTILITIES CD-ROM into a CD-ROM drive, specify the path shown in Table 2-
2, and click the ‘OK’button. Then select the desired printer driver.
7. Follow the instructions on your screen to install the supplied printer driver.
The PPD and PCL6 printer drivers cannot be installed on Windows 3.1x.
Windows NT 4.0
1. Ensure that the printer cable is connected between your computer and the printer and then turn on
your computer.
2. On the Start menu, highlight ‘Settings’, then highlight and click on ‘Printers’.
3. From the Printers window, select ‘Add Printer’to run the Add Printer Wizard.
4. Select ‘My computer’or ‘Network Printer Server’and then click on ‘Next’.
5. Follow the instructions on your screen to install the supplied printer driver. See Table 2-2 for the
printer driver path.
Making Floppy Disks from CD-ROM
The printer drivers and printer utilities in the CD-ROM can be copied to floppy disks. To install a
printer driver on a computer without a CD-ROM drive, the printer driver must be copied to a floppy
disk. The copying procedure on a Windows 95, Windows 98 or Windows NT 4.0 computer is shown
as follows.
1. On the ‘Start’menu, click ‘Run’.
2. Enter the CD-ROM drive, the desired folder, and “Mkdisk.bat”.
NOTE

PRINTING FROM A COMPUTER IN THE WINDOWS ENVIRONMENT
12
Example: The CD-ROM drive is designated as drive Q.
Windows NT PCL5e: Q:\Option\English\Nt_pcl5e\Mkdisk.bat
Windows 95/98 PCL5e: Q:\Option\English\9x_pcl5e\Mkdisk.bat
Windows 3.1 PCL5e: Q:\Option\English\3x_pcl5e\Mkdisk.bat
Windows NT PCL6: Q:\Option\English\Nt_pcl6\Mkdisk.bat
Windows 95/98 PCL6: Q:\Option\English\9x_pcl6\Mkdisk.bat
Windows NT PS: Q:\Option\English\Nt_ps2\Mkdisk.bat
Windows 95/98 PS: Q:\Option\English\9x_ps2\Mkdisk.bat
Windows 3.1 PS: Q:\Option\English\3x_ps2\Mkdisk.bat
Windows NT PPD: Q:\Option\English\Nt_psppd\Mkdisk.bat
Windows 95/98 PPD: Q:\Option\English\9x_psppd\Mkdisk.bat
Printer Status Monitor: Q:\Packages\English\Smon\Mkdisk.bat
Printer Administration Utility: Q:\Packages\English\Sadmin\Mkdisk.bat
NW Setup: Q:\Packages\English\Nwsetup\Mkdisk.bat
Display Font: Q:\Option\Font\Mkdisk.bat
3. Click ‘OK’.
4. Follow the on-screen instructions.
For installation from a floppy disk, use the same procedure as the installation from the CD-ROM but
insert the floppy disk and specify the floppy disk drive.
After installing the PPD driver on the Windows 95 or Windows 98 system, resident font information
must be installed. See page 13.
Uninstalling Printer Drivers and Printer Utilities
To uninstall a printer driver or a printer utility that has been installed using the installer, follow the
procedure shown below.
To delete a printer driver that has been installed using the plug & play feature or from the Add Printer
wizard, see the next section.
1. On the ‘Start’menu, highlight ‘Settings’, then highlight and click on ‘Control Panel’.
2. Double-click ‘Add/Remove Programs’.
3. Select the utility to be deleted and click ‘Add/Remove’.
4. Click ‘Yes’.
Deleting Printer Drivers
To delete a printer driver that has been installed using the plug & play feature or from the Add Printer
wizard, follow the procedure shown below.
1. On the ‘Start’menu, highlight ‘Settings’, then highlight and click on ‘Printers’.
2. Right-click the printer to be deleted.
3. Click ‘Delete’and then follow the instructions on your screen.
Other manuals for AR-PB2A
1
This manual suits for next models
1
Table of contents
Other Sharp Printer Accessories manuals

Sharp
Sharp ARFX13 - Fax Interface Card User manual

Sharp
Sharp MX-FR46U User manual

Sharp
Sharp AR-FN7 User manual

Sharp
Sharp FO-1MK User manual

Sharp
Sharp AR-FR11 User manual

Sharp
Sharp AR-FR22 U User manual

Sharp
Sharp MX-M260 User manual

Sharp
Sharp MX-B201D User manual

Sharp
Sharp 00ZFO3MKCUSME User manual

Sharp
Sharp AR-FR4 U User manual

Sharp
Sharp AR-RB1 User manual

Sharp
Sharp AR-F14N User manual

Sharp
Sharp AR-NB3 User manual

Sharp
Sharp MX-LCX2 User manual

Sharp
Sharp AM-300 User manual

Sharp
Sharp AR-S11 User manual

Sharp
Sharp SF-A57 User manual

Sharp
Sharp AR-FR19 U User manual

Sharp
Sharp AR-DC1 User manual

Sharp
Sharp AR-NB3 Configuration guide