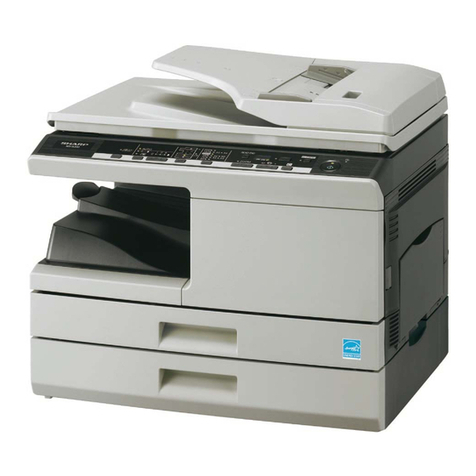
Sharp AR-DU3 User manual

This document has been published to be used for
after sales service only.
The contents are subject to change without notice.
Parts marked with “ “ are important for maintaining the safety of the set.
Be sure to replace these parts with specified ones for maintaining the safety and performance of the set.
SHARP CORPORATION
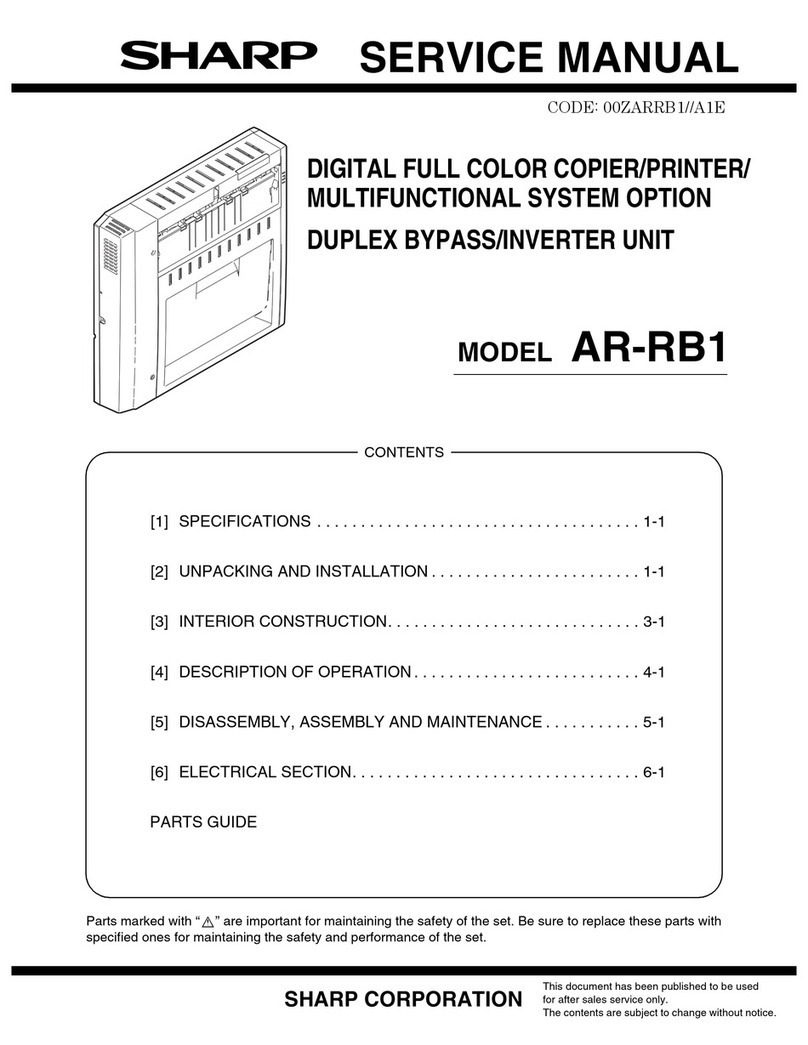
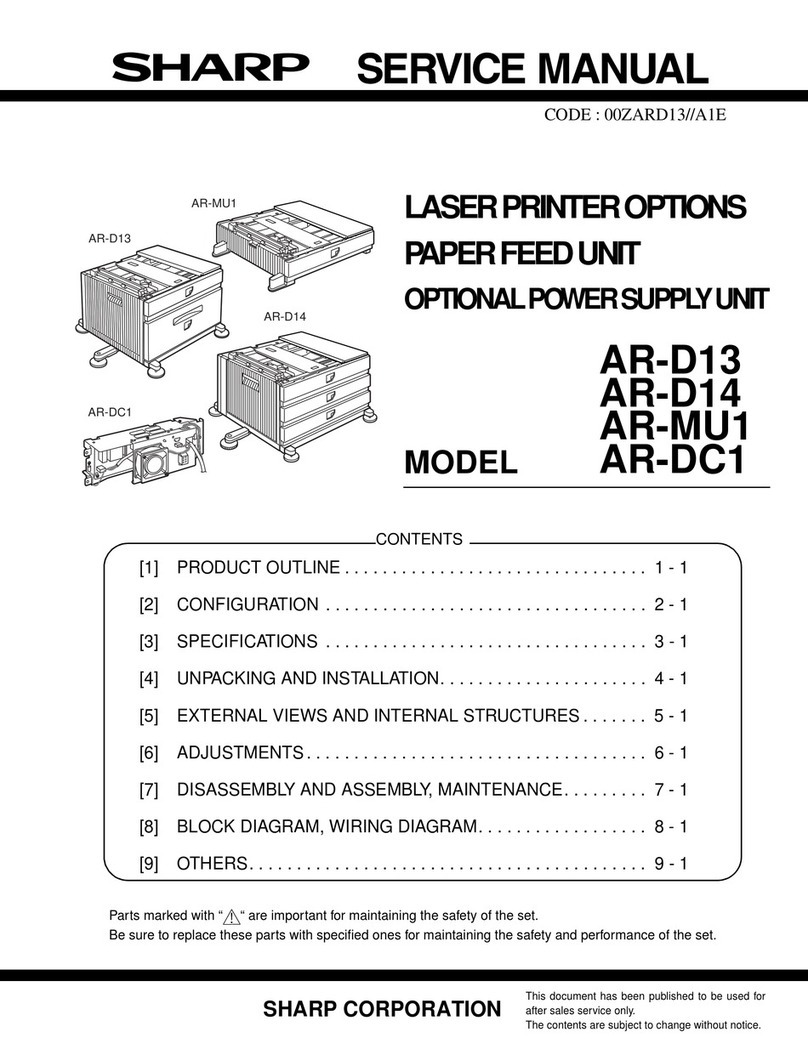
LASER PRINTER OPTIONS
AUTO DUPLEX MODULE
AR-DU3
AR-DU4
MODEL AR-TE3
CODE : 00ZARDU3//A1E
[1] PRODUCT OUTLINE . . . . . . . . . . . . . . . . . . . . . . . . . . . . . . . . 1 - 1
[2] CONFIGURATION. . . . . . . . . . . . . . . . . . . . . . . . . . . . . . . . . . . 2 - 1
[3] SPECIFICATIONS. . . . . . . . . . . . . . . . . . . . . . . . . . . . . . . . . . . 3 - 1
[4] UNPACKING AND INSTALLATION . . . . . . . . . . . . . . . . . . . . . . 4 - 1
[5] EXTERNAL VIEWS AND INTERNAL STRUCTURES . . . . . . . 5 - 1
[6] MACHINE OPERATION . . . . . . . . . . . . . . . . . . . . . . . . . . . . . . 6 - 1
[7] ADJUSTMENTS . . . . . . . . . . . . . . . . . . . . . . . . . . . . . . . . . . . . 7 - 1
[8] DISASSEMBLY AND ASSEMBLY, MAINTENANCE . . . . . . . . . 8 - 1
[9] BLOCK DIAGRAM, WIRING DIAGRAM . . . . . . . . . . . . . . . . . . 9 - 1
CONTENTS
AR-DU4
AR-DU3AR-DU3 AR-DU4
AR-TE3

AR-DU3/DU4/TE3 PRODUCT OUTLINE, CONFIGURATION 1-1
[1] PRODUCT OUTLINE
This unit is installed to the following machines to serve as a duplex module.
The AR-DU3 is equipped with the duplex feature only, and the AR-DU4 is additionally equipped with the manual paper feed feature.
AR-DU3 models is equipped with the paper exit port, which allows installation of the optional paper exit tray, the AR-TE3. (AR-DU4 standard)
[2] CONFIGURATION
1. To use this unit, one of the multi purpose paper feed tray (AR-MU1), the 3-stage paper feed desk (AR-D14), and the large capacity paper feed desk
(AR-D13) should be installed in advance.
2. When the saddle finisher (AR-FN7) is installed, the duplex module with the manual paper feed feature (AR-DU4) cannot be installed.
3. When the saddle finisher (AR-FN7) is installed, the paper exit tray (AR-TE4) cannot be installed.
Applicable models AR-P350 / P450, AR-M350 / M450
Related to paper feed unit
AR-DU4
AR-DU3
Scanner rack
Duplex module/bypass tray
Duplex module
=Any of the units must be installed together.
Multi purpose draw er
Stand/3 x 500 sheet paper dr awer
Stand/MPD & 2000 sheet
Duplex module/bypass tr ay
Duplex module
B/W scanner module/DSPF
Saddle stitch finisher
Finisher
Mail-bin stacker
Exit tray
Punch unit
PS3 expansion kit
Facsimile expansion kit
Print server card
Hard disk drive
Power supply unit
Upper exit tray extension
Multi-function controller board
Fax memory (8 MB)
Network scanner expansion kit
*1 *3 *2
*2
*1
*1
=Must be installed for installation of the stand/3 x 500 sheet paper
*2
drawer or the stand/MPD & 2000 sheet paper drawer. =Standard.
*3
=Cannot be installed together.
Simultaneous installation allowed
Simultaneous installation is required
B/W scanner module/DSPF(AR-EF1)
Upper exit tray
extension
(AR-TE4) Finisher
(AR-FN6)
Mail-bin stacker
(AR-MS1)
Stand/MPD & 2000 sheet
paper drawer
(AR-D13)
Power supply unit
(AR-DC1)
Multi purpose drawer
(AR-MU1)
Stand/3 x 500 sheet
paper drawer
(AR-D14)
Saddle stitch
finisher
(AR-FN7)
Duplex
module/bypass tray
(AR-DU4)
Exit tray
(AR-TE3 or AR-DU4 Standard)
Duplex module
(AR-DU3)
! "#$%&

AR-DU3/DU4/TE3 SPECIFICATIONS 3-1
[3] SPECIFICATIONS
1. AR-DU3/AR-DU4
A.Basic
AR-DU4: When the tray is extended fully.
AR-DU3: The AR-TE3 is not installed.
B.Duplex part
C.Exit tray (AR-TE3, AR-DU4)
D.Multi-bypass tray part (AR-DU4 only)
AR-DU3 AR-DU4
Type Automatic duplex unit Automatic duplex unit
equipped with multi-
bypass tray and exit
tray
Transport speed To support 35-45 sheet/minute
Transport alignment Center alignment
Power consumption Less than about 25W Less than about 46.6W
Power source Supplied from main unit
External
dimensions(WxDxH)* 115x412x416 (mm) 451x439x416 (mm)
Occupied
dimensions(WxD) 115x412 (mm) 451x439 (mm)
Weight Approx. 5kg Approx. 7.5kg
Method Non-stack method
Paper size A3, B4, A4, A4R, B5, B5R, A5R
11"x17", 8.5"x14", 8.5"x13", 8.5"x11",
8.5"x11"R, 5.5"x8.5"R
Media for paper transfer Plain 60-105g/m² / 15-28lbs
Output paper capacity 100 sheets (A4/8.5"x11" 80g/m²)
Output paper delivery Face-down
Output paper size A3, B4, A4, A4R, B5, B5R, A5R
11"x17", 8.5"x14", 8.5"x13", 8.5"x11",
8.5"x11"R, 5.5"x8.5"R,
Executive
Media for paper output Plain paper 60-105g/m² / 16-28lbs
Heavy paper 106-205g/m² / 29-55lbs
Transparency film
Remaining paper
detection Not provided
Exit tray full detection Not provided
Paper size A3, B4, A4, A4R, B5, B5R, A5R
11"x17", 8.5"x14", 8.5"x13", 8.5"x11",
8.5"x11"R, 5.5"x8.5"R,
Executive, Japanese p/c
Media available for paper
feeding Tracing paper 52-59g/m² / 14 ~ 15lbs
(only single feed)
Plain paper 60-128g/m² / 16 ~ 34lbs
Indea paper 176g/m² / 47lbs
Cover paper 205g/m² / 54 ~ 55lbs
Transparency
* Media heavier than 105g/m² should be
A4/8.5x11" or smaller. Media heavier than
108g/m² should be fed from shorter edge.
* Only single paper feed is enabled for
overlay copy or copy on back-side of
printed paper.
Paper capacity 100 sheets
(standard paper:80g/m²)
Post card: 20 sheets
Transparency film: 20 sheets
Paper type Plain, recycled, pre-printed, pre-punched,
color, letter head, labels, heavy,
transparency, Japanese p/c, envelope
(User can set bi-type for each of the above
paper type.)
Paper size detection Automatic-AB
(200V system) A3, B4, A4, A4R, B5, B5R,
8.5" ~ 13", A5R
Automatic-inch
(100V system) 11"x17", 8.5"x14",
8.5"x13", 8.5"x11",
8.5"x11"R, 7.25"x 10.5 R,
5.5"x 8.5"
Manual Post card
Detection ignoring setting Provided
Remaining paper detection Not provided
!"#$%

AR-DU3/DU4/TE3 UNPACKING AND INSTALLATION 4-1
[4] UNPACKING AND INSTALLATION
1.AR-DU3
<Before installation>
•Carry out the installation after checking that the DATA indicator on the
operation panel is neither lit nor blinking.
•For installing AR-DU3, an optional desk (multi purpose drawer, stand/3 x
500 sheet paper drawer or stand/MPD & 2000 sheet drawer) must have
been installed.
•Ensure that the front mounting plates and the rear mounting plates
included with the optional stand/paper drawer are securely attached.
•Check that the left adjuster supplied with an optional stand/drawer has
been attached.
1) Turn off the main switch of the main unit of the printer.
Turn the main switch located on the front side of the main unit of the
printer to the "OFF" position.
Then, remove the power plug of the main unit of the printer from the
outlet.
2) Remove the left side cover of the main unit of the printer.
Unlock the lock release lever of the main unit of the printer and then
pull out the left door.
Slide the two upper covers up to remove them. Remove the lower
cover by inserting a flat-blade screwdriver at three locations ( )
shown in the illustration.
Then, close the left door.
3) Attach the duplex module to the main unit of the printer.
<1>Hang the hooks located at the upper part of the duplex module on
the openings of the left door of the main unit of the printer.
<2>Push the lower part of the duplex module to insert the positioning
bosses securely into the main unit of the printer.
<3>Tighten the two screws built in the duplex module.
4) Connect the harness to the main unit of the printer.
<1>Remove the screw that fixesthe harness cover ofthe main unit of the
printer and then slide the harness cover up to remove it.
<2>Process the harness cover as shown in the illustration.
<3>Connect the connector of the relay harness of the duplex module to
the CN12 (white connector) of the PCU PWB of the main unit of the
printer.
<4>Insert the snap bands to the locations shown in the illustration and fix
them.
<5>Secure the earth harness using a supplied M4 screw.
<6>Reattach the harness cover to its original position and fix it with the
removed screw.
* If another peripheral device must be installed, carry out the following
step at the end of the installation work.
5) Carry out the off center adjustment.
"
OFF
"
Top covers
Lower cover
Left door
Lock release lever
Hook
Positioning boss
Hook
Duplex module Positioning boss
3
2
11
2
3
Harness cover
Screw
Cut out.
Harness cover
Relay harness
connector
PCU PWB
Snap bands
Ground harness
Screw
CN12
3
4
4
5
Harness cover
Screw
Relay harness
"# $%&'(

AR-DU3/DU4/TE3 UNPACKING AND INSTALLATION 4-2
2.AR-DU4
<Before installation>
•Carry out the installation after checking that the DATA indicator on the
operation panel is neither lit nor blinking.
•For installing AR-DU4, an optional desk (multi purpose drawer, stand/3 x
500 sheet paper drawer or stand/MPD & 2000 sheet drawer) must have
been installed.
•Ensure that the front mounting plates and the rear mounting plates
included with the optional stand/paper drawer are securely attached.
•Check that the left adjuster supplied with an optional stand/drawer has
been attached.
1) Turn off the main switch of the main unit of the printer.
Turn the main switch located on the front side of the main unit of the
printer to the "OFF" position.
Then, remove the power plug of the main unit of the printer from the
outlet.
2) Remove the left side cover of the main unit of the printer.
Unlock the lock release lever of the main unit of the printer and then
pull out the left door.
Slide the two upper covers up to remove them. Remove the lower
cover by inserting a flat-blade screwdriver at three locations ( )
shown in the illustration.
Then, close the left door.
3) Attach the duplex module to the main unit of the printer.
<1>Hang the hooks located at the upper part of the duplex module on
the openings of the left door of the main unit of the printer.
<2>Push the lower part of the duplex module to insert the positioning
bosses securely into the main unit of the printer.
<3>Tighten the two screws built in the duplex module.
4) Connect the harness to the main unit of the printer.
<1>Remove the screw that fixes the harness cover of the main unit ofthe
printer and then slide the harness cover up to remove it.
<2>Process the harness cover as shown in the illustration.
<3>Connect the connector of the relay harness of the duplex module to
the CN12 (white connector) of the PCU PWB of the main unit of the
printer.
<4>Insert the two snap bands to the locations shown in the illustration
and fix them.
<5>Secure the earth harness using a supplied M4 screw.
<6>Reattach the harness cover to its original position and fix it with the
removed screw.
5) Attach the exit tray.
* If another peripheral device must be installed, carry out the following
step at the end of the installation work.
6) Adjust the position of the paper guides of the bypass tray.
Refer to "Adjustments" described later.
7) Carry out the off center adjustment.
Parts included
Exit tray
"
OFF
"
Top covers
Lower cover
Left door
Lock release lever
Hook
Positioning boss Positioning boss
Hook
Duplex module
22
33
1
1
Harness cover
Screw
Cut out.
Harness cover
Relay harness
connector
PCU PWB
Snap bands
Ground harness
Screw
CN12
3
4
4
5
Harness cover
Screw
Relay harness
) "# $%&'(

AR-DU3/DU4/TE3 EXTERNAL VIEWS AND INTERNAL STRUCTURES 5-1
[5] EXTERNAL VIEWS AND INTERNAL STRUCTURES
A. External view
B. Internal structure
1 Paper exit tray (AR-TE3, AR-DU4 standard) 2 Manual paper feed tray (AR-DU4 only) 3 Paper feed module side cover
4 Manual paper fed extension tray
1 ADU paper entry roller 6 Separation pad 11 ADU transport roller 1
2 ADU paper entry sensor (APIND) 7 Manual paper feed roller 12 ADU paper exit roller
3 ADU transport sensor 1 (APPD1) 8 Manual take-up roller 13 ADU paper exit sensor (APOD)
4 ADU transport sensor 2 (APPD2) 9 Manual feed paper sensor (MPED) 14 ADU paper exit gate
5 ADU transport roller 3 10 ADU transport roller 2
1
2
4
3
3.APPD1
2.APIND
4.APPD2
567
8
9.MPED
10
11
12
13.APOD 14 1
! "#$%%&

AR-DU3/DU4/TE3 EXTERNAL VIEWS AND INTERNAL STRUCTURES 5-2
C. PWB, sensor
D. Motor, clutch, solenoid
Code Name Function Active condition Remark
1 ADU drive PWB ADU drive PWB Communication with the machine, ADU drive, control
2 APOD ADU paper exit sensor Paper exit detection L : Paper loaded
3 DSW-D ADU door sensor Door open detection L : Open
4 APND ADU paper entry sensor Paper feed detection L : Paper loaded
5 APPD1 ADU transport sensor 1 Paper transport detection L : Paper loaded
6 APPD2 ADU transport sensor 2 Paper transport detection L : Paper loaded
7 MPED Manual feed paper sensor Manual feed tray paper empty detection L : Paper loaded AR-DU4 only
8 MPLD1 Manual feed paper length sensor Manual feed tray paper length detection H : Paper loaded AR-DU4 only
9 MPWS Manual feed paper width sensor Manual feed tray paper width detection AR-DU4 only
10 MPLS1 Tray pull-out sensor Manual feed extension tray pull-out detection H: Pulled out AR-DU4 only
11 MPLS2 Tray installation sensor Manual feed extension tray installation detection H: Pushed in AR-DU4 only
Code Name Function Remark
1 SPM_HI Upper transport motor Upper section paper transport
2 SPM_LO Lower transport motor Lower section paper transport
3 ADUFM Cooling fan motor Cooling the ADU
4 DGS Gate solenoid upper Gate select in duplex copy, paper exit
5 MPFC Manual paper feed clutch Paper feed clutch from the manual paper feed tray AR-DU4 only
6 MPFS Manual paper feed solenoid Paper feed solenoid from the manual paper feed tray AR-DU4 only
7 MSS Shutter solenoid Shutter open/close in manual paper feed AR-DU4 only
4. APIND
2. APOD
5. APPD1
6. APPD2
1.
3. DSW-D
8. MPLD1
9. MPWS
7. MPED
10. MPLS1
11. MPLS2
4. DGS
1. SPM_HI
2. SPM_LO
3. ADUFM
5. MPFC
6. MPFS
7. MSS
' ! "#$%%&

AR-DU3/DU4/TE3 MACHINE OPERATION 6-1
[6] MACHINE OPERATION
1. Setting the printer driver for duplex
module, bypass tray and exit tray
When using the duplex module (including the bypass tray and the exit
tray) for printing, select "Properties" and make selections as follows for
the print job.
* The screens used in the following descriptions are for a PCL driver in
the Windows 98 environment.
A. Two-sided printing
Open the "Main" tab and check the radio button of the desired two-sided
printing mode.
B. Using the bypass tray
Open the "Paper" tab shown in the illustration below and select "Bypass
Tray" in the "Paper Selection" drop down.
C. Using the exit tray mounted to the duplex module
Open the "Paper" tab shown in the illustration below and select "Left Side
Tray" in the "Output" drop down.
Note:The settings screens above will appear only if the devices have
been set properly in the printer driver configuration
2. Copying in the duplex mode
For copying in the duplex mode, press the COPY key on the operation
panel and make all selections on the copy mode basic screen.
A. Automatic duplex copying
Touch the [2-SIDED COPY] key on the copy mode basic screen.
A selection screen for two-sided copying will appear.
B.Using the bypass tray
Touch the [PAPER SELECT] key on the copy mode basic screen.
A selection screen for paper source will appear. Select the bypass tray
on this screen.
C. Using the exit tray
Touch the [OUTPUT] key on the copy mode basic screen.
A selection screen for output will appear. Select the exit tray mounted to
the duplex module on this screen.
! "#$%%&

AR-DU3/DU4/TE3 ADJUSTMENTS 7-1
[7] ADJUSTMENTS
1. Paper guide position adjustment in the
manual paper feed section
(Printer model)
A. Correction value entry procedure
* This setup is used to enter the detection level to the printer when
installing, etc.
1) Turn the main switch on while pressing the [MENU] key and
the [OK] key of the operation panel of the main unit of the printer.
2) After pressing the [MENU] key several times to display
"SIZE ADJUSTMENT A" in the message display, press the [ ] key
to display "SIZE ADJUSTMENT B" and press the [OK] key.
3) "MAXIMUM SIZE" is displayed.
Since "MAXIMUM SIZE" is displayed with a number, press
the [ ] key or the [ ] key to change the number so that the
number is equal to the value of [MAX] written on the label(*NOTE)
and then press the [OK] key.
4) Since "P1 SIZE" is displayed with a number, press the [ ] key or
the [ ] key to change the number so that the number is equal to the
value of [P1] written on the label(*NOTE) and then press
the [OK] key.
5) Since "P2 SIZE" is displayed with a number, press the [ ] key or
the [ ] key to change the number so that the number is equal to the
value of [P2] written on the label(*NOTE) and then press
the [OK] key.
6) Since "MINIMUM SIZE" is displayed with a number, press
the [ ] key or the [ ] key to change the number so that the
number is equal to the value of [MIN] written on the label (*NOTE)
and then press the [OK] key.
7) Turn off the main switch to cancel the setting mode.
B. Alignment of the guide plate and the size mark
* This setup is used when the paper width sensor does not work
correctly or when it is replaced with a new one.
1) Press and hold [MENU] key and [OK] key together, and turn on the
main switch.
2) Press [MENU] key several times until "SIZE ADJUSTMENT A" is
displayed. Press the [ ] key to display "SIZE ADJUSTMENT C,"
and press [OK] key.
3) "MAXIMUM ISZE" is displayed.
Move the manual feed guide F to the maximum position, and press
[OK] key.
4) "P1 SIZE" is displayed. Move the manual paper feed guide F to the
size mark of A4R on the manual paper feed tray upper, and press
[OK] key.
5) "P2 SIZE" is displayed. Move the manual paper feed guide F to the
size mark of A5R on the manual paper feed tray upper, and press
[OK] key.
6) "MINIMUM SIZE" is displayed. Move the manual paper feed guide F
to the minimum position, and press [OK] key.
7) Turn off the main switch to cancel the setting mode.
"ON"
Label
(*NOTE)
Illustration of label sticking position
MAX MINP1 P2
(Back surface of the bypass tray
extension)
"ON"
Manual paper feed tray upper
(Caution)
Manual paper feed guide F
Paper size mark
5
1
/
2
7
1
/
4
8
1
/
2
11
B5
B4
A4
A3
A4
B5
A5
Manual paper feed guide F
*Align the inside line of the size mark with the paper
guide side of the manual paper feed guide.
Manual paper feed tray upper
Paper size mark
Position of the manual paper feed guide F in setting of
P1 (A4R) and P2 (A5R)
!"#$%

AR-DU3/DU4/TE3 ADJUSTMENTS 7-2
2. Aper guide position adjustment in the
manual paper feed section
(MFP model)
A.Width detection level adjustment in simulations
* This setup is used to enter the detection level to the printer when
installing, etc.
1) Enter the sub code of SIM 40-7, and the menu below will be
displayed.
SIM 40-7: Menu display of width detection level adjustment
2) Under the above state 1), press [1] key and then [START] key, and
the menu below will be displayed.
* Enter the value of "MAX" specified on the label with [0] - [9] keys.
After entering the value of "MAX," press [CUSTOM SETTINGS] key,
and menu 1) will be displayed.
3) Under the state 1), press [2] key and then [START] key, and the
menu below will be displayed.
* Enter the value of "P1" specified on the label with [0] - [9] keys.
After entering the value of "P1," press [CUSTOM SETTINGS] key,
and menu 1) will be displayed.
4) Under the state 1), press [3] key and then [START] key, and the
menu below will be displayed.
* Enter the value of "P2" specified on the label with [0] - [9] keys.
After entering the value of "P2," press [CUSTOM SETTINGS] key,
and menu 1) will be displayed.
5) Under the state 1), press [3] key and then [START] key, and the
menu below will be displayed.
* Enter the value of "MIN" specified on the label with [0] - [9] keys.
After entering the value of "MIN," press CUSTOM SETTINGS key,
and menu (1) will be displayed.
B. Width detection level adjustment in simulations
* This setup is used when the paper width sensor does not work
correctly or when it is replaced with a new one.
1) Enter the sub code of SIM 40-2, and the menu below will be
displayed.
SIM 40-2: Menu display of width detection level adjustment
2) Under the above state 1), move the manual paper feed guide F to the
MAX position and press [1] key and then [START] key, and the menu
below will be displayed. Check that "COMPLETE" is displayed, and
press [CUSTOM SETTING] key to return to the menu 1).
3) Move the manual paper feed guide F to the size mark of A4R on the
manual paper feed tray upper. Press [2] key and then [START] key,
and the menu below will be displayed. Check that "COMPLETE" is
displayed, and press [CUSTOM SETTINGS] key to return to the
menu 1).
4) Move the manual paper feed guide F to the size mark of A5R on the
manual paper feed tray upper. Press [3] key and then [START] key,
and the menu below will be displayed. Check that "COMPLETE" is
displayed, and press [CUSTOM SETTINGS] key to return to the
menu 1).
5) Move the manual paper feed guide F to the MIN position. Press [4]
key and then [START] key, and the menu below will be displayed.
Check that "COMPLETE" is displayed, and press [CUSTOM
SETTINGS] key to return to the menu 1).
SIMULATION 40-7
BYPASS TRAY VALUE SETTING.SELECT 1-4,AND PRESS START.
1.MAX.POSITION :
2.POSITION 1 :
3.POSITION 2 :
4.MIN.POSITION : 815
72
380
710
804
SIMULATION 40-7
BYPASS TRAY VALUE SETTING.INPUT VALUE 0-1023,AND PRESS START.
1.MAX.POSITION 80
SIMULATION 40-7
BYPASS TRAY VALUE SETTING.INPUT VALUE 0-1023,AND PRESS START.
2.POSITION 1 385
SIMULATION 40-7
BYPASS TRAY VALUE SETTING.INPUT VALUE 0-1023,AND PRESS START.
3.POSITION 2 720
SIMULATION 40-7
BYPASS TRAY VALUE SETTING.INPUT VALUE 0-1023,AND PRESS START.
4.MIN.POSITION 815
SIMULATION 40-2
BYPASS TRAY ADJUSTMENT.SELECT 1-4,AND PRESS START.
1.MAX.POSITION
2.POSITION 1
3.POSITION 2
4.MIN.POSITION
1
SIMULATION 40-2
BYPASS TRAY ADJUSTMENT.
MAX.POSITION...COMPLETE
SIMULATION 40-2
BYPASS TRAY ADJUSTMENT.
POSITION 1...COMPLETE
SIMULATION 40-2
BYPASS TRAY ADJUSTMENT.
POSITION 2...COMPLETE
SIMULATION 40-2
BYPASS TRAY ADJUSTMENT.
MIN.POSITION...COMPLETE
& !"#$%
AR-DU3/DU4/TE3 DISASSEMBLY AND ASSEMBLY, MAINTENANCE 8-1
[8] DISASSEMBLY AND ASSEMBLY, MAINTENANCE
1.Maintenance System Table
*1: Replacement reference: Use the counter value of each paper feed port.
Paper feed roller/Separation pad: 80K or 2 years
2. Maintenance
A. Unit installing side (Back) B. Inside of the paper exit section/ADU side door
Check (Clean, replace, or adjust as necessary.) Clean Replace Adjust Lubricate Move position
Part name When
calling 50K 100K 150K 200K 250K 300K 350K 400K Remark
Paper feed
separation section
(AR-DU4 only)
Paper feed rollers ( ) *1
Separation pad () *1
Transport section Transport rollers
Transport paper guides
Drive section Gears (Specified position)
Belts
Other Sensors
b
b
a
b
! "#$%&'

AR-DU3/DU4/TE3 DISASSEMBLY AND ASSEMBLY, MAINTENANCE 8-2
C. After disassembly of the paper feed unit/lower
cover
* For disassembly of the paper feed unit and the lower cover, refer to
the following descriptions.
D. After disassembly of the rear cabinet
* For disassembly of the rear cabinet, refer to the following
descriptions.
E. After disassembly of the front cabinet
* For disassembly of the front cabinet, refer to the following
descriptions.
3. Disassembly and assembly
A. External cabinet
(1) ADU lower cover (AR-DU3 only)
1) Open the ADU cover.
2) Remove the ADU lower cover.
(2) Front and rear cabinets
(3) ADU side door
a
a
a
1)
2)
1)
2)
1)
2)
1)
1)
1)
1)
2)
3)
( ! "#$%&'

AR-DU3/DU4/TE3 DISASSEMBLY AND ASSEMBLY, MAINTENANCE 8-3
(4) Paper exit section cover/door switch
(5) Upper cabinet/paper exit sensor
B. Manual paper feed section (AR-DU4 only)
(1) Manual paper feed unit
2)
1)
1)
1)
5)
3)
4)
1)
2)
3)
1) 4)
4)
5)
4)
6)
4)
4)
3)
5)
1)
2)
1) 2)
2) 1)
1)
) ! "#$%&'

AR-DU3/DU4/TE3 DISASSEMBLY AND ASSEMBLY, MAINTENANCE 8-4
(2) Manual paper feed tray
(3) Manual paper feed solenoid
(4) Shutter solenoid
(5) Sensors
(6) Manual feed paper width sensor
1) Extend the manual paper feed guide to the maximum position.
2) Fit the mark on the width detection pin on-gear with the mark on the
volume mounting plate.
3) Fix the mounting plate with a screw.
* When the rotational volume sensor is replaced, the sensor value
must be adjusted to the paper size (mark on the tray).
(Refer to the previous procedure of "Adjustment.")
1)
2) 1)
3)
1)
1)
2)
1)
2)
3)
3) 1)
2)
3) 4)
* ! "#$%&'

AR-DU3/DU4/TE3 DISASSEMBLY AND ASSEMBLY, MAINTENANCE 8-5
(7) Manual paper feed roller/Take-up roller
C. Upper transport motor/Lower transport motor/Fan
motor
D. ADU drive PWB
E. ADU gate solenoid
Note:When assembling, fit the edge of the solenoid mounting plate with
the center of the mark.
F. Rollers/Belts/Clutches
(1) Transport follower roller
1)
2)
3)
4)
6)
7)
8)
c
5) ba
1)
3)
1)
2)
1) 1)
2)
3)
4)
4)
1)
2)
3)
4)
4)
1)
2) 4)
3)
1)
2)
3)
3)
1)
2)
2)
1)
4)
4)
1)
2)
+ ! "#$%&'

AR-DU3/DU4/TE3 DISASSEMBLY AND ASSEMBLY, MAINTENANCE 8-6
(2) Transport roller/belt/clutch/gear
(3) ADU paper entry roller/belt/clutch/gear
G. Sensors
(1) Paper entry sensor
(2) Transport sensor
1)
1)
2)
3)
3)
1)
1)
2)
3)
4)
1)
2)
3)
1) 2)
, ! "#$%&'

AR-DU3/DU4/TE3 BLOCK DIAGRAM, WIRING DIAGRAM 9-1
[9] BLOCK DIAGRAM, WIRING DIAGRAM
1. BLOCK DIAGRAM
A. AR-DU3/AR-DU4
+24V
DGS
ADUFM +24V
+5V
+5V
APOD
APPD1 +5V
APPD2
+5V
+5V
DSW-D
APIND
(MTD1361)
4
+24V
SPM-LO
4
(74HC14)
(74HC74)
(74HC157)
+24V
SPM-HI
4
(74HC157)
(74HC74) (MTD1361)
4
(74HC14)
MPWS
+24V
+5V
MPLS2
(2SD1768STP)
+24V
+5V
+24V
MPFS
+5V
MPED
VAREF
MPLS1
MSS
MPLD1
MPFC
+5V
AR-DU3/DU4
ONLY AR-DU4
2
2
AR-P350~ M450S
FG
GND2
DM-3500~ 4556
GND2
AR-DU3/DU4 BLOCK DIAGRAM
Driver
circuit
(Machine body)
Logic
circuit
Logic
circuit
Chopping
circuit
Chopping
circuit
GND2
ADMCK2/
ADMEN2/
ADMEN1/
ADMCK1/
ADM H/L
ADUFM/
DGS
APIND
APOD
APPD1
APPD2
DSW-D
ADM H/L
ADUSET
MPLS1
MPFSET
MSS/
MPWS
MPLD1
MPFC/
MPED
MPLS2
MPFS/
+5V1
+24V2
VAREF
A
A
B
B
C
C
D
D
E
E
E E
D D
C C
B B
A A
Main PWB
Cooling Fan Motor
Gate Solenoid
Paper In Ditector
Paper Out Ditector
Paper Stop Point2 Ditector
Adu Door Ditector
Paper Stop Point1 Ditector
Tray Pull Out Senser
Paper Empty Senser
Paper Feed Clutch
Paper Length Senser
Paper Feed Solenoid
Tray Pull In Senser
Shutter Solenoid
Paper Width Sensor
Upper Transport Motor
Lower Transport Motor
! #$! %&'(

AR-DU3/DU4/TE3 BLOCK DIAGRAM, WIRING DIAGRAM 9-2
2. WIRING DIAGRAM
A. AR-DU3 / AR-DU4
ADU DRIVE PWB
3
13 MPFS/
+5V1
18
MPWS
+5V1
PL
APOD
+24V2
(JST:PHDR-30VS-1)
8ADMEN1/
APPD1
GND2
19
DSW-D
MPLS1
PL
(JST:PHR-3)
(JST:PHR-3)
3
UPPER PAPER
TRANSPORT
MOTOR
7
21
3
13
ADMEN2/
(JST:S30B-PHDSS)
28
LB
2
2
LO A/
APPD1
LO B
5
24
MPWS
8ADMEN1/
30
BR
(AMP:179228-3)
APOD
BL
(AMP:179228-3)
LO B/
LEDIN2
+24V2
1
20 DSW-D
7
21
DSW-D
27 ADUFM/
RD
PK
LOWER PAPER
TRANSPORT
MOTOR
GND1
15
ADMCK1/
5
24 MPFSET
1
OR
PAPER OUT DITECTOR
(PAPER OUT DITECTOR)
OS-655203-703
APIND
+24V2
11 ADMCK2/
GATE SOLENOID
1
20
N.C.
BR
GND2
PAPER DITECTOR 1
(PAPER STOP POINT1 DITECTOR)
OS-815203-703
10
26
APPD2
GND2
15
DGS/
30
PK
LEDIN11
+5V1
9
23 MPFSET
+24V2
11 MPFS/
27
PL
APPD1
BL
GND2
4
16
10
26
29
GY
LB MPFC/
BL
1
SPM_HI
APPD1
2
17
DGS/
9
23
2
TO ADU BODY
N.C.
RD
BR
APOD
ADU DOOR DITECTOR
GP1A73A
1
+24V2
14
ADMEN2/
4
16
ADUSET
MSS/
BR PAPER IN DITECTOR
(PAPER IN DITECTOR)
GP1A73A
APIND
DGS/
12 MPFC/
2
17
MPED
MPLS2
LB
PK
SPM_LO
6
25
APOD
+24V2
14
ADMCK1/
CN-A
29
BR
3GND2
3
VAREF
22 ADUSET
12
ADMCK2/
F-GND
PK
APPD2
APOD
BL
3 GND2
+24V2
HI B
+5V1
18 MPED
6
25
DSW-D
28
MSS/
GY
PL
APIND
OR
HI A
GND2
19
APIND
VAREF
22
ADM_H/L
LB
APIND
2
LO A
HI B/
HI A/
+24V2
+24V2
3
(JST:SMP-03V-NC) LEDIN1
2
22
APOD
1
3
(JST:SMP-02V-NC)
(JST:SMR-03V-N)
2
(JST:SMR-02V-N)
11DGS/
GND2
1
BK
5
+5V1
+24V2
DSW-D
BR
OR
(JST:S9B-PH-K-S)
2
HI A
5
BR
(JST:S8B-PH-K-S)
6
HI A
LEDIN1
CN-G
OR
5WT
GY
1
BR
3
GY
7
6
+24V2
GND2
2
7
CN-F
CN-D
1
APPD1
PK
1
5
HI B/
APOD
6
+24V2
GY
4
GND2
GND2
1
LEDIN2
4
DGS/
BR
8
BR
OR
GY
3
APIND
(JST:B6B-PH-K-R)
HI B
GND2
HI B/
CN-E
(JST:B7B-PH-K-S)
6
RD
3
OR
GND2
4
HI A/
4
HI A/
+5V1
+24V2
YL
8
+24V2
HI B 2
3
APPD2
STOP POINT2
APPD1
STOP POINT1
2
3
4
5
2
3
4
BR
BL
5
6
6
1
1
OR
OR
BK
BR
PK
WT
YL
GND2 9
7N.C.
CN-B
2ADUFM/
+24V2 1
CN-C
MPFS/
MSS/
+5V1
BK
RD ADUFM/ COOLING FAN MOTOR
OR
BR
GY
GND2
GND2
APPD2 PAPER DITECTOR 2
(PAPER STOP POINT2 DITECTOR)
GP1A73A
APPD2
GND2
1
2
3
+5V1
(AMP:179228-3)
1
CN-H
+5V1 2
3GND2
(JST:B3B-PH-K-S)
APPD2
1
2
3
4
5
6
7
8
9
10
11
12
13
14
15
16
17
19
20
21
22
VAREF
+5V1
+5V1
+5V1
+24V2
+24V2
+24V2
GND2
GND2
GND2
GND2
MPFC/
MPED
MPFSET
MPWS
GND2
2
(JST:B2B-PH-K-S)
18
MPLD1 MPLD1
N.C.
MPLS2
MPLS1
ADUFM/
ADM_H/L
MPLS2
MPLS1
MPLD1
(JST:B22B-PHDSS-B)
R
220J(1/4W)
R
220J(1/4W)
+5V1
+5V1
A
A
B
B
C
C
D
D
E
E
E E
D D
C C
B B
A A
ADU WIRING
External connection (Tube specifications)
ADU interface harness
ADU body paper exit sensor harness
ADU escape solenoid harness
ADU transport sensor harness
ADU stop position 2 harness
) ! #$! %&'(

AR-DU3/DU4/TE3 BLOCK DIAGRAM, WIRING DIAGRAM 9-3
B. AR-DU4 (Manual paper feed section)
(JST:SMR-10V-N)
MPFS PAPER FEED SOLENOID
3
1
GND2
+5V1
2PAPER EMPTY SENSOR
GP1A73A
MPED MPED
MSS GATE SOLENOID
(AMP:179228-3)
1
2
(JST:SMR-02V-B)
1
2
(JST:SMP-02V-NC) (JST:SMR-02V-N)
MPFS
MSS/
+24V2
+24V2
RD
RD
RD
BR
BR
BR
OR
BR
GY 2
(JST:SMR-03V-N)(JST:SMP-03V-NC)
1
3GND2
+5V1
MPED
3
1
2
OR
BR
GY
OR
BR
LB
OR
GY
OR
BL
GY
1
2 MPLD1
GND2
3MPLD1
+5V1
(AMP:179228-3)
PAPER LENGTH SENSOR 1
GP1A73A
+5V1
2
3
MPLS1
1
GND2
(AMP:179228-3)
MPLS1
MPF TRAY UNIT
(JST:SMR-12V-N)
MPLS2
TRAY
@PULL
@OUT
@SENSOR
GP1A73A
1 1
GND2
MPWS
GND2
MPWS
MPLS2
3
+5V1
2
2PAPER WIDTH SENSOR
3
(JST:SMR-03V-N)(JST:SMP-03V-NC)
2
1
(AMP:179228-3)
VAREF
3
(JST:SMP-02V-BC)
(JST:SMR-02V-N)(JST:SMP-02V-NC)
2
1 +24V2 MPFC PAPER FEED CLUTCH
N.C.2
1
1
2
1
2
TRAY
@PULL
@IN
@SENSOR
GP1A73A
GY
(JST:SMP-10V-NC)
(JST:SMP-12V-NC)
10
12
4
6
MPLS2
9
MPWS
+5V1
1
8
+5V1
+5V1
GND2
MPLD12
5
GND2
11
3
7MPLS1
GND2
GND2
1
2
3
4
5
6
7
8
9
10
11
12
VAREF
MPED
MSS/
5MPFC/
+24V2
9
7
3
2
GND2
+5V1
MPFS/
+24V2
10
+24V2
8
6
4
1
N.C.
6
8
10
4
2
3
7
9
5
1
GND2
MPFS/
MSS/
+5V1
1
2
3
4
5
6
7
8
9
10
11
12
13
14
15
16
17
19
20
21
22
VAREF
+5V1
+5V1
+5V1
+24V2
+24V2
+24V2
GND2
GND2
GND2
GND2
MPFC/
MPED
MPFSET
MPWS
18
MPLS2
MPLS1
MPLD1
(JST:PHDR-22VS-1)
OR
OR
OR
OR
OR
RD
RD
GY
GY
GY
GY
BR
PK
PL
LB
BL
BR
PK
PL
LB
RD
GY
(JST:SMP-12V-NC)
A
A
B
B
C
C
D
D
E
E
E E
D D
C C
B B
A A
* ! #$! %&'(

AR-DU3/DU4/TE3 BLOCK DIAGRAM, WIRING DIAGRAM 9-4
3. CIRCUIT DIAGRAM
A. AR-DU3 / AR-DU4
VCC
GND
IC001,002,007
14
7
4.7K 4
4.7K 4
1A
21Y 4
1B
3
2A
52Y 7
2B
6
3A
11 3Y 9
3B
10
4A
14 4Y 12
4B
13
A/B
1
G
15
1 2
3 4
5 6
9 8
11 10
13 12
D
12 Q9
CLK
11
Q8
PR
10 CL 13
D
2Q5
CLK
3
Q6
PR
4CL 1
1A
21Y 4
1B
3
2A
52Y 7
2B
6
3A
11 3Y 9
3B
10
4A
14 4Y 12
4B
13
A/B
1
G
15
D
2Q5
CLK
3
Q6
PR
4CL 1
D
12 Q9
CLK
11
Q8
PR
10 CL 13
B
2
E1
C3
CNA-1 VAREF
CNA-3 +24V2
CNA-5 GND2
CNA-11 MPFC/
CNA-13 DGS/
CNA-17 APPD1
CNA-19 MPED
CNA-21 DSW-D
CNA-23 MPFSET
CNA-2 +5V1
CNA-4 +24V2
CNA-6 GND2
CNA-12 MPFS/
CNA-14 APIND
CNA-16 APPD2
CNA-20 MPWS
CNA-24 MSS/
D001
DAN202K
D003
DAP202K
CND-5
DGS/
CNH-2
APPD2
CNG-5
APPD1
CND-7
DSW-D
CNB-1
VAREF
CNB-22
MPWS
CNB-14
MPFC/
CNB-15
MPFS/
CNB-17
MPED
CNB-16
MSS/
CNA-26 ADUFM/
CNA-9 ADMEN2/
CNC-2
ADUFM/
CNB-18
MPFSET
CNA-7 ADMEN1/
R13
4.7KJ R14
4.7KJ
C44
470pF C45
470pF
D002
DAN202K
IC004
74HC157
R16
4.7KJ R17
4.7KJ
C46
470pF C47
470pF
CNA-27 MPLS2
CNA-28 MPLS1
D004
DAP202K
CNB-21
MPLS1
IC007A
74HC14
IC007B
74HC14
IC007C
74HC14
IC007D
74HC14
IC007E
74HC14
IC007F
74HC14
CNA-8 ADMCK1/
CNA-10 ADMCK2/
CNG-2
APIND
CNA-15 APOD CND-2
APOD
C50
470pF
CNA-30 N.C.
CNB-20
MPLS2
CNA-25 ADM_H/L
C12,C13
473Z/16V
C9,C10,C11
473Z/16V
C48
470pF
L001 INDUCTOR
CNA-18 MPLD1
CND-6
+5V1
CND-1
LEDIN1
CNG-4
LEDIN2
CNB-2
+5V1
CNB-3
+5V1
CNB-4
+5V1
CNB-5
+5V1
CNH-1
+5V1 CNG-1
+5V1
R26
220J 1/4W
R25
220J 1/4W
CNB-10
GND2
CNB-11
GND2
CNB-13
GND2 CNB-12
GND2
CND-3
GND2
CNB-9
GND2
CND-8
GND2
CND-9
GND2
CNG-3
GND2
CNG-6
GND2
CNG-7
GND2
CNG-8
GND2
CNH-3
GND2
CNA-22
GND2
CNE-5
+24V2 CNE-2
+24V2 CNF-5
+24V2
CND-4
+24V2
CNB-6
+24V2
CNF-2
+24V2
C7
223Z/50V
C2
47uF/35V
+
C49
470pF
JP3
5mmPitch
L002 INDUCTOR
C5
473Z/16V
L003 INDUCTOR
JP4
5mmPitch
JP2
5mmPitch
CNC-1
CNB-19
MPLD1
CNA-29 N.C.
CNA-5 , 6
GND2
L004 INDUCTOR
IC001B
74HC74
IC001A
74HC74
C51
470pF
IC003
74HC157
R33 R34
R3
1
R30
R35
R29
IC002A
74HC74
IC002B
74HC74
R36
4.7KJ
R15
CNB-8
+24V2
CNB-7
+24V2
R38
10KJ
R37
510J
DTR003
DTC114YKA
4.7KJ
R39
JP1
5mmPitch
C1
47uF/35V
+
C?
47uF/35V
+
+5V1
+5V1
+5V
+5V1
+5V1
+5V1
+5V1
+5V1
+5V1 +5V1
+5V1
+5V1
+24V
S
P
S
P
S
P
S
P
A
A
B
B
C
C
E
D
C
B
A
Manual feed take-up solenoid drive circuit
+ ! #$! %&'(
This manual suits for next models
2
Table of contents
Other Sharp Printer Accessories manuals

Sharp
Sharp MX-CFX1 User manual

Sharp
Sharp AR-DC1 User manual

Sharp
Sharp AR-D15 User manual

Sharp
Sharp AR-FN7 User manual

Sharp
Sharp ARFX13 - Fax Interface Card User manual

Sharp
Sharp AR-PG1 User manual

Sharp
Sharp AR-FR4 U User manual

Sharp
Sharp AR-S11 User manual

Sharp
Sharp AR-FR19 U User manual

Sharp
Sharp ARNC5J User manual
Popular Printer Accessories manuals by other brands

Uninet
Uninet LEXMARK C520 Cartridge Remanufacturing Instructions

Uninet
Uninet XEROX WORKCENTRE PE120 Cartridge Remanufacturing Instructions

Canon
Canon Inner Finisher-D1 Installation procedures

Kyocera
Kyocera FS-7028M How to use

Epson
Epson T048520 Product information sheet

Kyocera
Kyocera TASKalfa 400ci Operation guide