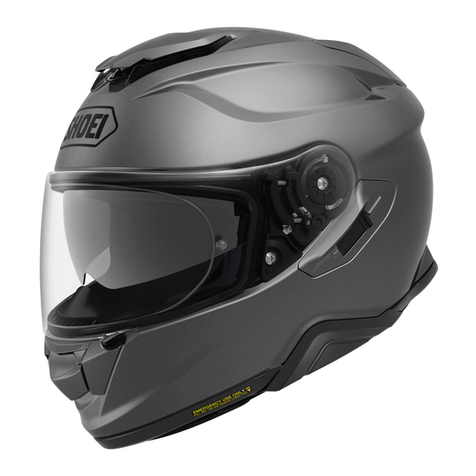
SHOEI GT-Air II User manual

Printed in Japan 20190131
306
取扱説明書
このたびはSHOEIヘルメットをお買い上げいただき、誠にありがとうございます。本製品の
機能および注意事項を十分にご理解いただき、より安全に快適なモーターサイクルライフ
を送っていただくために、ご使用まえに本取扱説明書をよく読んで記載されている内容を十
分に理解してください。本取扱説明書は、読み終わったあと、いつでも取り出せる場所に保
管してください。本取扱説明書を紛失したときは、弊社までお問い合わせください。
この取扱説明書の内容は、予告なしに変更する場合があります。
この取扱説明書に使われているイラストは、実際の製品とは異なる場合があります。
この取扱説明書の著作権は、株式会社SHOEIにあります。無断転載、複製は固くお断り
します。
Instructions for use
Thank you for purchasing this SHOEI helmet. Please read this manual carefully
before use and keep it for future reference. This manual contains valuable
information to help you understand the functions of the product and the
instructions for use in order for you to enjoy a safety and comfortable
motorcycle life. Your SHOEI dealer can provide a replacement if it is lost.
The contents of this manual are subject to change without notice.
The illustrations in this manual may differ from the actual product.
The copyrights for this manual belong to SHOEI CO., LTD. Reproduction or
copying of this manual without written permission is strictly prohibited.
คำแนะนำการใชงาน
ขอบคุณที่ไววางใจหมวกกันน็อก SHOEI อานคูมือฉบับนี้อยางละเอียดกอนการใชงานและเก็บไวเพื่อใชอางอิงในอนาคต
คูมือฉบับนี้มีขอมูลที่เปนประโยชนซึ่งชวยใหคุณเขาใจถึงฟงกชันตางๆ ของผลิตภัณฑ รวมถึงดำแนะมำในการใชงาน
เพื่อให คุณไดรับทั้งความปลอดภัยและความสบายในการขับขี่รถจักรยานยนต ตัวแทนจำหนายหรือผูจัดจำหนาย
SHOEI ของคุณ สามารถจัดหาเลมใหมไดในกรณีที่สูญหาย
เนื้อหาของคูมือฉบับนี้อาจมีการเปลี่ยนแปลงไดโดยไมจำเปนตองแจงใหทราบ
ภาพประกอบในคูมือฉบับนี้อาจแตกตางไปจากผลิตภัณฑจริง
ลิขสิทธิ์สำหรับคูมือฉบับนี้เปนของ SHOEI CO., LTD. หามทำซ้ำหรือทำสำเนาคูมือฉบับนี้โดยไมไดรับอนุญาตเปนลาย
ลักษณอักษรอยางเด็ดขาด
취급설명서
SHOEI 헬멧을 구매해 주셔서 대단히 감사합니다. 본 제품의 기능 및 주의사항을 충분히 이해
한 후 더욱 안전하고 쾌적한 모터 사이클 주행을 위해 사용하시기 전에 본 취급설명서를 잘 읽
고 기재된 내용을 충분히 이해해 주십시오. 본 취급설명서를 다 읽은 후에는 언제든지 꺼내 볼
수 있는 장소에 보관해 주십시오. 본 취급설명서를 분실했을 때에는 당사로 문의해 주십시오.
이 취급설명서의 내용은 예고 없이 변경될 수 있습니다.
이 취급설명서에 사용된 일러스트는 실제 제품과 다를 수 있습니다.
이 취급설명서의 저작권은 주식회사 SHOEI에 있습니다. 무단 전재, 복제를 엄격히
금지합니다.
Arahan penggunaan
Terima kasih kerana membeli topi keledar SHOEI ini. Baca buku panduan ini
dengan teliti sebelum penggunaan dan simpan buku panduan ini untuk rujukan
masa depan. Buku panduan ini mengandungi maklumat penting bagi memban-
tu anda memahami fungsi produk dan arahan penggunaan agar anda dapat
menikmati kehidupan bermotosikal yang selamat dan selesa. Wakil atau
pengedar SHOEI anda boleh menggantikan buku panduan anda jika buku ini
hilang. Kandungan dalam buku panduan ini adalah tertakluk kepada perubah-
an tanpa notis. Ilustrasi dalam buku panduan ini mungkin berbeza daripada
produk sebenar. Hak cipta untuk manual ini milik SHOEI CO., LTD. Pengelu-
aran semula atau penyalinan buku panduan ini tanpa kebenaran adalah
dilarang sama sekali.
* For further information, please consult your local SHOEI dealer or distributer.
* สำหรับขอมูลเพิ่มเติม โปรดสอบถามตัวแทนจำหนายหรือผูจัดจำหนาย SHOEI ใกลบานคุณ
* 자세한 정보에 대한 문의사항은 가까운 SHOEI 판매점에 문의해 주십시오.
* Untuk maklumat lanjut, sila rujuk wakil atau pengedar SHOEI tempatan anda.
カタログ請求および販売についてのお問い合わせは、下記〈本社・国内営業部〉まで、
製品についてのお問い合わせは、最寄りの販売店もしくは
〈茨城工場内顧客サービス課〉
〒300-0525茨城県稲敷市羽賀1793 TEL029-892-3617
E-mail:[email protected]までご連絡ください。
本社・国内営業部
〒110-0016東京都台東区台東1-31-7PMO秋葉原北8階
Tel.03-5688-5180Fax.03-3837-8245
HEAD OFFICE
8th Floor, PMO Akihabara Kita,1-31-7 Taito, Taito-ku, Tokyo 110-0016, JAPAN
Tel: +81 3 5688 5170 Fax: +81 3 3837 8245
www.shoei.com

2
最初にお読みください
梱包物の確認
各部の名称
ブレスガード
シリコンオイルの使用方法
チンカーテン
CNS-1シールド
シールドの取り扱いに関するご注意
CNS-1シールドの調整
QSV-2サンバイザー
QSV-2サンバイザーの取り扱いに
関するご注意
PINLOCK®EVOlens
サービスツール
内装の交換について
内装の取り外し方
イヤーパッド
内装の取り付け方
内装の取り扱いに関するご注意
インターコムを取り付ける時
E.Q.R.S.
(EmergencyQuickReleaseSystem)
警告
パーツリスト
Read This First
Confirm the Packed Items
Parts Description
Installing the Visor/Peak
Applying Silicone Oil
Chin Curtain
CNS-1 Shield / Visor
Important Notice about Handling
the CNS-1 Shield / Visor
Adjustment of the CNS-1 Shield/Visor
QSV-2 Sun Visor
Important Notice about Handling
the QSV-2 Sun Visor
PINLOCK®EVO lens
Service Tool
Replacing Interior Parts
Removing Interior Parts
Ear Pads
Installing Interior Parts
Important Notice about
Handling Interior Parts
When Installing the Intercom
E.Q.R.S.
(Emergency Quick Release System)
WARNING
Parts List
2
3
4
5
6
6
7
8-9
10・11
12・13
14-15
16・17
18
18
19
20-21
21
22-23
24
25-26
27
28
29
P2 -29
P2 -29
P30-57
P30-57
P58-80
日本語
English
ไทย
한국어
Bahasa Melayu
English
日本語

43
5
6 12
11
2
3
1.Helmet
2.PINLOCK®EVO lens
3.Breath Guard
4.Chin Curtain
5.Helmet Bag
6.Instruction Manual
7.“How to use your helmet properly”
8.Warning label (E-3 tag: for ECE R22 Products)
9.SHOEI logo stickers (2)
10.PINLOCK®Pin
11.Service Tool
12.Silicone Oil
1.ヘルメット
2.PINLOCK®EVOlens
3.ブレスガード
4.
チンカーテン
5.ヘルメットバッグ
6.取扱説明書
7.安全マニュアル
8.E-3タグ(マレーシア、フィリピン、タイ向けのみ)
9.SHOEIロゴステッカー
10.ピンロックピン
11.サービスツール
12.シリコンオイル
本製品を開梱したあと、パーツや付属品がすべて揃ってい
ることを確 認してくだ さい 。
WARNING
7 8
HOW TO USE
YOUR HELMET PROPERLY
4
1
10
9
Read This First
This product is a motorcycle helmet.
Do not use it for any purposes other than riding a
motorcycle. If you use the helmet for any other
purpose, it may not provide sufficient protection in
case of an accident.
No helmet can protect the wearer against
all foreseeable high speed and low speed
impacts.
For maximum head protection, the helmet must fit
properly and the retention system must be
securely fastened under the chin. The helmet
should allow sufficient peripheral vision when
secure on your head. If your helmet is too large, it
may slip or move on your head while riding. This
could cause your helmet to come off in an
accident or obstruct your vision while riding
resulting in personal injury or death. To learn to
properly wear and secure your helmet, see the
booklet “How to Use Your Helmet Properly” that is
packed with your helmet.
The contents of this manual are subject to change
without notice.
The illustrations in this manual may differ from the
actual product.
The copyrights for this manual belong to SHOEI
CO., LTD. Reproduction or copying of this manual
without written permission is strictly prohibited.
最初にお読みください
この商品はオートバイ用のヘルメットです。
これ以外の目的に使用しないでください。他の目的でこの
ヘルメットを使用すると、事故の際、十分な保護が得られな
いことがあります 。
ヘルメットは、すべての予測可能な高速および低速の衝撃
から着用者を保護することはできません。
頭部の保護能力を最大まで引き出すために、ヘルメットを頭
部 に 適 切 にフィットさせ 、あご ひ もを顎 の 下 でしっかりと締 め
付けてください。また、ヘルメットを頭に固定したときに、十
分な周辺視力が確保できなければいけません。ヘルメットが
大きすぎると、バイクに乗り降りするときに、ヘ ル メットが ず
れることがあり、これが原因で、ヘルメットが事故で外れた
り、視界を妨げたりする可能性があり、けがや死亡の原因と
なります。ヘルメットをうまく着用する方法については、「ヘ
ルメットの使い方」を参照してください。
マニュアルの内容は予告なしに変更されることがあります。
マニュアルの図は、実際の製品と、異なる場合があります。
マニュアルの著作権は株式会社SHOEIに帰属します。
本書を無断で複製または複製することは、固く禁じられてい
ます。
本取扱説明書中で表記される
「右」、「左」は、ヘルメットをかぶっ
た状態で着用者からみた「右」、
「左」に対応しています。
The terms “right” and “left” in
this manual are from the
point of view of a rider who is
wearing the helmet.
右
Right
左
Left
English
日本語
Confirm the Packed Items
梱包物の確認
日本語
English
After opening the product box, please confirm that
all parts and accessories are included.
We recommend that you save the box and
its cushioning material in case you need to
ship the product or its parts for repair. If
you dispose of these materials, please
follow the proper laws and regulations.
梱包物(箱や緩衝材)は、修理時の送付などのた
めにできるだけ保存されることをお薦めしますが、
廃棄される場合は、法令に従い正しく処理してく
ださい。
日本語
/English

5 6
デフロスター
Defogger Ventilation System
ロアエアインテーク/ Lower Air Intake
アッパーエアインテーク/Upper Air Intake
トップエアアウトレット/Top Air Outlet
ブレスガード
日本語
ヘルメットを持ち運ぶときなどに、ブレスガードを
持たないでください。パーツが外れ、ヘルメットが
落下して破損する可能性があります。
ブレスガードは呼吸によるシールドの曇りを軽減します。
ブレスガードを装着する際は、下記の方法で取り付けます。
ブ レ ス ガ ード の 取 り付 け 方
図のように、ブレスガードをデフロスターとマスクライナー
の隙間に入れ、上から押し込みます。取り付け後、ブレス
ガードがしっかり固定されているか確認してください。
ブ レ ス ガ ード の 取 り外し 方
デフロスターとマスクライナーの隙 間から、ブレスガードを
引き抜きます。ブレスガードを引き抜 いた際 、フェイスカバー
から窓ゴム裏側が引き出されてしまう事があります。その
際は窓ゴムをつまみ、元の状態に戻してご使用ください。
English
Installing the Visor/ Peak
Do not carry or hold the helmet by the
breath guard. The breath guard may come
off, causing the helmet to drop.
デフロスター
Defogger Ventilation
マスクライナー
Mask Liner
シールドと窓ゴムの密着性を保つため、点線で示した位置
に、付属のシリコンオイルを少量塗布してください。シリ
コンオイルは、ごみやほこりをふき取ってから塗布してくだ
さい。シリコンオイルがシールドに付着すると、視界の妨げ
となる恐れがあるので、余分なシリ
コン オ イル は 必 ず ふ き取ってくだ
さい。常に快適にご使用いただく
ため、定期的なメンテナンスをお勧
めしま す 。
シリコンオイルの使用方法
2
1
6
5
4
3
11
12
13
ベンチレーションを開くと、周りの音が大きく聞こ
えたり、乗車姿勢によっては風切り音が発生した
りする場合があります。
Opening the vents on the helmet can
cause an increase in noise levels.
7 8 9 10
The breath guard reduces fogging of the
shield/visor caused by breathing.
To install the breath guard, use the
following procedure.
Installing the Breath Guard
As shown in the drawing, insert the breath guard
in the space between the defogger ventilation and
the mask liner. After installing the breath guard,
confirm that it is firmly fixed.
Removing the Breath Guard
Pull the breath guard from the space between the
defogger ventilation and the impact absorbing
liner. When you pull out the breath guard, the
back side of the window beading may come off. If
this happens, grab the window beading between
the thumb and the forefinger and return it to its
location.
For better sealing of the shield / visor, apply the
enclosed silicone oil on the window beading. First,
remove any dirt or dust, then apply a small
amount of oil to the designated part as per
drawing. Wipe away any
excess oil. If silicone oil stains
the shield / visor, it may
obstruct your view. Check for
adequate lubrication regularly.
Applying Silicone Oil
日本語
/English
1. Lower Air Intake
2. Defogger Ventilation System
3. Sun Shield / Visor Lock Lever
4. CNS-1 Shield / Visor
5. QSV-2 Sun Shield / Visor
6. Sun Shield / Visor Holder
7. Upper Air Intake
8. Shell
9. Impact Absorbing Liner
10. Top Air Outlet
11. Shield / Visor Base
12. Sun Shield / Visor Lever
13. Chinstrap
Parts Description
各部の名称
1.ロアエアインテーク
2.デフロスター
3.サンバイザーロックレバー
4.CNS-1シールド
5.QSV-2サンバイザー
6.サンバイザーホルダー
7.アッパーエアインテーク
8.シェル
9.衝撃吸収ライナー
10.トップエアアウトレット
11.シールドベース
12.サンバイザーレバー
13.チンストラップ(あごひも)
English
日本語
閉/ Close
半開 / Half Open
開/ Open
閉/ Close
開/ Open

シ ー ルド
Shield / Visor
日本語
/English
7 8
1.チンカーテンを装着すると、周りの車やバイクの音が通常より小さく聞こえる
ので、運転時は特に注意してください。
2.ヘルメットを持ち運ぶときなどに、チンカーテンを持たないでください。パーツが
外れ、ヘルメットが落下して破損する可能性があります。
微開ポジションで高速走行した場合、シールドが不意に開く恐れがあり危険
です。高速走行時には使用しないでください。
シールドの取り外し方
1.シールドを全開の状態にします(図1)。
2.トリガーを下に引きながら、シールドを手前に持ち上げフック(A)(B)を外
したのち(図2)、フック(C)をフックレールから矢印方向に外して取ります
(図3)。
3.反対側も同じ要領で取り外します。
警告
CNS-1シールド
日本語
シ ールドは保 護フィルムを 外して から、使 用してください 。
シールドを完全に下ろすと、シールドノブがフックに掛かります。走行
時は、このポジションにすることを推奨します(図A)。
シールド微開ポジション
シールドが曇った際に、図Bのように微開ポジションにして低速走行することで
ヘルメット内を換 気し、曇りを取り除くことが出来ます。
CNS-1 Shield / Visor
English
Before using the shield / visor for the first time after
purchase, remove the protective film from the shield / vi-
sor.
If you pull the CNS-1 shield / visor completely down, the
shield / visor tab will clasp the hook. We recommend that you
use the shield/visor in this position while riding your motorcycle
(Drawing A).
Slightly Opened Position
In case the shield / visor is fogged, the fog can be removed by
setting the shield / visor to slightly opened position as in Drawing
B and riding a motorcycle at low speed to circulate air within the
helmet.
WARNING
Do not ride a motorcycle at high speed with the shield / visor in
slightly opened position. The shield / visor can be fully opened
unexpectedly and can be very dangerous.
Removing the CNS-1 Shield/Visor
1. Open a shield/visor to fully opened position as per Drawing
1.
2. Lift a shield/visor pulling a trigger down and release hooks
(A) and (B) as per Drawing 2. Then, remove a shield / visor
moving hook (C) to an arrowed direction as per Drawing 3.
3. Do in the same manner for the other side.
English
1. With the chin curtain is installed, the sound from nearby vehicles
will be reduced. Please be aware of this while riding.
2. Do not carry or hold the helmet by the chin curtain. The chin
curtain may come off, and the helmet may drop.
The chin curtain reduces the influx of air turbulence and wind noise
into the helmet’s chin area. The chin curtain is detachable. The chin
curtain can be removed or installed by using the following procedure.
Removing the Chin Curtain
From the cheek pad brackets, pull out the notches found near both
ends of the plate. Do not twist or pull it hard, otherwise the plate notch
may be damaged.
Installing the Chin Curtain
Install the cheek pads before installing the chin curtain. With turning
the bottom beading up and over, fix the plate notch (A) securely in the
boss of the front cheek pad bracket as per Drawing 1. Insert the plate
between the shell and the impact absorbing liner from one end to the
other and fix the pate notch in the boss of the other end of the chin
curtain (Drawing 2). After the installation, make sure the chin curtain is
installed in position as in Drawing 3.
Chin Curtain
WARNING
フック(C)
Hook (C)
フック(A)
Hook (A) トリガ ー
Trigger
フック(B)
Hook (B)
(A)
プ レ ート
Plate
1
B
A
2
3
1
2
3
チンカーテン
日本語
チンカーテンは、ヘルメットのあご周りの巻き込みおよび風切り音の進入を低減し
ます。チンカーテンは脱着可能です。取り付け、取り外しは下記の方法で行います。
チンカーテンの取り外し方
チ ー ク パ ッド ブ ラ ケ ット か ら 、プ レ ート 両 端 の 切 り 欠 き を 引 き 抜 き ま す 。こ の と き 、
チンカーテンを強く引っ張ったり、ねじったりすると、プレートを破損する恐れが
ありますのでご注意ください。
チンカーテンの取り付け方
チンカーテンは、チークパッドを装着してから取り付けます。まず、図1のようにフチ
ゴムをめくりながら片側のプレート端の切り欠き(A)をチークパッドブラケットのボス
に差し込 みます。そのまま、フチゴムをめくりながら端から順にプレートをシェルと
衝撃吸収ライナーの間に差し込んでいき、反対側の切り欠きも同じ要領でボスに
差し込みます(図2)。最後は図3の状態になっている事を確認してください。
警告

フックレ ー ル
Hook rail
フック(C)
Hook (C)
9 10
ご注意
フックやギアがシールドベースにはまっていないと、走行中に
シールドが外れ、思わぬ事故を引き起こす可能性があります。
取り付け後は、シールドの開閉操作を数回繰り返し、フックや
ギアが確実にはまっているか確認してください(図6)。また、
シールドを完全に下ろした状態で、シールドノブがフックに掛か
るか 確 認し てくだ さい 。
7. シールドベースをクリーニングしたり、あるいはシールド
ベースを交換した場合、シールドを閉めてシールドと窓
ゴムの密着を確認してください。隙間がある場合、風の
巻き込みや風切り音の原因となるため、シールドが窓
ゴムに密着するようシールドベースの位置を調整して
ください。
8. スクリューの 締 め付けなどを行う際は 、ビットサイズ
「No.2」のプラスドライバーを垂直に当て、ていねいに
回してください。サイズの合わないドライバーや電 動ドラ
イバ ーを使 用したり、スクリューをななめに締め付けたり
すると、ネジ頭を破損する場合がありますので、十分
注意して回してください。スクリューを交換する場合は、
必ず純正部品(アルミニウム製)をご使用ください。スク
リュー を 強く締めすぎると、スクリューが破損する場合
がありますのでご注意ください。(推奨締め付けトルク:
80cN・m/約8kgf・cm)
9. シールドの視界に入る位置に、ステッカーや粘着テープ
を貼らないでください 。
日本語
シールドの取り付け方
1.シールドを全開状態の位置に合わせ、フック(C)をフック
レールに差し込みます(図4)。
2.シールドの矢印付近を上からカチッとロックされるまで押し
(図5)、フック(A)(B)をフックレールにしっかりとはめ込み
ます(図6)。
3.反対側も同じ要領で取り付けます。
4.最後に、シールド開閉を数回繰り返し、フックがシールドベース
に確実にはまっているか確認してください。
WARNING
If the hook and gear are not securely fastened in the
shield/visor base, the shield/visor may come loose
while riding and an accident may unexpectedly
occur. After installing the CNS-1 shield/visor, open
and close the shield/visor a few times to confirm that
the hook and gear fit securely. With the shield/visor
completely closed, confirm that the shield/visor tab is
clasped by the hook.
English
Installing the CNS-1 Shield / Visor
1. Adjust a shield / visor to fully opened position and
insert shield / visor hook (C) as per Drawing 4.
2. Press arrowed areas of a shield/visor indicated
in Drawing 5 until it clicks. Then, insert hooks (A)
and (B) securely into positions indicated in
Drawing 6.
3. Do in the same manner for the other side.
4. Open and close a shield/visor a few times and
make sure that all the hooks are fixed securely.
サイズ
(No.2)
✓
シールドの取り扱いに関するご注意
日本語
フック(B)
Hook (B)
シ ー ルド
Shield / Visor
フック(A)
Hook (A)
4
5
6
1. 着色シールド、もしくはミラー加工のシールドとサンバ
イザーを併用しないでください。併用した場合、視界が
制限され、大変危険です。
2. シールドの汚れや傷は走行中の視界の妨げとなり、大変
危険で す。シ ールドが汚れ たり傷 が付 いたりしたら、直ち
に使用を中止し、取り外して洗浄するか、交換してくだ
さい。
3. シールドは、水で薄めた中性洗剤で洗い、真水でよくす
すいでから柔らかい布でふき取り、乾かしてください。
40℃を超える湯・塩水・酸性またはアルカリ性の洗剤・
ベンジン・シンナー・ガソリン・その他の有機溶剤・ガラ
スクリーナー等、有機溶剤を含むクリーナー類は使用
しな い でくだ さい 。これらが付着すると、シールドが変質
し、安全性に支障をきたす可能性があります。
4. シールドが曇った状態で走行しないでください。視界が
妨げられ大変危険です。シールドが曇った場合、ロアエ
アインテークを開けたり、シールドを開けたりしてヘル
メット内をよく換 気し、シ ー ルドの 曇りを取り除 いてくだ
さい。また、PINLOCK® EVO lensの使用も、シールド
の曇り防止に効果的です。
5. PINLOCK®EVOlensをご使用の場合は、必ず純正品
をご使用ください。取り扱い方法については、
PINLOCK® EVO lensに同梱されている取扱説明書
をご 覧ください 。
6. シールドは、保護フィルムをはがして使用してください。
日本語
/English

11 12
CNS-1シールドの調整
日本語
❶シールドベース下部の孔を、シェル側の下部スクリュー孔の上下左右
の中心に合わせ(図1)、スクリューを仮止めします。
❷次に、シールドベース上部の孔を、シェル側の上部スクリュー孔の上下
左右の中心に合わせ(図2)、ワッシャーを溝に合わせてはめ、スクリュ
ーを締め付けた後、下部スクリューも締め付けます(図3)。
❸反 対 側 のシ ー ルド ベースも同じように取り付けます 。
❹シールドを取り付けます。取り付け後、シールドのフックがフックレール
に確実にはまっているか確認してください。
❺シールドを完全に下ろした状態で、シールドが窓ゴムに密着しているか
確 認し てください 。
シールドと窓ゴムの間に隙間がある場合。
シールドを外してシールドベースの位置を調整してください。シールドベー
スの調整は、2か所のスクリューを緩めたのち、シールドベースを図の矢印
方向(図4参照)にずらしてスクリューを締め直します。調整後、シールドを
取り付け、シールドと窓ゴムの隙間を確認してください。隙間がなくならな
いときは、再度シールドを外し、同じ要領で反対側のシールドベースの位
置を調整してください。
最後に、シールドを完全に下ろした状態で、シールドノブがフックに掛かる
か確認してください。シールドベースの取り付け位置が極端に後方になる
と、シールドノブがフックに掛からなくなることがあります。また、シールド
開閉 の際にシールドがシェルと干渉し、シェルに傷が付く恐れがあります
の でご 注 意くだ さい 。
シールドと窓ゴムがきつく当たっていて、シールドの開閉がしづらい場合。
シールドを外してシールドベースのスクリューをゆるめ、シールドベースを
ほんの少し図5の矢印方向へずらし、スクリューを締めなおします。両側の
シールドベースを調整します。調整後、シールドを取り付け、シールドの開
閉動作を確認してください。また、シールドと窓ゴムの間に隙間がないか
確 認し てください 。
1
2
3
4
5
左側
ワッシャー
ビス
ワッシャー
ビス
ベース
プ レ ート
下部ビス穴
上部ビス穴
ワッシャー
ビス
ワッシャー
シ ー ルドノブ
6. Remove the protective film before using the
shield/visor for the first time.
7. After cleaning or replacing the base plates,
close the shield/visor and make sure that it
touches the window beading in all around. If
there is a gap between the shield/visor and
the window beading, adjust a position of the
base plate and eliminate the gap, because it
may cause roll-in of wind or noise.
8. For tightening screws, apply No.2 size Phillips
head screwdriver vertically and rotate it
carefully. If improper sized screwdriver or
electric screwdriver is used, a screw head
may be broken. Use a genuine screw made of
aluminum for replacement. If a screw is
tightened too much, it may be broken.
(Recommended torque: 80 cN.m or about 8
kgf.cm)
9. Do not place any sticker or tape in the
shield’s/visor’s field of vision.
1. Do not use tinted or spectra shield/ visor
and sun visor together. Or, your vision will
be limited and can be very dangerous.
2. Dirt and scratches on the shield / visor may
obstruct your view while riding and can be
very dangerous! If the CNS-1 shield / visor
gets dirty or scratched, stop using it
immediately. Remove the shield/visor and
clean or replace it.
3. The CNS-1 shield / visor should be cleaned
with a solution of mild, neutral soap and
water. Rinse well with pure water then wipe
dry with a soft cloth. Do not use any of the
following cleaning materials: hot water
over 40℃; salt water; any acidic or alkali
detergent; benzine, thinner, gasoline, or
other organic solvents; glass cleaner; or
any cleaner containing organic solvents. If
any of these cleaners are used, the
shield’s / visor’s chemical nature may be
altered and safety may be hindered.
4. Do not ride with a shield / visor that is fogged.
This may obstruct your view and can be very
dangerous. If the CNS-1 shield / visor is
fogged, open the lower air intake to circulate
air within the helmet and remove the fog from
the shield/visor. Use of the PINLOCK©EVO
lens is also effective in stopping fog.
5. Always use SHOEI’s genuine PINLOCK©EVO
lens for CNS-1. For fitting PINLOCK©EVO
lens, please read instructions enclosed in it.
Size
(No.2)
✓
Important Notice about Handling the CNS-1 Shield / Visor
English
日本語
/English
ビス

13 14
QSV-2サンバイザー
日本語
QSV-2サンバイザーは、ロックレバーを下げた状態で開閉が可能になります
(図1参照)。サンバイザー取り付け 、取り外しのとき以外はサンバイザーロック
レバーを引き出さないで下さい。ロックレバーを引き出したままヘルメットを使用
す る と 、サ ン バ イザーが開かなくなり危険です。
また、ロックレバーを引き出した状態でサンバイザー開閉レバーを動かさないで
ください。サンバイザー操作機構を破損し、サンバイザーの開閉ができなくなる
恐れ が ありま す 。
QSV-2サンバイザーの開閉は、シェル左側にあるサンバイザー開閉レバーで行い
ます。サンバイザーを開けるときは、図Aの位置までレバーを下げきってください。
サンバイザーが完全に開いていないと、走行中に振動等で不意に閉まって視界が
妨げられる可能性があり危険です。
QSV-2 Sun Visor
English
QSV-2 sun visor can be opened and closed as the lock levers for
sun visor on both sides are in downed position (Drawing 1).
Do not pull the levers up except when removing and installing the sun
visor. When using a helmet with the lock levers being in upped
position, the sun visor cannot be opened and is dangerous. Do not
move the sun visor lever with the sun visor lock lever in the pulled-out
position. It could cause the mechanical malfunction of the sun visor
and the sun visor might not function properly.
The QSV-2 sun visor can be opened and closed by sliding the sun visor
lever on the left side of the shell. To open the sun visor, pull the lever
down until it stops in the position shown in Drawing A. If the sun visor is
not fully open, it may slip down and close unexpectedly during riding due
to vibration or other phenomena and your view may be obstructed.
■Removing the QSV-2 Sun Visor
1. Make sure the lock levers on both sides for the sun visor are in
downed position. In case, the lock levers are in pulled-up position,
push them down as per Drawing 1.
2. Lower the QSV-2 sun visor by sliding the sun visor lever
(Drawing 2).
3. Pull the lock levers on both sides for the sun visor up by using
the service tool as per Drawing 3.
4. Hold the sun visor and use service tool to widen the space
between the sun visor holder and the sun visor as per Drawing
4. Detach the sun visor by rotating it in the direction shown by
the arrow.
5. Follow the same procedure for the other side.
サンバイザ ーレバ ー
Sun Visor Lever
ロックレバー
Lock Lever
ロックレバー
Lock Lever
サービスツール
Service Tool
1
2
3
4
5
1
A
2
4
3
Washer
Screw
Upper Screw Hole
Washer
Washer
Screw
Screw
Washer
Screw
Shield/ visor tab
Adjustment of the CNS-1 Shield/ Visor
English
❶Align the center of the hole in the lower base plate with the
center of the lower screw hole (Drawing 1) and tighten the
screw temporarily.
❷Next, align the center of the hole in the upper base plate
with the center of the upper screw hole (Drawing 2). Place
the washer on the base plate and tighten the screw. Firmly
tighten the lower screw to fix the base plate (Drawing 3).
❸Follow the same procedure to install the other side.
❹Install the shield/visor. Confirm that the hooks fit firmly into
the hook rails.
❺Close the shield/visor and check that the window bead
completely seals up the shield/visor in all around.
If there is a gap between the shield/visor and the window
beading.
Remove the shield/visor and adjust the position of the base
plate on either side of the helmet. To adjust, loosen both
screws and move the plate slightly toward the direction
indicated in the Drawing 4. Tighten the screws and fix the
base plate. Once again, install the shield/visor and check that
the window bead completely seals up around the shield/visor.
If the gap still remains, follow the same procedure to adjust
the position of the base plate on the other side of the helmet.
After adjusting the position of the base plate, close the
shield/visor and confirm that the shield/visor tab is clasped by
the hook. If the base plates are not installed properly, the
shield/visor tab may not clasp the hook. Also, make sure that
the shield/visor and the shell of the helmet are not scratching
each other when opening and closing.
If the shield/visor is in too close touch with the window
beading.
Remove the shield/visor and adjust the base plates.
Loosen both screws of a base plate and move the plate
slightly toward the direction indicated in the Drawing 5.
Follow the same procedure for both base plates. Install
the shield/visor and check that it opens and closes
smoothly and there is no gap between the shield/visor and the
window beading.
Left side
Base Plate
Lower Screw Hole
■QSV-2サンバイザーの取り外し方
1.ロックレバーが両側とも下がった状態であることを確認してください。ロック
レバーが引き出されている場合は、両側とも図1のように下げてください。
2.サンバイザー開閉レバーで、QSV-2サンバイザーを下げます(図2)。
3.図3のように左右両サイドにあるロックレバーを左右ともサービスツールを
使い引き出します 。
4.図4のようにサンバイザーを持ち、サンバ イザーホルダーとサンバイザーの
隙間をサービスツールなどで広げながら、矢印の方向に回転させるようにサン
バ イザ ーを抜 き取ります 。
5.反対側も同じ要領で抜き取り、サンバイザーを取り外します。
日本語
/English
サンバイザ ーレバ ー
Sun Visor Lever
サービスツール
Service Tool

15 16
日本語
/English
1.QSV-2サンバイザー本体を直接手で開閉
することは絶対にしないでください。サンバイ
ザーの開閉機構
を破損する可能性があり
ます。
2.サンバイザー 取り付け、取り
外し のとき 以 外 は サン バ イ
ザーロックを引き出さないで
ください。ロックレバーを引き出したままヘルメットを使用
すると、サンバ イザ ー が開 かなくなったり、途 中までしか
閉じなくなったりします。視界が妨げられ大変危険です。
必ずサンバイザーロックレバーを下げた状態でヘルメット
を使 用してくだ さい 。
3.ロックレバーを引き出した状態でサンバイザー開閉
レバーを動かさないでください。サンバイザー操作機構
を破損し、サンバイザーの開閉ができなくなる恐れがあり
ます。
4.QSV-2サンバイザーは日除けのための装備であり、シー
ルドとし て の 機 能 は あ りま せ ん 。シ ー ルド を 開 け て サ ン
バイザ ー の み で 走 行 はし ない でくだ さい 。
5.サングラスを併用すると、さらに視界が暗くなるため、
絶対にしないでください。視界が妨げられ、大変危険
です。
6.夜間およびトンネル内や、視界が悪い状態のときは、
QSV-2サンバイザーは使用しないでください。
7. QSV-2サンバイザーの汚れや傷は走行中の視界の妨
げとなり、大変危険です。QSV-2サンバイザーが汚れ
た り 傷 が 付 い た り し た ら 、直 ち に 使 用 を 中 止 し 、取 り 外 し
て ふ き 取 る か 、交 換 し て く だ さ い 。
8. QSV-2サンバイザーの汚れは、乾いた柔らかい布でふ
き取ってください 。4 0 ℃ を 超 え る 湯・塩 水・酸 性 ま た は
アルカリ性の洗剤・ベンジン・シンナー・ガソリン・その
他の有機溶剤・ガラスクリーナー等、有機溶剤を含む
クリーナー類は使用しないでください。これらが付 着
すると、サンバイザーが変質し、安全性に支障をきたす
可能性があります。
9. QSV-2サンバイザーは防曇加工が施されていますが、
低温時や多湿時には曇る場合があります。サンバイ
ザーが曇った状態で走行しないでください。視界が妨げ
られ大変危険です。QSV-2サンバイザーが曇った場
合、シールドやロアエアインテークを開けて換気をする
か、サンバイザーを上げて視界を確保してください。
10.QSV-1サンバイザーはGT-AirⅡには使用できません。
必ずQSV-2サンバイザーをご使用ください。
11.保管状況によっては、湿度の影響でQSV-2サンバイ
ザーの表面が白くなることがあります。その場合、メガ
ネ ク ロ ス の よ う な 、乾 い た 柔 ら か い 布 で ふ く と 、元 に 戻 り
ます。
12.視界を妨げる恐れがあるため、QSV-2サンバイザー
に 、ステッカー や 粘 着テープを 貼らない でくだ さい 。
日本語
■QSV-2サンバイザーの取り付け方
1.ロックレバーが両側とも下がった状態であることを確認してください。
ロックレバーが引き出されている場合は、両 側とも図 5のように下げて
ください。
2.サンバイザー開閉レバーを図6の位置にしてください。
3.図7のように 左 右両サイドのロックレバー を、サービ スツール 等 で左 右
とも引き出します。
4.図8のように、QSV-2サンバイザーの凸部①をホルダーに差し込み、
サンバイザーを上方へ回転させるようにしてサンバイザーの突起部②
をホルダーの穴にはめ込みます。
5.反対側も同じようにしてサンバイザーをホルダーへはめ込みます。
6.サンバイザーに指紋が付いたときは、乾いた柔らかい布でふき取って
ください。
7. サンバイザー取り付け後、必ずロックレバーを押し戻してください
(図9 )。
正しく取り付けていないと、走行中にサンバイザーが脱落し、思わぬ事故を
引き起こす可能性があります。QSV-2サンバイザー取り付け後は、開閉
レバーの操作を数回繰り返し、サンバイザーの突起部がホルダーの穴に
確実にはまっているか確認してください。また、サンバイザーとホルダー
の間に、隙間が無いことを確認してください。
QSV-2サンバイザーの取り扱いに関するご注意
日本語
警告
English
■Installing the QSV-2 Sun Visor
1. Make sure the lock levers for the sun visor are in downed
position. In case, the lock levers are in pulled-up position,
push them down as per Drawing 5.
2. Slide the sun visor lever to the position shown in the drawing 6.
3. Pull the sun visor lock levers up by using the service tool as
per Drawing 7 for both sides.
4. As shown in Drawing 8, insert the convexed part ①at the
bottom edge of the QSV-2 sun visor into the holder. While
rotating the sun visor upward, press the rounded part ②of the
sun visor into the holder until you hear it clicks.
5. Follow the same procedure for the other side.
6. Remove any fingerprints on the sun visor by wiping with a
soft, dry cloth.
7. After the installation, make sure to push the lock levers on
both sides for the sun visor down (Drawing 9).
If the sun visor is not installed properly, it may drop unexpectedly
during riding and obstruct the rider’s vision. After installing the
QSV-2 sun visor, raise and lower the visor several times to
confirm that the protruding section of the sun visor is fit securely
in the holder’s opening. Confirm that there is no space between
the sun visor and the holder.
WARNING
1
2
5
6
7
8
9
ロックレバー
Lock Lever
ロックレバー
Lock Lever
ロックレバー
Lock Lever
サービスツール
Service Tool
サンバイザ ーレバ ー
Sun Visor Lever

17 18
Service Tool
サービスツールは、以下の場合に使用します。
・ サ ン バ イ ザ ー の 取 り 外 し
(「QSV-2サンバイザー」を参照)
・ イ ン タ ー コ ム ベ ー ス カ バ ー の 取 り 外 し
(「インターコムを取り付けるとき」を参照)
・PINLOCK®EVOlensの調整時
(下図を参照)
PINLOCK® EVO lensの調整方法につ
いては、PINLOCK®EVOlensに同梱の
取扱説明書を参照してください。
Service tool is the tool to be used in following
cases.
・Removing sun visor
(Refer to „Removing the QSV-2 Sun visor“)
・Removing intercom base cover
(Refer to „When Installing the Intercom“)
・Adjusting PINLOCK® EVO lens
(Refer to the Drawing)
When adjusting PINLOCK® EVO
lens, read the instruction manual
that comes packed with it.
サービスツール
日本語
PINLOCK®EVOlensをご使用の場合は、
PINLOCK®EVO lensに同梱されている取扱説明書
をご覧ください。
PINLOCK®EVO lens
1.クリア以外のシールドにPINLOCK®EVO lens
を装着した状態で、夜間走行はしないでくだ
さい。
2. PINLOCK® EVO lensは、シールドよりも傷つきやすい
材質でできているので、取り扱いには十分注意してくだ
さい。
3. PINLOCK® EVO lensを使用すると、乗車姿勢によっ
ては視界が妨げられる可能性があります。
4. PINLOCK®EVOlensは、保護フィルムをはがして使用
してくだ さい 。
5.PINLOCK®EVOlensは、シート自体が湿気を吸収する
ことにより高い曇り止め効果を発揮します。しかし、低温
多湿などの曇りやすい条件下でヘルメット内が密閉
された状態が続くと、水蒸気でシートが飽和状態となり、
にじみ や 曇 りが 発 生 す るこ とが ありま す 。にじみ や 曇りが
発生すると、視界が妨げられ大変危険ですので、ロア
エアインテークを開けたり、シールドを開けたりしてヘル
メット内をよく換 気し、にじみや 曇りを取り除 い てくだ
さい。
6. CNS-1のPINLOCK® EVO lensを交換される場合は、
DKS301をご購入ください。
*PINLOCK® is a registered trademark of PINLOCK
SYSTEMS B.V.
*PINLOCK®は、PINLOCK SYSTEMS B.V.の登録
商標です。
English
If you are using the PINLOCK®* EVO lens,
read the instruction manual that comes
packed with it.
PINLOCK®EVO lens
1. Daytime use only. Never use PINLOCK®
EVO lens at night. If the PINLOCK® EVO
lens is used with a clear shield/visor, its light
transmission ratio will be approximately 80%.
This value does not meet the light transmission
standards in the U.S. (VESC-8, 85%), or
Europe (ECE R22, 80%), so this accessory is
for „daytime use only“ in these jurisdictions.
2. The PINLOCK® EVO lens is made of a material
that is easier to scratch than the outer
shield/visor. It should be treated with great care.
3. The PINLOCK® EVO lens may obstruct the
rider’s view in some riding positions.
4. Remove the protective film before using the
PINLOCK® EVO lens.
5.The PINLOCK® EVO lens demonstrates high
effectiveness in stopping fog by absorbing
moisture. However, if the helmet is used
continuously with the lower vent in the closed
position in low-temperature, high-humidity
conditions, the lens can become saturated with
water vapor causing streaks and fog to appear.
If streaks or fog appears, it may obstruct your
view and be very dangerous! In this case, open
the lower air intake and/or open the shield/visor
to circulate air within the helmet to remove the
streaks and fog from the helmet.
6. Purchase DKS301 for CNS-1 for replacement of
PINLOCK® EVO lens.
サービスツール
Service Tool
1. Only raise or lower the sun visor by
using the lever. Never raise or lower
the sun visor
directly with your
hands. This may
damage the sun
visor’s raising and
lowering mechanism.
2. Do not pull the sun visor levers up except when
removing and installing the sun visor. The sun
visor cannot be opened or closed completely as
the lock levers are in upped position when using
a helmet. It may obstruct your view and can be
very dangerous. Always use a helmet with the
lock levers for the sun visor in downed position.
3. Do not move the sun visor lever with the sun
visor lock lever in the pulled-out position. It
could cause the mechanical malfunction of the
sun visor and the sun visor might not function
properly.
4. The QSV-2 sun visor is designed to provide
shade only and cannot function as a
shield/ visor. Do not ride with the shield/visor
open and using only the sun visor.
5.Do not use the sun visor together with
sunglasses, as this will dangerously darken
your view!
6. Raise the sun visor while riding at night, through
a tunnel, or any other low-light condition.
7. Dirt and scratches on the sun visor may obstruct
your view while riding and can be very
dangerous! If the QSV-2 sun visor gets dirty or
scratched, stop using it immediately. Remove
the sun visor and clean or replace it.
8. The QSV-2 sun visor should be cleaned with a
solution of mild neutral soap and water. Rinse
well with pure water then wipe dry with a soft
cloth. Do not use any of the following
cleaning materials: hot water over 40℃; salt
water; any acidic or alkali detergent;
benzine, thinner, gasoline, or other organic
solvents; glass cleaner; or any cleaner
containing organic solvents. If any of these
cleaners are used, the sun shield’s/visor’s
chemical nature may be altered and safety may
be hindered.8.The QSV-2 sun visor has
undergone anti-fogging treatment but may
develop fog in low temperatures or high
humidity. In this case, open the lower air intake
to circulate air or raise the sun visor.
9. The QSV-2 sun shield /visor has undergone
anti-fogging treatment but may develop fog in
low temperatures or high humidity. In this case,
open the lower air intake to circulate air or raise
the sun shield/ visor.
10.QSV-1 sun visor cannot be used for GT-AirⅡ.
Use the QSV-2 sun visor for GT-Air Ⅱ.
11.Under certain storage conditions, humidity may
cause the outer surface of the sun visor to
become white. If this happens, take a soft, dry
cloth like one for cleaning eyeglasses and wipe
the sun visor to restore it to its original condition.
12.Do not attach any stickers or tape on the QSV-2
sun visor. They may obstruct your view.
Important Notice about Handling the QSV-2 Sun Visor
English
日本語
/English
19 20
内装の取り外し方
日本語
English
1
フック
Hook
(b)
1.チークパッドの取り外し
チークパッドベースから引き剥がすようにホックを3か所
外し(図1)、前部チークパッドブラケット(A)から溝(a)を
引き抜きます(図2)。次に後部チークパッドブラケット
(B)から溝(b)を引き抜きます(図3)。溝(b)を引き抜く
際は、強く引かずていねいに引き抜いてください。必ず溝
(a)から外してください。溝(a)を取り付けた状態で溝
(b)を真上に引き抜くと、プレートを破損する可能性が
ありますので、ご注意ください。
2.イヤーパッドの取り外し
4か所 の爪を、図のようにチークパッドベースから引き抜き、
イヤーパッドを取り外します(図4)。反対側も、同じ要領
で取り外します 。
Removing Interior Parts
1. Removing the Cheek Pads
Unfasten the 3 snaps to remove the pad from
the cheek pad base (Drawing 1), and pull the
notch (a) from the cheek pad bracket (A)
(Drawing 2). Next, pull the notch (b) from the
cheek pad bracket (B) as per Drawing 3. Do not
pull it hard. Be sure to pull the front notch (a)
out first. If you pull out the rear notch (b)
before pulling out notch (a), the plate may be
damaged.
2. Removing the Ear Pads
Unfasten the 4 clasps on the plate from the
cheek base, as shown in drawing 4. Remove the
ear pad. Remove the other ear pad in the same
manner.
(a)
チ ー ク パ ッド ブ ラ ケ ット( A )
Cheek Pad Bracket (A)
プ レ ート
Plate
チ ー ク パ ッド ブ ラ ケ ット( B )
Cheek Pad Bracket (B)
2
前
Front
後
Rear
・チークパッドは全サイズ 共 用 パーツです。例えば、Mサイズ
で頬部を緩くしたい場合はチークパッド31、きつくしたい
場合はチークパッド39(共にオプションパーツ)に交換して
ください 。
・センターパッドは各製品サイズで異なります。ご購入の際、
お手持ちのヘルメットのサイズを確認してください。
・The same cheek pads can be used with all helmet
sizes. For M size helmet example, choose cheek pad
size 31 if you want a looser fit and size 39 for a firmer
fit (both are optional parts).
・Center pads varies by helmet size. Confirm the size of
your helmet prior to making a purchase.
センターパッド
Center Pad
チークパッド
Cheek Pad
S
S13
S9
S5
M
M13
M9
M5
L
L13
L9
L5
XL
XL13
XL9
XL5
XXL
XL9
XL5
――
35
31
――
イヤーパッド
Ear Pad
イヤーパッド
Ear Pad
当製品はセンターパッド、チークパッド(左右)、チンスト
ラップカバー(左右)、イヤーパッドを取り外して洗うことが
で き ま す 。ま た 、オ プ シ ョ ン パ ッ ド と 交 換 す る こ と で 、か ぶ り
心地を調整することができます。内装の名称と図を参照し
て、着脱を確実に行ってください。センターパッド、チーク
パ ッド 、チ ン ス ト ラ ッ プ カ バ ー は 、必 ず す べ て 装 着 し て ご 使 用
ください。内装を交換する場合は、下記表を参照のうえ、
正し い サ イズ の もの をお 求 めくだ さい 。
Center pad, right and left cheek pads, right and
left chinstrap covers, and right and left ear pads
can be removed for washing. You can also adjust
the fit of your helmet by switching to the optional
pads. Look at the list and drawing of interior parts
and check whether the parts are installed or
removed. Be sure to always fix the center pad,
cheek pads, and chinstrap covers prior to riding.
If necessary, use the following table to order the
proper interior parts to adjust the fit of your
helmet.
センターパッド
Center Pad
チークパッド(右)
Cheek Pad (R)
チークパッド(左)
Cheek Pad (L)
チンストラップカバー
Chinstrap Cover
チンストラップカバー
Chinstrap Cover
39
35
31
製品サイズ / Helmet Size
イ ヤ ー パ ッド
Ear Pad
4
チークパッドベース
Cheek Pad Base
3
オ プ シ ョ ン( き つ め )/Optional(Firm fit)
標準/Standard
オ プ シ ョ ン( 緩 め )/Optional
(Loose fit)
オ プ シ ョ ン( き つ め )/Optional(Firm fit)
標準/Standard
オ プ シ ョ ン( 緩 め )/Optional
(Loose fit)
Replacing Interior Parts
内装の交換について
English
日本語
日本語
/English

21 22
内装の取り付け方
日本語
1.チンストラップカバーの取り付け
チンストラップカバーは左右共通です。取り付けは図8を参照し、チン
ストラップ に通し 、カチッと音 が す るまで ホックをは め込 みま す 。
2.センターパッドの取り付け
前頭部のプレートの端をブラケットにあわせ(図9)、隙間に合わせて
取り付けます(図10〜12)。そのあと、後頭部の2か所のホックを、
カチッと音がするまではめ込みます(図13)。
3.イヤーパッドの取り付け
イヤーパッドは、左右兼用です。取り付けるときは、図14のように(A)
の部分をセンターパッドと衝撃吸収ライナーの間に挟み、4か所の爪を、
それぞれチークパッドベースの切り欠き部分
に 差し込 んで 、イヤ ー パッドを固 定します。
反対側も、同じ要領で取り付けます。
Installing Interior Parts
English
1. Installing the Chinstrap Covers
A chinstrap is interchangeable right and left. Pass the
chinstrap through a chinstrap cover and snap each other
until you hear it clicks (Drawing 8).
2. Installing the Center Pad
Adjust the side of the front plate to bracket (Drawing 9),
and slide and insert the plate into a gap of bracket
(Drawing 10-12). Snap the two snaps into place in the rear
of the center pad as per Drawing 13.
3. Installing the Ear Pads
The ear pads are interchangeable for right and left sides.
Place ear pad section (A) between the center pad and the
impact absorbing liner as per Drawing 14. Insert the 4
clasps on the plate in the notches of the cheek base. Fix
the ear pad in place. Install the other ear pad in the same
manner.
日本語
5
3.センターパッドの取り外し
センターパッドは後頭部から取り外します。後頭部の
ホックを2か所外してから(図5)、前頭部は図6のように
プレートの近くを持ち、センターから引き剥がすようにして
センターパッドを取り外します。
4.チンストラップカバーの取り外し
チ ン ス ト ラ ッ プ カ バ ー を 取 り 外 す に は 、チ ー ク パ ッド を
取り外してからチンストラップカバー のホックを外し、チン
ストラップから引き抜きます(図7)。反対側も、同じ要領で
取り外します。
English
3. Removing the Center Pad
Remove the center pad by unsnapping 2 snaps
at the rear of the helmet first (Drawing 5), and
pull the front portion of the center pad from
center part as per Drawing 6.
4. Removing the Chinstrap Covers
Remove the cheek pad then unfasten the
chinstrap cover snap. Remove the cover from the
chinstrap (Drawing 7). Remove the other chinstrap
cover in the same manner.
8
イヤーパッドは、ヘルメット内への風の巻き込みに起因する
騒音を低減します。
イヤーパッドは取り外しが可 能です 。取り外し方、取り付け
方は、「内 装の取り外し方」および「内 装の取り付け 方」をご
覧ください 。
イヤーパッド
イヤーパッドを装着すると、周りの車やバイクの音
が通常より小さく聞こえるので、運転時は特に注意
してくだ さい 。
The ear pads are designed to reduce wind noise.
To remove or install the ear pads, see the
„Removing and Installing Inner Parts“ section.
Ear Pads
With the ear pads are installed, the sound
from nearby vehicles will be reduced.
Please be aware of this while riding.
(A) 14
イ ヤ ー パ ッド
Ear Pad
プ レ ート
Plate 6
10
11
12
5
5
13
ブ ラ ケ ット
Bracket
9
9
チ ン スト ラップ
Chinstrap
チ ン スト ラップ カ バ ー
Chinstrap Cover
7
フック
Hook
フック
Hook
チ ン スト ラップ
Chinstrap
チ ン スト ラップ カ バ ー
Chinstrap Cover
プ レ ート
Plate
プ レ ート
Plate
フック
Hook
日本語
/English

23 24
日本語
日本語
15
4.チークパッドの取り付け
チークパッドを取り付けるまえに、3か所のホックが図1 5
の位置にあることを確認してください。正しい位置でない
場 合 、ホックが はまらない ことが あります 。
取り付けるときは、チークパッドの左右を確認してくださ
い。プレート後端部の溝(b)をチークパッドブラケット(B)
のボスに差し込み(図16)、プレートを後方へスライドさ
せます。次にプレート後端から前方に向かって差し込んで
いき、プレートの溝(a)をチークブラケット(A)のボスに
差し込みます(図17)。このとき、図16のようにプレート
後端部が奥までしっかりスライドしていないと、溝(a)が
ボスに はまりま せ ん の でご 注 意 くだ さい 。
プレートを差し込んだあと、図18のようにチンストラップ
をチークパッドのくぼみに通
し、
❶→❷の 順 に ホックを は
め込み、図19のようにパッド
の角部分(C)をチークパッド
ベースの突起部にはめ込ん
で か ら 、最 後 に ❸の ホックを
は め 込 み ま す 。ホ ッ ク は 、
パッド側からホックの上部分を強く押し、カチッと音が
するまではめ込みます。反対側のチークパッドも、同じ
要領で取り付けます。
English
4. Installing the Cheek Pads
Before installing the cheek pads, make sure
that the 3 hooks are positioned properly shown
in Drawing 15. They may not be hooked if they
are not positioned properly.
Identify a right and a left pad. Insert the notch (b)
into a boss of a cheek pad bracket (B) located at
the rear of the helmet (Drawing 16) and slide it
toward the back of the helmet. Then, do
frontward and insert the notch (a) into a boss of
a cheek pad bracket (A) as per Drawing 17.
Make sure to slide the plate in toward the back
of the helmet completely as inserting the rear
section (Drawing 16), otherwise the notch (a)
may not fit into the boss.
After the plates are inserted, pass the chinstrap
through the hollow section of the cheek pad
(Drawing 18). Fasten the snaps in ❶to ❷
order by pressing the head of the snaps firmly
from the pad side until they click in place. Insert
the corner of the cheek pad (C) to the boss of
the cheek pad base as per Drawing 19, and
fasten the snap ❸by pressing down the head
of the snap. Install the cheek pad on the other
side in the same manner.
(C)
❶
❷
❸
15
19
前
Front
後
Rear
18
(a)
17
ボス
Boss
ボス
Boss
(b) 16
内装の取り扱いに関するご注意
1.ホックのはめ込み、取り外しはなるべくホックの近くを持
ち 、て い ね い に 行 っ て く だ さ い 。ホ ッ ク は カ チ ッ と 音 が す
るまできちんと取り付け てくだ さい 。
2.内装を洗う場合は手洗いか、洗濯機をご使用の場合は
ネットに入れるなどして、ていねいに洗ってください。洗
濯の際は水またはぬるま湯を使用し、乾いた布で水をふ
き取ってから陰干ししてください。内装パーツのプラス
チック部分を破損する恐れがありますので、強くしぼっ
たり、プラスチック部分を折り曲げたりしないでください 。
脱水機を使用する場合は、十分ご注意ください。衝撃
吸収ライナー(発泡スチロール部分)は、柔らかい布を水
または水で薄めた中性洗剤で湿らせてふいてください。
パーツを破損する恐れがありますので、40℃を超える
湯・塩 水・酸 性 ま た は ア ル カ リ 性 の 洗 剤・ベ ン ジ ン・シ ン
ナー・ガソリン・その他の有機溶剤・ガラスクリーナー等、
有機溶剤を含むクリーナー類は使用しないでください。
English
Important Notice about
Handling Interior Parts
1. When fastening or unfastening the snaps, you
should hold near the snaps and treat carefully.
Fasten the snaps firmily until they click in place.
2. You can clean the inner parts by hand washing
them or by washing them in a washing machine
after placing them in a laundry net. Please treat
them carefully when washing. Use lukewarm
water. Gently squeeze the parts with a dry towel
and dry them in the shade. To prevent damage
to the plastic areas of the interior parts, do not
wring them strongly and do not fold or bend the
plastic areas. Take special care if you are using
a washing machine. Do not dry the interior parts
with a clothes dryer, blow dryer, or any other
type of mechanical dryer, as heat can damage
the material. The impact absorbing liner
(polystyrene foam section) should be wet with a
soft cloth dipped in a solution of mild neutral
soap and water and then wiped. Allow time for
the impact absorbing liner to dry in the shade.
Do not dry the impact absorbing liner in the
sunlight or use any type of mechanical dryer, as
the impact absorbing liner is extremely sensitive
to heat. If the impact absorbing liner is exposed
to high heat of any kind, contact your dealer or
SHOEI directly for a safety evaluation. To
prevent damage, do not use any of the
following cleaning materials: hot water over
40°C; salt water; any acidic or alkali
detergent; benzine, thinner, gasoline, or
other organic solvents; glass cleaner; or any
cleaner containing organic solvents.
日本語
/English
チ ー ク パ ッド ブ ラ ケ ット( A )
Cheek Pad Bracket (A)
チ ー ク パ ッド ブ ラ ケ ット( B )
Cheek Pad Bracket (B)
チン
ストラ ッ プ
カバー
Chinstrap
Cover
プ レ ート
Plate

25 26
インターコムを取り付ける時
日本語
インターコムを取り付 け るときは 、インターコム ベ ー スカバ ーを 外し
ます。また、インターコムのバッテリーは、ヘルメットの後ろ下側に
あるバッテリースペースに配置します。
インターコム本体の取り付け、取り外し手順については、使用される
インターコムの取扱説明書を参照してください。
インターコムベースカバーの取り外し
図 1 の よ う に ツ メ を 押 し な が ら 、サ ー ビ ス ツ ー ル を イ ン タ ー コ ム
ベースとベースカバーの隙間に差し込み、インターコムベースの
前側の斜面と並行になるように、図1の矢印A方向にスライドさせて
取り外します。カバーを真下に引っ張ると、カバーが破損する恐れが
ありま す 。
インターコムベースカバーの取り付け
取り付 け 面 に あるベ ー ス ラインに 、インター コム ベ ー スカ バ ーの
上面をあわせ、矢印の方向に押し上げます(図2)。
When Installing the Intercom
English
When installing the intercom, remove the intercom base
covers. As to the battery, place it into the battery space at
the rear bottom of the helmet.
For installing and removing the intercom, please refer to
the instruction manual of the intercom you use.
Removing Intercom Base Cover
Insert the service tool in the gap between the intercom
base and the cover with pushing the tab down and at the
same time, sliding the cover down in the direction of the
arrow A shown in Drawing 1. Sliding down the cover
directly below may damage the base.
Installing the Intercom Base Cover
Align the upper side of the cover with the base line on the
intercom base (Drawing 2).
Slide the cover up onto the base in the direction of the
arrow shown.
ベ ー スラ イン
Base Line
前
Front
後
Rear
インターコム
ベースカバー
Intercom
Base Cover
インターコム ベ ー スカバ ー
Intercom Base Cover
サービスツール
Service Tool
ツメ
Tab
A
A
ベースカバーの上面
Upper side of cover
1
2
4
3
5
バッテリースペース用カバーの取り外し
ヘルメット側のツメを図3のように押しながら、バッテリースペース用カバーを
手前に引き出します。バッテリースペース用カバ ーを取り外した 後、バッテリー
スペースに入っているクッション材を取り外してください。
バッテリースペース用カバーの取り付け
バッテリースペース用カバーのツメ(3か所)を、図4のようにヘルメット側の固
定穴に差し込み、カチッと音がするまで押し込みます(図5)。
日本語
前
Front
バッテリースペース用カバー
Battery Space Cover
警告
●インターコムをご使用になる際、インターコムや接続機器の音量設定に
よっては周囲の音が聞こえなくなることがあります。ご使用にあたっては、
周囲の音を聞き取れるように音量設定してください。
●インターコムをヘルメットに取り付けていない場合は、必ず各インターコム
ベースカバーとバッテリースペース用カバーをヘルメットに取り付けた
状態で使用してください。
●インターコムは、必ずSHOEI推奨のGT-AirⅡ専用設計のものをご使用
ください。推奨品については、SHOEIの ウェブ サ イト
(https://www.shoei.com)をご確認ください。
●インターコムをご使用になる前に、ご使用になるインターコムの取扱説明
書を必ずお読みください。また、インターコム本体の取り扱いについては、
使用されるインターコムの取扱説明書を参照してください。
Removing the Battery Space Cover
Lift up the battery space cover pushing the tab in the direction of
the arrow in Drawing 3. After removing the cover, remove the
cushioning material from the space.
Installing the Battery Space Cover
Insert the hooks (3 points) of the battery space cover into the
fixed holes of the battery housing (Drawing 4) until they click into
position (Drawing 5).
English
WARNING
●When using the intercom, the sound from nearby vehicles can
be impaired depending on the volume settings of the intercom
and its connecting devices. Be sure to adjust your volume
accordingly so that your hearing is not impaired.
●When the intercom is not installed to the helmet, be sure to use
the helmet with the intercom base covers and the battery space
cover equipped.
●Be sure to use SHOEI recommended intercom exclusively
designed for GT-AirⅡ. For information about SHOEI
recommended intercoms, please refer to SHOEI official website
(https://www.shoei.com/).
●For information about handling the intercom, please refer to the
instruction manual of the intercom you use.
後
Rear
日本語
/English

2827
日本語
警告
1.ご使用のまえに、シールド左右のフックが確実にはまっ
て い るか 確 認し てくだ さい 。
2 . セ ン タ ー パ ッド 、チ ー ク パ ッド 、チ ン ス ト ラ ッ プ カ バ ー は 、
必ずすべて装着してご使用ください。
3.ヘルメットおよびシールドのお手入れに、40℃を超える
湯・塩 水・酸 性 ま た は ア ル カ リ 性 の 洗 剤・ベ ン ジ ン・シ ン
ナー・ガソリン・その他の有機溶剤・ガラスクリーナー
等、有機溶剤を含むクリーナー類は使用しないでくだ
さい。これらが付着すると、ヘルメットの構成部材が
変質し、安全性に支障をきたす可能性があります。
4.走行中に付着した虫による汚れは、放置すると塗装面を
浸食し、完全に除去できなくなりますので、すみやかに
取り除 い てください 。
5.シールドやサンバイザーや内装を交換する際は、必ず
純正部品を使用してください。
English
WARNING
1. Before use, check that the shield/visor hooks
and gears are fit firmly.
2. Be sure to always wear the center pad, cheek
pads, chinstrap covers when using the helmet.
3. When cleaning and caring for the helmet and
shield/visor, do not use any of the following
cleaning materials: hot water over 40℃; salt
water; any acidic or alkali detergent;
benzine, thinner, gasoline, or other organic
solvents; glass cleaner; or any cleaner
containing organic solvents. If any of these
cleaners are used, the helmet’s chemical nature
may be altered and safety may be hindered.
4. If insects become stuck to the helmet during
riding and are left in place, the helmet surface
may be corroded. They should be removed
promptly.
5. Be sure to use SHOEI genuine parts when
replacing the shield/visor, sun visor, or inner
parts.
E.Q.R.S.(エマージェンシー クイック リリース システム)とは、万が一の事故
の際、ヘルメットからチークパッドを引き抜くことで、救護者がライダーの頸部へ
の負担を最小限に抑えつつ、容易にヘルメットを取り外すことができるシステム
です。
緊急時にチークパッドを外すには、最初にチンストラップをほどくか切断し、ライ
ダーの頭部が動かないようにヘルメットを押さえ、赤いタブ部分(図1)を持ち、
図2で示された方向にエマージェンシータブを引っ張ります。(※チンカーテンが
装着されている場合は、エマージェンシータブを引き出すまえにチンカーテンを
取 り 外 し て く だ さ い 。)
エマージェンシータブを引っ張ることでチークパッドのホックが外れ 、ライダーが
ヘ ル メット を 被 っ た 状 態 の ま ま 、ヘ ル メット 下 部 か ら パ ッド を 引 き 抜 く こ と が で き
ます 。反 対 側 の チーク パッドも同じように 外します 。
チークパッドを外すときは、必ずヘルメットをしっかりと押さえ、ライダーの頭部を
動 か さな いよう注 意し てくだ さい 。
E.Q.R.S. (Emergency Quick Release System)
エ マー ジェン シ ー
タブ
Emergency
Tab
1
2
日本語
E.Q.R.S. (Emergency Quick Release System) is a mechanism for
emergency personnel to remove the cheek pads.
To remove a cheek pad in an emergency, cut or undo a chinstrap
first. While holding the helmet firmly so that the rider’s head may
not move, take emergency tab (Drawing 1) and pull it to a direction
indicated in the drawing 2. (If the chin curtain is installed, it must be
removed before using the emergency tab.)
Pulling the emergency tab will release snaps and allow a cheek
pad to be pulled out through the bottom of the helmet while it is still
on the rider’s head. Repeat the same procedure to remove the
other side.
Be sure to hold the helmet firmly and pay full attention not to move
the rider’s head while removing the cheek pads.
E.Q.R.S. (Emergency Quick Release System)
English
1. Make sure to hold the helmet firmly by
your hand when pulling out cheek pads.
2. Use genuine SHOEI cheek pads only and
never use non-SHOEI parts.
WARNING
1. Never pull the emergency tab while
riding.
2. Do not use Emergency Quick Release
System when removing a cheek pad for
maintenance.
1.ヘルメットからチークパッドを引き抜くとき、片方の
手で必ずヘルメットを固定してください。
2.必ず専用のチークパッドを使用してください。専用
の部品以外を取り付けたりしないでください。
警告
1. 走行中は絶対に使用しないでください。
2.普段、メンテナンスなどの目的でチークパッドを取り
外すときには使用しないでください。
このステッカーをヘルメットから剥がさないでください。
Never peel these stickers from a helmet.
3
日本語
/English

3029
日本語
パーツリスト
修理や交換用として下記オプションパーツをお求めいた
だけます。
パーツ交換の際は、同梱されている取扱説明書をご覧く
ださい。
● CNS-1シールド
● CNS-1シールドベースプレート2(右左)
● Q.R.S.A.ビス
● QSV-2サンバイザー
● PINLOCK®EVOlens(DKS301)
● アッパーエアインテーク
● チンカーテン
● ブレスガード
● センターパッド
● チークパッド(右左)
● チンストラップカバー(右左)
● イヤーパッド(右左)
English
Parts List
These optional parts are available for repair or
replacement.
To replace the parts, read the instruction manual
that comes packed with the parts.
● CNS-1 Shield/Visor
● CNS-1 Shield/Visor Base Plates2 (right and left)
● Q.R.S.A. screws
● QSV-2 Sun visor
● PINLOCK® EVO lens (DKS301)
● Upper Air Intake
● Chin Curtain
● Breath Guard
● Center Pad
● Cheek Pads (right and left)
● Chinstrap Covers (right and left)
● Ear Pads (right and left)
อ่านตรงนี้ก่อน
ตรวจสอบรายการในบรรจุภัณฑ์
คำอธิบายชิ้นส่วน
การ์ดจมูก
การใช้น้ำมันซิลิโคน
ม่านครอบคาง
หน้ากาก/กะบัง CNS-1
ข้อสังเกตสำคัญเกี่ยวกับการใ
ช้งานหน้ากาก/กะบัง CNS-1
การปรับหน้ากาก/กะบัง CNS-1
แผ่นบังแดด QSV-2
ข้อสังเกตสำคัญเกี่ยวกับการใ
ช้งานแผ่นบังแดด QSV-2
เลนส์ PINLOCK® EVO
เครื่องมือบำรุงรักษา
การเปลี่ยนชิ้นส่วนภายใน
การถอดชิ้นส่วนภายใน
แผ่นรองหู
การติดตั้งอินเตอร์คอม
ข้อสังเกตสำคัญเกี่ยวกับกา
รจัดการชิ้นส่วนภายใน
การติดตั้งอินเตอร์คอม
E.Q.R.S. (ระบบปล่อยฉุกเฉิน)
คำเตือน
รายชื่อชิ้นส่วน
먼저 읽어 주십시오.
포장 제품의 확인
각부의 명칭
코마개
실리콘 오일 사용 방법
턱마개
CNS-1 실드
실드 취급에 관한 주의사항
CNS-1 실드의 조정
QSV-2 선바이저
QSV-2 선바이저 취급에 관한 주의사항
PINLOCK® EVO lens
서비스 툴
내피 교환에 대해
내피 분리 방법
귀패드
내피 장착 방법
내피 취급에 관한 주의사항
인터컴을 장착할 때
E.Q.R.S. (Emergency Quick Release System)
경고
부품 목록
ไทย
한국어
31
32
33
34
34
35
36-37
38・39
40・41
42-43
44・45
46
46
47
48-49
49
50-51
52
53-54
55
56
57

이 상품은 오토바이용 헬멧입니다.
다른 목적으로 사용하지 마십시오. 다른 목적으로 이 헬멧을
사용하면 사고 시 보호 능력이 충분히 발휘되지 않을 수 있습니다.
헬멧이 모든 예측 가능한 고속 또는 저속의 충격으로부터
착용자를 보호하는 것은 불가능합니다.
머리 보호 능력을 최대한으로 끌어올리기 위해 헬멧을 머리에
적절하게 밀착시킨 후 턱끈을 턱 아래쪽에 단단히 매 주십시오.
헬멧을 머리에 고정했을 때 주변시야가 충분히 확보돼야 합니다.
헬멧이 너무 크면 바이크에 타고 내릴 때 헬멧이 비뚤어질 수
있으며, 그로 인해 사고 시 헬멧이 벗겨지거나 시야를 방해할
가능성이 있어 부상 및 사망의 원인이 됩니다. 헬멧을 올바르게
착용하는 방법은 “헬멧 사용법”을 참조해 주십시오. 설명서에
기재된 내용은 예고 없이 변경될 수 있습니다. 설명서에 실린
그림은 실제 제품과 다를 수 있습니다.
설명서의 저작권은 주식회사 SHOEI에 귀속됩니다. 본 설명서를
무단으로 복제 또는 복사하는 것을 엄격히 금지합니다.
1. หมวกนิรภัย
2. เลนส PINLOCK® EVO
3. การดจมูก
4. มานครอบคาง
5. ถุงใสหมวกนิรภัย
6. คูมือการใชงาน
7. คูมือความปลอดภัย
8. ฉลากเตือน (ปาย E-3: เฉพาะมาเลเซีย ฟลิปปนส ไทย)
9. สติกเกอรสัญลักษณ SHOEI (2)
10. สลัก PINLOCK®
11. เครื่องมือบำรุงรักษา
12. น้ำมันซิลิโคน
3231
5
6 12
11
2
3
WARNING
7 8
HOW TO USE
YOUR HELMET PROPERLY
4
1
10
9
포장 제품(상자, 완충재)은 수리 시 등에 사용할 수
있도록 가능한 한 보관하실 것을 권장하며, 폐기하실
경우에는 법령에 따라 올바르게 처리해 주십시오.
ขอแนะนำใหคุณเก็บกลองและวัสดุกันกระแทกไวใชในกร
ณีที่คุณตองการสงผลิตภัณฑหรือชิ้นสวนใดๆ
เพื่อเขารับการซอม หากคุณตองการทิ้งวัสดุเหลานี้
กรุณาปฏิบัติตามกฎหมายหรือขอบังคับที่เกี่ยวของ
먼저 읽어 주십시오.
อ่านตรงนี้ก่อน
ผลิตภัณฑ์นี้คือหมวกนิรภัยสำหรับรถจักรยานยนต์
หามใชสำหรับวัตถุประสงคอื่นๆ
นอกเหนือจากการขับขี่รถจักรยานยนต
หากคุณใชหมวกนิรภัยนี้สำหรับวัตถุประสงคอื่นๆ
หมวกอาจไมสามารถใหการปกปองไดอยางเพียงพอเมื่อเกิดอุบัติเหตุ
ไม่มีหมวกนิรภัยชนิดใดสามารถปกป้องผู้สวมใส่จา
กแรงปะทะที่คาดการณ์ได้ได้ทุกรณี
ไม่ว่าด้วยความเร็วสูงหรือความเร็วต่ำ
เพื่อการปองกันสวนศีรษะที่มีประสิทธิภาพสูงสุด
หมวกนิรภัยตองกระชับอยางพอดีและตองรัดระบบยึดจับที่บริเวณใ
ตคางอยางแนนหนา
หมวกนิรภัยควรใหทัศนวิสัยบริเวณโดยรอบระยะการมองเห็นอยางเ
พียงพอเมื่อสวมลงบนศีรษะของคุณ
หากหมวกนิรภัยของคุณใหญเกินไป
หมวกอาจลื่นหลุดหรือขยับอยูบนศีรษะของคุณขณะขับขี่
ซึ่งอาจทำใหหมวกนิรภัยของคุณหลุดออกหากเกิดอุบัติเหตุ
หรือบดบังทัศนวิสัยขณะขับขี่
สงผลใหคุณไดรับบาดเจ็บหรือถึงแกชีวิตได
สำหรับการสวมและรัดหมวกนิรภัยของคุณอยางเหมาะสม
โปรดอานเอกสาร “การใชงานหมวกนิรภัยของคุณอยางเหมาะสม”
ที่แนบมาพรอมกับหมวกนิรภัยของคุณ
เนื้อหาของคูมือฉบับนี้อาจมีการเปลี่ยนแปลงไดโดยไมจำเปนตองแจ
งใหทราบ
ภาพประกอบในคูมือฉบับนี้อาจแตกตางไปจากผลิตภัณฑจริง
ลิขสิทธิ์สำหรับคูมือฉบับนี้เปนของ SHOEI CO., LTD.
หามทำซ้ำหรือทำสำเนาคูมือฉบับนี้โดยไมไดรับอนุญาตเปนลายลักษ
ณอักษรอยางเด็ดขาด
นิยามของ “ขวา” และ “ซาย”
ในคูมือฉบับนี้พิจารณาจากมุมมองของผู
ขับขี่ที่กำลังสวมใสหมวกนิรภัยนี้
본 취급설명서에 표기된 “우”, “좌”는
헬멧을 쓴 상태에서 착용자가 본
“우측”, “좌측”에 대응합니다.
ขวา
우
ซาย
좌
한국어
ไทย
ไทย
/
한국어
1. 헬멧
2. PINLOCK® EVO lens
3. 코마개
4. 턱마개
5. 헬멧 백
6. 취급설명서
7. 안전설명서
8. E-3 태그 (말레이시아, 필리핀, 타이 수출용만)
9. SHOEI 로고 스티커
10. PINLOCK® 핀
11. 서비스 툴
12. 실리콘 오일
포장 제품의 확인
ตรวจสอบรายการในบรรจุภัณฑ์
ไทย
한국어
본 제품을 개봉한 후 부품 및 부속품이 전부 들어 있는지 확인해
주십시오.
หลังจากเปดกลองบรรจุภัณฑ
กรุณาตรวจสอบวามีชิ้นสวนและอุปกรณทั้งหมดอยางครบถวน

33 34
ระบบระบายอากาศขจัดฝา
디프로스터
ชองลมเขาดานลาง/로어 에어 인테이크
หามเคลื่อนยายหรือถือหมวกนิรภัยโดยจับที่การดจมูก
การดจมูกอาจหลุดออกมาและหมวกนิรภัยอาจรวงหลนได
การดจมูกชวยลดการเกิดฝาจากการหายใจที่บริเวณหนากาก/กะบัง
การติดตั้งการดจมูกสามารถทำไดตามขั้นตอนตอไปนี้
การติดตั้งการ์ดจมูก
สอดการดจมูกเขาไปในชองวางระหวางตัวระบายอากาศขจัดฝาและ
ชั้นกำบัง ดังที่แสดงในรูปภาพ หลังจากการติดตั้งการดจมูก
ตรวจสอบวาชิ้นสวนไดรับการยึดไวอยางมั่นคง
การถอดการ์ดจมูก
ดึงการดจมูกออกจากชองวางระหวางตัวระบายอากาศขจัดฝาและชั้
นดูดซับแรงกระแทก เมื่อคุณดึงการดจมูกออก
ดานหลังของขอบเขามุมกระจกอาจหลุดออกมาดวย
หากเกิดเหตุเชนนี้ ใชนิ้วโปงและนิ้วชี้จับที่ขอบเขามุมกระจก
แลวใสกลับเขาไปในตำแหนงเดิม
헬멧을 옮길 때 등에 코마개를 잡지 마십시오. 부품이
분리돼 헬멧이 떨어지면 파손될 가능성이 있습니다.
เพื่อการซีลที่ดียิ่งขึ้นของหนากาก/กะบัง
ใหใชน้ำมันซิลิโคนที่ใหมาดวยทาที่ขอบเขามุมกระจก กอนอื่น
ใหกำจัดรอยเปอนหรือฝุนออก
แลวทาน้ำมันเพียงเล็กนอยลงบนสวนที่ก
ำหนด ตามรูปภาพ
เช็ดน้ำมันสวนเกินออก
ถามีคราบซิลิโคนบนหนากาก/กะบัง
อาจเปนอุปสรรคตอการมองเห็นของคุณ
ตรวจดูการหลอลื่นใหเพียงพออยางเปนป
ระจำ
การใช้น้ำมันซิลิโคน
2
1
6
5
4
3
11
12
13
การเปดระบบอากาศบนหมวกนิรภัยอาจทำใหระดั
บของเสียงรบกวนสูงขึ้น
벤틸레이션을 열면 주변의 소리가 크게 들릴 수 있으며,
승차 자세에 따라서는 윈드 노이즈가 발생할 수
있습니다.
7 8 9 10
เปด/열림
코마개는 호흡에 의해 실드에 김이 서리는 것을 경감시킵니다.
코마개를 장착할 때에는 아래의 방법으로 장착합니다.
코마개 장착 방법
그림과 같이 코마개를 디프로스터와 마스크 내장재 사이에
끼우고 위쪽에서 밀어 넣습니다. 장착한 후 코마개가 확실하게
고정됐는지 확인해 주십시오.
코마개 분리 방법
디프로스터와 마스크 내장재 사이에서 코마개를 당겨 빼냅니다.
코마개를 당길 때 페이스 커버에서 창고무 안쪽이 빠져나올 수
있습니다. 이러한 경우에는 창고무를 잡아 원래 상태로 되돌린 후
사용해 주십시오.
실드와 창고무의 밀착성을 유지하기 위해 점선으로 표시된
위치에 부속된 실리콘 오일을 소량 도포해 주십시오. 실리콘
오일은 이물질이나 먼지를 제거한 후 도포해 주십시오. 실리콘
오일이 실드에 묻으면 시야를 가릴
우려가 있으므로 여분의 실리콘 오일은
반드시 닦아내 주십시오. 항상 쾌적하게
사용하실 수 있도록 정기적인 관리를
권장합니다.
실리콘 오일 사용 방법
1. 로어 에어 인테이크
2. 디프로스터
3. 선바이저 잠금 레버
4. CNS-1 실드
5. QSV-2 선바이저
6. 선바이저 홀더
7. 어퍼 에어 인테이크
8. 셸
9. 충격 흡수 내장재
10. 톱 에어 아웃렛
11. 실드 베이스
12. 선바이저 레버
13. 턱끈
1. ชองลมเขาดานลาง
2. ระบบระบายอากาศขจัดฝา
3. กานล็อกแผนบังแดด
4. หนากาก/กะบัง CNS-1
5. แผนบังแดด QSV-2
6. ตัวจับแผนบังแดด
7. ชองลมเขาดานบน
8. เปลือกหมวก
9. ชั้นดูดซับแรงกระแทก
10. ชองลมออกดานบน
11. ฐานหนากาก/กะบัง
12. กานปรับที่บังแดด
13. สายรัดคาง
ไทย
/
한국어
각부의 명칭
คำอธิบายชิ้นส่วน
한국어
ไทย
코마개
การ์ดจมูก
ไทย
한국어
ชองลมออกดานบน/톱 에어 아웃렛
ชองลมเขาดานบน/어퍼 에어 인테이크
ปด/닫힘
ปด/닫힘
กึ่งเปด/반열림
เปด/열림
ชั้นกำบัง
마스크 내장재
ตัวระบายอากาศขจัดฝา
성애 제거장치

35 36
1. เมื่อติดมานครอบคาง เสียงจากยานพาหนะภายนอกจะเบาลง
โปรดระมัดระวังประเด็นดังกลาวในขณะขับขี่
2. หามเคลื่อนยายหรือถือหมวกนิรภัยโดยจับที่มานครอบคาง
มานครอบคางอาจหลุดออกมาและหมวกนิรภัยอาจรวงหลนได
หามขับขี่รถจักรยานยนตดวยความเร็วสูงขณะที่หนากาก/กะบังอยูในตำแหนงเปดเล็กนอ
ย หนากาก/กะบังอาจเปดออกจนสุดโดยไมไดคาดหมาย ซึ่งอาจเปนอันตรายอยางมาก
การถอดหน้ากาก/กะบัง CNS-1
1. เปดหนากาก/กะบังใหอยูในตำแหนงเปดออกจนสุด ดังที่แสดงในรูปภาพ 1
2. ยกหนากาก/กะบังโดยดึงสลักลง แลวปลดตะขอ (A) และ (B) ดังที่แสดงในรูปภาพ 2
จากนั้นปลดหนากาก/กะบังโดยเลื่อนตะขอ (C) ตามทิศทางของลูกศร
ดังที่แสดงในรูปภาพ 3
3. ทำในลักษณะเดียวกันสำหรับอีกดานหนึ่ง
คำเตือน
หน้ากาก/กะบัง CNS-1
ไทย
กอนการใชงานหนากาก/กะบังเปนครั้งแรกหลังจากที่ซื้อมา
ใหถอดฟลมปองกันออกจากหนากาก/กะบังกอน
หากคุณดึงหนากาก/กะบัง CNS-1 ลงมาจนสุด ลิ้นหนากาก/กะบังจะเกี่ยวเขากับตะขอ
ขอแนะนำใหคุณใชหนากาก/กะบังในตำแหนงนี้ขณะขับขี่รถจักรยานยนตของคุณ
(รูปภาพ A)
ตำแหน่งเปิดเล็กน้อย
ในกรณีที่หนากาก/กะบังมีฝา
สามารถกำจัดฝาไดโดยการปรับหนากาก/กะบังไปที่ตำแหนงเปดเล็กนอย
ดังที่แสดงในรูปภาพ B แลวขับขี่รถจักรยานยนตดวยความเร็วต่ำ
เพื่อใหอากาศไหลเวียนภายในหมวกนิรภัย
CNS-1 실드
한국어
실드는 보호 필름을 뗀 후 사용해 주십시오.
실드를 완전히 내리면 실드 노브가 훅에 걸립니다. 주행 시에는 이 포지션을
유지할 것을 권장합니다. (그림A)
실드 미세 개방 포지션
실드에 김이 서렸을 때 그림B와 같이 미세 개방 포지션에 두고 저속 주행하면 헬멧
내부가 환기돼 김서림을 제거할 수 있습니다.
한국어
1. 턱마개를 장착하면 주변의 자동차나 바이크 소리가 평소보다 작게 들리므로 운전 시 특히
주의해 주십시오.
2. 헬멧을 옮길 때 등에 턱마개를 잡지 마십시오. 부품이 분리돼 헬멧이 떨어지면 파손될
가능성이 있습니다.
턱마개는 헬멧의 턱 주변으로 유입되는 것과 윈드 노이즈를 저감시킵니다. 턱마개는 탈착
가능합니다. 아래에 기재된 방법에 따라 장착 또는 분리합니다.
턱마개 분리 방법
볼패드 브래킷에서 플레이트 양쪽 끝의 노치를 당겨 빼냅니다. 이때 턱마개를 강하게
당기거나 비틀면 플레이트가 파손될 우려가 있으므로 주의해 주십시오.
턱마개 장착 방법
볼패드를 먼저 장착한 후 턱마개를 장착합니다. 우선 그림1과 같이 고무몰딩을 젖히면서
한쪽 플레이트 끝의 노치(A)를 볼패드 브래킷의 보스에 끼웁니다. 그 상태에서 고무몰딩을
젖히면서 끝부터 순서대로 플레이트를 셸과 충격 흡수 내장재 사이에 끼우고 반대쪽 노치도
같은 방법으로 보스에 끼웁니다. (그림2) 마지막으로 그림3과 같은 상태가 됐는지 확인해
주십시오.
미세 개방 포지션에서 고속 주행하면 실드가 갑자기 열릴 우려가 있어 위험합니다.
고속 주행 시에는 사용하지 마십시오.
실드 분리 방법
1. 실드를 완전 열림 상태로 만듭니다. (그림1)
2. 트리거를 아래로 당기면서 실드를 앞쪽으로 들어 올려 훅(A)와 훅(B)를 뺀 후(그림2),
훅(C)를 훅 레일에서 화살표 방향으로 빼 분리합니다. (그림3)
3. 반대쪽도 같은 방법으로 분리합니다.
턱마개
경고 경고
(A)
1
B
A
2
3
1
2
3
ม่านครอบคาง
ไทย
มานครอบคางชวยลดปริมาณลมและเสียงรบกวนจากลมที่เขาไปในบริเวณสวนคางของหมวกนิ
รภัยได มานครอบคางสามารถถอดออกได
การถอดหรือติดตั้งมานครอบคางสามารถทำไดโดยทำตามขั้นตอนตอไปนี้
การถอดม่านครอบคาง
จากโครงยึดแผนรองแกม ใหดึงสวนเวาที่ใกลกับขอบทั้งสองดานของเพลทออก
หามบิดหรือดึงอยางรุนแรง มิฉะนั้นสวนเวาของเพลทอาจชำรุดเสียหายได
การติดตั้งม่านครอบคาง
ติดตั้งแผนรองแกมกอนการติดตั้งมานครอบคาง พลิกขอบเขามุมดานลางขึ้นแลวยกขึ้น
ยึดสวนเวาของเพลท (A) ที่หลักของโครงยึดแผนรองแกมดานหนาใหแนน ดังที่แสดงในรูปภาพ
1 ใสเพลทระหวางเปลือกหมวกและชั้นดูดซับแรงกระแทกจากดานหนึ่งไปยังอีกดานหนึ่ง
แลวยึดสวนเวาของเพลทเขากับหลักของขอบอีกดานหนึ่งของมานครอบคาง (รูปภาพ 2)
หลังจากการติดตั้ง
ตรวจสอบใหแนใจวามานครอบคางไดรับการติดตั้งในตำแหนงดังที่แสดงในรูปภาพ 3
ไทย
/
한국어
เพลท
플레이트
ตะขอ (C)
훅(C)
หนากาก/กะบัง
실드
สลัก
트리거
ตะขอ (A)
훅(A)
ตะขอ (B)
훅(B)
คำเตือน

37 38
คำเตือน
หากไมไดยึดตะขอและเฟองอยางแนนหนาที่ฐานหนากาก/กะบัง
อาจทำใหหนากาก/กะบังหลุดออกขณะขับขี่และอาจเกิดอุบัติเหตุขึ้นไ
ด หลังจากติดตั้งหนากาก/กะบัง CNS-1 แลว
ใหเปดและปดหนากาก/กะบังสองถึงสามครั้งเพื่อใหแนใจวาประกอบต
ะขอและเฟองอยางแนนหนา เมื่อหนากาก/กะบังปดสนิท
ตรวจสอบใหแนใจวาตะขอเกี่ยวที่ลิ้นหนากาก/กะบัง
6. ถอดฟลมปองกันออกกอนใชงานหนากาก/กะบังเปนครั้งแรก
7. หลังจากการทำความสะอาดหรือการเปลี่ยนเพลทฐาน
ใหปดหนากาก/กะบัง
แลวตรวจสอบใหแนใจวาหนากากแนบกับขอบเขามุมกระจกไ
ดอยางสนิททุกดาน
ถามีชองวางระหวางหนากาก/กะบังและขอบเขามุมกระจก
ใหปรับตำแหนงของเพลทฐานและแกไขระยะหางดังกลาว
เนื่องจากอาจทำใหลมหรือเสียงรบกวนลอดผานได
8. ในการขันสกรู ใหใชไขควงแฉกเบอร 2
วางในแนวตั้งแลวหมุนอยางระมัดระวัง
ถาใชไขควงที่มีขนาดไมเหมาะสมหรือใชไขควงไฟฟา
หัวสกรูอาจเสียหายได ในการเปลี่ยน
ใหใชสกรูของแทซึ่งผลิตจากอะลูมิเนียม ถาขันสกรูแนนเกินไป
อาจทำใหอุปกรณชำรุดได (คาแรงขันที่แนะนำ: 80 cN.m
หรือประมาณ 8 kgf.cm)
9. หามติดสติกเกอรหรือเทปกาวในบริเวณระยะการมองเห็นของ
หนากาก/กะบัง
ไทย
การติดหน้ากาก/กะบัง CNS-1
1.ปรับหนากาก/กะบังไปที่ตำแหนงเปดออกจนสุด
แลวใสตะขอหนากาก/กะบัง (C) ดังที่แสดงในรูปภาพ 4
2. กดบริเวณที่มีลูกศรกำกับของหนากาก/กะบัง ดังที่แสดงในรูปภาพ
5 จนกระทั่งไดยินเสียงคลิก จากนั้นใสตะขอ (A) และ (B)
เขาตำแหนงใหแนน ดังที่แสดงในรูปภาพ 6
3. ทำในลักษณะเดียวกันสำหรับอีกดานหนึ่ง
4.เปดและปดหนากาก/กะบังสองถึงสามครั้ง
แลวตรวจสอบใหแนใจวาตะขอทั้งหมดไดรับการยึดอยางมั่นคง
1.ห้ามใช้หน้ากาก/กะบังแบบสีชาหรือสเปกตรัมร่วมกั
บแผ่นบังแดด
มิฉะนั้นการมองเห็นของคุณจะถูกจำกัดและอาจเป็น
อันตรายอย่างยิ่ง
2.รอยเปอนหรือรอยขีดขวนบนหนากาก/กะบังอาจบดบังทัศนวิสัยข
องคุณขณะขับขี่และอาจเปน
อันตรายอยางยิ่ง! หากหนากาก/กะบัง CNS-1
เกิดรอยเปอนหรือรอยขีดขวน ใหหยุดใชงานในทันที
ถอดหนากาก/กะบังออกมาและทำความสะอาดหรือเปลี่ยนใหม
3. ควรทำความสะอาดหนากาก/กะบัง CNS-1 ดวยน้ำสบูออนๆ
ที่มีคุณสมบัติเปนกลาง
ลางออกใหสะอาดดวยน้ำสะอาดและเช็ดใหแหงดวยผานุม
ห้ามใช้สารทำความสะอาดต่อไปนี้:
น้ำร้อนที่มีอุณหภูมิเกิน 40℃ น้ำเกลือ
สารช่วยทำความสะอาดที่มีฤทธิ์เป็นกรดหรือด่าง
เบนซีน ทินเนอร์ น้ำมันเบนซิน
หรือตัวทำละลายอินทรีย์ชนิดอื่นๆ
ผลิตภัณฑ์ทำความสะอาดกระจก
ผลิตภัณฑ์ทำความสะอาดทุกชนิดที่ประกอบด้วยตัว
ทำละลายอินทรีย์
หากใชสารทำความสะอาดเหลานี้
คุณสมบัติทางเคมีของหนากาก/กะบังอาจมีการเปลี่ยนแปลง
และอาจสงผลตอความปลอดภัย
4.หามขับขี่ขณะหนากาก/กะบังมีฝา
เนื่องจากอาจบดบังทัศนวิสัยของคุณและอาจเปนอันตรายอยางยิ่ง
หากหนากาก/กะบัง CNS-1 เกิดฝา
ใหเปดชองลมเขาดานลางเพื่อระบายอากาศภายในหมวกนิรภัยและ
กำจัดฝาที่หนากาก/กะบัง การใชเลนส PINLOCK® EVO
สามารถยับยั้งฝาไดอยางมีประสิทธิภาพเชนกัน
5. ใชเลนส PINLOCK® EVO ของแทจาก SHOEI สำหรับ CNS-1
เสมอ ในการติดตั้งเลนส PINLOCK® EVO
โปรดอานคำแนะนำที่แนบมาดวย
주의사항
훅이나 기어가 실드 베이스에 끼워져 있지 않으면 주행 중에 실드가
빠져 예기치 못한 사고를 일으킬 가능성이 있습니다. 장착한 후에는
실드 개폐 조작을 여러 번 반복해 훅이나 기어가 확실하게 끼워졌는지
확인해 주십시오. (그림6) 또한 실드를 완전히 내린 상태에서 실드
노브가 훅에 걸리는지 확인해 주십시오.
한국어
실드 장착 방법
1. 실드를 완전 열림 상태의 위치에 맞춘 후 훅(C)를 훅 레일에
끼웁니다. (그림4)
2. 실드의 화살표 부근을 찰칵 소리가 나면서 고정될 때까지 위에서
눌러(그림5) 훅(A)와 훅(B)를 훅 레일에 단단히 채웁니다. (그림6)
3. 반대쪽도 같은 방법으로 장착합니다.
4. 마지막으로 실드 개폐 조작을 여러 번 반복해 훅이 실드 베이스에
확실하게 끼워졌는지 확인해 주십시오.
✓
ข้อสังเกตสำคัญเกี่ยวกับการใช้งานหน้ากาก/กะบัง CNS-1
ไทย
4
5
6
ไทย
/
한국어
ตะขอ (C)
훅(C)
ราวตะขอ
훅 레일
หนากาก/กะบัง
실드
ขนาด
(เบอร 2)
ตะขอ (A)
훅(A)
ตะขอ (B)
훅(B)
Other manuals for GT-Air II
1
Table of contents
Other SHOEI Motorcycle Accessories manuals

SHOEI
SHOEI RF-1400 User manual

SHOEI
SHOEI CJ-2SP User manual

SHOEI
SHOEI RF-1400 User manual

SHOEI
SHOEI VFX-WR User manual

SHOEI
SHOEI GT-Air II User manual

SHOEI
SHOEI HORNET ADV User manual

SHOEI
SHOEI RF-1400 User manual

SHOEI
SHOEI Neotec 2 User manual

SHOEI
SHOEI NXR User manual

SHOEI
SHOEI X-Fifteen User manual
Popular Motorcycle Accessories manuals by other brands

Inuheat
Inuheat PowerPacks quick start guide

Most
Most V1000 instruction manual

Jesse Luggage
Jesse Luggage Slide Lock Plate install guide

Two Brothers Racing
Two Brothers Racing 005-31801 installation instructions

hepco & becker
hepco & becker 630989 00 02 installation instructions

Petzl
Petzl ALVEO VENT manual