manuals.online logo
Brands
  1. Home
  2. •
  3. Brands
  4. •
  5. SHOEI
  6. •
  7. Motorcycle Accessories
  8. •
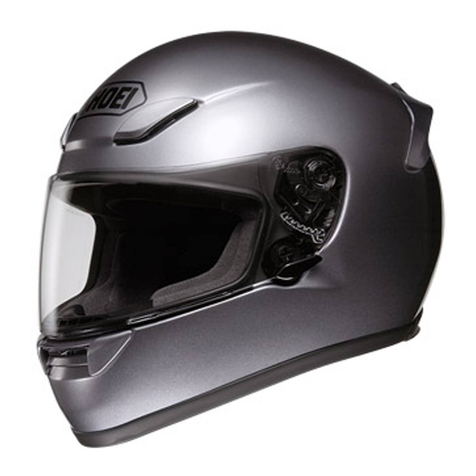
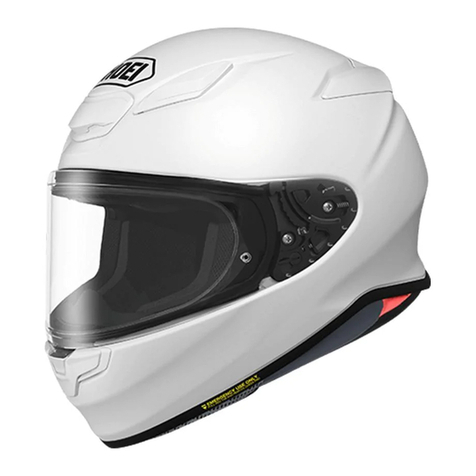
  9. SHOEI RF-1400 User manual

SHOEI RF-1400 User manual

Suomalainen
Polski
Svenska
MANUAL
shoei.com
Cautions:
1. Be careful not to scratch the surface of the shell when removing
ventilation parts.
2. Performance of the double-sided tape deteriorates when repasted.
3. Be careful not to mount the parts in places other than the original
positions. Otherwise, rain water may leak inside or the parts may
fall off.
4. Don’t use benzine, thinner, gasoline, glass cleaner, or any other
organic solvents in maintenance. Otherwise, parts may be
damaged.
Before removing the top air outlet, first wrap a flathead screwdriver or other tool
with a flat end in a cloth to prevent damage to the shell. Insert the tool into the
gap between the cover and shell. Remove the double-sided tape from the back
of the cover along the arrows as shown in Drawing 1 and then remove the
cover. Insert the tool into the gap between the base and shell. Remove the
double-sided tape from the back of the base along the arrows as shown in
Drawing 2 and then remove the base. After removing the cover and base,
clean off any double-sided tape, marks, dust, or oil remaining on the surface of
the shell.
Before attaching a new base, remove the protective film from the double-sided
tape on the back of the new base, align the base holes with the air outlet holes
of the shell, and attach the base to the area with dotted lines in Drawing 3.
Before doing this, cover the base with a soft cloth and then press down firmly
to attach it. Remove the protective film from the double-sided tape on the back
of the new cover, insert the cover pins on the back into the holes of the shell,
and attach the cover as shown in Drawing 4. Firmly press the double-sided
tape areas of the cover (areas with dotted lines in Drawing 5) and secure the
cover.
Attention:
1. Prenez garde à ne pas rayer la surface de la coque lors de l’extraction
des ventilations.
2. L’adhésif double-face n’adhèrera pas correctement s’il est décollé et
recollé.
3. Prenez garde à ne pas monter les pièces dans des endroits
autres que les emplacements d’origine. Sinon, de l’eau de pluie
peut s’infiltrer à l’intérieur ou les pièces peuvent tomber.
4. Ne pas utiliser de benzène, diluant, essence, produit à vitre ou
tout autre solvant organique lors de l’entretien afin de ne pas
endommager les pièces.
Avant de retirer l’évacuation d’air supérieure, entourez d’abord un tournevis à
tête plate ou un autre outil à extrémité plate dans un chiffon afin d’éviter
d’endommager la coque. Insérez l’outil dans l’interstice entre le couvercle et la
coque. Retirez le ruban adhésif double face à l’arrière du couvercle le long des
flèches, comme indiqué dans le schéma 1, puis retirez le couvercle. Insérez
l’outil dans l’interstice entre la base et la coque. Retirez le ruban adhésif double
face à l’arrière de la base le long des flèches, comme indiqué dans le schéma
2, puis retirez la base. Après avoir retiré le couvercle et la base, nettoyez toute
trace d’adhésif double face, de marques, de poussière ou d’huile restant sur la
surface de la coque.
Avant de fixer une nouvelle base, retirez le film protecteur du ruban adhésif
double face à l’arrière de la nouvelle base, alignez les trous de base avec les
trous de sortie d’air de la coque, et fixez la base sur la partie indiquée par des
lignes pointillées dans le schéma 3. Avant de le faire, couvrez la base avec un
chiffon doux, puis appuyez fermement dessus pour la fixer. Retirez le film
protecteur du ruban adhésif double face à l’arrière du nouveau couvercle,
insérez les projections du couvercle à l’arrière dans les trous de la coque, et
fixez le couvercle comme indiqué dans le schéma 4. Appuyez fermement sur
les zones du ruban adhésif double face du couvercle (parties indiquées par
des lignes pointillées dans le schéma 5) et fixez le couvercle.
Vorsichtsmaßnahmen:
1.Achten Sie darauf, dass die Helmschalenoberfläche beim Entfernen
der Lüftungsteile nicht zerkratzt wird.
2.Die Performance von doppelseitigem Klebeband verschlechtert sich,
wenn es zum wiederholten Male benutzt wird.
3. Achten Sie darauf, die Teile nicht an anderen als den
ursprünglichen Stellen zu montieren. Andernfalls kann
Regenwasser ins Innere gelangen oder die Teile können abfallen.
4. Verwenden Sie kein Benzin, Verdünner, Glasreiniger oder andere
organische Lösungsmittel im Rahmen der Instandhaltung.
Andernfalls können Teile beschädigt werden.
Wickeln Sie vor dem Entfernen des oberen Luftauslasses zunächst einen
Schlitzschraubenzieher oder ein anderes Werkzeug mit einem flachen Ende in
ein Tuch, um eine Beschädigung der Helmschale zu vermeiden. Führen Sie
das Werkzeug in den Spalt zwischen Abdeckung und Helmschale ein.
Entfernen Sie das doppelseitige Klebeband von der Rückseite der Abdeckung
entlang den Pfeilen, wie in Zeichnung 1 gezeigt, und entfernen Sie
anschließend die Abdeckung. Führen Sie das Werkzeug in den Spalt zwischen
Grundplatte und Helmschale ein. Entfernen Sie das doppelseitige Klebeband
von der Rückseite der Grundplatte entlang den Pfeilen, wie in Zeichnung 2
gezeigt, und entfernen Sie anschließend die Grundplatte. Entfernen Sie nach
dem Abnehmen von Abdeckung und Grundplatte alle Reste des doppelseitigen
Klebebandes, Schmutz, Staub und Öl von der Oberfläche der Helmschale.
Entfernen Sie vor dem Einsetzen einer neuen Grundplatte die Schutzfolie vom
doppelseitigen Klebeband auf der Rückseite der neuen Grundplatte, richten
Sie die Öffnungen in der Grundplatte an den Auslassöffnungen in der
Helmschale aus, und setzen Sie die Grundplatte in den in Zeichnung 3 mit
gepunkteten Linien gekennzeichneten Bereich ein. Decken Sie die Grundplatte
vorher mit einem weichen Tuch ab und drücken Sie sie dann fest nach unten,
um sie zu befestigen. Entfernen Sie die Schutzfolie vom doppelseitigen
Klebeband auf der Rückseite der neuen Abdeckung, führen Sie die Stifte an
der Rückseite der Abdeckung in die Löcher in der Helmschale ein und bringen
Sie die Abdeckung wie in Zeichnung 4 gezeigt an. Drücken Sie fest auf die
Bereiche der Abdeckung mit dem doppelseitigen Klebeband (Bereiche mit
gepunkteten Linien in Zeichnung 5) und befestigen Sie die Abdeckung.
English
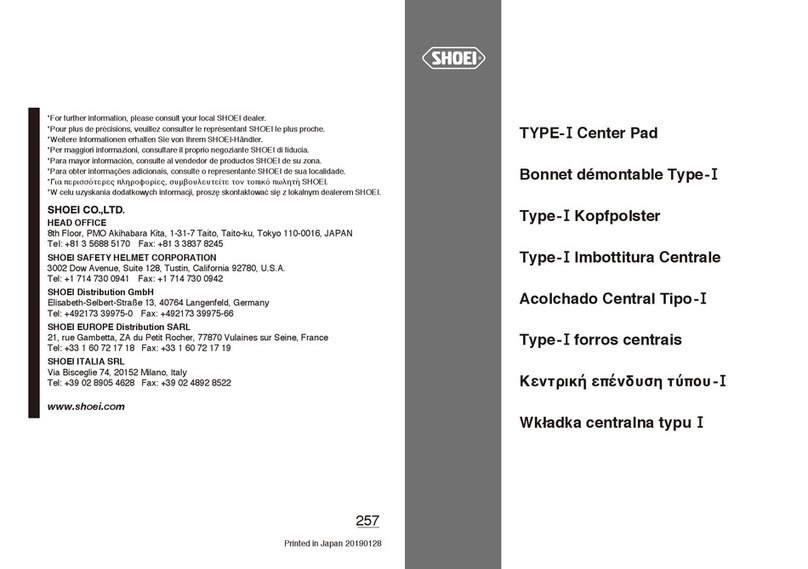
How to replace the NXR2/ RF-1400
top air outlet and cautions
Français
Comment remplacer l’évacuation d’air supérieure
NXR2/ RF-1400 et précautions
Austausch des oberen Luftauslasses beim
NXR2/ RF-1400 und Vorsichtshinweise
355
Cover/Couvercle
/Abdeckung
Deutsch
Base
Base
Grundplatte
Double-sided tape/Ruban adhésif double face
Doppelseitiges Klebeband
HEAD OFFICE 8th Floor, 1-31-7 Taito, Taito-ku, Tokyo 110-0016, JAPAN Tel: +81 3 5688 5170 Fax: +81 3 3837 8245
SHOEI SAFETY HELMET CORPORATION 3002 Dow Avenue, Suite 128, Tustin, California 92780, U.S.A. Tel: +1 714 730 0941 Fax: +1 714 730 0942
SHOEI Distribution GmbH
Elisabeth-Selbert-Straße 13, 40764 Langenfeld, Germany Tel: +492173 39975-0 Fax: +492173 39975-66
SHOEI EUROPE Distribution SARL 21, rue Gambetta, ZA du Petit Rocher, 77870 Vulaines sur Seine, France Tel: +33 1 60 72 17 18 Fax: +33 1 60 72 17 19
SHOEI ITALIA SRLVia Bisceglie 74, 20152 Milano, Italy Tel: +39 02 8905 4628 Fax: +39 02 4892 8522
www.shoei.com Printed in Japan 20201218
21 3 465
Precauciones:
1. Tenga cuidado de no rayar la superficie de la
calota al retirar las piezas de ventilación.
2. El rendimiento de la cinta adhesiva de doble
cara se deteriora cuando se vuelve a pegar.
3. Tenga cuidado de no montar las piezas en
lugares distintos de las posiciones
originales. De lo contrario, podría penetrar
agua de lluvia en su interior o las piezas
podrían caerse.
4. No use benceno, diluyente, gasolina,
productos para limpiar cristales ni cualquier
otro disolvente orgánico durante el
mantenimiento. En caso contrario, algunas
piezas podrán resultar dañadas.
Antes de extraer la salida de aire superior, en primer
lugar, envuelva el destornillador de cabeza plana o
cualquier otra herramienta con un extremo plano en un
paño para evitar que se produzcan daños en la calota.
Introduzca la herramienta en el espacio entre la cubierta
y la calota. Retire la cinta adhesiva de doble cara de la
parte trasera de la cubierta a lo largo de las flechas tal y
como se muestra en el Dibujo 1 y, a continuación, retire
la cubierta. Introduzca la herramienta en el espacio entre
la base y la calota. Retire la cinta adhesiva de doble cara
de la parte trasera de la base a lo largo de las flechas tal
y como se muestra en el Dibujo 2 y, a continuación,
retire la base. Después de extraer la cubierta y la base,
limpie los restos de cinta adhesiva de doble cara, las
marcas, el polvo o el aceite que queden en la superficie
de la calota.
Antes de colocar la nueva base, retire la película
protectora de la cinta adhesiva de doble cara de la parte
trasera de la nueva base, alinee los orificios de la base
con los orificios de la salida del aire de la calota y
coloque la base en el área con líneas discontinuas
indicada en el Dibujo 3. Antes de hacerlo, cubra la base
con un paño suave y, a continuación, presione
firmemente para colocarla. Extraiga la película
protectora de la cinta adhesiva de doble cara de la parte
trasera de la nueva cubierta, introduzca los pines de la
cubierta en la parte trasera en los orificios de la calota e
instale la cubierta tal y como se muestra en el Dibujo 4.
Presione firmemente las zonas de cinta adhesiva de
doble cara de la cubierta (las zonas con líneas
discontinuas en el Dibujo 5) y asegure la cubierta.
Precauções:
1. Tenha cuidado para não arranhar a superfície
do casco ao remover as peças de ventilação.
2. O desempenho da fita adesiva de dupla face
deteriora-se quando reposta.
3. Tenha cuidado para não montar as peças em
lugares diferentes das posições originais.
Caso contrário, pode entrar água da chuva
no interior ou as peças podem cair.
4. Na manutenção, não usar benzina, diluente,
gasolina, detergente limpa-vidros ou
quaisquer outros solventes orgânicos; caso
contrário, os componentes poderão ser
danificados.
Antes de remover a saída de ar superior, enrole primeiro
uma chave de fendas ou outra ferramenta com uma
extremidade plana num pano para evitar danos no
casco. Insira a ferramenta na folga entre a tampa e o
casco. Retire a fita adesiva de dupla face da parte de
trás da tampa na direção das setas, conforme mostrado
no Desenho 1, e depois retire a tampa. Insira a
ferramenta na folga entre a base e o casco. Retire a fita
adesiva de dupla face da parte de trás da base na
direção das setas, conforme mostrado no Desenho 2, e
depois retire a base. Após remover a tampa e a base,
limpe qualquer fita adesiva de dupla face, marcas, pó ou
óleo remanescente da superfície do casco.
Antes de colocar uma nova base, remova a película
protetora da fita adesiva de dupla face na parte de trás
da nova base, alinhe os orifícios da base com os
orifícios da saída de ar do casco, e coloque a base na
área pontilhada no Desenho 3. Antes de o fazer, cubra a
base com um pano macio e pressione firmemente para a
fixar. Remova a película protetora da fita adesiva de
dupla face na parte de trás da nova tampa, alinhe os
pinos da tampa na parte de trás dos orifícios do casco, e
coloque a tampa como mostrado no Desenho 4.
Pressione firmemente as áreas com fita adesiva de
dupla face na tampa (áreas pontilhadas no Desenho 5) e
fixe a tampa.
Ενδείξεις ασφαλείας:
1. Προσέξτε να μην γρατσουνίσετε την επιφάνεια
του σκελετού κράνους κατά την αφαίρεση των
εξαρτημάτων εξαερισμού.
2. Η απόδοση της ταινίας διπλής όψης
επιδεινώνεται όταν επανακολλάται.
3. Προσέξτε να μην τοποθετήσετε τα εξαρτήματα
σε μέρη διαφορετικά από την αρχική τους θέση.
Διαφορετικά, μπορεί να διαρρεύσει νερό της
βροχής ή να πέσουν τα εξαρτήματα.
4. Μην χρησιμοποιείτε ποτέ βενζόλιο, διαλυτικά,
βενζίνη, καθαριστικά τζαμιών ή άλλα οργανικά
απορρυπαντικά για να καθαρίσετε τη ζελατίνα.
Προκαλούν ζημιά στα εξαρτήματα.
Español
Español
Cómo sustituir la salida
de aire superior del NXR2/RF-1400
y precauciones a tomar
Prima di rimuovere l’uscita d’aria superiore, innanzitutto
avvolgere un cacciavite a testa piatta o un altro utensile
a estremità piatta in un panno per evitare di danneggiare
la calotta. Inserire l’utensile nello spazio tra il coperchio e
la calotta. Rimuovere il nastro biadesivo dalla parte
posteriore del coperchio lungo le frecce come mostrato
nel Disegno 1, quindi rimuovere il coperchio. Inserire
l’utensile nello spazio tra la base e la calotta. Rimuovere
il nastro biadesivo dalla parte posteriore della base lungo
le frecce come mostrato nel Disegno 2, quindi rimuovere
la base. Dopo la rimozione del coperchio e della base,
pulire tutti i residui di nastro biadesivo, i segni, la polvere
o l’olio rimasti sulla superficie della calotta.
Prima di fissare una nuova base, rimuovere la pellicola
protettiva dal nastro biadesivo sulla parte posteriore della
nuova base, allineare i fori della base con i fori di uscita
aria della calotta e fissare la base all’area con le linee
tratteggiate nel Disegno 3. Prima di eseguire questa
operazione, coprire la base con un panno morbido e
quindi premere con decisione per fissarla. Rimuovere la
pellicola protettiva dal nastro biadesivo sulla parte
posteriore del nuovo coperchio, inserire le proiezioni del
coperchio sulla parte posteriore nei fori della calotta,
quindi fissare il coperchio come mostrato nel Disegno 4.
Premere con decisione le aree del nastro biadesivo del
coperchio (aree con linee tratteggiate nel Disegno 5) e
fissare il coperchio.
Italiano
Sostituzione dell’uscita
d’aria superiore di NXR2/ RF-1400
e precauzioni
Po r t uguês
Como substituir a saída
de ar superior do NXR2/ RF-1400
e cuidados
Ελληνικά
Τρόπος αντικατάστασης της
άνω εξαγωγής αέρα NXR2/ RF-1400
και προφυλάξεις
Suomalainen
Polski
Svenska
MANUAL
shoei.com
Precauzioni:
1. Fate attenzione a non danneggiare la superficie
della calotta durante la rimozione.
2. Le proprietà di un biadesivo sono compromesse
in caso di reincollaggio.
3. Fare attenzione a non montare i componenti
in luoghi diversi dalle posizioni originali. In
caso contrario, l’acqua piovana potrebbe
penetrare all’interno o le parti potrebbero
cadere.
4. Non utilizzare benzene, solvent, petrol,
pulitori per vetri, o qualsi altro sgrassatore
per la manutenzione, per evitare il
danneggiamento dei componenti.
Πριν από την αφαίρεση της άνω εξαγωγής αέρα, πρώτα
τυλίξτε ένα ίσιο κατσαβίδι ή άλλο εργαλείο με επίπεδο
άκρο σε ένα πανί για να αποφύγετε την πρόκληση ζημιάς
στον σκελετό κράνους. Τοποθετήστε το εργαλείο στο
κενό ανάμεσα στο κάλυμμα και τον σκελετό κράνους.
Αφαιρέστε την ταινία διπλής όψης από το πίσω μέρος του
καλύμματος προς την κατεύθυνση των βελών όπως
φαίνεται στην Εικόνα 1 και στη συνέχεια αφαιρέστε το
κάλυμμα. Τοποθετήστε το εργαλείο στο κενό ανάμεσα
στη βάση και τον σκελετό κράνους. Αφαιρέστε την ταινία
διπλής όψης από το πίσω μέρος της βάσης προς την
κατεύθυνση των βελών όπως φαίνεται στην Εικόνα 2 και
στη συνέχεια αφαιρέστε τη βάση. Μετά την αφαίρεση
του καλύμματος και της βάσης, καθαρίστε τυχόν
υπολείμματα ταινίας διπλής όψης, σημάδια, σκόνη ή λάδι
από την επιφάνεια του σκελετού κράνους.
Πριν από την τοποθέτηση της νέας βάσης, αφαιρέστε την
προστατευτική μεμβράνη από την ταινία διπλής όψης στο
πίσω μέρος της νέας βάσης, ευθυγραμμίστε τις οπές της
βάσης με τις οπές αέρα εξόδου του σκελετού κράνους,
και τοποθετήστε τη βάση στην περιοχή με τις
διακεκομμένες γραμμές στην Εικόνα 3. Πριν το κάνετε
αυτό, καλύψτε τη βάση με ένα μαλακό πανί και, στη
συνέχεια, πιέστε σταθερά προς τα κάτω για να την
τοποθετήσετε. Αφαιρέστε την προστατευτική μεμβράνη
από την ταινία διπλής όψης στο πίσω μέρος του νέου
καλύμματος, τοποθετήστε τους πείρους καλύμματος στο
πίσω μέρος στις οπές του σκελετού κράνους και
τοποθετήστε το κάλυμμα όπως φαίνεται στην Εικόνα 4.
Πιέστε σταθερά τις περιοχές της ταινίας διπλής όψης του
καλύμματος (περιοχές με διακεκομμένες γραμμές στην
Εικόνα 5) και στερεώστε το κάλυμμα.
Coperchio/Cubierta
Tampa/Κάλυμμα
Base
Base
Base
Βάση
Nastro biadesivo/Cinta de doble cara
Fita adesiva de dupla face/Ταινία διπλής όψης
21 3 465
Other manuals for RF-1400

4

This manual suits for next models

1

Other SHOEI Motorcycle Accessories manuals

SHOEI X-Spirit III User manual

SHOEI

SHOEI X-Spirit III User manual

SHOEI RF-1400 User manual

SHOEI

SHOEI RF-1400 User manual

SHOEI RF-1400 User manual

SHOEI

SHOEI RF-1400 User manual

SHOEI Neotec 2 User manual

SHOEI

SHOEI Neotec 2 User manual

SHOEI RF-1400 User manual

SHOEI

SHOEI RF-1400 User manual

SHOEI GT-Air II User manual

SHOEI

SHOEI GT-Air II User manual

SHOEI rf 1000 User manual

SHOEI

SHOEI rf 1000 User manual

SHOEI TR-3 User manual

SHOEI

SHOEI TR-3 User manual

SHOEI VFX-WR User manual

SHOEI

SHOEI VFX-WR User manual

SHOEI NEOTEC 3 12070011 User manual

SHOEI

SHOEI NEOTEC 3 12070011 User manual

SHOEI NEOTEC3 393 User manual

SHOEI

SHOEI NEOTEC3 393 User manual

SHOEI JO User manual

SHOEI

SHOEI JO User manual

SHOEI Air Mask 3 Installation and user guide

SHOEI

SHOEI Air Mask 3 Installation and user guide

SHOEI TYPE-1 Manual

SHOEI

SHOEI TYPE-1 Manual

SHOEI J-Cruise II User manual

SHOEI

SHOEI J-Cruise II User manual

SHOEI X-Fifteen User manual

SHOEI

SHOEI X-Fifteen User manual

SHOEI VFX-WR User manual

SHOEI

SHOEI VFX-WR User manual

SHOEI QWEST User manual

SHOEI

SHOEI QWEST User manual

SHOEI Z-8 User manual

SHOEI

SHOEI Z-8 User manual

SHOEI JO User manual

SHOEI

SHOEI JO User manual

SHOEI Glamster User manual

SHOEI

SHOEI Glamster User manual

SHOEI RF-1400 User manual

SHOEI

SHOEI RF-1400 User manual

SHOEI X-Fourteen 263 User manual

SHOEI

SHOEI X-Fourteen 263 User manual

SHOEI CJ-2SP User manual

SHOEI

SHOEI CJ-2SP User manual

Popular Motorcycle Accessories manuals by other brands

R&G PKS0115 Fitting instructions

R&G

R&G PKS0115 Fitting instructions

SW-Motech Drybag 80 Mounting instructions

SW-Motech

SW-Motech Drybag 80 Mounting instructions

KTM 90112927044 Information

KTM

KTM 90112927044 Information

Memphis Shades MEM8875 Mounting instructions

Memphis Shades

Memphis Shades MEM8875 Mounting instructions

Thunderbike 28-73-040 manual

Thunderbike

Thunderbike 28-73-040 manual

Dynojet Quickshifter installation guide

Dynojet

Dynojet Quickshifter installation guide

DYNATEK DDK2-14 Installation and user guide

DYNATEK

DYNATEK DDK2-14 Installation and user guide

Lab-T R1M user manual

Lab-T

Lab-T R1M user manual

Memphis Shades 9874 Instructions and parts list

Memphis Shades

Memphis Shades 9874 Instructions and parts list

PUIG 9152 Mounting instructions

PUIG

PUIG 9152 Mounting instructions

Cobra 601-2108 installation instructions

Cobra

Cobra 601-2108 installation instructions

Suzuki 99183-25L10-RED installation instructions

Suzuki

Suzuki 99183-25L10-RED installation instructions

Pinewood 9588 instruction manual

Pinewood

Pinewood 9588 instruction manual

Smarter tools Power-300G operating manual

Smarter tools

Smarter tools Power-300G operating manual

Kolpin Matrix Seat Bag Assembly and installation

Kolpin

Kolpin Matrix Seat Bag Assembly and installation

Volt Resistance 12V Instruction booklet

Volt Resistance

Volt Resistance 12V Instruction booklet

Rekluse Motor Sports Core Manual installation guide

Rekluse Motor Sports

Rekluse Motor Sports Core Manual installation guide

hepco & becker 501675 00 01 manual

hepco & becker

hepco & becker 501675 00 01 manual

manuals.online logo
manuals.online logoBrands
  • About & Mission
  • Contact us
  • Privacy Policy
  • Terms and Conditions

Copyright 2025 Manuals.Online. All Rights Reserved.