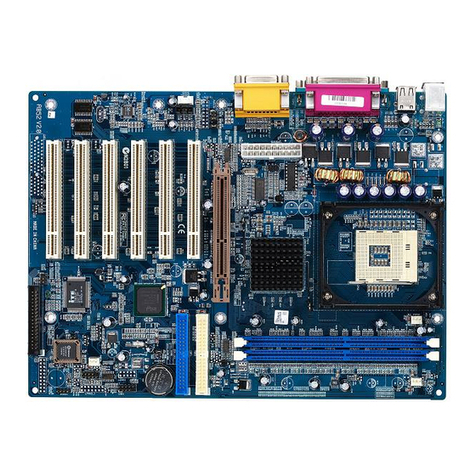
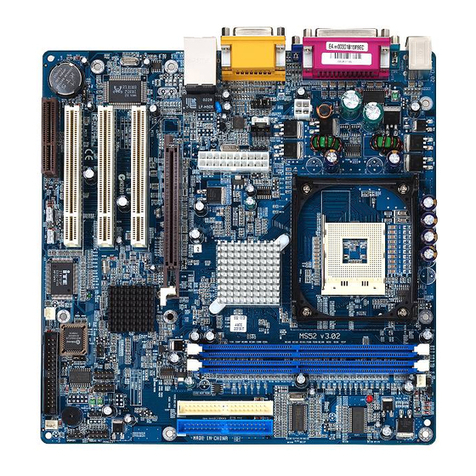
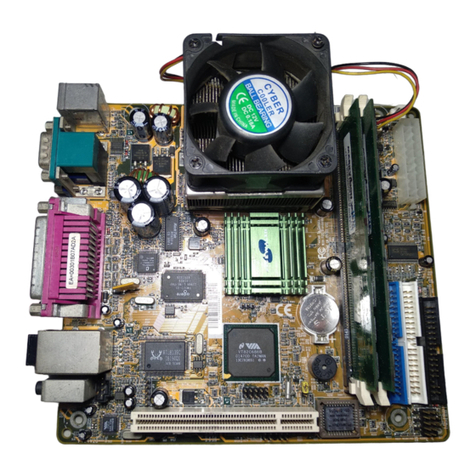
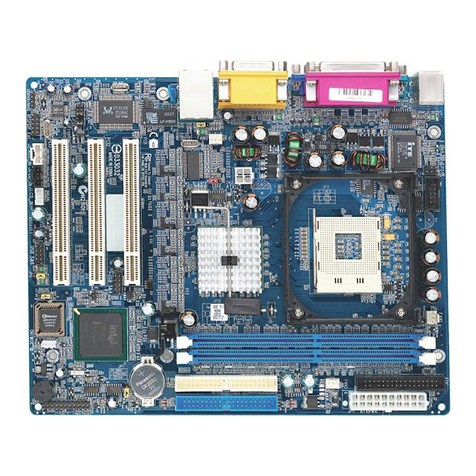
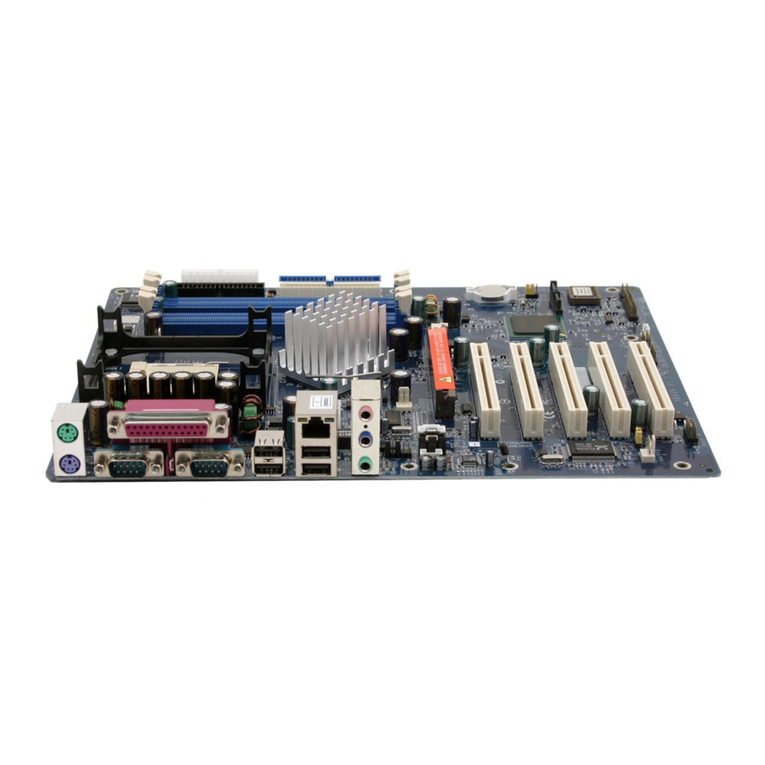
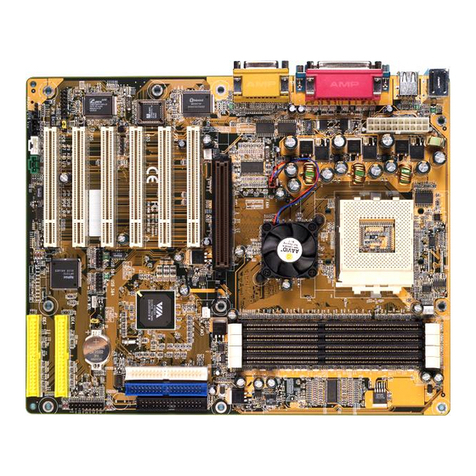
Shuttle ME21 User manual

ME21
FC-PGACeleronandFC-PGA/FC-PGA2
Pentium III Processor
Based AGPset MAIN BOARD
User's Manual

M444
Shuttle ME21
FC-PGA Celeron and FC-PGA/FC-PGA2 Pentium III processor
based AGPset Mainboard
Manual Version 3.0
Copyright
Copyright©2001 by Shuttle Inc. All Rights Reserved.
No part of this publication may be reproduced, transcribed, stored in a retrieval system,
translated into any language, or transmitted in any form or by any means, electronic,
mechanical, magnetic, optical, chemical, photocopying, manual, or otherwise, without
prior written permission from Shuttle Inc.
Disclaimer
Shuttle Inc. shall not be liable for any incidental or consequential damages resulting from the
performance or use of this product.
This company makes no representations or warranties regarding the contents of this manual.
Information in this manual has been carefully checked for reliability; however, no guarantee is
given as to the correction of the contents. In the interest of continued product improvement,
this company reserves the right to revise the manual or include changes in the specifications
of the product described within it at any time without notice and without obligation to notify any
person of such revision or changes. The information contained in this manual is provided for
general use by the customers.
Trademarks
Spacewalker is a registered trademark of Shuttle Inc.
Intel and Pentium are registered trademarks of Intel Corporation.
PS/2 is a registered trademark of IBM Corporation.
AMI is a registered trademark of American Megatrends Inc.
Microsoft and Windows are registered trademarks of Microsoft Corporation.
General Notice: Other brand and product names used herein are for identification
purposes only and may be trademarks of their respective owners.

- 1 -
TABLE OF CONTENTS
WHAT’S IN THE MANUAL .....................................................................5
Quick Reference................................................................................................5
About This Manual ............................................................................................5
1 INTRODUCTION .................................................................................6
1.1 TO DIFFERENT USERS ..............................................................................6
FIRST-TIMEDIYSYSTEMBUILDER ............................................................6
EXPERIENCEDDIY USER .........................................................................6
SYSTEMINTEGRATOR ...............................................................................6
1.2 ITEM CHECKLIST........................................................................................7
2 FEATURES..........................................................................................8
2.1 SPECIFICATIONS ........................................................................................8
3 HARDWARE INSTALLATION ...........................................................12
3.1 STEP BY STEP INSTALLATION................................................................12
Accessories of ME21 .............................................................................12
STEP1 Installthe CPU...........................................................................13
STEP 2 Set Jumpers..............................................................................14
STEP3 InstallSDRAM SystemMemory .................................................14
STEP4 Install Peripheralsin System Case.............................................15
STEP5 Mount theMainboard ontheComputer Chassis ........................16
STEP6 ConnectFront-PanelSwitches/LEDs/Speaker/Audio/USB........17
STEP 7 Connect IDE & Floppy Disk Drives............................................19
STEP8Connect OtherInternal Peripherals ............................................20
STEP9 Connectthe Power Supply ........................................................20
STEP10 Install Add-onCards inExpansion Slots ..................................21
STEP11 ConnectExternal Peripherals toBack-Panel............................22
STEP 12 First Time System Boot-Up .....................................................24

- 2 -
STEP13 InstallDrivers & SoftwareComponents....................................25
3.2 JUMPER SETTINGS ..................................................................................26
JUMPERS& CONNECTORSGUIDE ....................................................27
Jumpers
Clear PS/2 Keyboard Power on Password (J7) .....................................30
Clear CMOS Setting (J2)........................................................................30
PS/2 Keyboard & PS/2 Mouse Power-On Setting (JP14) .......................31
USB Keyboard Wake-Up Setting (JP14) ................................................31
FSB Speed Auto Configure Setting (J1,JP5,JP3)...................................32
BIOS Top Block Lock (J5).......................................................................33
Back-Panel Connectors
PS/2 Keyboard & PS/2 Mouse Connectors ............................................34
USB1/USB2Port Connectors.................................................................34
COM1Connector ...................................................................................34
VGAConnector ......................................................................................34
ParallelPort Connector...........................................................................34
Line-Out .................................................................................................35
Line-In ....................................................................................................35
Mic-In .....................................................................................................35
MIDI/GAMEPort.....................................................................................35
Front-Panel Connectors
ATX PowerOn/Off SwitchConnector (POW-BTN) ..................................36
EPMI(EPMI) ..........................................................................................36
GreenLED Connector (GLED)...............................................................37
HDD LED Connector (IDE LED).............................................................37
KeylockConnector (KEYLOCK) .............................................................37
Power LED Connector (PWR LED)........................................................38
HardwareResetConnector(RST) ..........................................................38

- 3 -
SpeakerConnector (SPKR) ...................................................................38
ExtendedLine-Out andMic-in Header(J27) ...........................................39
ExtendedUSB Header (J6) ....................................................................39
Internal Peripherals Connectors
EnhancedIDE ConnectorandFloppy Connector ....................................40
Other Connectors
ATXPower SupplyConnector (JWR1)....................................................41
CoolingFan Connectors forCPU (FAN1),
System (FAN2) & AGP (FAN3) ...............................................................41
COM2Connector (JP9) ..........................................................................42
ChassisIntrusion(J9) .............................................................................42
AudioConnectorTelephone_IN(JP11) ...................................................43
AudioConnector CD_In(JP13) ..............................................................43
AudioConnector AUX_In(JP12) ............................................................43
Wake-on LANConnector (J13) ...............................................................44
IRConnector(J17) .................................................................................44
3.3 SYSTEM MEMORY CONFIGURATION ......................................................45
INSTALLMEMORY ................................................................................45
UPGRADEMEMORY.............................................................................45
4 SOFTWARE UTILITY .......................................................................46
4.1 ME21 Mainboard CD Overview................................................................46
4.2 Install Mainboard Software ......................................................................47
4.2.AInstall ChipsetSystem Driver .........................................................48
4.2.BInstall AGPDevice Driver ..............................................................49
4.3 Install Audio Device Software..................................................................50
4.4 Install IDE Driver .......................................................................................51
4.5 View the User's Manual............................................................................52

- 4 -
5 BIOS SETUP.....................................................................................53
5.1 ENTER THE BIOS......................................................................................53
5.2 THE MAIN MENU .......................................................................................54
STANDARD CMOS FEATURES................................................................56
ADVANCED BIOS FEATURES..................................................................60
ADVANCED CHIPSET FEATURES ...........................................................64
INTEGRATEDPERIPHERALS...................................................................67
POWERMANAGEMENT SETUP ..............................................................72
PNP/PCICONFIGURATION .......................................................................76
PC HEATH STATUS...................................................................................78
FREQUENCY/VOLTAGECONTROL..........................................................79
LOAD FAIL-SAFE DEFAULTS...................................................................80
LOADOPTIMIZED DEFAULTS ..................................................................80
SET SUPERVISOR PASSWORD ..............................................................81
SET USER PASSWORD ...........................................................................81
SAVE & EXIT SETUP.................................................................................83
EXITWITHOUTSAVING.............................................................................83

- 5 -
WHAT’S IN THE MANUAL
Quick Reference
Hardware Installation >> Step-by-Step ................................................ Page 12
Jumper Settings >> A Closer Look ...................................................... Page 26
Drivers/Software Utilities >> How to Install ......................................... Page 46
BIOS Setup >> How to Configure ........................................................ Page 53
About This Manual
For First-Time DIY System Builder......................................................... Page 6
For Experienced DIY User ...................................................................... Page 6
For System Integrator ............................................................................. Page 6

- 6 -
1.1 To Different Users
First-Time DIY System Builder
Welcometo theDIY world! Buildingyour owncomputer systemis notas diffi-
cultas you may think. To makeyour first computer DIY experiencea success,
rightfrom thestart, we havedesigned the3Hardware Installation section in
astep-by-step fashionfor allthe first-timeDIYsystembuilders. Priorto installa-
tion, we also suggest you to read the whole manual carefully to gain a com-
plete understanding of your new Shuttle ME21 mainboard.
Experienced DIY User
Congratulate on your purchase of the Shuttle ME21 mainboard. You will find
that installing your new Shuttle ME21 mainboard is just that easy. Bundled
withanarray ofonboard functions,thehighly-integrated ME21mainboard pro-
vides you with a total solution to build the most stable and reliable system.
Referto section3.2 Jumper Settings and Chapter 4 Software Utilitytofindout
how to get the best out of your new mainboard. Chapter 5 BIOS Setup also
containsrelevant informationon howto tuneup yoursystemtoachievehigher
performance.
System Integrator
Youhave wiselychosen Shuttle ME21to constructyoursystem. Shuttle ME21
incorporatesall thestate-of-the-art technologyof the815EchipsetfromIntel. It
integrates the most advanced functions you can find to date in a compact
MicroATX board.
1INTRODUCTION

- 7 -
1.2 Item Checklist:
Check all items with you ME21 mainboard to make sure nothing is missing.
The complete package should include:
!One piece of Shuttle ME21 Mainboard
!One piece of ATA 100/66/33 Ribbon Cable
!One piece of Floppy Ribbon Cable
!One piece of 9-pin COM2 Cable
!One piece of twin ports USB Cable(optional)
!ME21User’s Manual
!One piece of Bundled CD-ROM with containing:
"The ME21 user’s manual saved in PDF format
"IntelChipset SystemDriver
"AGP device VGA driver
"AC97 audio CODEC driver
"IDEdriver
"AwardFlashing Utility
USB1
KBMS1
JP8
JP7 AJ1
JP5
J1
JP3
1
1-2
3-4
J6
J
17
IRFr
o
n
t
P
a
n
e
l
Audio J27 1
11
IDE 2 IDE1
111
DIMM1DIMM2
CNR1
FAN
3
1
J13 1J5 1
J
2
1
J
7
J
P14
1
1
GD75232D
HS48
GD75232D
HS48
1
J
P
9
FAN1 1
FAN2
1
J9
1
JP11
JP12
1
1
1
J
2
3
1+ -+ -
+ -
R
S
TEPMI
G
LED P
O
WBTN
SPKRKEYL
OC
KPWRLED
PGA370
Panasonic
CR 2032
3V
JAPAN1
i nbo nd

- 8 -
ME21 mainboard is carefully designed for the demanding PC user who wants high perfor-
mance and maximum intelligent features in a compact package.
2.1 Specifications
!!
!!
!CPU Support
IntelFC-PGA Celeron processorswith 66/100MHz FSB.
IntelFC-PGA Pentium IIIprocessors with100/133MHz FSB.
IntelFC-PGA2 Pentium IIIprocessors with133MHz FSB.
VIACyrix III processorswith 100/133MHz FSB.
!!
!!
!Chipset
Features Intel 815E B-STEP, 815/ 82801BA chipset.
!!
!!
!Jumperless CPU Configuration
Soft-configurationFSB (The FSBspeed is softwareconfigurablefrom 66MHz
to 166MHz in the Frequency/Voltage Control of BIOS setup program.)
!!
!!
!Integrated Graphics Controller
Enhancement 3D graphics visual and texturing features
Integrated24-bit 230MHz RAMDAC
Supports VESA DDC2B
Up to 1600X1200 in 8-bit color at 85Hz refresh in 2D graphics
!!
!!
!AC'97 Link for Audio and Telephony CODEC
AC'97 2.1 compliant
Separately independent PCI function for Audio and Modem
!!
!!
!Versatile Memory Support
Two 168-pin DIMM slots to support up to 512MB of PC100 or PC133
compliantSDRAM.
!!
!!
!PCI Expansion Slots
Providesthree 32-bitPCI slots
Indule one PCI Riser slot
2FEATURES

- 9 -
!!
!!
!4 USB Interface Onboard
"2 × USB connectors on back-panel and one sets of dual USB ports header
onmid-board.
!!
!!
!AGP Expansion Slots (AIMM Expansion Slot)
Provides one 32-bit AGP slot which supports up to 4X AGP device.
Alternativefunction: AIMMexpansion slot.
AIMM(AGP In_Line Memory Module) is the display cache of the integrated
graphic controller. This slot can support AIMM for up to 4MB of 133MHz
SDRAM display cache to deliver high quality video graphics.
Note: The AIMM Card is optional at the time of purchase.
!!
!!
!CNR Expansion Slots
Providesone CNR(CommunicationNetwork Riser)slot.
The CNR Slot supports the audio, modem, Lan ,Home PNA of the Intel
82801BA chipset
Note: The CNR Card is optional at the time of purchase.
!!
!!
!Onboard I/O Port and Interface
Providesa variety ofI/O interfaces:
"1 × Floppy interface for 3.5-inch FDD with 720KB, 1.44MB, 2.88MB
formator for 5.25-inch FDDwith 360KB or 1.2MB format.
"1 × PS/2 mouse connector
"1 × PS/2 Keyboard connector
"2 × DB9 Serial ports 16V550 UART compatible
"1× Infrared communicationsport.
(Serial port COM2 can also be redirected to an external IrDA Adapter for
wirelessconnection.)
"1 × DB15 VGA connector
"1 × DB25 Parallel port supporting Standard Parallel Port and Bi-direc-
tional (SPP), Enhanced Parallel Port (EPP), and Extended Capabilities Port
(ECP) datatransmission schemes.
"1 × Line-Out port.
"1× Line-In port.
"1× Mic-In port.
"1× MIDI/GAMEport.

- 10 -
!!
!!
!PCI Bus Master IDE Controller Onboard
Two Ultra DMA 100/66/33 Bus Master Dual-channel IDE ports provide sup-
porttoa maximumof fourIDEdevices (oneMaster andoneSlave perchannel).
The IDE Bus implements data transfer speeds of up to 100/66/33 MB/sec and
also supports Enhanced PIO Modes 0~4.
80-pin Cable Backward Compatible Legacy ATAPI Devices, ATAPI IDE CD-
ROM, CD-R, CD-RW, and LS-120 Supports.
!!
!!
!ATX Power Supply Connector
ATX power supply unit can connect to the onboard 20-pin ATX power
connector,supporting Suspend and Soft-On/Offby dual-function power
button.
!!
!!
!Advanced Configuration and Power Interface
Features four power saving modes: S1 (Snoop), S3 (Suspend to RAM), and S5
(Soft-Off).ACPI providesmoreefficient EnergySaving Features controlledby
youroperating system thatsupports OS DirectPower Management(OSPM)
functionality.
!!
!!
!System BIOS
Provides licensed Award BIOS V6.0 PG on Intel Firmware Hub 4Mb Flash
coreand supports Green PC,Desktop Management Interface(DMI).
!!
!!
!MicroATX Form Factor
System board conforms to the MicroATX specification.
Board dimensions: 245mm × 215mm.
!!
!!
!Advanced Features
"Low EMI -- Built in spread spectrum and automatic clock shut-off of
unused PCI/SDRAM slots to reduce the EMI.
"PS/2 Keyboard & PS/2 Mouse Power-On - This mainboard implements a
special jumper to enable a system power-on function by PS/2 keyboard &
PS/2mouse.
"Dual Function Power Button - The system can be in one of two states,
one is Suspend mode and the other is Soft-Off mode. Pushing the power
button for less than 4 seconds places the system into Suspend mode.
When the power button is pressed for longer than 4 seconds, the system
entersthe Soft-Offmode.

- 11 -
"Wake-on-LAN (J13) - The onboard J13 connector can be attached to
a network card that supports this function to wake up the system via the
LAN.
"CPU Host Clock Setting-Thisitem allowsusersto adjustCPU HostClock in
BIOS.
"CPU Ratio Setting- Thisitem allows usersto adjust CPURatio in BIOS.
Note : Alltheprocessors onmarketnowadaystheratiosettingisalmostfixed.
!!
!!
!Intelligent Features
"Voltage Monitoring - Monitorsvarious voltages of key elements, such as
theCPU,and other critical system voltagelevels to ensure stable current
passing through mainboard components. System voltages include Vcore
on CPU, and +5V, +12V, -5V, -12V on system etc.
"Fan Status Monitoring - To prevent CPU from overheating, the CPU fan is
monitored for RPM and failure. (CPU Cooling FAN with RPM sensor is
required.)
"Temperature Monitoring-This itemallows users tomake sure whether
the CPU or system runs in a suitable temperature.

- 12 -
Before removing or installing any of these devices including CPU, DIMMs, Add-On
Cards, Cables, please make sure to unplug the onboard power connector.
This section outlines how to install and configure your ME21 mainboard. Refer to the
followingmainboard layout to helpyou to identifyvarious jumpers, connectors, slots,and
ports. Then follow these steps designed to guide you through a quick and correct installa-
tionof your system.
3.1 Step-by-Step Installation
Accessories of ME21
3HARDWAREINSTALLATION
USB1
KBMS1
JP8
JP7 AJ1
JP5
J1
JP3
1
1-2
3-4
J6
J17
IR Front Panel
Au di o
J27 1
11
IDE2 IDE1
11
1
DIMM1 DIMM2
CNR1
FAN3
1
J13 1
J5 1J2
1
J7
JP14
1
1
GD75232D
HS48
GD75232D
HS48
1
JP9
FAN1 1
FAN2
1
J9
1
JP11
JP12
1
1
1
J23
1
+ -+ -
+ -
RST EPMIGLED POW_BTN
SPKR
KEYLOCK
PWRLED
PGA370
Panasonic
CR2032
3V
JA PA N1
in b on d
Three PCI Slots
One 4 x AGP Slot
Intel 82801BA Chipset
CNR Slot
SOCKET 370
FAN3
Two USB Connectors
Two DIMM Sockets
FAN2
Connector -
JP9
COM2
K/B & PS/2 Mouse Power-On setting -
JP14
PS/2
USB K/B Wake-Up setting -
JP14
Clear Password -
J7
Chassic intrusion -
J9
Extended two USB connector -
J6
Parallel Connector
VGA Connector
Intel 82815 Chipset
Serial Port
Connector (COM1)
On Board CODEC
Line-In/Line-Out/Mic-In
Game/MIDI Connectors
OnboardAudio
Connectors
Wake on LAN -
J13
BIOS Top BlockLock -
J5
Front Panel Connector -
J23
Clear CMOS -
J2
FSB Speed Config Setting - J
1, JP3, JP5
IR Connector -
J17
L-OUT & MIC-IN Connectors header -
J27
Floppy Connector
Programmable 2Mb
Flash EEPROM
PS/2 Keyboard/Mouse
Connectors
I/O Controller
Two E-IDE Connectors
FAN1
ATX Power Connector
One Riser Support Slot

- 13 -
Step 1
Install the CPU:
1. Locate the CPU ZIF (Zero Insertion Force) socket on the upper-right
sector of your mainboard (between the back-panel connectors and the
DIMMmemoryslots).
2. Pull the CPU ZIF socket lever slightly sideways away from the socket
to unlock the lever, and then bring it to an upward vertical position.
3. Place your FC-PGA/FC-PGA2 370 processor in the ZIF socket. Note that
the CPU’s edges have been purposely designed non-symmetrical to
preventfrom inserting theprocessor inwrong direction. The following
diagram demonstrates the correct placement of CPU in the ZIF socket.
You can see that the two blunt-edged corners should face towards the
socket-lever.
4. Slightlypush CPU into socket withoutapplyingexcessive forcewhile
making sure there is no gap between CPU and socket. Then lower
the socket lever all the way down to the horizontal position and lock it to
secure the CPU in place.
5. The FC-PGA/FC-PGA2 370 CPU requires a set of heatsink/fan to ensure
proper cooling of processor. If heatsink/fan are not already mounted on
your CPU, you must purchase them separately and have it installed. Plug
the cable from heatsink/fan to CPU fan power connector located nearby.
Note that there are several types of CPU fan connectors. Normally, if your
mainboard supports hardware monitoring function, a 3-pin fan power
connector should allow your system to detect the CPU fan’s speed . The
CPU fan can also run with a 2-pin fan power connector, however, detec-
tion of CPU fan’s speed is not supported. Another type of CPU fan may
feature a large 4-pin fan power connector, which does not support CPU
fan's speed detection and must connect directly to the system power
supplyunit.
PGA370
Lever BlankBlank Notch
PGA370
Pentium MA L AY
RB80526PY550256
Q 944A036-0393 S L3R3
®
FC-PGA CPU
Notch
PGA370
RK
805
2
6
PZ
00
12
56
D1
0
1F2
0
7
S
08
27
FC-PGA2 CPU
INTEL ‘00A4
V105502C-0343Q EJ0ES

- 14 -
Step 2.
Set Jumpers
This mainboard is jumperless! The default jumper settings have been set for
the common usage standard of this mainboard. Therefore, you do not need
to reset the jumpers unless you require special adjustments as any of the
followingcases:
1. Over-clock your CPU
2. Disabled the onboard audio before installing an add-on sound card
3. Clear CMOS
4. Clearsystem password
5. Clear PS/2 Keyboard Power on password
Forfirst-time DIY system builders, werecommend that you do notchange the
defaultjumper settings ifyou arenot totally familiarwith the mainboard
configurationprocedures. The factory-set defaultsettings are tunedfor opti-
mum system performance. For the advanced users who wish to customize
theirsystem, section3.2 Jumper Settings willprovide detailed informationon
how to configure your mainboard manually.
Step 3
Install SDRAM System Memory
To install memory, insert SDRAM memory module(s) in any one or two or
three DIMM banks. Note that SDRAM modules are directional and will not
go in the DIMM slots if they are not properly oriented. After the module is
fullyinserted into theDIMM slot,liftthe clipsof both sidesof the DIMMbank
to lock the module in place.

- 15 -
Step 4
Install Internal Peripherals in System Case
Before you install and connect the mainboard into your system case, we
recommendthat you firstassemble all theinternal peripheral devicesintothe
computerhousing, including ,butnot limited tothe hard diskdrive (IDE/
HDD),floppy disk drive(FDD), CD-ROMdrive, and ATXpower supply unit.
Thiswill greatly facilitate inmakingthe connections to themainboard de-
scribedbelow.
Toinstall IDE& FDD drives,follow thisprocedure:
1. Set the required jumpers on each device according to the instructions
provided by the manufacturer. (IDE devices, HDD and CD-ROM, have to
set jumpers to Master or Slave mode depending on whether you install
more than one device of each kind.)
2. Connect IDE cable and FDD cable on the back panel of the internal
peripheral devices to the corresponding headers on board. Note that the
cable should be oriented with its colored stripe (usually red or magenta)
connected to pin#1 both on the mainboard IDE or FDD connector and on
thedevice as well.
3. Connect an available power cable from your system power supply unit
to the back panel of each peripheral device. Note that the power cable is
directionaland cannot fitin if it isnot properly positioned.
4. Connect serial port cable to on board COM2 header. And install the other
side of COM2 cable to back panel with a screw.

- 16 -
Step 5
Mount the Mainboard on the Computer Chassis
1. You may find that there are a lot of different mounting hole positions
both on your computer chassis and on the mainboard. To choose
correct mounting holes, the key point is to keep the back panel of the
mainboard in a close fit with your system case, as shown below.
2. After deciding on the proper mounting holes, position the studs between
the frame of the chassis and the mainboard. The studs are used to fix the
mainboard and to keep a certain distance between the system chassis
and the mainboard, in order to avoid any electrical shortage between the
board and the metal frame of the chassis. (If your computer case is
alreadyequipped with mounting studs, youwillneed to tighten screws to
attachthe mainboard.)
Note: In most computer housings, you will be able to find 4 or more
attachmentpointsto install mounting studs and thenfix the
mainboard. If there aren’t enough matching holes, then make sure to
install at least 4 mounting studs to ensure proper attachment of the
mainboard.

- 17 -
Step 6
Connect Front-panel Switches/LEDs/Speaker/Audio/USB
connectors
You can find there are several different cables already existing in the system
caseand originating fromthe computer’s front-paneldevices (HDDLED,
Power LED, Reset Switch, PC Speaker, or USB devices etc.) These cables
serveto connect thefront-panel switches,LEDs, USB, Line-Out,and Mic-In
connectors to the mainboard’s front-panel connectors group (J23, J6, and
J27),as shown below.
1. HDDLED (IDELED)
2. RESET (RST)
-Hardware Reset Switch
J6 1
Front Panel
Audio
J27
1
J23
1
+ -
+ -
+ -
IDELEDRST EPMIGLED POW_BTN
SPKR
KEYLOCK
PWRLED
J23
1
+ -
+ -
+ -
IDELEDRST EPMIGLED POW_BTN
SPKR
KEYLOCK
PWRLED
J23
1
+ -
+ -
+ -
IDELED
RST EPMI
GLED POW_BTN
SPKR
KEYLOCK
PWRLED

- 18 -
3. GreenLED (GLED)
4. PowerSwitch (POW_BTN)
-ATX Soft PowerOn/Off
5. SPEAKER (SPKR)
6. POWER LED (PWR LED)
7. KEYLOCK
8. EPMI(Hardware System
ManagementInterface)
J23
1
+ -
+ -
+ -
IDELED
RST EPMI
GLED POW_BTN
SPKR
KEYLOCK
PWRLED
J23
1
+ -
+ -
+ -
IDELED
RST EPMI
GLED POW_BTN
SPKR
KEYLOCK
PWRLED
J23
1
+ -
+ -
+ -
IDELED
RST EPMI
GLED POW_BTN
SPKR
KEYLOCK
PWRLED
J23
1
+ -
+ -
+ -
IDELED
RST EPMI
GLED POW_BTN
SPKR
KEYLOCK
PWRLED
J23
1
+ -
+ -
+ -
IDELED
RST EPMI
GLED POW_BTN
SPKR
KEYLOCK
PWRLED
J23
1
+ -
+ -
+ -
IDELED
RST EPMI
GLED POW_BTN
SPKR
KEYLOCK
PWRLED
Other manuals for ME21
1
Table of contents
Other Shuttle Motherboard manuals

Shuttle
Shuttle DL30N Series User manual

Shuttle
Shuttle HOT-687V User manual

Shuttle
Shuttle FT20 User manual

Shuttle
Shuttle AN35 Ultra User manual

Shuttle
Shuttle FX83 User manual

Shuttle
Shuttle HOT-565 User manual

Shuttle
Shuttle HOT-623 User manual

Shuttle
Shuttle AV49 User manual

Shuttle
Shuttle AV14 User manual

Shuttle
Shuttle Spacewalker FE22 User manual

Shuttle
Shuttle AB49 User manual

Shuttle
Shuttle HOT-617 User manual

Shuttle
Shuttle FB86 User manual

Shuttle
Shuttle FB51 User manual

Shuttle
Shuttle FN41 User manual

Shuttle
Shuttle FS51 User manual

Shuttle
Shuttle FS51 User manual

Shuttle
Shuttle Spacewalker AV40S User manual

Shuttle
Shuttle FN41V3 User manual

Shuttle
Shuttle FT62 User manual