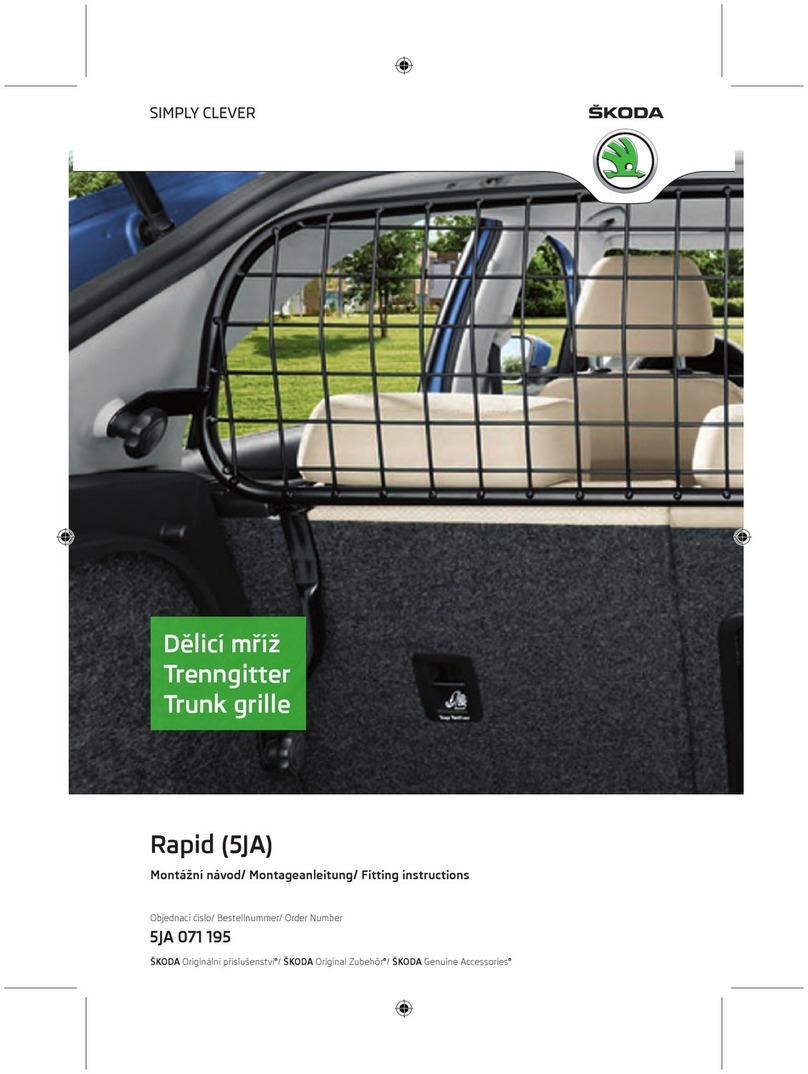
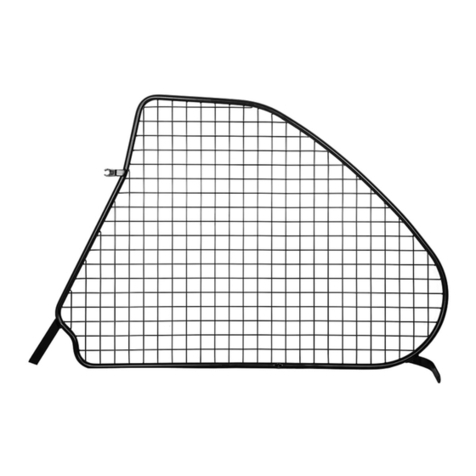
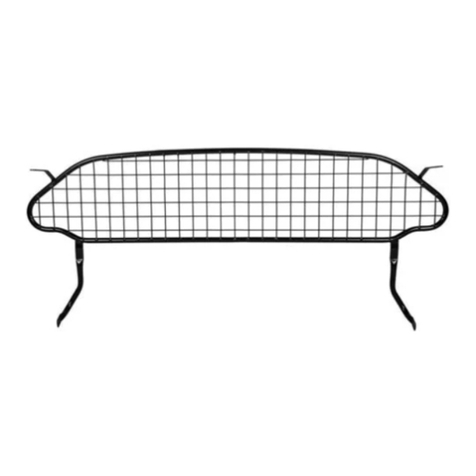
Skoda 565 017 221 User manual

Fitting instructions/ Montážní návod/ Montageanleitung
Dělicí mříž
Trenngitter
KODIAQ (NS)
Order Number/ Objednací číslo/ Bestellnummer
565 017 221
TRUNK GRILLE
TRUNK GRILLE

Notes to the text/ Poznámky k textu/ Anmerkungen zum Text
Caution.
Texts with this symbol warn against the risk of injury of the person performing the
assembly, or to potential risk of damage to the vehicle if the operation is performed
improperly.
Pozor.
Texty s tímto symbolem upozorňují na možnost poranění osoby provádějící montáž
popř. možnost poškození vozu při neopatrném provedení operace.
Achtung.
Texte mit diesem Symbol weisen auf Verletzungsgefahren bei Personen oder auf
eventuelle Beschädigungen des Wagens bei unachtsamer Durchführung der Operation
hin.
Attention.
Texts with this symbol contain instructions emphasizing accuracy of performance of
particular operation.
Upozornění.
Texty s tímto symbolem obsahují pokyny s důrazem na přesnost provedení dané
operace.
Hinweis.
Texte mit diesem Symbol enthalten Hinweise auf die Ausführungsgenauigkeit der
jeweiligen Operation.

Edge of the hole for the seat belt
Hrana otvoru pro bezpečnostní pás
Kante der Bohrung für
Sicherheitsgurt
Side window
Sklo boční
Seitenscheibe
Side window
Sklo boční
Seitenscheibe
Direction of travel
Směr jízdy
Fahrtrichtung
D-pillar gap
Spára D-sloupek
Spalt D-Säule
Gap
Spára
Spalt
565 017 221
A
B
G
J
C
D
H
E
F
Přípravu pro uchycení dělicí mříže
(vyvrtání otvorů a nanýtování matic)
-šipky- proveďte na obou stranách vozu
stejným způsobem.
Die Vorbereitung für die Befestigung des
Gitters (Herstellen von Bohrungen
und Einnieten der Muttern) -Pfeile- auf
beiden Fahrzeugseiten auf die gleiche
Weise durchführen.
Make preparations for attaching the grille
partition (drilling holes and riveting nuts)
(see arrow) in the same way on both sides
of the vehicle.
1
2

H
see text
viz text
siehe Text
Die Kennzeichnung der Stelle für die
Bohrung sowie das anschließende
Bohren immer senkrecht zur
Dachverkleidung durchführen!
Označení místa pro vrtání otvoru i jeho
následné vrtání provádějte vždy kolmo
k panelu stropu!
When you mark where the hole is to be
drilled and then drill the hole itself,
make sure you do this at right angles
to the roof lining.
Airbag
Airbag
Airbag
90°
Roof lining
Panel stropu
Dachverkleidung
Template
Šablona
Schablone
Hole in the roof side panel
Otvor v postranici střechy
Bohrung im Dach-Seitenteil
3
4

see text
viz text
siehe Text
see text
viz text
siehe Text
MTX 9-193/B
ø 26 mm
Proceed with extreme care when
finishing the hole in the roof lining
in order to avoid damaging the
airbag.
Otvor v panelu stropu dořízněte
s nejvyšší opatrností. Nebezpečí
poškození airbagu!
Die Bohrung in der Dachverkleidung
äußerst vorsichtig fertigstellen.
Gefahr der Airbagbeschädigung!
5
6
7

Check the position of the airbag
and, if necessary, use your finger
to push the airbag in as far as
possible.
Zkontrolujte umístění airbagu,
popř. jej prstem ruky urovnejte
do nejnižší možné polohy.
Die Airbagposition überprüfen,
ggf. den Airbag mit einem Finger
so tief wie möglich verschieben.
MTX 9-295
B
Schraube M8
Screw M8
Šroub M8
Mutter M8 mit Unterlage
Nut M8 with washer
Matice M8 s podložkou
D
8
9
10

ø 26 mm
min. 3 mm
If the hole drilled in the roof lining is not quite the right size, use a sharp
cutter to widen it so that the gap between the roof lining and the
adapter is 3 mm.
Otvor v panelu stropu v případě potřeby upravte oříznutím ostrým nožem
tak, aby mezera mezi panelem stropu a mezikusem byla 3 mm.
Die Bohrung in der Dachverkleidung ggf. mit einem scharfen
Messer nachträglich korrigieren, sodass das Spaltmaß
zwischen der Dachverkleidung und dem
Zwischenstück 3 mm beträgt.
F
11
12

J
see text
viz text
siehe Text
13

ø 25 mm
ø 25 mm
Vrtejte pouze do panelu
C-sloupku!
Nur in die C-Säulenverkleidung
bohren!
Only drill into the C-pillar trim.
see text
viz text
siehe Text
ø 25 mm
see text
viz text
siehe Text
14
15

MTX 9-295
B
C
Schraube M8
Screw M8
Šroub M8
Mutter M8 mit Unterlage
Nut M8 with washer
Matice M8 s podložkou
16
17

E
A
18
19

see text
viz text
siehe Text
G
20
21

EN
13
Trunk grille
The accessories are intended for professional fitting. ŠKODA AUTO recommends that they are
fitted by a contractual partner.
Please note: The trunk grille can only be fitted in five-seater ŠKODA
KODIAQ vehicles.
Once the trunk grille has been fitted in the luggage compartment, it
will no longer be possible to fold the rear seat backs to the position
furthest back, otherwise the seat back will hit the grille. This must
be pointed out to the customer before the trunk grille is fitted, as it
does not constitute grounds for a complaint.
Component index for the trunk grille set (Fig. 1)
Component Quantity Item
Trunk grille 1 A
M8 rivet nut 4 B
Adapter (for inserting into the opening in the body
underneath the C-pillar trim) 2 C
Adapter (for inserting into the opening in the
roof side panel) 2 D
Cover cap (for fitting onto the C-pillar trim) 2 E
Cover cap (for fitting onto the roof lining) 2 F
M8 bolt 4 G
Template (for marking where the hole is to be drilled
in the roof lining) 1 H
Template (for marking where the hole is to be drilled
in the C-pillar trim) 1 J
Fitting instructions 1
Note:
If the rivet nuts are ever lost, you can order more from the ŠKODA Original Accessories
catalogue using part number 5L6 071 754.
List of special tools
Drill bit (26 mm diameter) for drilling holes in the roof lining – MTX 9-193/B.
Hole saw bit (25 mm diameter) for drilling holes in the C-pillar trim.
Riveting tool for riveting rivet nuts (B) (in the holes in the roof side panel underneath the roof
lining and in the holes in the body panel underneath the C-pillar trim) – MTX 9-295, 21 mm
open-end wrench, no. 10 Allen key.
Tool for screwing in adapters (C, D) - M8 x 50 bolt, M8 nut with washer, 13 mm open-end
wrench.
Pin, suction device.

EN
14
Important fitting information
Remove the retractable luggage compartment cover from the vehicle and fold the rear
seat backs forwards.
Fit the trunk grille as shown in the figures in the instructions (see arrows in fig. 2 for
where to position the attachment points).
Carry out all the instructions for fitting the grille in the same way on both sides of the
vehicle.
Caution: Use the suction device to remove the swarf produced when
drilling the holes, and make sure that the vehicle interior is kept
clean when fitting the grille.
Fitting procedure
How to create the attachment points for attaching the trunk grille to the roof
lining:
Fig. 3 - 12
› Carefully position the template (H) to mark where the hole is to be drilled in the roof
lining, as described on the template.
› Use the pin to mark the point where you need to drill.
Please note: When marking where the hole is to be drilled, hold the
pin at right angles to the roof lining; likewise, when drilling the hole,
hold the drill at right angles to the roof lining (fig. 4). When pushing
the pin into the roof lining and when drilling the hole, proceed with
extreme care in order to avoid damaging the head-level air bag. This
is fitted next to the roof side panel.
› Fold the template back and use a suitable felt-tip pen to make the mark on the roof lining
clearer. Remove the template and put it in a safe place to one side. It can be used later to
mark where the hole is to be drilled on the other side of the vehicle.
› At the point you have marked, drill a hole with a diameter of 26 mm in the top layer of the
roof lining (to do this, use the MTX 9-193/B drill bit).
› Then, use a suitable tool to finish the hole. Check the position of the airbag with your index
finger and, if necessary, push the airbag in as far as possible so that it is not damaged
(trapped) when the nut is riveted.
Rivet the rivet nut (B) in the hole in the roof side panel underneath the roof lining using
the MTX 9-295 riveting tool as follows:
› Screw the rivet nut (B) into the riveting tool.
› Insert the riveting tool with the rivet nut into the hole in the roof side panel.
› Rivet the rivet nut by gradually tightening the nut on the tool.
› Fully tighten the nut on the tool, otherwise the rivet nut will be loose.
› Undo the nut and remove the tool.

EN
15
Screw in the adapter (D) using the M8 x 50 bolt and M8 nut as follows:
› Screw the adapter using the washer onto the nut on the M8 bolt.
› Tighten the nut until it comes into contact with the adapter.
› Insert the tool with the adapter into the hole in the riveted nut and screw in the adapter.
› Undo the nut and remove the bolt.
If the hole drilled in the roof lining is not quite the right size, use a sharp cutter to widen
it so that the gap between the roof lining and the adapter is 3 mm.
Place the cover cap (F) onto the protruding shaft of the adapter and then press it in.
Please note: Position the cover cap such that it lies completely flat
against the roof lining. When fitting the cover cap, ensure that the
roof lining is not deformed. If the roof lining around the cover cap is
uneven, pull it out and smooth it using the pin.
Create the attachment point for the trunk grille in the roof lining on the other side of the
vehicle in the same way.
How to create the attachment points for attaching the trunk grille to the
C-pillar trim:
Fig. 13 - 18
› Carefully position the template (J) to mark where the hole is to be drilled in the C-pillar
trim, as described on the template. Use the pin to mark the point where you need to drill.
› Remove the template and put it in a safe place to one side. It can be used later to mark
where the hole is to be drilled on the other side of the vehicle.
› Use the hole saw bit to drill holes with a diameter of 25 mm. Use a suitable tool to remove
any burring.
Caution: Only drill into the C-pillar trim. If the hole has been drilled
correctly in the lining, it should match up with the hole in the body
panel underneath the lining. Make sure that you do not damage the
C-pillar trim in any way.
› The procedure for riveting the rivet nut (B) in the hole in the body panel underneath the
C-pillar trim and then screwing in the adapter (C) is the same as for the holes in the roof side
panel.
Place the cover cap (E) onto the protruding shaft of the adapter and then press it in.
Please note: Position the cover cap such that it lies completely flat
against the C-pillar trim.
Create the attachment point for the trunk grille in the C-pillar trim on the other side of
the vehicle in the same way.
Fig. 19 - 20
› Insert the trunk grille (A) into the vehicle’s luggage compartment and position it on the
prepared attachment points.

EN
16
Caution: Make sure that you do not damage the roof lining or the
C-pillar trim.
› Secure the grille in place using the bolts with plastic heads (G).
› Fully tighten the bolts manually.
Visually check that the trunk grille is secured correctly. Place the retractable
luggage compartment cover into the vehicle (fig. 21). Fold the rear seat backs
back into place.

CZ
17
Dělicí mříž
Produkty příslušenství jsou určeny k odborné montáži. ŠKODA AUTO doporučuje provádět
montáž u smluvních partnerů.
Upozornění. Dělicí mříž lze montovat pouze do vozů ŠKODA KODIAQ
v 5-místném provedení.
Po namontování dělicí mříže do zavazadlového prostoru vozu nelze
sklopit opěry zadních sedadel do poslední zadní polohy (z důvodu
kolize opěry sedadla s mříží). Na tuto skutečnost upozorněte zá-
kazníka ještě před samotnou montáží dělicí mříže - není důvodem k
reklamaci.
Sada dělicí mříže obsahuje (obr. 1)
Název dílu Kusů Pozice
Dělicí mříž 1 A
Nýtovací matice M8 4 B
Mezikus (do otvoru v karoserii pod panelem C-sloupku) 2 C
Mezikus (do otvoru v postranici střechy) 2 D
Krytka (do panelu C-sloupku) 2 E
Krytka (do panelu stropu) 2 F
Šroub M8 4 G
Šablona (pro označení otvoru do panelu stropu) 1 H
Šablona (pro označení otvoru do panelu C-sloupku) 1 J
Montážní návod 1
Poznámka
Pokud dojde ke ztrátě nýtovacích matic, je možné je doobjednat z katalogu ŠKODA Origi-
nálního příslušenství pod číslem dílu 5L6 071 754.
Seznam speciálního nářadí
Vrtací přípravek (průměr 26 mm) pro vyvrtání otvorů do panelu stropu - MTX 9-193/B.
Vykružovací vrták (průměr 25 mm) pro vyvrtání otvorů do panelů C sloupku.
Přípravek pro nanýtování nýtovacích matic (B) (do otvorů v postranici střechy pod panelem
stropu a otvorů v plechu karoserie pod panelem C- sloupku)
- MTX 9-295, stranový klíč OK 21, imbus klíč č. 10.
Přípravek pro našroubování mezikusů (C, D)
- šroub M8 x 50, matice M8 s podložkou, stranový klíč OK 13.
Čalounický špendlík, vysavač.
Důležité pokyny k montáži
Vyjměte rolo zavazadlového prostoru z vozu a sklopte opěradla zadních sedadel.

CZ
18
Dělicí mříž namontujte dle obrázků v návodu (místa pro umístění upevňovacích bodů
viz -šipky- obr. 2).
Všechny pokyny pro namontování dělicí mříže provádějte na obou stranách vozu stejným
způsobem.
Pozor. Při operacích vrtání vysávejte vzniklé špony, během montáže
udržujte čistotu ve voze.
Postup montáže
Provedení upevňovacích bodů pro uchycení dělicí mříže v panelu stropu.
Obr. 3 - 12
› Šablonu (H) pro označení otvoru do panelu stropu ustavte pečlivě dle popisu na šabloně.
› Čalounickým špendlíkem označte místo pro budoucí otvor.
Upozornění. Špendlík při značení otvoru, stejně tak i vrtačku při
vrtání otvoru držte v kolmé poloze oproti panelu stropu (obr. 4).
Operace - zatlačení špendlíku do panelu stropu a následné vrtání
otvoru provádějte s nejvyšší opatrností, aby nedošlo k poškození
hlavového airbagu vedoucího podél postranice střechy.
› Šablonu odkloňte a označené místo na panelu stropu zvýrazněte vhodnou fixou. Odstraňte
šablonu a odložte ji na vhodné místo. Použijte ji pak k označení umístění otvoru na druhé
straně vozu.
› V označeném místě vyvrtejte do vrchní vrstvy panelu stropu otvor o průměru 26 mm (pou-
žijte vrtací přípravek MTX 9-193/B).
› Potom otvor vhodným nástrojem opatrně dořízněte. Ukazovákem ruky zkontrolujte polohu
airbagu, popřípadě jej urovnejte do nejnižší možné polohy, aby nemohlo dojít při nýtování
matice k jeho poškození (proskřípnutí).
Nýtovací matici (B) nanýtujte do otvoru v postranici střechy pod panelem stropu pomocí
nýtovacího přípravku MTX 9-295 následovně:
› nýtovací matici (B) našroubujte na nýtovací přípravek,
› přípravek s nýtovací maticí vložte do otvoru v postranici střechy,
› postupným utahováním matice na přípravku nýtovací matici nanýtujte,
› matici na přípravku dotáhněte na doraz, jinak bude nýtovací matice volná,
› povolte matici a přípravek vyšroubujte.
Mezikus (D) našroubujte pomocí šroubu M8 x 50 a matice M8 následujícím způsobem:
› mezikus našroubujte přes plochou podložku k matici na šroubu M8,
› matici dotáhněte k mezikusu,
› přípravek s mezikusem vložte do otvoru v nanýtované matici a mezikus zašroubujte.
› povolte matici a šroub vyšroubujte.
Otvor v panelu stropu v případě potřeby upravte oříznutím ostrým nožem tak, aby mezera
mezi panelem stropu a mezikusem byla 3 mm.
Na vyčnívající dřík mezikusu ustavte a potom namáčkněte krytku (F).

CZ
19
Upozornění. Krytku ustavte tak, aby po celé své ploše kopírovala
plochu panelu stropu. Při nasazení krytky dbejte na to, aby nedošlo k
deformaci panelu stropu. Je-li u krytky panel stropu nerovný, vytáh-
něte a srovnejte jej pomocí čalounického špendlíku.
Stejným způsobem vytvořte upevňovací bod dělicí mříže v panelu stropu na druhé straně
vozu.
Provedení upevňovacích bodů pro uchycení dělicí mříže v panelu C-sloupku.
Obr. 13 - 18
› Šablonu (J) pro označení otvoru do panelu C-sloupku ustavte pečlivě dle popisu na šablo-
ně. Čalounickým špendlíkem označte místo pro budoucí otvor.
› Odstraňte šablonu a odložte ji na vhodné místo. Použijte ji pak k označení umístění otvoru
na druhé straně vozu.
› K vyvrtání otvorů o průměru 25 mm použijte vykružovací vrták. Případné otřepy začistěte
vhodným nástrojem.
Pozor. Vrtejte pouze do panelu C-sloupku. Správně vyvrtaný otvor v
panelu by měl být soustředný s otvorem v plechu karoserie pod
panelem. Dbejte na to, aby nedošlo k poškození panelu C-sloupku.
› Nanýtování nýtovací matice (B) do otvoru v plechu karoserie pod panelem C-sloupku a
následné zašroubování mezikusu (C) proveďte stejným způsobem jako u otvorů v postranici
střechy.
Na vyčnívající dřík mezikusu ustavte a potom namáčkněte krytku (E).
Upozornění. Krytku ustavte tak, aby po celé své ploše kopírovala
plochu panelu C-sloupku.
Stejným způsobem vytvořte upevňovací bod dělicí mříže v panelu C-sloupku na druhé
straně vozu.
Obr. 19 - 20
› Vložte dělicí mříž (A) do zavazadlového prostoru vozu a ustavte ji k připraveným upevňova-
cím bodům.
Pozor. Dbejte na to, aby nedošlo k poškození panelu stropu nebo
panelu C-sloupku.
› Pomocí šroubů s plastovou hlavou (G) mříž upevněte.
› Šrouby rukou dotáhněte na doraz.
Zkontrolujte vizuálně správné uchycení dělicí mříže. Vložte do vozu rolo zavaza-
dlového prostoru (obr. 21). Opěradla zadních sedadel sklopte zpět do standardní
polohy.

DE
20
Trenngitter
Die Zubehörprodukte sind für eine fachgerechte Montage vorgesehen. ŠKODA AUTO emp-
fiehlt es, die Montage durch Vertragspartner durchzuführen.
Hinweis. Das Trenngitter kann nur in die Fahrzeuge ŠKODA KODIAQ in
der 5-Sitzer-Variante eingebaut werden.
Nach dem Einbau des Trenngitters in den Kofferraum lassen sich
die Rücksitzlehnen nicht in die letzte hintere Stellung umklappen
(wegen Kollision der Sitzlehne mit dem Gitter). Darauf ist der Kunde
noch vor dem Einbau des Trenngitters hinzuweisen - es besteht kein
Reklamationsgrund.
Teileverzeichnis des Trenngittersets (Abb. 1)
Teil Stückzahl Position
Trenngitter 1 A
Einnietmutter M8 4 B
Zwischenstück (in die Öffnung in der Karosserie
unter der C-Säulenverkleidung) 2 C
Zwischenstück (in die Öffnung im Dach-Seitenteil) 2 D
Blende (in die C-Säulenverkleidung) 2 E
Blende (in die Dachverkleidung) 2 F
Schraube M8 4 G
Schablone (zur Kennzeichnung der Bohrung
in der Dachverkleidung) 1 H
Schablone (zur Kennzeichnung der Bohrung
in der C-Säulenverkleidung) 1 J
Montageanleitung 1
Anmerkung
Sollten die Einnietmuttern einmal abhandenkommen, dann können diese aus dem Kata-
log ŠKODA Original Zubehör unter der Teilenummer 5L6 071 754 nachbestellt werden.
Liste der Spezialwerkzeuge
Bohrwerkzeug (Durchmesser 26 mm) für die Herstellung von Bohrungen in der Dachverklei-
dung - MTX 9-193/B.
Schweifbohrer (Durchmesser 25 mm) für die Herstellung von Bohrungen in den C-Säulenver-
kleidungen.
Nietwerkzeug für das Einnieten von Einnietmuttern (B) (in die Bohrungen im Dach-Seitenteil
unter der Dachverkleidung und in die Bohrungen im Karosserieblech unter der C-Säulenver-
kleidung) - MTX 9-295, Maulschlüssel SW 21, Inbusschlüssel Nr. 10.
Werkzeug für das Einschrauben von Zwischenstücken (C, D)
- Schraube M8 x 50, Mutter M8 mit Scheibe, Maulschlüssel SW 13.
Stecknadel, Absaugvorrichtung.
Table of contents
Languages:
Other Skoda Automobile Accessories manuals

Skoda
Skoda 5E5 065 110 User manual

Skoda
Skoda 565 061 164 User manual

Skoda
Skoda 5JH 061 162 User manual

Skoda
Skoda 57A 017 221A User manual

Skoda
Skoda 5L6 071 175 User manual

Skoda
Skoda 1K0 051 437 User manual

Skoda
Skoda 5J0 054 907 User manual
Skoda
Skoda 000 071 175C User manual

Skoda
Skoda 5E5 061 162 User manual

Skoda
Skoda 5E5 064 711A User manual

Skoda
Skoda 5E7 071 151 User manual

Skoda
Skoda Yeti User manual

Skoda
Skoda EEA 309 001 User manual

Skoda
Skoda 57A 061 163 User manual

Skoda
Skoda 3V9 017 221 User manual

Skoda
Skoda iV Charger User manual

Skoda
Skoda SmartLink WLAN User manual

Skoda
Skoda 5E1 064 209 User manual

Skoda
Skoda 5JA 071 126 User manual
Skoda
Skoda TMB PS 010.01 User manual