manuals.online logo
Brands
  1. Home
  2. •
  3. Brands
  4. •
  5. Teknik
  6. •
  7. Indoor Furnishing
  8. •
  9. Teknik Market 5425767 User manual

Teknik Market 5425767 User manual

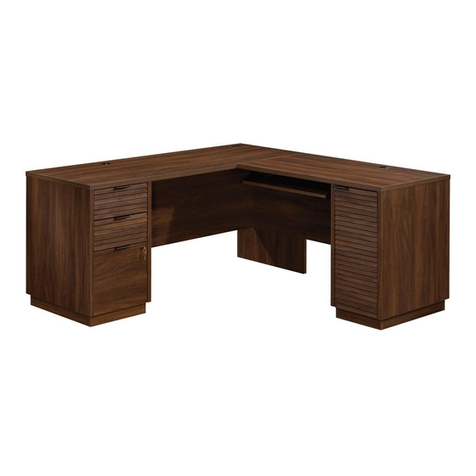
Market L-Shaped Desk
Model 5425767
We're in your corner.
Teknik
www.teknikoffice.co.uk
Part Identification
Hardware Identification
Assembly Steps
Français
Español
Safety
Warranty
Hammer
Not actual size
No. 2 Phillips Screwdriver
Tip Shown Actual Size
Skip the power trip.
This time.
Table of Contents Assembly Tools Required
3
4
5-20
21-24
25-28
29-30
31
Pae 2
Part Identification
åWhile not all parts are labeled, some of the parts will have a label or an inked letter on the ede
to help distinuish similar parts from each other. Use this part identification to help identify similar parts.
Now you know
our ABCs.
A LEFT END LEG (1)
B LEFT UPRIGHT LEG (1)
C BACK (1)
D SHELF/BOTTOM (2)
E SMALL DRAWER FRONT (1)
F LARGE DRAWER FRONT (1)
G LARGE LEFT DRAWER SIDE (1)
H LARGE RIGHT DRAWER SIDE (1)
J LARGE DRAWER BACK (1)
K SMALL LEFT DRAWER SIDE (1)
L SMALL RIGHT DRAWER SIDE (1)
M SMALL DRAWER BACK (1)
N DRAWER BOTTOM (2)
O SMALL TOP (1)
P BRACE (1)
Q WIRE SHELF (1)
R FRONT LONG BRACE (1)
S REAR LONG BRACE (1)
T RIGHT END LEG (1)
U REAR LEG (1)
V LARGE TOP (1)
W SHORT BRACE (1)
A
B
C
D
D
E
F
G
H
J
K
L
M
N
N
O
P
Q
R
S
T
U
V
W
Pae 3
Hardware Identification
åScrews are shown actual size. You may receive extra hardware with your unit.
CAM SCREW - 17
7HIDDEN CAM - 17
8
SMALL WOOD
DOWEL - 4
9LARGE WOOD
DOWEL - 9
10
CABINET RIGHT - 1
5
DRAWER RIGHT - 1
3
CABINET LEFT - 1
6
DRAWER LEFT - 1
4
(EXTENSION SET SHOWN SEPARATED)
1EXTENSION RAIL - 2 2EXTENSION SLIDE - 2
BLACK 1-3/16" FLAT HEAD SCREW - 8
17
BLACK 1-7/8" HEX HEAD SCREW - 4
15 BLACK 1-3/16" HEX HEAD SCREW - 23
16
L-WRENCH - 1
11
FILE GLIDE - 2
13 PULL - 2
14
BLACK 1/2" FLAT HEAD SCREW - 24
19
Pae 4
18 BLACK 1316" MACHINE SCREW  4
APPLIQUE CARD - 1
12
Hardware Usae Guide
HOW TO USE A HIDDEN CAM & CAM SCREW OR CAM DOWEL
NOTE: Various CAM SCREWS or a CAM DOWEL may be used.
Cam Screws Cam Dowel
Turn the CAM SCREW or
ently tap the CAM DOWEL
until the shoulder is aainst
the surface of the part.
1.
3.
1
2
Insert the CAM SCREW or CAM DOWEL into the
HIDDEN CAM. Tihten the HIDDEN CAM.
Hidden CamHidden Cam
Arrow
Push a HIDDEN CAM into
the part. The arrow in the
HIDDEN CAM must point
toward the hole in the
ede of the board.
Hole
2.
Pae 5
Step 1
å Assemble your unit on a carpeted floor or on the empty
carton to avoid scratchin your unit or the floor.
å Turn eiht CAM SCREWS (7) into the LEFT END LEG (A)
and LEFT UPRIGHT LEG (B).
(8 used) 7
A
B
Pae 6
å Fasten the CABINET RIGHT (5) to the LEFT UPRIGHT LEG (B). Use three BLACK 1/2" FLAT HEAD SCREWS (19).
å Fasten the CABINET LEFT (6) to the LEFT END LEG (A). Use three BLACK 1/2" FLAT HEAD SCREWS (19).
å Separate the EXTENSION SLIDES (2) from the EXTENSION RAILS (1) as shown in the upper diaram below. Be
prepared, the parts are reasy.
å Fasten the EXTENSION RAILS (1) to the LEFT END LEG (A) and LEFT UPRIGHT LEG (B). Use six BLACK 1/2" FLAT
HEAD SCREWS (19).
å NOTE: For each EXTENSION RAIL, turn a SCREW into the hole shown in the enlared diaram. Then, slide the inner
cartride of the EXTENSION RAIL in to find the other holes that line up with the holes in the LEFT LEGS. Turn a
SCREW into those holes.
å NOTE: The EXTENSION SLIDES will be used later for the LARGE DRAWER.
Step 2
A
B
Open end
Open end
Roller end
Roller end
Push the black lever in and pull the SLIDE from the RAIL.
BLACK 1/2" FLAT HEAD SCREW
(12 used in this step)
19
1
1
1
5
6
2
Pae 7
å Insert eiht LARGE WOOD DOWELS (10) into the edes
of the BACK (C) and SHELF/BOTTOMS (D).
å Push eiht HIDDEN CAMS (8) into the SHELF/BOTTOMS (D).
Step 3
C
D
D
10
10
8
Arrow
Arrow
8
Arrow
The arrow in the HIDDEN
CAM must point toward the
hole in the ede of the board.
Hole
(8 used)
Pae 8
å Fasten the SHELF/BOTTOMS (D) and the BACK (C) to the
LEFT UPRIGHT LEG (B). Tihten four HIDDEN CAMS.
å NOTE: Be sure the WOOD DOWELS in the SHELF/
BOTTOMS and BACK (C) insert into the LEFT UPRIGHT LEG.
å Fasten the LEFT END LEG (A) to the BACK (C) and
SHELF/BOTTOMS (D). Tihten four HIDDEN CAMS.
å NOTE: Be sure the WOOD DOWELS in the SHELF/
BOTTOMS and BACK insert into the LEFT END LEG.
Step 4
A
B
C
D
D
Surface with
HIDDEN
CAMS
Surface with
HIDDEN
CAMS
Pae 9
Some assembly
(and snacks) required.
å Fasten the LEGS (T and U) to the WIRE SHELF (Q).
Tihten four BLACK 1-3/16" HEX HEAD SCREWS (16)
usin the L-WRENCH (11).
å Fasten the LONG BRACES (R and S) to the
LEGS (T and U)
.
Tihten four BLACK 1-3/16" HEX HEAD SCREWS (16) usin
the L-WRENCH (11).
Step 5
The wire rate
and metal frame
should be even.
BLACK 1-3/16" HEX HEAD SCREW
(8 used in this step)
16
T
U
These holes must be here.
Q
R
S
11
Pae 10
å Carefully stand your unit upriht.
å Insert a LARGE WOOD DOWEL (10) into the exact hole shown
in the BRACE (P).
å Push a HIDDEN CAM (8) into the
BRACE (P).
å Fasten the BRACE (P) to the REAR LEG (U). Tihten two BLACK
1-7/8" HEX HEAD SCREWS (15) usin the L-WRENCH (11).
å Fasten the LEFT UPRIGHT LEG (B) to the BRACE (P). Tihten
two BLACK 1-7/8" HEX HEAD SCREWS (15) usin the
L-WREN CH (11).
å Fasten the SHORT BRACE (W) to the FRONT LONG BRACE (R)
and LEFT UPRIGHT LEG (B). Tihten two BLACK 1-3/16" HEX
HEAD SCREWS (16) usin the L-WRENCH (11).
BLACK 1-3/16" HEX HEAD SCREW
(2 used in this step)
16
Step 6
P
W
P
Arrow
8
10
Surface with
HIDDEN CAM
BLACK 1-7/8" HEX HEAD SCREW
(4 used in this step)
15 11
Pae 11
B
R
U
å Fasten the LARGE TOP (V) to the LONG BRACES (R and S)
and LEGS (T and U). Tihten eiht BLACK 1-3/16" HEX HEAD
SCREWS (16) usin the L-WRENCH (11).
Step 7
R
S
T
U
Surface without holes
V
11
BLACK 1-3/16" HEX HEAD SCREW
(8 used in this step)
16
Pae 12
å Turn a CAM SCREW (7) into the SMALL TOP (O).
å Flip the SMALL TOP over and fasten it to the LEGS (A and B),
SHORT BRACE (W) and BRACE (P). Tihten the HIDDEN CAM
in the BRACE. Tihten five BLACK 1-3/16" HEX HEAD
SCREWS (16) usin the L-WRENCH (11).
å NOTE: Be sure the WOOD DOWEL in the BRACE inserts
into the SMALL TOP.
Step 8
O
O
F
L
I
P
O
V
E
R
Surface without holes
11
BLACK 1-3/16" HEX HEAD SCREW
(5 used in this step)
16
A
B
P
W
Pae 13
Side Step: Make
nachos. (Optional, but
recommended.)
7
Step 9
E
F
G
K
L
H
J
(8 used) 7
9
9
Arrow
8
(8 used)
å Turn eiht CAM SCREWS (7) into the DRAWER
FRONTS (E and F).
å Insert four SMALL WOOD DOWELS (9) into the edes
of the LARGE DRAWER SIDE (G and H) and LARGE
DRAWER BACK (J).
å Push eiht HIDDEN CAMS (8) into the DRAWER
SIDES (G, H, K, and L).
Pae 14
Step 10
å Fasten the SMALL DRAWER FRONT (E) to the SMALL DRAWER SIDES (K and L). Tihten four HIDDEN CAMS.
å NOTE: Be sure the DRAWER BOTTOM (N) inserts into the roove of the SMALL DRAWER FRONT (E).
12
3
å Fasten the SMALL DRAWER SIDES (K and L) to the
SMALL DRAWER BACK (M). Use four BLACK 1-3/16" FLAT
HEAD SCREWS (17).
å Slide a DRAWER BOTTOM (N) into the rooves in the
SMALL DRAWER SIDES (K and L) and SMALL DRAWER
BACK (M).
KK
L
N
L
N
MM
K
L
Be sure the DRAWER
BOTTOM inserts into the
DRAWER FRONT roove.
Groove
E
BLACK 1-3/16" FLAT HEAD SCREW
(4 used in this step)
17
Unfinished
surface
Pae 15
å Fasten a PULL (14) to the SMALL DRAWER FRONT (E). Use
two BLACK 13/16" MACHINE SCREWS (18).
å Flip the SMALL DRAWER over. Fasten the DRAWER RIGHT (3) to
the SMALL RIGHT DRAWER SIDE (L) and the DRAWER LEFT (4)
to the SMALL LEFT DRAWER SIDE (K). Use six BLACK 1/2" FLAT
HEAD SCREWS (19).
Step 11
E
L
K
Roller end
Roller end
14
3
4
BLACK 1/2" FLAT HEAD SCREW
(6 used in this step)
19
Pae 16
BLACK 13/16" MACHINE SCREW
(2 used in this step)
18
Step 12
å Fasten the LARGE DRAWER FRONT (F) to the LARGE DRAWER SIDES (G and H). Tihten four HIDDEN CAMS.
å NOTE: Be sure the DRAWER BOTTOM (N) inserts into the roove of the LARGE DRAWER FRONT (F).
å NOTE: Be sure the WOOD DOWELS in the LARGE DRAWER SIDES insert into the LARGE DRAWER FRONT.
12
3
å Fasten the LARGE DRAWER SIDES (G and H) to the
LARGE DRAWER BACK (J). Use four BLACK 1-3/16" FLAT
HEAD SCREWS (17).
å NOTE: Be sure the WOOD DOWELS in the LARGE DRAWER
BACK inserts into the holes in the LARGE DRAWER SIDES.
å Slide a DRAWER BOTTOM (N) into the rooves in
the LARGE DRAWER SIDES (G and H) and LARGE
DRAWER BACK (J).
G
G
J
N
H
N
J
H
G
H
Unfinished
surface
Be sure the DRAWER
BOTTOM inserts into the
DRAWER FRONT roove.
Groove
F
BLACK 1-3/16" FLAT HEAD SCREW
(4 used in this step)
17
Pae 17
Step 13
å Fasten a PULL (14) to the LARGE DRAWER FRONT (F).
Use two BLACK 13/16" MACHINE SCREWS (18).
å Fasten the EXTENSION SLIDES (2) to the LARGE
DRAWER SIDES (G and H). Use six BLACK 1/2" FLAT
HEAD SCREWS (19).
BLACK 1/2" FLAT HEAD SCREW
(6 used in this step)
19
2
2
14
F
G
H
Open end
Open end
Pae 18
BLACK 13/16" MACHINE SCREW
(2 used in this step)
18
å Push two FILE GLIDES (13) onto the top edes of the
LARGE DRAWER SIDES (G and H).
å NOTE: This drawer is desined to hold letter size haners.
Step 14
G
H
13
13
Letter
Pae 19
Almost time to
celebrate! With a nap.
Step 15
å To insert the small drawer into your unit, tip the front of the drawer down and drop the rollers on the drawer behind the
rollers on the unit. Lift the front of the drawer up and slide it into the unit.
å To insert the lare drawer into your unit, line up the EXTENSION SLIDES on the drawer with the EXTENSION RAILS on
the unit and push the drawer into the unit until the drawer is fully inserted. The drawer will push in hard until it is all the
way in, then it will slide in and out easier.
å Peel APPLIQUES from the APPLIQUE CARD (12) and stick them onto each visible HIDDEN CAM.
å NOTE: Please read the back paes of the instruction booklet for important safety information.
å This completes assembly. Clean with a damp cloth. Wipe dry.
Place the roller on the SLIDE
behind the roller on the RAIL.
50 lbs.
25 lbs.
15 lbs.
35 lbs.
60 lbs.
25 lbs.
Pae 20
12

Other Teknik Indoor Furnishing manuals

Teknik 5410416 User manual

Teknik

Teknik 5410416 User manual

Teknik Hudson Elm Finish 5427424 User manual

Teknik

Teknik Hudson Elm Finish 5427424 User manual

Teknik Home Study 5426055 User manual

Teknik

Teknik Home Study 5426055 User manual

Teknik Lux Desk 5426429 User manual

Teknik

Teknik Lux Desk 5426429 User manual

Teknik White Home Study L-Shaped Desk User manual

Teknik

Teknik White Home Study L-Shaped Desk User manual

Teknik Hampstead Park 5420731 User manual

Teknik

Teknik Hampstead Park 5420731 User manual

Teknik Barrister Home 5417772 User manual

Teknik

Teknik Barrister Home 5417772 User manual

Teknik Streamline L-Shaped Desk 5414417 User manual

Teknik

Teknik Streamline L-Shaped Desk 5414417 User manual

Teknik New Hyde 426440 User manual

Teknik

Teknik New Hyde 426440 User manual

Teknik Canal Heights Console 5419230 User manual

Teknik

Teknik Canal Heights Console 5419230 User manual

Teknik Louvre 5415109 User manual

Teknik

Teknik Louvre 5415109 User manual

Teknik Wide Bookcase 5420282 User manual

Teknik

Teknik Wide Bookcase 5420282 User manual

Teknik Stationmaster 5426454 User manual

Teknik

Teknik Stationmaster 5426454 User manual

Teknik Elstree 5426908 User manual

Teknik

Teknik Elstree 5426908 User manual

Teknik Home Study 5426616 User manual

Teknik

Teknik Home Study 5426616 User manual

Teknik 5426436 User manual

Teknik

Teknik 5426436 User manual
Teknik Barrister Home User manual

Teknik

Teknik Barrister Home User manual

Teknik Hythe 5426438 User manual

Teknik

Teknik Hythe 5426438 User manual

Teknik 1800 Hutch User manual

Teknik

Teknik 1800 Hutch User manual

Teknik Denver Swivel Recliner User manual

Teknik

Teknik Denver Swivel Recliner User manual

Teknik 5427129 User manual

Teknik

Teknik 5427129 User manual

Teknik 5426135 User manual

Teknik

Teknik 5426135 User manual

Teknik Shaker Style 5428225 User manual

Teknik

Teknik Shaker Style 5428225 User manual

Teknik Industrial Style Chunky Desk 5422097 User manual

Teknik

Teknik Industrial Style Chunky Desk 5422097 User manual

Popular Indoor Furnishing manuals by other brands

Schildmeyer Venlo 651400 Assembly instructions

Schildmeyer

Schildmeyer Venlo 651400 Assembly instructions

Twin-Star International Bell'O 26MM9313 instruction manual

Twin-Star International

Twin-Star International Bell'O 26MM9313 instruction manual

SEI Modesto CK642200TX Assembly instruction

SEI

SEI Modesto CK642200TX Assembly instruction

Better Bathrooms BeBa 24913 user manual

Better Bathrooms

Better Bathrooms BeBa 24913 user manual

Allen + Roth OPHELIA 30AL installation manual

Allen + Roth

Allen + Roth OPHELIA 30AL installation manual

TRIBU 07661 Assembly instructions

TRIBU

TRIBU 07661 Assembly instructions

Better Homes and Gardens CONNELL BH18-021-199-25 Assembly instructions

Better Homes and Gardens

Better Homes and Gardens CONNELL BH18-021-199-25 Assembly instructions

Bebecar TRAMA 07954 instructions

Bebecar

Bebecar TRAMA 07954 instructions

Next 551599 Assembly instructions

Next

Next 551599 Assembly instructions

RH Baby&child BELLAMY Assembly instructions

RH Baby&child

RH Baby&child BELLAMY Assembly instructions

modway Ripple EEI-1532 manual

modway

modway Ripple EEI-1532 manual

NTC SGUALA' user manual

NTC

NTC SGUALA' user manual

CABINETS TO GO Findley & Myers WD2412 Assembly instructions

CABINETS TO GO

CABINETS TO GO Findley & Myers WD2412 Assembly instructions

SAFAVIEH COUTURE Anabelle SFV2535 quick start guide

SAFAVIEH COUTURE

SAFAVIEH COUTURE Anabelle SFV2535 quick start guide

convenience concepts 8025W Assembly instructions

convenience concepts

convenience concepts 8025W Assembly instructions

Ferm LITTLE ARCHITECT BENCH Assembly manual

Ferm

Ferm LITTLE ARCHITECT BENCH Assembly manual

modway EEI-3916 quick start guide

modway

modway EEI-3916 quick start guide

Better Homes and Gardens Collins BH16-084-299-04 manual

Better Homes and Gardens

Better Homes and Gardens Collins BH16-084-299-04 manual

manuals.online logo
manuals.online logoBrands
  • About & Mission
  • Contact us
  • Privacy Policy
  • Terms and Conditions

Copyright 2025 Manuals.Online. All Rights Reserved.