manuals.online logo
Brands
  1. Home
  2. •
  3. Brands
  4. •
  5. Teknik
  6. •
  7. Indoor Furnishing
  8. •
  9. Teknik City Centre 5426059 User manual

Teknik City Centre 5426059 User manual

NOTE: THIS INSTRUCTION
BOOKLET CONTAINS IMPORTANT
SAFETY INFORMATION.
PLEASE READ AND KEEP FOR
FUTURE REFERENCE.
TV Stand
City Centre Collection | Model 5426059
It stands. You sit.
A thing of beauty,
this one.
Teknik
www.teknikoffice.co.uk
Part Identification
Hardware Identification
Assembly Steps
Safety
No. 2 Phillips Screwdriver
Tip Shown Actual Size
WARNING
!
Table of Contents Assembly Tools Required
Use of a TV that is too heavy or large is hazardous. A TV that is too heavy will create a risk of a tip-over that can cause severe injury or
death. A TV that is too large for the available space might be accidentally pushed or bumped o the furniture, or subject to tip-over.
• Check the size and weight of your TV. Compare it to the diagram below – before you begin assembly!
• This Sauder unit is designed for use with flat panel televisions weighing less than 50 pounds. Never use with a TV that weighs
more.
• The size of the television, front-to-back and side-to-side, must fit within the space defined in the diagram.
• Never place the front edge of the TV past the front edge of the TV support shelf (or stop molding – if equipped)
• Never allow the sides of the TV to extend past the side edges of the TV support surface.
• Be sure to apply the warning label as instructed later in the assembly. The label provides important safety related information.
3
4
5-16
17
50 lbs.
50 lbs.
46"
46"
15-5/8"
15-5/8"
Page 2
Part Identification
åWhile not all parts are labeled, some of the parts will have a label or an inked letter on the edge
to help distinguish similar parts from each other. Use this part identification to help identify similar parts.
Now you know
our ABCs.
A SMALL UPRIGHT (1)
B SHELF (1)
C UPRIGHT (2)
D LEFT END (1)
E RIGHT END (1)
F BOTTOM (1)
G LEG (2)
H FOOT (2)
J TOP (1)
K BACK (1)
A
B
C
C
D
E
FG
G
J
K
H
Page 3
Hardware Identification
åScrews are shown actual size. You may receive extra hardware with your unit.
1/2" PAN HEAD SCREW - 30
9
CAM SCREW -14
1HIDDEN CAM - 14
2WOOD DOWEL - 10
3
1-3/8" FLAT HEAD SCREW - 10
7 8 13/16" HEX HEAD SCREW - 4
Page 4
APPLIQUE CARD - 3
4L-WRENCH - 1
5
(Refer to the last step for proper location and application)
WARNING LABEL - 1
6
522,68 22,68
50 lbs. 22 kg 22 kg
Hardware Usage Guide
HOW TO USE A HIDDEN CAM & CAM SCREW OR CAM DOWEL
NOTE: Various CAM SCREWS or a CAM DOWEL may be used.
Cam Screws Cam Dowel
Turn the CAM SCREW or
gently tap the CAM DOWEL
until the shoulder is against
the surface of the part.
1.
Hidden CamHidden Cam
Arrow
Push a HIDDEN CAM into
the part. The arrow in the
HIDDEN CAM must point
toward the hole in the
edge of the board.
Hole
2.
3.
1
2
Insert the CAM SCREW or CAM DOWEL into the
HIDDEN CAM. Tighten the HIDDEN CAM.
Page 5
Step 1
å Assemble your unit on a carpeted floor or on the empty
carton to avoid scratching your unit or the floor.
å Push six HIDDEN CAMS (2) into the SHELF (B) and
SMALL UPRIGHT (A).
å Turn four CAM SCREWS (1) into the SHELF (B).
B
1
A
2
Arrow
Arrow
2
Page 6
Step 2
å Fasten the SMALL UPRIGHT (A) to the SHELF (B). Use
two 1-3/8" FLAT HEAD SCREWS (7).
B
A
1-3/8" FLAT HEAD SCREW
(2 used in this step)
7
Edge with holes
Surface with
HIDDEN
CAMS
Surface with HIDDEN CAMS
Page 7
Do not stand the unit upright without the
BACK fastened. The unit may collapse.
Caution
Step 3
C
C
C
C
Arrow
2
B
Surface with HIDDEN CAMS
å Push four HIDDEN CAMS (2) into
the UPRIGHTS (C).
å Insert two WOOD DOWELS (3) into the
edges of the UPRIGHTS (C).
å Fasten the UPRIGHTS (C) to the SHELF (B).
Tighten four HIDDEN CAMS.
å NOTE: Be sure the WOOD DOWELS in
the UPRIGHTS insert into the SHELF.
3
3
Page 8
å Turn four CAM SCREWS (1) into the ENDS (D and E).
å Push four HIDDEN CAMS (2) into the ENDS (D and E).
Step 4
E
D
Arrow
2
2
Arrow
1
Page 9
å Insert a WOOD DOWEL (3) into each END (D and E).
å Fasten the ENDS (D and E) to the SHELF (B). Tighten four
HIDDEN CAMS.
å NOTE: Be sure the WOOD DOWELS in the ENDS insert
into the SHELF.
Step 5
D
E
B
3
3
Page 10
These holes
must be here.
These holes
must be here.
å Insert a WOOD DOWEL (3) into each edge of the
ENDS (D and E) and UPRIGHTS (C).
å Fasten the BOTTOM (F) to the ENDS (D and E) and
UPRIGHTS (C). Use eight 1-3/8" FLAT HEAD SCREWS (7).
å NOTE: Be sure the WOOD DOWELS in the ENDS and
UPRIGHTS insert into the BOTTOM.
Step 6
D
EF
C
C
1-3/8" FLAT HEAD SCREW
(8 used in this step)
7
3
3
(4 used)
These
holes
must be
here.
Page 11
Step 7
Page 12
å Fasten the BACK (K) to the ENDS (D and E), SHELF (B), and
BOTTOM (F). Use twenty-two 1/2" PAN HEAD SCREWS (9).
D
E
1/2" PAN HEAD SCREW
(22 used in this step)
9
Do not stand the unit upright without the
BACK fastened. The unit may collapse.
Caution
K
F
B
Step 8
Page 13
13/16" HEX HEAD SCREW
(4 used in this step)
8
G
G
å Fasten the LEGS (G) to the BOTTOM (F). Tighten
four 13/16" HEX HEAD SCREWS (8) using the
L-WRENCH (5).
å NOTE: You should start each SCREW a few turns
before completely tightening any of them.
5
F
å Fasten the FEET (H) to the BOTTOM (F). Use eight 1/2"
PAN HEAD SCREWS (9).
å Turn six CAM SCREWS (1) into the TOP (J).
Step 9
Page 14
1
J
H
H
F
1/2" PAN HEAD SCREW
(8 used in this step)
9
å Carefully stand your unit upright.
å Insert a WOOD DOWEL (3) into each END (D and E).
å Fasten the TOP (J) to the SMALL UPRIGHT (A) and
ENDS (D and E). Tighten six HIDDEN CAMS.
å NOTE: Be sure the WOOD DOWELS in the ENDS insert
into the TOP.
Step 10
3
3
J
Page 15
E
D
A
Step 11
Page 16
522,68 22,68
å Apply the WARNING LABEL (6) to the TOP (J). You should be able to read the label when the TV is removed
from the unit. When the TV is in place, it should hide the label. Peel o the backing and apply the label as shown
in the diagram.
å NOTE: This is a permanent label intended to last for the life of the product. Once applied, do not try to remove it.
å Peel APPLIQUES from the APPLIQUE CARDS (4) and stick them onto each visible HIDDEN CAM.
å NOTE: Please read the back pages of the instruction booklet for important safety information.
å This completes assembly. Clean with a damp cloth. Wipe dry.
522,6822,68
J
6
To cover HIDDEN CAMS
3
50 lbs. total
50 lbs.
50 lbs.
(3 used)
WARNING
Please use your furniture correctly and safely. Improper use can cause safety hazards,
or damage to your furniture or household items. Carefully read the following safety information.
Death or serious injury may occur when children climb on audio and/or video equipment furniture. A remote control or toys
placed on the furnishing may encourage a child to climb on the furnishing and as a result may tip over onto the child.
NEVER allow children to climb or play with the TV or furnishing supporting the TV.
NEVER place toys, food, remote, etc. on top of the TV or TV furnishing.
ALWAYS use either the safety hardware as instructed or other wall anchoring device.
Relocating audio and/or video equipment to furniture not specifically designed to support audio and/or video equipment
may result in death or serious injury due to furniture collapse or over turning onto a child.
NEVER place a TV on furniture that is not intended to support a TV.
NEVER exceed the maximum size and weight of the TV shown in the instructions.
Be sure to apply the TV warning label as shown in the instructions.
Overloading drawers and shelves may result in furniture that can break or sag, or tip-over which may result in injury.
NEVER exceed the weight limits shown in the instructions.
Place the heavier items on lower shelves as far back from the front as possible.
Load the bottom surfaces first to avoid top-heavy furniture.
Moving furniture that is not designed to be moved or equipped with casters may result in injury or damage to furnishings or
personal property.
ALWAYS unload shelves and drawers, starting with the top surfaces, before moving.
NEVER push or pull furniture on carpet. Have a friend help lift properly to move and/or reposition it.
Page 17

Other Teknik Indoor Furnishing manuals

Teknik Hampstead Park Compact Desk 5420284 User manual

Teknik

Teknik Hampstead Park Compact Desk 5420284 User manual

Teknik Craft 5421416 User manual

Teknik

Teknik Craft 5421416 User manual

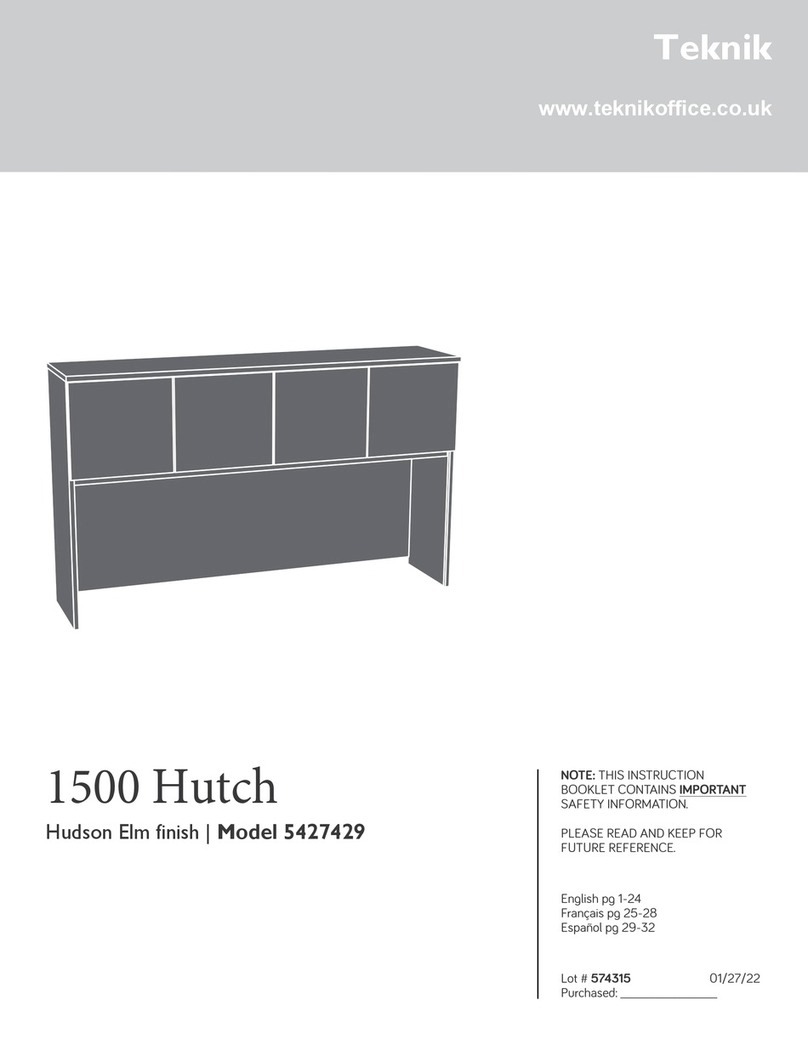
Teknik 5427129 User manual

Teknik

Teknik 5427129 User manual

Teknik Scribed Oak Storage Desk 5418294 User manual

Teknik

Teknik Scribed Oak Storage Desk 5418294 User manual

Teknik City Center 5425658 User manual

Teknik

Teknik City Center 5425658 User manual

Teknik New Hyde 426440 User manual

Teknik

Teknik New Hyde 426440 User manual

Teknik 5420276 User manual

Teknik

Teknik 5420276 User manual

Teknik Boutique Style Desk User manual

Teknik

Teknik Boutique Style Desk User manual

Teknik 5426463 User manual

Teknik

Teknik 5426463 User manual
Teknik Canal Heights 5419228 User manual

Teknik

Teknik Canal Heights 5419228 User manual

Teknik 5424933 User manual

Teknik

Teknik 5424933 User manual

Teknik 5418072 User manual

Teknik

Teknik 5418072 User manual

Teknik 5420277 User manual

Teknik

Teknik 5420277 User manual

Teknik 5422378 User manual

Teknik

Teknik 5422378 User manual

Teknik Hudson 5425709 User manual

Teknik

Teknik Hudson 5425709 User manual

Teknik Hampstead 5426504 User manual

Teknik

Teknik Hampstead 5426504 User manual

Teknik Canal Heights Coffee Table 5419233 User manual

Teknik

Teknik Canal Heights Coffee Table 5419233 User manual

Teknik Louvre 5415109 User manual

Teknik

Teknik Louvre 5415109 User manual

Teknik Hideaway Cotswold 5430446 User manual

Teknik

Teknik Hideaway Cotswold 5430446 User manual

Teknik 5426135 User manual

Teknik

Teknik 5426135 User manual

Teknik 5423547 User manual

Teknik

Teknik 5423547 User manual

Teknik Spanish Style Desk 5420114 User manual

Teknik

Teknik Spanish Style Desk 5420114 User manual

Teknik Hampstead Park 5420834 User manual

Teknik

Teknik Hampstead Park 5420834 User manual

Teknik Barrister Home User manual

Teknik

Teknik Barrister Home User manual

Popular Indoor Furnishing manuals by other brands

Better Homes and Gardens Autumn Lane BH19-D1-1011-08 manual

Better Homes and Gardens

Better Homes and Gardens Autumn Lane BH19-D1-1011-08 manual

Strictly Beds & Bunks AMELIA BED FRAME Assembly instructions

Strictly Beds & Bunks

Strictly Beds & Bunks AMELIA BED FRAME Assembly instructions

Eurobib Direct Showalot mini E4470 Assembly instructions

Eurobib Direct

Eurobib Direct Showalot mini E4470 Assembly instructions

Trasman 5020 DGAME Assembly manual

Trasman

Trasman 5020 DGAME Assembly manual

diotti GRANADILLA Assembly instructions

diotti

diotti GRANADILLA Assembly instructions

OSP Designs DEVONSHIRE WRITING DESK DVN2547 operating instructions

OSP Designs

OSP Designs DEVONSHIRE WRITING DESK DVN2547 operating instructions

Wholesale Interiors BBT 5264 Assembly instructions

Wholesale Interiors

Wholesale Interiors BBT 5264 Assembly instructions

WB Mfg iXchange SSW1001-AL Assembly instructions

WB Mfg

WB Mfg iXchange SSW1001-AL Assembly instructions

ZINUS OPSST2-16-2 Assembly instruction

ZINUS

ZINUS OPSST2-16-2 Assembly instruction

BluDot Modu-licious 3 Assembly notes

BluDot

BluDot Modu-licious 3 Assembly notes

Cooper Lighting IMI-321 installation instructions

Cooper Lighting

Cooper Lighting IMI-321 installation instructions

Furniture Tree Sammie Bunk instructions

Furniture Tree

Furniture Tree Sammie Bunk instructions

Tutti Bambini BARCELON 211095 manual

Tutti Bambini

Tutti Bambini BARCELON 211095 manual

Furniture of America Julia CM3014RT Assembly instructions

Furniture of America

Furniture of America Julia CM3014RT Assembly instructions

modway EEI-1525 quick start guide

modway

modway EEI-1525 quick start guide

Furniture of America CM-DK933 Assembly instructions

Furniture of America

Furniture of America CM-DK933 Assembly instructions

Triarch 31455 Assembly instructions

Triarch

Triarch 31455 Assembly instructions

Living Spaces Margherita 288021 Assembly instructions

Living Spaces

Living Spaces Margherita 288021 Assembly instructions

manuals.online logo
manuals.online logoBrands
  • About & Mission
  • Contact us
  • Privacy Policy
  • Terms and Conditions

Copyright 2025 Manuals.Online. All Rights Reserved.