This is a legally binding contract between you, as the end user, and Testo.
Once you or another authorised person opens the sealed CD-ROM packaging, the conditions of this contract
are recognised. If you do not agree with the conditions, return the unopened software package with all
accompanying items, including all written documentation and boxes, to the point from which you purchased
the software and your money will be returned in full.
Concession
This licence authorises you to use a copy of the Testo software, acquired with this licence, on a single
computer on condition that the software is only used on one computer at any one time. If you have acquired
multiple licences for the software you can have so many copies in use as you have licences. The software is
deemed as being “in use” on a computer if it is loaded in a cache i.e. RAM or if it is saved in a permanent
memory e.g. on the hard disk of this computer, with the exception of a copy installed in a network server for
the sole purpose of distribution to other computers which is then deemed as not being “in use”. If the number
of persons using the software exceeds the number of licences acquired you are then required to provide
suitable mechanisms or procedures to ensure that the number of persons using the software simultaneously
does not exceed the number of licences.
Copyright
The software is protected against copying by copyright laws, international contracts and other legal
stipulations. It is forbidden to copy the software, product manuals and other accompanying written
documents on the software. The software should not be licenced, rented or leased. If the software is not
provided with technical protection you can make a single copy of the software solely for security and filing
purposes or you can transmit the software to one hard disk on the condition that the original is kept solely for
security or filing purposes. Reverse engineering, decompilation, disassembly are not permitted. For every
infringement of protective rights you or any authorised person are liable to claims from Testo GmbH & Co
Lenzkirch.
Limited warranty
Testo guarantees for a period of 90 days following the acquisition of the software by the buyer or for a longer
minimum time period if stipulated by the laws in the country of purchase that the software generally
corresponds to the standards defined in the accompanying documentation. Testo specifically does not
guarantee that the software will run without interruptions or errors. If the software does not function normally in
accordance with the accompanying documentation, the purchaser then has the right to return the software to
Testo within the warranty time accompanied by a written description on the malfunction(s). Testo is only
obliged, after a reasonable time period, to make a functioning copy of the software available to the purchaser
or to refund the full purchase price if a copy is unavailable for whatever reason.
Any guarantees in relation to the software, the corresponding manuals and written documentation exceeding
the above limited warranty are not admitted.
Neither Testo nor Testo suppliers are obliged to replace any damage occurring during use of this Testo
product or caused by the inability to use this Testo product even if Testo has been informed of the possibility of
such damage. This exclusion does not apply to damage caused deliberately or through gross negligence by
Testo. Likewise claims supported by inalienable legal stipulations are unaffected.
Copyright © by 2000 Testo AG
M. Windows®und Excel®are the registered trade marks of the Microsoft Corporation.
3
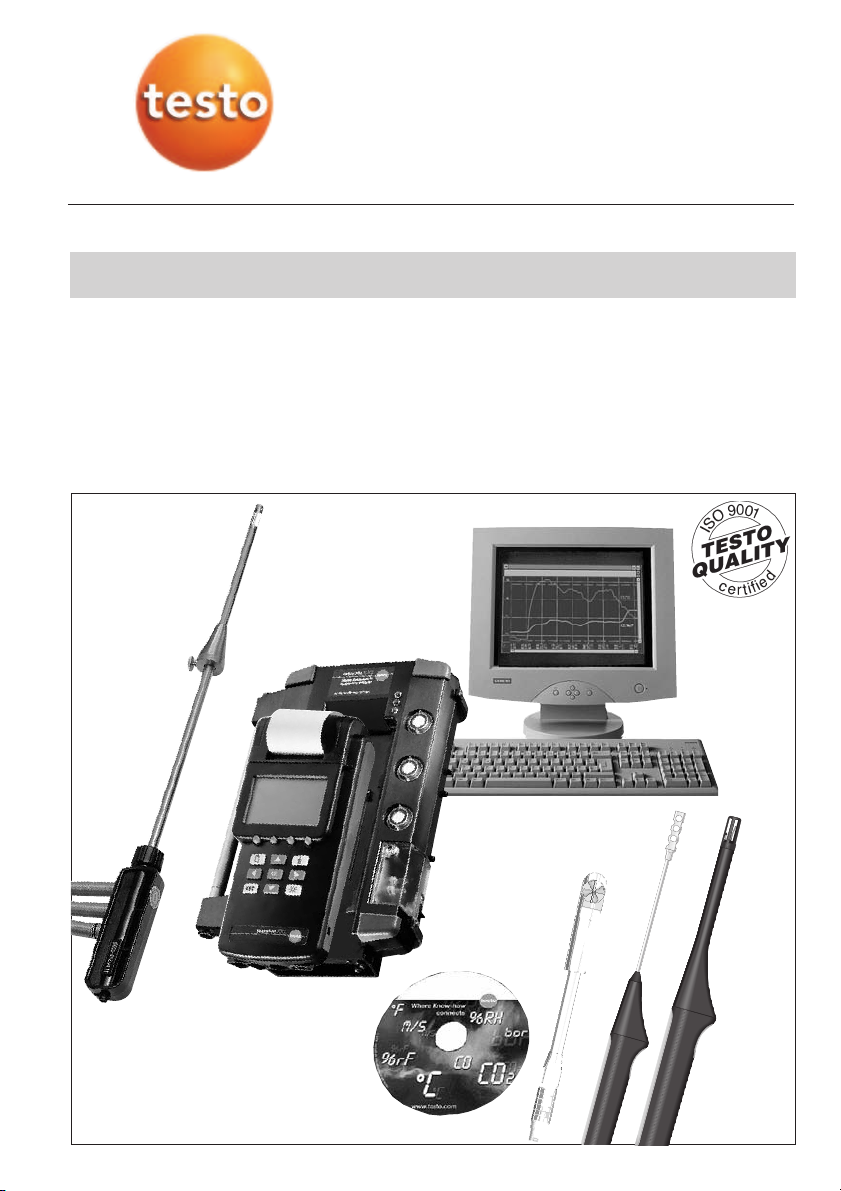
Licence Agreement