Nebezpečí: Nikdy neponechávejte stroj bez dozoru, pokud je zapojen v síti. Vždy stroj odpojte z
el. sítě ihned po došití nebo před čištěním.
Varování: Neodpojujte taháním za kabel. Pro odpojení přívodní kabelu uchopte zástrčku a
vytáhněte.
Jakmile je pedál odpojen, stroj nebude fungovat.
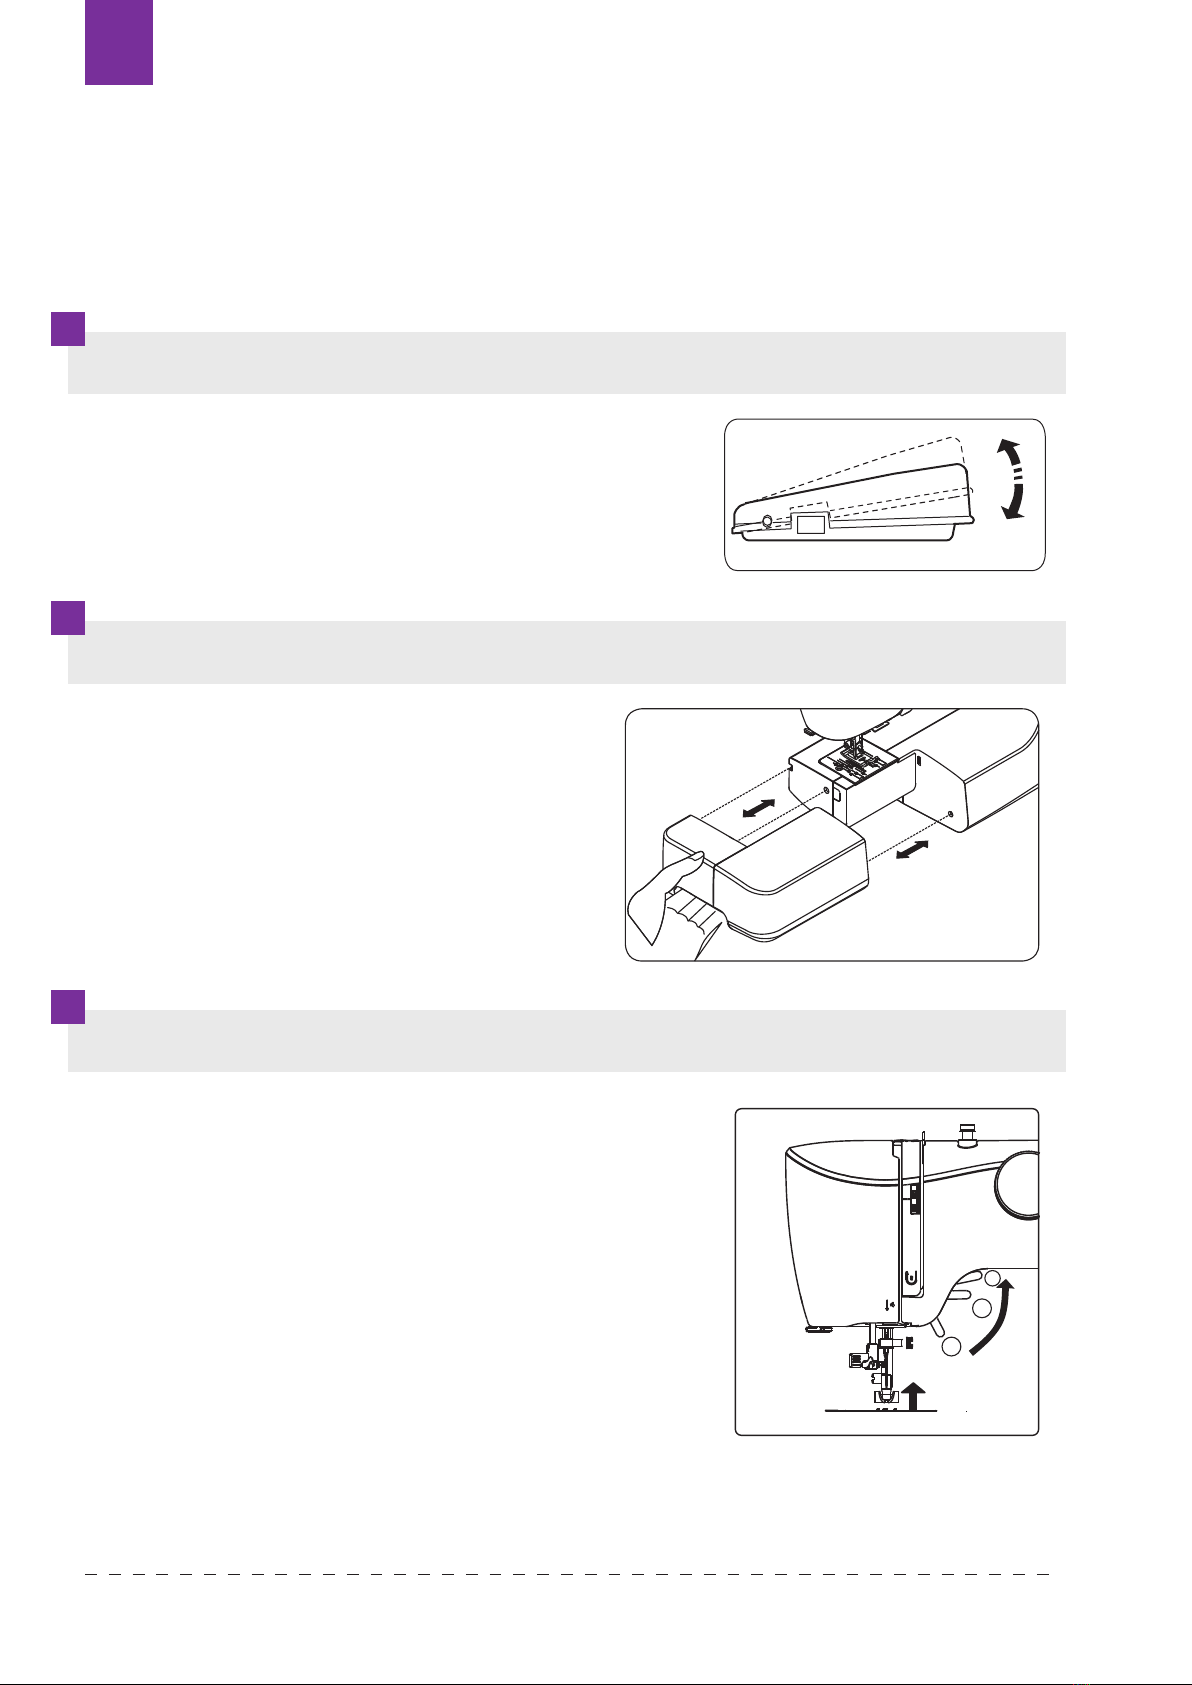
PEDÁL
ŠITÍ NA VOLNÉM RAMENU
PÁČKA PRO ZDVIH A SPUŠTĚNÍ PŘÍTLAČNÉ PATKY
Rychlost šití lze ovládat pomocí pedálu.
Čím silněji pedál sešlápnete, tím rychleji budete šít.
Na stroji lze šít i na volném rameni. S
připojeným pracovním stolkem / schránkou
na příslušenství získáte dodatečnou šicí
plochu. Odstraněním pracovního stolku
(jednoduše jej vysuňte směrem vlevo, dle
obrázku), připravíte stroj pro šití na volném
ramenu.
Páčku lze použít v následujících 3 pozicích:
1. Pro šití spusťte přítlačnou patku.
2. Pro odstranění, či vložení látky páčku zdvihněte.
3. Pro výměnu přítlačné patky nebo odstranění či
vložení velmi silného materiálu můžete použít extra
zdviženou polohu páčky, viz obrázek.
3
2
13
5
4
7
689
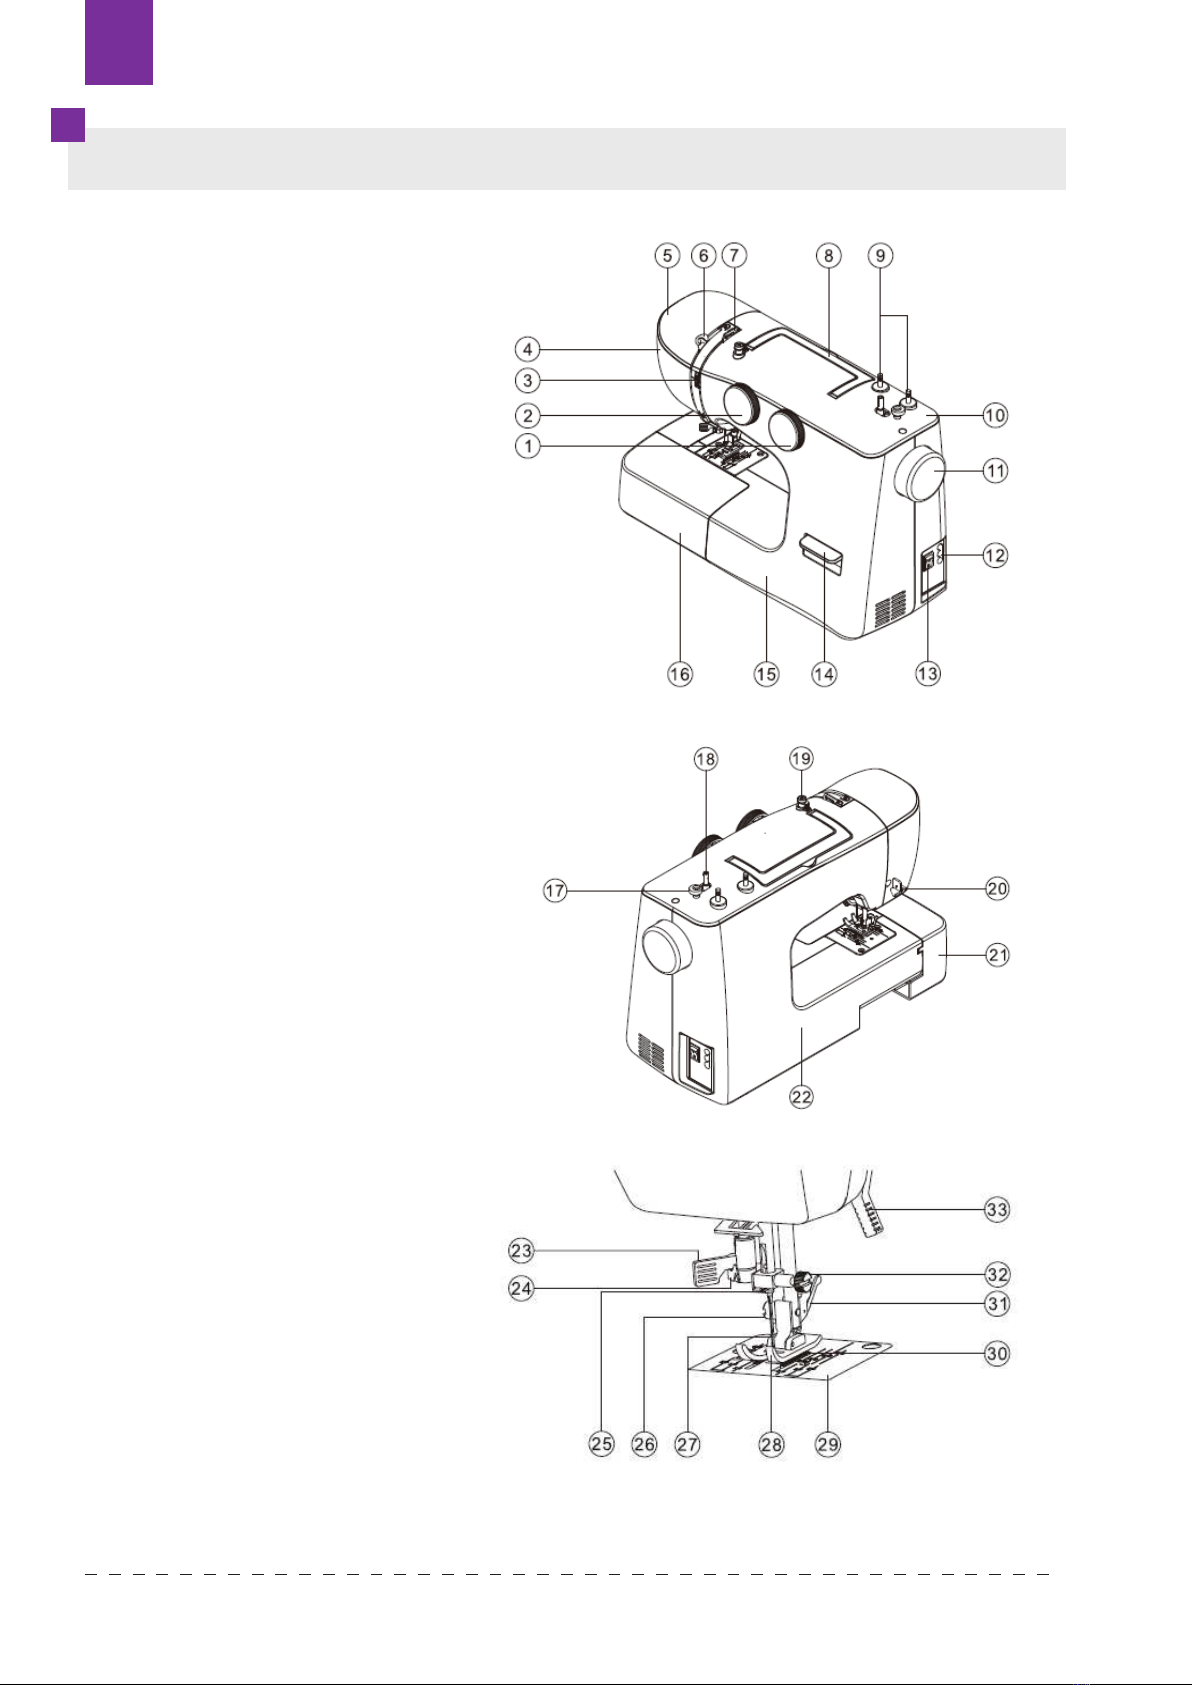
KNOWING YOUR SEWING MACHINE
Power line cord/foot control
Make sure that the sewing machine is turned off (the
power switch is set to “O”), and then connect the plug
of the power line and into the appliance inlet and your
wall outlet.
The foot that comes on your sewing machine
is called zigzag foot and will be used for the
majority of your sewing.
Setting up your machine
Bu sure to wipe off any surplus oil from needle
plate area before using your machine the first
time.
Power/light switch
Your machine will not operate until the power/light switch is turned on. The same switch controls
both the power and the light.
When servicing the machine, or changing needles, etc., machine must be disconnected from
the power supply.
NOTE:When foot control is disconnected,
the machine will not operate.
Always disconnect the machine from power
supply by removing the plug from the wall-outlet.
Sewing speed can be varied the foot control.
The harder you press on the control, the faster
machine runs.
Accessories
1. Bobbins (3pcs)
2. Needle 3 pcs and twin needle 1 pc
3. Multi-function screwdriver
4. Seam guide(optional)
5. Ripper/Brush
6. Buttonhole foot
7. Guide presser foot
8. Zipper foot
9. Button fitting foot
Power/light
switch “OFF”
Power/light
switch “ON”
4
2
1
3
KNOWING YOUR SEWING MACHINE
Converting to free-arm sewing
Your machine can be used either as a flat-bed or as a
free-arm model.
With the extension table in position, it provides a
large working surface as a standard flat-bed model.
To remove the extension table, hold it firmly with both
hands and pull it off to the left as shown. To replace,
slide the extension table back into place until it
clicks.
With the extension table removed the machine
converts into a slim free-arm model for sewing
children’s clothes, cuffs, trouser legs, and other
hard-to-reach places.
Presser foot lifter
There are three positions for your presser foot.
1. Lower the presser foot to sew.
2. Raise the lifter to the middle position to insert or remove
fabric.
3. Lift it to its highest position to change the presser foot or to
remove thick fabric.
Reverse sewing lever
As long as you are pressing down this
button while sewing, the machine will feed
the fabric backwards.
Dropping the feed dogs
1. For dropping the feed dogs, press down
lever and move it to the direction of arrow
as illustrated.
2. To raise the feed dogs, press down the
lever and move it to the direction or arrow
as illustrated.
* Feed dogs must always be up for normal
sewing.
Texi Fox 2510
CS