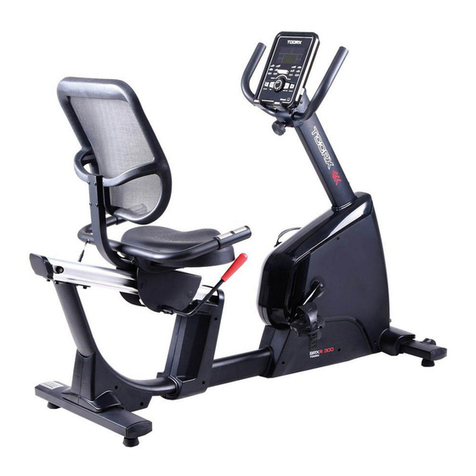
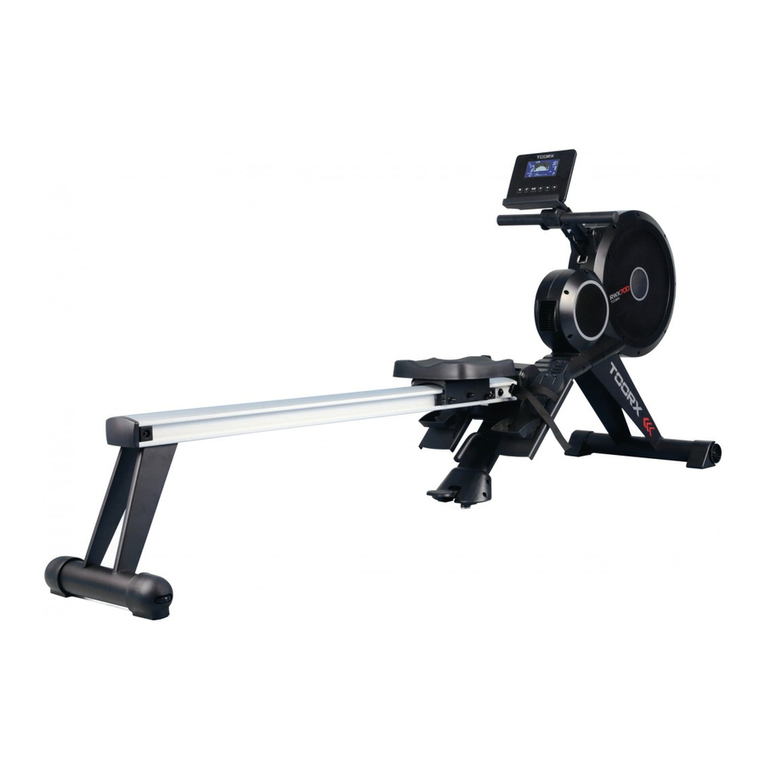
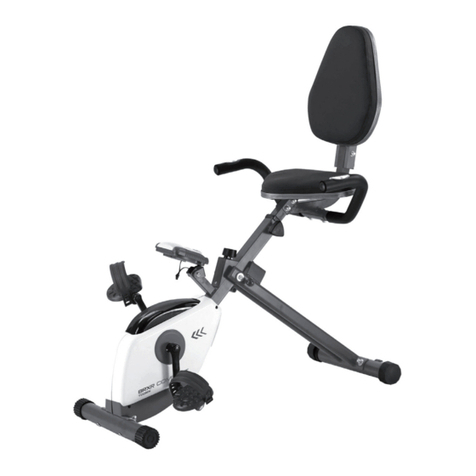
TOORX BRX R9500 User manual

Ed : Rev : Cod :
INSTRUCTION
09/20 GRLDTOORXBRXR950000

Exploded drawing:
50
48L
51L
49
46
45
2926222421 27 30 2831
44
48R
45 51R
8586
78
84 83 80 82
79
52
55
53
54
9
15
16
12
11
416 7
3
6
9
88 101
16
9
7A
5
76
40 39 39
17 72
841
43 38 42
3 2 16 797A
539
47
63 64 65 39731814
56 38
37L
37R
35L
35R
32L
32R
23
25
34 33 19 36
1
8
41
15
9
16
38
39
39
10L
10R
13
15
16
93
16
28
28
38
38
39
87
69
71L
71R
20
67 70
75
52 39
53
53
102
100
99
98
97
96
95
94
92
91 90
89 103
104 106
105 107
108
107109
110
111
112
113
114
115
116
118
122120
121
119
16
123
62
38
68 74
59 61 60
39
57 58
77
87 88
66
TAICO

Check list:
1
X1X1
51L & 51R
5
X2
40
X1
X1
17
24
X1X1X1
X1
X1
X1X1
114 & 115
X1
X2
20
7 M8*1.25*70L 4PCS 9 D15.4*D8.2*2T 8PCS
(mm)
STEP 1
KH-744S0
16 D16*D8.5*1.2T 8PCS
7A M8*1.25*110L 4PCS
STEP 2
15 M8*1.25*15L 4PCS 16 D16*D8.5*1.2T 4PCS 9 D15.4*D8.2*2T 4PCS
STEP 5
42 97.2*75*42 1PC
STEP 4
41 M8*1.25*50L 4PCS
8 D22*D8.5*1.5T 4PCS
15 M8*1.25*15L 3PCS
9 D15.4*D8.2*2T 3PCS
16 D16*D8.5*1.2T 3PCS
112 M8*1.25*35L 4PCS
16 D16*D8.5*1.2T 4PCS
39 M5*12L 8PCS
39 M5*12L 8PCS
STEP 3
38 ST4.2*15L 1PC

Part list:
Part no
Description
Qty
Part no
Description
Qty
1
Main frame
1
61
Chargeable battery
1
2
Rear stabilier
1
62
Connecting cable(2)
1
3
Adjustable wheel
4
63
Upper computer cable
1
4
Front stabilizer
1
64
Upper computer cable
1
5
Front stabilizer cover
2
65
Lower computer cable
1
6
Allen bolt M8*1.25*40L
2
66
Fixing plate(1)
1
7
Hex bolt M8*1.25*70L
4
67
End cap(round)
2
7A
Hex bolt M8*1.25*110L
4
68
Controller
1
8
Curved washer D22xD8.5x1.5T
4
69
Seat
1
9
Spring washer D15.4xD8.2x2T
12
70
Dip foam
2
10L
Middle supporting cover(left)
1
71L
Left rear chain cover
1
10R
Middle supporting cover(right)
1
71R
Right rear chain cover
1
11
Upper decorative cover
1
72
Handleabar
1
12
Rear cover
1
73
Sensor cable
1
13
Seat post
1
74
Electric cable
1
14
Quick key cable(middle)
2
75
Connecting cable
1
15
Hex bolt M8*1.25*15L
4
76
Computer
1
16
Flat washer
D16*D8.5*1.2T
29
77
C-clip S-17(1T)
1
17
Handlebar psot
1
78
Waved washer D17*D22*0.3T
3
18
Handle pulse cable
2
79
Bearing 6203-2RS
2
19
Supporting bracket for water
bottle holder
2
80
Plastic washer D10*D24*0.4T
1
20
Water bottle holder
2
82
Flat washer D28*D8.5*3T
1
21
Bearing #6004-2RS(C0)
2
83
Plastic cover D3*30L
2
22
Waved washer D27*D20.3*0.5T
1
84
Spring D2.2*D14*55L
1
23
Screw M3*0.5*30L
4
85
Fixing plate for idle wheel
1
24
C-clip D22.5*D18.5*1.2T
2
86
Plastic washer D50*D10*1.0T
1
25
Screw M3*0.5*12L
2
87
Nut M8*1.25*6T
1
26
Crank axle
1
88
Nylon nut M8*1.25*8T
3
27
Belt wheel
1
89
Sliding rail
1
28
Nylon nut M6*1.0*6T
6
90
Limiting plate for seat post
1
29
Hex bolt M6x1.0x15L
4
91
Fixing plate 2
1
30
Belt
1
92
Screw M5*0.8*15L
4
31
Round magnet
1
93
Enforcing plate 2
1
32L
Quick key cable (upper)(2)
1
94
Bolt M6*1*15L
3
32R
Quick key cable(upper)(1)
1
95
Hex bolt M8*1.25*45L
4

33
Upper cover for handle pulse
2
96
Sliding rail for enforcing tube2
2
34
Lower cover for handle pulse
2
97
Allen screw M8*1.25*55L
2
35L
Membrane keys (-)
1
98
Buffer
4
35R
Membrane keys(+)
1
99
Allen bolt M8*1.25*100L
2
36
Handlebar
1
100
Cable plug
2
37L
Quick key cable(lower)(2)
1
101
Wheel
2
37R
Quick key cable(lower)(1)
1
102
Connecting tube for sliding
rail
3
38
Screw ST4.2*15L
45
103
Adjustable pole
1
39
Bolt M5*0.8*12L
29
104
Trigger
1
40
Back cover for the computer
1
105
Round cap
1
41
Hex bolt M8*1.25*50L
4
106
Allen bolt M8*1.25*25L
1
42
Rear protective cover for
handlebar
1
107
Allen screw M6*1.0*35L
2
43
Front protective cover for
handlebar
1
108
Sleeve
1
44
Flat washerD26*D21*1.5T
1
109
Fixing plate
1
45
Crank cover
2
110
Spring D1.5*D10*35L
1
46
Left chain cover
1
111
Wheel
8
47
Right chain cover
1
112
Hex bolt M8*1.25*35L
4
48L
Left crank
1
113
End cap
4
48R
Right crank
1
114
Left protective cover for
handlebar
1
49
Anti-loose nut M10*1.25*9T
2
115
Right protective cover for
handlebar
1
50
Screw cover
2
116
Adjustable protective cover
1
51L&51R
Pedal set
1
117
Backrest adjusting tube
1
52
Allen screw M6*1.0*15L
6
118
Hex bolt M8*1.25*25L
4
53
Flat washer D13*D6.5*1.0T
8
119
Backrest
1
54
Flat washer D13*D6.5*1.0T
4
120
Backrest decorative cover
1
55
Self-generator system
1
121
Round cap
4
56
Pin
12
122
Bolt
4
57
Nut M5*0.8*5T
1
123
Water pad
2
58
Screw M5*0.8*20L
1
Allen spanner
1
59
Battery connecting cable
1
Spanner
1
60
Buffer bar
2

Assembly drawing:
STEP 1
Step-1
x4
x8
x8
7
9
16
13
15
x4
7A
1-3
1-1
2
916 7A
7
1
2
916 7A
7
1-2
1
9 7 16
7A
4
9716
7A
4
1-4
1) Throw away the fixing tube including two bolts into trash can. They are not the machine parts.
Please refer to 1-1.
2) Take the package material Styrofoam and put it under the rear frame to assemble the rear
stabilizer(2) with main frame (1) by using flat washer (16), the spring washer(9) and hex bolt
bolts (7 & 7A). Please refer to 1-2.
3) Throw away the fixing tube including two bolts into trash can. They are not the machine parts.
Please refer to 1-3.
4) Raise up the front fame by Styrofoam. Assemble the front stabilizer (4) with main frame (1) by
using the flat washer (16), the spring washer(9) and hex bolts (7 & 7A). Please refer to 1-4.

STEP 2
2-1
75
17
64
65
65
64
2-2
9
15
16
11
17
2-3
x4
x4
x4
15
9
16
13
15
Step-2
2-4
18
14
18 14
1
1,Suggest two persons to assemble this step.
2,Through the upper decorative cover (11) into the front post(17),move it up. Please refer to 2-1
3,Connect the middle cable for console (64) with lower cable for console(65), middle cable for
quick button(14) and hand pulse cable (18). Please refer to 2-2.
4,Throw away the fixing plate into trash can, it is not machine part. Please refer to 2-3.
5, Place down the upper decorative cover (11) and make it match well with front post. Please
refer to 2-4.
6,You could adjust the knob under the stabilizer to make machine steady.

STEP 3
Step-3
76
39
40 39
64
76
3-1
14
76
x8
39
64 14
1
3-2
3-3
76
39
17 39
40 17
1) Connect the console (76) with middle cable for console (64) and middle cable for quick
button(14). Please refer to 3-1
2) Fix the console (76) onto front post by using cross bolts (39). Please refer to 3-2.
3) Fix the back cover for console (40) with console by using bolts (39). Please refer to 3-3.

STEP 4
Step-4
841
72
42 15
9
16
18
37L 37R 18
37L 37R
x3
x3
x3
15
9
16
13
15
x4
41
x48
1
36
119
20
41
8
1)Assemble the back pad (119) with main frame by using flat washer (16), the spring washer (9)
and hex bolt (15).
2)Connect lower cable for quick button (2) & lower cable for quick button (1) with hand pulse
cable(18). Fix the handlebar (36) onto frame by using curve washer (8) and bolt (41). Put the
bottle holder (20) into the bracket.
3)Fix the front handlebar (72) by using the using curve washer (8) and bolt (41). Cover the rear
protective cover for handlebar (42).

STEP 5
Step-5
16
112
69
1
38
39
39
39
5
5
39
L
51L 48L
51L
R
48R
51R
51R
x8
39
x4
112
x4
13
15
x138
16
1,Assemble the saddle(69) on to main frame by using flat washer (16) and bolt (12).
2,Assemble the pedal (51L & 51R) with left crank (48L & 48R). Left pedal by counter-clockwise,
right pedal by clockwise.
3. Cover the cover of front & rear stabilizer (5) and left & right handrail cover (114&115),fasten them
by using the cross bolt (39) and the cross screw(38).

Move the machine: The machine with wheel, you could move the machine easily.
You can adjust the saddle up and down by counter- clockwise.

INSTRUCTION MANUAL
【DISPLAY FUNCTIONS】
ITEMS
DESCRIPTION
TIME
Setting range: 0:00~99:00(±1 minute)
Display range: 0:00~99:59
DISTANCE
Setting range: 0.00~99.0(±1)
Display range: 0.00~99.99
CALORIES
Setting range: 0~9990(±10)
Display range: 0~9999
PULSE
Setting range: 0~30~230(±1)
Display range: 0~230
WATTS
Display range: 0~999
SPEED
Display current working speed , max to 99.9.
RPM
Display current RPM
Display range : 0~999
【BUTTON FUNCTIONS】
ITEMS
DESCRIPTION
“+ ”
Setting or increase the training resistance.
“- ”
Setting or decrease training resistance.
ROTARY BUTTON
To confirm all setting.
STAR/STOP
To start or stop workout.
RESET
In setting mode or in selection mode , press it back to initial training mode, if keep press this
button 2s , computer will re-start.
RECOVERY
To test heart rate recovery status.
BODY FAT
To test body fat % when press the BODY FAT button in standby mode .

【OPERATING PROCEDURE】
Power on & Power off
Power on :
1. LED will display all segments, such as wheel diameter, KM or ML, Eurasian gauge.(image1, image 2)
Image 1 Image 2
2. Enter into user selection mode,setting user’s private file U1-U4 (image 3), SEX (image 4) ,AGE(image 5), HEIGHT
(image 6), WEIGHT(image 7), after that will enter into function selection mode : MANUAL, PROGRAM, USER
PROGRAM, H.R.C, WATT.
Image 3 Image 4
Image 5 Image 6

Image 7
Power off :
If without RPM input in 4 minute, LED closed display, the computer in power off mode. But if detect RPM , the computer
will be woke up.
MANUAL FUNCTION:
By turning the button “+” or “-” , user may set up TIME →DISTANCE →CALORIES →PULSE(image 8~ image 10) .
Press START/STOP if without setting to start workout,and in working period user can adjust the RESISTANCE
LEVEL,LED display the working value. Then press START/STOP,computer will enter into break mode ,press button
“RESET” leave this mode.
Image 8 Image 9
Image 10

PROGRAM FUNCTION:
A. In this mode, there are 12 programs (P1~P12) for user to select (image 11). While user chose the PROGRAM and
turning the button “+” or “-” to setting the TIME (image 12), LED display the setting value by user adjustment ,if finished
setting press “START/STOP” to start work ( in break mode user can choose to adjust the “TIME” value ). In START status,
user can adjust RESISTANCE level . During working time , press “ START/STOP” ,computer will enter into break mode,
press button “RESET” leave this mode.
Image 11 Image 12
B. PROGRAM IMAGES AS BELOW :
P1 P2
P3 P4
P5 P6

P7 P8
P9 P10
P11 P12
USER PROGRAM FUNCTION:
By turning the button “+” or “-”, user can setting PROGRAM image, then press MODE/ENTER to confirm the setting
value of resistance (image 13 ), if user want to stop setting pls keep press MODE/ENTER button 2s, LED shows last setting
value. While press MODE/ENTER button 2s,user can setting the “TIME”(image14), if no setting value, press “START”
enter into working image. In START mode user can adjust the resistance .During the working time press “START” enter
into break mode, then press button “RESET” leave this mode.
Image 13 Image 14
H. R.C FUNCTION :
In H.R.C mode , LED screen will show heart rate percentage 55%, 75%, 90% and TARGET. User may select one of the
heart rate percentage by turning “+” or “-”button for training (image 15).
TARGET preset value is 100 , user can setting the pulse value by themselves, press the rotary button can setting TIME
value ( image 16), if do not need, press “START/ STOP “, it will start to work according the H.R.C function and show the

current pulse value .If not detect the pulse ,LED display as image 17.During the working time press “START” enter into
break mode, then press button “RESET” leave this mode.
Image 15 Image 16
Image 17
WATT FUNCTION:
The preset watt value 120 ( image 18 ), by turning “+” or “-”button to setting the WATT value
( setting range : 10~350 ). Finished setting, press the rotary button to set TIME ( image 19), if no need setting the Time
value, press “ START/STOP”, resistance value will adjust automatic according to the set target WATT value.During the
working time press “START/STOP” enter into break mode, then press button “RESET” it will leave this mode.
Image 18 Image 19

RECOVERY FUNCTION:
A. If no pulse input, it’s invalid press “RECOVERY” button.
B. If detected pulse input, press this button to “RECOVERY” function mode, time count down from 00:60
to 00:00 ( image20 ). Screen will display your heart rate recovery status F1,F2….to F6 (image 21 ). F1 is the
best,
F6 is the worst. User may keep exercising to improve the heart rate recovery status.
C. In testing ,press the RECOVERY button to leave this test mode.
Image 20 Image 21
BODY FAT FUNCTION:
A. Setting personal profile.
B . Press “BODY FAT” button to start test body fat ( image22 ~ image 24), at this time user should grab the hand grip
correctly, computer will display the test value.
If any following situation is accrued, there will be other possible indications showing on LCD.
"E-1”( image 25) - When user sees this indication, it means user did not put your thumb properly on the
conductor. Please try again.
"E-4” - When user sees this indication, it means the BODY FAT advice is exceeded the setting
range(5%~50%).
After finished testing, LED display both FAT% and BMI(image26, image27). In “BODY FAT”test
mode,press”BODY FAT” button to cancel this testing and go back to continue the previous exercise before
testing.
Image 22 Image 23

Image 24 Image 25
Image 26 Image 27

GARLANDO SPA
Via Regione Piemonte, 32 - Zona Industriale D1
15068 - Pozzolo Formigaro (AL) - Italy
www.toorx.it - info@toorx.it
This manual suits for next models
1
Table of contents
Other TOORX Fitness Equipment manuals

TOORX
TOORX BRX R300 ERGO User manual
TOORX
TOORX WLX70 User manual

TOORX
TOORX MSX 60 User manual

TOORX
TOORX Chrono Series User manual

TOORX
TOORX WBX300 User manual

TOORX
TOORX WBX85 User manual

TOORX
TOORX ERX900 User manual
TOORX
TOORX BRX RECUMBENT COMPACT User manual

TOORX
TOORX Professional Line WBX4000 User manual

TOORX
TOORX CLX-9000 User manual
Popular Fitness Equipment manuals by other brands

G-FITNESS
G-FITNESS AIR ROWER user manual

CAPITAL SPORTS
CAPITAL SPORTS Dominate Edition 10028796 manual

Martin System
Martin System TT4FK user guide

CIRCLE FITNESS
CIRCLE FITNESS E7 owner's manual

G-FITNESS
G-FITNESS TZ-6017 user manual

Accelerated Care Plus
Accelerated Care Plus OMNISTIM FX2 CYCLE/WALK user manual