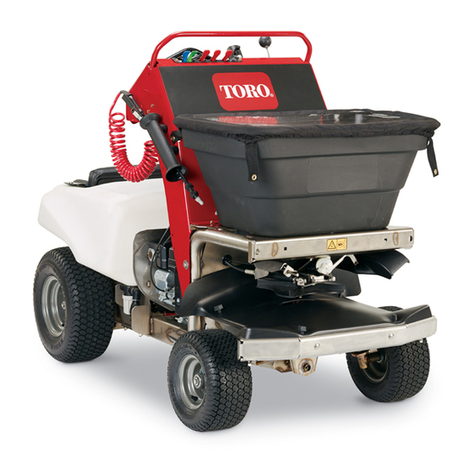
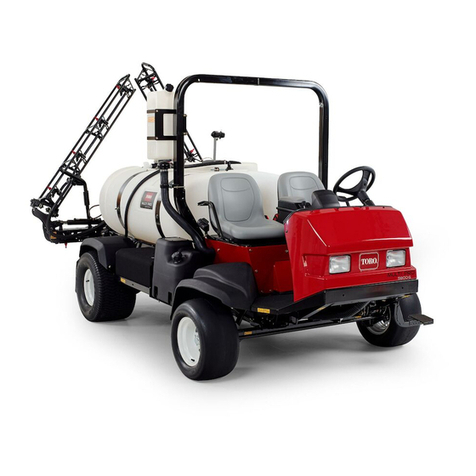
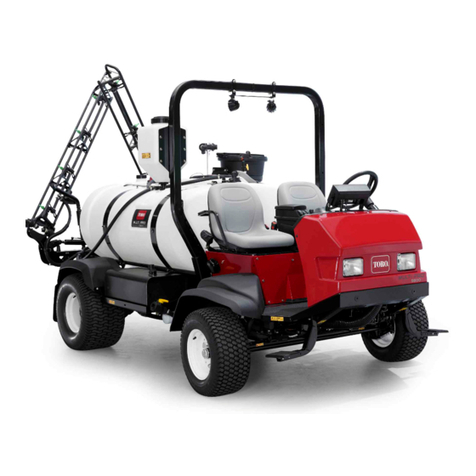
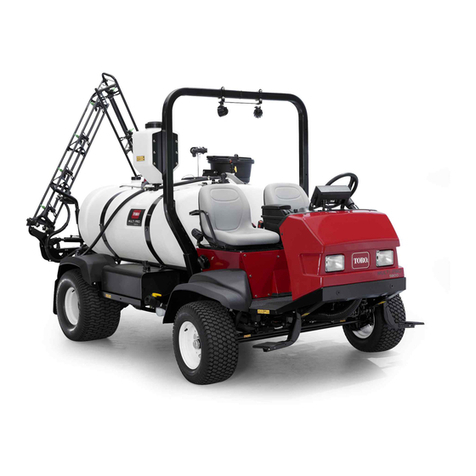
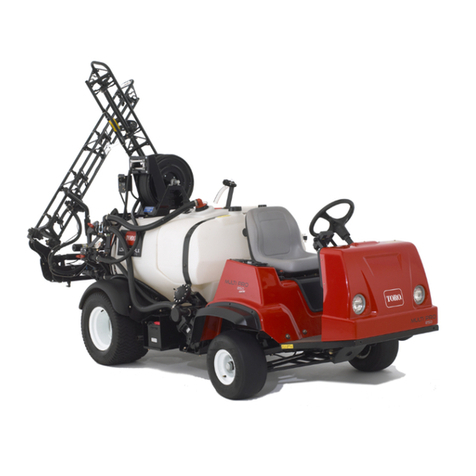
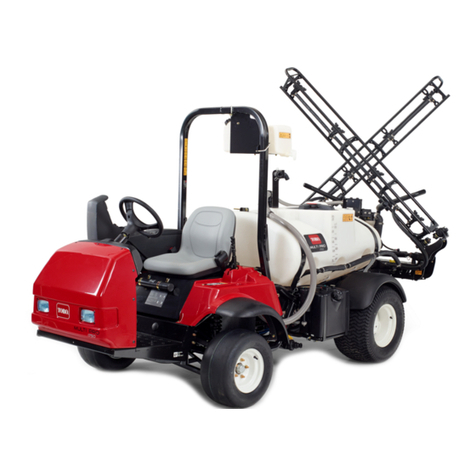
Toro Multi Pro WM User manual

FormNo.3409-695RevE
Note:TheinstallationoftheMultiProWMrequirestheinstallation
ofoneormoreinterdependentkits.ContactyourAuthorized
ToroDistributorformoreinformation.
MultiPro®WMTurfSprayer
ModelNo.41240—SerialNo.400000000andUp
Registeratwww.Toro.com.
OriginalInstructions(EN)*3409-695*E

WARNING
CALIFORNIA
Proposition65Warning
Useofthisproductmaycauseexposure
tochemicalsknowntotheStateof
Californiatocausecancer,birthdefects,
orotherreproductiveharm.
Introduction
Readthismanualcarefullytolearnhowtooperate
andmaintainyourproductproperly.Theinformationin
thismanualcanhelpyouandothersavoidinjuryand
productdamage.AlthoughT orodesignsandproduces
safeproducts,youareresponsibleforoperatingthe
productproperlyandsafely.YoumaycontactT oro
directlyatwww.Exmark.comforproductsafetyand
operationaltrainingmaterials,accessoryinformation,
helpndingadealer,ortoregisteryourproduct.
Wheneveryouneedservice,genuineT oroparts,or
additionalinformation,contactanAuthorizedService
DealerorT oroCustomerServiceandhavethemodel
andserialnumbersofyourproductready.Figure1
illustratesthelocationofthemodelandserialnumbers
ontheproduct.
g022350
Figure1
1.Locationofthemodelandserialnumbers
ModelNo.
SerialNo.
Thismanualidentiespotentialhazardsandhas
safetymessagesidentiedbythesafety-alertsymbol
(Figure2),whichsignalsahazardthatmaycause
seriousinjuryordeathifyoudonotfollowthe
recommendedprecautions.
g000502
Figure2
1.Safety-alertsymbol
Thismanualuses2wordstohighlightinformation.
Importantcallsattentiontospecialmechanical
informationandNoteemphasizesgeneralinformation
worthyofspecialattention.
©2019—TheToro®Company
8111LyndaleAvenueSouth
Bloomington,MN554202
Contactusatwww.Toro.com.
PrintedintheUSA
AllRightsReserved

Contents
Safety.......................................................................4
GeneralSafety...................................................4
SafeOperatingPractices....................................4
Training..............................................................4
BeforeOperating................................................5
ChemicalSafety.................................................6
WhileOperating..................................................6
Maintenance.......................................................8
SafetyandInstructionalDecals..........................9
Setup......................................................................14
1RemovingtheExistingBed............................16
2PreparingtoInstalltheT ankSkid...................17
3InstallingtheHold-DownBracketsforthe
TankSkid......................................................18
4InstallingtheTankSkid..................................18
5AssemblingtheDrainValve...........................20
6DisconnectingtheBattery..............................21
7ConnectingtheSpeedSensor
Harness........................................................22
8CouplingtheSprayerPump...........................23
9InstallingtheControlConsoletothe
Machine........................................................23
10InstallingtheElectricalHarnessesforthe
Sprayer.........................................................24
11InstallingtheSprayerFuseBlock.................25
12ConnectingtheSprayerHarnesstothe
Battery..........................................................27
13LoweringtheT ankSkid................................30
14InstallingtheCenterBoomSection...............31
15InstallingtheLeftandRightBoom
Section..........................................................32
16InstallingtheBoomHoses............................34
17InstallingtheNozzles...................................36
18InstallingtheFreshwaterT ank......................36
19InstallingtheAnti-SiphonFill
Receptacle....................................................38
20CheckingtheBoomHingeSprings...............39
21StoringtheJackStands(Optional)...............39
22LearningMoreaboutYourProduct...............40
ProductOverview...................................................41
Controls...........................................................41
Specications..................................................44
Operation................................................................44
ThinkSafetyFirst..............................................44
UsingtheInfoCenter.........................................44
PreparingtoUsetheSprayer............................54
OperatingtheSprayer......................................55
FillingtheFreshwaterT ank...............................56
FillingtheSprayTank........................................56
OperatingtheBooms........................................57
Spraying...........................................................58
TurfCarePrecautionswhileOperatingin
StationaryModes..........................................58
SprayingTips....................................................59
UncloggingaNozzle.........................................59
SelectingaNozzle............................................59
CleaningtheSprayer........................................59
CalibratingtheSprayer.....................................60
SprayFilterRecommendations........................64
Maintenance...........................................................67
RecommendedMaintenanceSchedule(s)...........67
DailyMaintenanceChecklist.............................68
NotationforAreasofConcern...........................68
Pre-MaintenanceProcedures..............................69
AccessingtheMachine.....................................69
Lubrication..........................................................70
GreasingtheSprayerSystem...........................70
GreasingtheSprayerPump.............................70
GreasingtheBoomHinges...............................71
SpraySystemMaintenance.................................71
InspectingtheHoses........................................72
ChangingtheSuctionFilter...............................72
ChangingthePressureFilter............................72
ChangingtheNozzleFilter................................73
InspectingtheSprayerPump............................73
AdjustingtheBoomstoLevel............................74
InspectingtheNylonPivotBushings.................75
Cleaning..............................................................75
CleaningtheFlowmeter...................................75
CleaningtheSprayerValves.............................76
Storage...................................................................86
RemovingtheSprayerandTankSkid...............87
Troubleshooting......................................................90
Schematics.............................................................91
3

Safety
Important:Readandunderstandtheinformation
inthesafetysectionoftheOperator’sManual
foryourWorkmanvehiclebeforeoperatingthe
machine.
GeneralSafety
Thisproductiscapableofcausingpersonalinjury.
Alwaysfollowallsafetyinstructionstoavoidserious
personalinjury.
•Readandunderstandthecontentsofthis
Operator’sManualbeforestartingtheengine.
•Useyourfullattentionwhileoperatingthe
machine.Donotengageinanyactivitythat
causesdistractions;otherwise,injuryorproperty
damagemayoccur.
•Useappropriatepersonalprotectiveequipment
(PPE)toguardagainstcontactwithchemicals.
Chemicalsubstancesusedinthesprayersystem
maybehazardousandtoxic.
•Donotputyourhandsorfeetnearmoving
componentsofthemachine.
•Donotoperatethemachinewithoutallguards
andothersafetyprotectivedevicesinplaceand
workingonthemachine.
•Keepclearofanydischargeareaofthesprayer
nozzlesandspraydrift.Keepbystandersand
childrenoutoftheoperatingarea.
•Neverallowchildrentooperatethemachine.
•Shutofftheengine,removethekey(ifequipped),
andwaitforallmovementtostopbeforeyouleave
theoperator’sposition.Allowthemachinetocool
beforeadjusting,servicing,cleaning,orstoringit.
Improperlyusingormaintainingthismachinecan
resultininjury.Toreducethepotentialforinjury,
complywiththesesafetyinstructionsandalways
payattentiontothesafety-alertsymbol,which
meansCaution,Warning,orDanger—personalsafety
instruction.Failuretocomplywiththeseinstructions
mayresultinpersonalinjuryordeath.
Notalltheattachmentsthatadapttothismachine
arecoveredinthismanual.Refertotheoperator’s
manualprovidedwitheachattachmentforadditional
safetyinstructions.
SafeOperatingPractices
Important:Themachineisdesignedprimarily
asanoff-roadvehicleandisnotintendedfor
extensiveuseonpublicroads.
Whenusingthemachineonpublicroads,follow
alltrafcregulationsanduseanyadditional
accessoriesthatmayberequiredbylaw,suchas
lights,turnsignals,slow-movingvehicle(SMV)
sign,andothersasrequired.
TheWorkmanwasdesignedandtestedtooffer
safeservicewhenoperatedandmaintained
properly.Althoughhazardcontrolandaccident
preventiondependuponthedesignand
congurationofthemachine,thesefactors
alsodependontheawareness,concern,and
propertrainingofthepersonnelinvolvedin
theoperation,maintenance,andstorageofthe
machine.Improperlyusingormaintainingthe
machinecanresultininjuryordeath.
TheWorkmanisaspecializedutilityvehicledesigned
foroff-roaduseonly.Therideandhandlingofthe
machinehasadifferentfeelthanthatofpassenger
carsortrucks.T aketimetobecomefamiliarwithyour
machine.
NotalltheattachmentsthatadapttotheWorkman
arecoveredinthismanual.SeetheInstallation
Instructionsprovidedwithattachmentforadditional
safetyinstructions.
Toreducethepotentialforinjuryordeath,complywith
thefollowingsafetyinstructions:
Supervisor'sResponsibilities
•Makesurethatoperatorsarethoroughlytrained
andfamiliarwiththeOperator’sManual,the
Operator’sManualoftheWorkmanmachine,
trainingmaterial,enginemanual,andalllabelson
theWorkmanmachine.
•Establishyourownspecialproceduresandwork
rulesforunusualoperatingconditions(e.g.,slopes
toosteepformachineoperation).Usethethird
highlockoutswitchifhighspeedcouldresultina
safetyormachineabusesituation.
Training
•ReadtheOperator'sManualandothertraining
materialbeforeoperatingthemachine.
Note:Iftheoperator(s)ormechanic(s)cannot
readthemanuallanguage,itistheowner's
responsibilitytoexplainthismaterialtothem.
•Becomefamiliarwiththesafeoperationofthe
equipment,operatorcontrols,andsafetysigns.
•Alloperatorsandmechanicsshouldbetrained.
Theownerisresponsiblefortrainingtheusers.
•Neverallowuntrainedpeopletooperateorservice
theequipment.
4

Note:Localregulationsmayrestricttheageof
theoperator.
•Theowner/usercanpreventandisresponsible
foraccidentsorinjuriesoccurringtohimselfor
herself,otherpeople,ordamagetoproperty.
BeforeOperating
•Operatethemachineonlyafterreadingand
understandingthecontentsofthismanual.
•Neverallowchildrentooperatethemachine.
•Neverallowotheradultstooperatethemachine
withoutrstreadingandunderstandingthe
Operator'sManual.Onlytrainedandauthorized
personsshouldoperatethismachine.Makesure
thatalloperatorsarephysicallyandmentally
capableofoperatingthemachine.
•Thismachineisdesignedtocarrytheoperator
and1passengerintheseatprovidedbythe
manufacturer.Nevercarryanyadditional
passengersonthemachine.
•Neveroperatethemachinewhileyouareill,tired,
orundertheinuenceofalcoholordrugs.
•Usetheseatbeltwhenoperatingthemachineand
becertainthatitcanbereleasedquicklyinthe
eventofanemergency.
•Becomefamiliarwiththecontrolsandknowhow
toshutofftheenginequickly.
•Keepallshields,safetydevices,anddecals
inplace.Ifashield,safetydevice,ordecalis
malfunctioning,illegible,ordamaged,repairor
replaceitbeforeoperatingthemachine.
•Wearappropriateclothing;includingsafety
glasses,longpants,substantialslip-resistant
footwearorrubberboots,andgloves.Donotwear
jewelryorlooseclothing.Tiebacklonghair.
•Keepbystandersawayfromtheareasofoperation.
•Avoiddrivingwhenitisdark,especiallyin
unfamiliarareas.Ifyoumustdrivewhenitisdark,
besuretodrivecautiouslyandusetheheadlights.
•Beforeoperatingthemachine,alwayscheckall
partsofthemachineandanyattachments.If
somethingiswrong,stopusingthemachine.
Makesurethattheproblemiscorrectedbeforethe
machineorattachmentisoperatedagain.
•Makesuretheoperatorandpassengerareais
cleanandfreefromchemicalresidueanddebris
buildup.
•Ensurethatalluidlineconnectorsaretightand
allhosesareingoodconditionbeforeapplying
pressuretothesystem.
Note:Donotusethemachineifitisleakingor
damaged.
•Sincefuelishighlyammable,handleitcarefully.
–Useanapprovedfuelcontainer.
–Donotremovethecapfromthefueltankwhen
theengineishotorrunning.Allowtheengine
tocoolbeforefuelingthemachine.
–Donotsmokewhilehandlingfuel.
–Fillthefueltankofthemachineoutdoors.
5

–Fillthefueltankofthemachinetoabout25mm
(1inch)belowthetopofthetank(thebottom
ofthellerneck).Donotoverllthefueltank.
–Wipeupanyspilledfuel.
ChemicalSafety
WARNING
Chemicalsubstancesusedinthe
spreader-sprayersystemmaybehazardous
andtoxictoyou,bystanders,animals,plants,
soilsorotherproperty.
•Carefullyreadandfollowthechemical
warninglabelsandmaterialsafetydata
sheets(MSDS)forallchemicalsusedand
protectyourselfaccordingtothechemical
manufacturer'srecommendations.Ensure
thataslittleskinaspossibleisexposed
whileusingchemicals.Useappropriate
personalprotectiveequipment(PPE)
toguardagainstpersonalcontactwith
chemicals;personalprotectiveequipment
includes:
–safetyglasses,goggles,and/orface
shield
–respiratororltermask
–chemical-resistantgloves
–rubberbootsorothersubstantial
footwear
–hearingprotection
–cleanchangeofclothes,soap,and
disposabletowels,tobekepton-hand,
intheeventofachemicalspill.
•Keepinmindthattheremaybemorethan
1chemicalused,andinformationoneach
chemicalshouldbeassessed.
•Refusetooperateorworkonthesprayerif
thisinformationisnotavailable!
•Beforeworkingonasprayersystem,
makesurethatthesystemhasbeen
triplerinsedandneutralizedaccording
totherecommendationsofthechemical
manufacturer(s)andthatallthevalves
havebeencycled3times.
•Verifythereisanadequatesupplyofclean
waterandsoapnearby,andimmediately
washoffanychemicalsthatcontactyou.
•Obtainpropertrainingbeforeusingorhandling
chemicals.
•Usethecorrectchemicalforthejob.
•Followthechemicalmanufacturer'sinstructionsfor
thesafeapplicationofthechemical.Donotexceed
recommendedsystemapplicationpressure.
•Donotll,calibrate,orcleantheunitwhenpeople,
especiallychildren,orpetsareinthearea.
•Handlechemicalsinawell-ventilatedarea.
•Havecleanwateravailableespeciallywhenlling
thespraytank.
•Donoteat,drink,orsmokewhileworkingwith
chemicals.
•Donotcleanspraynozzlesbyblowingthrough
themorplacinginmouth.
•Alwayswashyourhandsandotherexposedareas
assoonaspossibleafteryounishworkingwith
chemicals.
•Keepchemicalsintheiroriginalpackagesand
storedinasafelocation.
•Properlydisposeofunusedchemicalsand
chemicalcontainersasinstructedbythechemical
manufacturerandyourlocalcodes.
•Chemicalsandfumesaredangerous;neverenter
thetankorplaceyourheadoverorintheopening
ofatank.
•Followalllocal,state,andfederalregulationsfor
spreadingorsprayingchemicals.
WhileOperating
WARNING
Engineexhaustcontainscarbonmonoxide,
whichisanodorless,deadlypoisonthatcan
befatal.
Donotrunengineindoorsorinanenclosed
area.
•Theoperatorandpassengershouldremain
seatedwheneverthemachineisinmotion.The
operatorshouldkeepbothhandsonsteering
wheelwheneverpossibleandthepassenger
shouldusetheprovidedhandholds.Keeparms
andlegswithinthevehiclebodyatalltimes.Never
carrypassengersintheboxoronattachments.
Rememberthatyourpassengermaynotbe
expectingyoutobrakeorturn.
•Alwayswatchoutforandavoidlowoverhangs
suchastreelimbs,doorjambs,andoverhead
walkways.Makesurethatthereisenoughroom
overheadtoeasilyclearthemachine,sprayer
boomsectionsandyourhead.
•Whenstartingtheengine:
6

–Sitontheoperator’sseatandensurethatthe
parkingbrakeisengaged.
–IfyourmachineisequippedwithaPTOor
handthrottlelever,disengagethePTOand
returnhandthrottlelevertotheOFFposition.
–Movetheshiftlevertoneutralanddepress
clutchpedal.
–Keepyourfootoffacceleratorpedal.
–TurnthekeyforthestarterswitchtoSTART
position.
•Usingthemachinedemandsattention.Failure
tooperatethemachinesafelymayresultinan
accident,tipoverofthemachine,andserious
injuryordeath.Drivecarefully.Topreventtipping
orlossofcontrol:
–Useextremecaution,reducespeed,and
maintainasafedistancearoundsandtraps,
ditches,creeks,ramps,andanyunfamiliar
areasorotherhazards.
–Watchforholesorotherhiddenhazards.
–Usecautionwhenoperatingthemachineona
steepslope.Normallytravelstraightupand
downslopes.Reducespeedwhenmaking
sharpturnsorwhenturningonhillsides.Avoid
turningonhillsideswheneverpossible.
–Useextracautionwhenoperatingthemachine
onwetsurfaces,athigherspeeds,orwitha
fullload.Stoppingtimeanddistanceincreases
withafullload.Shiftintoalowergearbefore
startingupordownahill.
–Avoidsuddenstopsandstarts.Donotgo
fromreversetoforwardorforwardtoreverse
withoutrstcomingtoacompletestop.
–Slowdownbeforeturning.Donotattempt
sharpturns,abruptmaneuvers,orotherunsafe
drivingactionsthatmaycausealossofvehicle
control.
–Beforebackingup,looktotherearandensure
thatnooneisbehindyou.Backupslowly.
–Watchoutfortrafcwhenyouarenearor
crossingroads.Alwaysyieldtherightofwayto
pedestriansandothervehicles.Thismachine
isnotdesignedforuseonstreetsorhighways.
Alwayssignalyourturnsorstopearlyenough
sothatotherpeopleknowwhatyouplantodo.
Obeyalltrafcrulesandregulations.
–Theelectricalandexhaustsystemsofthe
machinecanproducesparkscapableof
ignitingexplosivematerials.Neveroperatethe
machineinornearanareawherethereisdust
orfumesintheairthatareexplosive.
–Whendrainingthetank,donotletanyone
standbehindthemachineanddonotdrain
liquidonanyone’sfeet.
–Ifyouareeverunsureaboutsafeoperation,
stopworkandaskyoursupervisor.
•Donottouchtheengineormuferwhiletheengine
isrunningorsoonafterithasshutoff.These
areasmaybehotenoughtocauseburns.
•Ifthemachineevervibratesabnormally,stop
immediately,waitforallmotiontostop,andinspect
themachinefordamage.Repairalldamage
beforeresumingoperation.
•Beforegettingofftheseat:
1.Stopthemachine.
2.Removeyourfootfromthetractionpedal
andengagetheparkingbrake.
3.TurnthekeyforthestarterswitchtotheOFF
position.
4.Removethekeyfromthestarterswitch.
Important:Donotparkthemachineon
anincline.
•Lightningcancausesevereinjuryordeath.If
lightningisseenorthunderisheardinthearea,do
notoperatethemachine;seekshelter.
Braking
•Slowdownbeforeyouapproachanobstacle.This
givesyouextratimetostoporturnaway.Hitting
anobstaclecandamagethemachineandits
contents.Moreimportant,itcaninjureyouand
yourpassenger.
•Grossvehicleweight(GVW)hasamajorimpact
onyourabilitytostopand/orturn.Heavyloads
andattachmentsmakeamachinehardertostop
orturn.Theheaviertheload,thelongerittakes
tostop.
•Turfandpavementareslickwhentheyarewet.
Itcantake2to4timesaslongtostoponwet
surfacesasondrysurfaces.Ifyoudrivethrough
standingwaterdeepenoughtogetthebrakes
wet,theywillnotworkwelluntiltheyaredry.After
drivingthroughwater,youshouldtestthebrakes
tomakesurethattheyworkproperly.Iftheydo
not,driveslowlywhileputtinglightpressureonthe
brakepedal.Thisdriesthebrakesout.
7

OperatingonHillsandRough
Terrain
WARNING
Suddenchangesinterrainmaycauseabrupt
steeringwheelmovement,possiblyresulting
inhandandarminjuries.
•Reduceyourspeedwhenoperatingon
roughterrainandnearcurbs.
•Gripthesteeringwheellooselyaroundthe
perimeter.Keepyourhandsclearofthe
steeringwheelspokes.
Operatingthemachineonahillmaycausetippingor
rollingofthemachine,ortheenginemaystallandyou
couldloseheadwayonthehill.Thiscouldresultin
personalinjury.
•Donotacceleratequicklyorsuddenlyapplythe
brakeswhenbackingdownahill,especiallywitha
load.
•Neverdriveacrossasteephill;alwaysdrive
straightupordownorgoaroundthehill.
•Iftheenginestallsoryoubegintoloseheadway
whileclimbingahill,graduallyapplythebrakes
andslowlybackstraightdownthehill.
•Turningwhiletravelingupordownhillscanbe
dangerous.Ifyouhavetoturnwhileonahill,doit
slowlyandcautiously.Nevermakesharporfast
turns.
•Heavyloadsaffectstability.Reducetheweightof
theloadandyourspeedwhenoperatingonhills.
•Avoidstoppingonhills,especiallywithaload.
Stoppingwhilegoingdownahilltakeslongerthan
stoppingonlevelground.Ifthemachinemustbe
stopped,avoidsuddenspeedchanges,whichmay
initiatetippingorrollingofthemachine.Donot
suddenlyapplythebrakeswhenrollingbackward,
asthismaycausethemachinetooverturn.
•Checkcarefullyforoverheadclearances(i.e.,
branches,doorways,electricalwires)before
drivingunderanyobjectsanddonotcontactthem.
•Donotremovetherolloverprotectionsystem
(ROPS).
•Reducespeedandloadwhenoperatingonrough
terrain,unevenground,andnearcurbs,holes,and
othersuddenchangesinterrain.Loadsmayshift,
causingthesprayertobecomeunstable.
Loading
TheweightofthecargocanchangetheWorkman
centerofgravityandhandling.T oavoidlossofcontrol
andpersonalinjury,followtheseguidelines:
•Reducetheweightoftheloadwhenoperating
onhillsandroughterraintoavoidtippingor
overturningofthevehicle.
•Liquidloadscanshift.Thisshiftinghappens
mostoftenwhileturning,goingupordownhills,
suddenlychangingspeeds,orwhiledrivingover
roughsurfaces.Shiftingloadscancausethe
vehicletotipover.
•Whenoperatingwithaheavyload,reduceyour
speedandallowforsufcientbrakingdistance.Do
notsuddenlyapplythebrakes.Useextracaution
onslopes.
•Beawarethatheavyloadsincreaseyourstopping
distanceandreduceyourabilitytoturnquickly
withouttippingover.
Maintenance
•Onlypermitqualiedandauthorizedpersonnelto
maintain,repair,adjust,orinspectthemachine.
•Beforeservicingormakingadjustmentstothe
machine,parkthemachineonalevelsurface,
engagetheparkingbrake,shutofftheengine,
andremovethekeytopreventsomeonefrom
accidentallystartingtheengine.
•Emptythetankbeforetiltingorremovingthe
sprayerfrommachineandbeforestorage.
•Neverworkunderthemachinewithoutusingthe
tanksupportproprod.
•Ensurethatallhydrauliclineconnectorsaretight,
andthatallhydraulichosesandlinesareingood
conditionbeforeapplyingpressuretothesystem.
•Keepyourbodyandhandsawayfrompinhole
leaksthatcanejecthydraulicuidunderhigh
pressure.Usepaperorcardboard,notyourhands,
tosearchforleaks.
DANGER
Hydraulicuidescapingunderpressure
canhavesufcientforcetopenetrateskin
anddoseriousdamage.
Ifuidisinjectedintotheskinitmustbe
surgicallyremovedwithinafewhoursby
adoctorfamiliarwiththisformofinjuryor
gangrenemayresult.
•Beforedisconnectingorperforminganywork
onthehydraulicsystem,relieveallpressurein
systembystoppingtheengine,cyclingthedump
valvefromraisetolower,and/orloweringthetank
8

andattachments.Ifthetankmustbeintheraised
position,secureitwiththesafetysupport.
•Tomakesurethattheentiremachineisingood
condition,keepallnuts,bolts,andscrewsproperly
tightened.
•Toreducepotentialrehazard,keeptheengine
areafreeofexcessivegrease,grass,leavesand
accumulationofdirt.
•Iftheenginemustberunningtoperforma
maintenanceadjustment,keephands,feet,
clothing,andanypartsofthebodyawayfromthe
engineandanymovingparts.Keepeveryone
away.
•Donotoverspeedtheenginebychangingthe
governorsettings.Themaximumenginespeedis
3,650rpm.T oassuresafetyandaccuracy,have
anAuthorizedT oroDistributorcheckthemaximum
enginespeedwithatachometer.
•Ifmajorrepairsareeverneededorassistanceis
required,contactanAuthorizedToroDistributor.
•Toensureoptimumperformanceandcontinued
safetycerticationofthemachine,useonly
genuineTororeplacementpartsandaccessories.
Replacementpartsandaccessoriesmadeby
othermanufacturerscouldbedangerous,and
suchusecouldvoidtheproductwarranty.
•RefertoyourWorkmanmachineOperator’s
Manualforadditionalmaintenanceinformation.
SafetyandInstructionalDecals
Safetydecalsandinstructionsareeasilyvisibletotheoperatorandarelocatednearanyarea
ofpotentialdanger.Replaceanydecalthatisdamagedormissing.
decal131-5808
131-5808
1.Automatic—closed
loop-ratecontrol
2.Manual—openloop-rate
control
decal120-0616
120–0616
1.Warning—readtheOperator’sManual;usefresh,clean
waterforrst-aidwashing.
decal120-0622
120–0622
1.Warning—readthe
Operator’sManual.
3.Chemicalburnhazard;
toxicgasinhalation
hazard—wearhandand
skinprotection;weareye
andrespiratoryprotection.
2.Warning—donotenterthe
sprayertank.
9

decal119-9434
119-9434
1.Tankcontents
decal104-8904
104-8904
1.Grasptheboomhere.
decal127-6976
127-6976
1.Decrease2.Increase
decal120-0617
120–0617
1.Severinghazardofhand,
pinchingpoint—keep
awayfromactuatedjoints.
2.Crushinghazard—keep
bystandersawayfromthe
machine.
decal125-4052
125–4052
1.Raiseleftboom4.Lowerrightboom
2.Lowerleftboom5.Toggletankrinseon/off
3.Raiserightboom6.Togglesonicboomon/off
decal125-8139
125–8139
1.Toggleboomsprayerson/off
10

decal127-3966
127–3966
1.ReadtheOperator’s
Manualforinformationon
fuses.
4.7.5A—TECcontroller
output
2.30A—Tankrinse5.10A—Ignition
3.2A—TECcontrollerlogic6.15A—Sprayerboom
decal127-3936
127–3936
1.Backwardtipping
hazard—donotraise
afulltank;donotmove
themachinewitharaised
tank;onlyraiseand
emptytank;onlymovethe
machinewithalowered
tank.
3.Crushinghazard—keep
bystandersawaywhen
loweringthetank.
2.Electricalshockhazard,
overheadpower
lines—checkthearea
foroverheadpowerlines
beforeoperatingthe
machineinthearea.
decal127-3937
127–3937
1.Warning—donotstep.3.Entanglementhazard,
belt—keepawayfrom
movingparts;keepall
guardsandshieldsin
place.
2.Warning—keepawayfrom
hotsurfaces.
decal127-6979
127-6979
1.Bypass-returnow3.Agitationow
2.Flow
11

decal127-6981
127-6981
1.Bypass-returnow3.Boomspray
2.Flow
decal127-6982
127-6982
1.Bypass-returnow2.Boomspray
decal127-6984
127-6984
1.Flow2.Tank-returnow
12

decal130-8294
130-8294
1.Leftboom5.Centerboomsprayon9.Rightboomsprayoff13.Agitation
2.Leftboomsprayon6.Centerboomsprayoff10.Speed14.Agitationon
3.Leftboomsprayoff7.Rightboom11.Increasespeed15.Agitationoff
4.Centerboom8.Rightboomsprayon12.Decreasespeed
13

Setup
LooseParts
Usethechartbelowtoverifythatallpartshavebeenshipped.
ProcedureDescriptionQty.Use
1Nopartsrequired–Removetheexistingbed.
RearPTOKit,Heavy-DutyWorkman
Vehicle(HD-SeriesModelswitha
ManualTransmission)
1
MultiProWMTurfSprayerFinishing
Kit,ManualWorkmanUtilityVehicle
(HD-SeriesModelswithaManual
Transmission)
1
MultiProWMTurfSprayerFinishing
Kit,ManualWorkmanUtilityVehicle
(HD-SeriesModelswithaManual
Transmission)
1
2
MultiProWMTurfSprayerFinishing
Kit,AutomaticWorkmanUtilityVehicle
(HDX-AutoModel)
1
Preparetoinstallthecenterboom
section.
3Hold-downbrackets2Installtheattachmenthold-down
brackets.
Tankandskidassembly1
Clevispins2
Taperedclevispin2
Hairpins2
Lynchpins4
Bolt(1/2x1-1/2inches)2
4
Nuts(1/2inch)2
Installthetankskid.
5Nopartsrequired–Assemblethedrainvalve.
6Nopartsrequired–Disconnectthebattery.
7Nopartsrequired–Connectthespeedsensorharness.
8Nopartsrequired–Couplethesprayerpump.
Consolemountingbracket1
Flangelocknut(5/16inch)3
Flange-headbolt(5/16inch)3
Plasticbushing2
Controlconsole1
Spring-clippin1
9
Handknob1
Installthecontrolconsoletothe
machine.
J-clips3
Bolt(1/4x3/4inch)1
10Flangenut(1/4inch)1
Installthecontrolconsoleontothe
machine.
11Fusedecal(127–3966)1Installthecontrolconsoleandthe
electricalharness.
14

ProcedureDescriptionQty.Use
Batteryterminalbolt2
Clampnut2
12Cover—wide(batteryterminal—red)1
Connectthesprayerharnesstothe
battery.
Bolt(1/2x1-1/2inch2
13Locknut(1/2inch)2Lowerthetankskid.
Center-boomassembly1
Bolt(3/8x1inch)10
Flangelocknut(3/8inch)10
Boom-transportcradle2
Bolt(1/2x1-1/4inches)4
14
Flangenut(1/2inch)4
Installtheboomsection.
Leftboomsection1
Rightboomsection1
Flange-headbolts(3/8x1-1/4inch)8
Backingplates8
Flangelocknuts(3/8inch)8
Clevispin2
15
Hairpin2
Installtheleftandrightboomsections.
Hoseclamps3
R-clamp2
Shoulderbolt2
Washer2
16
Nut2
Installtheboomhoses.
Freshwatertank1
90°elbow(3/4inchNPT)1
90°spigot1
Freshwater-tankmount1
Mountstrap4
Flange-headbolt(5/16x5/8inch)4
Flangelocknut(5/16inch)10
Supporttube(freshwatertank)1
Jamnut(5/16inch)1
Bolt(5/16x1inch)1
Shoulderbolt(1/2x1-15/16inches)2
Bolt(5/16x2-1/4inch)2
18
Washer(5/16inch)2
Installthefreshwatertank.
Fillreceptacleassembly1
19Flange-headbolt(5/16x3/4inch)1Installtheanti-siphonllreceptacle.
20Nopartsrequired–Checktheboomhingesprings.
Frontjackstand2
Rearjackstand2
Cotterpin4
Clevispin(4-1/2inch)2
Clevispin(3inch)2
21
Knob2
Storethejackstands(optional).
Operator'sManual1
Operatortrainingmaterial1
Registrationcard1
Selectionguide1
22
Pre-deliveryinspectionsheet1
Readthemanualandviewthetraining
materialbeforeoperatingthemachine.
15

Important:TheMulti-ProWMturfsprayerrequiresa4-postROPSorcabinstalledwiththeWorkman
vehicle.
Note:Determinetheleftandrightsidesofthemachinefromthenormaloperatingposition.
1
RemovingtheExistingBed
NoPartsRequired
Procedure
CAUTION
Thefullbedweighsapproximately95kg(210
lb).Youcaninjureyourselfifyouremovethe
bedwithoutaid.
•Donottrytoinstallorremovethebedby
yourself.
•Getthehelpof2or3otherpeopleoruse
anoverheadcrane.
1.Parkthemachineonalevelsurface,engagethe
parkingbrake,andstarttheengine.
2.Movethehydraulicliftleverforwardandlower
thebeduntiltheclevispinsforthecylinderrod
endliftcylindersarelooseinthemountingslots
ofthebedmountingplates.
3.Releasethehydraulicliftlever,setthehydraulic
liftlocklever,andshutofftheengine;refertothe
Operator’sManualofyourmachine.
4.Removethelynchpinsfromtheouterendsof
thecylinderrodclevispins(Figure3).
g002368
Figure3
1.Cylinderrodend4.Lynchpin
2.Bedmountingplate5.Rearslots(fullbed)
3.Clevispin6.Frontslots(2/3bed)
5.Removetheclevispinssecuringthecylinder
rodendstothebedmountingplatesbypushing
thepinstowardthecenterlineofthemachine
(Figure3).
6.Removethelynchpinsandclevispinssecuring
thepivotbracketsofthebedtotheframe
channelsofthemachine(Figure4).
16

g002369
Figure4
1.Left,rearcornerofbed4.Clevispin
2.Vehicleframechannel5.Lynchpin
3.Pivotplate
7.Liftthebedoffthevehicle.
8.Stowtheliftcylindersinstorageclips.
2
PreparingtoInstallthe
TankSkid
Partsneededforthisprocedure:
1RearPTOKit,Heavy-DutyWorkmanVehicle
(HD-SeriesModelswithaManualTransmission)
1
MultiProWMTurfSprayerFinishingKit,Manual
WorkmanUtilityVehicle(HD-SeriesModelswitha
ManualTransmission)
1
MultiProWMTurfSprayerFinishingKit,Manual
WorkmanUtilityVehicle(HD-SeriesModelswitha
ManualTransmission)
1MultiProWMTurfSprayerFinishingKit,Automatic
WorkmanUtilityVehicle(HDX-AutoModel)
InstallingtheRearPTOKitfor
HeavyDutyWorkmanVehicles
(HD-SeriesModelswithaManual
Transmission)
ForHD-andHDX-SeriesWorkmanmodelswith
amanualtransmission,fullyinstalltheRearPTO
KitforHeavy-DutyWorkmanVehicles;refertothe
InstallationInstructionsfortheRearPTOKitforHeavy
DutyWorkmanVehicles.
High-FlowHydraulicsKit,
WorkmanHDX-AutoUtilityVehicle
(Non-TC—HDX-AutoModel)
FullyinstalltheHigh-FlowHydraulicsKitforWorkman
HDX-AutoUtilityVehicles;refertotheInstallation
InstructionsfortheHigh-FlowHydraulicsKit,
WorkmanHDX-AutoUtilityVehicle.
LiftingtheSprayerSkid
Usingliftingequipmentwitha408kg(900lb)lift
capacity,liftthetankskidfromtheshippingcrateat
the2frontand2rearliftpoints(Figure5).
Note:Ensurethatthetankskidisraisedhighenough
toinstallthejackstands.
g023738
Figure5
1.Rearliftpoint2.Frontliftpoint
MultiProWorkmanTurfSprayer
FinishingKit(HD-SeriesModels
withaManualTransmission)
ForHD-andHDX-SeriesWorkmanmodelswith
amanualtransmission,completethestepsinthe
MultiProWMTurfSprayerFinishingKitforManual
WorkmanUtilityVehicles;refertotheInstallation
InstructionsfortheMultiProWMTurfSprayer
FinishingKit,ManualWorkmanUtilityVehicle.
MultiProWorkmanTurfSprayer
FinishingKit(HDX-AutoModel)
HDX-AutomaticSeriesWorkmanmodels,complete
thestepsintheMultiProWMTurfSprayerFinishing
17

KitforAutomaticWorkmanUtilityVehicles;referto
theInstallationInstructionsfortheMultiProWMTurf
SprayerFinishingKit,AutomaticWorkmanUtility
Vehicle.
3
InstallingtheHold-Down
BracketsfortheTankSkid
Partsneededforthisprocedure:
2Hold-downbrackets
Procedure
1.Removethe2rearange-headboltsand2
angelocknutsthatsecurethesupportbracket
fortheenginetubetotheframeofthemachine
(Figure6).
Note:Retainthefastenersforlateruse.
g028410
Figure6
1.Rearhole—support
bracket(enginetube)
4.Enginesupporttube
2.Flangelocknut5.Liftcylinder
3.Flange-headbolt
2.Rotatetheliftcylindertoprovideclearanceto
installthehold-downbracketforthetankskid
(Figure6).
3.Assemblethehold-downbracketstosupport
bracketandframetheusingthe2ange-head
boltsandangelocknutsremovedinstep1
(Figure7).
g028421
Figure7
1.Supportbracket(engine
tube)
3.Flanged-headbolts
2.Hold-downbracket(tank
skid)
4.Liftcylinder
4.Torquetheboltsandnutsto91to113N∙m(67
to83ft-lb).
5.Repeatsteps1to4attheoppositesideofthe
machine.
18

4
InstallingtheTankSkid
Partsneededforthisprocedure:
1Tankandskidassembly
2Clevispins
2Taperedclevispin
2Hairpins
4Lynchpins
2Bolt(1/2x1-1/2inches)
2Nuts(1/2inch)
Procedure
DANGER
Thesprayertankassemblyrepresentsa
storedenergyhazard.Ifnotproperlyretained
wheninstallingorremovingtheassembly,
itcanmoveorfallandinjureyouorother
bystanders.
Usestrapsandanoverheadlifttosupport
thesprayertankassemblyduringinstallation,
removal,oranymaintenancewheneveryou
removeretainingfasteners.
1.Usingalift,raisethetankskidassembly(Figure
8)andpositionitoverthevehicleframewiththe
pumpandvalveassembliesfacingrearward.
Note:Haveanotherpersonhelpyouperform
thefollowingsteps.
g023738
Figure8
1.Rearliftpoint2.Frontliftpoint
2.Slowlylowerthetankskidontotheframeofthe
machine.
3.Extendtheliftcylinderstothebracketsonthe
tankskid,andalignthecylinderttingswiththe
holesinthetankskidbrackets(Figure9).
g022353
Figure9
1.Hairpin3.Liftcylinders
2.Clevispin
4.Securethetankskidtotheliftcylinderswith
theclevispinsandhairpinsatbothsidesofthe
machine.
5.Lineuptheholesinthepivotlugsattherear
ofthetankskidassemblywiththeholesinthe
bedpivottubeattheendofthevehicleframe
(Figure10).
g022354
Figure10
1.Taperedclevispin2.Lynchpin
6.Installataperedclevispinand2lynchpinsto
thepivotlugtosecurethetankassemblytothe
frame(Figure10).
7.Extendtheliftcylinderstoraisethetankand
supportitsweight.
Note:Disconnectthetankassemblyfromthe
liftingequipment.
8.Removethebedsupportfromthestorage
bracketsonbackoftheROPSpanel(Figure11).
19

g002397
Figure11
1.Bedsupport
9.Pushthebedsupportontothecylinderrod,
makingsurethatthesupportendtabsreston
theendofcylinderbarrelandonthecylinderrod
end(Figure12).
g009164
Figure12
1.Bedsupport3.Skidframe
2.Liftcylinder
5
AssemblingtheDrainValve
NoPartsRequired
Procedure
1.Removethecabletiethatsecuresthedrain
valveandhoseforthesprayertanktotheskid
channel(Figure13).
g213728
Figure13
1.Drainvalve3.Skidchannel
2.Cabletie
2.Movethedrainvalveandhoseoutboardofthe
skidchannel(Figure14A).
20
This manual suits for next models
1
Table of contents
Other Toro Paint Sprayer manuals

Toro
Toro 41568 User manual

Toro
Toro Multi Pro 1200 User manual

Toro
Toro Multi-Pro 5800 User manual

Toro
Toro Ultra Sonic Boom 130-8229 User manual

Toro
Toro Multi Pro 5800-D User manual

Toro
Toro 34215 User manual

Toro
Toro Multi Pro 5800 User manual

Toro
Toro 34230 User manual

Toro
Toro 136-0457 User manual

Toro
Toro 41229 User manual

Toro
Toro 41593 User manual

Toro
Toro 41593 User manual

Toro
Toro Multi-Pro 5800 User manual

Toro
Toro GeoLink 41624 User manual

Toro
Toro Spray Master Series User manual

Toro
Toro Multi Pro 5800 User manual

Toro
Toro 41235 User manual

Toro
Toro 41107 User manual

Toro
Toro 41229 User manual

Toro
Toro Multi Pro 41240 User manual