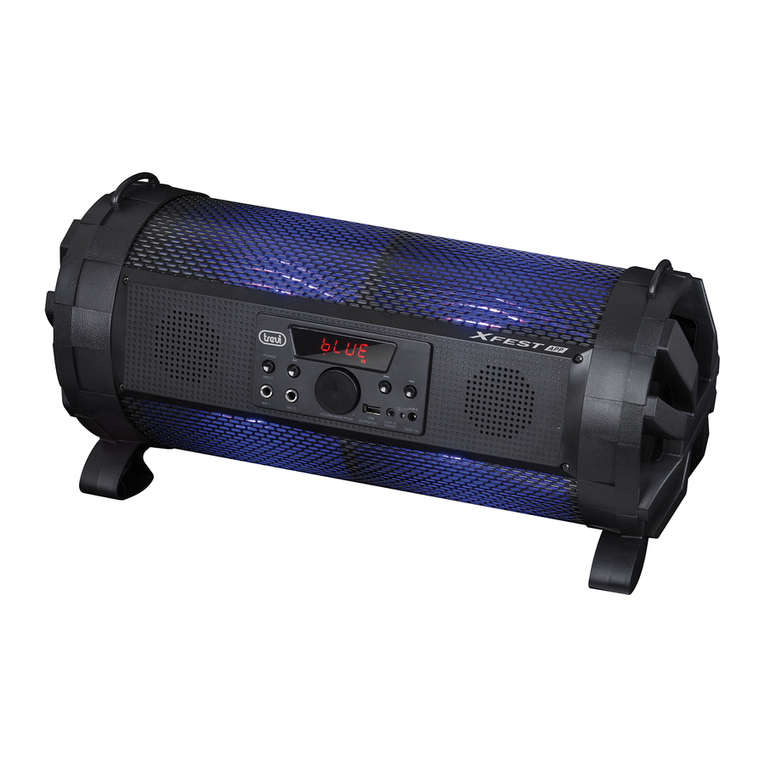
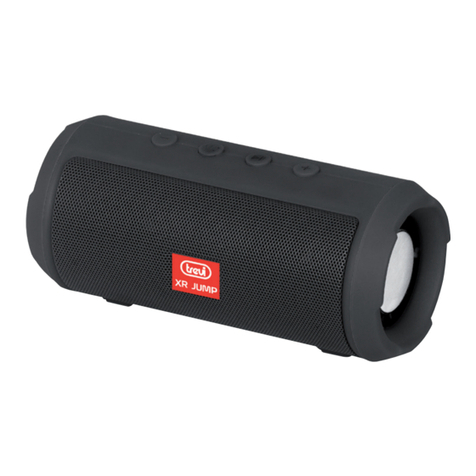
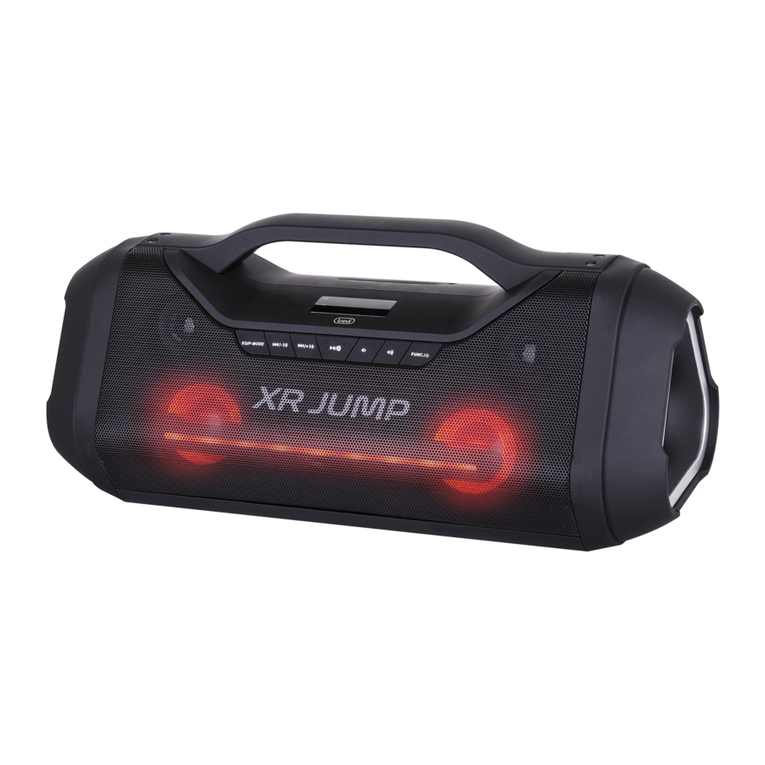
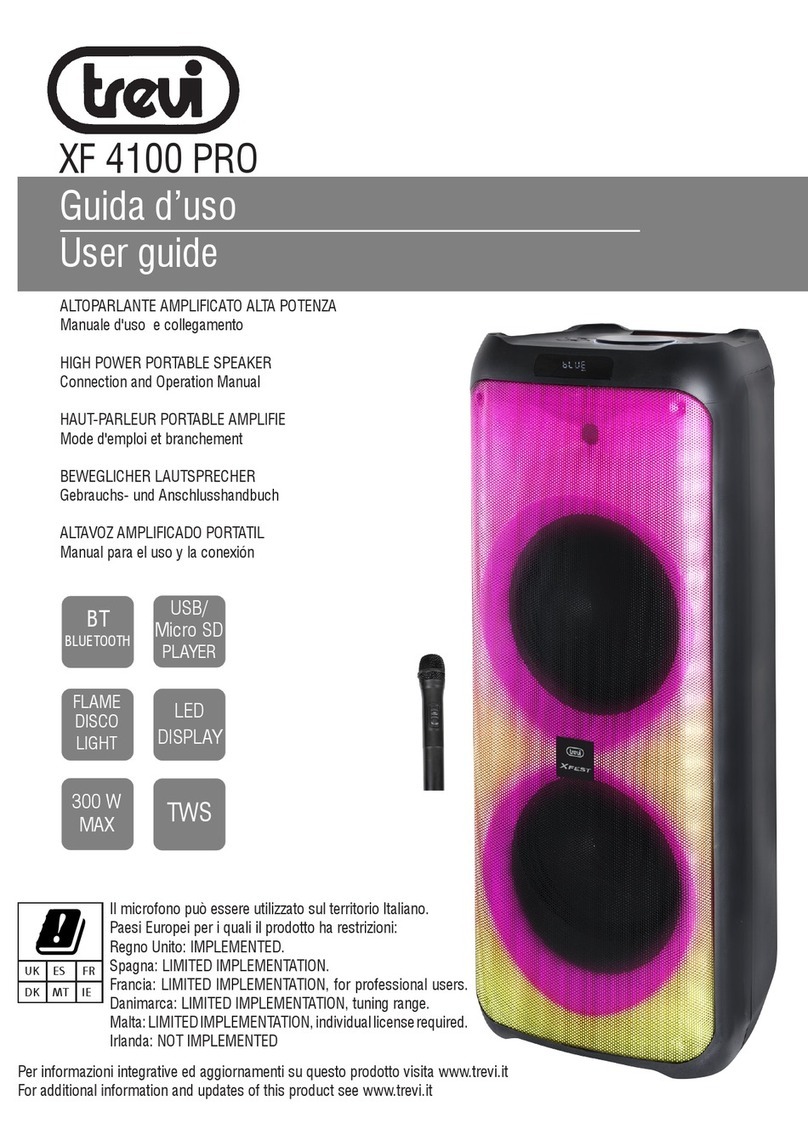
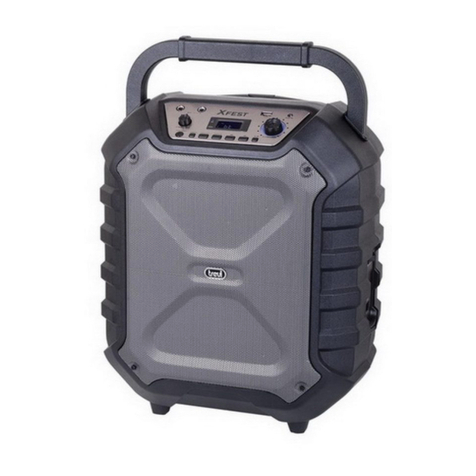
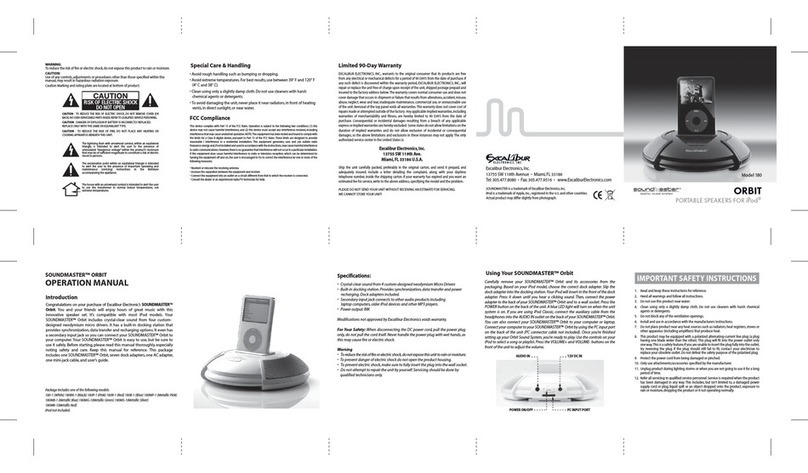
Trevi XF 350 User manual

* Per informazioni integrative e aggiornamenti di questo prodotto vedi: www.trevi.it
* For additional information and updates of this product: www.trevi.it
ita
eng
fra
deu
esp
XF 350
Guida d’uso / User Guide
ALTOPARLANTE AMPLIFICATO con Bluetooth/Lettore MP3-USB-micro SD/Disco Light
PORTABLE SPEAKER with Bluetooth/MP3-USB-Micro SD player/Disco Light
HAUT-PARLEUR avec Bluetooth/Lecteur MP3-USB-Micro SD/Lumière Disco
BEWEGLICHER LAUTSPRECHER mit Bluetooth/MP3-USB-Micro-SD player/Disco-Licht
ALTAVOZ AMPLIFICADO con Bluetooth/MP3-USB-Micro SD/Luz de disco
MICRO SD/
USB
READER
LINE IN
BLUETOOTH
CONNECTION
DISCO
LIGHT
15W
MAX
BT
ENIf you will notfindyourlanguageontheinstruction manual,
please go on our website www.trevi.it to find it

XF 350
2
NOTE D’USO
Ascoltare a volume alto per lungo tempo, potrebbe danneggiare il vostro udito.
Questo apparecchio è uno strumento elettronico di alta precisione, evitate quindi di utilizzarlo
nei seguenti casi:
• Vicino a campi magnetici.
• Vicino a fonti di calore come caloriferi e stufe.
• In luoghi molto umidi come stanze da bagno, piscine, ecc...
• In luoghi molto polverosi.
• In luoghi soggetti a forti vibrazioni.
• Non avvicinare l’orecchio all’altoparlante durante le fasi di messa punto e regolazioni
del volume, e in particolare di tenere il volume al minimo nella fase di accensione.
• Posizionare l’apparecchio in modo che ai suoi lati ci sia sempre abbastanza spazio per
la libera circolazione di aria (almeno 5 cm).
• Se dei liquidi penetrano all’interno dell’apparecchio scollegare immediatamente la spina
dalla presa e portare l’apparecchio al più vicino centro assistenza autorizato TREVI.
• Controllare sempre prima di ricaricare l’apparecchio, che i cavi di alimentazione e di
collegamento siano installati correttamente.
• Nessuna sorgente di fiamma nuda, quali candele accese, dovrebbe essere posta
sull’apparecchio.
• L’apparecchio non deve essere esposto a stillicidio o a spruzzi d’acqua e nessun oggetto
pieno di liquido, quali vasi, deve essere posto sull’apparecchio.
• Conservare il presente manuale per futuri riferimenti.
CURA E MANUTENZIONE
Per la pulizia si consiglia l’uso di un panno morbido, leggermente inumidito. Evitate solventi
o sostanze abrasive.
IMPORTANTE
La buona costruzione di questo apparecchio ne garantisce per lungo tempo il perfetto
funzionamento. Se, tuttavia, dovesse presentarsi qualche inconveniente, sarà opportuno
consultare il più vicino Centro Assistenza autorizzato.
TREVI persegue una politica di continua ricerca e sviluppo. Pertanto i prodotti possono
presentare caratteristiche diverse da quelle descritte.
AVVERTENZA PER IL CORRETTO UTILIZZO DELLA BATTERIA RICARICABILE
- Ricaricare la batteria ad una temperatura compresa tra i 5°C e i 35°C.
-- Non prolungare la ricarica oltre i tempi indicati per evitare il rischio di surriscaldamento
e scoppio.
- La ricarica della batteria oltre i tempi indicati o un prolungato periodo di inattività possono
ridurne la durata.
- La batteria ricaricabile è soggetta ad usura e la sua capacità diminuisce gradualmente.
- Evitare di tenere la batteria sotto carica tutta la notte.
ITALIANO

XF 350
3
DESCRIZIONE COLLEGAMENTI E COMANDI
A. Interruttore di accensione ON/OFF
B. Ingresso LINE IN
C. Ingresso memoria Micro SD/USB
D. Tasto MODE
E. Tasto REC
F. Tasto REPEAT
G. Tasto 9, precedente
H. Tasto, Play/Pausa
I. Tasto :, successivo
J. Ingresso Microfono
K. Interruttore accnesione/spegnimento Led
disco light
L. PresaAlimentazione5V /led indicatori
di carica
M. Manopola regolazione Volume
N. Manopola regolazione Echo Microfono
O. Manopola regolazione Volume Microfono
ITALIANO
A. Tasto accensione/standby
B. Tasto, Play/Pausa
C. Tasto EQ, equalizzazione audio
D. Tastierino numerico
E. Tasto MODE
F. Tasto MUTE
G. Tasto 9, precedente
H. Tasto :, successivo
I. Tasto VOL-, per abbassare il volume
J. Tasto VOL+, per alzare il volume
K. Tasto RPT, funzione REPEAT
L. Tasto U/SD, per selezionare la memoria
Micro SD/USB

XF 350
4
ITALIANO
Dove non diversamente indicato, i comandi hanno le stesse funzioni sull’apparecchio e
sul telecomando.
RICARICA DELLA BATTERIA
1. Ad apparecchio spento, collegare il cavo di un alimentatore (non in dotazione)
5V 1A con presa microUSB alla presa (L) del dispositivo. Collegare l’alimentatore
ad una presa di rete.
2. Il led accanto alla presa (L) si accenderà di colore rosso.
3. A carica ultimata i led accanto alla presa (L) si accenderanno di colore rosso e verde.
Incasodispegnimentoimprovvisoofunzionamentoanomalodell’apparecchioprocedere
alla completa ricarica della batteria.
Nota: Per una buona durata della batteria è consigliato tenere l’apparecchio spento durante
la fase di ricarica.
ACCENSIONE/SPEGNIMENTO
1. Agire sull’interruttore di accensione (A) portandolo in posizione ON per accendere
l’apparecchio.
2. Agire sull’interruttore di accensione (A) portandolo in posizione OFF per spegnere
l’apparecchio.
3. Da telecomando agire sul tasto accensione/standby (A) per spegnere ed attivare l’ap-
parecchio.
REGOLAZIONE VOLUME - FUNZIONE MUTE - FUNZIONE EQ
1. Ruotarela manopolaVolume(M)insensoorarioperaumentareilvolumedell’apparecchio.
2. Ruotare la manopola Volume (M) in senso anti orario per diminuire il volume dell’appa-
recchio.
3. Da telecomando agire sui tasti Vol- (I) e Vol+ (J) per regolare il volume.
4. Da telecomando agire sul tasto MUTE (F) per silenziare immediatamente l’apparecchio,
ripremerlo per riattivare l’audio.
5. Da telecomando agire su tasto EQ (C) per variare la dinamica audio in riproduzione;
sono disponibili 4 equalizzazioni (0, 1, 2, 3).
FUNZIONAMENTO RADIO (PRESENTE PER VERSIONI EXPORT)
MEMORIZZAZIONE AUTOMATICA DELLE STAZIONI
1. Premere il tasto MODE (D) più volte fino a quando sul display comparirà la frequenza
radio.
2. Premere il tasto(H) per effettuare una ricerca e memorizzazione automatica delle
stazioniradio;laricerca/memorizzazionesifermeràalcompletamentodell’interascansione
della banda radio. Al termine verrà riprodotta la prima stazione radio memorizzata.
RICHIAMO DELLA STAZIONE MEMORIZZATA
1. Per richiamare il numero di una stazione memorizzata utilizzare i tasti :(I) per passare
alla stazione successiva o 9(G) per passare alla stazione precedente.
Da telecomando utilizzare i tasti PREV (G) e NEXT (H).
2. Premendo a lungo il tasto :(I) o 9(G) e’ possibile effettuare una ricerca sulla stazione
radio successiva/precedente con forte segnale.

XF 350
5
Nota: La ricezione in FM dipende molto dal luogo dove è posto l’apparecchio.
La vicinanza di apparecchi TV, lampade al neon o altri elettrodomestici può provocare
disturbi nella ricezione di programmi radio, in questo caso allontanate l’apparecchio.
FUNZIONAMENTO BLUETOOTH
ACCOPPIAMENTO AI DISPOSITIVI
1. Posizionare lo speaker vicino al dispositivo Bluetooth da accoppiare e accendere l’ap-
parecchio.
2. Premere il tasto MODE (D) più volte fino a quando sul display comparirà la scritta “BLUE”.
3. Seguire le istruzioni del vostro dispositivo esterno per ricercare lo speaker.
4. Ricercare lo speaker nominato “XF 350” e inserire il PIN “0000” se richiesto.
5. Ad accoppiamento avvenuto si avvertira un suono di notifica.
Nota: l’altoparlante Bluetooth funziona solamente con una connessione alla volta, la con-
nessione non può essere interrotta durante il normale funzionamento.
COMANDI DISPONIBILI IN MODALITÀ BLUETOOTH
- Premere una volta il tasto 9(G) per passare al brano precedente, premere una volta il
tasto :(I) per passare al brano successivo.
- Premere il tasto(H) per mettere in pausa, per riprendere la riproduzione musicale
premere nuovamente(H).
FUNZIONAMENTO MICRO SD CARD/USB
1. Inserire una scheda Micro SD o una memoria USB nelle prese (C) e accendere l’appa-
recchio.
2. La riproduzione partirà in automatico.
3. Premere una volta il tasto 9(G) per passare al brano precedente, premere una volta il
tasto :(I) per passare al brano successivo;
4. Premere il tasto(H) per mettere in pausa, per riprendere la riproduzione premerlo
nuovamente.
5. Premere a lungo i tasti 9(G) o :(I) per scorrere velocemente un brano.
Rilasciare i tasti per tornare alla normale riproduzione.
6. Premere il tasto REPEAT(F) o il tasto RPT(K) sul telecomando per attivare la funzione di
ripetizione del singolo brano (ONE) o di tutti i brani presenti (ALL).
7. Da telecomando utilizzare il tastierino numerico (D) per richiamare direttamente un brano
presente sulla memoria.
FUNZIONAMENTO LINE IN
1. Collegare una qualsiasi unità provvista di uscita audio tramite apposito cavo Jack da
3,5mm all’ingresso LINE IN (B), premere il tasto MODE (D) più volte fino a quando sul
display comparirà la scritta “LINE”.
2. Regolare il dispositivo esterno dai propri comandi.
EFFETTI DISCO-LIGHT
1. Per attivare gli effetti Disco-Light portare l’interruttore (K) sulla posizione ON.
2. Per disattivare gli effetti Disco-Light portare l’interruttore (K) sulla posizione OFF.
ITALIANO

XF 350
6
ITALIANO
UTILIZZO DEL MICROFONO
1. Collegare il microfono fornito nella presa MIC IN(J) ed agire sull’interruttore presente
sul manico per accenderlo.
2. Regolare il volume del microfono tramite la manopola (O).
3. Regolare l’effetto ECHO del microfono tramite la manopola (N).
FUNZIONE REC
E’ possibile registrare il solo parlato del microfono su memoria microSD/USB:
1. Inserire una memoria microSD o una memoria USB nei rispettivi ingressi.
2. Premere il tasto REC per avviare la registrazione; sul display compare la scritta REC
seguita poi dal tempo di inzio registrazione.
3. Per terminare la registrazione premere di nuovo il tasto REC. Verra’ riprodotta la traccia
appena registrata.
Nota: registrando dal microfono, e’ plausibile la presenza di un certo rumore di fondo
sulla registrazione.
CARATTERISTICHE TECNICHE
Potenza Totale:.............................................15W
Potenza max di trasmissione Bluetooth:........0,8mW
Frequenza di trasmissione Bluetooth:............2,4GHz
Alimentazione: .............................................Batteria 3.7V 4400mAh ricaricabile tramite
alimentatore 5V 1A
Dimensioni: .................................................230 x 245 x 415 mm
Peso:...........................................................3,5 Kg
INFORMATIVA SULLA RIMOZIONE E LO SMALTIMENTO DELLE BATTERIE
Attenzione: l’operazione di rimozione e smaltimento è riservata esclusivamente al
personale tecnico specializzato!
1. Rimuovere le viti che fissano il pannello dei comandi frontale.
2. Estrarre il pannello dei comandi.
3. Estrarre il connettore e rimuovere la batteria dal suo alloggiamento.
Qualunque sia il tipo di batteria esaurita, essa non deve essere gettata tra i rifiuti domestici,nel
fuoco o nell’acqua. Ogni tipo di batteria esaurita deve essere riciclata oppure smaltita presso
gli appositi centri raccolta dedicati.

XF 350
7
ITALIANO
INFORMAZIONI AGLI UTENTI ai sensi del Decreto Legislativo N°49 del 14 Marzo 2014
“AttuazionedellaDirettiva 2012/19/UEsuirifiutidiapparecchiatureelettricheedelettroniche(RAEE)”
Il simbolo del cassonetto barrato riportato sull’apparecchiatura indica che il prodotto alla fine della propria
vita utile deve essere raccolto separatamente dagli altri rifiuti. L’utente dovrà, pertanto, conferire l’apparec-
chiatura integra dei componenti essenziali giunta a fine vita agli idonei centri di raccolta differenziata dei
rifiuti elettronici ed elettrotecnici, oppure riconsegnarla al rivenditore al momento dell’acquisto di nuova
apparecchiatura di tipo equivalente, in ragione di uno a uno, oppure 1 a zero per le apparecchiature aventi
latomaggioreinferiore a25cm.L’adeguataraccolta differenziataperl’avviosuccessivodell’apparecchiatura
dimessa al riciclaggio, al trattamento e allo smaltimento ambientale compatibile contribuisce ad evitare
possibili effetti negativi sull’ambiente e sulla salute e favorisce il riciclo dei materiali di cui è composta
l’apparecchiatura. Lo smaltimento abusivo del prodotto da parte dell’utente comporta l’applicazione delle
sanzioni amministrative di cui al D.Lgs n. Decreto Legislativo N°49 del 14 Marzo 2014.

XF 350
8
USAGE NOTES
• Listen at high volume for long periods of time, may damage your hearing.
• Avoid placing the player:
- Near magnetic fields.
- Near any heat sources such as heaters and stoves.
- In very damp places like bathrooms, swimming pools, etc...
- In very dusty places.
- In places subject to strong vibrations.
• Place the appliance so that its sides there is always enough room for free air circulation
(at least 5cm).
• If liquids penetrate into the appliance immediately disconnect the plug from the wall
socket and set the appliance to your nearest authorised TREVI Service Centre.
• Always check before charging, power cables and connection are installed properly.
• No naked sources, such as lighted candles, should be placed on this.
• The apparatus shall not be exposed to dripping or splashing water and no object filled
with water, such as vases, should be placed on the unit.
• Keep this manual for future reference.
CARE AND MAINTENANCE
For cleaning it is recommended to use a soft, slightly damp cloth. Avoid solvents or abrasive
substances.
IMPORTANT
The construction of this device guarantees long flawless operation. However, if come some
problem, you should consult your nearest authorized service center.
TREVI pursues a policy of continuous research and development. Therefore, the products
may show different characteristics from those described.
WARNING FOR A CORRECT USE OF RECHARGEABLE BATTERY
- Recharge the battery in an ambient temperature between 5°C and 35°C.
- Don’t recharge more than the suitable period to prevent the risk of overheating and burst.
- Recharging the battery over the suitable period or an extended period of inactivity may
reduce battery duration.
- Rechargeable battery is liable to wear and tear and its performance will reduce gradually.
- To extend the duration of the battery use it when is completely charged up to the complete
discharging, then recharge it fully before use it again. Recharge a battery not completely
consumed,willresultareducedduration.Inthiscase,repeatthefullcharging/discharging
cycle many times.
- Avoid recharge the battery for the whole night.
ENGLISH

XF 350
9
ENGLISH
DESCRIPTION LINKS AND CONTROLS
A. ON / OFF switch
B. LINE IN input
C. Micro SD / USB memory input
D. Button MODE
E. Button REC
F. Button REPEAT
G. Button 9, previous track
H. Button , Play / Pause
I. Button :, next track
J. Microphone input
K. Switch on / off Led disco light
L. 5V power supply socket / charge indicator
LEDs
M. Volume adjustment knob
N. Microphone Echo adjustment knob
O. Microphone Volume Adjustment Knob
A. Power / standby button
B. Button , Play / Pause
C. Button EQ, audio equalization
D. Numeric keypad
E. Button MODE
F. Button MUTE
G. Button 9, previous track
H. Key :, next track
I. VOL- button, to lower the volume
J. VOL + button, to increase the volume
K. RPT button, REPEAT function
L. U/SD button, to select Micro SD/USB
memory

XF 350
10
ENGLISH
Unless otherwise indicated, the controls have the same functions on the appliance and
on the remote control.
BATTERY RECHARGE
1. With the appliance switched off, connect the cable of a power supply unit (not supplied)
5V 1A with microUSB socket at the socket (L) of the device. Connect the power
supply to a mains socket.
2. The LED next to the socket (L) will light up red.
3. When charging is complete, the LEDs next to the socket (L) will light up red and green.
In case of sudden shutdown or abnormal operation of the appliance, proceed with the
complete recharging of the battery.
Note: For a good battery life it is recommended to keep the device switched off during
the charging phase.
POWER ON/OFF
1. Turn the switch (A) to the ON position to turn on the appliance.
2. Turn the switch (A) to the OFF position to switch off the appliance.
3. Using the remote control, press the on / standby button (A) to switch the appliance off
and on.
VOLUME ADJUSTMENT - MUTE FUNCTION - EQ FUNCTION
1. Turn the Volume knob (M) clockwise to increase the volume of the appliance.
2. Turn the Volume knob (M) counterclockwise to decrease the volume of the appliance.
3. Use the Vol- (I) and Vol + (J) buttons on the remote control to adjust the volume.
4. From the remote control, press the MUTE button (F) to immediately silence the device,
press it again to reactivate the audio.
5. UsetheEQbutton (C) ontheremotecontrolto change theaudiodynamicduring playback;
4 equalizations are available (0, 1, 2, 3).
RADIO
AUTOMATIC STORAGE STORAGE
1. Press the MODE button (D) several times until the radio frequency appears on the display.
2. Press the (H) button to automatically search and memorize radio stations; the
search / memorization will stop when the entire radio band scan is complete. At the end
the first memorized radio station will be played.
RECALL OF THE STORED STATION
1. To recall the number of a stored station use the keys :(I) to go to the next station or
9(G) to go to the previous station.
Use the PREV (G) and NEXT (H) buttons on the remote control.
2. By long pressing the key :(I) or 9(G) it is possible to search the next / previous radio
station with a strong signal.
Note: FM reception depends greatly on where the device is located.
The proximity of TV sets, neon lamps or other household appliances can cause disturbances
in the reception of radio programs, in this case remove the appliance.

XF 350
11
ENGLISH
BLUETOOTH
PAIRING
1. Place the speaker next to the Bluetooth device to be paired and switch on the device.
2. Press the MODE button (D) several times until “BLUE” appears on the display.
3. Follow the instructions of your external device to search for the speaker.
4. Search for the speaker named “XF 350” and enter the PIN “0000” if required.
5. A notification sound will be heard once pairing is completed.
Note: the Bluetooth speaker only works with one connection at a time, the connection
cannot be interrupted during normal operation.
CONTROLS AVAILABLE IN BLUETOOTH MODE
- Press the 9(G) key once to go to the previous track, press the :key (I) once to go
to the next track.
- Press the (H) button to pause, to resume music press (H) again.
MICRO SD CARD / USB
1. Insert a Micro SD card or USB memory into the sockets (C) and switch on the device.
2. Playback will start automatically.
3. Press the 9(G) key once to go to the previous track, press the :key (I) once to go
to the next track;
4. Press the (H) button to pause, to resume playback press it again.
5. Long press the 9(G) or :(I) keys to quickly scroll through a track.
Release the keys to return to normal playback.
6. Press the REPEAT button (F) or the RPT button (K) on the remote control to activate the
repeat function of the single track (ONE) or of all the tracks present (ALL).
7. Using the remote control, use the numeric keypad (D) to directly call up a track on the
memory.
LINE IN
1. Connect any unit equipped with an audio output using the appropriate 3.5mm Jack cable
to the LINE IN (B) input, press the MODE button (D) several times until “LINE” appears
on the display.
2. Adjust the external device from its commands.
DISCO-LIGHT EFFECTS
1. To activate the Disco-Light effects, set the switch (K) to the ON position.
2. To deactivate the Disco-Light effects, set the switch (K) to the OFF position.
USE OF THE MICROPHONE
1. Connect the supplied microphone to the MIC IN socket (J) and use the switch on the
handle to switch it on.
2. Adjust the microphone volume using the knob (O).
3. Adjust the ECHO effect of the microphone using the knob (N).

XF 350
12
ENGLISH
REC FUNCTION
It is possible to record only the microphone speech on microSD / USB memory:
1. Insert a microSD memory or a USB memory into the respective inputs.
2. Press the REC button to start recording; the display shows the word REC followed by
the recording start time.
3. To end the recording, press the REC button again. The track just recorded will be played.
Note: recording from the microphone, it is plausible the presence of a certain background
noise on the recording.
TECHNICAL FEATURES
Total power: ................................................15W
FM range: ...................................................87.5 - 108MHz
Maximum transmission power Bluetooth: ....0.8mW
Bluetooth transmission frequency: ..............2.4GHz
Power supply: ............................................. Rechargeable 3.7V 4400mAh battery via
5V 1A power supply
Dimensions: ...............................................230 x 245 x 415 mm
Weight: .......................................................3.5 Kg
INFORMATION ON THE REMOVAL AND DISPOSAL OF BATTERIES
Attention: the removal and disposal operation is reserved exclusively for specialized
technical personnel!
1. Remove the screws that secure the front control panel.
2. Remove the control panel.
3. Remove the connector and remove the battery from its housing.
Whatever the type of exhausted battery, it must not be thrown in the household waste, in
the fire or in the water. Each type of exhausted battery must be recycled or disposed of in
the appropriate dedicated collection centers.
Precautions for correct disposal of the product.
The symbol shown on the equipment indicates that waste must be disposed of in “sepa-
rate collection” and so the product must not be disposed of together with urban waste.
The user must take the product to special “separate waste collection centres” provided
by local government, or deliver it to the retailer against the purchase of a new product.
Separate collection of waste and subsequent treatment, recycling and disposal operations
promotes the production of equipment with recycled materials and limits negative effects
on the environment and on health caused by improper handling of waste.
Illegal disposal of the product leads to the enforcement of administrative penalties.

XF 350
13
NOTES D’EMPLOI
• Ne pas écouter à un volume trop élevé à plusieurs reprises. Cela pourrait endommager
votre ouïe.
• Éviter de placer le lecteur:
- Près de champs magnétiques.
- Près de sources de chaleur comme des radiateurs et des poêles.
- Dans des endroits très humides comme les salles de bains, les piscines, etc.
- Dans des endroits très poussiéreux.
- Dans des endroits exposés à de fortes vibrations.
• Placer l’appareil de sorte qu’il y ait toujours assez d’espace sur ses côtés pour laisser
circuler librement l’air (au moins 5cm).
• Si des liquides pénètrent à l’intérieur de l’appareil, débranchez-le immédiatement et
amenez-le au centre d’assistance agréé TREVI le plus proche.
• Contrôlez toujours, avant de recharger l’appareil, que les câbles d’alimentation et les
câbles de connexion sont correctement installés.
• Aucune source nue, telle que des bougies allumées, doivent être placés sur ce point.
• L’appareil ne doit pas être exposé à des gouttes ou éclaboussures d’eau et aucun
objet rempli d’eau, tels que des vases, doit être placé sur l’appareil.
• Conservez ce manuel pour référence future.
MANIEMENT ET ENTRETIEN
Pour le nettoyage, il est conseillé d’utiliser un chiffon doux, légèrement humide. Évitez
l’emploi de solvants ou de substances abrasives.
IMPORTANT
La bonne fabrication de cet appareil garantit un fonctionnement parfait pour une longue
période. Si toutefois quelques inconvénients devaient se présenter, adressez-vous au Centre
d’Assistance agréé le plus proche.
TREVI poursuit une politique de recherche et de développement continus. C’est pourquoi
ses produits peuvent présenter des caractéristiques différentes par rapport à celles qui
sont décrites.
AVERTISSEMENT RELATIF À L’UTILISATION ADÉQUATE DE LA BATTERIE
RECHARGEABLE
- Rechargez la batterie à une température comprise entre 5°C et 35°C.
- Ne prolongez pas le rechargement au-delà des délais indiqués afin d’éviter
les risques de surchauffe et d’explosion.
- La recharge au-delà des délais indiqués ou une période d’inactivité prolongée
peut réduire la durée de vie de la batterie.
- La batterie rechargeable est soumise à l’usure et sa capacité diminue petit à petit.
- Pour prolonger la durée de vie de la batterie, utilisez-la lorsqu’elle est complètement
rechargéejusqu’àundéchargementcomplet.End’autrestermes,rechargezcomplètement
la batterie avant de l’utiliser à nouveau.
- Évitez de maintenir la batterie chargée pendant la nuit.
FRANÇAISE

XF 350
14
FRANÇAISE
CONTRÔLES ET DESCRIPTION LIENS
A. Interrupteur marche / arrêt
B. Entrée LINE IN
C. Entrée mémoire Micro SD / USB
D. Bouton MODE
E. Bouton REC
F. Bouton REPEAT
G. Bouton 9, piste précédente
H. Bouton , Lecture / Pause
I. Bouton :, piste suivante
J. Entrée microphone
K. Allumer / éteindre la lumière de disque led
L. 5V alimentation / indicateur de charge
M. Bouton de réglage du volume
N. Boutonderéglagedel’échodumicrophone
O. Bouton de réglage du volume du micro-
phone
A. Bouton d’alimentation / veille
B. Bouton , Lecture / Pause
C. Bouton EQ, égalisation audio
D. Clavier numérique
E. Bouton MODE
F. Bouton MUTE
G. Bouton 9, piste précédente
H. Bouton :, piste suivante
I. Bouton VOL - pour baisser le volume
J. Bouton VOL +, pour augmenter le volume
K. Bouton RPT, fonction REPEAT
L. Bouton U/SD, pour sélectionner une
mémoire Micro SD / USB

XF 350
15
FRANÇAISE
Sauf indication contraire, les commandes ont les mêmes fonctions sur l’appareil et sur
la télécommande.
RECHARGE DE BATTERIE
1. Lorsque l’appareil est éteint, connectez le câble d’un bloc d’alimentation (non fourni)
5V 1A avec prise microUSB sur la prise (L) de l’appareil. Branchez l’alimentation
sur une prise secteur.
2. Le voyant situé à côté de la prise (L) s’allume en rouge.
3. Une fois la charge terminée, les voyants situés à côté de la prise (L) s’allument en rouge
et en vert.
En cas d’arrêt brutal ou de fonctionnement anormal de l’appareil, procédez à la recharge
complète de la batterie.
Remarque: pour une bonne durée de vie de la batterie, il est recommandé de laisser l’appareil
éteint pendant la phase de charge.
MARCHE / ARRÊT
1. Mettez l’interrupteur (A) sur ON pour allumer l’appareil.
2. Placez l’interrupteur (A) sur OFF pour éteindre l’appareil.
3. A l’aide de la télécommande, appuyez sur le bouton marche / veille (A) pour allumer et
éteindre l’appareil.
RÉGLAGE DU VOLUME - FONCTION MUTE - FONCTION EQ
1. Tournez le bouton de volume (M) dans le sens des aiguilles d’une montre pour augmenter
le volume de l’appareil.
2. Tournez le bouton de volume (M) dans le sens contraire des aiguilles d’une montre pour
diminuer le volume de l’appareil.
3. Utilisez les boutons Vol- (I) et Vol + (J) de la télécommande pour régler le volume.
4. Sur la télécommande, appuyez sur le bouton MUTE (F) pour mettre immédiatement
l’appareil en mode silencieux, appuyez à nouveau pour réactiver le son.
5. Utilisez le bouton EQ (C) de la télécommande pour modifier la dynamique audio pendant
la lecture. 4 égalisations sont disponibles (0, 1, 2, 3).
RADIO
STOCKAGE AUTOMATIQUE
1. Appuyez plusieurs fois sur le bouton MODE (D) jusqu’à ce que la fréquence radio
apparaisse à l’écran.
2. Appuyez sur le bouton (H) pour rechercher et mémoriser automatiquement des
stations de radio; la recherche / mémorisation s’arrête lorsque le balayage de la bande
radio complète est terminé. A la fin, la première station de radio mémorisée sera lue.
RAPPEL DE LA STATION STOCKÉE
1. Pour rappeler le numéro d’une station mémorisée, utilisez les touches:(I) pour passer
à la station suivante ou 9(G) pour passer à la station précédente.
Utilisez les boutons PREV (G) et NEXT (H) de la télécommande.
2. En appuyant longuement sur la touche :(I) ou :(G), il est possible de rechercher la
station de radio suivante / précédente avec un signal puissant.

XF 350
16
FRANÇAISE
Remarque: la réception FM dépend grandement de l’emplacement de l’appareil.
La proximité de téléviseurs, de lampes au néon ou d’autres appareils domestiques peut
perturber la réception des programmes radio. Dans ce cas, retirez l’appareil.
BLUETOOTH
COUPLAGE
1. Placez le haut-parleur à côté du périphérique Bluetooth à jumeler et allumez-le.
2. Appuyez plusieurs fois sur le bouton MODE (D) jusqu’à ce que “BLUE” apparaisse à
l’écran.
3. Suivez les instructions de votre périphérique externe pour rechercher le haut-parleur.
4. Recherchez le haut-parleur nommé «XF 350» et entrez le code PIN «0000» si nécessaire.
5. Un son de notification sera entendu une fois le couplage terminé.
Remarque: le haut-parleur Bluetooth ne fonctionne qu’avec une connexion à la fois, la
connexion ne peut pas être interrompue en mode de fonctionnement normal.
COMMANDES DISPONIBLES EN MODE BLUETOOTH
- Appuyez une fois sur la touche 9(G) pour accéder à la piste précédente, appuyez une
fois sur la touche :(I) pour accéder à la piste suivante.
- Appuyez sur le bouton (H) pour mettre en pause. Pour reprendre la musique,
appuyez à nouveau sur (H).
MICRO SD CARD / USB
1. Insérezune carte Micro SD ou une clé USB dansles connecteurs(C) et allumez l’appareil.
2. La lecture commencera automatiquement.
3. Appuyez une fois sur la touche 9(G) pour accéder à la piste précédente, appuyez une
fois sur la touche :(I) pour accéder à la piste suivante;
4. Appuyezsurlebouton (H)pourmettreenpause.Appuyezànouveaupourreprendre
la lecture.
5. Appuyez longuement sur les touches 9(G) ou :(I) pour faire défiler rapidement une
piste. Relâchez les touches pour revenir à la lecture normale.
6. Appuyez sur le bouton REPEAT (F) ou le bouton RPT (K) de la télécommande pour activer
la fonction de répétition d’une piste (ONE) ou de toutes les pistes présentes (ALL).
7. A l’aide de la télécommande, utilisez le pavé numérique (D) pour appeler directement
une piste de la mémoire.
AUX IN
1. Connectez toute unité équipée d’une sortie audio à l’aide de la prise jack 3,5 mm ap-
propriée à l’entrée LINE IN (B), appuyez plusieurs fois sur la touche MODE (D) jusqu’à
ce que «LINE» apparaisse à l’écran.
2. Ajustez le périphérique externe à partir de ses commandes.
DISCO-LIGHT
1. Pour activer les effets Disco-Light, positionnez le commutateur (K) sur ON.
2. Pour désactiver les effets Disco-Light, réglez le commutateur (K) sur la position OFF.

XF 350
17
FRANÇAISE
UTILISATION DU MICROPHONE
1. Connectez le microphone fourni à la prise MIC IN (J) et utilisez l’interrupteur de la poignée
pour l’allumer.
2. Réglez le volume du microphone à l’aide du bouton (O).
3. Ajustez l’effet ECHO du microphone à l’aide du bouton (N).
REC FONCTION
Il est possible d’enregistrer uniquement les paroles du microphone sur une mémoire
microSD / USB:
1. Insérez une mémoire microSD ou une clé USB dans les entrées respectives.
2. Appuyez sur le bouton REC pour lancer l’enregistrement. l’écran affiche le mot REC suivi
de l’heure de début de l’enregistrement.
3. Pour terminer l’enregistrement, appuyez à nouveau sur le bouton REC. La piste qui vient
d’être enregistrée sera lue.
Remarque: en enregistrant à partir du microphone, il est plausible la présence d’un certain
bruit de fond sur l’enregistrement.
CARACTÉRISTIQUES TECHNIQUES
Puissance totale: ........................................15W
Gamme FM: ................................................87,5 - 108 MHz
Puissance maximale de transmission Bluetooth: 0.8mW
Fréquence de transmission Bluetooth: .........2,4 GHz
Alimentation: ...............................................batterie 3.7V 4400mAh rechargeable via
Alimentation 5V 1A
Dimensions: ...............................................230 x 245 x 415 mm
Poids: .........................................................3,5 kg
INFORMATIONS SUR LE RETRAIT ET L’ÉLIMINATION DES PILES
Attention: l’opération d’enlèvement et d’élimination est exclusivement réservée au
personnel technique spécialisé!
1. Retirez les vis qui fixent le panneau de commande avant.
2. Retirez le panneau de commande.
3. Retirez le connecteur et retirez la batterie de son logement.
Quelquesoitletypedebatterieépuisée,ellenedoitpasêtrejetéedanslesorduresménagères,
dans le feu ou dans l’eau. Chaque type de batterie épuisée doit être recyclé ou éliminé dans
des centres de collecte appropriés.

XF 350
18
FRANÇAISE
Recommandations pour l’élimination correcte du produit.
Le symbole figurant sur l’appareil indique que le produit fait l’objet d’une “collecte
séparée“. C’est pourquoi, le produit ne doit pas être éliminé avec les déchets urbains.
L’utilisateur doit remettre le produit auprès de “décharges spécialisées de collecte
séparée“ prévues par les autorités locales, ou bien le rendre au revendeur quand il
achètera un nouvel appareil équivalent.
La collecte séparée du produit et les opérations successives de traitement, recyclage et
élimination favorisent la production d’appareils composés par des matériaux recyclés
ainsi que permettent d’éviter des effets négatifs sur l’environnement et sur la santé des
personnes suite à une gestion impropre du déchet.
Toute élimination abusive du produit entraîne l’application de sanctions administratives.

XF 350
19
GEBRAUCHSHINWEISE
• NichtfürlängereZeitbeihoherLautstärkeMusikhören.DieskönntezuHörschäden führen.
• Das Gerät sollte nicht in folgenden Bereichen aufgestellt werden:
- in der Nähe von Magnetfeldern.
- in der Nähe von Wärmequellen wie Heizkörpern und Öfen.
- in sehr feuchten Räumen wie Badezimmern, Schwimmbädern, usw.
- in sehr staubigen Räumen.
- An Orten, die starken Schwingungen ausgesetzt sind.
• Das Gerät sollte so aufgestellt werden, dass auf den Seiten jeweils genügend Raum
verbleibt,um eine freie Luftzirkulation zu gewährleisten (mindestens 5 cm).
• Sollten Flüssigkeiten ins Innere des Geräts eindringen, den Stecker un verzüglich von
der Steckdose abziehen und das Gerät zur nächstgelegenen autorisierten TREVI-
Kundendienststelle bringen.
• VorderAufladungdesGerätsiststetssicherzustellen,dassNetzkabelundAnschlusska-
bel korrekt installiert sind.
• Keine offenen Quellen, wie zum Beispiel brennende Kerzen, auf diese platziert werden.
• Das Gerät darf nicht Tropf- oder Spritzwasser und kein Objekt mit Wasser, wie Vasen,
auf dem Gerät platziert werden.
• Bewahren Sie diese Anleitung zum späteren Nachschlagen.
PFLEGE UND WARTUNG
Für die Reinigung wird die VeSKIP-endung eines leicht angefeuchteten, weichen Tuchs
empfohlen. Der Einsatz von Lösungsmitteln oder scheuernden Substanzen sollte vermieden
werden.
WICHTIG
Der fachgerechte Bau dieses Geräts gewährleistet langfristig einen einwandfreien Betrieb.
Sollten dennoch Betriebsstörungen auftreten, wenden Sie sich bitte an die nächstgelegene
autorisierte Kundendienststelle.
TREVIverfolgt eine Politik ständiger Forschung und Weiterentwicklung. Die Produkte können
daher andere als die beschriebenen Eigenschaften auSKIP+eisen.
HINWEISE FÜR DEN KORREKTEN GEBRAUCH DER AUFLADBAREN BATTERIE
- Die Ladung der Batterie sollte bei einer Temperatur zwischen 5°C und 35°C erfolgen.
- Die Ladezeit sollte die angegebenen Zeiten nicht überschreiten, um die Gefahr der
Überhitzung und Explosion zu vermeiden.
- Die Batterie sollte nicht für einen Zeitraum von mehr als 64 hinaus oder eine
längere Nichtbenutzung können deren Lebensdauer reduzieren.
- Die aufladbare Batterie ist ein Verschleißteil, ihre Ladekapazität reduziert sich allmählich.
- Um die Lebensdauer der Batterie zu erhöhen, sollte diese stets komplett aufgeladen
und vollständig entleert werden. Vor der erneuten Benutzung sollte sie wieder komplett
aufgeladen werden. Wird eine nicht vollständig entleerte Batterie aufgeladen, so wird
deren La deautonomie reduziert. In diesem Falle sollte der Vorgang der vollständigen
Ladung/Entleerung mehrmals wiederholt werden.
- Der Ladevorgang über die ganze Nacht sollte vermieden werden.
DEUTSCH

XF 350
20
DEUTSCH
BESCHREIBUNG LINKS UND STEUERELEMENTEN
A. EIN / AUS-Schalter
B. LINE IN-Eingang
C. Micro SD / USB-Speichereingang
D. Taste MODE
E. Taste REC
F. Taste REPEAT
G. Taste 9, vorheriger Titel
H. Taste , Wiedergabe / Pause
I. Taste :nächster Titel
J. Mikrofoneingang
K. Ein- / Ausschalten der LED-Anzeige
L. 5V Netzteilbuchse/Ladeanzeige-LEDs
M. Lautstärkeregler
N. Mikrofon-Echo-Einstellknopf
O. Lautstärkeregler für das Mikrofon
A. Ein / Aus / Standby-Taste
B. Taste , Wiedergabe / Pause
C. Taste EQ, Audio-Equalizer
D. Ziffernblock
E. Taste MODE
F. Taste MUTE
G. Taste 9, vorheriger Titel
H. Taste :Nächster Titel
I. VOL-Taste,umdieLautstärkezuverringern
J. VOL+Taste,umdieLautstärkezuerhöhen
K. RPT-Taste, REPEAT-Funktion
L. U / SD-Taste, um den Micro SD / USB-
Speicher auszuwählen
Table of contents
Languages:
Other Trevi Portable Speakers manuals

Trevi
Trevi XF 150 KB User manual

Trevi
Trevi XF 1300 BEACH User manual

Trevi
Trevi XF 1550 KB User manual

Trevi
Trevi XR 8A01 User manual

Trevi
Trevi XF 3800 PRO User manual

Trevi
Trevi XF 440 KB User manual

Trevi
Trevi XF 550 APP User manual

Trevi
Trevi XF 4200 DJ User manual

Trevi
Trevi XR 84 BT User manual

Trevi
Trevi XF 300 POP User manual

Trevi
Trevi XF 1250 KB User manual

Trevi
Trevi XR 400 APP User manual

Trevi
Trevi XF 3500 PRO User manual

Trevi
Trevi XF 4100 PRO User manual

Trevi
Trevi XR 8A70 User manual

Trevi
Trevi SL 3841 User manual

Trevi
Trevi XF 1560 KB User manual

Trevi
Trevi XF 3200 PRO User manual

Trevi
Trevi XF 300 User manual

Trevi
Trevi XF 780 KB User manual