Trevi XF 1300 BEACH User manual

ALTOPARLANTE AMPLIFICATO ALTA POTENZA
Manuale d'uso e collegamento
HIGH POWER PORTABLE SPEAKER
Connection and Operation Manual
HAUT-PARLEUR PORTABLE AMPLIFIE
Mode d'emploi et branchement
BEWEGLICHER LAUTSPRECHER
Gebrauchs- und Anschlusshandbuch
ALTAVOZ AMPLIFICADO PORTATIL
Manual para el uso y la conexión
LED
DISPLAY
USB
PLAYER
XF 1300 BEACH
Guida d’uso
User guide
DISCO
LIGHT
80 W
MAX
BT
BLUETOOTH
Per informazioni integrative ed aggiornamenti su questo prodotto visita www.trevi.it
For additional information and updates of this product see www.trevi.it
IPX4
BASS
REFLEX


WARNINGS
ATTENZIONE
RISCHIO DI SCOSSE
ELETTRICHE!
NON ESPORRE A PIOGGIA E
UMIDITÀ
ATTENZIONE: NON APRITE L'APPARECCHIO. ALL'INTERNO NON VI SONO
COMANDI MANIPOLABILI DALL'UTENTE NE PARTI DI RICAMBIO. PER TUTTE
LE OPERAZIONI DI SERVIZIO RIVOLGERSI AD UN CENTRO DI ASSISTENZA
AUTORIZZATO TREVI
WARNING!
WARNING: DO NOT OPEN THE SET. NEITHER CONTROLS OR SPARE PARTS TO
BE USED BY THE USER ARE TO BE FOUND INSIDE IT. APPLY TO AUTHORISED
TREVI CENTERS FOR SERVICE OPERATIONS.
DANGER OF ELECTRIC SHOCK!
DO NOT EXPOSE TO
RAIN OR HUMIDITY
ATTENTION
ATTENTION: NE PAS OUVRIR L’APPAREIL, A L’INTERIEUR IL N’Y A PAS DE
COMMANDESAMANIPULERPAR L’UTILISATEUR OU DE PIECES DE RECHANGE.
POUR TOUTES LES OPERATIONS DE SERVICE IL FAUT S’ADRESSER A UN
SERVICE D’ASSISTANCE AUTORISE TREVI.
RISQUE DE DECHARGES
ELECTRIQUES
NE PAS EXPOSER A LA PLUIE ET A
L’HUMIDITE
ACHTUNG
ACHTUNG: DAS GERÄT NICHT ÖFFNEN. IM INNERN BEFINDEN SICH KEINE VOM
BENUTZERSELBSTINSTANDSETZBARENTEILEUNDAUCHKEINEERSATZTEILE.
FÜR JEGLICHE SERVICEARBEITEN, WENDEN SIE SICH BITTE AN EINE TREVI
AUTORISIERTEN KUNDENDIENSTSTELLE.
GEFAHR ELEKTRISCHER SCHLÄGE
NICHT DER FEUCHTIGKEIT UND
DEM REGEN AUSSETZEN
ATENCION
ATENCION: NO ABRIR EL APARATO, EN SU INTERIOR NO HAY MANDOS QUE
PUEDAN SER MANIPULADOS POR EL USUARIO NI PARTES DE REPUESTO.
PARA TODAS LAS OPERACIONES DE SERVICIO DIRIGIRSE A UN CENTRO DE
ASISTENCIA AUTORIZADO TREVI.
PELIGRO DE CHOQUES
ELECTRICOS
NO EXPONER A LLUVIA Y
HUMEDAD
Per evitare possibili danni all’udito,
limitare il tempo di ascolto a volumi elevati
To avoid possible hearing damage,
limit the listening time to high volumes
Pour éviter d'éventuels dommages auditifs,
limiter la durée d'écoute à volume élevé
Um mögliche Hörschäden zu vermeiden,
begrenzen die Höhe der Zeit bei hohen Lautstärke
hören
Para evitar posibles daños a la audición,
limitar la cantidad de tiempo de escucha a un
volumen alto

4
XF 1300 BEACH
NOTE D'USO
Ascoltare a volume alto per lungo tempo, potrebbe danneggiare il vostro udito.
Evitare di posizionare il riproduttore:
- Vicino a campi magnetici.
- Vicino a fonti di calore come caloriferi e stufe.
- In luoghi molto umidi come stanze da bagno, piscine, ecc...
- In luoghi molto polverosi.
- In luoghi soggetti a forti vibrazioni.
- Non avvicinare l’orecchio all’altoparlante durante le fasi di messa punto e regolazioni del volume, e in particolare di tenere il
volume al minimo nella fase di accensione.
- Posizionare l’apparecchio in modo che ai suoi lati ci sia sempre abbastanza spazio per la libera circolazione di aria (almeno
5 cm).
- Se dei liquidi penetrano all’interno dell’apparecchio scollegare immediatamente la spina dalla presa e portare l’apparecchio
al più vicino centro assistenza autorizato TREVI.
- Controllaresempreprimadiricaricarel’apparecchio,cheicavidialimentazioneedi collegamento siano installati correttamente.
- Nessuna sorgente di fiamma nuda, quali candele accese, dovrebbe essere posta sull’apparecchio.
- L’apparecchio non deve essere esposto a stillicidio o a spruzzi d’acqua e nessun oggetto pieno di liquido, quali vasi, deve
essere posto sull’apparecchio.
- Istruire al corretto utilizzo bambini e persone con scarse conoscenze del prodotto.
- Conservare il presente manuale per futuri riferimenti.
CURA E MANUTENZIONE
Per la pulizia si consiglia l’uso di un panno morbido, leggermente inumidito. Evitate solventi o sostanze abrasive.
IMPORTANTE
Questo dispositivo e' progettato per uso domestico non professionale. La buona costruzione di questo apparecchio ne garantisce
per lungo tempo il perfetto funzionamento. Se tuttavia dovesse presentarsi qualche inconveniente, sarà opportuno consultare il
più vicino Centro Assistenza autorizzato TREVI.
TREVI persegue una politica di continua ricerca e sviluppo. Pertanto i prodotti possono presentare caratteristiche diverse da
quelle descritte.
ITALIANO
DESCRIZIONE COMANDI
29

5
XF 1300 BEACHITALIANO
TRASPORTO
Premere il pulsante presente sulla maniglia del trolley, alzare il manico fino al blocco (si udira' uno scatto metallico). Per il trasporto,
agendo sulla maniglia del trolley, piegare leggermente l'apparecchio e sfruttare le due ruote laterali.
Per lo sblocco e chiusura del trolley, premere nuovamente il pulsante sulla maniglia ed abbassare completamente il manico.
ALIMENTAZIONE/RICARICA BATTERIA
Questa unità funziona con batteria interna ricaricabile al piombo da 12V , 4,5Ah o alimentazione di rete 230V 50Hz.
Quando la batteria è in fase di esaurimento o l'apparecchio non si accende, portare l'interruttore principale POWER ON/OFF(20) in
posizione "OFF", inserire il cavo di alimentazione nella presa(19) del dispositivo e la spina in una presa di corrente per effettuare
la ricarica della batteria interna; i segmenti dell'icona della batteria sul display(1) cominceranno a lampeggiare.
A carica ultimata i segmenti dell'icona della batteria rimarranno fissi.
Nota: Non collegare l'apparecchio a prese con tensione diversa da quella indicata.
21. Tasto MODE: selezione funzione
22. Cartella precedente /cartella successiva; passaggio a Cartella precedente
o successiva
23. Tasto 9/:, selezione traccia precedente/ successiva
24. Tasto, Play/Pausa
25. Tasto EQ: equalizzazioni DSP pre-impostate
26. Tasti -/+, regolazione Volume generale
27. Tasti 0/--/---, tasti di inserimento diretto per inserire decine e centinaia
28. Tasti numerici
1. Display
2. Ingresso MIC 1/Chitarra
3. Ingresso MIC 2/Chitarra
4. MIC1 VOL, regolazione Volume Microfono/Chitarra
5. MIC2 VOL, regolazione Volume Microfono/Chitarra
6. Regolazione ECHO microfono
7. Ingresso AUX IN
8. Presa USB
9. Ricevitore telecomando
10. Tasto <, precedente
11. Tasto SOURCE, selezione funzione
12. Tasto , Bluetooth
13.Tasto LIGHTS, attivazione/disattivazione Led frontali/
posteriori (Disco Light)
14. Tasto >, successivo
15. Tasto, Play/Pausa, tenendolo premuto: selezione
cartella
16. Pre equalizzazioni DSP: NORMAL/POP/ROCK
17. RegolazioneVolumegenerale, premendoloregolazione toni
Bassi e Alti
18. Pre equalizzazioni DSP: CLASSICAL/COUNTRY/JAZZ
19. Presa per inserimento cavo di alimentazione da rete
20. Interruttore principale POWER ON/OFF (accensione/
spegnimento)
29. Microfono
TELECOMANDO
TIRARE LA LINGUETTA
2- TIRARE
1- SPINGERE
ATTIVAZIONE E SOSTITUZIONE DELLA BATTERIA DEL TELECOMANDO
Il telecomando monta una batteria tipo CR2025
Per attivare la batteria del telecomando (inclusa) togliere la linguetta plastica
di protezione.
Per la sostituzione della batteria:
1. Spingere il fermo plastico dell’alloggiamento porta batteria verso destra;
2. Estrarre l’alloggiamento porta batteria;
3. Inserire una batteria nuova facendo attenzione a rispettare le polarità;
4. Richiudere l'alloggiamento porta batteria.

6
XF 1300 BEACH
FUNZIONI DI BASE
ACCENSIONE/SPEGNIMENTO
Portare l'interruttore principale POWER ON/OFF(20) in posizione "ON" per accendere e utilizzare l'apparecchio con la sua batteria
interna.
Portare l'interruttore principale POWER ON/OFF(20) in posizione "OFF" per spegnere completamente l'apparecchio o per ricaricare
la batteria.
TASTI A DOPPIA FUNZIONE
I seguenti tasti sull'unità hanno una doppia funzione a seconda del tempo con cui vengono premuti:
- Tasto <(10): una breve pressione riproduce l'ultima traccia riprodotta o la riproduzione del brano precedente. Premere a lungo
per abbassare il volume.
- Tasto >(14): una breve pressione riproduce il brano successivo successivo. Premere a lungo per aumentare il volume.
- Tasto,(15) Play/Pause: una breve pressione attiva la pausa della traccia corrente oppure l'avvio della riproduzione. Una
lunga pressione mette l'unità in "Modalità cartella", permettendoti di navigare dentro e fuori le eventuali cartelle presenti nella
memoria USB, utilizzando i tasti <(10) e >(14).
- Manopola Volume generale(17): una lunga pressione mette l'unità in modalità "Mute" (silenzioso), premerlo nuovamente per
ripristinare il suono.
SELEZIONE DELLA FUNZIONE
Per cambiare la modalità di funzionamento, premere piu' volte il tasto SOURCE(11) sull'unità o premere il tasto MODE(21) sul
telecomando per selezionare: BLUETOOTH (sul display compare "BLUE"), RADIO(sul display compare la frequenza), USB (solo se
sullapresaUSB(8)viècollegataunamemoria,suldisplaycompareunapiccolascritta"USB"),AUX-IN (sul display compare "LINE").
REGOLAZIONE DEL VOLUME
1. Ruotare la manopola del VOLUME(17) per aumentare o diminuire il volume generale di riproduzione oppure utilizzare i tasti
-/+(26) sul telecomando;
2. Ruotare la manopola MIC VOL1(4) o MIC VOL2(5) per regolare il volume del segnale sull'ingresso MIC1(2) o MIC 2(3).
PRE-EQUALIZZAZIONI
Questa unità ha un sistema di equalizzazioni audio pre impostate. Premere più volte il tasto EQ(5) sul telecomando per selezionare
una delle 6 equalizzazioni audio disponibili oppure selezionarla direttamente attraverso il tasto corrispondente tra quelle indicate
sull'unità(16 e 18) e che meglio si adatta alla riproduzione sonora in corso.
REGOLAZIONE TONI ALTI E BASSI
Per regolare separatamente il suono dei bassi e degli acuti:
1. Premere una volta la manopola del VOLUME(17) sull'unità per regolare i toni bassi, una "b" apparirà sul display. Ruotare la
manopola per effettuare la regolazione;
2. Premere una seconda volta la manopola del VOLUME(17) sull'unità per regolare i toni alti, una "t" apparirà sul display. Ruotare
la manopola per effettuare la regolazione;
3. Premere una terza volta la manopola del VOLUME(17) sull'unità per tornare alla regolazione del volume (indicato sul display
con una "v").
EFFETTO ECHO
Ruotare la manopola ECHO(6) per aumentare o diminuire l'effetto eco sugli ingressi MIC1 e MIC2.
Nota: l'effetto eco agisce unicamente sugli ingressi microfonici.
EFFETTO DISCO-LIGHT
Per attivare l'effetto Disco-Light premere il tasto LIGHTS(13) sull'unità.
Per disattivare l'effetto Disco-Light, premere nuovamente il tasto LIGHTS(13) sull'unità.
PRESA USB CHARGE
La presa USB(8) è in grado di caricare dispositivi esterni, come smartphone e tablet.
- Collegare alla presa USB(8) il vostro dispositivo portatile tramite apposito cavo (non in dotazione);
- L'indicatore di carica sul dispositivo mobile esterno, indicherà lo stato di ricarica in corso.
ITALIANO

7
XF 1300 BEACH
MODALITA' RADIO FM
RICERCA AUTOMATICA
Per utilizzare la modalità FM, è necessario prima eseguire una scansione/memorizzazione delle stazioni più forti nella vostra zona.
1. Accendere l'apparecchio e premere più volte il tasto SOURCE(11) sull'unità, o il tasto MODE(21) sul telecomando e selezionare
la funzione RADIO (sul display comparirà l'indicazione della frequenza);
2.
Premere il tasto
(15)
sull'unità per attivare la ricerca e memorizzazione automatica delle emittenti (la radio inizia una
ricerca automatica delle stazioni radio e le salva automaticamente in memoria). Il numero delle stazioni memorizzate dipende
dal segnale radio nella vostra zona. Durante la ricerca premere il tasto
(15)
sull'unità per arrestare la memorizzazione;
3. Una volta completata la scansione, utilizzare i tasti <(10) e >(14)
sull'unità
per muoversi tra i preset della stazione salvate.
Nota:
-
La ricezione in FM dipende molto dal luogo dove è posto l’apparecchio.
- La vicinanza di apparecchi TV, lampade al neon o altri elettrodomestici può provocare disturbi nella ricezione di
programmi radio, in questo caso allontanate l'apparecchio.
FUNZIONAMENTO BLUETOOTH
1. Accendere l'apparecchio e premere il tasto (12) sull'unità o premere il tasto MODE(21) sul telecomando e selezionare la
funzione bluetooth, sul display compare la scritta "BLUE";
2. Nella modalità Bluetooth, la scritta "BLUE" sul display comincerà a lampeggiare e il sistema si porterà automaticamente in
modalità ricerca;
3. Attivare la funzionalità Bluetooth sul dispositivo esterno da accoppiare;
4. Avviare la ricerca dei dispositivi. Al termine selezionare il dispositivo "XF 1300 BEACH";
5. Inserire la password "0000" se richiesto;
6. Premere il tasto
(15) sull'unità oppure sul telecomando
per avviare la riproduzione e utilizzare i tasti <(10) o >(14)
sull'unità, oppure i tasti 9/:(23) sul telecomando per la selezione dei brani.
RIPRODUZIONE SU INGRESSO USB
1. Accendere l'apparecchio;
2. Inserire una memoria USB nella presa(8). La riproduzione viene avviata automaticamente;
3. Per mettere in pausa la riproduzione, premere il tasto
(15) sull'unità oppure il tasto
(24) del telecomando
; sul
display comparirà la scritta "PAUS";
4. Per riprendere la riproduzione, premere nuovamente il tasto
(15) sull'unità o (24) sul telecomando
;
5. Utilizzare i tasti(22) del telecomando per selezionare eventualmente una cartella specifica all'interno della memoria USB;
6. Premere il tasto >(14) sull'unità o il tasto :(23) sul telecomando, durante l’ascolto, per passare alla traccia successiva.
Premere il tasto <(10) sull'unità o il tasto 9(23) sul telecomando per passare ai brani precedenti;
7. Utilizzando la tastiera numerica(28) del telecomando è possibile digitare direttamente il numero del brano musicale che si
vuole riprodurre.
Nota:
- Il lettore potrebbe non supportare alcuni dispositivi USB, questo è dovuto all'incompatibilità di alcuni processori.
- Per evitare interferenze dannose, collegare sempre le periferiche USB direttamente all'unità, non utilizzare cavi di prolunga.
- Dal computer formattare le memorie USB in FAT (16 o 32).
AUX-IN
1. Premere il tasto SOURCE(11) sull'unità o premere il tasto MODE(21) sul telecomandoe e selezionare la funzione "LINE IN";
2. Collegare una qualsiasi unità provvista di uscita audio tramite l'apposito cavo Jack da 3,5mm (non in dotazione) all'ingresso
AUX IN(7);
3. Regolare il dispositivo esterno dai propri comandi.
ITALIANO

8
XF 1300 BEACH
ITALIANO
UTILIZZO DEI MICROFONI
1. Collegare il microfono in dotazione all'ingresso MIC1(2) o MIC2(3);
2. Accendere il microfono agendo sull'interruttore presente sul manico del microfono stesso portandolo in posizione ON;
3. Regolare il volume di ingresso del microfono e l'effetto eco come desiderato tramite gli appositi comandi (4/5/6).
RISOLUZIONE DEI PROBLEMI
Se si verifica un problema, attenersi alla procedura descritta nella seguente tabella.
Se il problema non può essere risolto, contattare il rivenditore o il centro assistenza.
Problema Possibili cause Soluzione
Nessun suono riprodotto quan-
do l'apparecchio viene acceso
1. Nessuna sorgente sonora in ingresso
2. Manopola Volume a livello 0
3. Nessun dispositivo USB collegato
1. Collegare un dispositivo all'ingresso AUX-IN
2. Regolare il volume
3. Collegare una memoria USB, riprodurre MP3
Suono distorto 1. Volume troppo alto
2. Errore file Audio
1. Abbassare il volume
2. Controllare e riprodurre un'altro file Audio
Nessun suono dal microfono 1. La presa del microfono può non
essere collegata correttamente.
2. L'interrutore di accensione sul
microfono può essere in posizione
"spento".
3. Volume del microfono basso.
1. Assicurarsi che il microfono sia collegato
correttamente alla presa.
2. Accendere il microfono.
3. Regolare correttamente il volume del
microfono
Nessun suono quando si inseri-
sce un dispositivo USB
1. Formato file non supportato
2. USB non collegata correttamente
1. Il formato dei file audio deve essere MP3
2. Collegare l'apparecchio USB correttamente
Impossibile caricare la batteria
o la batteria ha una durata breve
1. Il cavo di alimentazione non è inserito
bene nella presa
2. La batteria non è completamente
carica
3. La batteria potrebbe aver terminato il
suo ciclo di vita
1. Controllare se il cavo di alimentazione è
collegato in modo corretto
2. Normalmente ci vogliono 5-6 ore per ricari-
care completamente la batteria
3. Sostituire la vecchia batteria con una nuova
avente le stesse specifiche tecniche
Dagli altoparlanti si sentono
forti rumori
1. Microfono acceso ma troppo vicino
all'altoparlante
2. Microfono acceso ma non viene
utilizzato
1. Tenere il microfono alla distanza di 2 metri
dal diffusore
2. Spegnere il microfono se non utilizzato

9
XF 1300 BEACH
Dagli altoparlanti si sentono
forti rumori
3. Il Volume del microfono potrebbe
essere troppo alto
4. Un cellulare viene utilizzato troppo
vicino all'altoparlante
5. Apparecchi senza fili possono essere
molto vicini a chi sta utilizzando il
microfono
3. Abbassare il volume del microfono
4. Tenere il cellulare lontano dall'altoparlante
mentre si effettua una chiamata.
5. Tenere il diffusore lontano da apparecchi
wireless
INFORMATIVA SULLA RIMOZIONE E LO SMALTIMENTO DELLE BATTERIE
Attenzione: Questa operazione è riservata esclusivamente al personale tecnico specializzato!
PROCEDURA PER LA RIMOZIONE DELLA BATTERIA DALL’ALTOPARLANTE AMPLIFICATO
Operare esclusivamente in assenza di collegamento dell’apparecchio alla rete elettrica!
1. Rimuovere le viti che serrano il pannello plastico posteriore;
2. Rimuoverlo e individuare la batteria;
3. Scollegare la batteria e rimuoverla.
SMALTIMENTO DELLA BATTERIA
Qualunque sia il tipo di batteria esaurita, essa non deve essere gettata tra i rifiuti domestici, nel fuoco o nell’acqua. Ogni tipo di
batteria esaurita deve essere riciclata oppure smaltita presso gli appositi centri di raccolta dedicati.
INFORMAZIONI AGLI UTENTI
ai sensi del Decreto Legislativo N° 49 del 14 Marzo 2014
“Attuazione della Direttiva 2012/19/UE sui rifiuti di apparecchiature elettriche ed elettroniche (RAEE)”
Il simbolo del cassonetto barrato riportato sull’apparecchiatura indica che il prodotto alla fine della propria vita utile deve essere
raccolto separatamente dagli altri rifiuti. L’utente dovrà, pertanto, conferire l’apparecchiatura integra dei componenti essenziali
giunta a fine vita agli idonei centri di raccolta differenziata dei rifiuti elettronici ed elettrotecnici, oppure riconsegnarla al rivenditore al
momento dell’acquisto di nuova apparecchiatura di tipo equivalente, in ragione di uno a uno, oppure 1 a zero per le apparecchiature
aventi lato maggiore inferiore a 25cm. L’adeguata raccolta differenziata per l’avvio successivo dell’apparecchiatura dimessa al
riciclaggio, al trattamento e allo smaltimento ambientale compatibile contribuisce ad evitare possibili effetti negativi sull’ambiente
e sulla salute e favorisce il riciclo dei materiali di cui è composta l’apparecchiatura. Lo smaltimento abusivo del prodotto da parte
dell’utente comporta l’applicazione delle sanzioni amministrative di cui al D.Lgs n. Decreto Legislativo N° 49 del 14 Marzo 2014.
CARATTERISTICHE TECNICHE
GENERALI
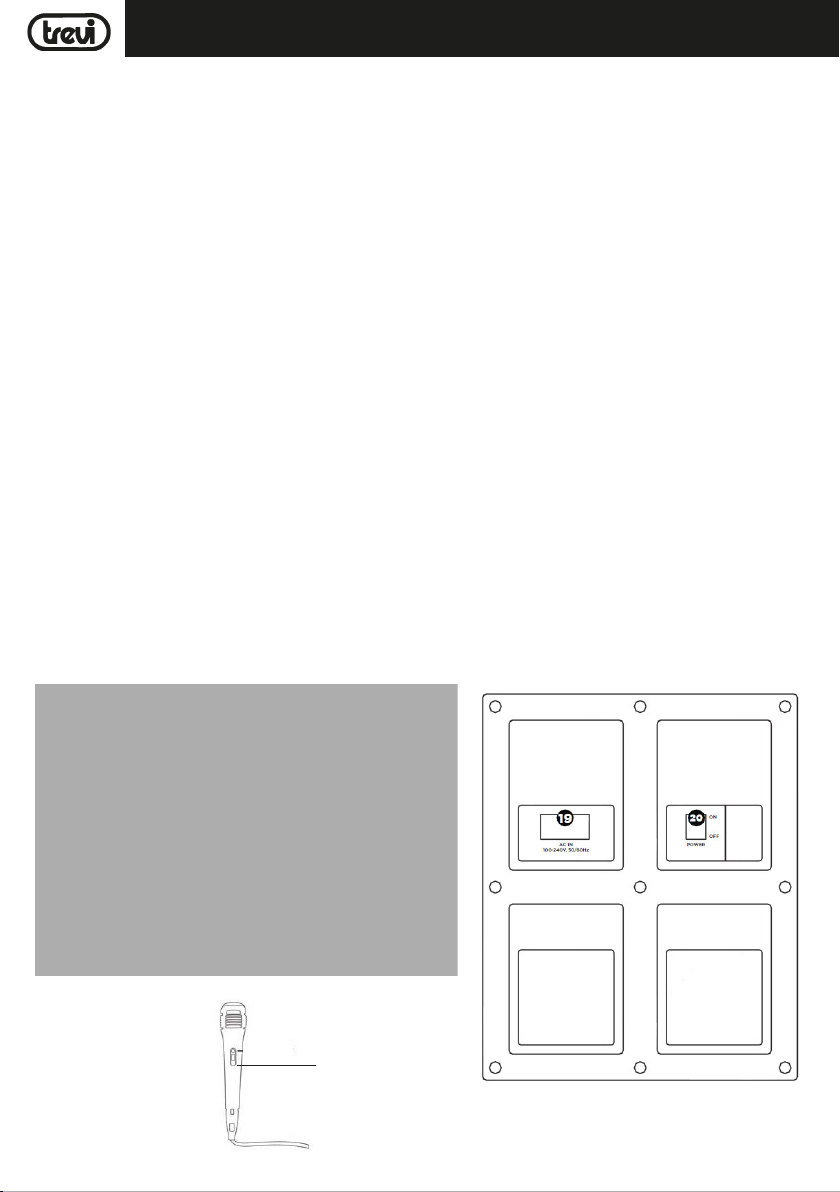
Alimentazione: ....................................................... 100-230V 50/60Hz
batteria interna ricaricabile al piombo 12V , 4,5Ah
Consumo: ..............................................................................Max 80W
IPX: ...................................................... 4 (resistente agli spruzzi)
Potenza massima Audio: ..................................................................................... 80W
Woofer: ....................................................................................... 10"
Tweeter: ......................................................................................... 3"
Risposta in frequenza: ...................................................................... 55Hz - 18KHz
Sensibilità d'ingresso: ................................................................. 96±2db 1W/1M
Classe di Potenza Bluetooth: .......................................................................................... 2
Potenza di trasmissione di picco Bluetooth: ................................................................. 2,5mW
Potenza di trasmissione max Bluetooth:....................................................................... 1,9mW
Banda di trasmissione Bluetooth:................................................................................. 2,4GHz
Dimensioni: ................................................................. 520x365x258mm
Peso: .................................................................................. 9,5 Kg
ITALIANO

10
XF 1300 BEACH
ENGLISH
NOTES ON USE
Listening at high volume for a long time may damage your hearing.
This is a precision electronic appliance; avoid using it in the following cases:
- Near magnetic fields.
- Near heat sources such as heaters and heaters.
- In very humid places like bathrooms, swimming pools, etc...
- In very dusty places.
- In places subject to strong vibrations.
- Do not place your ear near the loudspeaker during the set-up and volume adjustment phases, and in particular keep the volume
at minimum during the ignition phase.
- Position the appliance so that there is always enough space on its sides for the free circulation of air (at least 5 cm).
- If liquids enter the appliance, immediately disconnect the plug from the socket and take the appliance to the nearest authorized
TREVI service center.
- Always check before recharging the appliance, that the power and connection cables are installed correctly.
- No naked flame sources, such as lighted candles, should be placed on the appliance.
- The appliance must not be exposed to dripping or splashing water and no objects filled with liquids, such as vases, must be
placed on the appliance.
- Instruct children and people with poor knowledge of the product to use correctly.
- Keep this manual for future reference.
CARE AND MAINTENANCE
Use a slightly damp soft cloth for cleaning. Do not use solvents and abrasive substances.
IMPORTANT
This device is designed for non-professional home use. The good construction of this device guarantees its perfect functioning
for a long time. If, however, a problem should arise, it is advisable to consult the nearest TREVI Authorized Service Center.
TREVI follows a policy of ongoing research and development. Therefore products may have different features from those described.
LOCATION OF CONTROL
29

11
XF 1300 BEACHENGLISH
TRANSPORTATION
Press the button on the handle of the trolley, lift the handle up to the block (you will hear a metallic click). For transport, by acting
on the handle of the trolley, slightly bend the appliance and take advantage of the two side wheels.
To unlock and close the trolley, press the button on the handle again and lower the handle completely.
POWER
This unit works with internal rechargeable lead battery 12V , 4,5Ah or 230V 50Hz mains power supply.
When the battery is not charge or the unit does not turn on, turn the main POWER ON/OFF switch(20) to the "OFF" position, insert
the power cord into the socket(19) of the device and plug it into a power outlet to recharge the internal battery; the segments of
the battery icon on the display(1) will start to flash.
Once the charge is complete, the segments of the battery icon will remain fixed.
Note: Do not connect the appliance to an outlet with a voltage other than that indicated.
21. MODE Button: Select Audio Source (USB/Bluetooth)
22. BACK/FWD Folder Buttons Navigate to Previous or Next Folder
23. 9/:Track Buttons: Play Previous or Next Track
24. ,Play or Pause the current Track
25. EQ mode key
26. -/+ Volume Buttons: Increase or Decrease Volume
27. 0/--/--- Direct Entry Buttons: To enter tens and hundreds
28. Number Buttons: For Numeric Entry
REMOTE CONTROL
1. LED Display
2. Connector for Microphone 1 or Guittar
3. Connector for Microphone 2 or Guittar
4. Volume knob for Mic 1 input
5. Volume knob for Mic 2 input
6. Echo knob: Effect adjustment for Mic and Guitar input
7. AUX Input
8. USB Port
9. Receiver for Remote Control
10. <Button: Short press: Switch Previous Song, Long press
Voice DOWN
11. PressswitchbetweenUSB/RADIO/BLUETOOTH/LineInput
12. Bluetooth mode
13. LED light power switch
14. >Button: Short press: Switch next Song, Long press
Voice UP
15. Short press: Play/Pause, Long press for FOLDER tracking
16. Music Style with preset modes: NORMAL/POP/ROCK
17. Turn around for Volume control of amplifier, Press down
for DSP-Digital signal processing
18. Music Style with preset modes: CLASSICAL/COUNTRY/
JAZZ
19. AC Power Socket input
20. Power button
29. Microphone
PULL THE PLASTIC PART
2- PULL
1- PUSH
ACTIVATION AND REPLACEMENT REMOTE CONTROL'S BATTERY
The remote control is equipped with a CR2025 battery.
To activate the battery of the remote control (included), remove the plastic
protection tab.
For battery replacement:
1. Push the battery's plastic holder compartment to the right;
2. Remove the battery compartment;
3. Insert a new battery, taking care to respect the polarities;
4. Close the battery compartment.

12
XF 1300 BEACH
ENGLISH
BASIC FUNCTIONS
POWER ON/OFF
Set the main switch POWER ON/OFF(20) to "ON" to turn on and use the device with its internal battery.
Set the main switch POWER ON/OFF(20) to "OFF" to completely switch off the device or charge the battery.
DOUBLE FUNCTION KEYS
The following keys on the unit have a double function depending on how long they are pressed:
- <(10) key: a short press plays the last track played or the previous track. Long press to lower the volume.
- >(14) key: a short press plays the next following track. Long press to increase the volume.
- ,(15) Play/Pause key: a short press activates the pause of the current track or the start of playback. A long press puts
the unit in "Folder mode", allowing you to navigate in and out any folders in the USB memory, using the <(10) and >(14)
keys
- General Volume knob(17): a long press puts the unit in "Mute" mode, press it again to restore the sound.
MODE FUNCTION
To change the operating mode, press several times the SOURCE button(11) on the unit or press the MODE button(21) on the remote
control to select: BLUETOOTH ("BLUE" appears on the display), RADIO (the frequency appears on the display), USB (only if on the
USB socket (8) a memory is connected, a small "USB" message appears on the display), AUX-IN ("LINE" appears on the display).
ADJUSTING THE VOLUME
1. Turn the VOLUME knob(17) to increase or decrease the general playback volume or use the -/+ keys(26) on the remote
control;
2. Turn the MIC VOL1(4) or MIC VOL2(5) knob to adjust the volume of the signal at the MIC1(2) or MIC 2(3) input.
PRE-EQUALIZER
This unit has a pre-set audio equalization system. Press several times EQ button(5) on the remote control to select one of the 6
available audio equalizers or select it directly using the corresponding button among those indicated on the unit (16 and 18) and
which is best suited to the current sound reproduction.
SETTING TONE TREBLE AND BASS
To separately adjust the bass and treble sound:
1. Press the VOLUME knob(17) on the unit once to adjust the bass tones, a "b" will appear on the display. Turn the knob to make
the adjustment;
2. Press the VOLUME knob(17) on the unit a second time to adjust the high tones, a "t" will appear on the display. Turn the knob
to make the adjustment;
3. Press the VOLUME knob(17) on the unit a third time to return to volume control (shown on the display with a "v").
ECHO EFFECT
Turn the ECHO knob(6) to increase or decrease the echo effect on the input MIC1/2.
Note: the echo only works on microphone input.
DISCO-LIGHT EFFECTS
Press the LIGHTS button(13) on the unit to activate the Disco-Light effect.
To deactivate the Disco-Light effect, press the LIGHTS button(13) on the unit again.
USB CHARGE OUTPUT
The USB socket(8) can be used to charge external devices, like smartphones or tablets.
- Connect your external device to the USB socket(8) using the appropriate cable (not supplied);
- The charge indicator on the external device will indicate the charging status in progress.
FM RADIO MODE
To use FM mode, you will first need to scan for strong stations in your area. To begin the scan, press the(15) button on unit.
This will begin scanning, and any strong signals will be saved as presets.
Once scanning is complete, you will be able to use the <(10)and >(14) buttons to jump to the saved station presets. Presets will be
numbered, and the FM frequency will be displayed.

13
XF 1300 BEACH
BLUETOOTH FUNCTION
1. Switch on the appliance and press the button (12) on the unit or press the MODE button(21) on the remote control and
select the bluetooth function; the word "BLUE" will appear on the display;
2. In the Bluetooth mode, the word "BLUE" on the display will start to flash and the system will automatically go into search
mode;
3. Activate the Bluetooth feature on the external device to be coupled;
4. Initiate a search for devices. After select the "XF 1300 BEACH";
5. Enter the password "0000" if required;
6. Press the
button(15) on the unit or on the remote control to start playback and use the <(10) or >(14) buttons on the
unit, or the
9/: buttons(23) on the remote control to select the tracks.
PLAY ON INPUT USB
1. Switch the appliance on;
2. Insert a USB memory into the socket(8). Playback starts automatically;
3. To pause playback, press thebutton(15) on the unit or thebutton(24) on the remote control; the word "PAUS" will
appear on the display;
4. To resume playback, press the
(15)
on the unit or on the remote control;
5. Use the buttons (22) on the remote control to select a specific folder in the USB memory;
6. Press the >(14) button on the unit or the button 9(23) on the remote control, while listening, to go to the next track. Press
the <(10) button on the unit or the :(23) button on the remote control to skip to the previous tracks;
7. Using the numeric keypad(28) on the remote control, you can directly enter the number of the music track you want to play.
Note:
- The player may not support some USB devices, this is due to the incompatibility of some processors.
- To avoid harmful interference, always connect USB devices directly to the unit, do not use extension cords.
- From the computer to format the USB memory FAT (16 or 32).
AUX-IN
1. Press the SOURCE button(11) on the unit or press the MODE button(21) on the remote control and select the "LINE IN" function;
2. Connect any unit with audio output through the appropriate 3.5mm jack cable (not supplied) to the AUX IN input(7);
3. Adjust the external device from your commands.
ENGLISH

14
XF 1300 BEACH
ENGLISH
USING THE MICROPHONE
1. Connect the supplied microphone to the MIC1(2) or MIC2(3) input;
2. Turn on the microphone by turning the switch on the microphone handle to the ON position;
3. Adjust the microphone input volume and the echo effect as desired using the appropriate commands (4/5/6).
TROUBLESHOOTING
If a problem occurs, follow the steps in the table below.
If the problem still can’t be solved, please contact your retailer.
Problem Possible cause Solution
No sound when power is
turned ON
1. No input sound source comes
2. Volume knob in the lowest position
3. Voice switch off
4. USB card not plugged
1. Input AUX signal
2. Adjust volume
3. Turn on voice switch
4. Plug USB play MP3
Distorted sound 1. Volume is too loud
2. Audio file error
1. Turn the volume down
2. Check and change the audio file
No sound from the mi-
crophone
1. Microphone socket may not be plugged
properly.
2. Microphone switch may not be on.
3. Microphone volume is on lowest mode.
1. Ensure the microphone is correctly plugged into
the socket.
2. Turn on the microphone
3. Adjust the microphone volume as per users wish
No sound comes after
inserting USB
1. Incorrect file format
2. USB may not be plugged properly
1. File format should be MP3
2. Plug USB correctly
Unable to charge or the
battery works only for
short duration
1. Connect with power cord to charge
2. Battery not fully charged
3. Battery life may have ended
1. Check if power cord connected properly
2. Extend charging time;normally it takes 5-6 hour
to fully charge
3. Replace old batteries with the same specification
as the old batteries.
Speaker makes loud
noises
1. Microphone switched on but may too
close to the speaker
2. Microphone switched on but is not
being used
3. Microphone volume may be too loud
4. Mobile phone is being used too close
to the speaker
5. Other wireless equipment may be
placed very close to the speaker
1. Keep the microphone 2 meters away from the
speaker
2. Turn off microphone if not in use.
3. Adjust microphone volume to lower mode
4. Keep mobile away from the speaker whilst a
ending a call.
5. Keep the speaker away from other wireless
equipment
INFORMATION NOTE ON THE REMOVAL BATTERY
Warning: Only high-qualified personnel should perform this operation!
BATTERY REMOVAL
The appliance should not be plugged to the mains socket when performing this operation!
1. Remove the screws that tighten the rear plastic panel;
2. Remove it and locate the battery;
3. Disconnect the battery and remove it.
INFORMATION ON DISPOSAL BATTERY
Used batteries should not be disposed of with household waste or thrown into fire or water. Used batteries should be recycled or
disposed of in separate waste collection centres.

15
XF 1300 BEACHENGLISH
INFORMATION TO USERS
pursuant to Legislative Decree No. 49 of March 14, 2014
"Implementation of Directive 2012/19/EU on Waste Electrical and Electronic Equipment (WEEE)"
This wheeled bin symbol on the product indicates that at the end of its life must be collected separately from other waste. The
user must, therefore, take the remote control integrates the essential components that got to its life to the appropriate differen-
tiated collection centers for electronic and electro-technical waste, or return it to the dealer when purchasing a new appliance of
equivalent type, in terms of one to one, or one to zero for equipment having longer side of less than 25cm. Appropriate separate
collection for the decommissioned equipment for recycling, processing and environmentally compatible disposal helps prevent
negative impact on the environment and human health and promotes recycling of the materials making up the product. Illegal
dumping of the product by the user entails the application of administrative sanctions stated in Legislative Decree n. Legislative
Decree No. 49 of March 14, 2014.
TECHNICAL SPECIFICATIONS
Power Supply: ....................................................... 100-230V 50/60Hz
internal lead acid rechargeable battery 12V 4,5Ah
Power consumption: ..............................................................................Max 80W
IPX: ................................................................... 4 (Splash proof)
Output Audio power: ..................................................................................... 80W
Woofer: ....................................................................................... 10"
Tweeter: ......................................................................................... 3"
Frequency response: ...................................................................... 55Hz - 18KHz
Input sensitivity: ................................................................. 96±2db 1W/1M
Class Bluetooth: .......................................................................................... 2
Bluetooth peak transmission power: ............................................................................ 2,5mW
Bluetooth max power transmission:............................................................................. 1,9mW
Band transmission Bluetooth: ................................................................................. 2,4GHz
Dimensions: ................................................................. 520x365x258mm
Weight: ...................................................................................9,5 kg

16
XF 1300 BEACH
NOTES D’EMPLOI
Écouter à fort volume pendant une longue période peut endommager votre audition.
Cet appareil est un instrument électronique de haute précision, évitez donc de l’utiliser dans les cas suivants:
- Près des champs magnétiques.
- À proximité de sources de chaleur telles que des radiateurs et des radiateurs.
- Dans des endroits très humides tels que salles de bains, piscines, etc...
- Dans des endroits très poussiéreux.
- Dans des endroits soumis à de fortes vibrations.
- Ne placez pas votre oreille près du haut-parleur pendant les phases de réglage et de réglage du volume, et en particulier
maintenez le volume au minimum pendant la phase d'allumage.
- Placez l'appareil de sorte qu'il y ait toujours assez de place sur les côtés pour permettre la libre circulation de l'air (au moins
5 cm).
- Si des liquides pénètrent dans l'appareil, débranchez immédiatement la fiche de la prise de courant et portez-le au centre de
réparation TREVI le plus proche.
- Vérifiez toujours, avant de recharger l'appareil, que les câbles d'alimentation et de connexion sont correctement installés.
- Ne placez aucune source de flamme nue, telle que des bougies allumées, sur l'appareil.
- L'appareil ne doit pas être exposé à des gouttes d'eau ni à des éclaboussures d'eau et aucun objet contenant des liquides,
tels que des vases, ne doit être placé sur l'appareil.
- Demandez aux enfants et aux personnes ayant une faible connaissance du produit d’utiliser correctement.
- Conservez ce manuel pour référence ultérieure.
MANIEMENT ET ENTRETIEN
Pourlenettoyage,il estconseillé d’utiliserunchiffondouxlégèrementhumide.Évitez l’emploide solvantsoudesubstancesabrasives.
IMPORTANT
Cet appareil est conçu pour un usage domestique (usage non professionnel). La bonne fabrication de cet appareil garantit un
fonctionnement parfait pour une longue période. Si toutefois quelques inconvénients devaient se présenter, adressez-vous au
Centre d’Assistance agréé TREVI le plus proche.
TREVI observe une politique de recherche et de développement continus. C’est pourquoi ses produits peuvent présenter des
caractéristiques différentes par rapport à celles qui sont décrites.
DESCRIPTION DES CONNECTEURS ET DES COMMANDES
FRANCAIS
29

17
XF 1300 BEACHFRANCAIS
TRANSPORT
Appuyez sur le bouton de la poignée du chariot, soulevez-la jusqu'au bloc (vous entendrez un clic métallique). Pour le transport,
en agissant sur la poignée du chariot, pliez légèrement l’appareil et tirez parti des deux roues latérales.
Pour déverrouiller et fermer le chariot, appuyez à nouveau sur le bouton de la poignée et abaissez-la complètement.
ALIMENTATION
Cet appareil fonctionne avec une batterie au plomb rechargeable 12V , 4,5Ah et alimentation 230V 50Hz.
Lorsque la batterie n'est pas chargée ou que l'appareil ne s'allume pas, mettez l'interrupteur principal POWER ON/OFF(20) en
position "OFF", insérez le cordon d'alimentation dans la prise(19) de l'appareil et branchez-le prise de courant pour recharger la
batterie interne; les segments de l'icône de la batterie sur l'écran(1) commencent à clignoter.
Une fois la charge terminée, les segments de l'icône de la batterie resteront fixes.
Remarque: Ne connectez pas l'appareil à une prise avec une tension autre que celle indiquée.
1. Affichage
2. Entrée MIC 1/guitare
3. Entrée MIC 2/guitare
4. MIC1VOL,Réglage du volume du microphone/de la guitare
5. MIC2VOL,Réglage du volume du microphone/de la guitare
6. Réglage du microphone ECHO
7. Entrée AUX IN
8. Prise USB
9. Récepteur de télécommande
10. Bouton <, précédente
11. Bouton SOURCE, sélection de fonction
12. Bouton , Bluetooth
13. Bouton LIGHTS, activation/désactivation des LED avant/
arrière (Disco Light)
14. Bouton >, suivante
15.
button,
Lecture/Pause, appui long pour le suivi
des dossiers
16. Pré-égalisation DSP: NORMAL/POP/ROCK
17. Réglage du volume général, en appuyant dessus pour
régler les graves et les aigus
18. Pré-égalisation DSP: CLASSICAL/COUNTRY/JAZZ
19. Prise pour l'insertion du câble d'alimentation
20. Interrupteur POWER ON/OFF (marche/arrêt)
29. Microphone
21. Bouton MODE: Sélection de la source audio (USB/Bluetooth)
22. Boutons BACK/FWD Folder Accéder au dossier précédent ou suivant
23. Bouton de piste 9/:: Lecture de la piste précédente ou suivante
24. Bouton: Lecture ou pause de la piste en cours
25. Button EQ
26. Boutons Volume -/+: augmenter ou diminuer le volume
27. 0/--/--- Touches de saisie directe: pour entrer des dizaines et des centaines
28. Bouton numériques: pour la saisie numérique
TÉLÉCOMMANDE
TIRER LA PROTECTION
2- TIRER
1- POUSSER
ACTIVATION ET REMPLACEMENT DE LA BATTERIE DE TÉLÉCOMMANDE
La télécommande est équipée d'une pile CR2025
Pour activer la pile de la télécommande (fournie), retirez la protection en plastique.
Pour le remplacement de la batterie:
1. Poussez le support en plastique du compartiment à piles vers la droite;
2. Retirez le compartiment à piles;
3. Insérez une nouvelle pile en prenant soin de respecter les polarités;
4. Fermez le compartiment à piles.

18
XF 1300 BEACH
FRANCAIS
FONCTIONS
MARCHE/ARRÊT
Réglez l'interrupteur principal POWER ON/OFF(20) sur "ON" pour allumer et utiliser l'appareil avec sa batterie interne.
Réglez l'interrupteur principal POWER ON/OFF(20) sur "OFF" pour éteindre complètement l'appareil ou charger la batterie.
BOUTON DE DOUBLE FONCTION
Les touches suivantes de l'appareil ont une double fonction selon la durée pendant laquelle elles sont enfoncées:
- Bouton <(10): une pression courte permet de lire la dernière piste lue ou la piste précédente. Appuyez longuement pour
baisser le volume.
- Bouton >(14): un appui bref permet de lire la piste suivante. Appuyez longuement pour augmenter le volume.
- Bouton,(15) Lecture/Pause: un appui bref active la pause de la piste en cours ou le début de la lecture. Un appui long
met l'appareil en "mode dossier", vous permettant de naviguer dans tous les dossiers de la mémoire USB, à l'aide des touches
<(10) et >(14).
- Bouton de volume général(17): un appui long met l'appareil en mode "Mute", appuyez à nouveau pour rétablir le son.
SELECTION DE LA FONCTION
Pour changer le mode de fonctionnement, appuyez plusieurs fois sur la touche SOURCE(11) de l'appareil ou appuyez sur
la touche MODE(21) de la télécommande pour sélectionner: BLUETOOTH ("BLUE" apparaît à l'écran), RADIO (la fréquence
apparaît à l'écran), USB (uniquement si Prise USB(8) une mémoire est connectée, un petit message "USB" apparaît à l'écran),
AUX-IN ("LINE" apparaît à l'écran).
AJUSTEMENT DU VOLUME
1. Tournez le bouton VOLUME(17) pour augmenter ou diminuer le volume général de la lecture ou utilisez les touches -/+(26)
de la télécommande;
2. Tournez le bouton MIC VOL1(4) ou MIC VOL2(5) pour régler le volume du signal à l'entrée MIC1(2) ou MIC 2(3).
PRE-EGALISATION
Cette unité dispose d'un système d'égalisation audio prédéfini. Appuyez plusieurs fois sur le bouton EQ(5) de la télécommande
pour sélectionner l'un des 6 égaliseurs audio disponibles ou sélectionnez-le directement à l'aide du bouton correspondant à ceux
indiqués sur l'appareil (16 et 18) et qui vous convient le mieux à la reproduction sonore actuelle.
REGLAGE TONALITE AIGUS ET DES GRAVES
Pour régler séparément les sons graves et aigus:
1. Appuyez une fois sur le bouton VOLUME(17) de l'appareil pour régler les basses, un "b" apparaît sur l'affichage. Tournez le
bouton pour effectuer le réglage;
2. Appuyez une seconde fois sur le bouton VOLUME(17) de l'appareil pour régler les tonalités aiguës. Un "t" apparaît à l'écran.
Tournez le bouton pour effectuer le réglage;
3. Appuyez une troisième fois sur le bouton VOLUME(17) de l'appareil pour revenir au contrôle du volume (indiqué à l'écran par
un "v").
ECHO EFFET
Tournez le ECHO(6) pour augmenter ou diminuer l'effet d'écho sur les entrées MIC1/2.
Remarque: l'écho ne fonctionne que sur les entrées MIC.
EFFET DE LUMIÈRE DISQUE
Appuyez sur le bouton LIGHTS(13) de l’appareil pour activer l’effet Disco-Light.
Pour désactiver l'effet Disco-Light, appuyez à nouveau sur le bouton LIGHTS(13) de l'appareil.
USB DE CHARGE
La prise USB(8) peut être utilisée pour charger des périphériques externes, tels que des smartphones ou des tablettes.
- Connectez votre périphérique externe à la prise USB(8) à l'aide du câble approprié (non fourni).
- L’indicateur de charge sur le périphérique externe indiquera l’état de charge en cours.

19
XF 1300 BEACHFRANCAIS
MODE RADIO FM
Pour utiliser le mode FM, vous devez d’abord numériser pour les stations fortes dans votre région. Pour commencer le numériser,
appuyez sur le bouton
(15) de l'appareil
. Cette volonté commencer à balayer, et tout signal fort sera enregistré en tant que
préréglages.
Une fois la numérisation terminée, vous serez capable d'utiliser les boutons <(10) et >(14) pour accéder à les stations présélec-
tionnées. Les préréglages seront numéroté et la fréquence FM sera affiché.
BLUETOOTH FONCTIONNEMENT
1. Mettez l'appareil en marche et appuyez sur le bouton (12) de l'appareil ou appuyez sur le bouton MODE(21) de la télécom-
mande et sélectionnez la fonction Bluetooth; le mot "BLEU" apparaît à l'écran;
2. En mode Bluetooth, le mot "BLEU" sur l’afficheur se mettent à clignoter et le système passe automatiquement en mode de
recherche;
3. Activez la fonction Bluetooth sur le périphérique externe à coupler;
4. Lancer une recherche de périphériques. Après sélectionnez "XF 1300 BEACH";
5. Entrez le mot de passe "0000" si nécessaire;
6. Appuyez sur le bouton
button(15) de l'appareil ou de la télécommande pour lancer la lecture et utilisez les touches
<(10) ou >(14) de l'appareil ou les bouton
9/:de la télécommande, pour sélectionner les pistes.
ENTRÉE USB
1. Allumez l'appareil;
2. Insérez une clé USB dans la prise(8). La lecture commence automatiquement;
3. Pour suspendre la lecture, appuyez sur le bouton(15) de l'appareil ou sur le bouton(24) de la télécommande; le
mot "PAUS" apparaîtra à l'écran;
4. Pour reprendre la lecture, appuyez sur le bouton
(15)
de l'appareil ou de la télécommande;
5. Utilisez les boutons(22) de la télécommande pour sélectionner un dossier spécifique dans la clé USB;
6. Appuyez sur le bouton >(14) de l'appareil ou sur le bouton 9(23) ode la télécommande pendant l'écoute pour passer à
la plage suivante. Appuyez sur le bouton <(10) de l’appareil ou sur le bouton :(23) de la télécommande pour passer aux
pistes précédente;
7. A l'aide du clavier numérique(28) de la télécommande, vous pouvez directement entrer le numéro de la piste musicale que
vous souhaitez lire.
Remarque:
- Le joueur peut ne pas supporter certains périphériques USB, cela est dû à l'incompatibilité de certains processeurs.
- Pour éviter les interférences nuisibles, toujours connecter des périphériques USB directement à l'appareil, ne pas utiliser de
rallonges.
- De l'ordinateur pour formater la mémoire USB FAT (16 ou 32).
AUX-IN
1. Appuyez sur le bouton SOURCE(11) de l’appareil ou sur le bouton MODE(21) de la télécommande et sélectionnez la fonction
"LINE IN";
2. Connectez toute unité avec une sortie audio via le câble jack 3,5 mm approprié (non fourni) à l'entrée AUX IN(7);
3. Réglez l'appareil externe de leurs commandes.

20
XF 1300 BEACH
FRANCAIS
UTILISATION DU MICROPHONE
1. Connectez le microphone fourni dans la prise MIC1(2) ou MIC2(3);
2. Allumez le microphone en tournant l’interrupteur de la poignée du microphone sur la position ON;
3. Réglez le volume d'entrée du microphone et l'effet d'écho à votre guise à l'aide des commandes appropriées (4/5/6).
DÉPANNAGE
Si un problème se produit, suivez les étapes dans le tableau suivant.
Si le problème ne peut être résolu, contactez votre revendeur.
Problème Causes possibles Solution
Aucun son lorsque l'appareil est
en marche
1. Sans Source sonore
2. Manopola Volume au niveau 0
3. Voce off Guide
4. Nessun Dispositif USB connecté
1. Connectez un appareil à la prise AUX-IN
2. Réglez le volume
3. Attivare le guidage vocal
4. Connecter USB jouer MP3
Distorsion du son 1. Volume trop élevé
2. Errore Fichiers audio
1. Baissez le volume
2. Vérifier et lire un autre fichier audio
Aucun son du microphone 1. La prise de microphone ne peut pas être
correctement connecté.
2. Le contacteur d'allumage sur le micro-
phone peut être en position "off".
3. Volume du microphone de basse.
1. Assurez-vous que le microphone est
correctement branché.
2. Allumez le microphone.
3. Réglez correctement le volume du
microphone
Pasdesonlorsque vous insérez
un périphérique USB
1. Format de fichier non pris en charge
2. USB est pas correctement connecté
1. Le format de fichier audio doit être MP3
2. Connectez le périphérique USB correcte-
ment
Vous ne pouvez pas charger
la batterie ou la batterie a un
court-terme
1. Branchez le cordon d'alimentation pour
recharger
2. La batterie est pas complètement
chargée
3. La batterie peut avoir exécuter son cycle
de vie
1. Vérifiez si le câble d'alimentation est
correctement connecté
2. Normalement, il prend 5-6 heures pour
charger complètement la batterie
3. Remplacez la pile par une nouvelle avec
les mêmes spécifications techniques
Table of contents
Languages:
Other Trevi Portable Speakers manuals

Trevi
Trevi XF 780 KB User manual

Trevi
Trevi XF 600 KB User manual

Trevi
Trevi XF 1700KB User manual

Trevi
Trevi XR 8A01 User manual

Trevi
Trevi XF 1800KB User manual

Trevi
Trevi XF 150 KB User manual

Trevi
Trevi XF 350 User manual

Trevi
Trevi XR 400 APP User manual

Trevi
Trevi XF 1200 KB User manual

Trevi
Trevi XF 300 POP User manual

Trevi
Trevi XF 4200 DJ User manual

Trevi
Trevi XR 84 BT User manual

Trevi
Trevi XF 950 KB User manual

Trevi
Trevi XFest XF 1560 KB User manual

Trevi
Trevi XF 800 User manual

Trevi
Trevi XF 3200 PRO User manual

Trevi
Trevi XF 550 APP User manual

Trevi
Trevi XF 3400 PRO User manual

Trevi
Trevi XF 1250 KB User manual

Trevi
Trevi XF 1550 KB User manual