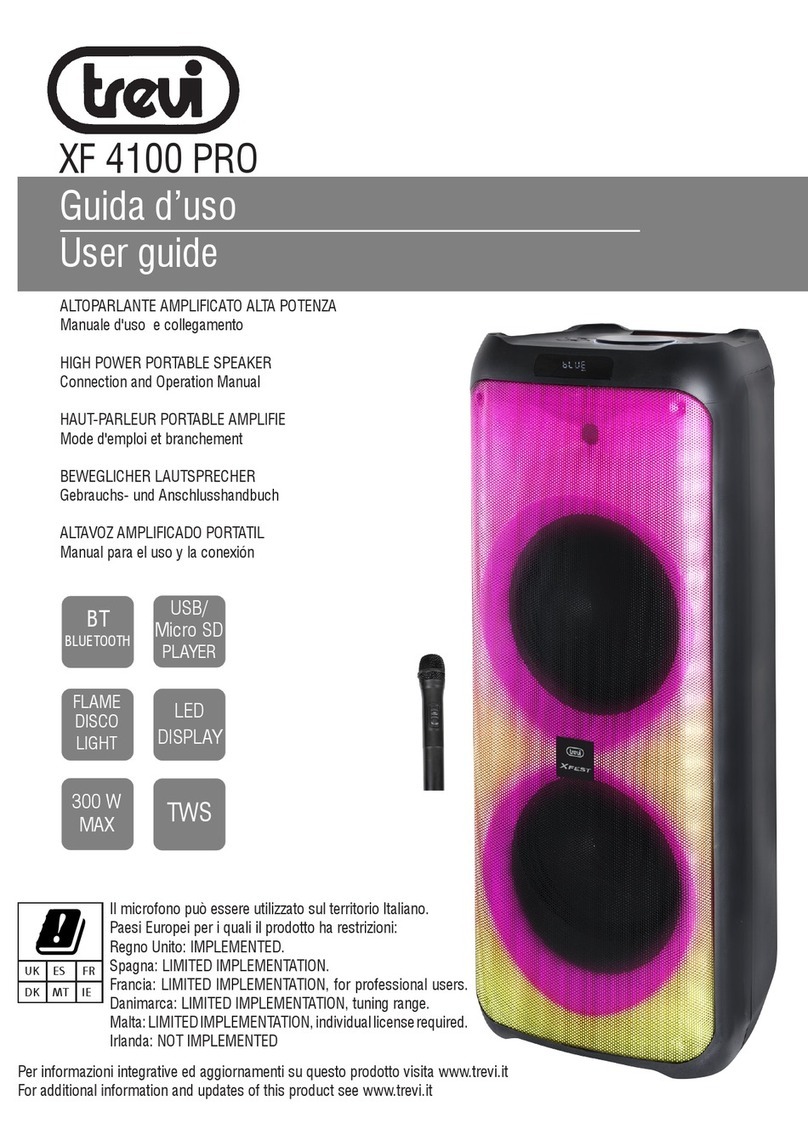
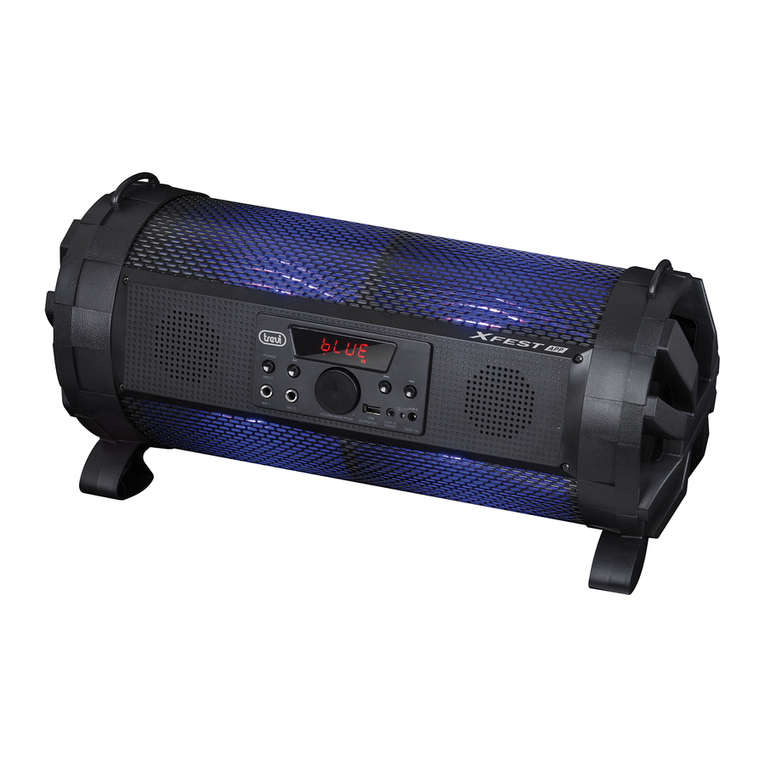
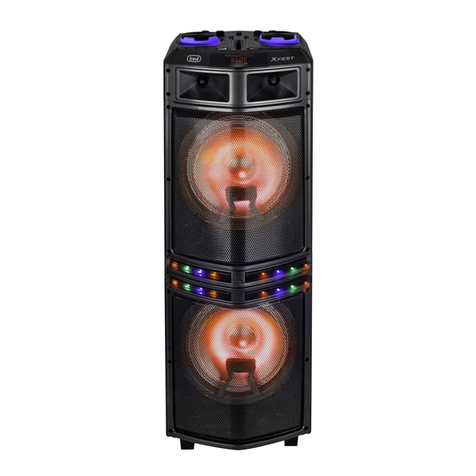
Trevi XF 780 KB User manual

* Per informazioni integrative e aggiornamenti di questo prodotto vedi: www.trevi.it
* For additional information and updates of this product: www.trevi.it
ita
eng
fra
deu
esp
XF 780 KB
Guida d’uso / User Guide
ALTOPARLANTEAMPLIFICATO con Bluetooth/Lettore MP3-USB-micro SD/Disco Light
PORTABLE SPEAKER with Bluetooth/MP3-USB-Micro SD player/Disco Light
HAUT-PARLEUR avec Bluetooth/Lecteur MP3-USB-Micro SD/Lumière Disco
BEWEGLICHER LAUTSPRECHER mit Bluetooth/MP3-USB-Micro-SD player/Disco-Licht
ALTAVOZAMPLIFICADO con Bluetooth/MP3-USB-Micro SD/Luz de disco
USB
MICRO SD
READER
LINE IN
BLUETOOTH
MOVING
DISCO
LIGHT
TWS
BT
110W
MAX

XF 780 KB
2

XF 780 KB
3
NOTE D'USO
Ascoltare a volume alto per lungo tempo, potrebbe danneggiare il vostro udito.
Questo apparecchio è uno strumento elettronico di alta precisione,evitate quindi di
utilizzarlo nei seguenti casi:
• Vicino a campi magnetici.
• Vicino a fonti di calore come caloriferi e stufe.
• In luoghi molto umidi come stanze da bagno, piscine, ecc...
• In luoghi molto polverosi.
• In luoghi soggetti a forti vibrazioni.
• Non avvicinare l’orecchio all’altoparlante durante le fasi di messa punto e re-
golazioni del volume, e in particolare di tenere il volume al minimo nella fase di
accensione.
• Posizionare l’apparecchio in modo che ai suoi lati ci sia sempre abbastanza spazio
per la libera circolazione di aria (almeno 5 cm).
• Se dei liquidi penetrano all’interno dell’apparecchio scollegare immediatamente la
spina dalla presa e portare l’apparecchio al più vicino centro assistenza autorizato
TREVI.
• Controllare sempre prima di ricaricare l’apparecchio, che i cavi di alimentazione
e di collegamento siano installati correttamente.
• Nessunasorgentediammanuda,qualicandeleaccese,dovrebbeessereposta
sull’apparecchio.
• L’apparecchio non deve essere esposto a stillicidio o a spruzzi d’acqua e nessun
oggetto pieno di liquido, quali vasi, deve essere posto sull’apparecchio.
• Primadiaccenderel’apparecchio,vericaresemprecheilcavodialimentazione
e il cavo di collegamento siano installati correttamente.
• L’adattatore di corrente deve essere collegato a una presa vicina al dispositivo e
deve essere facilmente accessibile.
• Se si nota un calore eccessivo sul dispositivo o sull’adattatore di corrente, scol-
legare immediatamente la spina dalla presa di corrente principale.
• Non tirare il cavo di alimentazione
• Conservare il presente manuale per futuri riferimenti.
CURA E MANUTENZIONE
Per la pulizia si consiglia l’uso di un panno morbido, leggermente inumidito. Evitate
solventi o sostanze abrasive.
IMPORTANTE
Questo dispositivo e' progettato per uso domestico non professionale. La buona
costruzione di questo apparecchio ne garantisce per lungo tempo il perfetto fun-
zionamento.Se tuttavia dovesse presentarsi qualche inconveniente, sarà opportuno
consultare il più vicino Centro Assistenza autorizzato TREVI.
TREVI persegue una politica di continua ricerca e sviluppo. Pertanto i prodotti
possono presentare caratteristiche diverse da quelle descritte.
ITALIANO

XF 780 KB
4
DESCRIZIONE COMANDI
COMANDI UNITÀ
1. Ingresso Mic 1
2. Ingresso Mic 2
3. Ingresso LINE IN (3.5mm)
4. Slot memoria Micro SD
5. Presa USB
6. Indicatore Led di ricarica
7. Tasto M.PRI, priorità al microfono
8. Tasto LIGHT (effetti Led disco light)
9. Tasto EQ, equalizzazioni audio
10. MIC.VOL,regolazione volume microfono
11. RegolazioneVolume
12. Tasto POWER, accensione/spegnimento
13. Tasto MODE
14. Tasto 9, precedente
15. Tasto,Play/Pausa + premere a lungo
per la funzione TWS
16. Tasto :, successivo
17. Tasto MENU
COMANDITELECOMANDO
1. Tasto MUTE, Attivazione/disattivazione
audio
2. Tasto 9, precedente
3. Tasto MODE
4. Tasto REC
5. Tasto ECHO -
6. Tasti regolazione toni bassi
7. TastoEQ,equalizzazionipredenite
8. Tasti regolazione volume microfoni
9. Tasto accensione/Stand by
10. Tasto, Play/Pausa
11. Tasto :, successivo
12. Tasto LIGHT (effetti Led disco light)
13. Tasto REPEAT, ripetizione
14. Tasto REC/PLAY
15. TastoREC DEL,cancellazioneregistrazione
16.Tasto ECHO +
17.Tasto M-PRI, priorità al microfono
18.Tasti regolazione toni alti
19.Tasti regolazione volume
20.Tasti selezione numerica diretta
ITALIANO

XF 780 KB
5
RICARICA DELLA BATTERIA
1. Ad apparecchio spento, collegare il cavo di alimentazione alla presa posizionata
sul retro del dispositivo.
2. L’indicatore Led (6) si accenderà di colore Rosso;
3. A carica ultimata l’indicatore Led (6) diventerà verde;
4. Con batteria in esaurimento, l’ultimo segmento dell’icona batteria presente sul
display lampeggerà per un certo tempo, poi l’apparecchio si porterà automati-
camente in modo standby.
Nota:
- Per una buona durata della batteria è consigliato tenere l’apparecchio spento durante
la fase di ricarica.
Senondiversamentespecicato,icomandidescrittidiseguitovalgonosiaperl’unità
che per il telecomando.
ACCENSIONE/SPEGNIMENTO
- Agire sul tasto POWER accensione/spegnimento(12) per accendere e spegnere
l’apparecchio.
- Premere il tasto STANDBY(9) sul telecomando per portare l’unità in modo
Stand-by (il tasto POWER diventa rosso);premerlo nuovamente per riaccendere
l’unità. E’ possibile attivare l’unità con il telecomando solo se il tasto POWER e’
rosso altrimenti bisogna agire sul tasto POWER dell’unità.
REGOLAZIONEVOLUME/ MUTE/TONI/ EFFETTO ECHO
1. Ruotare la manopola Volume (11) in senso orario/ antiorario per aumentare/
diminuire il volume dell’apparecchio. Premere il tasto MUTE(1) del telecomando
per silenziare immediatamente l’apparecchio,ripremerlo per tornare al normale
ascolto;
2. Premere il tasto MENU(17) e ruotare la manopola (11) per attivare la regolazione
dei toni alti, toni bassi, effetto echo;
3. Tramite il tasto EQ(9) è possibile variare la dinamica audio scegliendo tra quelle
preimpostate: POP, ROCK, JAZZ, CLASSIC, FLAT.
ATTIVAZIONE/ DISATTIVAZIONE VOCE GUIDA
Tenere premuto per qualche secondo il tasto MODE (13) sull’unità per attivare/
disattivare la voce guida (in lingua Inglese).
ITALIANO

XF 780 KB
6
RADIO FM (solo per versione Export)
PremereiltastoMODEnoafarcompariresuldisplaylafrequenzaricevuta:
1. Per effettuare una scansione con salvataggio delle stazioni radio trovate premere il
tasto (15), attendere che venga effettuata la scansione su tutta la banda FM,
le radio trovate vengono salvate automaticamente.
2. Per spostarsi da una radio salvata in memoria all’altra premere i tasti 9(14) o
:(16), il display mostra il numero di memoria P che si sta ascoltando.
3. Per effettuare una ricerca manuale premere a lungo i tasti 9(14) o :(16), la
ricerca si ferma sulla prima stazione radio trovata con buon segnale.
FUNZIONAMENTO BLUETOOTH
ACCOPPIAMENTO AI DISPOSITIVI
1. Posizionare lo speaker vicino al dispositivo Bluetooth da accoppiare e accendere
l’apparecchio;
2. Selezionare tramite iltasto MODE (13) la funzione bluetooth,sul display comparirà
la scritta “BLUE” lampeggiante;
3. Seguire le istruzioni del vostro dispositivo esterno per ricercare lo speaker;
4. Ricercare lo speaker nominato“XF 780 KB” e inserire il PIN“0000” se richiesto;
5. Adaccoppiamentoavvenutolascritta“BLUE”suldisplayrimarràssa.
Note: L’altoparlante Bluetooth funziona solamente con una connessione alla volta, la
connessione non può essere interrotta durante il normale funzionamento.
La vicinanza di apparecchi TV, lampade al neon o altri elettrodomestici può
provocare disturbi nella ricezione, in questo caso allontanate l’apparecchio.
COMANDI DISPONIBILI IN MODALITÀ BLUETOOTH
- Avviare la riproduzione sonora dal proprio dispositivo.
- Premere una volta il tasto 9(14) per passare al brano precedente,premere una
volta il tasto :(16) per passare al brano successivo.
- Premere il tasto(15) per mettere in pausa, premerlo nuovamente per
riprendere la riproduzione.
COLLEGAMENTO TWS
La tecnologia TWS consente all’utente di effettuare una connessione wireless tra
due altoparlanti dello stesso modello e compatibili con la funzioneTWS.
1. Disattivare la funzione bluetooth sul telefono o altro dispositivo Bluetooth;
2. Accendere entrambi i diffusori e selezionare su entrambi la modalità“Bluetooth”;
3. Tenerepremutoper 3sec.il tasto(15) di uno dei diffusori,dopo pochi secondi
i due altoparlanti saranno accoppiati (un suono acustico avviserà dell’avvenuto
accoppiamento);
4. Attivare il Bluetooth sul telefono o altro dispositivo,ricercare ed accoppiare l’ap-
parecchio esterno all’altoparlante.Dopo la connessione sarà possibile riprodurre
musica con il sistema stereo-altoparlanteTWS.
Le regolazioni sull’altoparlante principale verranno effettuate simultaneamente anche
ITALIANO

XF 780 KB
7
sull’altro altoparlante. Ad esempio, selezione del brano precedente e successivo,
riproduzione e pausa.
Note:
- In caso di mancato accoppiamento tra i 2 altoparlanti,spegnere entrambi gli apparecchi
e ripetere i passi 1, 2 e 3.
- La funzione TWS funziona solamente tra diffusori uguali o con altri diffusori che
utilizzano lo stesso micro processore o soluzione.
FUNZIONAMENTO MICRO SD CARD/ USB
1. Inserire una scheda Micro SD nella slot(4) con i contatti elettrici rivolti verso il
retro dell’altoparlante o una chiavetta USB nella presa (5) e accendere l’appa-
recchio;
2. La riproduzione partirà in automatico.In caso contrario premere il tasto MODE(14)
piu’voltenoafarcompariresuldisplayUSBoTF;
3. Premere una volta il tasto 9(14) per passare al brano precedente, premere una
volta il tasto :(16) per passare al brano successivo;
4. Premere il tasto(15) per mettere in pausa, premerlo nuovamente per
riprendere la riproduzione;
5. Premere e tenere premuto il tasto 9(14) o il tasto :(16) per avanzare o
retrocedere velocemente nell’ascolto del brano, rilasciare il tasto per tornare
all’ascolto normale;
6. Tramite il tasto REPEAT(9) e’ possibile attivare la funzione di ripetizione del brano
(ONE=ripete il singolo brano,ALL=ripete tutti i brani presenti);
7. Utilizzare i tasti numerici sul telecomando(20) per la selezione diretta di un brano.
FUNZIONAMENTO LINE IN
1. Collegare una qualsiasi unità provvista di uscita audio tramite apposito cavo Jack
da3,5mmall’ingressoLINEIN(3),premereiltastoMODE(13)piùvoltenoa
quando sul display comparirà la scritta “LINE”;
2. Regolare il dispositivo esterno dai propri comandi.
MOVING DISCO-LIGHT
Per variare gli effetti Moving Disco-Light premere più volte il tasto LIGHT (8),i vari
effetti luminosi verranno mostrati sul display con i numeri.
UTILIZZO DEL MICROFONO
1. Collegare il microfono fornito nella presa MIC1(1) o MIC2(2);
2. Regolare il volume tramite il comando (10) e l’effetto ECHO del microfono
utilizzando i tasti ECHO - (5) e ECHO + (16);
3. Tramite il tasto M.PRI (7) e’ possibile attivare o disattivare la funzione di priorità
del microfono sull’audio riprodotto; con la priorità attiva il volume dell’audio
riprodotto si abbassa automaticamente quando si parla al microfono.
ITALIANO

XF 780 KB
8
FUNZIONE REC
E’ possibile registrare il solo parlato del microfono su memoria microSD/USB:
1. Inserire una memoria micro SD o una memoria USB nei rispettivi ingressi;
2. Premere il tasto REC(4) sul telecomando per avviare la registrazione; sul display
compare la scritta REC seguita poi dal tempo di inzio registrazione;
3. Premere il tasto REC/PLAY(14) per ascoltare la registrazione appena effettuata;
4. Premere il tasto R-DEL(15) per cancellare la registrazione appena effettuata.
Nota: registrando dal microfono, è plausibile la presenza di un certo rumore di fondo sulla
registrazione.
CARATTERISTICHETECNICHE
Potenza Totale:.................................................. 110W
Potenza max di trasmissione Bluetooth:.... 0,8mW
Frequenza di trasmissione Bluetooth:......... 2,4GHz
Banda di ricezione FM:................................... 87.5MHz - 108.0MHz
Alimentazione:.................................................. 230V~50Hz
........................................................................... Batteria al Lithio 7,4V 3600mA
Dimensioni:....................................................... 300(L) x 300(D) x 640(H) mm
Peso:................................................................... 6,8 Kg
INFORMATIVA SULLA RIMOZIONE E LO SMALTIMENTO
DELLE BATTERIE
Attenzione:l’operazione di rimozione e smaltimento è riservata esclusi-
vamente al personale tecnico specializzato!
1. Rimuoverelevitichessanoilpannellosuperioredeicomandi;
2. Estrarre il pannello dei comandi;
3. Individuare e rimuovere la batteria dal suo alloggiamento.
Qualunquesiailtipodibatteriaesaurita,essanondeveesseregettatatrairiuti
domestici,nel fuoco o nell’acqua. Ogni tipo di batteria esaurita deve essere riciclata
oppure smaltita presso gli appositi centri raccolta dedicati.
ITALIANO
XF 780 KB
9
AVVERTENZA PER UN CORRETTO UTILIZZO DELLA
BATTERIA RICARICABILE
- Ricaricare la batteria a una temperatura ambiente compresa tra 5°C e 35°C.
- Non ricaricare più del periodo adeguato per prevenire il rischio di surriscalda-
mento e scoppio.
- La ricarica della batteria per un periodo adeguato o un lungo periodo di inattività
può ridurre la durata della batteria.
- La batteria ricaricabile è soggetta a usura e le sue prestazioni si ridurranno
gradualmente.
- Per prolungare la durata della batteria,utilizzarla quando è completamente carica
noallascaricacompleta,quindiricaricarlacompletamenteprimadiriutilizzarla.
Ricaricare una batteria non completamente consumata,si tradurrà in una durata
ridotta. In questo caso, ripetere più volte l’intero ciclo di carica/ scarica.
- Evitare di ricaricare la batteria per tutta la notte.
INFORMAZIONI AGLI UTENTI ai sensi del Decreto Legislativo
N°49 del 14 Marzo 2014
“Attuazione della Direttiva 2012/19/UE sui riuti di apparecchiature
elettriche ed elettroniche (RAEE)”
Il simbolo del cassonetto barrato riportato sull’apparecchiatura indica che il prodotto
allanedellapropriavitautiledeveessereraccoltoseparatamentedaglialtririuti.
L’utente dovrà, pertanto, conferire l’apparecchiatura integra dei componenti essen-
zialigiuntaanevitaagliidoneicentridiraccoltadifferenziatadeiriutielettronici
ed elettrotecnici, oppure riconsegnarla al rivenditore al momento dell’acquisto di
nuova apparecchiatura di tipo equivalente, in ragione di uno a uno, oppure 1 a zero
per le apparecchiature aventi lato maggiore inferiore a 25cm. L’adeguata raccolta
differenziata per l’avvio successivo dell’apparecchiatura dimessa al riciclaggio, al
trattamento e allo smaltimento ambientale compatibile contribuisce ad evitare
possibili effetti negativi sull’ambiente e sulla salute e favorisce il riciclo dei materiali
di cui è composta l’apparecchiatura. Lo smaltimento abusivo del prodotto da parte
dell’utente comporta l’applicazione delle sanzioni amministrative di cui al D.Lgs n.
Decreto Legislativo N°49 del 14 Marzo 2014.
ITALIANO
XF 780 KB
10
USE NOTES
Listening at high volumes for a long time may damage your hearing.
This appliance is a high precision electronic instrument, therefore avoid using it in
the following cases:
• Nearmagneticelds.
• Near heat sources such as heaters and stoves.
• In very humid places such as bathrooms, swimming pools, etc...
• In very dusty places.
• In places subject to strong vibrations.
• Do not bring your ear close to the speaker during the adjustment and volume
adjustment phases, and in particular to keep the volume to a minimum in the
ignition phase.
• Position the appliance so that there is always enough space on its sides for the
free circulation of air (at least 5 cm).
• If liquids penetrate inside the appliance,immediately disconnect the plug from the
socket and take the appliance to the nearest authorizedTREVI service center.
• Always check before recharging the appliance, that the power and connection
cables are installed correctly.
• Nonakedamesources,suchaslightedcandles,shouldbeplacedontheappliance.
• The appliance must not be exposed to dripping or splashing water and no objects
lledwithliquid,suchasvases,mustbeplacedontheappliance.
• Before turning on the appliance, always check that the power cable and the
connection cable are installed correctly.
• The power adapter must be connected to an outlet near the device and must
be easily accessible.
• If you notice excessive heat on the device or on the power adapter, immediately
disconnect the plug from the main power socket.
• Do not pull on the power cable.
• Keep this manual for future reference.
CARE AND MAINTENANCE
For cleaning,we recommend the use of a soft,slightly moistened cloth.Avoid solvents
or abrasive substances.
IMPORTANT
This device is designed for non-professional home use.The good construction of this
appliance guarantees perfect operation for a long time.However,should any inconve-
nience arise, it is advisable to consult the nearestTREVI Authorized Service Center.
TREVI pursues a policy of continuous research and development. Therefore the
products may have different characteristics from those described.
ENGLISH

XF 780 KB
11
UNIT COMMANDS
1. Mic 1 input
2. Mic 2 input
3. LINE IN jack (3.5mm)
4. Micro SD memory slot
5. USB socket
6. LED charging indicator
7. M.PRI key, microphone priority
8. LIGHT button (Led disco light effects)
9. EQ key, audio equalization
10.MIC.VOL,microphone volume adjustment
11.Volume adjustment
12. POWER key, on/off
13. MODE key
14. Key 9, previous
15. key, Play/Pause + long press for
TWS function
16. Key :, next
17. MENU key
COMMANDS DESCRIPTION
REMOTE CONTROL
COMMANDS
1. MUTE function
2. Key 9, previous
3. MODE button
4. REC button
5. ECHO- button
6. Low tone adjustment keys
7. EQbutton,predenedequalizations
8. Microphone volume adjustment keys
9. Power/ standby button
10. button, Play/ Pause
11. Key :, next
12. LIGHT button (Led disco light effects)
13. REPEAT button
14. REC/ PLAY button
15. REC DEL button
16. ECHO + button
17. M-PRI key, microphone priority
18.Treble keys
19.Volume adjustment keys
20. Numeric keys
ENGLISH

XF 780 KB
12
BATTERY RECHARGE
1. With the device off, connect the power cord to the socket located on the back
of the device.
2. The Led indicator (6) will light up red;
3. When charging is complete, the Led indicator (6) will turn green;
4. Withlowbattery,thelastsegmentofthebatteryicononthedisplaywillashfor
a certain time, then the appliance will automatically go into standby mode.
Note:
- For a good battery life it is advisable to keep the device switched off during the recharging phase.
Unless otherwise noted,the commands described below apply to both the unit and the remote.
ON/OFF
- Use the POWER on/off switch (12) to turn the appliance on and off.
- Press the STANDBY(9) key on the remote control to put the unit in Stand-by
mode; press it again to turn the unit back on.
VOLUME / MUTE / TONE / ECHO EFFECT ADJUSTMENT
1. Turn the Volume knob (11) clockwise/anticlockwise to increase/decrease the
volume of the device. Press the MUTE(1) key on the remote control to imme-
diately silence the device, press it again to return to normal listening;
2. Press the MENU(17) key and turn the knob (11) to activate the adjustment of
the high tones, low tones, echo effect;
3. Using the EQ(9) key it is possible to vary the audio dynamics by choosing from
the pre-set ones: POP, ROCK, JAZZ, CLASSIC, FLAT.
GUIDEVOICE ACTIVATION/DEACTIVATION
Press and hold the MODE key (13) on the unit for a few seconds to activate/deactivate
the voice guide (in English).
FM RADIO
This device is equipped with FM radio:
1. To scan and save the radio stations found,press the (15) button,wait for the
scan to be carried out on the entire FM band, the radio stations found are saved
automatically.
2. To move from one radio saved in the memory to another, press keys 9(14) or
:(16), the display shows the P memory number you are listening to.
3. To carry out a manual search, press and hold keys 9(14) or :(16), the search
stopsontherstradiostationfoundwithagoodsignal.
ENGLISH

XF 780 KB
13
BLUETOOTH OPERATION
PAIRINGTO DEVICES
1. Place the speaker near the Bluetooth device to pair and turn on the device;
2. SelectthebluetoothfunctionusingtheMODEkey(13),theashing“BLUE”will
appear on the display;
3. Follow the instructions of your external device to search for the speaker;
4. Search for the speaker named“XF 780 KB” and enter the PIN“0000” if required;
5. Oncepairinghastakenplace,theword“BLUE”onthedisplaywillremainxed.
Note:
-The Bluetooth speaker only works with one connection at a time, the connection cannot be
interrupted during normal operation.
-The proximity ofTV sets,neon lamps or other appliances can cause disturbances in reception,
in this case move the appliance away.
COMMANDS AVAILABLE IN BLUETOOTH MODE
- Start audio playback from your device.
- Press the 9(14) key once to go to the previous track, press the :(16) key once
to go to the next track.
- Press(15) button to pause, press it again to resume playback.
TWS LINK
TWS technology allows the user to make a wireless connection between two speakers
of the same model and compatible with the TWS function.
1. Turn off the bluetooth function on your phone or other bluetooth device;
2. Turn on both speakers and select “Bluetooth” mode on both;
3. Press and hold for 3 sec. the key(15) of one of the loudspeakers, after a
few seconds the two loudspeakers will be paired (a beep will warn of successful
pairing);
4. Turn on Bluetooth on your phone or other device, search and pair the external
device to the speaker. After connection, you will be able to play music with the
TWS stereo-speaker system.
Adjustments on the main speaker will also be made simultaneously on the other
speaker. For example, previous and next track selection, play and pause.
Note:
- If the 2 speakers fail to pair, turn off both devices and repeat steps 1, 2 and 3.
-The TWS function only works between the same speakers or with other speakers using the
same micro processor or solution.
ENGLISH

XF 780 KB
14
MICRO SD CARD/USB OPERATION
1. Insert a Micro SD card in the slot (4) or a USB stick in the socket (5) and turn on
the device;
2. Playback will start automatically.Otherwise,press the MODE(14) key several times
until USB or TF appears on the display;
3. Press the 9(14) key once to go to the previous track, press the :(16) key once
to go to the next track;
4. Press(15) button to pause, press it again to resume playing;
5. Press and hold down key 9(14) or key :(16) to fast forward or rewind in
listening to the track, release the key to return to normal listening;
6. Using the REPEAT(9) key it is possible to activate the track repeat function
(ONE=repeat a single track,ALL=repeat all the tracks present);
7. Use the number buttons on the remote control (20) for direct selection of a track.
LINE IN OPERATION
1. Connect any unit equipped with an audio output via the appropriate 3.5mm Jack
cable to the LINE IN input (3), press the MODE key (13) several times until the
wording “LINE” appears on the display;
2. Adjust the external device by your commands.
MOVING DISCO-LIGHT
To vary the Moving Disco-Light effects, press the LIGHT key (8) several times, the
various light effects will be distinguished on the display with the numbers.
USINGTHE MICROPHONE
1. Plug the supplied microphone into the MIC1(1) or MIC2(2) jack;
2. Adjust the volume using the control (10) and the ECHO effect of the microphone
using the ECHO - (5) and ECHO + (16) keys;
RECORD FUNCTION
Itis possible to recordonlythe speechof themicrophoneon the microSD/USB memory:
1. Insert a micro SD memory or a USB memory in the respective inputs;
2. Press the REC(4) button on the remote control to start recording; the message
REC appears on the display followed by the recording start time;
3. Press the REC/PLAY(14) key to listen to the recording just made;
4. Press the R-DEL(15) key to delete the recording just made.
Note:When recording from the microphone, it is plausible that there is some background
noise on the recording.
ENGLISH

XF 780 KB
15
TECHNICAL FEATURES
Total power: .................................................... 110W
Max Bluetooth transmission power: .......... 0.8mW
Bluetooth transmission frequency: ............. 2.4GHz
FM frequency:................................................... 87.5MHz - 108.0MHz
Power supply: .................................................. 230 V~50Hz
........................................................................... 7.4V 3600mA lithium battery
Dimensions: ..................................................... 300 (L) x 300 (D) x 640 (H) mm
Weight: .............................................................. 6.8 kg
INFORMATION ONTHE REMOVAL AND DISPOSAL OF
BATTERIES
Warning: the removal and disposal operation is reserved exclusively for
specialized technical staff!
1. Remove the screws that secure the upper control panel;
2. Extract the control panel;
3. Locate and remove the battery from its compartment.
Whatever the type of exhausted battery,it must not be thrown into household waste,
inreorinwater.Anytypeofexhaustedbatterymustberecycledordisposedof
atthespecicdedicatedcollectioncenters.
ENGLISH

XF 780 KB
16
Precautions for correct disposal of the product.
The symbol shown on the equipment indicates that waste must be disposed of in
“separate collection” and so the product must not be disposed of together with
urban waste.
The user must take the product to special “separate waste collection centres”
provided by local government, or deliver it to the retailer against the purchase of
a new product.
Separate collection of waste and subsequent treatment,recycling and disposal opera-
tions promotes the production of equipment with recycledmaterials and limits negative
effects on the environment and on health caused by improper handling of waste.
Illegal disposal of the product leads to the enforcement of administrative penalties.
WARNING FOR A CORRECT USE OF RECHARGEABLE
BATTERY
- Recharge the battery in an ambient temperature between 5°C and 35°C.
- Don’t recharge more than the suitable period to prevent the risk of overheating
and burst.
- Recharging the battery over the suitable period or an extended period of inactivity
may reduce battery duration.
- Rechargeable battery is liable to wear and tear and its performance will reduce
gradually.
- To extend the duration of the battery use it when is completely charged up to
the complete discharging, then recharge it fully before use it again. Recharge a
battery not completely consumed, will result a reduced duration. In this case,
repeat the full charging/discharging cycle many times.
- Avoid recharge the battery for the whole night.
ENGLISH

XF 780 KB
17
NOTES D’UTILISATION
L’écoute à des volumes élevés pendant une longue période peut endommager votre
audition.
Cet appareil est un instrument électronique de haute précision, évitez donc de
l’utiliser dans les cas suivants:
• Près des champs magnétiques.
• Près de sources de chaleur telles que des radiateurs et des poêles.
• Dans des endroits très humides tels que salles de bain, piscines, etc...
• Dans des endroits très poussiéreux.
• Dans des endroits soumis à de fortes vibrations.
• Ne rapprochez pas votre oreille du haut-parleur pendant les phases de réglage
et de réglage du volume, et notamment pour maintenir le volume au minimum
en phase d’allumage.
• Positionnezl’appareildemanièreàcequ’ilyaittoujourssufsammentd’espace
sur ses côtés pour la libre circulation de l’air (au moins 5 cm).
• Si des liquides pénètrent à l’intérieur de l’appareil,débranchez immédiatement la
chedelapriseetapportezl’appareilaucentredeserviceTREVIagrééleplus
proche.
• Vérieztoujoursavantderechargerl’appareilquelescâblesd’alimentationet
de connexion sont correctement installés.
• Aucunesourcedeammenue,tellequedesbougiesallumées,nedoitêtreplacée
sur l’appareil.
• L’appareil ne doit pas être exposé à des gouttes ou des éclaboussures d’eau et
aucun objet rempli de liquide, comme des vases,ne doit être placé sur l’appareil.
• Avantd’allumerl’appareil,vérieztoujoursquelecâbled’alimentationetlecâble
de connexion sont correctement installés.
• L’adaptateur secteur doit être connecté à une prise près de l’appareil et doit
être facilement accessible.
• Si vous remarquez une chaleur excessive sur l’appareil ou sur l’adaptateur secteur,
débranchezimmédiatementlachedelaprised’alimentationprincipale.
• Netirezpassurlecâbled’alimentation.
• Conservez ce manuel pour référence future.
ENTRETIEN ET MAINTENANCE
Pour le nettoyage, nous recommandons l’utilisation d’un chiffon doux légèrement
humide. Évitez les solvants ou les substances abrasives.
IMPORTANT
Cet appareil est conçu pour un usage domestique non professionnel. La bonne
construction de cet appareil garantit un fonctionnement parfait pendant longtemps.
Cependant, en cas de désagrément, il est conseillé de consulter le centre de service
agréé TREVI le plus proche.
TREVI poursuit une politique de recherche et développement continue.Par conséquent,
les produits peuvent avoir des caractéristiques différentes de celles décrites.
FRANÇAISE

XF 780 KB
18
COMMANDES D’UNITÉ
1. Entrée micro 1
2. Entrée micro 2
3. Prise LINE IN (3,5 mm)
4. Fente pour mémoire Micro SD
5. Prise USB
6. Indicateur de charge LED
7. Touche M.PRI, priorité au microphone
8. Bouton LIGHT (effets de lumière disco
led)
9. Touche EQ, égalisation audio
10. MIC. VOL, réglage du volume du micro-
phone
11. Réglage du volume
12. Touche POWER, marche/arrêt
13. Touche MODE
14. Touche 9, précédente
15. Touche,Lecture/Pause + appui long
pour la fonction TWS
16. Clé :, suivant
17. Touche MENU
DESCRIPTION DES COMMANDES
FRANÇAISE
COMMANDES DE
TÉLÉCOMMANDE
1. Fonction MUTE
2. Bouton 9, précédente
3. Bouton MODE
4. Bouton REC
5. Bouton ECHO -
6. Touches de réglage de tonalité basse
7. BoutonEQ,égalisationsprédénies
8. Touches de réglage du volume du
microphone
9. Bouton d’alimentation/ veille
10. Touche, Lecture/ Pause
11. Clé :, ensuite
12. Bouton LIGHT (effets de lumière disco
Led)
13. Bouton REPEAT
14. Bouton REC/ PLAY
15. Bouton REC DEL
16. Bouton ECHO +
17. Bouton M-PRI, priorité microphone
18.Touches de réglage des aigus
19.Touches de réglage du volume
20.Touches numériques

XF 780 KB
19
CHARGEMENT DE LA BATTERIE
1. L’appareiléteint,branchezlecâbled’alimentationsurlaprise(6)del’appareil.
Connectez l’alimentation à une prise secteur;
2. Le voyant Led (7) s’allume en rouge;
3. Une fois la charge terminée, le voyant LED (7) devient vert;
4. Lorsque la batterie est faible,le dernier segment de l’icône de batterie sur l’écran
clignote pendant un certain temps, puis l’appareil passe automatiquement en
mode veille.
Remarque:
- Pour une bonne autonomie de la batterie, il est recommandé de garder l’appareil éteint
pendant la phase de charge.
Sauf indication contraire, les commandes décrites ci-dessous s’appliquent à la fois à
l’unité et à la télécommande.
MARCHE/ ARRÊT
- Utilisez l’interrupteur Marche/ Arrêt (8) pour allumer et éteindre l’appareil.
- Appuyez sur le bouton STANDBY (9) de la télécommande pour mettre l’appareil
en mode veille; appuyez à nouveau pour rallumer l’appareil.
VOLUME/ MUTE/ TONE/ ECHO EFFECT
1. Tournez le bouton de volume (19) pour augmenter/diminuer le volume de l’unité;
appuyez sur le bouton MUTE (1) de la télécommande pour faire taire l’appareil,
appuyez à nouveau pour revenir à l’écoute normale;
2. Appuyez sur le bouton MENU (11) et tournez le bouton (15) pour régler les
sons aigus et faibles du microphone et l’effet d’écho;
3. GrâceauboutonEQ(12),ilestpossibledemodierladynamiqueaudioen
choisissantparmicellesprédénies:POP,ROCK,JAZZ,CLASSIC,COUNTRY,
FLAT.
GUIDEVOCAL MARCHE/ ARRÊT
Appuyez sur le bouton MODE (14) de l’appareil et maintenez-le enfoncé pour activer/
désactiver le guide vocal.
FONCTIONNEMENT RADIO
Cet appareil est équipé d’une radio FM :
1. Pour rechercher et enregistrer les radios trouvées, appuyez sur la touche
(15), attendez que la recherche soit effectuée sur toute la bande FM, les radios
trouvées sont automatiquement enregistrées.
2. Pour passer d’une radio enregistrée en mémoire à une autre, appuyez sur les
touches 9(14) ou :(16),l’afcheurindiquelenumérodemémoirePquevous
écoutez.
3. Pour effectuer une recherche manuelle, maintenez les touches 9(14) ou :(16)
enfoncées, la recherche s’arrête sur la première radio trouvée avec un bon signal.
FRANÇAISE

XF 780 KB
20
FONCTIONNEMENT BLUETOOTH
APPAIRAGE AUX APPAREILS
1. Positionnez l’enceinte près de l’appareil Bluetooth à coupler et allumez l’appareil;
2. Appuyez sur le bouton BLEU (13),le mot clignotant “BLUE” apparaît sur l’écran;
3. Suivez les instructions de votre appareil externe pour rechercher le haut-parleur;
4. Recherchez l’enceinte nommée “XF 780 KB” et entrez le code PIN “0000” si
nécessaire;
5. Unefoisjumelé,lemot“BLUE”àl’écranrestexe.
Remarque: Le haut-parleur Bluetooth ne fonctionne qu’avec une seule connexion à la fois,
la connexion ne peut pas être interrompue pendant le fonctionnement normal.
La proximité de téléviseurs, de néons ou d’autres appareils peut perturber la
réception, dans ce cas, éloignez l’appareil.
COMMANDES DISPONIBLES EN MODE BLUETOOTH
- Démarrez la reproduction du son depuis votre appareil.
- Appuyez sur le bouton 9(14) pour passer à la piste précédente, appuyez sur
le bouton :(16) pour passer à la piste suivante.
- Appuyez sur la touche(15) pour mettre en pause,appuyez à nouveau pour
reprendre la lecture.
FONCTIONNEMENT DE LA FONCTIONTWS
Le mode deux haut-parleurs est en mode Bluetooth,vous choisissez 1 haut-parleur et
appuyez sur le bouton(15) pendant 3 secondes, ce sera le mode TWS. Ensuite,
vous connectez Bluetooth sur un téléphone portable, jouez de la musique, 2 haut-
parleurs peuvent jouer de la musique en même temps.Appuyez longuement sur le
bouton(15) pour haut-parleur 1pc, il est déconnecté.
Lehaut-parleurseconnecteàvosappareilsBluetooth,cequisigniequ’ils’agitdu
haut-parleur hôte. L’autre conférencier est le conférencier assistant.
CARTE MICRO SD/ USB
1. Insérez une carte Micro SD dans la fente (4) ou une clé USB dans la prise (5) et
allumez l’appareil;
2. La lecture démarre automatiquement.Sinon,appuyez plusieurs fois sur le bouton
MODE(14)jusqu’àcequeUSBouTFapparaissesurl’afchage;
3. Appuyez sur le bouton 9(14) pour passer à la piste précédente, appuyez sur
le bouton :(16) pour passer à la piste suivante;
4. Appuyez sur le bouton(15) pour mettre en pause,appuyez à nouveau pour
reprendre la lecture;
5. Appuyez sur le bouton 9(14) ou :(16) et maintenez-le enfoncé pour avan-
ceroureculerrapidementdansl’écoutedelachanson,relâchezlatouchepour
revenir à l’écoute normale;
6. En utilisant le bouton REPEAT (13) de la télécommande, il est possible d’activer
FRANÇAISE
Table of contents
Languages:
Other Trevi Portable Speakers manuals

Trevi
Trevi XR 8A70 User manual

Trevi
Trevi XF 550 APP User manual

Trevi
Trevi XF 300 POP User manual

Trevi
Trevi XF 470 KB User manual

Trevi
Trevi XF 1500 KB User manual

Trevi
Trevi XF 1200 KB User manual

Trevi
Trevi XF 1750KB User manual

Trevi
Trevi XF 800 User manual

Trevi
Trevi XF 1560 KB User manual

Trevi
Trevi SL 3841 User manual

Trevi
Trevi XR 8A01 User manual

Trevi
Trevi XF 350 User manual

Trevi
Trevi XFest XF 1560 KB User manual

Trevi
Trevi XF 1800KB User manual

Trevi
Trevi XF 1300 BEACH User manual

Trevi
Trevi XF 3200 PRO User manual

Trevi
Trevi XF 300 User manual

Trevi
Trevi XR 400 APP User manual

Trevi
Trevi XF 3400 PRO User manual

Trevi
Trevi XF 1250 KB User manual