manuals.online logo
Brands
  1. Home
  2. •
  3. Brands
  4. •
  5. U-Line
  6. •
  7. Power Tools
  8. •
  9. U-Line H-1993 User manual

U-Line H-1993 User manual

Other manuals for H-1993

1

Other U-Line Power Tools manuals

U-Line H-2027 User manual

U-Line

U-Line H-2027 User manual

U-Line H-738 User manual

U-Line

U-Line H-738 User manual

U-Line Swingline Light Touch H-2323 Instruction Manual

U-Line

U-Line Swingline Light Touch H-2323 Instruction Manual

U-Line H-491 User manual

U-Line

U-Line H-491 User manual

U-Line H-915 User manual

U-Line

U-Line H-915 User manual

U-Line SHRINKFAST H-6098 User manual

U-Line

U-Line SHRINKFAST H-6098 User manual

U-Line H-8094 User manual

U-Line

U-Line H-8094 User manual

U-Line H-1024 User manual

U-Line

U-Line H-1024 User manual

U-Line H-995 User manual

U-Line

U-Line H-995 User manual

U-Line H-3070 User manual

U-Line

U-Line H-3070 User manual

U-Line Shrinkfast 975 User manual

U-Line

U-Line Shrinkfast 975 User manual

U-Line H-8094 User manual

U-Line

U-Line H-8094 User manual

U-Line H-1993 User manual

U-Line

U-Line H-1993 User manual

U-Line H-491 User manual

U-Line

U-Line H-491 User manual

U-Line H-1302 User manual

U-Line

U-Line H-1302 User manual

U-Line H-8094 User manual

U-Line

U-Line H-8094 User manual

U-Line H-2027 User manual

U-Line

U-Line H-2027 User manual

U-Line H-2028 User manual

U-Line

U-Line H-2028 User manual

U-Line H-10066 User manual

U-Line

U-Line H-10066 User manual

U-Line H-1026 User manual

U-Line

U-Line H-1026 User manual

U-Line H-1481 User manual

U-Line

U-Line H-1481 User manual

U-Line H-1980 User manual

U-Line

U-Line H-1980 User manual

U-Line H-915 User manual

U-Line

U-Line H-915 User manual

U-Line Н-863 User manual

U-Line

U-Line Н-863 User manual

Popular Power Tools manuals by other brands

ISLAND HOPPER Power Egg HT-309 operating instructions

ISLAND HOPPER

ISLAND HOPPER Power Egg HT-309 operating instructions

Sioux Tools SSR6P25 Instructions-parts list

Sioux Tools

Sioux Tools SSR6P25 Instructions-parts list

Makita HM1317C technical information

Makita

Makita HM1317C technical information

ABB Smart Tool + quick start guide

ABB

ABB Smart Tool + quick start guide

Baumr-AG BMJK-24S user manual

Baumr-AG

Baumr-AG BMJK-24S user manual

Bosch Professional GST 18 V-LI S Original instructions

Bosch

Bosch Professional GST 18 V-LI S Original instructions

Ronix RA-2702 quick start guide

Ronix

Ronix RA-2702 quick start guide

Nordson ProBlue user guide

Nordson

Nordson ProBlue user guide

aoyue int6028 instruction manual

aoyue

aoyue int6028 instruction manual

Hitachi CJ 65VA2 Instruction manual and safety instructions

Hitachi

Hitachi CJ 65VA2 Instruction manual and safety instructions

Makita HM1304 instruction manual

Makita

Makita HM1304 instruction manual

Kurtz Ersa Ersa X-TOOL VARIO operating instructions

Kurtz Ersa

Kurtz Ersa Ersa X-TOOL VARIO operating instructions

SCHUNK KSO 65 Installation and operating instruction

SCHUNK

SCHUNK KSO 65 Installation and operating instruction

Harken LokHead 500 user manual

Harken

Harken LokHead 500 user manual

Senco DuraSpin ExTPro installation instructions

Senco

Senco DuraSpin ExTPro installation instructions

Ferm JSM1020 Original instructions

Ferm

Ferm JSM1020 Original instructions

Milwaukee M12 FUEL 2559-20 Operator's manual

Milwaukee

Milwaukee M12 FUEL 2559-20 Operator's manual

EINHELL BT-CD 12/2 operating instructions

EINHELL

EINHELL BT-CD 12/2 operating instructions

manuals.online logo
manuals.online logoBrands
  • About & Mission
  • Contact us
  • Privacy Policy
  • Terms and Conditions

Copyright 2025 Manuals.Online. All Rights Reserved.

PAGE 1 OF 3 0714 IH-1993
πH-1993
KIHLBERG MANUAL
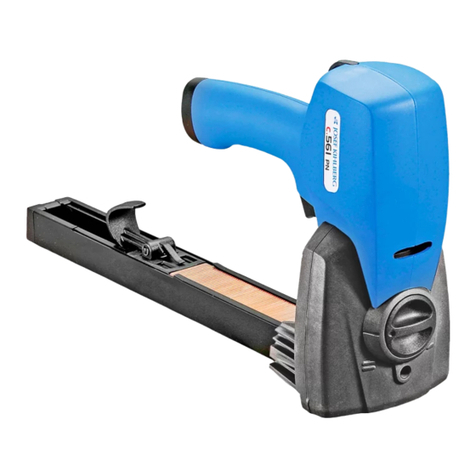
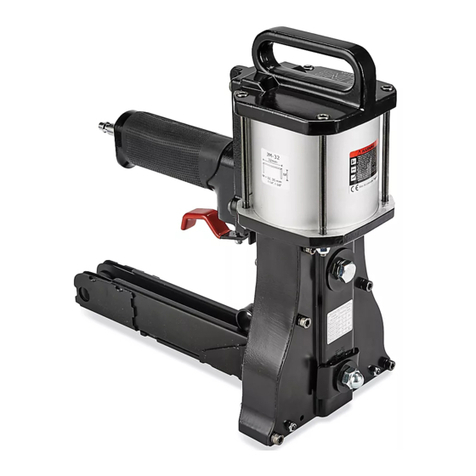
CARTON STAPLER
1-800-295-5510
uline.com
LOADING
ADJUSTING THE STAPLE LEG LENGTH
The stapler is adjustable for 5/8"-3/4" staples. The stapler
setting for a different staple leg length is altered as
follows. Start by adjusting the depth of stapling for deep
clinching (=). (See Figure 2)
1. With the allen wrench,
unscrew locking screw (A)
two turns. (See Figure 1)
2. With a screwdriver, adjust
screw (B) to 5/8" or 3/4" leg
length. (See Figure 1)
3. Tighten the locking
screw (A). (See Figure 1)
ADJUSTING THE PENETRATION DEPTH
The depth of stapling is
easily adjusted by using the
setting knob (1). Press the
knob in and turn it to the
desired position.
(See Figure 2)
• Use "–" for shallow
stapling penetration.
• Use "=" for deep stapling
penetration.
ADJUSTING STAPLE CLINCH
It is possible to adjust how tightly the staples are closing:
1. With the allen wrench,
turn the adjusting screw
clockwise for a stronger
clinch. (See Figure 3)
2. Turn the adjusting screw
counterclockwise to
open the clinch more.
CONTROLLING THE CLINCH (See Figure 4)
A. Good clinch.
B. Leg length of the
staple too long or
bent too much.
C. Leg length of staple
too short or not bent
enough.
If necessary, adjust
staple clinch.
NOTE: Always use Josef Kihlberg original
staples – S-10720 (5/8") or S-10721 (3/4").
Adjusting
Screw
Figure 3
C
B
A
Figure 4
3/4" 5/8"
B
A
Figure 1
1
Figure 2
TOOL NEEDED COMPATIBLE STAPLES
Allen Wrench
(Included)
S-10721
C34
1⁄ x 3/4"
S-10720
C58
1⁄ x 5/8"
PAGE 2 OF 3 0714 IH-1993
LOADING THE STAPLER
NOTE: Always use Josef Kihlberg original
staples – S-10720 (5/8") or S-10721 (3/4").
The correct type of staple is marked on the left hand
side of the magazine. Be sure to use the correct staple
length for your application and that ensure the stapler is
adjusted for this length.
1. Pull the pusher all the way
out. (See Figure 5)
2. Place three staple strips
into the magazine from
the top. (See Figure 6)
3. Lift the pusher to release.
Carefully move the pusher
forward until it reaches the
staples. (See Figure 7)
LOADING CONTINUED
OPERATION
MAINTENANCE
OPERATING THE STAPLER
WARNING! Always place yourself in a firmly
balanced position when using or handling
the stapler.
• Press the stapler against the cardboard.
• Pull the handle firmly.
• Move the stapler and repeat until you have
finished stapling.
• Control the clinch regularly. Adjust when necessary.
WARNING! Before stapling, ensure that your
hand or any other part of your body is not
underneath the staple discharge area.
Staple Strip
Figure 6
Pusher
Figure 5
Pusher
Figure 7
CLEANING THE STAPLER
This stapler does not require special servicing. It
only needs regular cleaning with a non-aggressive
(non-corrosive) cleaning agent.
NOTE: Do not remove any parts for cleaning
purposes.
NOTE: Check the proper functioning of all
safety devices daily. Make sure that all screws
and nuts are securely tightened.
REMOVING JAMMED STAPLES
To remove a jammed staple:
1. Unscrew 6 screws at the rear body. (See Figure 8)
2. Remove rear body and the defective staple.
(See Figure 9)
3. Assemble by reattaching the rear body with
6 screws. (See Figure 8)
Allen
Wrench
Figure 8 Figure 9
PAGE 3 OF 3 0714 IH-1993
REPLACING THE DRIVER BLADE/ANVILS
TO REPLACE THE DRIVER BLADE:
1. Remove six screws
holding the rear
body to the front
section. (See Figure 10)
2. Remove the rear
body with magazine.
3. Replace the driver
blade. (See Figure 11)
4. Assemble parts in
reverse order.
NOTE: If changing the anvils, always change
both at the same time.
TO REPLACE THE ANVILS:
1. Remove the driver
blade (See Figure 11)
2. Remove the screws.
3. Replace the anvils.
4. Assemble parts in
reverse order.
MAINTENANCE CONTINUED
Rear Body
Screw
Figure 10
Screw
Anvils
Driver
Blade
Screw
Figure 11
πCHICAGO•ATLANTA•DALLAS•LOSANGELES•MINNEAPOLIS•NYC/PHILA•SEATTLE•MEXICO•CANADA
1-800-295-5510
uline.com