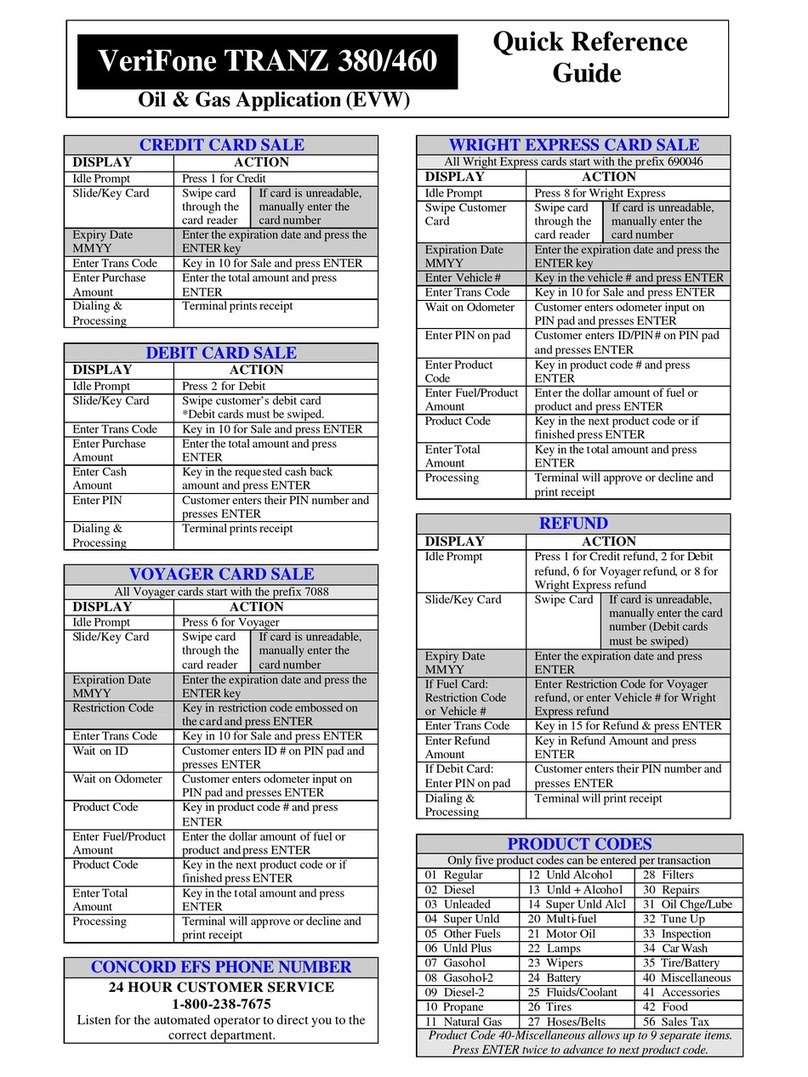
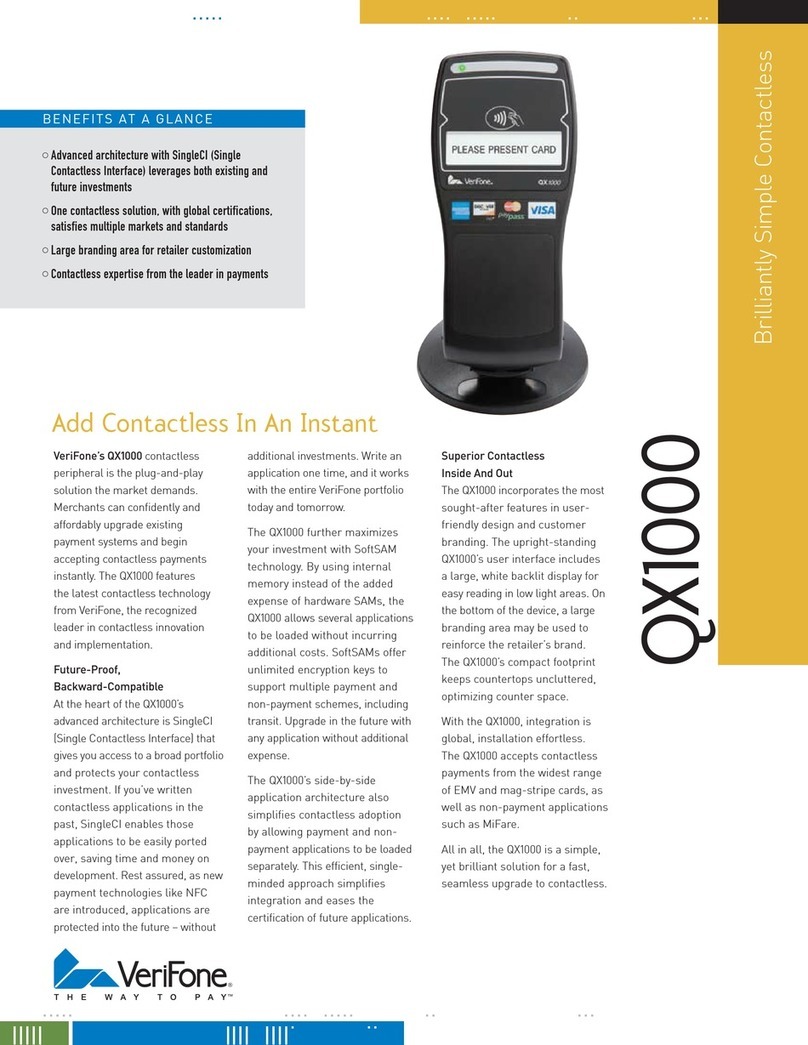
manuals.online logo
Brands
  1. Home
  2. •
  3. Brands
  4. •
  5. VeriFone
  6. •
  7. Payment Terminal
  8. •
  9. VeriFone Vx-520 Series APACS 40 User manual

VeriFone Vx-520 Series APACS 40 User manual

This Quick Reference
Guide will help you
navigate your terminal.
VERIFONE
VX520
INDUSTRY
RETAIL AND RESTAURANT
APPLICATION
FT431EV
PART # 8.3133.100 REV. 9/15
INTEGRATED
SMART
CHIP CARD
TECHNOLOGY:
Note: Smart chip
acceptance at the
individual merchant
may depend on
setup variables.
INTEGRATED
CONTACTLESS
TECHNOLOGY:
CONTACTLESS PAYMENTS
During a sale transaction, the terminal/PIN pad will display the “Insert,
Tap or Swipe Card” prompt and the contactless symbol shown below. A
contactless enabled card or mobile phone device should be held right
above the terminal/PIN pad screen in order for the terminal/PIN pad to
read the device. Once the card is read, the terminal/PIN pad will beep
and four lights will illuminate once the card is read successfully. The
terminal will then process the contactless payment transaction as if a
card were swiped or inserted.
SMART CHIP CARD
This device supports smart chip card technology. A chip payment
card looks just like a magnetic stripe card with a chip in addition to
the standard magnetic stripe on the back of the card. The microchip
provides an additional level of authenticity for the transaction.
Stand-alone Terminal
When a customer presents a chip card, initiate a sale and then pass
the terminal to the customer. The customer inserts their card into the
chip reader at the bottom of the terminal, where it should remain until
the transaction completes. This ensures that the card never leaves
the customer’s possession and that your business does not accept
counterfeit plastics.
Terminal with Smart Chip Card PIN Pad
When a customer presents a chip card, initiate a sale and have the
customer insert their card into the chip reader at the bottom of the
PIN pad. The card should remain in the PIN pad until the transaction
completes. This ensures that the card never leaves the customer’s
possession and that your business does not accept counterfeit plastics.
PARTIAL
APPROVALS
HOT KEY
FUNCTIONS
Use the hot key
functions to quickly
access your desired
transaction.
TERMINAL DISPLAY ACTION
Accept Partial Approval? Yes or No Press Yes to accept the Partial
Approval.
If No, then a receipt will print
stating the transaction was
voided.
Please be aware this application supports split-tender purchases (partial
approvals) by allowing card issuers (including prepaid) to approve a
portion of the original transaction amount in the authorization request when
the transaction amount exceeds the funds available on the card. THE
MERCHANT IS RESPONSIBLE FOR COLLECTING THE REMAINDER OF
THE PURCHASE AMOUNT IN ANOTHER FORM OF PAYMENT.
The terminal will display the following when a transaction has been partially
approved:
If partial approval is accepted, the terminal will print a receipt showing
the amount due. The amount due will print below the total line when a
transaction has been partially approved. The remaining balance will print
for prepaid cards only. A new transaction will need to be initiated in order to
receive the remaining balance.
*** Receipt Example ***
Total: $12.48
Appr Amt = $6.00
Remaining Bal = $0.00
Amount Due: $6.48
I agree to pay above total amount
according to card issuer agreement.
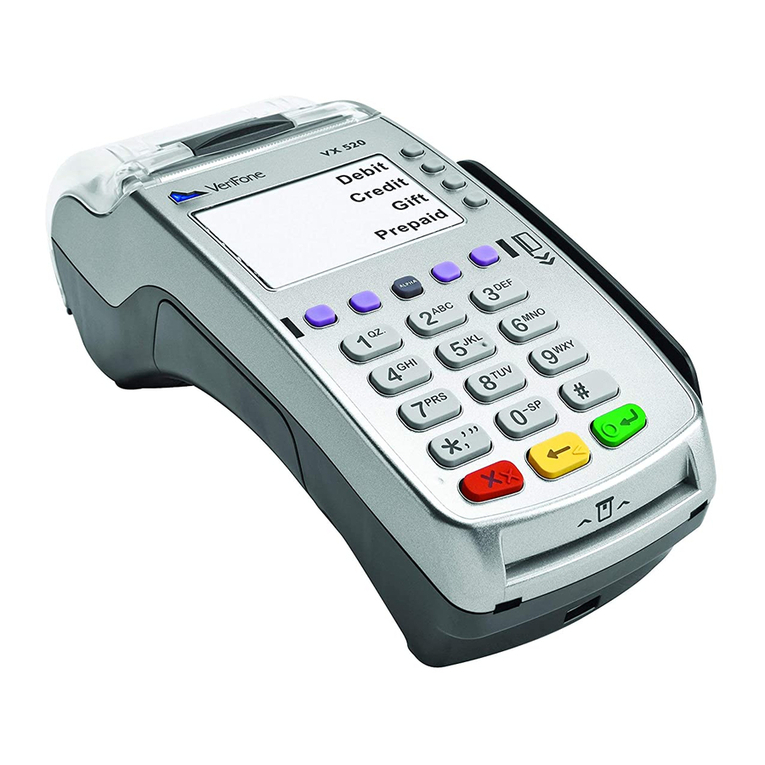
DISPLAY ICON LOCATION FUNCTION
First Purple Key
Far Left
Down Arrow – Press to
scroll down to the next menu.
Second Purple Key
Middle Left
Tip Adjust – Press to add a
tip to a completed transaction
prior to settlement, if enabled.
Third Purple Key
Middle Right
Reprint – Press to reprint
a transaction using the
reference number.
Fourth Purple Key
Far Right
Reports – press to access
available reports.
NAVIGATING
YOUR
TERMINAL:
Refer to this section
to nd and begin
the transaction or
function you wish
to use.
BEGIN A SALE
Press Sale and enter the amount of the transaction. For standalone
terminal, pass the device to the customer.
• For magnetic stripe payments, the customer should swipe their
card, and then specify credit or debit. (Note: Debit cards must be
swiped)
• For smart chip card payments, the customer should insert their
card and leave it inserted for the entire transaction. If the chip
card is swiped, then the terminal may prompt the customer to
insert the card in the chip reader slot.
• For contactless payments, the customer should tap/wave their
card or mobile device on or in close proximity to the terminal/PIN
pad screen.
BEGIN OTHER TRANSACTIONS
Press the down [Arrow] key at the main menu or idle prompt to navigate
to the transaction type you wish to perform. Scroll through the menu and
press the corresponding [F] key when your desired transaction appears
on the terminal display.
REPRINT A RECEIPT
Press [Reprint] to access the Reprint menu. You will be
Prompted to select last receipt, or enter criteria to search for another
receipt to print.
ACCESS TIP FUNCTION
Press [Tip Adjust] to access the Tip menu. Scroll to the desired report
or report category, then press the corresponding [F] key and follow the
prompts
** Tips will upload when the Settlement is initiated **
NOTE: In order to process tip adjustment transactions, smart chip cards
must be disabled.
Tip at the time of sale is supported with smart chip cards. Press Sale,
Enter Amount, Enter Tip, Conrm Amount, Insert or Swipe card.
ACCESS REPORTS
Press [Reports] to access the Report menu. Scroll to the desired report
or report category, then press the corresponding [F] key and follow the
prompts to view or print your report.
ACCESS CLERK/SERVER SETUP
Navigate to the Clerk Setup/Server Setup option from the main menu by
pressing [Enter] or green button.
AVAILABLE
TRANSACTION
TYPES:
Your terminal
supports various
transaction types.
Refer to this section
for information on
what transactions are
available, when to
use, and how to begin
the transaction.
Note: Press [Arrow]
to scroll to view
additional options.
CREDIT TRANSACTIONS TO INITIATE
Credit Sale A sale transaction using a
card; the card may or may not be present.
Optional prompts dependent on setup
variables (E.G. Tax or Tip Adjustment).
Press Sale, Enter Amount,
Conrm Amount, Insert or
Swipe Card.
Note: On swipe
transactions you will be
prompted to select Credit
or Debit.
For smart chip cards you
may be prompted for a PIN
or signature.
Void Perform a void to reverse a credit
sale, force, or refund transaction and
prevent any funds from transferring from
the cardholder’s account. Only available
for transactions in the current batch (i.e.,
same day).
Select Void.
Refund Performed a refund to return
money to a cardholder’s account from a
credit sale completed in a closed batch
(i.e., previous day). May also be used to
adjust a previous transaction.
Select Refund.
Phone Order A manually keyed sale
transaction with AVS and CVV2 prompts.
Select Phone Order.
Pre-Auth An authorization-only transaction
provides an approval, but does not charge
the cardholder until the transaction has
been added to the batch by way of a force
transaction.
• Pre Comp – This function completes
the Pre Auth transaction (Similar to
closing a tab).
• Pre Auth Rvsl – This function is used to
reverse a Pre Auth transaction.
• Pre Auth Rpt – Report of Pre
Authorized transactions.
Select Pre-Auth.
Force Used to complete a transaction that
received an Authorization Code via the
Voice Auth System.
Select Force.
SETTLING THE
BATCH
Your transactions
must be “settled”
daily. Read this
section to ensure
the settlement
process operates
smoothly.
ABOUT SETTLEMENT
A Settlement operation is used to close the current batch and open
a new batch for logging and accumulating transactions. When the
settlement is initiated, Tips will upload rst, a Batch Inquiry will process,
and then the terminal will prompt for the Settlement information.
SETTLEMENT OPTIONS:
1 – AUTO OPEN/MANUAL SETTLEMENT
Opens batch with the rst transaction of a new batch, and the merchant
is responsible for settling the batch each day.
2 – AUTO OPEN/AUTO SETTLEMENT (Timed Upload)
Opens batch with the rst transaction of a new batch. The auto
settlement feature is designed to automatically settle transactions in
the current batch at a specic time, predetermined by the merchant
and within a 24-hour period. When congured, auto settlement begins
anytime after the set time occurs, if there are transactions in the batch.
For example, if auto settlement time is set to 22:30:00 (10:30 p.m.) then
auto settlement occurs any time after 22:30:00. If the terminal is turned
off before the set time, and turned on again (usually the next morning),
auto settlement occurs the next morning.
DEBIT TRANSACTIONS TO INITIATE
Debit Sale A sale transaction using a
debit card; the card must be swiped.
Optional prompts dependent on setup
variables (E.G. Tax or Tip at the Time
of Sale).
Press Sale, Enter Amount,
Conrm Amount, Insert or
Swipe Card.
Note: On swipe transactions
you will be prompted to
select Credit or Debit.
Smart chip card settings
are determined by the card
issuer and other determining
factors. For smart chip cards
you may be prompted for a
PIN or signature.
EBT TRANSACTIONS TO INITIATE
EBT Sale An Electronic Benets
Transfer (EBT) sale transaction;
the card can be swiped or manually
entered.
Press Sale, Enter Amount,
Conrm Amount, Insert or
Swipe Card, Select EBT.
AVAILABLE
REPORTS
A report is like a
snapshot in
time of business
activities. Use
this data to
help you make
crucial business
decisions.
Press the
[Reports] hot key
(the purple button
on the far right)
to launch the
Reports menu.
REPORTS: BATCH REVIEW MENU
Detail Report Allows access to view details on all transactions in
the current batch. Enter search criteria to retrieve transactions in the
current batch, and then you may adjust or void the transaction. To
access the Batch Review for all transaction, the Supervisor or
Manager password level is required.
Totals Report Display Totals Sales, Total Refunds, and Net Sale Totals.
Clerk/Server Report Allows access to details or totals on all transactions
sorted by Clerk number.
REPORTS: CLERK/SERVER REPORTS MENU
Detail Report Prints detail information on all transactions performed by
all clerks/servers.
Totals Report Prints totals for a specic clerk or server
Shift Report Prints transaction totals per shift.
Clerk/Server Table Prints login and logout information.
Unadjusted Report Prints a series of settlement reports by date.
CLERK/SERVER SETUP MENU
Add Clerk/Server Adds new clerks or servers to your terminal. You will
be prompted to create a password for each new clerk/server. The clerk/
server ID may be up to four digits in length and the password may be
5-10 digits in length.
Log On/Off Clerk/Server Used to log on clerks/servers as their shift
begins, and logs them off at the end of their shift.
Delete Clerk/Server Removes a single clerk/sever from the terminal.
Modify Clerk/Server Allows modication of cash tip amount or a clerk/
server’s ID or password.
Clerk Clerks/Servers This option is used to clear clerk/server totals from
the clerks/servers internal totals le.
CLERK/SERVER
SETUP
Accessible through
main menu,
select [Enter] or
green button and
[Servers/F3].
PROMPT DESCRIPTION / ACTION
Imprint Card
Press Enter Key
May display while performing a manually entered
transaction. Imprint the card using a manual
Imprint machine to prove the card was present
during the transaction.
CVV2-Code: Enter the CVC (Card Verication Code), typically
the last 3 or 4 digits found on the back of the card
on the signature line. CVC codes are designed
to reduce payment card fraud.
Code Present?
0 = No 1 = Xread
Displays if V-Code prompt is by-passed. Select
Xread if the code is present, but unreadable.
Enter Tax
Amount:
Displays if you are attempting a transaction using
a corporate or purchasing card. Key in the Tax
amount or press Enter to bypass.
Tax Exempt?
0 = No 1 = Yes
Press 0 if not tax exempt.
Press 1 if tax exempt.
Appr Code: Displays during a Force transaction.
key in the approval code you received from the
Voice Authorization Center, and press
[Enter].
Amt Due: x.xx
Enter to Conrm
Press [Enter] to continue with another
transaction for the amount due.
(See Partial Approvals)
Send Duplicate?
Yes [F1] No [F2]
Displays if you are attempting a transaction with
an account number that has already been used
in the current batch. Select Yes to conrm that
this transaction should be processed. Select No
to cancel the transaction.
Override Chip
Requirement?
If a smart chip card is presented, but the terminal
fails to read the chip, the terminal will fall back to
swipe. The terminal will prompt, Override Chip
Requirement, Yes or No?
Yes, accepts information read from magnetic
stripe and proceeds with the transaction.
No, returns to the idle prompt, main menu.
Chip Malfunction If smart card chip read fails, terminal will display
“Chip Malfunction”.
PROMPT
Q&A
While navigating
through
transactions,
you may nd that
some prompts
aren’t as clear
as others. This
section claries
those prompts.
COMMON ERROR
CODES:
In the event that your
terminal displays
an error, refer to
these error codes
to troubleshoot your
terminal.
If the code you are
experiencing is not
shown, retry the
transaction, or if
possible, manually
enter the account
number.
If the error persists,
contact Customer
Service for support.
ERROR CODE DESCRIPTION ACTION
Bad Account # The card number being
used for the current
transaction does not pass
the LUHN check.
Retry. If error persists,
ask for another form of
payment as the card may
be fraudulent.
Batch Full The terminal has reached
batch transaction capacity.
Perform batch settlement.
Close Batch The batch is more than
90% full.
Perform batch settlement.
Empty Batch Cannot perform requested
function – batch is empty.
(no transactions)
No action.
Expired Card The card’s expiration date
has passed.
Retry. If error persists,
ask for another form of
payment. .
Invalid
Account #
The 4 digits keyed do not
match the account number
from the card’s magnetic
stripe.
Re-key the last 4 digits.
If error persists, ask for
another form of payment
as the card may be
fraudulent.
Invalid Amount The amount entered is
invalid.
Re-key the dollar amount.
Invalid Srvr ID
Invalid Clrk ID
The clerk/server number
keyed has not been logged
in.
Login the Clerk/Server
Setup.
Settl Neg Batch Terminal prompting for
conrmation to settle a
negative batch.
Press [Enter] to conrm
that the negative batch
should be settled, or
press [Cancel] and print
a report, which should
be used to verify that the
negative batch total is
correct.
Void Not
Allowed
The user tried to void an
already voided transaction
No action.
VX520
INDUSTRY
RETAIL AND RESTAURANT
APPLICATION
FT431EV
PART # 8.3133.100 REV. 9/15

Other manuals for Vx-520 Series APACS 40

25

Other VeriFone Payment Terminal manuals

VeriFone HICAPS VX820 User manual

VeriFone

VeriFone HICAPS VX820 User manual

VeriFone V240m User manual

VeriFone

VeriFone V240m User manual

VeriFone omni 5 series User manual

VeriFone

VeriFone omni 5 series User manual

VeriFone Vx-520 Series APACS 40 User manual

VeriFone

VeriFone Vx-520 Series APACS 40 User manual

VeriFone M425 User manual

VeriFone

VeriFone M425 User manual

VeriFone Vx-520 Series APACS 40 User manual

VeriFone

VeriFone Vx-520 Series APACS 40 User manual

VeriFone QX1000 User manual

VeriFone

VeriFone QX1000 User manual

VeriFone Vx-520 Series APACS 40 User manual

VeriFone

VeriFone Vx-520 Series APACS 40 User manual

VeriFone Omni 3700 Series User manual

VeriFone

VeriFone Omni 3700 Series User manual

VeriFone UX401 User manual

VeriFone

VeriFone UX401 User manual

VeriFone V400c User manual

VeriFone

VeriFone V400c User manual

VeriFone T650p User manual

VeriFone

VeriFone T650p User manual

VeriFone VX805 CTLS User manual

VeriFone

VeriFone VX805 CTLS User manual

VeriFone Omni Vx Series User manual

VeriFone

VeriFone Omni Vx Series User manual

VeriFone VX 520 Series User manual

VeriFone

VeriFone VX 520 Series User manual

VeriFone Carbon Mobile 5 User manual

VeriFone

VeriFone Carbon Mobile 5 User manual

VeriFone Vx-520 Series APACS 40 User manual

VeriFone

VeriFone Vx-520 Series APACS 40 User manual

VeriFone VX820 Pin Pad User manual

VeriFone

VeriFone VX820 Pin Pad User manual

VeriFone VX 685 GPRS User manual

VeriFone

VeriFone VX 685 GPRS User manual

VeriFone VX 520 Series User manual

VeriFone

VeriFone VX 520 Series User manual

VeriFone Incident 525 Instruction Manual

VeriFone

VeriFone Incident 525 Instruction Manual

VeriFone Omni 3200 User manual

VeriFone

VeriFone Omni 3200 User manual

VeriFone TRANZ 460 User manual

VeriFone

VeriFone TRANZ 460 User manual

VeriFone UX301 User manual

VeriFone

VeriFone UX301 User manual

Popular Payment Terminal manuals by other brands

XAC xAPT-103WiFi.3G installation guide

XAC

XAC xAPT-103WiFi.3G installation guide

Lipman Nurit 3010 user manual

Lipman

Lipman Nurit 3010 user manual

ACS ACR880 user manual

ACS

ACS ACR880 user manual

Valor VL100 Configuration and Connection Guide

Valor

Valor VL100 Configuration and Connection Guide

SmartPay PAX S80 Getting started guide

SmartPay

SmartPay PAX S80 Getting started guide

dejavoo QD Terminal Line Quick reference guide

dejavoo

dejavoo QD Terminal Line Quick reference guide

Dojo P2PE instruction manual

Dojo

Dojo P2PE instruction manual

Bennett Site Master SP product manual

Bennett

Bennett Site Master SP product manual

Inspiry InsPos S operation instruction

Inspiry

Inspiry InsPos S operation instruction

PC-EFTPOS PX328 reference guide

PC-EFTPOS

PC-EFTPOS PX328 reference guide

Quest Engineering CT400 Getting started guide

Quest Engineering

Quest Engineering CT400 Getting started guide

IDTECH ViVOpay VP3600 user manual

IDTECH

IDTECH ViVOpay VP3600 user manual

IDTECH ViVOpay VP6800 user manual

IDTECH

IDTECH ViVOpay VP6800 user manual

Ingenico Elite 510 supplementary guide

Ingenico

Ingenico Elite 510 supplementary guide

Moneris iCT250 manual

Moneris

Moneris iCT250 manual

Elavon iCT250 Setup guide

Elavon

Elavon iCT250 Setup guide

Ingenico Aqua Specifications

Ingenico

Ingenico Aqua Specifications

Ingenico PAYZONE iCT250 Quick reference guide

Ingenico

Ingenico PAYZONE iCT250 Quick reference guide

manuals.online logo
manuals.online logoBrands
  • About & Mission
  • Contact us
  • Privacy Policy
  • Terms and Conditions

Copyright 2025 Manuals.Online. All Rights Reserved.