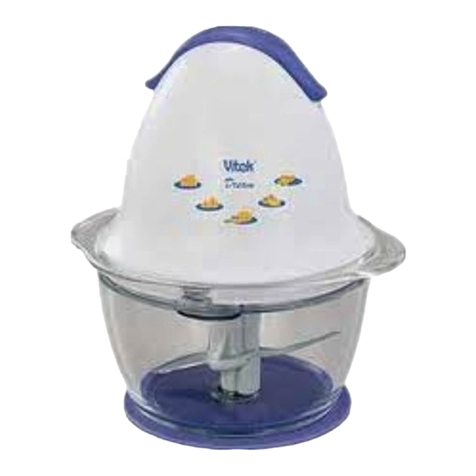
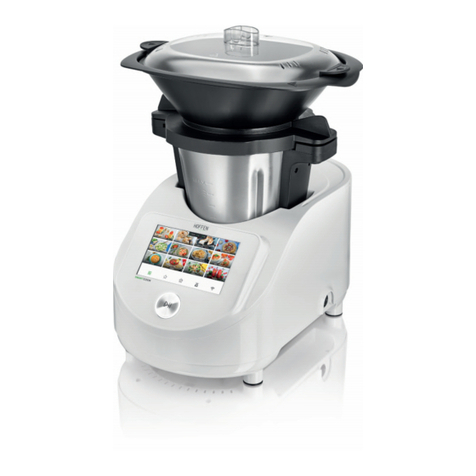
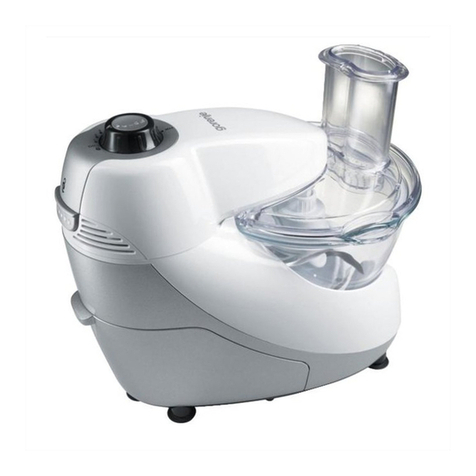
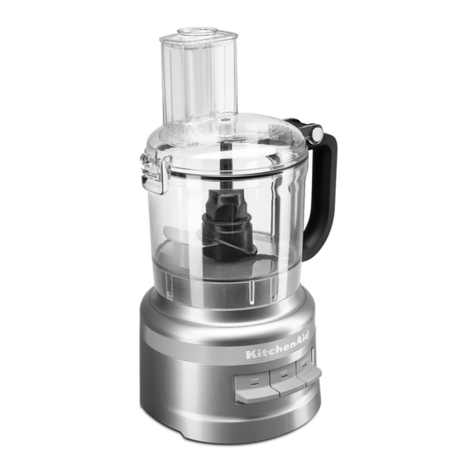
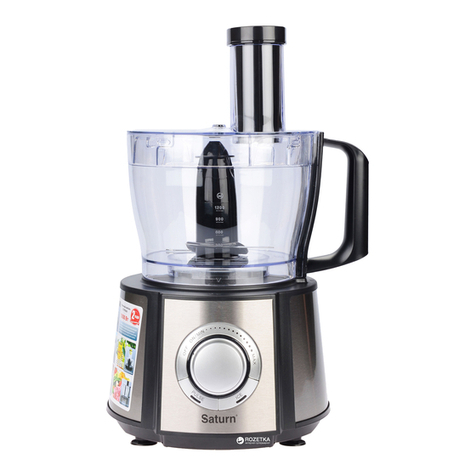
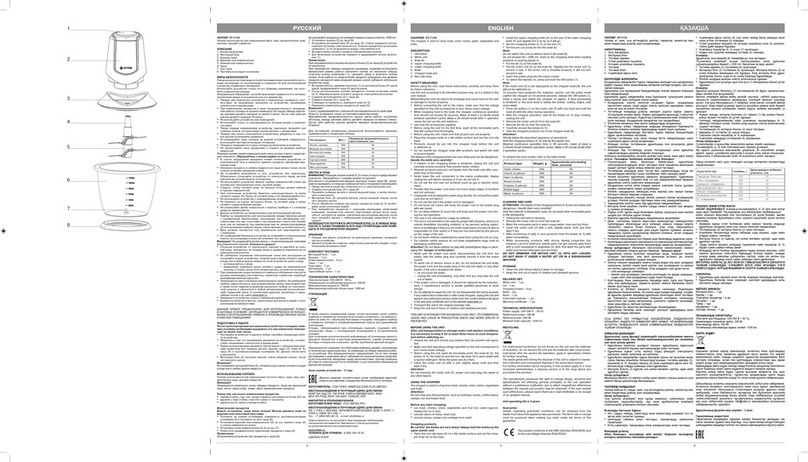
Vitek VT-1640 User manual

МОДЕЛЬ VT1640
МИНИПРОЦЕССОР
MINI CHOPPER
ИНСТРУ ЦИЯ ПО Э СПЛУАТАЦИИ
MANUAL INSTRUCTION
1640.qxd 20.01.03 14:03 Page 2
All manuals and user guides at all-guides.com
all-guides.com

ENGLISH
2
Гарантийный талон
Сведения о покупке
Модель:
Серийный №:
Дата покупки:
Сведения о продавце
Название и адрес продающей организации
Подтвер даю получение исправного изделия, с условиями гарантии ознакомлен
Подпись покупателя
Телефон:
Купон №3
Модель: Серийный №:
Дата поступления в ремонт:
Дата выполнения ремонта:
Вид ремонта:
М.П.
Купон №2
Модель: Серийный №:
Дата поступления в ремонт:
Дата выполнения ремонта:
Вид ремонта:
М.П.
Купон №1
Модель: Серийный №:
Дата поступления в ремонт:
Дата выполнения ремонта:
Вид ремонта:
М.П.
Внимание!
Гарантийный талон действителен только при наличии печати
продающей организации
М.П.
IDENTIFICATION OF PARTS
CH 164000000
CH 164000000
CH 164000000
CH 164000000
1640.qxd 20.01.03 14:03 Page 4
All manuals and user guides at all-guides.com

Important safeguards
When using electrical appliances, basic safety precautions should be fol
lowed, including the following:
1. Don't put the motor unit in water or any other liquid, don't use the chop
per in a bathroom or near any source of water, and don't use it outdoors.
2. This appliance should be used only by or under the direct and constant
supervision of a responsible adult.
3. Don't try to remove the lid until after the blade has stopped moving,
otherwise you'll hurt yourself.
4. Don't handle the blade at all. There's plenty of plastic handle that
instead.
5. The blades are very sharp. Take care when you're handling and clean
ing the blade unit if you can't see what you're doing, don't do it.
6. Unplug before moving, dismantling, or cleaning the chopper.
7. Don't leave the chopper unattended while plugged in.
8. This appliance is designed to process small quantities of food. Larger
quantities may be processed in batches, but it shouldn't be used instead
of a full size processor. Do this and you'll break it.
9. Don't use it for processing liquids or foods with a high liquid content. It
might overheat.
10. Don't use it for food hotter than you could handle comfortably.
11. Don't try to process big bits cut them down to 1218mm (1/23/4
inch) cubes.
12. Don't fill the bowl more than half full.
13. Don't use it continuously for more than one minute. After one minute,
let it cool down for five minutes before using it again.
14. Route the mains lead so that it doesn't overhang, and can't be caught
accidentally or tripped over.
15. Don't use accessories or attachments other than those we supply.
16. Don't use it in any way other than those described in these instruc
tions.
17. Keep the chopper, accessories, and mains lead away from hot sur
faces.
18. Don't wrap the mains lead around the chopper.
ENGLISH
3
14
1640.qxd 20.01.03 14:03 Page 6
All manuals and user guides at all-guides.com

19. Don't use the chopper if it malfunctions, if it gets damaged, or if the
mains lead or plug is damaged. If the mains lead is damaged, the chop
per must be returned for repair or replacement in order to avoid hazard.
Household use only
Before use
Before using for the first time, clean all the removable parts, to remove
any manufacturing dust, etc. (see "Care and maintenance").
Opening
1. Press the front of the On/off switch (0) to check that it's switched off,
then unplug it.
2. Press the lid lock button at the top rear of the motor unit. The lid lock
will spring up
3. Turn the lid anticlockwise the tabs round the edge of the lid will force
it up until they clear the grooves in the top of the bowl.
4. Lift the lid clear of the bowl.
5. Hold the upper plastic part of the blade unit (or the whisk), and lift it
straight up and out of the bowl. Take care the blades are very sharp.
6. Turn the bowl anticlockwise about an eighth of a turn to release it from
the catches round the drive shaft, then lift it gently off.
Filling
7. Lower the bowl over the drive shaft and turn it about an eighth of a turn
to engage the catches round the drive shaft and lock it in place.
8. Hold the blade unit (or the whisk) by the upper plastic part, lower it on
to the drive shaft, and rotate slightly to fit the flat sides of the drive shaft.
9. Put the food in the bowl.
10. Try not to pour anything over the drive shaft.
11. Don't fill the bowl more than about half full. If you want to process larg
er quantities, do it in batches. If you regularly need to do several batches,
you should think about getting a full size processor.
12. Don't fill it with anything hotter than you could comfortably handle,
don't try to crush or chip ice, and don't try to chop raw meat.
ENGLISH
4
СПЕЦИФИ АЦИЯ
Напря ение/мощность 230 В ~ 50 Гц 260Вт
Емкость чаши 500 мл.
СРОК СЛУЖБЫ МИНИПРОЦЕССОРА НЕ МЕНЕЕ 3Х ЛЕТ
УСЛОВИЯ ГАРАНТИЙНОГО ОБСЛУЖИВАНИЯ
Уважаемый покупатель!
Фирма VITEK выра ает благодарность за Ваш выбор и гарантирует высокое
качество и безупречное функционирование приобретенного Вами изделия при
соблюдении правил его эксплуатации.
Срок гарантии на все изделия - 12 месяцев со дня покупки. Данным гарантийным
талоном VITEK подтвер дает исправность данного изделия и берет на себя
обязательство по бесплатному устранению всех неисправностей, возникших по вине
производителя.
Гарантийный ремонт мо ет быть произведен в авторизированном сервис-центре
на территории России.
Условия гарантии:
1. Настоящая гарантия имеет силу при соблюдении следующих условий:
- правильное и четкое заполнение гарантийного талона с указанием наименования
модели, ее серийного номера, даты прода и и печати фирмы-продавца в
гарантийном талоне и отрывных купонах;
- наличие оригинала квитанции (чека), содер ащего дату покупки.
2. VITEK оставляет за собой право на отказ в гарантийном обслу ивании в случае
непредоставления вышеуказанных документов, или если информация в них будет
неполной, неразборчивой, противоречивой.
3. Гарантия не включает в себя периодическое обслу ивание, установку, настройку
изделия на дому у владельца, чистку аудио-видео головок.
4. Не подле ат гарантийному ремонту изделия с дефектами, возникшими
вследствие:
- механических повре дений;
- несоблюдении условий эксплуатации или ошибочных действий владельца;
- неправильной установки, транспортировки;
- стихийных бедствий (молния, по ар, наводнение и т. п.), а так е других причин,
находящихся вне контроля продавца и изготовителя;
- попадания внутрь изделия посторонних предметов, идкостей;
- ремонта или внесения конструктивных изменений неуполномоченными лицами;
- отклонений от Государственных Технических Стандартов питающих,
телекоммуникационных и кабельных сетей;
- при выходе из строя деталей, обладающих ограниченным сроком слу бы.
5. Настоящая гарантия не ущемляет законных прав потребителя, предоставленных
ему действующим законодательством.
РУСС ИЙ
13
1640.qxd 20.01.03 14:03 Page 8
All manuals and user guides at all-guides.com

5
Closing
13. Turn the lid so that the oil holes and the bit sticking up behind them
are towards the lid lock.
14. Put the lid on the bowl, and turn it clockwise to engage the tabs round
the edge of the lid into the groove in the top of the bowl. This should
align the back of the lid with the lid lock.
15. Press the lid lock forwards, to lock the lid, and engage the safety
interlock.
16. Unwind as much of the mains lead as you need from the cord storage
area under the chopper.
17. Plug the chopper into the power socket, then press the rear of the
On/off switch (I) to switch on.
18. It's pretty powerful, so it's best to hold the body of the chopper to pre
vent it moving across the work surface.
Processing
19. Press and hold CHOP, WHISK or GRIND. The light on the button will
come on and will stay on until you stop pressing.
20. It's not designed for continuous use. Use it in bursts and let it rest for
a minute after a few bursts. Most food won't need more than a few bursts.
21. Keep an eye on the contents of the bowl, to avoid overprocessing.
CHOP for chopping, pureeing and mixing.
GRIND to grind coffee beans, chocolate, nuts and hard cheese.
WHISK to emulsify, whip egg whites, make mayonnaise. You can drizzle
oil through one of the oil holes leave the other hole free to let air out.
Emptying
22. Press the front of the On/off switch (0) and unplug the chopper.
23. Press the lid lock button to release the lid lock.
24. Turn the lid anticlockwise to clear the tabs from the grooves in the top
of the bowl.
25. Lift the lid off.
26. Hold the upper plastic part of the blade unit or whisk, and lift it straight
3. Паста для тостов
Ингредиенты:
125 г. черных оливок
30 г. филе анчоусов
1,5 ч.л. каперсов
75 мл. оливкового масла
1 ч.л. бренди
Для измельчения используйте насадку с но ами.
Смешайте и измельчите в емкости все ингредиенты. Во время
процесса измельчения добавьте оливковое масло через
отверстия в крышке емкости. Рекомендуется использовать как
пасту к тостам.
4. Кислосладкий соус для птицы/рыбы
Ингредиенты:
2 очищенных луковицы
небольшая часть очищенного кориандра
1 долька чеснока
1 ч.л. соевого соуса
1 ч.л. винного уксуса
1 ч.л. горчицы
1 ч.л. томатной пасты
Для измельчения используйте насадку с но ами.
Смешайте и измельчите в емкости все ингредиенты.
Рекомендуется подавать соус к курице или рыбе.
ЧИСТ А
Рекомендуется чистить прибор сразу после эксплуатации.
Промойте все части в горячей воде с добавлением чистящего
средства. Все части минипроцессора не рекомендуется мыть в
посудомоечной машине. Протрите основу с мотором вла ной
тряпочкой, не помещайте ее в воду. Соберите минипроцессор и
поместите его в сухое место.
РУСС ИЙ
12
ENGLISH
1640.qxd 20.01.03 14:03 Page 10
All manuals and user guides at all-guides.com

НЕ ИСПОЛЬЗУЙТЕ ПРИБОР НЕПРЕРЫВНО БОЛЕЕ 10 СЕКУНД
НЕ ВКЛЮЧАЙТЕ ПУСТОЙ ПРИБОР
Рекомендации по использованию продуктов:
Перед процессом измельчения/помола разделите продукты на
небольшие части. Шоколад, орехи и сыр рекомендуется
перемалывать предварительно охла денными. При взбивании
яичных белков для безе, добавьте в чашу немного соли, помимо
сахара.
Рецепты:
1. Приправа для супа
Ингредиенты:
2 больших части све его кориандра
2 дольки све его чеснока
60 г. кедровых орехов
125 мл. оливкового масла
60 г. сыра “Пармезан”
Для измельчения используйте насадку с но ами. Смешайте и
измельчите в емкости все ингредиенты, кроме сыра. Во время
процесса измельчения добавьте оливковое масло через
отверстия в крышке емкости. Отдельно измельчите сыр.
Смешайте все ингредиенты вместе в отдельной чаше. Перед
подачей к столу, посыпьте черным перцем.
2. Острая приправа к мясным блюдам
Ингредиенты:
125 мл. сливок
1 яблоко
3 ч.л. хрена
1 ч.л. паприки
Для перемешивания используйте насадку для взбивания.
Взбейте в емкости сливки, затем постепенно добавьте все
ингредиенты. Перед подачей к столу, посыпьте черным перцем.
Используйте как приправу к говядине или сосискам.
РУСС ИЙ
11
6
up and out of the bowl take care with the blades, they're very sharp.
27. Turn the bowl anticlockwise to release the catches and then lift it off.
A few ugge tion
Cut your ingredients into small pieces before chopping/grinding Chocolate, nuts,
cheese will chop/grind better if thoroughly chilled first Egg whites will peak better
for meringue if you add a very, very small pinch of salt along with the sugar
Coriander pe to (blade unit)
2 large handfuls fresh coriander
2 cloves fresh garlic
60g (2 oz) pine nuts
125ml (4 fl oz) olive oil
60g (2 oz) freshly grated Parmesan
Put the coriander, garlic and pine nuts in the bowl, add a spoonful of oil and
process Repeat until it's all done, then put in a larger bowl and mix in the
Parmesan Season with freshly ground black pepper Serve as a topping for
soup, tossed through warm pasta, or as a dip
Hor eradi h and apple auce (whi k)
125ml (4 fl oz) double cream
1 sharp flavored apple, peeled and grated
3 tbsp horseradish relish
1 tsp paprika
Put the cream into the bowl and process until soft peaks have formed, then transV
fer it to a mixing bowl and fold in the rest of the ingredients Season with freshly
ground black pepper Serve with beef or sausages
Black olive and anchovy auce (blade unit)
125g (5 oz) pitted black olives 30g (1 oz) anchovy fillets, drained 1'/2 tbsp capers,
drained 75ml (3 fl oz) olive oil
1 tbsp brandy (optional)
Freshly ground black pepper
Put everything but the oil into the bowl
Add one tbsp oil and process for 5 seconds Do this twice more
If it's too dry, add a little more oil and process again Toss through warm pasta or
spread on toast
Sweet and our auce (blade unit)
2 shallots, peeled
Small piece fresh ginger, peeled
1 clove garlic
ENGLISH
1640.qxd 20.01.03 14:03 Page 12
All manuals and user guides at all-guides.com
all-guides.com

7
1 tbsp soy sauce
Dash white wine vinegar
1 tsp mustard
1 tsp tomato puree
Put everything in the bowl and process until smooth Serve with chicken or fish, or
as a dip
Care and maintenance
Unplug before dismantling and cleaning.
The blades are very sharp. Take care when you're handling and cleaning
the blade unit if you can't see what you're doing, don't do it. Wipe the
motor unit with a damp cloth. Don't put it in water or any other liquid.
Wash the removable parts in warm soapy water. Rinse to remove all
traces of soap and dry thoroughly before use.
Clean the inside of the blade unit and whisk with a thin bottlebrush.
We don't recommend using a dishwasher, as it may damage the surface
finishes. If you do, put the blade unit and whisk in the cutlery basket and
the rest of the removable parts on the top tray.
Don't use harsh or abrasive cleaning agents or solvents.
If the plug needs replacing
Connect the Blue wire (Neutral) to the terminal marked N. Connect the
Brown wire (Live) to the terminal marked L. Fasten the cord grip secure
ly. If in doubt consult an electrician.
If the plug supplied is nonrewireable (moulded)
Don't use the plug unless the fuse cover is in place. If you need to remove
the plug, cut it from the mains lead and dispose of it. To avoid electric
shock, don't reuse the plug or insert it into a socket.
SPECIFICATIONS
Power Requirement 230 V ~ 50 Hz 260 W
Capacity bowl 500 ml.
SERVICE LIFE OF THE MINI CHOPPER NOT LESS THAN 3 YEARS
10
ENGLISH
2. Поворотом по часовой стрелке, зафиксируйте чашу на
подставке.
3. Опустите насадку с но ами или насадку для взбивания вниз
до упора на штырь чаши.
4. Поместите продукты вовнутрь чаши.
5. Поворотом по часовой стрелке, зафиксируйте крышку на чаше
до щелчка.
6. Выровняйте выемку на крышке с блокировкой крышки,
находящейся на корпусе процессора. Опустите безопасную
блокировку крышки до щелчка.
Примечание: минипроцессор не работает, если крышка не
закрыта до щелчка или неправильно установлена чаша.
7. Включите сетевой шнур в розетку.
8. На мите кнопку “Вкл./Выкл.”
9. На мите одну из трех кнопок на передней панеле процессора,
при этом загорится индикатор на соответствующей кнопке.
CHOP кнопка предназначена для измельчения яблок, хлеба,
мяса, лука, рыбы, моркови и т.п.
GRIND кнопка предназначена для перемолки кофейных зерен,
орехов, шоколада и твердого сыра.
WHISK кнопка предназначена для приготовления соусов,
майонеза, взбивания яичных белков. Во время процесса
приготовления соусов Вы мо ете добавить в емкость
растительное масло через отверстия на крышке.
10. Пре де чем снять крышку с чаши, на мите кнопку
“Вкл./Выкл.” и подо дите, пока но и остановятся полностью.
11. Извлеките сетевой шнур из розетки.
12. На мите кнопку, блокирующую крышку на тыльной стороне
процессора.
13. Поворотом против часовой стрелки, снимите крышку с
емкости.
14. Удалите насадку с но ами или насадку для взбивания из
чаши, пре де чем извлечь ее содер имое.
15. Поворотом против часовой стрелки, снимите емкость с
основания чоппера.
РУСС ИЙ
1640.qxd 20.01.03 14:03 Page 14
All manuals and user guides at all-guides.com

МЕРЫ ПРЕДОСТОРОЖНОСТИ
При использовании электрических приборов необходимо
соблюдать следующие меры предосторо ности.
1. Прочитайте всю инструкцию перед использованием прибора.
2. Во избе ание пора ения электрическим током, не
погру айте корпус процессора в воду или другие идкости.
3. Отключайте прибор от сети, если он не используется, а так е
перед его сборкой, разборкой и чисткой.
4. Перед включением прибора убедитесь, что крышка
процессора наде но закреплена на своем месте.
5. Не эксплуатируйте прибор без крышки.
6. Разборку прибора мо но начинать после полной остановки
мотора.
7. Не используйте прибор с повре денным электрическим
проводом, штепселем или другой деталью. Неисправный
прибор отнесите в сервисную мастерскую для проверки и
ремонта.
8. Не используйте прибор вне дома.
9. Не оставляйте работающий прибор без наблюдения.
10. Используйте только те приспособления, которые
входят в комплект.
11. Будьте аккуратны при обращении с острыми но ами
процессора.
12. Не допускайте располо ения провода на углу стола, а
так е его контакта с горячей поверхностью.
ПРАВИЛА ИСПОЛЬЗОВАНИЯ
Данный минипроцессор предназначен для приготовления
фарша, пюре, измельчения орехов, моркови, лука,
приготовления детской смеси и т.п.
Перед эксплуатацией прибора, удалите весь упаковочный
материал, вымойте в мыльной воде и тщательно протрите чашу,
крышку, лезвия но а. Аксессуары мо но мыть в посудомоечной
машине.
1. Поместите процессор на устойчивую сухую поверхность.
РУСС ИЙ
9
РУСС ИЙ
8
НАИМЕНОВАНИЕ ЭЛЕМЕНТОВ МИНИПРОЦЕССОРА
1640.qxd 20.01.03 14:03 Page 16
All manuals and user guides at all-guides.com
Table of contents
Other Vitek Food Processor manuals

Vitek
Vitek VT-1606 User manual

Vitek
Vitek VT-1604 User manual

Vitek
Vitek VT-1606 User manual

Vitek
Vitek VT-4115 User manual

Vitek
Vitek VT-1607 User manual

Vitek
Vitek VT-1608 User manual

Vitek
Vitek VT-7134 ST User manual

Vitek
Vitek Silky Red Series User manual

Vitek
Vitek VT-1617 User manual

Vitek
Vitek VT-1639 User manual

Vitek
Vitek VT-1436 User manual

Vitek
Vitek VT-1437 Simple manual

Vitek
Vitek VT-1640 User manual

Vitek
Vitek VT-7136 User manual

Vitek
Vitek VT-1608 User manual

Vitek
Vitek VT-1643 User manual

Vitek
Vitek VT-1603 User manual

Vitek
Vitek VT-7131 User manual

Vitek
Vitek VT-1602 User manual

Vitek
Vitek VT-1637 User manual