manuals.online logo
Brands
  1. Home
  2. •
  3. Brands
  4. •
  5. X10
  6. •
  7. Security System
  8. •
  9. X10 SC1200-G Operator's manual

X10 SC1200-G Operator's manual

SECURITY
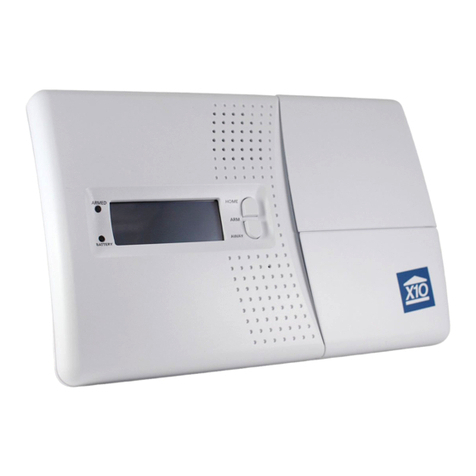
SC1200-G Security Console
Quick Start Guide
For additional help with troubleshooting or installation refer to the
Owner’s Manual for the SC1200-G. You can also visit
www.x10.com/support
Connecting the SC1200
Open the center lid on the Console. Attach the power supply’s
cord to the connector labeled power supply. Plug the power supply
into any AC outlet. (Use only the included power supply).
1
Attach the phone cord (supplied) to the connector labeled phone.
Plug the other end into an unused phone jack for landline use.
2
Install 4 AA alkaline batteries (not supplied) in the Console’s
battery compartment.
Install SIM Card into the open slot for GSM Cellular Operation.
3
4
Close the battery cover. If you open the cover again after applying
power, TAMPER appears in the display. Enter the PIN (0000) to
remove TAMPER from the display. The display then shows HOME
CONTROL in the top line and the time of day below it.
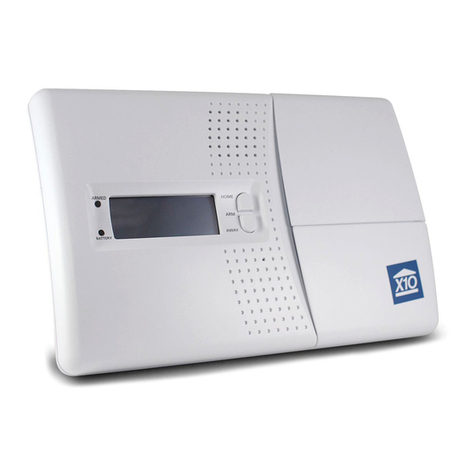
The X10 SC12A Supervised Security Console with automatic dialer
calls friends or relatives in the event of a break in, and plays a mes-
sage (in your voice). Your friend or neighbor can listen in to your
home through the Console’s microphone, and call the police if
there’s a problem. Accessories include battery powered Radio Fre-
quency (RF) Door/Window Sensors, battery powered RF Motion De-
tectors, and RF Keyfob Remote Controls for arming and disarming
the system.
Arming and Disarming the System
Arming the System
Press ARM HOME on the Console to arm ALL Door/Window Sen-
sors instantly. Motion Detectors will not trip the system when it is
armed in the ARM HOME mode.
Press ARM AWAY on the Console to arm all Door/Window Sensors
and Motion Detectors. This arms the system after a set delay. The
delay will be what you specifi ed as the EXIT DELAY - one minute
default (see owner’s manual). If you arm the system in the AWAY
mode you will also have an entry delay when you enter your home
before the alarm trips (from Door/Window Sensors set to MAX,
and from Motion Detectors), to give you time to disarm it. This
delay will be what you specifi ed for your ENTRY DELAY - 30
second default (see owner’s manual for more details).
Pressing ARM on the Keyfob remote always arms in the AWAY
mode, (instantly). ALL Door/Window Sensors and Motion Detec-
tors trip instantly when armed from the Keyfob.
Disarming the System
Pressing DISARM on the Keyfob remote disarms the system in-
stantly. The zone that was violated is shown in the Console’s dis-
play. To remove this press Arm and Disarm again.
To disarm from the Console: Enter your 4 digit PIN.
This will be 0000 unless you changed it (see owner’s manual).
27
Preparing Devices
Initializing Keyfob Remotes
Press and hold the ARM button on the Keyfob remote for 3-4
seconds and then release it. This initializes the remote and picks
a random code that is used when it is registered with the Console.
Pry the two halves of the Door/Window Sensor apart and install 2
AAA alkaline batteries inside. Observe polarity. Note some Sensors
use two AA batteries - follow the instructions that came with the
Sensors.
Set the switch inside to MAX (left) for doors, or MIN (right) for win-
dows.
Press and hold the button inside the Door/Window Sensor for 3-4
seconds and then release it. This initializes the Sensor and picks
a random code that is used when it is registered with the Console.
Replace the cover and place the magnet next to the Sensor (with
the arrows aligned).
Initializing Door/Window Sensors
Initializing Motion Detectors
Remove the cover on the front of the Motion Detector and install 2
AA alkaline batteries in the battery compartment. Replace the
cover (some types of unit have a tamper switch).
Press and hold the TEST button on the back of the Motion Detec-Press and hold the TEST button on the back of the Motion Detec-
tor for 3-4 seconds and then release it. This initializes the Motion
Detector and picks a random code that is used when it is regis-
tered with the Console. Place the unit face down, so that it won’t
see any motion during the registering process.
1
Set the DELAY slide switch (inside the Sensor) to MIN (for
windows) to always trigger the alarm instantly, or to MAX (for
doors) to trigger the alarm after a preset entry delay when the
system is armed in the AWAY mode.
2
Attach the Door/Window Sensor to the wall using the mounting
screws provided (replace the cover).
3
Fit the Door/Window Sensor as high as possible at the top of the
door/window.
Make sure the arrows on the magnet and the Door/Window
Sensor are facing each other and that they separate cleanly when
the door or window is opened.
To protect two doors or windows close to each other, use the
Door/Window Sensor with an additional set of magnetic switch
contacts (see owner’s manual for details).
4
5
Installing Door/Window Sensors
Installing Motion Detectors
Installing the Sensors
1
Set the slide switch (on the back) to position 1 for instant trigger-
ing for maximum sensitivity, or position 2 to trigger only after two
movements have been sensed.
2
Attach the Motion Detector to a wall
at a height of 5 to 6 ft., using the
mounting bracket and screws
provided.
3
Point the Motion Detector so
that it looks slightly downwards.
63
Preparing Devices
Initializing Keyfob Remotes
Press and hold the ARM button on the Keyfob remote for 3-4
seconds and then release it. This initializes the remote and picks
a random code that is used when it is registered with the Console.
Pry the two halves of the Door/Window Sensor apart and install 2
AAA alkaline batteries inside. Observe polarity. Note some Sensors
use two AA batteries - follow the instructions that came with the
Sensors.
Set the switch inside to MAX (left) for doors, or MIN (right) for win-
dows.
Press and hold the button inside the Door/Window Sensor for 3-4
seconds and then release it. This initializes the Sensor and picks
a random code that is used when it is registered with the Console.
Replace the cover and place the magnet next to the Sensor (with
the arrows aligned).
Initializing Door/Window Sensors
Initializing Motion Detectors
Remove the cover on the front of the Motion Detector and install 2
AA alkaline batteries in the battery compartment. Replace the
cover (some types of unit have a tamper switch).
Press and hold the TEST button on the back of the Motion Detec-Press and hold the TEST button on the back of the Motion Detec-
tor for 3-4 seconds and then release it. This initializes the Motion
Detector and picks a random code that is used when it is regis-
tered with the Console. Place the unit face down, so that it won’t
see any motion during the registering process.
1
Set the DELAY slide switch (inside the Sensor) to MIN (for
windows) to always trigger the alarm instantly, or to MAX (for
doors) to trigger the alarm after a preset entry delay when the
system is armed in the AWAY mode.
2
Attach the Door/Window Sensor to the wall using the mounting
screws provided (replace the cover).
3
Fit the Door/Window Sensor as high as possible at the top of the
door/window.
Make sure the arrows on the magnet and the Door/Window
Sensor are facing each other and that they separate cleanly when
the door or window is opened.
To protect two doors or windows close to each other, use the
Door/Window Sensor with an additional set of magnetic switch
contacts (see owner’s manual for details).
4
5
Installing Door/Window Sensors
Installing Motion Detectors
Installing the Sensors
1
Set the slide switch (on the back) to position 1 for instant trigger-
ing for maximum sensitivity, or position 2 to trigger only after two
movements have been sensed.
2
Attach the Motion Detector to a wall
at a height of 5 to 6 ft., using the
mounting bracket and screws
provided.
3
Point the Motion Detector so
that it looks slightly downwards.
45

Other manuals for SC1200-G

1

Other X10 Security System manuals

X10 UX21A User manual

X10

X10 UX21A User manual

X10 PROTECTOR+ User manual

X10

X10 PROTECTOR+ User manual

X10 DS18 User manual

X10

X10 DS18 User manual

X10 PK9000 Installation manual

X10

X10 PK9000 Installation manual

X10 SC1200 User manual

X10

X10 SC1200 User manual

X10 IN39A Manual

X10

X10 IN39A Manual

X10 SC1200-G User manual

X10

X10 SC1200-G User manual

X10 VANGUARD VK77A User manual

X10

X10 VANGUARD VK77A User manual

X10 DC8700 User manual

X10

X10 DC8700 User manual

X10 Ninja VK74A User manual

X10

X10 Ninja VK74A User manual

X10 PA5800 User manual

X10

X10 PA5800 User manual

X10 SC12A User manual

X10

X10 SC12A User manual

X10 Ninja VK75A User manual

X10

X10 Ninja VK75A User manual

X10 Powerhouse DS7000 User manual

X10

X10 Powerhouse DS7000 User manual

X10 IN62A Manual

X10

X10 IN62A Manual

X10 ActiveEYE MS15A Installation manual

X10

X10 ActiveEYE MS15A Installation manual

X10 Monitor Plus DC8700P User manual

X10

X10 Monitor Plus DC8700P User manual

X10 UX23A User manual

X10

X10 UX23A User manual

X10 IN46A Manual

X10

X10 IN46A Manual

X10 VT38A User manual

X10

X10 VT38A User manual

X10 IN42A Manual

X10

X10 IN42A Manual

X10 MS12A Installation manual

X10

X10 MS12A Installation manual

X10 Orca2000 User manual

X10

X10 Orca2000 User manual

X10 POWERHORN SH10A User manual

X10

X10 POWERHORN SH10A User manual

Popular Security System manuals by other brands

MySpy WiFi Messenger Alarm quick start

MySpy

MySpy WiFi Messenger Alarm quick start

Bentel Security LADY-PI manual

Bentel Security

Bentel Security LADY-PI manual

WOOX R7052 quick start guide

WOOX

WOOX R7052 quick start guide

Swissvoice AW100 manual

Swissvoice

Swissvoice AW100 manual

MiTEC MAC-608 user manual

MiTEC

MiTEC MAC-608 user manual

AT&T XG1000 installation manual

AT&T

AT&T XG1000 installation manual

Voxx Electronics Prestige APSSEC Quick installation guide

Voxx Electronics

Voxx Electronics Prestige APSSEC Quick installation guide

Abibird Abibird user guide

Abibird

Abibird Abibird user guide

M-system AS4CT instruction manual

M-system

M-system AS4CT instruction manual

CellSecure E12 CLEO user manual

CellSecure

CellSecure E12 CLEO user manual

Giant Alarm System JJ-MB-02-2 user manual

Giant Alarm System

Giant Alarm System JJ-MB-02-2 user manual

Novar ED&S KarizmaPlus operating instructions

Novar ED&S

Novar ED&S KarizmaPlus operating instructions

ACA ALLERTOR 125 Installation, operation, maintenance and parts manual

ACA

ACA ALLERTOR 125 Installation, operation, maintenance and parts manual

Morrison Bros. co. 918SB Series Installation, operation and maintenance instructions

Morrison Bros. co.

Morrison Bros. co. 918SB Series Installation, operation and maintenance instructions

Nortek 2GIG GC2 Installation and programming guide

Nortek

Nortek 2GIG GC2 Installation and programming guide

Bosch SE 320 LSNi installation manual

Bosch

Bosch SE 320 LSNi installation manual

Intellinet NSC15 user manual

Intellinet

Intellinet NSC15 user manual

WOOX R7073 Setup manual

WOOX

WOOX R7073 Setup manual

manuals.online logo
manuals.online logoBrands
  • About & Mission
  • Contact us
  • Privacy Policy
  • Terms and Conditions

Copyright 2025 Manuals.Online. All Rights Reserved.