Yealink Telkom W52P User manual

ManIT Technology
Hosted Cordless VoIP Handset
User Guide
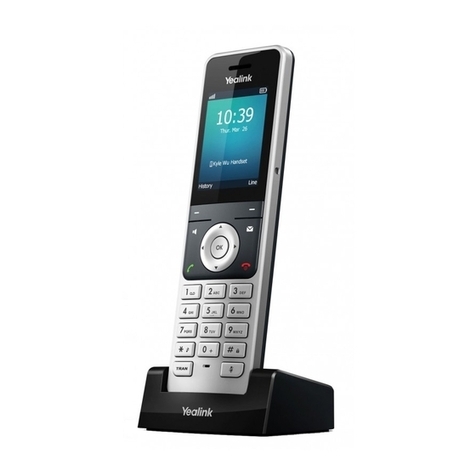
Yealink w52p DECT

Hosted Cordless VoIP Handset User Guide –Yealink w52p
2
Understanding your phone and buttons
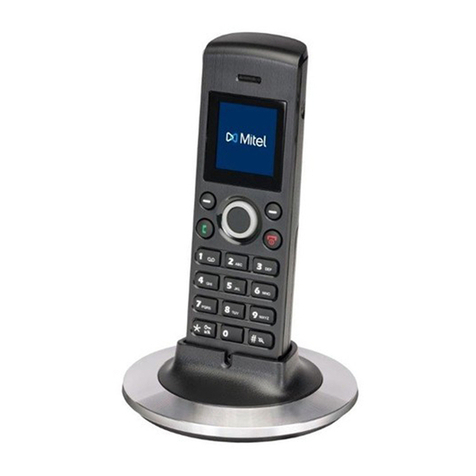
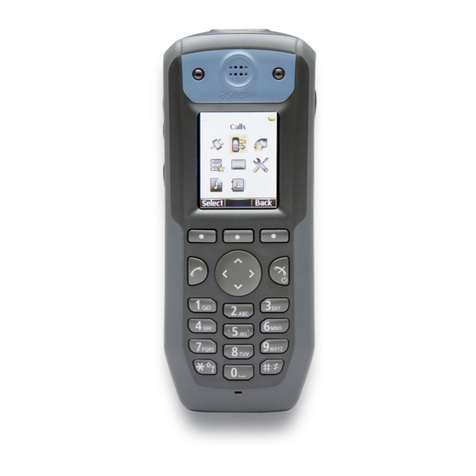
Yealink w52p DECT phone in charger pictured

Hosted Cordless VoIP Handset User Guide –Yealink w52p
3
#
Phone Feature
Description
1
Earpiece
Provides sound during call
2
LCD Screen
Displays call information, handset status icons and, prompt
messages
3
Softkey buttons
Press a softkey button to perform the action shown on the
label above it. The function of each button will change
depending on the phone’s current operation.
4
Speakerphone
button
Switches between the earpiece and speakerphone modes,
also used to answer an incoming call
5
Headset
Connector
Connects to an optional headset
6
Off-hook button
Answers an incoming call, enters the redial call list and
places a call
7
Keypad
Provides digits, letters and special characters in context-
sensitive applications
8
Star button
Enters the star symbol and toggles silent mode on and off
9
Redirect button
Transfers a call to another extension
10
Microphone
Picks up outgoing sound during earpiece and hands-free
calls
11
Mute button
Toggles the mute feature on and off
12
Pound button
Enters the pound symbol, locks or unlocks the handset
keypad and switches the input method
13
On-hook/Power
button
Long presses in the menu screen to return to the idle
screen.
Long press to turn the handset on or off when the phone is
idle.
Cancels actions, ends calls and rejects incoming calls
14
Message button
Warns about new voicemail messages and takes you to
your voicemail or missed call list
15
Navigation
Buttons
Press an arrow to scroll in a direction through items
displayed on the screen.
Left and Right buttons used to adjust the ringer volume
OK button confirms actions or enters the main menu

Hosted Cordless VoIP Handset User Guide –Yealink w52p
4
Understanding the LCD Screen
The LCD screen is split into three parts; The Status, Text and Soft Key Lines
The table below shows what to expect on each given line of the LCD screen
Status Line
On hook:
Signal strength, internal handset number
and battery status
Off hook:
The line ID
Text Line
On hook:
Handset name, time and date, caller
information while ringing
Off hook:
The dialled digits
Soft Key Line
On hook:
The History and Line soft keys
Off hook:
Various functions according to current
operation

Hosted Cordless VoIP Handset User Guide –Yealink w52p
5
Icons appearing on the LCD screen are described in the table below
Anonymous Call
Call Hold
Anonymous Call Rejection
Call Mute
Missed Call
Unassigned Outgoing Line
Voicemail
Unusable Line
Keypad Lock
Loudspeaker On
Silent Mode
Headset Mode On
Do Not Disturb
Normal Call
Call Forward
Conference Call
Call functions and general use
Adjusting Volume:
The default volume set in the phone may not be appropriate, to change do
the following:
Ringer: while phone is inactive, press the Left and Right navigation
buttons to the desired volume, press the save soft key to set the
volume.
In call volume: While a call is active, press the Left and Right
navigation buttons to the desired volume, this will save automatically
when this function times out after a few seconds.

Hosted Cordless VoIP Handset User Guide –Yealink w52p
6
Answering a Call:
To answer a call, when phone is ringing;
Press the Off-hook or Accept soft key button and listen to the
earpiece, or
Press the Speaker button and listen via the phone’s loudspeaker, or
With the (optional) headset attached, press the Accept soft key
button to communicate through the headset
Answering When on Another Call:
To answer an inbound call while already on another call, press the Off-
hook, Speaker or Accept soft key buttons. The original call will be placed
on hold.
Ending a Call:
Press the On-hook button
Initiating a Call:
To initiate a call enter the digits you wish to dial using the keypad, when
finished do one of the following to dial:
Press the Off-hook or Accept soft key button and listen to the
earpiece, or
Press the Speaker button and listen via the phone’s loudspeaker, or
With the (optional) headset attached, press the Accept soft key
button to communicate through the headset

Hosted Cordless VoIP Handset User Guide –Yealink w52p
7
Redial:
Dial a previously dialled number
1. Press the Off-hook button to display the Redial List
2. Use the Up and Down navigation buttons to select the number you
wish to dial
3. Once selected press either the Off-hook button or Speaker button to
initiate a call.
Call History:
To view the call history of the handset:
1. When the phone is idle, press the History soft key
2. Using the Up and Down navigation buttons scroll through the Call
History menu
3. Select the category of call history by pressing the OK button or OK
soft key
4. Use the On-hook button to move backwards in the Call History menu
Using Hold and Resume:
You can place an active call on hold at any time, there is a limit of 1 active
call being placed on hold at any given time
1. Press the Options soft key during a call
2. Using the Up and Down navigation buttons, select Hold and press the
OK button.
To resume a call that is on hold, do one of the following:
Press the Resume soft key
Press the Speaker button
Press the Off-hook button

Hosted Cordless VoIP Handset User Guide –Yealink w52p
8
Mute a call:
When mute is enabled you can hear the other party but they cannot hear
you.
To mute a call press the Mute button, the Call Mute icon will appear
on the screen
To unmute press the Mute button, the Call Mute icon disappears from
the screen
Call Forward:
Call Forwarding will divert all incoming numbers to another number.
1. Press the OK button to enter the main menu
2. Use the Up and Down navigation buttons to select Call Forward and
press the OK button or OK soft key
3. Use the Up and Down navigation buttons to select the desired line and
press the OK button or OK soft key
4. Use the Up and Down navigation buttons to select the desired
forwarding type
Always Forward –Incoming calls are immediately forwarded
Busy Forward –Incoming calls are immediately forwarded if the
line is busy
No Answer Forward –Incoming calls are forwarded if not
answered after a period of time
Press the Left or Right navigation buttons to select Enabled from the
Status field
5. Enter the destination number you want to forward incoming calls to in
the Target field
a. Press the Left or Right navigation buttons to select the desired ring
time before forwarding (if No Answer Forward is selected)
6. Press the Save soft key to accept the change
7. The Call Forward icon will now be displayed on the idle screen

Hosted Cordless VoIP Handset User Guide –Yealink w52p
9
Transfer a call:
There are 3 transfer methods:
Blind Transfer –Transfer a call directly to another party without
consulting
Semi-Attended Transfer –Transfer a call when receiving the ring-back
Attended Transfer –Transfering a call with prior consulting
Blind Transfer
1. Press the Options soft key during a call, and select Blind Transfer
2. Do one of the following:
Enter the destination number you want to transfer the call to and
press the Redirect or OK button, or
Press the Directory softkey, select the desired contact and press
the Call soft key
Semi-Attended Transfer
1. Press the Options soft key during a call, and select Transfer
2. Do one of the following:
Enter the destination number you want to transfer the call to and
press the OK button or Transfer soft key to dial out
Press the Directory soft key, and select the desired contact, then
press the Call soft key
3. Press the Redirect button or the Transfer soft key to complete the
transfer when receiving the ring-back

Hosted Cordless VoIP Handset User Guide –Yealink w52p
10
Attended Transfer
4. Press the Options soft key during a call, and select Transfer
5. Do one of the following:
Enter the destination number you want to transfer the call to and
press the OK button or Transfer soft key to dial out
Press the Directory soft key, and select the desired contact, then
press the Call soft key
6. You are now connected with the other party, if they wish to receive
the call, press the Redirect button or the Transfer soft key to complete
the transfer.
Do Not Disturb:
Do Not Disturb puts the phone in a constant “busy” state, this will redirect
all incoming calls to voicemail
1. To active Do Not Disturb, press the OK button to enter the main menu.
2. Using the Up and Down navigation buttons, select Do Not Disturb and
press the OK button.
3. Using the Up and Down navigation buttons to select the desired line
and press the OK button.
4. Press the Left or Right navigation buttons to select Enabled from the
Status field
5. Press the OK soft key to accept the change.

Hosted Cordless VoIP Handset User Guide –Yealink w52p
11
Speed Dial:
A speed dial is a pre-programmed phone number (or extension) associated
with a single digit on the keypad. Assigned speed dials can be from 2-9.
Assigning Speed Dial destinations
1. Press the OK button to enter the main menu
2. Using the Up and Down navigation buttons to select Telephony, press
the OK button
3. Using the Up and Down navigation buttons to select Speed Dial, press
the OK button
4. Using the Up and Down navigation buttons to select the desired speed
dial key and press the Assign soft key
5. Press the OK button to select the Directory where the contact is stored
6. Using the Up and Down navigation buttons to select the desired
contact, press the OK soft key
Dialling a Speed Dial destination
1. Press the speed dial key (digit on the keypad) for several seconds
when the handset is idle. The number assigned to this speed dial key
is then dialled.

Hosted Cordless VoIP Handset User Guide –Yealink w52p
12
Voicemail Operations
Voicemail, also known as a message bank are voice messages left by a
caller when a phone is busy or not answered
Create Voicemail Greeting
The Voicemail Greeting is the recording a caller will hear if they reach the
Voicemail mailbox. To create a personalised greeting:
1. Press the Message button
2. When prompted, enter your voicemail password
Default password: 0000#
3. Press 5 to enter “Advanced Options” menu
4. Press 1 to enter “Record a Greeting” menu
5. Select a number for this greeting between 1 and 9 on the keypad
6. Record your message then press any key to end the recording.
a) Press 1 to listen to the greeting
b) Press 2 to save the greeting, this will return you to the “Advanced
Options menu”
c) If you’re not happy with the recording, press 3 to re-record the
greeting
7. To select the recorded greeting as your Voicemail greeting, while in
the “Advanced Options” menu, press 2 then enter the greeting
number to be used using the keypad. (press 0 to use the default
extension greeting)
8. Hang up

Hosted Cordless VoIP Handset User Guide –Yealink w52p
13
Leave a Voicemail Message
If a destination is busy or unavailable you may be redirected to voicemail
1. When prompted, record your voicemail message then press any key
to end the recording (or hang up)
2. If a key is pressed to end the recording, you have these options:
a) Press 1 to listen to the voicemail message
b) Press 2 to save the voicemail message
c) Press 3 to re-record the voicemail message
Retrieve Voicemail Messages
Voicemail messages are available either through the handset or if enabled,
via email. Voicemail messages older than 2 weeks will be removed from
your phone automatically, this has no effect on the voicemail messages in
your email.
Accessing via the handset:
1. Press the Message button
2. If prompted, enter your voicemail password
Default password: 0000#
3. You have the following options in the Voicemail menu
a) Press 1 to listen to new messages
b) Press 2 to listen to saved messages
4. After listening to the message, perform one of the following actions
a) Press 1 to listen again
b) Press 2 to save
c) Press 3 to return call
d) Press 7 to delete

Hosted Cordless VoIP Handset User Guide –Yealink w52p
14
Conference Calls
Conference calls, also known as a party line allow multiple people to speak
to each other at the same time.
Establish a 3 party conference call using your phone
1. Dial the first party
2. After the other party has picked up, press the Options soft key, using
the Up and Down navigation keys, select Conference and press the OK
button
3. Do one of the following:
Enter the number of the second party and press the OK button or
the Conf soft key, or
Press the Directory soft key and using the Up and Down navigation
buttons select the desired contact and press the Call soft key
4. When the second party answers the call, you can consult with them
before adding to the conference. Press the Conf soft key to join all
parties

Hosted Cordless VoIP Handset User Guide –Yealink w52p
15
NOTES:

Hosted Cordless VoIP Handset User Guide –Yealink w52p
16
Other manuals for Telkom W52P
60
Table of contents
Other Yealink Handset manuals

Yealink
Yealink IPW56 User manual

Yealink
Yealink T55A-Skype for Business Edition User manual

Yealink
Yealink W56H Instruction manual

Yealink
Yealink W56H User manual

Yealink
Yealink Embrace W60B User manual

Yealink
Yealink T46 User manual

Yealink
Yealink W56H Instruction manual

Yealink
Yealink W56H Instruction manual

Yealink
Yealink MP56 User manual

Yealink
Yealink T41 User manual
Yealink
Yealink T21P User manual

Yealink
Yealink W56H User manual

Yealink
Yealink W56H User manual

Yealink
Yealink W59R User manual

Yealink
Yealink T19 User manual

Yealink
Yealink T54 User manual

Yealink
Yealink T42 User manual

Yealink
Yealink IP29G User manual

Yealink
Yealink W56H User manual

Yealink
Yealink W52 User manual