Installation and Technical Information
BEGA
In the interest of product improvement, BEGA reserves the right to make technical changes without notice.
Replacement Parts
Accessories
Please refer to the appropriate
accessory installation sheet for
further instruction when applicable.
BEGA 1000 Bega Way, Carpinteria, CA 93013 (805)684-0533 Fax (805)566-9474 www.bega-us.com © Copyright BEGA-US 2018 77 607
3/27/2018
Page 1 of 2
Figure 1
Figure 2
Small scale oodlight with mounting canopy 77 607
Tools Required:
3mm hex key
Flat head screw driver medium
Phillips head screw driver medium
Protection Class: IP65
Weight: 2.0 lbs.
Dimensions
A: 4-1/8 ”
B: 5-7/8 ”
C: 4-3/8 ”
D: 3-1/2 ”
Relamping/Maintenance
Remove trim and lens by loosening screws. Clean
luminaire and lens using only solvent-free cleansers.
Replace trim and lens. Tighten screws.
Lamp: 7.9W LED 24V DC Module
Description
Lens
Lens gasket
LED Driver
LED Module (3000K)
LED Module (4000K)
Part No
140850
831652
76014
LED-0733/830
LED-0733/840
Notice to Installer for 77 607:
1. See page 2 for specic product safety warnings.
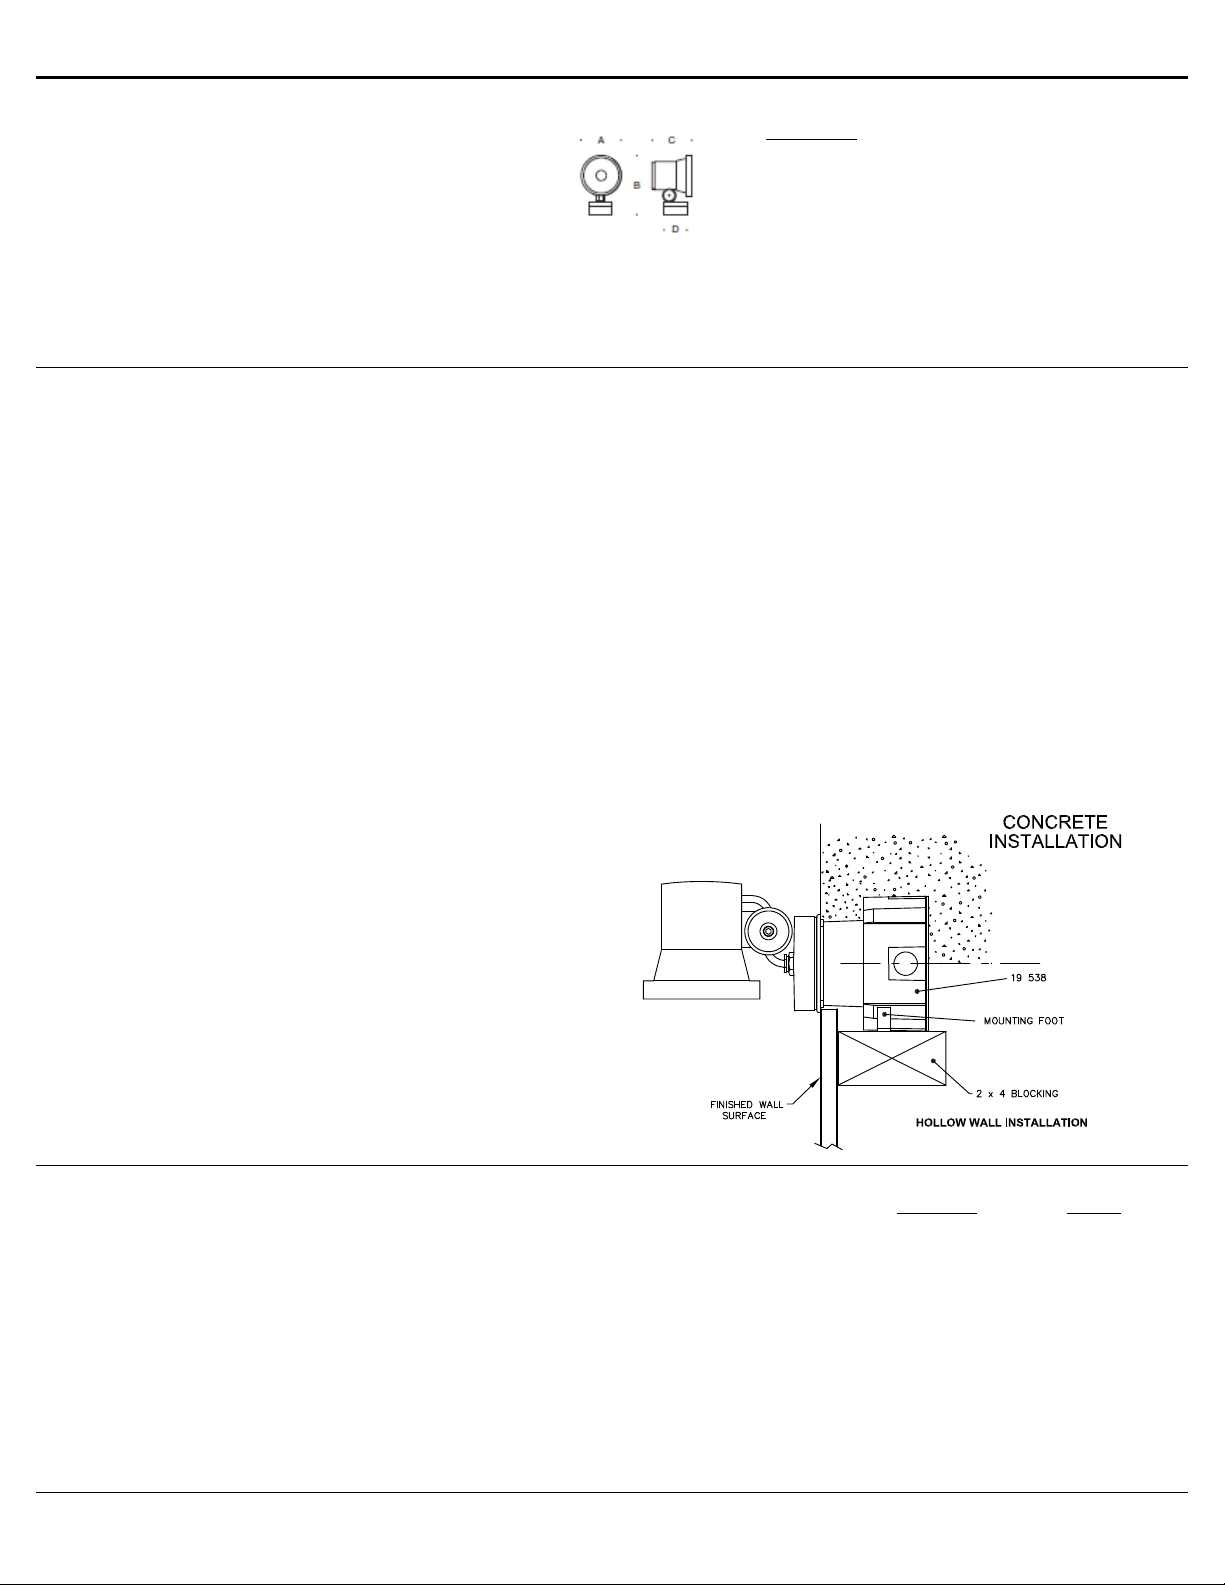
2. Mounts directly to 19 538 small opening wiring box (provided). IMPORTANT: DO
NOT MAKE WALL CUTOUT FOR STANDARD WIRING BOX. OPENING MUST
BE MADE FOR BEGA 19 538 WIRING BOX OR CUTOUT WILL BE VISIBLE.
3. In conformance with UL Standard 1598, a silicone based sealant must be used
between luminaire and supporting wall.
4. See installation sheet 99068, supplied, for detailed instructions on 19 538 small
wiring box installation.
5. Requires a 24V DC class 2 electronic power supply to operate intended LED
wattage.
6. LEDs are high-quality electronic components! Please avoid touching the light
output opening of the LED directly during installation
77 607 - installation:
1. Remove luminaire mounting plate by loosening 3mm set screw on rear canopy
of xture.
2. Feed luminaire wires through back of luminaire mounting plate.
3. Make 24 VDC supply wiring and luminaire wiring connections in small opening
wiring box:
NEGATIVE SUPPLY WIRE TO BLACK LUMINAIRE WIRE
POSITIVE SUPPLY WIRE TO RED LUMINAIRE WIRE
4. Attach mounting strap to wiring box using (2) 3/8” screws.
5. Attach mounting plate to mounting strap and wiring box by using (2) 8-32 x 1”
mounting screws.
6. Place a small bead of silicone around the back side of the luminaire base that
will come in contact with the nished surface.
7. Mount luminaire to mounting plate. Tighten 3mm set screw to secure.
Small opening wiring box 19 538
Floodlight shield 70 755
Flatbeam lens 70 050
Remote 25W LED driver/box 19 580
Remote 50W LED driver/box 19 591


