BEGA Gantenbrink-Leuchten KG · Postfach 31 60 · 58689 Menden · info@bega.com · www.bega.com
23.17 · Modicaciones técnicas reservadas · Con riserva di modiche tecniche · Technische wijzigingen voorbehouden
!
Pieza de empotrar en el suelo
Collegamento a terra
Grondstuk
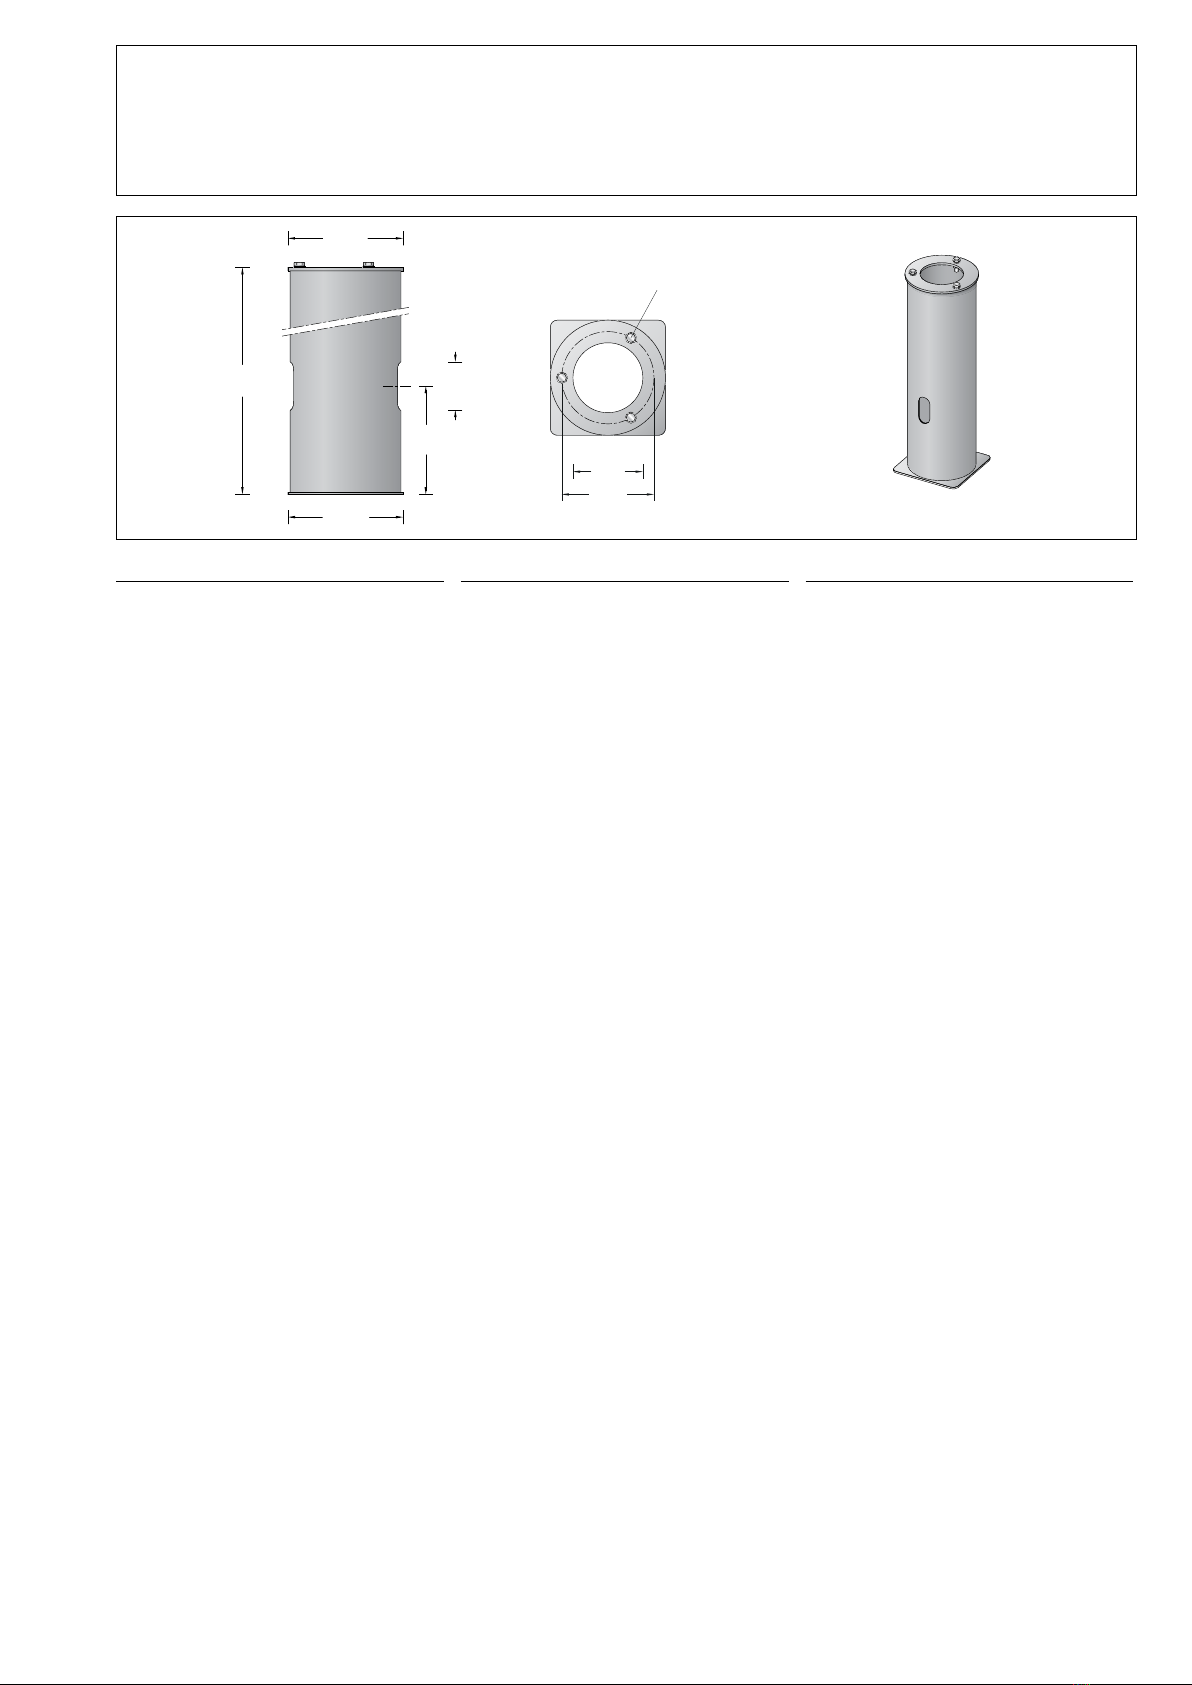
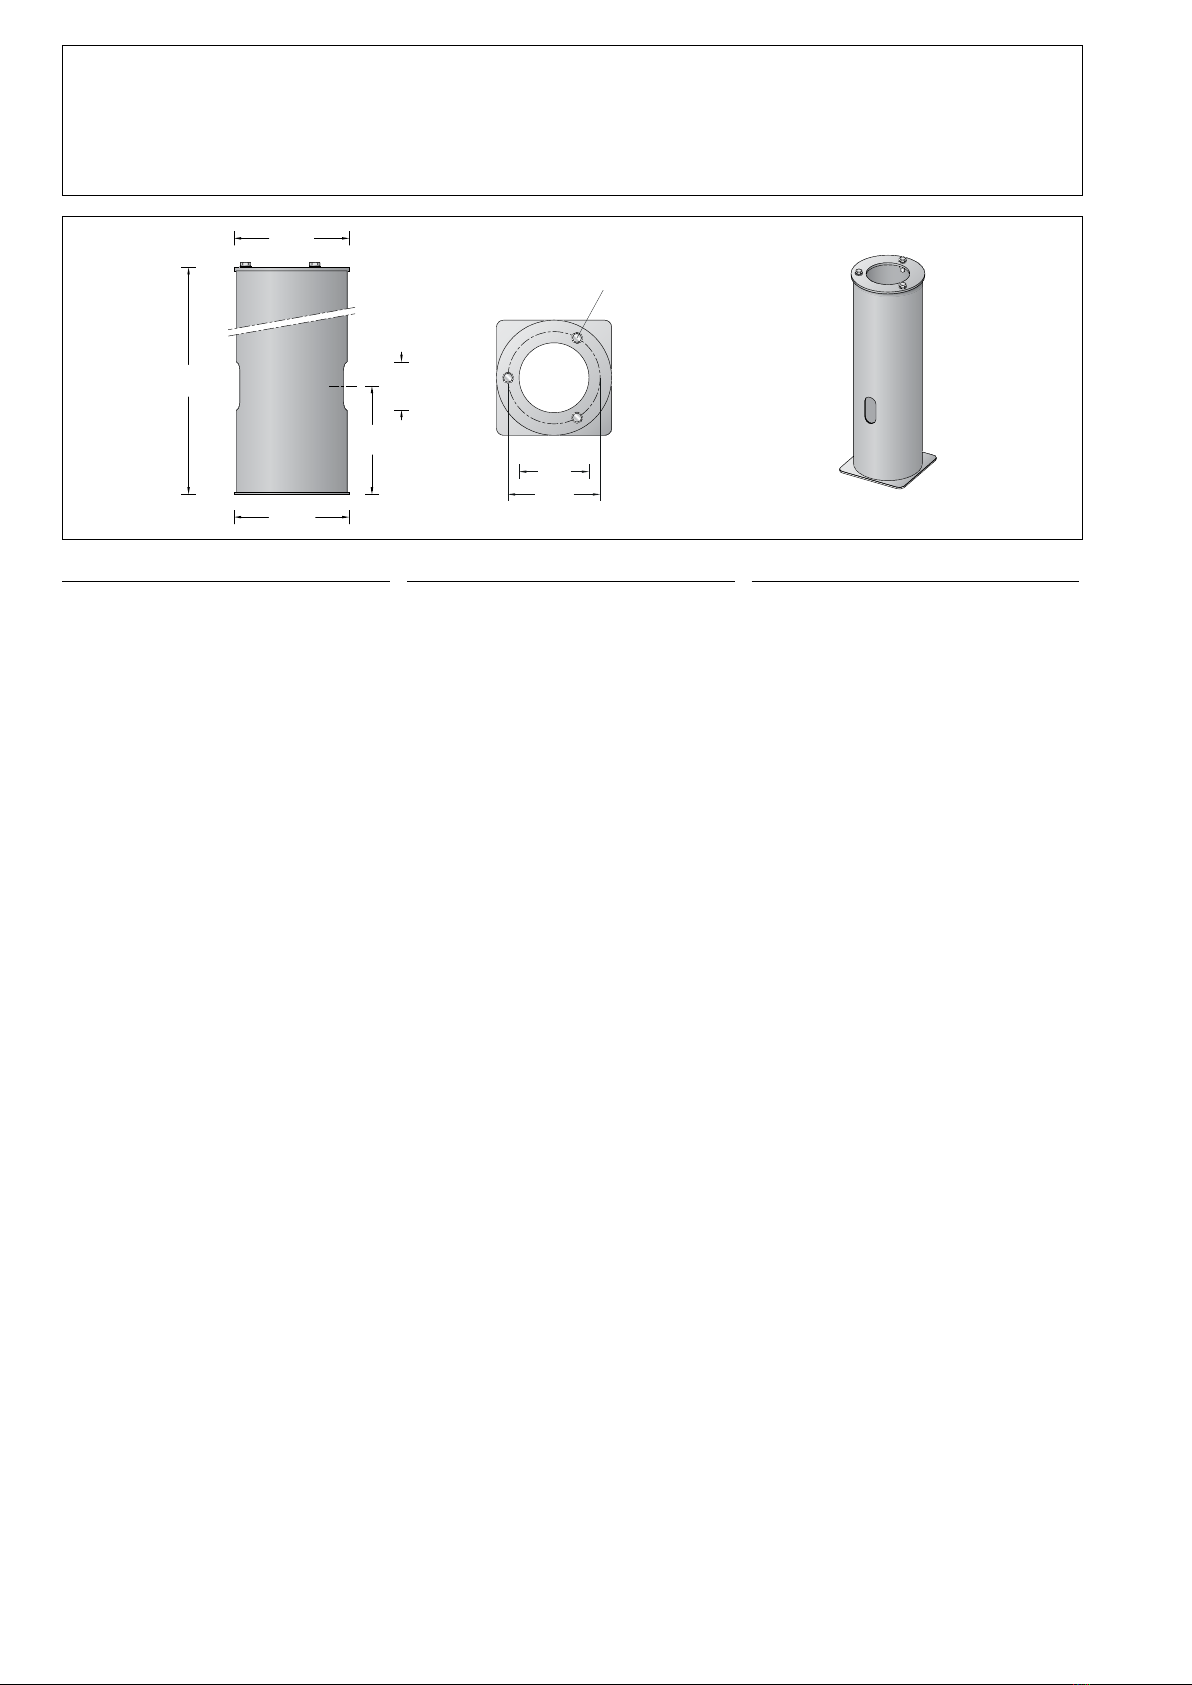
70 896
Ø 132
Ø 100
M8 · 3 x 120°
70 x 3070 x 30
155155
Ø 165Ø 165
500500
91659165
Instrucciones de uso Istruzioni per l’uso Gebruiksaanwijzing
Aplicación
Pieza de empotrar en el suelo para la jación
de luminarias y postes lumínicos con placa
base en el suelo.
Applicazione
Collegamento a terra per il ssaggio di
apparecchi e pali con piastra di base nel
terreno.
Toepassing
Grondstuk voor het bevestigen van de
armaturen en lichtmasten met voetplaat in de
grond.
Descripción del producto
Pieza de empotrar en el suelo de acero
galvanizado según EN ISO 1461
3 piezas roscadas con tornillos de jación
M8 x 25 de acero inoxidable
Grado de acero: 1.4301
Diámetro primitivo 132mm
Entrada lateral para cables 70 x 30 mm
Peso: 4,5 kg
Descrizione del prodotto
Il collegamento a terra è realizzato in acciaio
zincato a fuoco conformemente alla norma EN
ISO 1461
3 inserti lettati con viti di
ssaggio M8 x 25 in acciaio inox
Materiale n.: 1.4301
Diametro del cerchio 132mm
Ingresso cavi laterale 70 x 30 mm
Peso: 4,5 kg
Productbeschrijving
Het grondstuk is van staal,
vuurverzinkt volgens EN ISO 1461
3 draadstukken met bevestigings-
schroeven M8 x 25 van edelstaal
Materiaalnr.: 1.4301
Cirkeldiameter 132 mm
Zijdelingse kabelinvoer 70 x 30 mm
Gewicht: 4,5 kg
Seguridad
El fabricante no asume ninguna
responsabilidad en caso de daños causados
por el uso o el montaje inadecuados.
En caso de realizar modicaciones posteriores
en el accesorio, la persona que realiza dichas
modicaciones será considerada como
fabricante.
Sicurezza
Il produttore non si assume la responsabilità
per eventuali danni causati da un uso o
montaggio errato.
Qualora vengano apportate delle modiche
all’accessorio in un secondo momento, è da
intendere come produttore la persona che
esegue tali modiche.
Veiligheid
De fabrikant is niet aansprakelijk voor schade
die ontstaat door een onjuist gebruik of
verkeerde montage.
Indien achteraf wijzigingen aan het accessoire
worden aangebracht, geldt de persoon die
deze wijzigingen aanbrengt, als de fabrikant.
Montaje
La pieza de empotrar en el suelo debe
instalarse de forma estable según las
características del suelo y el uso.
El tamaño de cimiento necesario para el
empotramiento en hormigón debe ser
determinado en obra.
Pasar el cable de tierra por la entrada lateral
para cables en la pieza de empotrar en el
suelo.
El montaje se tiene que realizar de manera que
la placa de brida esté colocada en posición
horizontal y quede enrasada con el borde
superior del pavimento. Es absolutamente
necesario prever un drenaje correcto.
La alineación de los tornillos de jación
(esquema de perforaciones de la placa de
brida) puede ser importante para algunas
luminarias.
Por este motivo, observe las instrucciones de
uso de las luminarias utilizadas.
Desmontar los tornillos de jación M8
– SW 13 – y las arandelas de la pieza de
empotrar en el suelo.
Fijar la placa de montaje de la luminaria o del
poste en la pieza de empotrar en el suelo.
Apretar rmemente los tornillos.
Par de apriete = 12 Nm.
Montaggio
Il collegamento a terra va ssato in modo
stabile in base alle caratteristiche del fondo e
alla destinazione d’uso.
Le dimensioni della base necessarie per il
collegamento a terra vanno denite dal cliente.
Inserire il cavo di terra nel collegamento a terra
attraverso un ingresso cavi laterale.
L’installazione deve essere effettuata in modo
tale che la piastra angiata risulti posizionata
orizzontalmente e si trovi a lo con il bordo
superiore del rivestimento del fondo.
Va assolutamente realizzato un drenaggio
a regola d’arte. L’orientamento delle viti di
ssaggio (schema di foratura della piastra
angiata) può risultare importante per alcuni
apparecchi.
Di conseguenza è necessario attenersi alle
istruzioni d’ uso degli apparecchi utilizzati.
Smontare le viti di ssaggio M8 – da 13 – e le
rondelle dal collegamento a terra.
Fissare la piastra di montaggio dell’apparecchio
o del palo sul collegamento a terra.
Serrare saldamente le viti.
Coppia di serraggio = 12 Nm.
Montage
Het grondstuk dient afhankelijk van de
bodemgesteldheid en het gebruiksdoel stabiel
te worden gefundeerd.
Hoe groot dit betonnen fundament moet zijn,
dient ter plaatse te worden bepaald.
Steek de grondkabel door de zijdelingse
kabelinvoer in het grondstuk.
De inbouw dient zodanig te worden uitgevoerd,
dat de ensplaat horizontaal ligt en met de
bovenkant van het grondoppervlak gelijkliggend
afsluit. Er moet in ieder geval voor een
vakkundige drainage worden gezorgd.
De uitrichting van de bevestigingsschroeven
- gatenbeeld ensplaat - kan voor sommige
armaturen belangrijk zijn.
Raadpleeg hiervoor de gebruiksaanwijzingen
van de te plaatsen armaturen.
Demonteer de bevestigingsschroeven M8
– SW 13 – en sluitringen uit het grondstuk.
Bevestig de montageplaat van het armatuur of
de mast op het grondstuk.
Draai de schroeven vast.
Aanhaalmoment = 12 Nm.