9
Installation Plastic Laminate Restroom Partitions, Floor-To-Ceiling — Series 700
Bradley • HDWL-INSTR-004 Rev. C; ECN 12-14-004J 12/13/2012
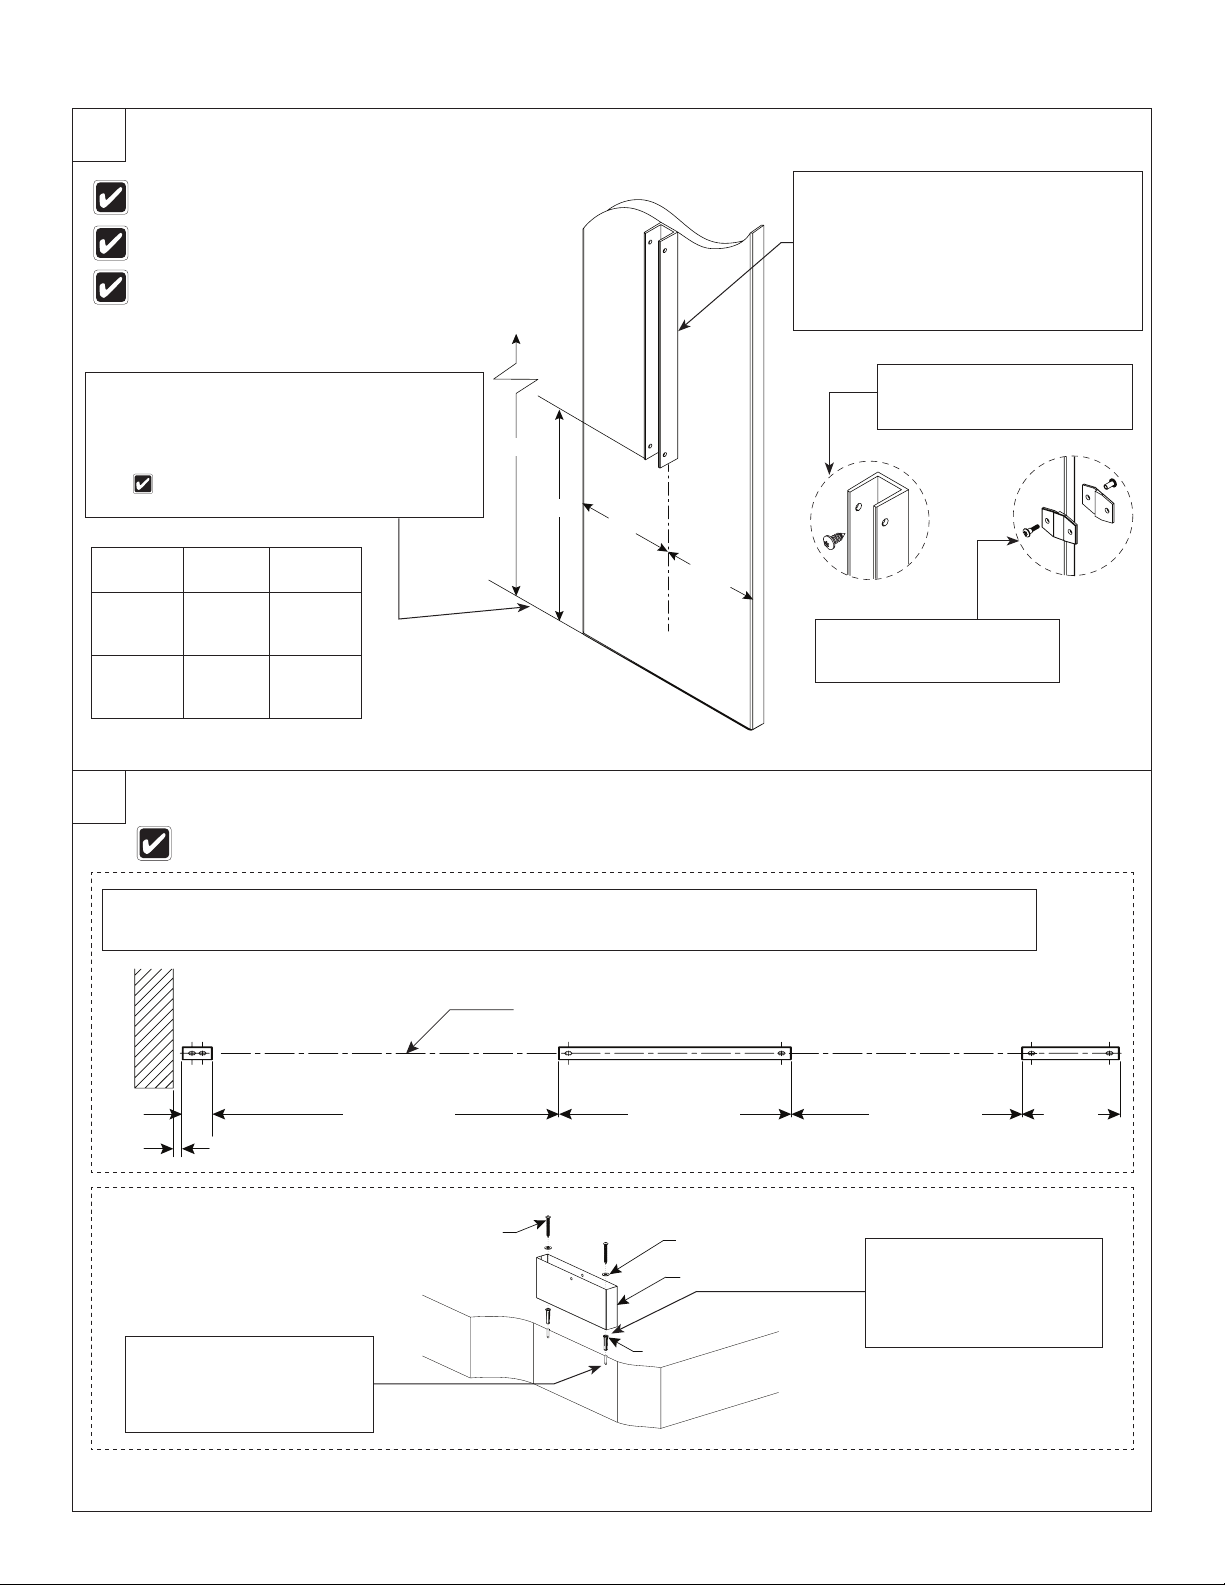
6a Panels and Pilasters with Continuous Brackets (Optional)
Pilasters located at walls should be mounted first. Start at one end and install a panel, then a pilaster. Continue alternating until
installation is complete. When installing in an alcove or in-corner alcove, use an alcove bracket to secure the pilaster to the panel.
Refer to your submittal drawing and leave the appropriate gaps. Standard gap is 1" (25mm) between the panel and the wall
and ½" (13mm) between the panel and the pilaster.
Pilasters at Wall
Check to make sure the pilasters are plumb and level to each other. The pilaster height can be adjusted with the leveling
screw that was placed at the bottom of the pilaster (see page 5 for attaching leveling bolt).
Each pilaster comes with a matching shoe kit containing the required fasteners and "L" brackets for mounting.
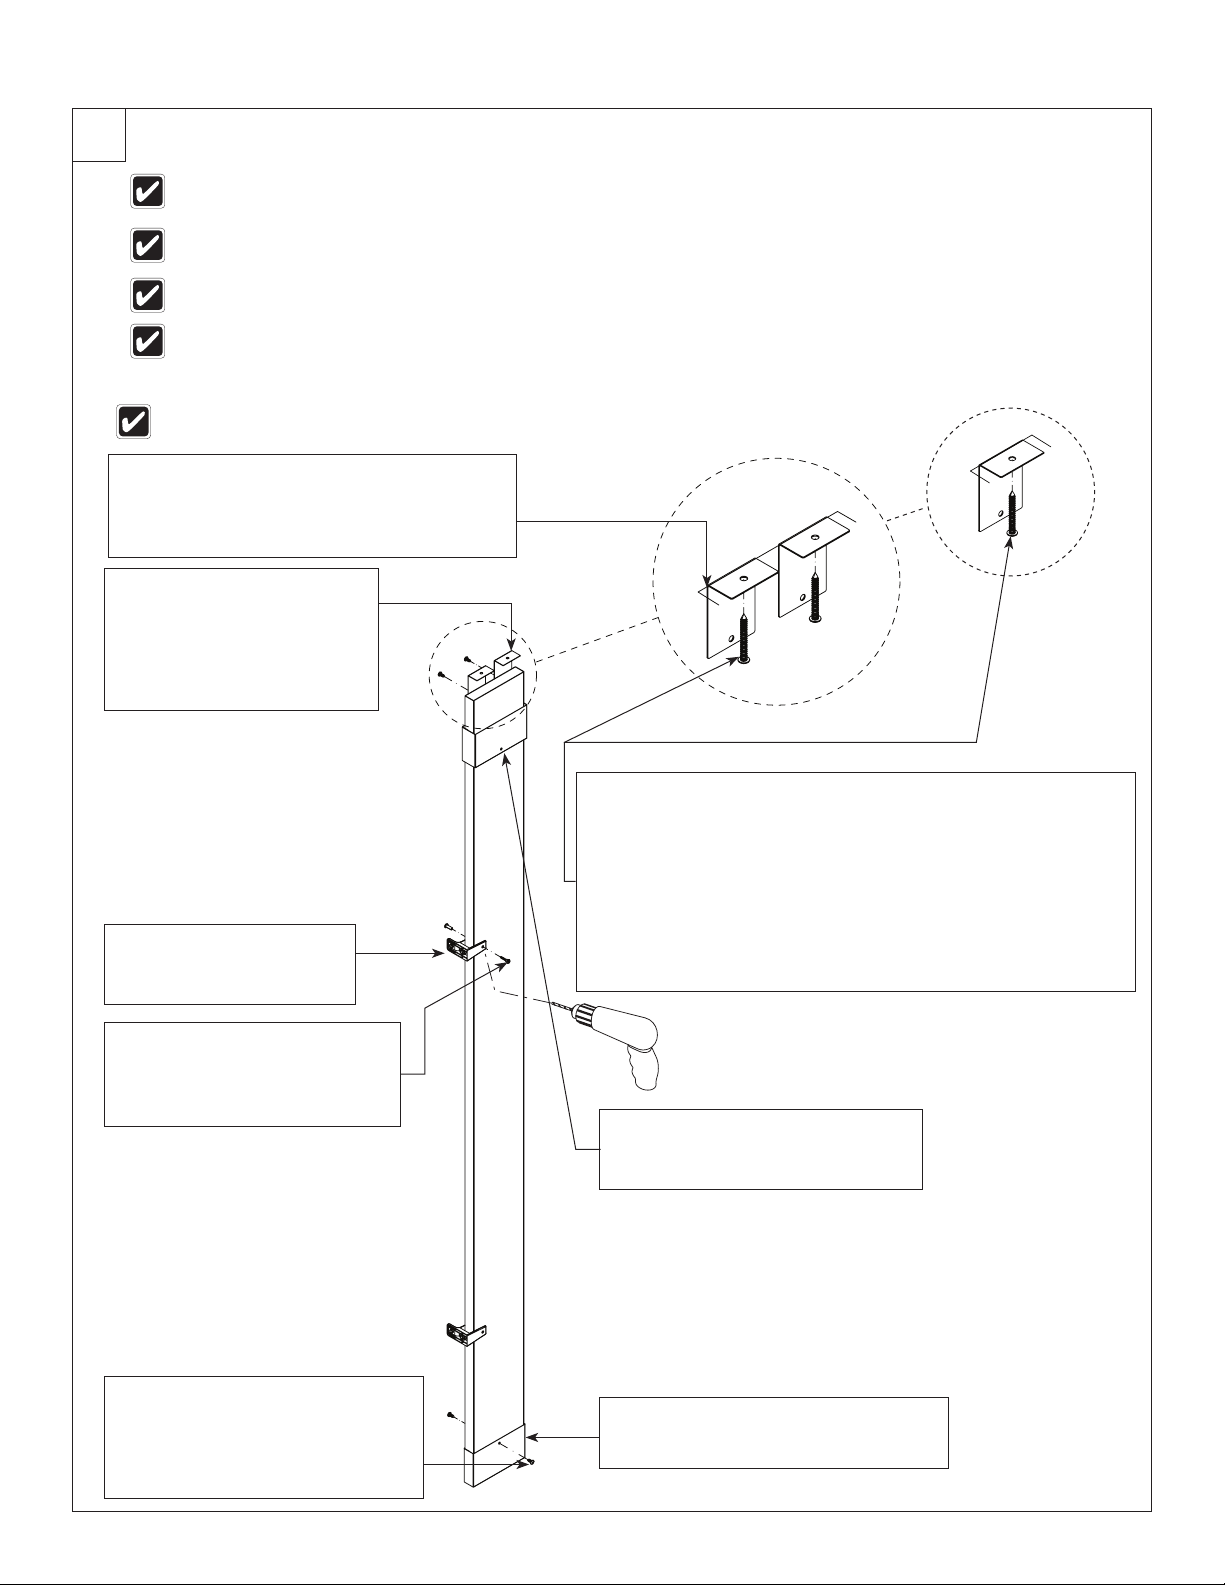
Set the pilaster back into the shoe
secured to the floor while at the same
time placing into the wall bracket.
D
Slide the other shoe onto the top end
of the pilaster with the screw hole
towards the bottom and temporarily
tape in place about 5" from the end.
C
Using the bracket as
templates, drill Ø ¼" holes
through the pilaster at each
pilaster bracket hole.
F
Secure the pilaster to the bracket with
the #10-24 x ¾" (stainless) barrel
nuts and #10-24 x 1" (stainless)
shoulder screws provided for
aluminum or stainless steel brackets.
G
Using the hole in the shoe as a
template, drill a Ø ⁵⁄₃₂" pilot hole all
the way through the pilaster. Secure
the shoe to the pilaster with the
¼-14 x ⁵⁄₈" fasteners provided.
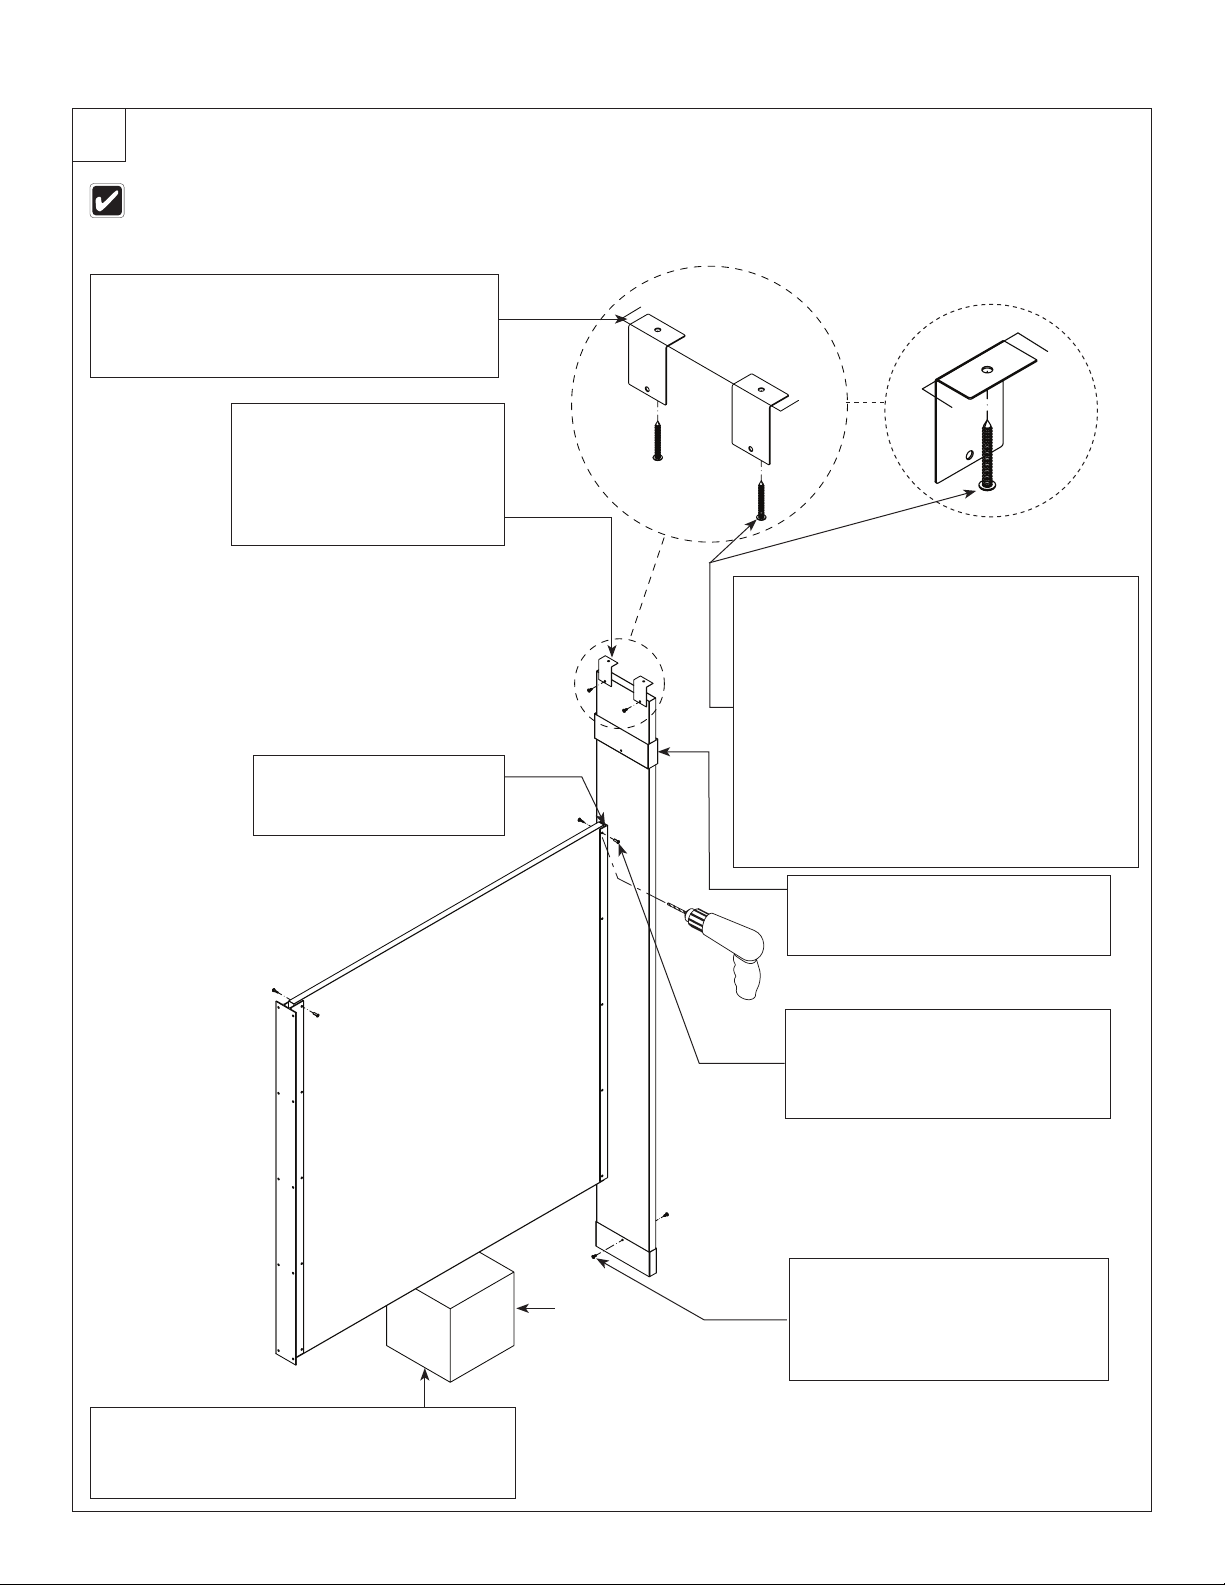
H
Set the pilaster into the shoe secured to the
floor while at the same time placing into the wall
brackets. Verify that pilasters are plumb in both
directions. Project the outer edges and inside
face of the pilaster onto the ceiling.
A
Using each "L" bracket as a
template, drill a Ø ⁵⁄₃₂" x ⁵⁄₈"
(16mm) deep pilot hole at
each hole location. Secure the
pilaster to each "L"-bracket
with the ¼-14 x ⁵⁄₈" fastener
provided.
E
Remove the pilaster.
For 3"–5" pilasters: center the "L" bracket between the projected
outer edge lines and flush with the projected inside face line.
For 6"—24" pilasters: Two "L" brackets are provided. Place each
bracket ½" in from the outer edge line and flush with the projected
inside face line.
For each bracket, use the bracket as a template and mark the
hole location on the ceiling. Remove the bracket and drill a Ø
⁵⁄₁₆" hole (min 2" [51mm] deep) at each hole location. Insert the
plastic anchor and secure the bracket to the ceiling with #14 x 2"
(stainless) screws provided.
B
When installing pilasters at walls, the gaps range from ½" to 1¼"
(13mm to 32mm). Refer to your submittal drawing for your gap sizes.