manuals.online logo
Brands
  1. Home
  2. •
  3. Brands
  4. •
  5. emaux
  6. •
  7. Underwater Lighting
  8. •
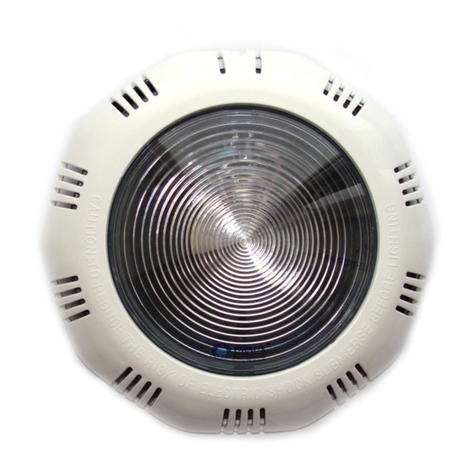
  9. emaux NP300 Series User manual

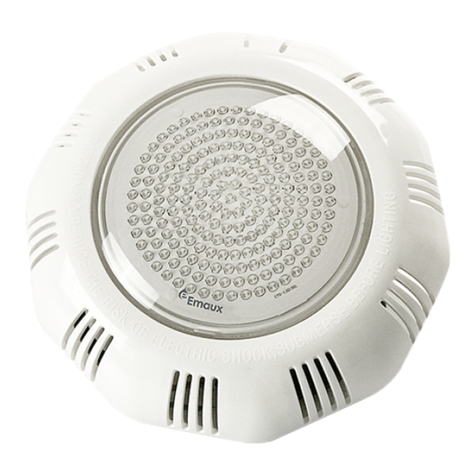
emaux NP300 Series User manual

4"min
To GFCI, CircuitBreaker
and Power Source
Rigid Conduit 18"min. to
top of Lens
"
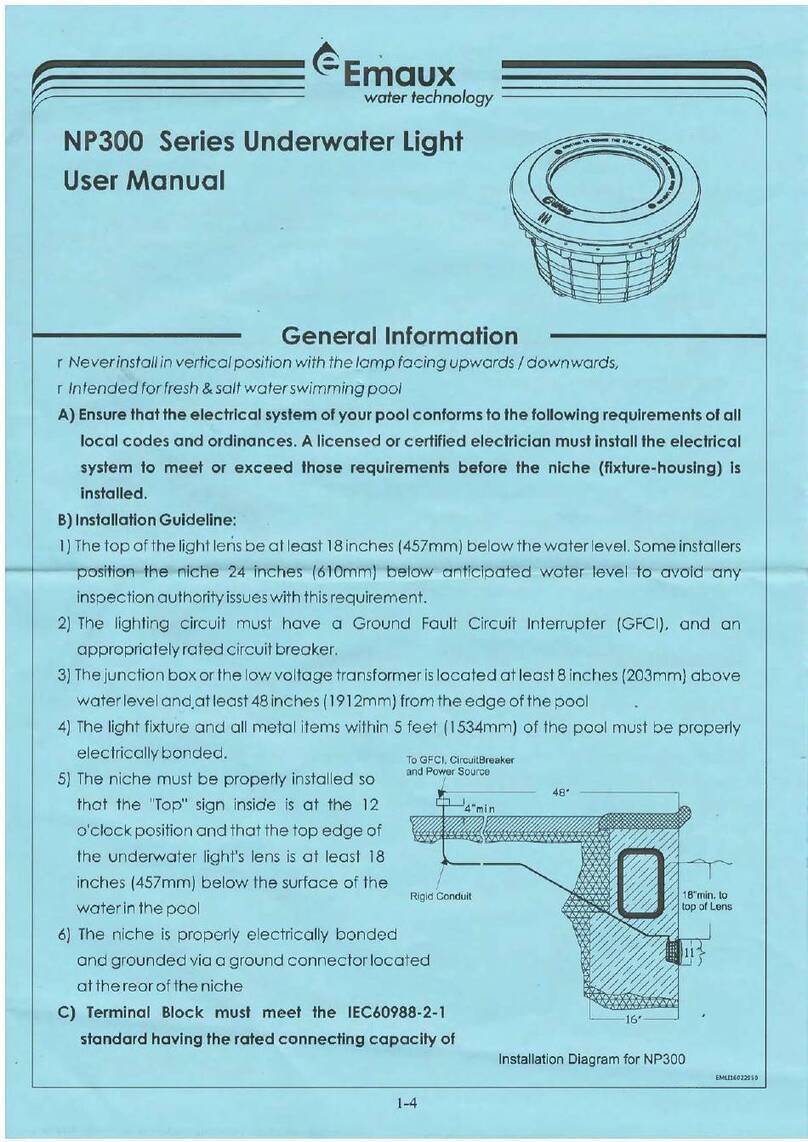
NP300 Series Underwater Light
1-4
rNeverinstallinverticalpositionwiththelampfacingupwards/downwards,
rIntendedforfresh&saltwaterswimmingpool
A) Ensure that the electrical system of your pool conforms to the following requirements of all
local codes and ordinances. A licensed or certified electrician must install the electrical
system to meet or exceed those requirements before the niche (fixture-housing) is
installed.
B)InstallationGuideline:
1)Thetopofthelightlensbeatleast18inches(457mm)belowthewaterlevel.Someinstallers
position the niche 24 inches (610mm) below anticipated water level to avoid any
inspectionauthorityissueswiththisrequirement.
2) The lighting circuit must have a Ground Fault Circuit Interrupter (GFCI), and an
appropriatelyratedcircuitbreaker.
3)Thejunctionboxorthelowvoltagetransformerislocatedatleast8inches(203mm)above
waterlevelandatleast48inches(1912mm)fromtheedgeofthepool
4) The light fixture and all metal items within 5 feet (1534mm) of the pool must be properly
electricallybonded.
5) The niche must be properly installed so
that the "Top" sign inside is at the 12
o'clockposition and thatthe top edgeof
the underwater light's lens is at least 18
inches (457mm) below the surface of the
waterinthepool
6) The niche is properly electrically bonded
andgroundedviaagroundconnector located
attherearoftheniche
C) Terminal Block must meet the IEC60988-2-1
standard having the rated connecting capacity
User Manual
4-4
GENERAL INFORMATION
ØConnectthecableterminalstothelamp,usingthe2screwssuppliedwith
thelamp,seeFigure10.
ØFullycentrethegasketinitsseat.
ØFirmlytightenthenuts.
ØBefore lamp replacement, ensure the power to the underwater light is
cutoff.
ØInorder to ensurefull water tightness,Discard the oldGasket and replace
itwithanewone.
Remoteoperation:
ChangescolorModebyButton1-11,TurnofflightbyOFFButton,seeFigure11.
Mode:1)Red+Green+Blue. 2)Blue. 3)Red. 4)Green.
5)RGBColourSequence. 6)RGBColourSequence.
7)Red+Green/Blue+Green/Blue+RedSequence.
8)Red+Green/Blue+Green/Blue+RedSequence.
9)Red+Green/Blue+Green/Blue+RedSequence.
10)Red+Green/Blue+Green/Blue+RedSequence.
11)RGBColourSequence.
REPLACEMENT PARTS
Gasket
Figure 10
Installation Diagram for NP300
EMLI20071401
Item
Part No.
Description
Qty
1
03011189
M6*80 Screws
2
2
01050008
Plastic Lid (EMAUX)
1
01050025
Plastic Lid (Blank)
89041609
Stainless Steel Lid (EMAUX)
89041610
Stainless Steel Lid (Blank)
3
03011184
M6*55 Hexagon Head Screws
6
4
01110013
Face Ring
1
5
04011004
Par56 Bulb(300W)
1
08040026
Par56(144 LEDs,12V/10W,Auto RGB)
08040025
Par56(144 LEDs,12V/10W,Cool White)
08040024
Par56(252 LEDs,12V/16W,Auto RGB)
08040022
Par56(252 LEDs,12V/16W,Cool White)
08040023
Par56(252 LEDs,12V/16W,RGB with remote)
6
02010019
Waterproof O-Ring for Par56
1
7
01230003
Waterproof Cover
1
8
89041601
Waterproof O-Ring with Tooth Head for Cable
1
9
89041602
Nut Fitting
6
10
89041603
Fastening suite
1
11
89041604
Water Joint Fittings for Cable
1
12
E040709
Two-Core Cable 2.5m(With wiring connector,For no
remote version)
1
E040405
Three-Core Cable 2.5m(With wiring connector,For
remote version)
13
89041608
Vinyl Pool Fitting(For NP300 Lights Niche)
1
E040718
Vinyl Pool Fitting(NP300 Lights Niche with Copper Nut)
14
01050010
NP300 Lights Niche
1
01050148
NP300 Lights Niche with Copper Nut
15
89041605
Plug with O-Ring
1
16
01171106
Joint for wire &pipe
1
7
6
5
3
2
1
4
14
13
10
98
11
16
15
12
Figure 11
1)Toinstalltheunderwaterlightinginaconcreteswimming
pool, the niche should be fixed in the wall of the
swimming pool. Be sure the top of the niche be at least
18 inches (457mm) below the water level, and the TOP
signofthenicheisatthe12o'clockposition.
2) There are two conduits at the back of the niche, please
chose one which is most convenient to your wiring design
andsealtheotheronewiththeplugprovided.
3)Concretingthepoolasshowninfigure2.
1) To install the underwater lighting in a concrete swimming pool with vinyl liner, the niche should
be fixed in the wall of the swimming pool. Be sure the top of the niche be at least 18 inches
(457mm)belowthewaterlevel,andtheTOPsignofthenicheisatthe12o'clockposition.
2)There are two conduits at thebackofthe niche, please chose onewhichismost convenient to
yourwiringdesignandsealtheotheronewiththeplugprovided.
3)Punchordrilltheholesinthevinyllinerasstatedinfigure3.
4)InstalltheNicheasshowninfigure4.
3-42-4
NICHE INSTALLATION
1 Feed cord through conduit to junction box, leaving at least 59 inches (1500mm) of cord at the
lightfixturetocoilaroundthebackofthelight,suchthatthelightfixturewouldbeboughtback
tothepooldeckforservice.
2 Makethewireconnectiontothejunctionbox.
3 Insert the entire underwater light fixture into the niche. In order to obtain good pool lighting it is
important that the company logo of Emaux of the lid is located on
the6o'clockposition.
4 Screw in the two M6 x 75 screws on the lid until the fastening dog is
securedintheinnerwallsoftheniche figure7.
5 Before operating the light for more than 10 seconds, fill the pool with
wateruntiltheunderwaterlightiscompletelysubmergedinwater.To
check for proper operation, turn on main street or circuit breaker as
wellastheswitchthatoperatestheunderwaterlightitself.
)
)
)
) asshownin
)
Figure 7
Concrete swimming pool with vinyl liner
Concrete swimming pool Underwater light fixture installation
Gasket
1 To remove the underwater light to the pool deck, loosen the two screws on the lid until the
fastening dog yields sufficiently so that the underwater light unit can be separated from the
niche.
2 Unscrewthe6nuts whichsecurethelidtothebaseoftheunderwaterlight figure8.
)
) asshownin
Figure 8
Lamp Replacement
Gasket
Concrete
Vinyl Liner
Setting Fitting
20-M5 Screw
Figure 4
20-Ø6mm
Ø235mm
Ø252mm
Figure 3
Installation of the stainless steel or plastic lid
Figure 5 Figure 6
1)RemovetheoldlidbyunscrewingthetwoM6screwon
the lid. Note that the O ring, nuts slide block and the
fastening dog will be loosen too by removing the M6
screwsonthelid,asshowninfigure5.
2)Installthenew plasticlidorstainlesssteellidasshownin
figure6,makesurethescrewsholearealigned.Fasten
theM6screwonthelid.
of 4.0mm2, use of screw type terminal at least 25A rated current, mounted inside
junction boxes, see the figure1 below
D) Use only EMAUX lighting fixtures in this niche to
ensure proper bonding and grounding
connections.
ø(For US user, please also follow the requirements
of the National Electrical Code (NEC)
Niche
Concrete
Underwater
Light Fixture
Figure 2
Figure 1
3) Remove the lamp and gasket from the inside of the base of the
underwater light by disconnecting the two terminals, loosening the two
screwswhichsecurethemtothelamp,seeFigure9.
4) Change the lamp and assemble the Underwater light, in the opposite
orderdescribed,takingspecialcareto: Figure 9
Other emaux Underwater Lighting manuals

emaux P50 Instructions for use

emaux

emaux P50 Instructions for use

emaux LED-P10 User manual

emaux

emaux LED-P10 User manual

emaux EL-S100S User manual

emaux

emaux EL-S100S User manual

emaux UL-TP100 Series Manual

emaux

emaux UL-TP100 Series Manual

emaux UL-P100 Series Manual

emaux

emaux UL-P100 Series Manual

emaux E-Lumen Compact User manual

emaux

emaux E-Lumen Compact User manual

emaux LED-P100 series Manual

emaux

emaux LED-P100 series Manual

emaux GL10 User manual

emaux

emaux GL10 User manual

emaux ElumenX Series User manual

emaux

emaux ElumenX Series User manual

emaux NP300 Series User manual

emaux

emaux NP300 Series User manual

emaux UL-CP100 User manual

emaux

emaux UL-CP100 User manual

emaux E-Lumen X User manual

emaux

emaux E-Lumen X User manual

emaux EL-NP300 Series User manual

emaux

emaux EL-NP300 Series User manual

emaux E-Lumen-252 User manual

emaux

emaux E-Lumen-252 User manual

emaux EL-H200 User manual

emaux

emaux EL-H200 User manual

emaux Arr30 User manual

emaux

emaux Arr30 User manual

emaux P50 User manual

emaux

emaux P50 User manual

emaux E-Lumen X Series User manual

emaux

emaux E-Lumen X Series User manual

emaux NP300 Series User manual

emaux

emaux NP300 Series User manual

emaux LED-TP100 Series Manual

emaux

emaux LED-TP100 Series Manual

emaux UL-P300 Series User manual

emaux

emaux UL-P300 Series User manual

emaux UNDERWATER LIGHT Series User manual

emaux

emaux UNDERWATER LIGHT Series User manual

Popular Underwater Lighting manuals by other brands

LIGMAN NEMO 2 installation manual

LIGMAN

LIGMAN NEMO 2 installation manual

LIGMAN BOH-60003 installation manual

LIGMAN

LIGMAN BOH-60003 installation manual

Aqualuma GEN2 3 Series Fitting instructions

Aqualuma

Aqualuma GEN2 3 Series Fitting instructions

Ikelite DS230 manual

Ikelite

Ikelite DS230 manual

lumishore SMX53-SUPRA Mechanical installation instructions

lumishore

lumishore SMX53-SUPRA Mechanical installation instructions

Kripsol PEH100.C Manual for the installation, use and maintenance

Kripsol

Kripsol PEH100.C Manual for the installation, use and maintenance

Hayward ColorLogic® 4.0 installation guide

Hayward

Hayward ColorLogic® 4.0 installation guide

Pontec PondoStar LED Set 6 operating instructions

Pontec

Pontec PondoStar LED Set 6 operating instructions

Easydive Jaeger 600 user guide

Easydive

Easydive Jaeger 600 user guide

RGBlue System 02 Premium Color instruction manual

RGBlue

RGBlue System 02 Premium Color instruction manual

GRE POOL EXPERT PLCH144 instruction manual

GRE

GRE POOL EXPERT PLCH144 instruction manual

UNDERWATER LIGHTS LIMITED QT LED QTS-130-RGBW quick start guide

UNDERWATER LIGHTS LIMITED

UNDERWATER LIGHTS LIMITED QT LED QTS-130-RGBW quick start guide

UNDERWATER LIGHTS LIMITED UL Ti MATE 130 SA quick start guide

UNDERWATER LIGHTS LIMITED

UNDERWATER LIGHTS LIMITED UL Ti MATE 130 SA quick start guide

Ros MV-LED II DC Operation and maintenance manual

Ros

Ros MV-LED II DC Operation and maintenance manual

Oceanled X4 Product guide

Oceanled

Oceanled X4 Product guide

Seamaid LEDINPOOL 502679 Installation & maintenance manual

Seamaid

Seamaid LEDINPOOL 502679 Installation & maintenance manual

Sea & Sea YS-03 SOLIS instruction manual

Sea & Sea

Sea & Sea YS-03 SOLIS instruction manual

Astral Pool 74393 installation manual

Astral Pool

Astral Pool 74393 installation manual

manuals.online logo
manuals.online logoBrands
  • About & Mission
  • Contact us
  • Privacy Policy
  • Terms and Conditions

Copyright 2025 Manuals.Online. All Rights Reserved.