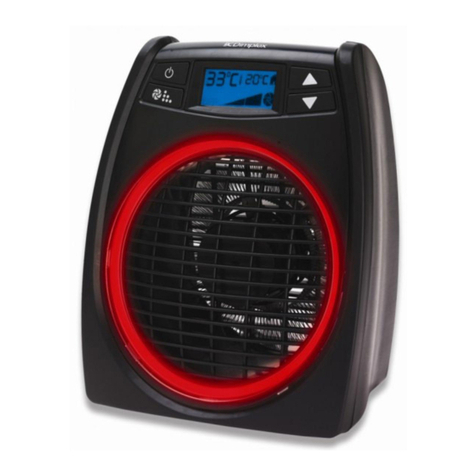
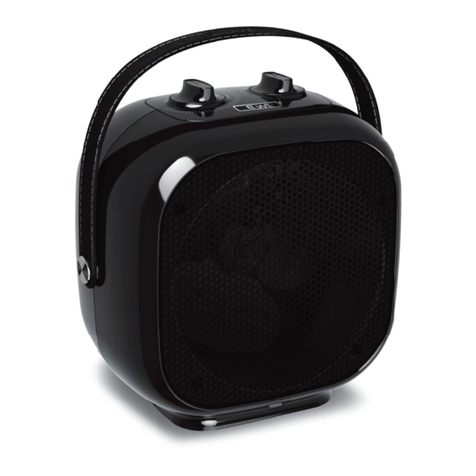
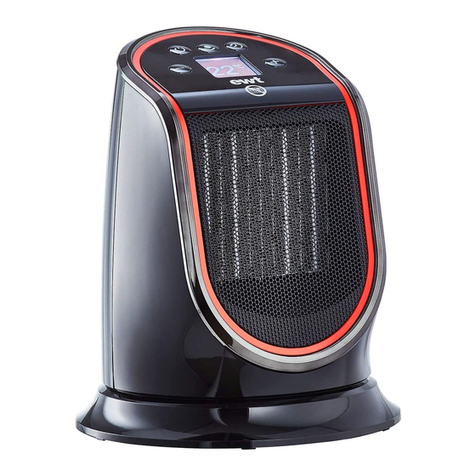
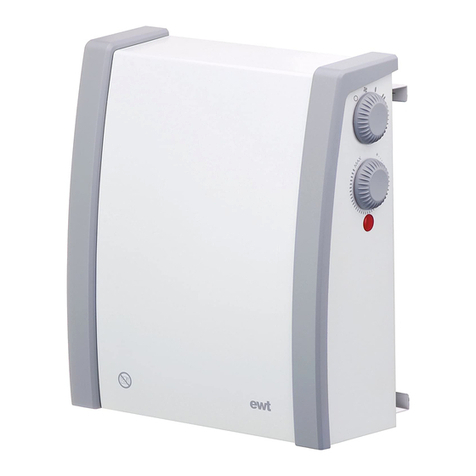
EWT MaxiHC B User manual

MaxiHC B/W
08/54130/0 Issue 4
The product complies with the European Safety Standards EN60335:2-30 and the European Standard Electromagnetic Compatibility (EMC) EN55014:1,
EN55014:2, EN61000:3-2 and EN61000:3-3 which cover the essential requirements of EMC Directive 2014/30/EU and the LVD Directive 2014/35/EU.
UK: As with all portable heating appliances: This product is suitable only for well insulated spaces or occasional use.
DE: Wie bei allen tragbaren Heizgeräten: Dieses Produkt eignet sich nur für gut isolierte Bereiche oder für gelegentliche Verwendung.
FR: Comme dans le cas de tous les appareils de chauage portatifs, ce produit convient seulement dans des espaces bien isolés
et pour un usage occasionnel.
IT: Come nel caso di tutte le apparecchiature termiche portatili: questo prodotto è idoneo esclusivamente all’uso occasionale e nei locali
opportunamente isolati.
NL: Zoals geldt voor alle draagbare verwarmingsapparatuur: Dit product is alleen geschikt voor goed geïsoleerde ruimtes en
incidenteel gebruik.
PL: Jak w przypadku wszystkich przenośnych urządzeń grzewczych: Niniejszy produkt jest przystosowany wyłącznie do użytkowania
w dobrze izolowanych pomieszczeniach lub do sporadycznego użytkowania.

Installation and Operating Instructions
IMPORTANT SAFETY ADVICE
DO NOT use the heater in the immediate
surroundings of a bath, a shower or a
swimming pool.
DO NOT place the heater directly below a
xed socket outlet.
The socket-outlet must be accessible at
all times to enable the mains plug to be
disconnected as quickly as possible.
DO NOT COVER or obstruct the air inlet and
outlet openings in any way.
This heater carries the warning symbol
indicating that it must not be covered.
DO NOT operate the heater with the mains
lead overhanging the front outlet grille.
WARNING: In order to avoid overheating do
not cover the heater.
IMPORTANT: If the mains lead of this appliance
is damaged, it must be replaced by a qualied
person in order to avoid a hazard.
WARNING: In order to avoid a hazard due to
inadvertent resetting of the thermal cut-out,
this appliance must not be supplied through
an external switching device, such as a timer,
or connected to a circuit that is regularly
switched on and o by the utility.
This appliance can be used by children aged
from 8 years and above and persons with
reducedphysical,sensoryormentalcapabilities
or lack of experience or knowledge if they
have been given supervision or instruction
concerning the use of the appliance in a safe
way and understand the hazards involved.
Children shall not play with the appliance.
Cleaning and user maintenance shall not
be made by children without supervision.
Children of less than 3 years should be kept
away unless continuously supervised.
Children aged from 3 years and less than 8
years shall only switch on/o the appliance
provided that it has been placed or installed
in its intended normal operating position and
they have been given supervision or instruction
concerning the use of the appliance in a safe
way and understand the hazards involved.
Children aged from 3 years and less than 8
years shall not plug in, regulate and clean the
appliance or perform user maintenance.
CAUTION: Some parts of this product can
become very hot and cause burns. Particular
attention has to be given where children and
vulnerable people are present.
IMPORTANT: Avoid use of an extension cord
because the extension cord may overheat and
cause risk of re.
CHOKING HAZARD: The remote control for
this unit contains a small battery. Keep the
remote away from children and do not swallow
the battery. If the battery is swallowed seek
medical advice at once.
WARNING: To avoid danger of suocation
please remove all packaging materials
particularly plastic and EPS and keep these
away from vulnerable people, children and
babies.
WARNING: To avoid the risk of accidental
strangulation from the supply cord all children
and vulnerable people must be supervised
when in the vicinity of the product whether it
is working or not.
This instruction leaet belongs to the appliance
and must be kept in a safe place. If changing
owners, the leaet must be surrendered to the
new owner.
Keep combustible materials such as drapes
and other furnishings clear from the front,
sides and rear of the heater. Do not use heater
to dry your laundry.
DO NOT use this heater if it has been dropped.
DO NOT use if there are visible signs of
damage to the heater.
IMPORTANT: Use this heater on a horizontal
and stable surface.
WARNING: Do not use this heater in small
rooms when they are occupied by persons
not capable of leaving the room on their own,
unless constant supervision is provided.
WARNING: To reduce the risk of re, keep
textiles, curtains or any other ammable
material a minimum distance of 1m from the
air outlet.
ELECTRICAL CONNECTION
This heater must be used on an A.C. ~ supply
only and the voltage marked on the heater
must correspond to the supply voltage.
IMPORTANT: THESE INSTRUCTIONS SHOULD BE READ CAREFULLY BEFORE USE AND RETAINED FOR FUTURE REFERENCE
UK

Dimensions
270mm 270mm
694mm

Assembly
• Open the packaging and remove the product.
• The glass base is packaged unassembled from the product.
• Remove the xing nut from the bottom of the product.
• Slide the glass base into place.
• Screw the xing nut on to x the glass base into position.
• The product is now assembled and should be placed in an upright position.
• Always ensure the product is on a at stable surface when in use.
Controls
Increase
Decrease
Fan Speed
(Cooling Only)
Oscillation Runback Timer
Heating Mode
Standby

Standby
• When the appliance is plugged in there will be an audible beep.
.
First time setup?
YES
On rst time start-up the product will start
with the default settings. The temperature will
be set to 22ºC and the heat setting will be set
to intelligent heat mode, see Heat Selection
on the screen below
• When put into standby mode there is a countdown from 10 to 1 before shutting down.
• When disconnected from the power supply (plugged out/power cut/tilt switch) then
reconnected and turned back on product will return to last used settings for Heat Selection, Fan
Selection, Temperature Setting, Sound and Audio. Bluetooth will attempt to re-pair. Runback
Timer and Oscillation will return to OFF.
Note:
Inactive buttons
will not beep when pressed.
Standby mode
Power going to the product but the product
is not turned ON. Once the standby button
has been pressed the product will turn ON
and STANDBY icon will turn OFF.
Press the Standby button to turn the product On.
NO
When subsequently turned on the product
will return to the last used settings for Heat
Selection, Fan Selection, Temperature Setting,
Sound and Audio. Bluetooth will attempt to
re-pair, see Bluetooth. Runback Timer and
Oscillation will return to OFF. The screen below
shows an example where the user previously
set temperature to 25ºC and Heat Selection
to LOW.
Press the Standby button to put the product into Standby.

Remote Bluetooth Pairing/Operation
CONNECTED
Pairing : Slow ashing icon
Press and hold for 2 seconds to
begin pairing.
Has the product previously been paired and
connected?
NO YES
Once Runback Timer and Heat are held for 2
seconds the Bluetooth Icon will begin to ash
slowly. You can now connect to the product
using a smart device.
When a device is found and is pairing the
Bluetooth icon will begin to ash quickly until
the device is paired whereby the icon will stop
ashing and stay on.
If product cannot connect after 60 seconds
product will exit pairing mode and the
Bluetooth icon will turn OFF.
When turned on and Bluetooth was previously
set the product will automatically search for a
previously connected device for 60 seconds. If
previous device is not found after 60 seconds
Bluetooth will then exit pairing mode and the
Bluetooth icon will turn o.
If a connected device goes out of range the
product will try to reconnect for 60 seconds
and will then exit pairing mode and the
Bluetooth icon will turn o. When a previously
connected device comes back into range the
product will automatically repair.
Press and hold for 2 seconds to exit
pairing mode and turn o Bluetooth icon.
Icon stays on solid.
The appliance can be controlled remotely using a smartphone or similar device. To facilitate
this remote operation it is necessary to rst download the app. The app is available on
both android and IOS devices and is available free from the Apple or Android App store. The
App is compatible with Android version 4.3 and above and IOS version 5 and above. Once
the App has been downloaded it is necessary to pair the appliance with the smartphone to
complete the remote setup. Please follow the steps shown below:
• On the smartphone, or other device, the product should be visible on the pairing screen, this will be a unique 6 digit
code but will always start with 'SZ', for example ‘SZ6417’. Select this device and press connect to initiate pairing.

Remote Control Storage Remote Control
Standby
Increase
Heating
Mode
Oscillation
Decrease
Fan
Speed
(Cooling Only)
Runback
Timer
Changing Remote Batteries Hot: Do Not Touch

Heating Mode
Cycle through
Heat modes or
Fan Speed (Cooling Only)
Increase Temperature
(Max 30ºC/86ºF)
Decrease Temperature
(Min 5ºC/41ºF)
When set to 5ºC the Frost Protect symbol appears. The product will cycle on and o to maintain
a temperature of approximately 5ºC to give a degree of protection against frost conditions.
Intelligent Eco Heat: The product will automatically regulate the room temperature
accordingly. In this mode the product operates at full power, however the output
of the product is automatically reduced and regulated as the room temperature
approaches the desired level. This mode optimises energy use by calculating the
most ecient and eective way to achieve the desired temperature setting. The
desired room temperature can be adjusted at any time during operation by pressing
the appropriate key.
High Heat: In this mode, the appliance will operate at a high heat setting, the
appliance will automatically cycle at this setting to maintain the room temperature
setting. Fan speed is automatically set to Medium speed to boost heat output.
Low Heat: In this mode, the appliance will operate at a low heat setting, the appliance
will automatically cycle at this setting to maintain the room temperature setting.
Fan speed is automatically set to Low speed.
• If the temperature is set and is lower than the room temperature then the product will shut o.
The temperature will be ashing to indicate this. The product will stay in this state until the room
temperature lowers or the set temperature is increased higher than the room temperature.
Increase Fan speedDecrease Fan speed
Cycle through Fan speeds
Low Speed: This speed is designed to give a Low level of cooling eect.
Medium Speed: This speed is designed to give Medium cooling eect.
Turbo Speed: The 'highest velocity' setting is designed to give Maximum
cooling eect.
• Default Fan speed is Low. When only the Fan is running the segmented display cycles through
3 states to resemble a rotating fan blade.
OR

Runback Timer
Increase Runback time
Decrease Runback
time (stops at 0hr)
Current Runback Timer:
Runback button can be pressed to view
remaining time of Runback Timer. The
Runback Timer can be edited or if left alone
for 6 seconds will continue in its runback and
return to the main screen.
Cancelling Runback Timer:
To cancel the runback timer the user can
go back into runback settings and change
the runback time to 0 or press the Standby
button.
The heater is tted with a Runback Timer feature which can be set in either cooling or
heating modes. The Runback Timer range is 1 to 12 hours. To set Runback Timer please follow
the directions below:
Increase Runback
time (stops at 12hr)
Increase Runback
time
Cancel RunbackPress to set Runback Timer.
Icons will be ashing while setting
Runback Timer
RUNBACK TIMER SET
Icon will be on solid while
Runback Timer is active.
Has Runback Timer been set previously?
NO
Has Runback Timer been set previously?
YES
• After pressing Runback Timer, icon will
ash for 6 seconds. After 6 seconds the
Runback Timer period will be set.
Press Runback Timer
button to cycle to 0
to Cancel Runback
Timer
Cancel Runback
Timer
Decrease Runback time to 0 to
cancel Runback Timer

Oscillation
• Oscillation feature provides Heating and Cooling eect across a wide area. This is particularly
useful for providing maximum coverage for Heating or Cooling eect quickly and eciently.
Oscillation ON
Product will oscillate and icon
will be visible
Oscillation OFF
Product will be static and icon
will be o
LED Feature Lighting
The product comes with LED Feature
Lighting. This Feature Lighting can
be switched On or O. To do this,
press and hold for 2 seconds.
Sound ON/OFF
Press to cycle Oscillation On
and OFF
Press and hold for 2 seconds
to switch Sound On or O.
Sound OFF
Product will not 'beep' on
button presses and icon
will be visible
Sound ON
Product will 'beep' on
button presses and icon
will be O.

• Switch o the appliance rst and disconnect the plug from the socket.
• Clean the housing with a moist cloth, vacuum cleaner or brush.
• Do not use any abrasive or caustic cleaning agents.
• Do not use any ammable cleaning agents e.g. petrol or spirit for cleaning the appliance.
• Never immerse the appliance in water.
• Air inlet and outlet area should be cleaned with a vacuum cleaner regularly·
• If the appliance is not used for extended periods, it must be protected against excessive dust
and dirt.
Cleaning
• This heater is provided with an air lter.
• This is designed to remove large dust particles, u and hair to enhance air quality.
• It is recommended the lter be removed regularly to clean to avoid overheating of the element.
• To clean the lter remove the lter cover from the back of the heater and gently shake outside.
• Alternatively, you can place lter in warm water and remove to dry naturally for a 24 hour
period.
Air Filter

Key Lock
450
Temperature Units
• Temperature units on the product can be changed between Celsius (0C)and Fahrenheit (0F).
• The temperature displayed on the product will change accordingly.
• Minimum temperature setting is 50C or 410F.
• Maximum temperature setting is 300C or 860F.
• The product is tted with a safety tilt
switch which will prevent the heater from
working if the heater is accidentally tipped
over in any direction.
• The tilt switch mechanism makes a muted
rattling noise when the product is moved
or tilted, this is not a fault, this noise is
normal.
• Product should only be operated on a at
stable surface.
Tilt Switch
Keylock ON
All buttons (apart from standby
and keylock) are inactive and
Keylock icon will be On.
Keylock OFF
All buttons will be active and
icon will be O.
Press and hold for 2 seconds to
change temperature units to 0F.Press and hold for 2 seconds to
change temperature units to 0C.
Note: Inactive buttons will
not beep when pressed.
Press and hold for 2 seconds to
activate or deactivate Keylock.

Control Panel Intensity
The control panel display remains visible at
all times and cannot be switched o. This
is for safety reasons to ensure the product
can remain visible in poor light conditions
(even if feature lighting is switched o).
The display reduces its intensity by 50%
after a 10s period of time. When a control
button is pressed it increases its intensity
temporarily.
Overheat protection
The heater is tted with a temperature limiter.
If the air inlet or outlet grilles are restricted in
anyway the temperature limiter switches the
heater o automatically. To bring the heater
back into operation, remove the cause of
overheating then unplug the unit from the
electricity supply for a few minutes. When
the heater has cooled suciently reconnect
and switch on the heater.
Remote batteries
To insert or replace the battery remove the
battery cover on the rear of the remote.
Insert the button cell (CR/2025/3V) battery
with the positive terminal facing upwards.
Replace the cover.
Recycling For electrical products
sold within the European
Community. At the end of the
electrical products useful life it
should not be disposed of with
householdwaste.Please recycle
where facilities exist. Check
with your Local Authority or
retailer for recycling advice in
your country.
Batteries should be disposed of or recycled
in accordance with WEEE Directive 2012/19/
EU. Packaging should be recycled where
possible.
Supplementary Information
After sales service
Should you require after sales service
please contact the retailer from whom the
appliance was purchased or contact the
service number relevant to your country on
the warranty card.
Please do not return a faulty product to us
in the rst instance as this may result in loss
or damage and delay in providing you with
a satisfactory service.
In the interests of further development, the
appliance may be subject to constructional
or design changes without prior notice.
Please retain your receipt as proof of
purchase.
Model Identier(s): MaxiHC B/W
Heat output
Nominal heat output Pnom 2.5 kW
Minimum heat output (indicative) Pmin 1.35 kW
Maximum continuous heat output Pmax,c 2.5 kW
Auxiliary electricity Consumption
At nominal heat output elmax 0.0 kW
At minimum heat output elmin 0.0 kW
In standby mode elSB 0.0005 kW
Type of heat output/ room temperature control
Electronic room temperature control Yes
Contact details
GDHVI
Dunleer,
Co. Louth,
Ireland.

Montage- und Bedienungsanleitung
WICHTIG: DIESE ANLEITUNG SOLLTE VOR DER VERWENDUNG SORGFÄLTIG DURCHGELESEN UND FÜR ZUKÜNFTIGE NACHSCHLAGEZWECKE AUFBEWAHRT WERDEN
SICHERHEITSVORSCHRIFTE
NICHT in unmittelbarer Nähe von Bädern,
Duschen oder Schwimmbecken verwenden.
NICHT direkt unter einer fest angebrachten
Steckdose aufstellen.
Die Steckdose muss jederzeit frei zugänglich
bleiben, damit der Netzstecker so rasch wie
möglich gezogen werden kann.
NICHT den Lufteinlass oder -auslass des
Geräts auf irgendeine Art blockieren.
Am Heizgerät ist ein Warnsymbol
angebracht. Dieses weist darauf hin, dass
das Gerät nicht abgedeckt werden darf.
NICHT betreiben, wenn das Netzkabel vorne
über dem Gitter hängt.
ACHTUNG: Um Überhitzungen zu vermeiden,
darf das Heizgerät nicht zugedeckt werden.
WICHTIG: Wenn das Netzkabel dieses Geräts
beschädigt ist, muss es von einer qualizierten
Person ersetzt werden, um Gefahren zu
vermeiden.
ACHTUNG!: Um Gefahr durch das
versehentliche Zurücksetzen der thermalen
Sicherheitsabschaltungzuvermeiden,darfdiese
Vorrichtung nichtdurch einexternes Schaltgerät
(z.B.eine Zeitschaltuhr) mit Strom versorgtoder
an einen Schaltkreis angeschlossen werden, der
vom Versorgungsbetrieb regelmäßig ein- und
ausgeschaltet wird.
Dieses Gerät kann von Kindern über 8
Jahren, von Personen, deren körperliche
oder geistige Unversehrtheit oder deren
Wahrnehmungsfähigkeit eingeschränkt ist,sowie
von Personen mit mangelnden Kenntnissen
oder Erfahrung benutzt werden. Dies gilt nur
unter der Voraussetzung, dass sie beaufsichtigt
werden oder dass sie eine Einweisung in die
sichere Nutzung des Geräts und die damit
verbundenen Gefahren erhalten haben. Kinder
dürfen mit dem Gerät nicht spielen. Reinigung
und Wartung dürfen ohne Beaufsichtigung nicht
von Kindern durchgeführt werden. Kinder unter
3 Jahren sollten sich ohne Beaufsichtigung nicht
in der Nähe des Geräts aufhalten.
Kinder von 3 bis 8 Jahren sollten das Gerät nur
ein- oder ausschalten dürfen, wenn es in der
dafür vorgesehenen Betriebsposition montiert
wurde. Dies gilt nur unter der Voraussetzung,
dass sie beaufsichtigt werden oder dass sie eine
Einweisung in die sichere Nutzung des Geräts
und die damit verbundenen Gefahren erhalten
haben. Kinder von 3 bis 8 Jahren dürfen das
Gerät nicht an eine Steckdose anschließen,
regeln bzw. reinigen oder das Gerät warten.
VORSICHT: Einige Geräteteile können sehr
heiß werden und Verbrennungen hervorrufen.
Eine besondere Beaufsichtigung gilt bei
Kindern und schutzbedürftigen Personen.
WICHTIG: Verlängerungskabel nicht
verwenden, da eine Brandgefahr von einem
überhitzten Kabel ausgehen könnte.
ERSTICKUNGSGEFAHR: Die Fernbedienung
für diese Einheit enthält eine kleine Batterie.
Halten Sie die Fernbedienung von Kindern
fern und schlucken Sie die Batterie nicht.
Falls die Batterie verschluckt wird, gehen Sie
unverzüglich zum Arzt.
ACHTUNG: Zur Verhinderung einer Erstickung
entfernenSiebittealleVerpackungsmaterialien,
im Besonderen Kunststo und EPS und halten
Sie diese fern von verletzlichen Personen,
Kindern und Babys.
ACHTUNG: Zur Verhinderung des Risikos
einer zufälligen Strangulierung durch das
Netzkabel müssen alle Kinder und verletzliche
Personen überwacht werden, wenn sie sich in
der Nähe des Produkts aufhalten, egal ob es in
Betrieb ist oder nicht.
Diese Gebrauchsanweisung gehört zum
Gerät und ist an einem sicheren Ort
aufzubewahren. Bei Besitzerwechsel ist die
Bedienungsanleitung an den neuen Besitzer
zu übergeben.
Entzündliche Materialien wie Gardinen und
ähnliche Einrichtungsgegenstände von der
Vorder- und Rückseite sowie den Seiten des
Heizgeräts fernhalten. Das Heizgerät nicht
zum Wäschetrocknen verwenden.
NICHT verwenden, wenn dieses Heizgerät
fallen gelassen wurde.
NICHT verwenden, wenn das Heizgerät
sichtbare Schäden aufweist.
WICHTIG: Dieses Heizgerät muss auf einer
waagerechten, stabilen Oberäche verwendet
werden.
ACHTUNG: Dieses Heizgerät nicht in kleinen
Räumen verwenden,wenn sich darin Personen
aufhalten, die den Raum nicht alleine verlassen
können, es sei denn, das Gerät wird ständig
überwacht.
ACHTUNG: Um die Brandgefahr zu verringern,
Textilien, Vorhänge oder andere brennbare
Materialien mindestens 1 m vom Luftauslass
entfernt halten.
ELEKTRISCHER ANSCHLUSS
Das Heizgerät darf nur an eine
Wechselstromversorgung angeschlossen werden
unddieaufdemGerätangegebeneSpannungmuss
mit der Versorgungsspannung übereinstimmen.
DE

Abmessungen
270 mm
694 mm
270 mm

Montage
• Önen Sie die Verpackung und entfernen Sie das Produkt.
• Der Glasboden ist im nicht-montierten Zustand verpackt.
• Entfernen Sie die Befestigungsmutter vom Boden des Produkts.
• Schieben Sie den Glasboden in seine Position.
• Schrauben Sie die Befestigungsmutter an, um den Glasboden in seiner Position zu befestigen.
• Das Produkt ist nun montiert und muss in einer aufrechten Position platziert werden.
• Achten Sie darauf, dass das Heizgerät immer auf einer stabilen Oberäche betrieben werden muss.
Bedienelemente
Erhöhen
Reduzieren
Gebläsedrehzahl
(nur Kühlen)
Oszillation Rücklauf
-Zeitschaltuhr
Heizmodus
Standby

Standby
• Wenn das Gerät angesteckt ist, ertönt ein hörbarer Piepton.
.
Ersteinrichtung?
JA
Beim ersten Start startet das Produkt mit den
Standardeinstellungen. Die Temperatur wird
auf 22 °C eingestellt und die Heizeinstellung
auf den intelligenten Heizmodus, siehe
Heizeinstellungen auf dem nachstehenden
Bildschirm
• Bei Aktivierung des Standby-Modus gibt es einen Countdown von 10 auf 1 vor dem Ausschalten.
• Bei Trennung von der Stromversorgung (ausgesteckt/Stromsperre/Kippschalter) sowie
erneuter Verbindung und Einschaltung des Produkts kehrt es zu den zuletzt verwendeten
Einstellungen für die Heizeinstellungen, Gebläseeinstellungen, Temperatureinstellungen, Ton
und Audio zurück. Das Bluetooth führte einen erneuten Verbindungsversuch durch. Die
Rücklauf-Zeitschaltuhr und die Oszillation werden ausgeschaltet.
Hinweis:
Inaktive Tasten
geben beim Drücken keinen
Piepton ab.
Standby-Modus
Strom läuft zum Produkt, aber das Produkt ist
nicht eingeschaltet. Nach dem Drucken der
Standby-Taste wird das Produkt eingeschaltet
und das Symbol STANDBY erlischt.
Drücken Sie die Taste Standby um das Produkt einzuschalten.
NO
Nach dem anschließenden Einschalten kehrt das
ProduktzudenzuletztverwendetenEinstellungen
für Heizeinstellungen, Gebläseeinstellungen,
Temperatureinstellung, Ton und Audio
zurück. Das Bluetooth führt einen erneuten
Verbindungsversuch durch, siehe Bluetooth.
Rücklauf-Zeitschaltuhr und Oszillation werden
ausgeschaltet. Der nachstehende Bildschirm
zeigt ein Beispiel dafür, wenn der Benutzer zuvor
die Temperatur auf 25 °C und die Heizeinstellung
auf NIEDRIG eingestellt hat.
Drücken Sie die Taste Standby um das Produkt in Standby
zu versetzen.

Remote-Bluetooth-Verbindung/Betrieb
VERBUNDEN
Verbindung : Langsam
blinkendes Symbol
Halten Sie es 2 Sekunden lang gedrückt,
um den Verbindungsprozess zu starten.
Wurde das Produkt zuvor verbunden?
NEIN JA
Wenn die Rücklauf-Zeitschaltuhr und
Heizleistung 2 Sekunden lang gedrückt
gehalten werden, beginnt das Bluetooth-
Symbol, langsam zu blinken. Sie können nun
das Produkt mithilfe eines smarten Geräts
verbinden.
Wenn ein Gerät gefunden wurde und
verbunden wird, beginnt das Bluetooth-
Symbol schnell zu blinken, bis das Gerät
verbunden wird, wobei das Symbol mit dem
Blinken aufhört und eingeschaltet bleibt.
Wenn das Produkt nach 60 Sekunden nicht
verbunden werden kann, verlässt es den
Verbindungsmodus und das Bluetooth-
Symbol erlischt.
Beim Einschalten und wenn Bluetooth
zuvor eingerichtet wurde, sucht das Produkt
automatisch 60 Sekunden lang nach
einem zuvor verbundenen Gerät. Wenn das
vorherige Gerät nach 60 Sekunden nicht
gefunden wurde, verlässt Bluetooth den
Verbindungsmodus und das Bluetooth-
Symbol erlischt.
Wenn ein verbundenes Gerät die Reichweite
überschreitet, versucht das Produkt 60
Sekunden lang, erneut eine Verbindung
herzustellen, und verlässt anschließend den
Verbindungsmodus und das Bluetooth-
Symbol erlischt. Wenn ein zuvor verbundenes
Gerät wieder in Reichweite ist, verbindet das
Produkt automatisch wieder.
Halten Sie 2 Sekunden lang gedrückt, um den Verbindungsmodus
zu verlassen und das Bluetooth-Symbol auszuschalten.
Das Symbol leuchtet
dauerhaft.
Das Gerät kann mit einem Smartphone oder einem ähnlichen Gerät ferngesteuert werden.
Zur Erleichterung der Fernbedienung muss zunächst die App heruntergeladen werden.
Die App ist sowohl für Android- als auch für IOS-Geräte verfügbar und kostenlos erhältlich
im Apple Store oder Android App Store. Die App ist kompatibel mit der Android-Version
4.3 oder höher und der iOS-Version 5 und höher. Nach dem Herunterladen der App muss
das Gerät mit dem Smartphone verbunden werden, um die Einrichtung der Fernbedienung
abzuschließen. Befolgen Sie bitte die nachstehend dargestellten Schritte:
• Auf dem Smartphone oder einem anderen Gerät sollte das Gerät sichtbar auf dem Verbindungsbildschirm sein,
und zwar in Form eines einzigartigen 6-stelligen Codes, wobei dieser immer mit „SZ“ anfängt, beispielsweise
„SZ6417“. Wählen Sie dieses Gerät und drücken Sie „Verbinden“, um den Verbindungsprozess einzuleiten.

Aufbewahrung der
Fernbedienung Fernbedienung
Standby
Erhöhen
Heizmodus
Oszillation
Reduzieren
Gebläsedrehzahl
(nur Kühlen)
Rücklauf-
Zeitschaltuhr
Wechsel der Batterien
derFernbedienung
Heiß: Nicht berühren

Heizmodus
Durch die
Heizmodi
blättern oder
Gebläsedrehzahl (nur Kühlen)
Erhöhen Sie die
Temperatur
(Max. 30 ºC/86 ºF)
Reduzieren Sie die
Temperatur
(Min. 5 ºC/41 ºF)
Bei Einstellung auf 5 ºC erscheint das Frostschutz-Symbol. Das Produkt schaltet sich abwechselnd
ein und aus, um eine Temperatur von ungefähr 5 °C beizubehalten, um einen gewissen Schutz
vor Frostbedingungen zu bieten.
Intelligente Eco Hitze: Das Produkt regulierte die Raumtemperatur automatisch entsprechend. In
diesem Modus arbeitet das Produkt bei voller Leistung, wobei die Leistung des Produkts automatisch
reduziert und reguliert wird, weil die Raumtemperatur sich dem gewünschten Wert nähert. Dieser
Modus optimiert den Energieverbrauch durch Berechnung der ezientesten und eektivsten
Methode zur Erreichung der gewünschten Temperatureinstellung. Die gewünschte Raumtemperatur
kann jederzeit während des Betriebs, durch Drücken der entsprechenden Taste, eingestellt werden.
Hohe Heizleistung: In diesem Modus arbeitet das Gerät bei einer Einstellung für hohe Heizleistung,
und läuft automatisch bei dieser Einstellung, um die Raumtemperatur-Einstellung beizubehalten.
Die Gebläse-Drehzahl wird automatisch auf eine mittlere Drehzahl eingestellt, um die Heizleistung
zu stärken.
Niedrige Heizleistung: In diesem Modus arbeitet das Gerät bei einer Einstellung für niedrige
Heizleistung, und läuft automatisch bei dieser Einstellung, um die Raumtemperatur-Einstellung
beizubehalten. Die Gebläse-Drehzahl wird automatisch auf eine niedrige Drehzahl eingestellt.
• Wenn die Temperatur eingestellt und niedriger als die Raumtemperatur ist, schaltet sich das Produkt ab. Die
Temperatur blinkt, um dies anzuzeigen. Das Produkt bleibt in diesem Status, bis die Raumtemperatur sinkt oder
die eingestellte Temperatur höher als die Raumtemperatur eingestellt wird.
Gebläse-Drehzahl erhöhenGebläse-Drehzahl
reduzieren
Durchlauf Gebläse-
Drehzahlen
Niedrige Drehzahl: Diese Drehzahl ist für die Bereitstellung einer niedrigen
Kühlwirkung vorgesehen.
Mittlere Drehzahl: Diese Drehzahl ist für die Bereitstellung einer mittleren
Kühlwirkung vorgesehen.
Turbo-Drehzahl: Die Einstellung „höchste Geschwindigkeit“ ist für die
Bereitstellung einer maximalen Kühlwirkung vorgesehen.
• Die voreingestellte Gebläse-Drehzahl ist niedrig. Wenn nur das Gebläse läuft, läuft das
aufgeteilte Display durch 3 Status zur Darstellung eines sich drehenden Gebläseügels.
ODER
This manual suits for next models
1
Table of contents
Languages:
Other EWT Heater manuals
Popular Heater manuals by other brands

Kinder
Kinder Limours Installation, user and servicing instructions

Nordic Home Culture
Nordic Home Culture CDR-1002 user manual

StripIR
StripIR 4185 instruction manual

Thermal Trend
Thermal Trend FENIX Installation and user manual

STIEBEL ELTRON
STIEBEL ELTRON IA 2054 extreme Operation and installation

Fondital
Fondital eBLITZ GD5806 Installation, use and maintenance manual