FAAC A1400 AIR RDT User manual

A1400 AIR RDT
EN16005:2012

A1400 AIR RDT 2 53211904 - Rev. C
FAAC S.p.A. Soc. Unipersonale
Via Calari, 10 - 40069 Zola Predosa BOLOGNA - ITALY
Tel. +39 051 61724 - Fax +39 051 758518
www.faac.it - www.faacgroup.com
Translation of the original instructions ENGLISH
© Copyright FAAC SpA dal 2014. All rights reserved.
No part of this manual may be reproduced, archived, distributed to
third parties nor copied in any other way, in any format and with any
means, be it electronic, mechanical or by photocopying, without prior
written authorisation by FAAC SpA.
All names and trademarks mentioned are the property of their respec-
tive manufacturers.
Customers may make copies exclusively for their own use.
This manual was published in 2014.

A1400 AIR RDT 3 53211904 - Rev. C
Direttive di riferimento:
Reference Directives:
2006/42/CE
TÜV Italia S.r.l. - TÜV SÜD Group
via G. Carducci, 125 pal 23
20099 Sesto S. Giovanni (MI)- Italy
T. +39 02 24130 1 F. +39 02 24130 0399
Document No.
TUV255076_TRoC A1400AIRRD_01
1
Technical Report of Compliance
Fabbricante:
Manufacturer
F
FA
AA
AC
CS
S.
.P
P.
.A
A.
.
Via Calari, 10 – 40069 Zola Predosa (BO)
Italy
Prodotto:
Product
A
A1
14
40
00
0A
AI
IR
RR
RD
D
Documenti esaminati:
Evaluated Documents
Fascicolo tecnico
Istruzioni per l’uso
Disegni, note di calcolo, relazioni tecniche
Norme armonizzate di riferimento:
Reference harmonized standards
EN ISO 12100:2010
EN ISO 13849-1:2008 PL:”d” Cat:3 (Escape Route Functionality)
EN 16005:2012
Il prodotto non è contemplato dall’Allegato IV della Direttiva 2006/42/CE.
La documentazione relativa al prodotto è stata verificata su base volontaria e risulta
essere conforme ai requisiti applicabili nel caso non siano presenti NC nel presente
Profile Validation (vedi § CONSIDERAZIONI FINALI).
The product is not referred to in Annex IV of 2006/42/CE Directive.
The product documents was tested on a voluntary basis and complies with the EHSRs
required if they are not present in this Profile Validation NC (see § FINAL
CONSIDERATIONS).
Bologna, Febbraio 2015
_______________________
dott. ing. ir. Michele Rinieri
Ispettore incaricato - TÜV Italia S.r.l.
Translation of the original instructions ENGLISH

A1400 AIR RDT 4 53211904 - Rev. C
Translation of the original instructions ENGLISH
EC DECLARATION OF CONFORMITY OF A MACHINE
(2006/42/CE ANN.II P.1, LETT. A)
Manufacturer and person authorised to compile the technical file
Company name: FAAC SpA
Address: Via Calari, 10 - 40069 Zola Predosa BOLOGNA - ITALY
hereby declares that the following machine:
Description: Linear sliding door with 1 or 2 leaves
Model: A1400 AIR RDT CS
complies with the following applicable EU legislations:
Machinery Directive 2006/42/EC (including all applicable amendments)
EMC Directive 2004/108/EC
Directive ROHS 2 2011/65/EU
and that the technical file has been compiled in compliance with part A of Annex VII.
Furthermore, the following harmonised standards have been applied:
EN 16005:2012
EN ISO 12100:2010
EN 61000-6-2:2005
EN 61000-6-3:2007
EN 60335-1:2013
EN 13849-1:2008 PL ”d”CAT. 3
EN 13849-2:2008
Bologna, 01-01-2015 CEO
A. Marcellan
EC DECLARATION OF CONFORMITY
The Manufacturer
Company name: FAAC SpA
Address: Via Calari, 10 - 40069 Zola Predosa BOLOGNA - ITALY
hereby declares that the following products:
Description: Automation for linear sliding door with 1 or 2 leaves
Model: A1400 AIR RDT KIT; A1400 AIR RDT PA
comply with the following applicable EU legislations:
EMC Directive 2004/108/EC
Directive ROHS 2 2011/65/EU
Furthermore, the following harmonised standards have been applied:
EN 16005:2012
EN 61000-6-2:2005
EN 61000-6-3:2007
Bologna, 01-01-2015 CEO
A. Marcellan

A1400 AIR RDT 5 53211904 - Rev. C
Translation of the original instructions ENGLISH
DECLARATION OF INCORPORATION OF PARTLY COMPLETED MACHINERY
(2006/42/CE ANN.II P.1, LETT. B)
Manufacturer and person authorised to prepare the relevant technical documentation
Company name: FAAC SpA
Address: Via Calari, 10 - 40069 Zola Predosa BOLOGNA - ITALY
hereby declares that for the partly completed machinery:
Description: Linear sliding door with 1 or 2 leaves
Model: A1400 AIR RDT KIT
the essential requirements of the Machinery Directive 2006/42/EC (including all applicable amendments) applied and met are:
RESS 1.1.2, 1.1.3, 1.1.4, 1.1.5, 1.1.6, 1.2.1, 1.2.3, 1.3.4, 1.5.1, 1.5.11, 1.5.13, 1.6.3, 1.7.1, 1.7.1.2, 1.7.4
and that the relevant technical documentation has been compiled in compliance with part B of Annex VII.
Furthermore, the following harmonised standards have been applied:
EN 16005:2012
EN ISO 12100:2010
EN 60335-1:2013
EN 60335-2-103:2011
EN 13849-1:2008
EN 13849-2:2008
It is also declared that the partly completed machinery identified above may not be commissioned until the final machine - into which it will be incorporated - has
been declared to conform to the provisions of the above mentioned Machine Directive 2006/42/EC.
Bologna, 01-01-2015 CEO
A. Marcellan
DECLARATION OF INCORPORATION OF PARTLY COMPLETED MACHINERY
(2006/42/CE ANN.II P.1, LETT. B)
Manufacturer and person authorised to prepare the relevant technical documentation
Company name: FAAC SpA
Address: Via Calari, 10 - 40069 Zola Predosa BOLOGNA - ITALY
hereby declares that for the partly completed machinery:
Description: Linear sliding door with 1 or 2 leaves
Model: A1400 AIR RDT PA
the essential requirements of the Machinery Directive 2006/42/EC (including all applicable amendments) applied and met are:
RESS 1.1.2, 1.1.3, 1.1.5, 1.1.6, 1.2.1, 1.2.3, 1.2.6, 1.3.1, 1.3.2, 1.3.3, 1.3.4, 1.4.1, 1.4.2.1, 1.5.1, 1.5.2, 1.5.4, 1.5.11, 1.5.13, 1.6.1,
1.6.3, 1.6.4, 1.6.5, 1.7.1, 1.7.1.2, 1.7.4
and that the relevant technical documentation has been compiled in compliance with part B of Annex VII.
Furthermore, the following harmonised standards have been applied:
EN 16005:2012
EN ISO 12100:2010
EN 60335-1:2013
EN 60335-2-103:2011
EN 13849-1:2008
EN 13849-2:2008
It is also declared that the partly completed machinery identified above may not be commissioned until the final machine - into which it will be incorporated - has
been declared to conform to the provisions of the above mentioned Machine Directive 2006/42/EC.
Bologna, 01-01-2015 CEO
A. Marcellan

A1400 AIR RDT 6 53211904 - Rev. C
Translation of the original instructions ENGLISH
CONTENTS
EC Declaration of conformity of a machine ................... 4
EC Declaration of conformity................................... 4
Declaration of incorporation of partly completed machinery5
1. INTRODUCTION TO THE INSTRUCTIONS MANUAL ......... 9
1.1 Safety recommendations ........................................ 9
Safety of the installer/maintenance technician .............. 9
Workplace safety ................................................ 9
Operator safety .................................................. 9
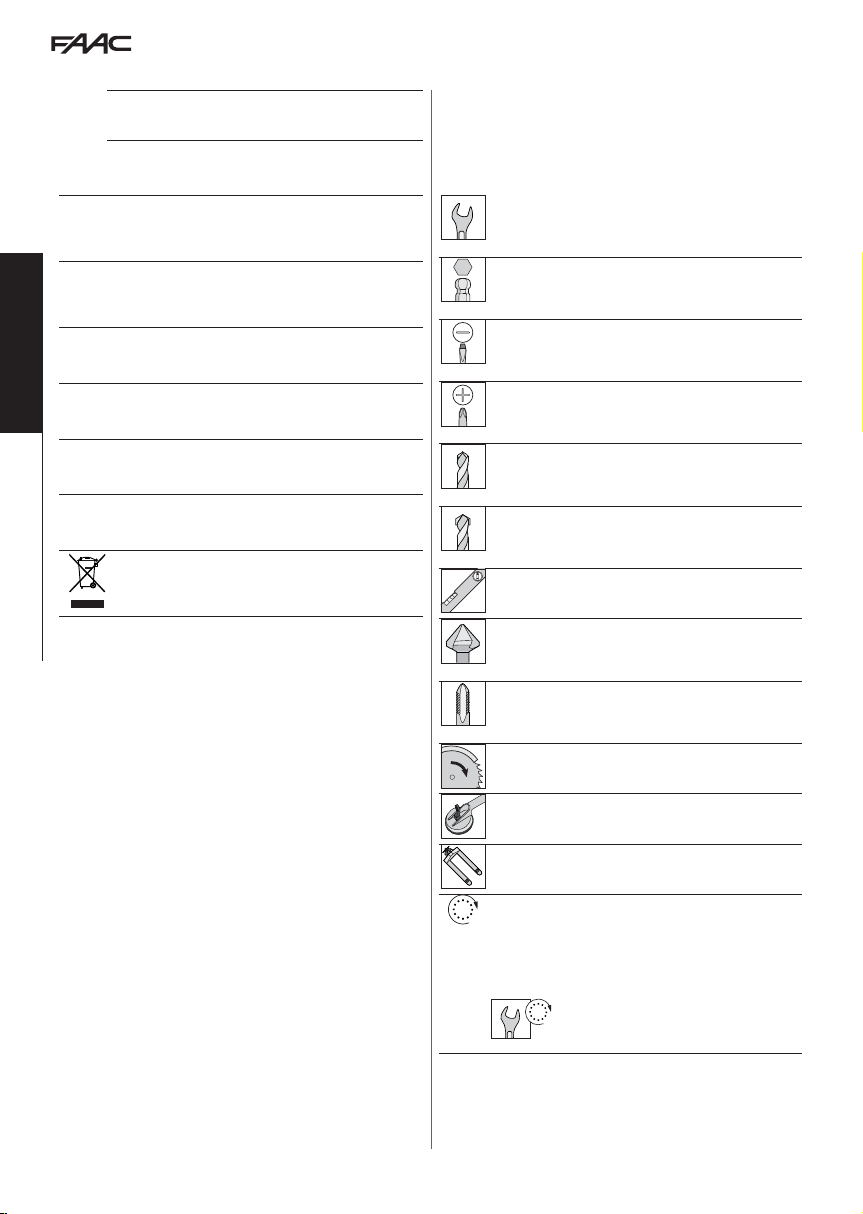
1.2 Meaning of the symbols used ..................................10
2. AUTOMATION A1400 AIR RDT ................................ 12
2.1 Intended use .....................................................12
Limitations for use..............................................12
2.2 Unauthorised use................................................12
2.3 Identification plate ..............................................13
2.4 Technical specifications .........................................14
2.5 Composition of the supply .....................................15
Installation stages according to type of supply ............. 15
Components of the automation ..............................16
3. REQUIRED INSPECTIONS AND ARRANGEMENTS ......... 18
3.1 Preliminary inspections .........................................18
3.2 Arrangement of electrical cables ..............................18
4. TRANSPORT AND RECEPTION OF THE CONSIGNMENT.. 19
Handle packages................................................19
Unpack and Handle.............................................19
5. CUT THE PROFILES .............................................. 20
6. ASSEMBLE THE HEAD SECTION .............................. 21
6.1 Preliminary for self-supporting head section (if any)........21
6.2 Assemble the components .....................................22
Mechanical stops ...............................................22
Electronics module and telescopic profile Rod..............23
Safety cables and spacers......................................23
Motor_1..........................................................23
Auxiliary_motor.................................................23
Motor release monitor XB LOCK...............................24
Internal release..................................................24
Motor block operation test XB LOCK .......................24
Cover drilling ....................................................25
Closed door monitor sensor ...................................25
Emergency battery kit .........................................25
7. ASSEMBLE THE FRAME A1400 AIR RDT CS ................. 26
7.1 Entry door with Profiles TK50...................................26
Preliminary operations.........................................26
Assembling the frame..........................................26
Fastening the fixed leaves .....................................27
Mounting mobile leaves .......................................27
Glazing installation .............................................27
Assembly of the head section to the upper profile .........27
7.2 Entry door with profiles TK20 ..................................27
Preliminary operations.........................................27
Assembling the frame..........................................28
Mounting MOBILE LEAVES ....................................28
Assembly of the head section to the upper profile .........28
8. INSTALL THE HEAD SECTION.................................. 29
8.1 Preliminary operations..........................................29
8.2 Wall fastening ....................................................29
8.3 Self-supporting automation fastening........................30
8.4 Mount the transom..............................................31
9. INSTALL LEAVES ................................................. 32
9.1 Mount the lower shoes .........................................32
Shoe with bracket TK50........................................32
Swivel shoe TK50 ...............................................32
Shoe with bracket TK20........................................32
9.2 Mount profiles on the leaves ...................................33
9.3 Mount the lower brush strip....................................33
Glass leaves......................................................33
9.4 Install leaves......................................................33
9.5 PREPARING THE EXTERNAL CARRIAGES .......................34
9.6 Telescopic profile assembly.....................................35
9.7 plate on telescopic profile ......................................36
9.8 PREPARING EXTERNAL CARRIAGES ............................36
9.9 Steel cable fixing ................................................38
9.10 Adjust leaves and carriages ...................................39
Height of the leaves ............................................39
Depth of the leaves.............................................39
Counter wheel ..................................................39
10. INSTALL GLASS LEAVES ...................................... 40
10.1 Mount the sweepers ...........................................42
11. ASSEMBLE THE BELT, CASING AND ACCESSORIES ...... 43
11.1 Mount the belt .................................................43
Adjust the belt...................................................44
11.2 Belt tensioning .................................................45
11.3 Adjust the mechanical stops..................................46
Stops on opening...............................................46
Double leaf closing stops ......................................46
Single leaf closing stops........................................46
11.4 Mount the side profiles........................................47
11.5 Install the casing brackets.....................................47
11.6 Fit the closing cover............................................48
11.7 Mount motor block XB LOCK..................................49
11.8 Adjust Motor block XB LOCK..................................49
11.9 Align Motor block ..............................................50
11.10 Mount motor block XM LOCK ...............................50
11.11 Mount the cable gland guides ..............................50
12. ELECTRONIC INSTALLATION................................. 51
12.1 Electronics module.............................................51
Electronic board E1400 RD.....................................51
12.2 Terminal boards and connectors .............................53
J1 J2 J3 J4 - Safety detectors...................................53
J5 - Internal motion detector ..................................53
J6 - External motion detector .................................53
J7 - Emergency: remote opening .............................53
J8 - SDK EVO.....................................................53
J9 - Button photocells XFA.....................................53
J10 - Main power supply 36V - 4A.............................53
J11 - Motor_1 ....................................................53
J12 - Motor_1 Encoder..........................................53
J13 - Motor block and monitoring (OPTIONALS) ............54
J14 - Emergency battery .......................................54

A1400 AIR RDT 7 53211904 - Rev. C
Translation of the original instructions ENGLISH
J17 - USB Port....................................................54
J18 - NOT used ..................................................54
J21 - Configurable inputs ......................................54
J22 - Configurable outputs ....................................54
J23 J24 J25 - Optional modules ...............................54
12.3 Motors and encoders ..........................................55
12.4 Motor block XB LOCK and monitoring (OPTIONAL)........55
12.5 Motor block XM LOCK and monitoring (OPTIONAL) .......56
12.6 EXIT detector XDT3 and entry detector XDT1 ..............57
12.7 EXIT and ENTRY detectors XDT3 ..............................58
12.8 Detectors XBFA for safety on opening for configurations
12.5/12.6...............................................................59
12.9 2 exit detectors XDT3 and 2 entry detectors XDT1 .........60
12.10 Detectors XBFA for safety on opening for configuration
12.8.....................................................................61
12.11 J9 - Button photocells XFA ...................................62
12.12 J7 - Emergency: remote opening ...........................62
J22 - Configurable outputs ....................................62
13. COMMISSIONING .............................................. 63
Preliminary checks prior to commissioning .................63
13.1 System power supply and SETUP.............................63
Checks following SETUP .......................................63
Saving the Configuration ......................................63
13.2 Basic / advanced programming ..............................64
14. SYSTEM FUNCTIONALITY/CONFIGURATIONS ........... 68
14.1 Operating mode ...............................................68
14.2 Inputs configuration ..........................................69
14.3 Configuration of J22 outputs .................................71
14.4 Obstacle detection.............................................71
14.5 Anti-intrusion and PULL&GO .................................71
14.6 Function Energy Saving ......................................72
How to activate theEnergy Saving............................72
14.7 Function Low Energy in closing -
CS CF
CS CF ..................72
How to set Low Energy on closure............................72
15. DIAGNOSTICS AND PROCEDURES.......................... 73
15.1 Acoustic signal..................................................73
15.2 System diagnostics: alerts, errors.............................73
15.3 Solution of problems or outages .............................76
16. OPERATIONS ON THE BOARD ............................... 77
16.1 Setup ............................................................77
How to perform setup from board ...........................77
16.2 RESET ............................................................77
When is Reset necessary .......................................77
How to perform RESET from board...........................77
16.3 Restoring factory status .......................................77
When is Restore necessary ....................................77
How to perform restore........................................77
16.4 Update (UPLOAD) ..............................................78
16.5 Download.......................................................78
17. LKEVO ............................................................ 80
17.2 selection MENU ................................................80
18. SDK EVO ......................................................... 84
18.1 Assembly and testing..........................................84
18.2 Switching on and use..........................................84
18.3 Home page .....................................................85
18.4 Reset - Block/Release SDKEVO................................85
18.5 PASSWORD......................................................85
18.6 selection MENU ................................................86
18.7 Function MENU.................................................87
Menu 1 language ...............................................90
Menu 2 Programming..........................................90
Menu 3 ERRORS.................................................93
Menu 4 INDICATIONS...........................................93
Menu 5 CYCLE COUNTER.......................................94
Menu 6 DATE / TIME ............................................94
Menu 7 TIMER...................................................94
External programmers LKEVOSDK EVOnd 95
95
Menu 8 PASSWORD.............................................95
Menu 9 INFO ....................................................96
19. MAINTENANCE ................................................. 97
19.1 Calculation estimate of cycles performed ...................97
Routine maintenance ..........................................97
Periodic replacements .........................................97
19.2 Maintenance technician safety ...............................98
19.3 Replacements ..................................................98
19.4 Cleaning....................................................... 100
19.5 Functional checks ............................................ 100
20. WASTE DISPOSAL .............................................100
21. ANNEXES .......................................................101
21.1 Installation diagrams ........................................ 102
A1400 AIR RDT with TK20 2 mobile leaves and fixed leaf 102
A1400 AIR RDT with TK20 2 mobile leaves ................. 103
A1400 AIR RDT with tk20 4 mobile leaves ................ 104
A1400 AIR RDT with tk20 4 mobile leaves and 2 fixed leaves
105
Position of components on support profile ............... 106
A1400 AIR RDTRight Opening Single Leaf.................. 106
A1400 AIR RDT Left Opening Single Leaf................... 107
A140 AIR Telescopic Single Leaf Right and Left Opening 108
A1400 AIR RDT Double Leaf.................................. 109
A140 AIR Telescopic Double Leaf ........................... 110
21.2 selection MENU .............................................. 113
21.3 selection MENU .............................................. 115

A1400 AIR RDT 8 53211904 - Rev. C
Translation of the original instructions ENGLISH
INDEX OF TABLES
1 Symbols: notes and warnings on the instructions .................. 10
2 Symbols: work equipment (type and size)......................... 10
3 Symbols: safety recommendations (EN ISO 7010) .................. 11
4 Symbols: signs on the product.................................... 11
5 Symbols: Personal Protective Equipment .......................... 11
6 Symbols: signs on the packaging ................................. 11
7 Technical specifications .......................................... 14
8 Profile cutting measurements .................................... 20
9 Belt tensioning (measurements in mm)........................... 45
10 LED on the board................................................ 52
11 BASIC programming fw version 1.6 or higher...................... 65
12 ADVANCED programming fw version 1.6 or higher ................. 65
13 Setting max speed in Low Energy................................. 72
14 Statuses of the automation ...................................... 73
15 Errors........................................................... 74
16 Alerts .......................................................... 75
17 AUX Errors ...................................................... 75
18 Guide to outage solution......................................... 76
19 Updating functions (UPLOAD) from USB........................... 78
20 Download Functions on USB ..................................... 78
21 Firmware and programming file names ........................... 78
22 BOOTLOADER Errors ............................................. 79
23 Errors........................................................... 82
24 Alerts .......................................................... 83
25 Firmware Version ............................................... 83
26 FUNCTION Menu ................................................ 88
27 Maintenance and replacement programme ....................... 97
28 Automation weights........................................... 101
29 Positions of components on the head section.................... 101

A1400 AIR RDT 9 53211904 - Rev. C
Translation of the original instructions ENGLISH
1. INTRODUCTION TO THE INSTRUCTIONS MANUAL
The instructions manual provides the correct procedures and require-
ments to be complied with for installation and operation of the system
in safe conditions.
! Carefully read and comply with all the instructions before starting
any activity on the product.
Keep these instructions for future reference.
Unless otherwise specified, the measurements provided in the
instructions are in mm.
In writing the instructions manual, due account was taken of the
results of the risk assessment conducted by the manufacturer on the
entire life cycle of the automation in order to implement effective
risk reduction.
The following stages of the life cycle of the automation were con-
sidered:
-Consignment reception/handling
-Assembly and installation
-Setting up and commissioning
-Operation
-Maintenance / addressing any failures
-Disposal at the end of the product’s life.
The sources of risk arising from installation and use of the automation
were taken into account:
-Risks for the installer/maintenance technician (technical personnel)
-Risks for the automation’s operator
-Risks for the product’s integrity (damage)
1.1 SAFETY RECOMMENDATIONS
The installer/maintenance technician is responsible for the instal-
lation/testing of the system and for filling in the system’s Register.
SAFETY OF THE INSTALLER/MAINTENANCE TECHNICIAN
! Installation must be performed in compliance with Standards cur-
rently in force. The installer’s safety is connected to environmental
and operative conditions that reduce the risks of accidents and severe
damage to a minimum.
It should be remarked that most accidents occurring in the workplace
are caused by failure to comply with and monitor the most basic and
fundamental safety and prevention rules.
The installer/maintenance technician must prove or declare to pos-
sess the technical-professional proficiency to perform installation,
testing and maintenance activities according to the requirements of
these instructions. He or she is bound to read and comply with the
instructions manual.
Incorrect installation and/or incorrect use of the product might cause
serious harm to people.
Perform installation and other activities adhering to the sequences
provided in the instructions manual.
Always comply with all the requirements contained in the instructions
and warning tables at the beginning of the paragraphs.
Do not modify the components of the automation system in any way.
Only the installer and/or maintenance technician is authorised to
open the automation casing.
FAAC disclaims any liability involving the automation’s safety and
proper operation in the event non-original components are used FAAC.
For the supplyA1400 AIR RDT CS, FAAC a System Register form is
provided.
WORKPLACE SAFETY
! The installer/maintenance technician must be in good psycho-
physical conditions, aware of and responsible about the hazards that
may be engendered when using a machine.
The installation activity requires special work conditions. Further-
more, the suitable precautions must be taken to prevent risks of
injury to persons or damage.
It is recommended to always comply with the safety recommenda-
tions.
Cordon off the work site and prevent access to the area.
The work area must be kept tidy and must not be left unattended.
Do not wear clothes or accessories - such as ties or bracelets - that
might get caught in moving parts.
Always wear the personal protective equipment recommended for
the type of activity to be carried out.
Use work instruments in good conditions.
The required level of workplace lighting must be equal to at least
200 lux.
Use the transport and lifting equipment recommended in the instruc-
tions manual.
Use safety-compliant portable ladders of adequate size, fitted with
anti-slip devices at the top and bottom, equipped with retainer hooks.
OPERATOR SAFETY
! The operator in charge of using the automation is responsible for
running the system.
He or she is bound to read and comply with the instructions manual.
He/she must be in good psycho-physical conditions, aware of and
responsible about the hazards that may be engendered when using
a machine.
The required level of ambient lighting must be equal to at least
200 lux.
The operator in charge of using the automation must prevent use of
the control devices to anyone who is not explicitly authorised and
instructed by them. He/she must not allow access to the control
devices to persons under age or with reduced psycho-physical abili-
ties, unless under supervision by an adult responsible for their safety.
Do not use the system in case of malfunctioning.
In no event shall the operator be authorised to perform any procedure
inside the automation housing or on installed components.
The operator is not allowed to perform any type of procedure on the
motorisation or on other system components.
In the event of malfunctioning, the operator must abstain from any
attempt to repair or intervene directly. He/she must request interven-
tion by the INSTALLER/MAINTENANCE TECHNICIAN.
The operator must have the system’s maintenance be carried out
according to the instructions provided in this manual.
The installer/maintenance technician must provide the operator
with all the information required to operate the system and for
emergency situations.
The installer/maintenance technician must supply the system’s
Register to the owner.

A1400 AIR RDT 10 53211904 - Rev. C
Translation of the original instructions ENGLISH
1.2 MEANING OF THE SYMBOLS USED
! Perform the operations and steps described in compliance with safety
regulations and the instructions provided so as to prevent the risks
indicated by the symbols in the following tables.
2 Symbols: work equipment (type and size)
6-8...
HEX WRENCH of the specified size (6, 8...)
6-8...
ALLEN KEY with ROUND HEAD of the specified size (6, 8...)
6-8...
FLAT-HEAD SCREWDRIVER of the specified size (6, 8...)
6-8...
CROSS-HEAD SCREWDRIVER of the specified size (6, 8...)
6-8...
METAL DRILL BITS of the specified size (6, 8...)
6-8...
MASONRY DRILL BITS of the specified size (6, 8...)
LEVEL
45°...
COUNTERSINK with specified angle (45°...)
M6-M8...
THREADING TAP with specified thread (M6, M8...)
ROUND SAW
GLASS SUCTION CUPS
PALLET FORKS
TOOL withTORQUE ADJUSTMENT
Itindicates thatatool withtorqueadjustmentis requiredwherenecessary
for safety reasons.
TIGHTENING TORQUE VALUE
The pictures specify the tool and the tightening torque in Nm. E.g.:
HEX WRENCH 6 set at 2.5 Nm
2.5
2.5
Nm
1 Symbols: notes and warnings on the instructions
!CAUTION
It indicates the risk of personal injury or damage to parts. The described
operation/step must be carried out in compliance with the instructions
provided and with safety regulations.
FWARNING ELECTROCUTION HAZARD
Indicates risk of electrocution. The described operation/step must be
carried out in compliance with the instructions provided and with safety
regulations.
WARNING
Details and specifications to be followed with the utmost attention, in
order to ensure correct operation of the system.
PAGE REFERENCE
It refers to the page indicated by the number for details or clarifications.
PICTURE REFERENCE
It refers to the picture indicated by the number.
TABLE REFERENCE
It refers to the table indicated by the number.
CAUTION
The batteries and electronic components must not be disposed of with
household waste but delivered to authorised disposal and recycling
centres.

A1400 AIR RDT 11 53211904 - Rev. C
Translation of the original instructions ENGLISH
3 Symbols: safety recommendations (EN ISO 7010)
GENERIC HAZARD
It indicates the risk of personal injury or damage to parts.
ELECTROCUTION HAZARD
It indicates the risk of electrocution due to the presence of live parts.
RISK OF CRUSHING AND MUSCULOSKELETAL DISORDERS
It indicates the risk of crushing and musculo-skeletal disorders due to
lifting heavy parts.
BURNING OR SCALDING HAZARD
It indicates the risk of burning or scalding due to the presence of parts
at high temperature.
CRUSHING HAZARD
It indicates the risk of crushing hands/feet due to the presence of heavy
parts.
RISK OF CRUSHING HANDS
Itindicates therisk of crushinghands dueto thepresenceof movingparts.
CUTTING/AMPUTATION/PIERCING HAZARD
It indicates the risk of cutting due to the presence of sharp parts or using
pointed tools (drill).
SHEARING HAZARD
It indicates the risk of shearing due to moving parts.
RISK OF IMPACT/CRUSHING
It indicates the risk of impact or crushing due to moving parts.
FALLING OBJECTS HAZARD
It indicates the risk of impact due to falling objects.
SPENT BATTERIES HAZARD
It indicates a risk for the environment and health arising from spent bat-
teries due to possible leakage of the liquid content.
COLLISION WITH FORKLIFT TRUCKS HAZARD
It indicates a risk of collision/impact with forklift trucks.
5 Symbols: Personal Protective Equipment
Personal protective equipment to be worn for protection from any
risks (e.g. crushing, cutting, shearing, etc.):
Obligation to wear head protection helmet.
Obligation to wear safety footwear.
Obligation to wear mask/goggles to protect the eyes from the risk of
fragments due to the use of drill or welder.
Obligation to wear work gloves.
Obligation to wear ear protectors.
Obligation to wear overalls. Do not wear clothes or accessories - such as
ties or bracelets - that might get caught in moving parts.
6 Symbols: signs on the packaging
Important warnings for the safety of people and integrity of the load:
Handle with care. Presence of fragile parts.
Store away from water and humidity.
PROHIBITION to stack items.
2Maximum number of stackable items, e.g.: 2.
Wear work gloves.
Wear safety footwear.
Use pallet trucks.
Use forklift trucks.
20 kg is the MAX weight that 1 person can lift.
K
g
___
_
WEIGHT of the load.
4 Symbols: signs on the product
Obligation to read the instructions

A1400 AIR RDT 12 53211904 - Rev. C
1
230V~
6
1
2
5
4
3
7
7
Translation of the original instructions ENGLISH
2. AUTOMATION A1400 AIR RDT
2.1 INTENDED USE
Systems FAAC series A1400 AIR RDT make it possible to operate auto-
matically, manage and control operation of sliding one- or two-leaf
doors, with linear horizontal motion.
The automations of series A1400 AIR RDT are designed to install
automated entry doors exclusively for pedestrian traffic.
They are suitable for installing emergency exits compliant with
standard EN 16005:2012.
They are suitable for indoor installation, for applications meeting the
features detailed in 7.
! No other use outside the ones set out above is allowed by the
manufacturer.
FAAC disclaims all liability deriving from misuse or use other than that
for which the automation is intended.
LIMITATIONS FOR USE
Do not use the automation in the presence of the following conditions:
-direct exposure to weathering
-exposure to direct water jets of any type or extent
-outside the technical limitations set out. Specifically, it is forbid-
den to connect to sources of energy other than those set out.
2.2 UNAUTHORISED USE
It is forbidden to:
-use the automation for uses other than THE INTENDED USE;
-use the automation for installing smoke and/or fire protection
doors (fire doors);
-install integral anti-panic breakout systems (APN) on doors series
A1400 AIR RDT;
-use the automation with mobile and fixed guards tampered
with or removed;
-use the automation in premises under risk of explosion and/or
fire: the presence of flammable gases or fumes is a severe danger
for safety (the product is not certified pursuant to the 94/9/EC
ATEX directive);
-integrate other systems and/or commercial equipment not
intended;
-use other systems and/or commercial equipment for uses not
authorised by the respective manufacturers;
-use commercial devices for purposes other than those set out by
the respective manufacturers.
external
internal
1 Monitored detector for internal opening and safe closing (XDT3) included in the supply
2 Monitored detector for external opening and safe closing (XV1/XDT1) optional accessory
3 SDK EVO optional accessory
4 Key switch to lock theSDK EVO optional accessory
5 Emergency/Key/OPEN control buttons optional accessories
6 Power supply 230V~
7 Internal monitored detectors for safe opening (XBFA) optional accessory

A1400 AIR RDT 13 53211904 - Rev. C
2
1050400000
1050400000
0114
0114
0001
0001
1
1
Translation of the original instructions ENGLISH
2.3 IDENTIFICATION PLATE
The identification plate 2-1 is located on the support profile.
In case of supplyA1400 AIR RDT KIT, the identification plate must
be applied in a visible position, under the installer’s responsibility
2-1.
Month and year of production (mm/
yy)
Sale code
Sale code
Product name
Progressive no. of the month of
production
IDENTIFICATION NUMBER
example:

A1400 AIR RDT 14 53211904 - Rev. C
Translation of the original instructions ENGLISH
2.4 TECHNICAL SPECIFICATIONS
7 Technical specifications
MODEL A1400 AIR RDT single leaf A1400 AIR RDT double leaf
Length * [mm] from 1750 to 4600 from 2200 to 6100
Depth * [mm] 234 234
Total depth with self-supporting beam * [mm] 289 289
Height * [mm] 100 100
Weight** [kg] MIN. 25 - MAX 43 MIN. 31 - MAX. 55
No. of leaves 2 4
MAX weight of one leaf *** The weight depends on the leaf dimensions:
L [m] Pmax [Kg]
≤ 1.4 110+110
1.6 90+90
1.7 75+75
1.8 65+65
2.0 60+60
2.2 63+63
2.4 70+70
2.6 80+80
2.8 90+90
3.0 110+110
The weight is independent of leaf dimen-
sions:
60+60+60+60 [Kg]
Passage opening (Vp) [mm] from 1100 to 3000 from 1400 to 3000
Beam length [mm] Vp x 1.5 +100 Vp x 1.5 +100
Maximum framed leaf thickness [mm] 65 65
Power supply voltage 230V~ (+6% -10% ) 50 Hz 230 V~(+6% -10% ) 50 Hz
MAX Absorbed power [W] 140 140
Use frequency 100 % 100 %
Main motor (with encoder) powered at 36V powered at 36V
Auxiliary motor (without encoder) powered at 36V powered at 36V
Max. accessories load 1A, 24V (excludingSDK EVO) 1A, 24V (excluding SDK EVO)
Time/date backup battery Lithium CR2032 3V Lithium CR2032 3V
Motion backup battery NiMh 24V 1800mAh NiMh 24V 1800mAh
Traction by toothed belt by toothed belt
Opening/closing speed adjustment (empty) [cm/s] 10... 75 20... 150
Partial opening adjustment 5%... 95% of total opening 5%... 95% of total opening
Pause time adjustment [s] 0... 30 0... 30
Night pause time adjustment [s] 0... 240 0... 240
Anti-crushing device in opening/closing in opening/closing
Protection sensors monitoring (EN 16005:2012) can be bypassed can be bypassed
Function Energy Saving can be enabled can be enabled
Drive Low Energy can be enabled can be enabled
Operating ambient temperature [°C] -20... +55 -20... +55
Automation protection degree IP 23 (internal use) IP 23 (internal use)
* The dimensions and weight of the automation are specified excluding carriage and leaf overall dimensions, which are customisable
** For the specifications of weights in relation to automation length, see 28.
*** The leaf weight is variable non proportional to L leaf dimension. This is connected to the opening speed which must remain constant regardless of leaf weight and size,
with reference to standard EN 16005:2012.

A1400 AIR RDT 15 53211904 - Rev. C
Translation of the original instructions ENGLISH
2.5 COMPOSITION OF THE SUPPLY
Automations FAAC of the A1400 AIR RDT series may be purchased
with the following supply methods:
-Automation in kit: A1400 AIR RDT KIT
-Assembled automation: A1400 AIR RDT PA
-Complete entry door: A1400 AIR RDT CS
INSTALLATION STAGES ACCORDING TO TYPE OF SUPPLY
! During installation, it is recommended to comply with the order of
the sections set out based on the type of purchased supply.
A1400 AIR RDT KIT
A
B
A. Package with automation components to be assembled on the
support profile FAAC
B. Package with profiles FAAC purchased in 4.30 m or 6.10 m length
rods
Sequence of installation phases (dedicated sections in the instructions
manual)
- Required inspections and arrangements (§ 3)
- Cutting the profiles (§ 5)
- Installation of the head section: assembly of the components on the
support profile (use exclusively profiles FAAC) (§ 6)
- Installation of the head section (§ 8)
- Installation of the leaves (§ 9) - for glass Leaves (§ 10)
- Electronic installation (§ 12)
- Commissioning (§ 13)
A1400 AIR RDT PA
C
C. Automation assembled on head section FAAC*
Sequence of installation phases (dedicated sections in the instructions manual)
- Required inspections and arrangements (§ 3)
- Installation of the head section (§ 8)
- Installation of the leaves (§ 9) - for glass Leaves (§ 10)
- Electronic installation (§ 12)
- Commissioning (§ 13)
A1400 AIR RDT CS
C
D
E
C. Automation assembled on head section FAAC*
D. Leaves FAAC (with TK20 or TK50 profiles)
E. Package with TK20 or TK50 profiles to install the door wall frame
FAAC
Sequence of installation phases (dedicated sections in the instructions
manual)
- Required inspections and arrangements (§ 3)
- Installation of the door wall frame (§ 8) with FAAC - TK50 or TK20
profiles
- Installation of the head section (§ 8)
- Installation of the leaves (§ 9) - for glass Leaves (§ 10)
- Electronic installation (§ 12)
- Commissioning (§ 13)
* supplied with the required measurement and with pre-assembled
automation components.

A1400 AIR RDT 16 53211904 - Rev. C
Translation of the original instructions ENGLISH
COMPONENTS OF THE AUTOMATION
Supporting profile
It lets you adequately fasten the automation along a load-bearing
metal or masonry wall.
Self-supporting profile KIT - OPTIONAL
gp
To fasten the head section to the side walls. In cases where there is
no load bearing wall to fasten the supporting profile, or if the wall
is not smooth.
The kit includes:
- Self-Supporting Profile to be assembled to the supporting profile
to obtain a self-supporting head section.
- 2 Sides to fasten the head section to the side walls.
- Transom Profiles to lock any transom panel installed above the
self-supporting profile.
CLOSING front CASING PROFILE (H100)
Aluminium profile for front head section closure.
Electronic module rod
Accessory for installation of the electronics module.
Plates with screws
Accessories for installation of components.
Motor_1 - with encoder
Auxiliary_Motor - with pulley adjustment
_pyj
Leaf Support/Sliding Carriages - (2 for each leaf)
Transmission Belt
! It is obligatory to use the belt FAAC for A1400 AIR RDT
Control electronics module
0.0
RESET/SETUP
DL2 DL11
MAIN
F1
USB
+
-
F
ERR
BAT1
OPEN
EMERG
BAT2
SIC_OP
SIC_CL
J10
J14
J11
J12 J13
V G
I
I+
I-
J5
V G
E
E+
E-
J6
V G
S1
G
T
J1
V G
S2
G
T
J2
V G
S3
G
T
J3
V G
S4
G
T
J4
J17
V RX TX G
J8
E1 G E2
J7
T1G
T2
R1
G R2
J9
V G 0102 02
J22
J21
V
G
I1
I2
G
I3
I4
V
J18
GCH CL G
J23J24
J25
Electronic board E1400 RD and Power supply unit.
Emergency battery - COMPULSORY installation
It allows the automation to operate in case of mains power failure.

A1400 AIR RDT 17 53211904 - Rev. C
Translation of the original instructions ENGLISH
Motor block and Internal release - OPTIONAL
It acts directly on Motor_1 mechanically locking it to maintain leaf
position.
Supplied with internal release device which allows emergency open-
ing to be performed in case of need.
Ready for installing external release.
Monitoring - OPTIONAL
The magnetic monitoring sensor detects door status: closed/not
closed. It is fitted with connector for connecting a relay (e.g. to con-
nect an alarm system).
The monitoring micro switch on the motor block detects any mal-
function. It is ready to remotely activate a light or sound warning.
Motor block XM LOCK - OPTIONAL
It acts directly on Motor_1 mechanically locking it to maintain leaf
position.
SDK EVO - OPTIONAL
Programming and function selector device with display.
LKEVO - OPTIONAL
Programming and function selector device without display.
TK50 - Sliding shoes with bracket - OPTIONAL
For fastening to wall or fixed leaf (supplied in a PAIR).
TK50 - Swivel sliding shoes - OPTIONAL
For fastening to the floor (supplied in a PAIR).
TK20 - Sliding shoes with bracket - OPTIONAL
For fastening to fixed leaf (supplied in a PAIR).
Lower guide profile - OPTIONAL
To adapt the lower leaf profile to the sliding shoe.
Supplied in 3.0 m long rods.
Upper profile for connecting the leaf - (1 for each leaf) - OPTIONAL
Accessory to adapt the upper leaf profile to the carriage connections.
Supplied in 3.0 m long rods.
Brush strip for lower guide profile (H19 or H25) - OPTIONAL
Completes the floor guide system.
Glass leaf lower shoes - OPTIONAL
For glass leaf sliding.
Glass leaf gripper - OPTIONAL

A1400 AIR RDT 18 53211904 - Rev. C
external
internal
230V~
6
230V~
6
5
4
1
27
7
3
Translation of the original instructions ENGLISH
3. REQUIRED INSPECTIONS AND ARRANGEMENTS
3.2 ARRANGEMENT OF ELECTRICAL CABLES
! Before performing any operation on the system, disconnect the
power supply.
The electrical system must be compliant with the regulations in force
in the Country of installation (EN 60335-1...)
The power mains of the automation system must be fitted with a
multi-pole power switch with a switch-contact gap of at least 3 mm. It
is advisable to use a 6A circuit breaker with a multi-pole power switch.
Ensure there is a residual current device with a 0.03 A threshold
upstream of the system.
Ensure the earthing system is constructed in a workmanlike manner
and connect the structure’s metal parts to it.
Arrange the electrical cables for connecting accessories and the
electrical power supply 3.
Protect cables by means of suitable ducting.
! Place control accessories within the automation’s visual range.These
devices must always be accessible, even with the door open.
Comply with the following heights from the ground:
- control accessories = minimum 150 cm
- emergency buttons = max 120 cm
3.1 PRELIMINARY INSPECTIONS
! Prior to installation, check soundness of the load bearing masonry
structure and door. Perform any required work to assure:
- solidity, stability and absence of any risk of detachment or collapse
of the masonry structure, fixed door frame and automation
- level flooring, without any friction/hindrance to smooth leaf sliding
- absence of sharp edges (cutting hazard)
- absence of protruding parts (hooking/entrainment hazard)
230V~
6
1
2
3
external
internal
1 Monitored detector for internal opening and safe closing (XDT3) included in the supply
2 Monitored detector for external opening and safe closing (XV1/XDT1) optional accessory
3 SDK EVO optional accessory
4 Key switch to lock theSDK EVO optional accessory
5 Emergency/Key/OPEN control buttons optional accessories
6 Power supply 230V~
7 Internal monitored detectors for safe opening (XBFA) optional accessory

A1400 AIR RDT 19 53211904 - Rev. C
Translation of the original instructions ENGLISH
4. TRANSPORT AND RECEPTION OF THE CONSIGNMENT
HANDLE PACKAGES
! Always comply with instructions on the package.
The NET WEIGHT is indicated on the package.
PALLETISED SUPPLY
RISKS
PERSONAL PROTECTIVE EQUIPMENT
REQUIRED TOOLS
SINGLE PACKAGE
RISKS
PERSONAL PROTECTIVE EQUIPMENT
REQUIRED TOOLS
For manual lifting, arrange for 1 person every 20 kg to be lifted.
UNPACK AND HANDLE
RISKS
PERSONAL PROTECTIVE EQUIPMENT
REQUIRED TOOLS
For manual lifting, arrange for an adequate number of people for the
weight of the leaf: 1 person every 20 kg to be lifted.
1. Open and remove all packaging elements.
2. Ensure all components requested in the supply are present and
intact (§ 2.5 - 16).
In the event of non-conforming supply, proceed as set out in the
General sale conditions included in the Sale catalogue, which can
be viewed on the website www.faacgroup.com.
The unpackaged goods must be handled manually.
! Should transport be required, the products must be suitably packaged.
Discard the packaging after use in the appropriate containers in
compliance with waste disposal regulations.
The packaging materials (plastic, polystyrene, etc.) must not be
left within reach of children as they are potential sources of danger.

A1400 AIR RDT 20 53211904 - Rev. C
Lt
50 50
Vp
La
4
Translation of the original instructions ENGLISH
5. CUT THE PROFILES
In case of A1400 AIR RDT KIT supply, the profiles must be cut to the
indicated measure. This operation is performed in the shop. After
cutting, assemble the components to the support profile.
Handling instructions: 19.
RISKS
PERSONAL PROTECTIVE EQUIPMENT
REQUIRED TOOLS
Use a circular or linear saw cutting machine with blade suitable for
cutting metals.
It is forbidden to use a hand saw.
Only use equipment in good conditions and fitted with all the
required safety devices.
Always comply with the instructions provided by the equipment's
manufacturer.
Cutting operations may only be performed by personnel authorised
to use the equipment.
Perform the cuts to the measures set out in 8.
8 Profile cutting measurements
Profile to be cut Cutting measurement [mm]
- Support profile
- Head section cover
- Self-supporting profile (OPTIONAL)
Lt = Vp x 1.5+ 100
The head section length (Lt) must be calculated based on the measurement of the passage opening (Vp).
100 mm is the measurement of the overlap between leaves (50 + 50). If the overlap is different, the Lt measurement
varies accordingly.
The passage opening measurement (Vp) taken on the installation must already be known when placing the order
since the profiles can be supplied in 6100 mm-long rods.
- Leaf connection profile (OPTIONAL)
- Lower guide profile (OPTIONAL)
La
The leaf width measurement (La) depends on the passage opening measurement (Vp), on the number of leaves and
the planned overlap.
This manual suits for next models
1
Table of contents
Other FAAC Door Opening System manuals