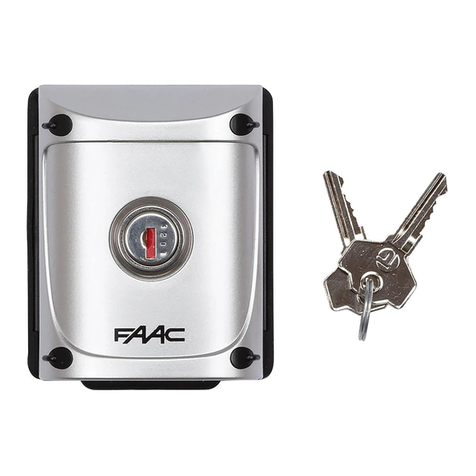
FAAC XKPR125D User manual

XKPR125D
XKPR125D-DA
XKPR1356D EN
IT
FR
DE
ES
NL


XKPRD 3 532229 - Rev.C
Sommario
Dati tecnici ..................................................... 6
1. Installazione ................................................... 7
2. XKPRD .......................................................... 7
3. Utilizzo ......................................................... 7
4. Collegamento al DOOR CONTROLLER via SPINet.............. 8
5. Soluzione ai problemi di funzionamento..................... 8
6. INFO DISPLAY .................................................. 8
IT Istruzioni originali
DICHIARAZIONE DI CONFORMITÀ UE
Il Fabbricante, FAAC S.p.a. Soc. Unipersonale, dichiara che il tipo di apparecchiatura marca FAAC modello
XKPR125D/XKPR125D-DA/XKPR1356Dsonoconformialla direttiva2014/53/EU.Il testodella dichiarazione
di conformità UE è disponibile al seguente indirizzo Internet:
http://www.faac.biz/certificates
UTILIZZO PREVISTO
XKPR125D/XKPR125D-DA/XKPR1356Dsonolettoriprogettatiperapplicazioni inambitodi ControlloAccessi
di varchi veicolari e pedonali.
LIMITI DI UTILIZZO
Non è consentito l'uso del lettore in modalità di funzionamento a "uomo presente" (EN 12453).
UTILIZZO NON CONSENTITO
È vietato un impiego diverso dall'utilizzo previsto.
Non consentire l'utilizzo dei dispositivi a chiunque non espressamente autorizzato e istruito.
Non consentire l'utilizzo dei dispositivi a bambini o persone con ridotte capacità psicofisiche, se non sotto
la supervisione di un adulto responsabile della loro sicurezza.

XKPRD 4 532229 - Rev.C
Ø 3.5 mm
1
2
BZ1
J1
Ø 15 mm
BA
Ø max 6 mm
Ø max 3 mm
≥ 25 mm (A)
≥ 8 mm (B)
Guarnizione di tenuta IP
J1 BUS SPINet: Morsetto•
BZ1 Buzzer •
IT Istruzioni originali

XKPRD 5 532229 - Rev.C
3
Door
Controller
J17
BUS SPINET
(*)CavoSPINET-cod.S-CAVO-BUS - 2 coppie twistate da 0.5 mm2 conschermo.
J23
J23
Lettore A
Lettore B
IT
Istruzioni originali
R R
Resistenza
fine linea:
DISINSERITA
Resistenza
fine linea:
INSERITA
Jumper (J7) : inserimento resistenza di carico linea SPINET. Ponticello su R per inserirla.
(*)
J7 J7

XKPRD 6 532229 - Rev.C
4
5
5
-Selezione Lettore A o B -
-Default di fabbrica = Lettore A -
Guarnizione di tenuta IP
IT Istruzioni originali

XKPRD 7 532229 - Rev.C
6
IT
Istruzioni originali
DATI TECNICI
XKPR125D XKPR125D-DA XKPR1356D
alimentazione Bus SPINet (11-15Vdc) Bus SPINet (11-15Vdc) Bus SPINet (11-15Vdc)
consumo MAX
116mA @12Vdc(1,39W)
146mA@12Vdc(1,75W) 104mA@12Vdc(1,25W)
grado di protezione IP 54 IP 54 IP 54
temperatura di funzionamento -10 °C +55 °C -10 °C +55 °C -10 °C +55 °C
dimensioni di ingombro 110 x 193 x 32 mm 110 x 193 x 32 mm 110 x 193 x 32 mm
tipologiaTag riconosciuti 125Khz 125Khz 13.56Mhz
Sul Bus SPINet possono essere installati due dispositivi, rispettivamente lettore A e B.

XKPRD 8 532229 - Rev.C
1. INSTALLAZIONE
! La superficie di appoggio deve essere piana e regolare. Le guarnizioni di tenuta IP devono essere
presenti e integre, nella base (1) e nel corpo (5).
1. Predisporre i cavi di collegamento e fissare la base. Rispettare le indicazioni di 1.
2. CollegareXKPRD aimorsettiSPINetdella schedaDoorController. Rispettarele indicazionidi2 e3.
-Scoprire dalla guaina almeno 7 cm di conduttore. Nelle guarnizioni IP devono essere presenti solo i
conduttori e non la guaina. Contrariamente si perderebbe la tenuta IP.
-Il connettore su XKPRD consente l'inserimento dei cavi max 0,5mmq
3. Configurare i jumper in base all'indirizzo che si vuole impostare sul lettore (A o B). (4).
4. Alimentare la scheda Door Controller:
-verificare che il display e la tastiera del XKPRD si illuminino (se non disabilitati da software).
5. Verificare il corretto funzionamento di tastiera e lettore di prossimità.
6. Fissare il corpo sulla base (5). Fissare la cover (6).
! Chiudere o aprire il lettore in assenza di alimentazione !
2. XKPRD
Il lettore XKPRD fa parte della gamma FAAC di dispositivi per il controllo accessi.
XKPRD consente la lettura di un tag 125Khz/13.56Mhz o la digitazione di codici numerici riservati ad
ogni utente.
Ogni codice utente deve essere memorizzato sul Door Controller per essere validato.
! - Per la riservatezza degli accessi, è importante non divulgare i codici memorizzati. Ogni codice
deve essere comunicato all'utente con raccomandazione di riservatezza.
XKPRD deve essere collegato ad un DOOR Controller per il suo funzionamento.
3. UTILIZZO
! L'utente,deveseguireleindicazioni e leraccomandazioniper lasicurezzaricevutedall'installatore.
Per la riservatezza degli accessi, l'utente non deve divulgare il proprio codice.
Digitare sempre un pulsante alla volta (la digitazione contemporanea di 2 pulsanti non viene
rilevata). L'installatore deve fornire agli utenti le informazioni per l'utilizzo.
Per la digitazione di un codice (in modalità Secret Code) inserire in sequenza i numeri che lo compongono,
premendo un tasto alla volta, al termine premere il tasto E.
La pressione del tasto # eliminerà l'ultima cifra inserita.
Il funzionamento del Buzzer e della Retroilluminazione è configurabile tramite il SW Keydom.
IT Istruzioni originali

XKPRD 9 532229 - Rev.C
7
8
IT
Istruzioni originali
4. COLLEGAMENTO AL DOOR CONTROLLER VIA SPINET
- Collegare al morsetto J23 il Bus Spinet rispettando le indicazioni di 3.
! Ogni dispositivo collegato sulla linea SPINet deve avere un indirizzo univoco, utilizzare i Pin di
indirizzo (4).
5. SOLUZIONE AI PROBLEMI DI FUNZIONAMENTO
Segnalazione Possibili cause Azione necessaria
Il dispositivo non si accende. Mancanza di alimentazione o
dispositivo non funzionante. Verificareilcollegamentoepresenza
di alimentazione. Se non ci sono
errori, sostituire il dispositivo.
All’accensione XKPRD visualizza il
messaggio:
WARNING ! Multiple
Slave A on SPInet !
Sono presenti due lettori con lo
stesso indirizzo. Modificare l'indirizzo su di uno dei
due dispositivi.
All'accensione il display e la tasti-
era non sono illuminati L'illuminazione potrebbe essere
disabilitata. Verificare la configurazione di tast-
iera e display del Dispositivo in
Keydom.
Un codice utente o un tag non
sono validati, viene visualizzato
unmessaggiodi erroresul display.
Errore nella configurazione del
software. Verificare la configurazione dei
Media di Accesso in Keydom.
Modalità Operativa (ON-LINE)
Quando il display visualizza il simbolo dell'im-
magine (8) viene indicato che il Door
Controller, al quale è collegato il Lettore XKPRD,
è in comunicazione con il Network Controller.
Modalità Degradata (OFF-LINE)
Quando il display visualizza il simbolo dell'im-
magine (7) viene indicato che il Door
Controller, al quale è collegato il Lettore XKPRD,
nonèincomunicazione conilNetworkController.
6. INFO DISPLAY

XKPRD 10 532229 - Rev.C
9
10
11
12
MANUTENZIONE
Pulire solo le superfici esterne con un panno morbido. Non utilizzare detergenti né oli. Non eseguire
alcunamodifica ai componentioriginali. Perle sostituzioniutilizzareesclusivamentericambioriginaliFAAC.
Premendo il pulsante #verrà visualizzato l'ind-
irizzo del Lettore XKPRD (A o B) e la versione del
firmware attualmente installata.
Premendo per una seconda volta il pulsante
#verrà visualizzato l'indirizzo e la versione
firmware del Door Controller, al quale il Lettore
XKPRD è collegato.
Premendoperunaterza voltailpulsante#verrà
visualizzatol'indirizzoIPdel Door Controller(D)
equellodel NetworkController(N) quando sono
in comunicazione.
Attenzione:
Questa funzione è disponibile solo nei Door
Controller LAN.
Quando il display visualizza questa immagine
viene indicato che ci sono problemi di collega-
mento tra XKPRD ed il Door Controller.
IT Istruzioni originali

XKPRD 11 532229 - Rev.C
Contents
Technical data........................................................ 14
1. Installation........................................................... 15
2. XKPRD ................................................................15
3. Usage................................................................. 15
4. Connecting to the DOOR CONTROLLER via SPINet. . . . . . . . . . . . . . .16
5. Troubleshooting...................................................... 16
6. INFO DISPLAY ........................................................16
EN
Translation of the original instructions
EU DECLARATION OF CONFORMITY
Themanufacturer, FAACS.p.a.Soc.Unipersonale,hereby, declaresthatthemodelXKPR125D/XKPR125D-DA/
XKPR1356Dthey arecompliantwith Directive2014/53/EU.Thefulltext ofthe EUdeclarationof conformity
is available at the following Internet address:
http://www.faac.biz/certificates
INTENDED USE
The XKPR125D/XKPR125D-DA/XKPR1356D they are readers designed for applications in the field of Access
Control of vehicular and pedestrian gates.
LIMITATIONS OF USE
The reader must not used in the "Dead-man" operating mode (EN 12453).
UNAUTHORISED USE
Uses other than the intended use are prohibited.
Do not allow the devices to be used by anyone who is not specifically authorised and trained to do so.
Do not allow the devices to be used by children or persons with mental and physical deficiencies unless
they are supervised by an adult who is responsible for their safety.

XKPRD 12 532229 - Rev.C
Ø 3.5 mm
1
2
BZ1
J1
Ø 15 mm
BA
Ø max 6 mm
Ø max 3 mm
≥ 25 mm (A)
≥ 8 mm (B)
EN Translation of the original instructions
IP sealing gasket
J1 SPINet BUS: Terminal •
BZ1 Buzzer •

XKPRD 13 532229 - Rev.C
3
Door
Controller
J17
SPINET BUS
(*)SPINET cable -cod. S-BUS CABLE - 2 shielded twisted two pair cable
0.5 mm2 .
J23
J23
Reader A
Reader B
EN
Translation of the original instructions
End of
line resistor:
NOT
INSTALLED
End of
line resistor:
INSTALLED
R R
Jumper (J7): insertion of the SPINET line load resistance. Bridge on R to insert it.
(*)
J7 J7

XKPRD 14 532229 - Rev.C
4
5
5
EN Translation of the original instructions
-Reader A or B selection -
-Factory default = Reader A -
IP sealing gasket

XKPRD 15 532229 - Rev.C
6
TECHNICAL DATA
XKPR125D XKPR125D-DA XKPR1356D
power supply SPINet Bus (11-15Vdc) SPINet Bus (11-15Vdc) SPINet Bus (11-15Vdc)
MAX power consumption
116mA @12Vdc(1,39W)
146mA @12Vdc(1,75W) 104mA @12Vdc(1,25W)
protection rating IP 54 IP 54 IP 54
operating temperature -10 °C to +55°C -10 °C to +55°C -10 °C to +55°C
dimensions 110 x 193 x 32 mm 110 x 193 x 32 mm 110 x 193 x 32 mm
type of Tags recognised 125 KHz 125 Khz 13.56 Mhz
Two devices can be installed on the SPINet Bus (reader A and B respectively).
EN
Translation of the original instructions

XKPRD 16 532229 - Rev.C
EN Translation of the original instructions
1. INSTALLATION
! The support surface must be flat and smooth. The IP sealing gaskets must be present and intact
in the base (1) and in the body (5).
1. Prepare the connecting cables and install the base. Follow the instructions given in 1.
2. Connect the XKPRD to the SPINet terminals of the Door Controller board. Follow the instructions
given in 2 and 3.
-Remove at least 7 cm of the conducting sheath. Only the conductors and not the sheath must be
present in the IP gaskets. Otherwise, the IP gasket will leak.
-Wires having a maximum section of 0.5mm2can be placed in the connector on the XKPRD.
3. Configure the jumpers according to the address you wish to set for the reader (A or B). (4).
4. Turn the power on to the Door Controller:
-Make sure that the display and keypad of the XKPRD light up (if not disabled by the software).
5. Make sure that the keypad and the proximity sensor are working correctly.
6. Fasten the body to the base (5). Install the cover (6).
! Close or open the reader in the absence of power!
2. XKPRD
The XKPRD reader is included in the FAAC range of access control devices.
The XKPRD allows a 125kHz/13.56Mhz tag to be read or numeric codes to be entered that are restricted
to each user.
In order to be valid, each user code must be stored on the Door Controller.
! - In order to restrict access, it is important not to allow the stored codes to be known by unau-
thorised persons.Whenever the user is given a code, one should recommend that he/she keeps it
confidential.
The XKPRD must be connected to a DOOR Controller in order to work.
3. USAGE
! The user must follow the safety instructions and recommendations provided by the installer.
In order to restrict access, the user must not give his code to other people.
Always press one button at a time (if 2 buttons are pressed at the same time, neither is recog-
nised). The installer must provide users with information for use.
To type in a code (in Secret Code mode), enter the numbers that make up the code in sequence, pressing
one key at time. When finished press key E.
Pressing the #key will cancel the last digit that was entered.
The operation of the Buzzer and the Backlight is configurable via the SW Keydom.

XKPRD 17 532229 - Rev.C
7
8
4. CONNECTING TO THE DOOR CONTROLLER VIA SPINET
- Connect the Spinet Bus to terminal J23 as indicated in 3.
! EverydeviceconnectedtotheSPINet linemust havea uniqueaddress.UsetheaddressPins(4).
5. TROUBLESHOOTING
Indication Possible causes Necessary action
The device does not turn on. Nopoweror device notworking. Check that the power supply is
connected and live. If there are no
errors, replace the device.
The following message appears
when the XKPRD is switched on:
WARNING ! Multiple
Slave A on SPInet !
There are two readers with the
same address. Change the address for one of the
two devices.
The display and the keyboard do
notlightupwhen itisswitchedon. The illumination may be dis-
abled. Check the keypad and display con-
figuration for the Device in the
Keydom software.
A user code or tag is not validated,
an error message appears on the
display.
Software configuration error. Check the Access Media configura-
tion in Keydom.
On-line mode
When the symbol in the figure (8) is dis-
played, it indicates that the Door Controller,
to which the XKPRD Reader is connected, is
communicating with the Network Controller.
Off-line mode
When the symbol in the figure (7) is dis-
played, it indicates that the Door Controller, to
which the XKPRD Reader is connected, is not
communicating with the Network Controller.
6. INFO DISPLAY
EN
Translation of the original instructions

XKPRD 18 532229 - Rev.C
9
10
11
12
MAINTENANCE
Cleantheoutersurfacesonlywithasoft cloth. Donotuse detergentsoroils. Donotmakeanymodifications
to the original components. Only use original FAAC spare parts.
Pressingthe#buttonwill displaytheaddressof
the XKPRD reader (A or B) and the version of the
firmware currently installed.
Pressing the #button again will display the ad-
dress and the firmware version of the Door Con-
troller, to which the XKPRD reader is connected.
Pressing the #button a third time will display
the IP address of the Door Controller (D) and
the Network Controller (N) when they are
communicating.
Warning:
This function is available only for LAN Door
Controllers.
When this figure appears on the display, it
indicates that there are problems with the
connection between the XKPRD and the Door
Controller.
EN Translation of the original instructions

XKPRD 19 532229 - Rev.C
Sommaire
Données techniques ..........................................23
1. Installation....................................................24
2. XKPRD .........................................................24
3. Utilisation .....................................................24
4. Connexion au DOOR CONTROLLER via SPINet................25
5. Solution aux problèmes de fonctionnement ................25
6. INFO DISPLAY .................................................25
FR
Traduction de la notice originale
DÉCLARATION DE CONFORMITÉ UE
Le fabricant, FAAC S.p.a. Soc. Unipersonale, déclare que le type d'équipement de la marque FAAC, modèle
XKPR125D/XKPR125D-DA/XKPR1356D ils sont conformes à la directive 2014/53/EU. Le texte complet de
la déclaration de conformité UE peut être lu à l'adresse Internet suivante:
http://www.faac.biz/certificates
UTILIZATION PRÉVUE
XKPR125D/XKPR125D-DA/XKPR1356D ce sont des lecteurs conçu pour des applications dans le domaine
du contrôle d'accès des portes pour véhicules et piétons.
LIMITES D'UTILISATION
Il est interdit d'utiliser le lecteur en modalité de fonctionnement "Homme mort" (EN 12453).
UTILISATION INTERDITE
Tout usage non prévu est interdit.
Ne pas permettre aux personnes non autorisées et non instruites d'utiliser les dispositifs de commande.
Nepermettreauxenfantsetauxpersonnes auxfacultésmentalesetphysiqueréduitesd'utiliserlesdispositifs
de commande que sous la supervision exclusive d'un adulte responsable de leur sécurité.

XKPRD 20 532229 - Rev.C
Ø 3.5 mm
1
2
BZ1
J1
Ø 15 mm
BA
Ø max 6 mm
Ø max 3 mm
≥ 25 mm (A)
≥ 8 mm (B)
Joint d'étanchéité IP
J1 BUS SPINet : Borne•
BZ1 Buzzer •
FR Traduction de la notice originale
This manual suits for next models
2
Table of contents
Languages:
Other FAAC Door Opening System manuals