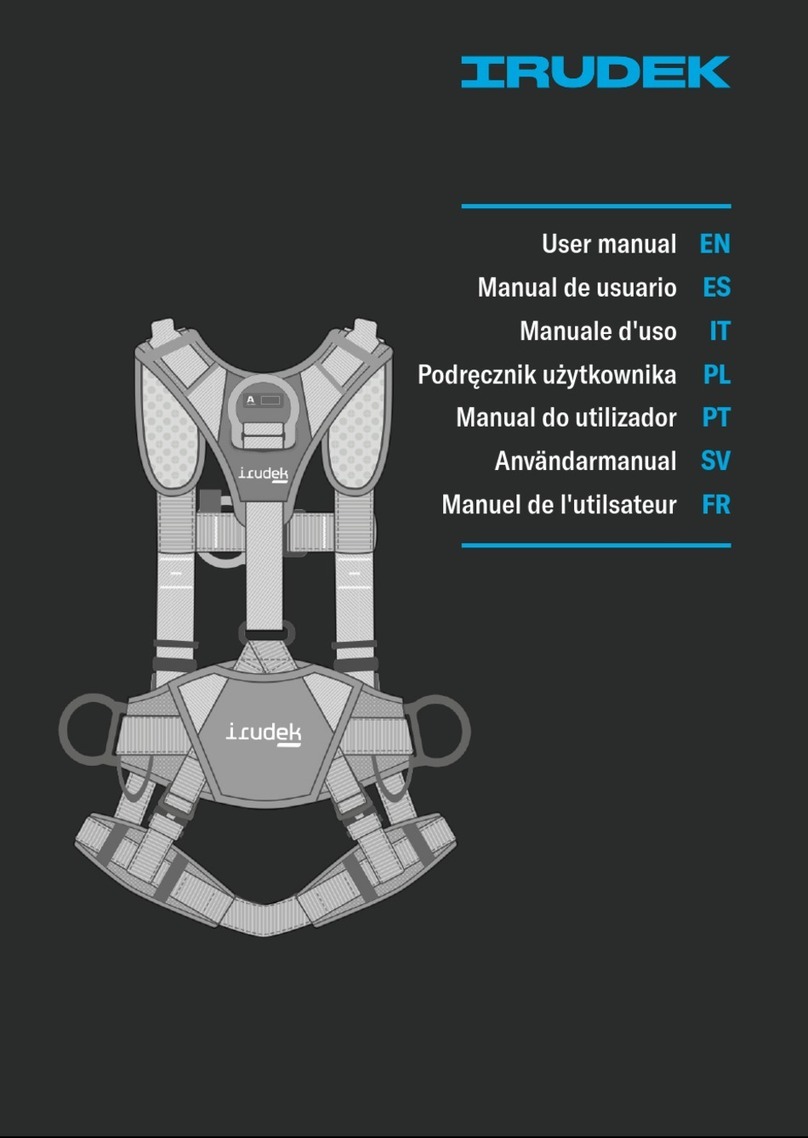
IRUDEK PRO 100 User manual

ES
GB
IT
PT
PL
Instrucciones de uso
Instruction for Use
Istruzioni per l´uso
Instruçoes de serviço
Instrukcja obslugi
Polígono Industrial Apatta – C/ Baratzondo, Naves C-14 C-18
www.irudek.com
irudek@irudek.com
T: +34 943 69 26 17
© IRUDEK
89/686/EEC - 21/04/2019 - EU 2016/425
0161

GB
CAREFULLY READ THE INSTRUCTIONS BEFORE USING THE FULL
BODY HARNESS
DESCRIPTION
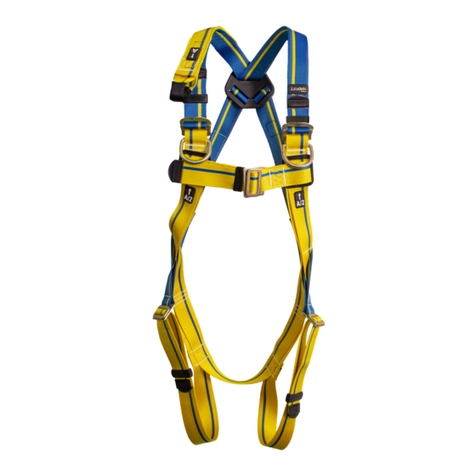
Full body harnesses are Personal Protective Equipment (PPE)
against falls from a height and are in conformity to the Norm
EN 361:2002.
The full body harness is a basic component of the fall arrest
system in conformity to the Norm EN 363:2018.
Some full body harnesses are equipped with work positioning
belts (EN 358:1999) and can also include a seat harness
(EN 813:2008) intended for use along with positioning and
restraint systems.
The full body harnesses IRUDEK are in conformity with the
European PPE Regulation EU 2016/425.
The declaration of conformity is available at the following
internet address:
http://www.irudek.com/es-es/descargas/

APPLICATION
The use of the full body harness with a fall arrest subsytem
must be compatible with the operating instructions for
each component of the system and the Norms: EN
353-1:2014+A1:2017, EN 353-2:2002, EN 355:2002, EN
360:2002, EN 362:2004.
FITTING
Only use a harness of suitable size. A harness either too
loose or too tight straps will restrict movement and will not
provide the optimum level of protection.
NORMATIVES
LIGHT PLUS P1
LIGHT PLUS 1
LIGHT PLUS 2
LIGHT PLUS 4
LIGHT PLUS 5
LIGHT PLUS 11
LIGHT PLUS 14
EXPERT PRO 50
EXPERT PRO 100
EXPERT PRO 200
EXPERT PRO 300
WIND BLUE 1
WIND BLUE 2
WIND BLUE 3
GRAVITY PLUS 1
DIELECTRIC 4
HYDRO 2
EN361:2002
EN358:1999
EN813:2008
E
N1497:2007
TALLA
140 Kg
U U
S-M
L-XL
XXL-
XXXL
S-M
L-XL
XXL-
XXXL
U U U S-M
L-XXL
S-M
L-XXL
S-M
L-XXL
S-M
L-XXL
S-M
L-XXL
S-M
L-XXL
S-M
L-XXL
S-M
L-XXL
U
WIND BLUE 4
EXPERT PRO 55
GRAVITY PLUS 2
S-M
L-XXL
S-M
L-XXL
S-M
L-XXL
S-M
L-XXL


Fall Arrest Harnesses ( EN 361: 2002 )
Step 1: Hold the harness by the dorsal D ring.
Step 2: Insert your arms into the shoulder straps and close
the plastic buckle on the chest strap.
Step 3: Pull the leg straps one by one around your thighs
outwards to your front.
Step 4: Close the buckles of the leg straps one by one.
Step 5: Tighten the leg straps by pulling the free ends of the
straps until the harness fits perfectly to the body.
Step 6: Use the back D-ring or the front anchor point joined
together by a connector as anchor point for fall arrest
systems. To locate the anchor points on the harness, check
for the “A” marking near them.
Positioning belt: EN358: 1999 )
Step 7: Place the work positioning belt around the waist with
the confort pad at the back and D ring at each side. Pull the
free end of the waist belt until the waist belt fits the body
tightly without hindering free movement and close the buckle.
The belt is padded and has two lateral anchor points, which are
used as anchor points for work positioning. The comfortable
back support provides excellent ergonomic support for the
back. The belt is adjusted the way that the webbing can slide
freely on the padded back support, facilitating its adaptation
to the size of the user. The belt has textile rings for tool holding
and metallic rings for hanging a tool holding bag.
The full body harnesses equipped with a work positioning belt
can be used to keep users in place at their work (positioning) or
to prevent to reach a point where it can cause a fall (restraint).
The lateral anchor points should not be used for fall arrest. The
anchor point must be positioned at or above the waist level of
the user. The connecting element must remain tight and the
free movement should be restricted to a maximum of 0.60m.

Seat harness ( EN 813: 2008 )
Step 8 : Place the work positioning belt around the waist with
the confort pad at the back and D ring in the ventral part.
The seat harness is intended to be used in work positioning,
restraint and rope access systems when a lower anchor point
is required.
Before first use, the user should perform a suspension test in
a safe place to make sure the harness is the right size, the fit
is sufficient and that provides an acceptable comfort level for
the conditions of use provided.
rescue harness ( EN 1497: 2007 )
Step 9: The “D” ring located on the evacuation belt or the
textile shoulder evacuation rings are only for connection to
rescue teams during a rescue operation. It should not be used
as a fall arrest. In the case of textile rings, an evacuation belt
(Boomer) must be attached
The rescue harness is intended to be carried out during normal
work activities and the user should carry out a suspension
test in a safe place before using the rescue harness for the
first time, to ensure that it is the correct size, It has sufficient
fit and its comfort level is acceptable for the intended use.
MATERIAL
The full body harness is manufactured from 44 mm polyester
webbing.

LIMITATIONS FOR USE
- Personal protective equipment should be a personal issue
item.
- It is recommended that the anchor point where the fall
arrest system is going to be fixed should be placed above the
position of the user. Anchor point must have a minimum
static strength of 12 kN (metal) or 18kN (textile) and must be
in conformity to EN 795:1996 / EN 795:2012 requirements.
- Personal protective equipment must not be used by a person
with medical condition that could affect the safety of the
equipment user in normal and emergency use.
- Personal protective equipment shall only be used by a person
trained and competent in its safe use.
SIZES
A
B
C
D

ATTENTION
- A full body harness is the only acceptable body holding
device that can be used in a fall arrest system.
- The fall protection system must only be connected to the
harness anchor points identified with the capital letter “A”.
Identification “A/2” indicates the need to join the two points
showing the same identification together. It is forbidden to
connect the system to a single anchor point identified as
“A/2”.
- For harnesses equipped with belt, the work positioning
device must only be connected to the lateral D rings on the
belt.
- Connection to the anchor point and other equipment must
be done through connectors in conformity to EN 362:2004.
- For use with fall arresters in conformity to EN 353-1:2014
+A1:2017, EN 353-2:2002 it is recommended to connect the
equipment to the front anchor point on the harness. For use
with energy absorbers EN 355 or fall arresters EN 360 it is
recommended to connect the equipment to the back anchor
point on the harness.
- Before each use of personal protective equipment it is
obligatory to carry out a pre-use check of the equipment,
to ensure that it is in a serviceable condition and operates
correctly before it is used.
- During pre-use check it is necessary to inspect all elements
of the equipment in respect of any damages, excessive wear,
corrosion, abrasion, degradation due to UV, cuts or misuse,
especially take into account webbings, seams, anchor D rings,
buckles and adjusting elements.

INFORMATION & ADVICE
- A rescue plan shall be in place to deal with any emergencies
that could arise during the work.
- It is forbidden to make any alterations or additions to the
equipment without the manufacturer´s prior written consent.
- Personal protective equipment shall not be used outside its
limitations, or for any purpose other than that for which it is
intended.
- Before use ensure about the compatibility of items of
equipment when assembled into a system. Ensure that
all items are compatible and appropriate for the proposed
application. It is forbidden to use combinations of items
of equipment in which the safe function of any one item is
affected by or interferes with the safe function of another.
Periodically check the connection and adjustment of the
components to avoid accidental disconnection and loosening.
- Personal protective equipment must be withdrawn from
use immediately when any doubt arise about its condition for
safe use and not used again until confirmed in writing by a
competent person that it is acceptable to do so.
- Personal protective equipment must be withdrawn from use
immediately when it have been used to arrest a fall.
- It is essential for safety to verify the free space required
beneath the user at the workplace before each occasion of
use, so that, in the case of a fall, there will be no collision with
the ground or other obstacle in the fall path. The required value
of the free space should be taken from instruction manual of
used equipment.
- There are many hazards that may affect the performance
of the equipment and corresponding safety precautions that
have to be observed during equipment utilization, especially:

•Trailing or looping of lanyards or lifelines over sharp edges,
•Any defects like cutting, abrasion, corrosion
•Climatic exposure,
•Pendulum falls,
•Extreme temperatures
•Chemical reagents,
•Electrical conductivity
-It is essential for the safety of the user that if the product is
re-sold outside the original country of destination the reseller
shall provide instructions for use, for maintenance, for periodic
examination and for repair in the language of the country in
which the product is to be used.
LIFETIME
The estimated product lifetime is 11 years from the date of
manufacture (1 year storage + 10 years for use). The following
factors can reduce the lifetime of the product : intense use,
contact with chemical substances, specially agressive
environment, extreme temperature exposure, UV exposure,
abrasion, cuts, violent impacts, bad use or maintenance.
The required annual examinations will validate the correct
functioning of the equipment. It is compulsory that the
equipment is examined by the manufacturer or his authorized
representative at least once a year.
In case that it have been used to arrest a fall, the equipment
must be withdrawn from use.
TRANSPORT
The Personal Protective Equipment must be transported in
a package that protects it against moisture or mechanical,
chemical and thermal attacks.

INSTRUCTIONS FOR MAINTENANCE
-CLEANING: The personal protective equipment must be
cleaned without causing adverse
effect on the materials used in the manufacture of the
equipment. For textile (webbing and ropes) and plastic
parts wipe with cotton cloth or a soft brush. Do not use any
abrasive material. For intensive cleaning wash the harness
at a temperature between 30ºC and 60ºC using a neutral
detergent. For metallic parts wipe with a wet cloth. When the
equipment becomes wet, either from being in use or when
due to cleaning, it shall be allowed to dry naturally, and shall
be kept away from direct heat.
-STORAGE: Personal protective equipment should be stored
loosely packed, in a dry and well
- ventilated place, protected from direct light, UV degradation,
dust, sharp edges, extreme temperature and aggressive
substances.
REPAIR
Any repair shall only be carried out by equipment manufacturer
or his authorized representative following manufacturer’s
procedures.
MARKING
The equipment is marked with the next information:
i)CE marking, Conformity to European Legislation
ii) Identification of the manufacturer
iii) Reference of the equipment
iv) Lot or serial number
v) Year of manufacture
vi) Material

vii) Size
viii) European Norm
ix) Notified body number
x) Pictogram to indicate the necessity for user to read the
instruction for use
INSTRUCTIONS FOR PERIODIC EXAMINATIONS
It is necessary to carry out regular periodic examinations. The
safety of the users depend upon the continued efficiency and
durability of the equipment.
The personal protective equipment shall be examined at least
every 12 months. The periodic examination can only be carried
out by the manufacturer or his authorized representative.
The comments should be included in the check card of the
equipment. After the periodic examination, the next due date
for periodic examination will be determined.
During periodic inspection it is necessary to check the legibility
of the equipment marking
CHECK CARD
The check card should be filled in before the first use.
All information about the personal protective equipment (
name, serial number, date of purchase and date of putting into

operation, user name, periodic examination and repair history,
and next periodic examination date ) shall be noted into de
check card.
All records in the check card can only be filled in by a competent
person.
Do not use the personal protective equipment without a duly
filled check card.
LEGGERE ATTENTAMENTE LE ISTRUZIONIPER L’USO PRIMA
DI UTILIZZARE L’IMBRACATURA
DESCRIZIONE
Le imbracature anticaduta sono dispositivi di
protezione individuale (DPI) contro le cadute dall’alto e sono
conformi alla Normativa EN 361:2002.
L’imbracatura anticaduta è un elemento base del
sistema anticaduta conforme alla Normativa EN 363:2018.
Alcune imbracature sono dotate di cintura di posizionamento
(EN 358:1999) e possono avere anche un anello per la
sospensione incorporato (EN 813:2008) e sono destinate
ai sistemi di trattenuta, posizionamento e accesso su fune.
Le imbracature IRUDEK sono conformi al Regolamento
EU 2016/425 sui DPI (Dispositivi di Protezione Individuale).
IT

individual (nome, número de série, data da compra e a data
da primeira utilização, nome do usuário, o histórico das
revisões periódicas e reparações e próxima data para a
revisão periódica) deve estar anotao na ficha de controlo do
equipamento.
A ficha deve ser preenchida unicamente pelo responsável do
equipamento de proteção.
Não utilizar o equipamento de proteção individual sem a sua
ficha devidamente preenchida.
PL
PRZED PRZYSTĄPIENIEMDO UŻYTKOWANIASZELEK
BEZPIECZEŃSTWANALEŻYDOKŁADNIEZAPOZNAĆSIĘZTREŚCIĄ
NINIEJSZEJ INSTRUKCJI
OPIS
Szelki bezpieczeństwa są osobistym sprzętem
zabezpieczającym (PPE) przed upadkami z wysokości
zgodnie i są zgodne z normą EN 361:2002.
Szelki bezpieczeństwa są podstawowym komponentem
systemu do ochrony przed upadkiem z wysokości który jest
zgodny z normą EN 363:2018.
Niektóre szelki bezpieczeństwa wyposażone są w pasy
regulujące pozycję pracy (EN 358) a także mogą zawierać pas
ramieniowy (EN 813) który przeznaczony jest do użytku wraz z
systemami pozycjonującymi i ochronnymi.
Szelki bezpieczeństwa IRUDEK o środkach przepisami UE
2016/425 w sprawie PPE oraz spełniają wymogi EN 361:2002
(szelki bezpieczeństwa).
Deklaracja zgodności jest dostępna na następującej stronie
internetowej:
http://www.irudek.com/es-es/descargas/

ZASTOSOWANIE
Zastosowanie szelek bezpieczeństwa z podsystemem
do ochrony przed upadkiem musi być zgodne z instrukcją
użytkowania dla każdego z komponentów sytemu oraz z
normami: EN 353-1:2014+A1:2017, EN 353-2:2002,EN
355:2002, EN 360:2002, EN 362:2004.
ZAKŁADANIE
W celu założenia szelek bezpieczeństwa IRUDEK Light Plus
1,2,5 należy postępować zgodnie z krokami 1 do 6 oraz od 1 do
NORMATYWNY
LIGHT PLUS P1
LIGHT PLUS 1
LIGHT PLUS 2
LIGHT PLUS 4
LIGHT PLUS 5
LIGHT PLUS 11
LIGHT PLUS 14
EXPERT PRO 50
EXPERT PRO 100
EXPERT PRO 200
EXPERT PRO 300
WIND BLUE 1
WIND BLUE 2
WIND BLUE 3
GRAVITY PLUS 1
DIELECTRIC 4
HYDRO 2
EN361:2002
EN358:1999
EN813:2008
EN1497:2007
TALLA
140 Kg
U U
S-M
L-XL
XXL-
XXXL
S-M
L-XL
XXL-
XXXL
U U U S-M
L-XXL
S-M
L-XXL
S-M
L-XXL
S-M
L-XXL
S-M
L-XXL
S-M
L-XXL
S-M
L-XXL
S-M
L-XXL
U
WIND BLUE 4
EXPERT PRO 55
GRAVITY PLUS 2
S-M
L-XXL
S-M
L-XXL
S-M
L-XXL
S-M
L-XXL

7 w przypadku szelek IRUDEK Light Plus 4. Stosować szelki
odpowiedniego rozmiaru. Stosowanie zbyt luźnych lub zbyt
ciasnych szelek bezpieczeństwa spowoduje ograniczenie
ruchów i nie zapewni optymalnego poziomu bezpieczeństwa.

Uprząż upadkowa ( EN 361: 2002 )
Krok 1: Chwycić szelki za grzbietowy pierścień D Ring.
Krok 2: Umieścić ramiona w pasach mocujących na ramionach
i zapiąć plastikową klamrę na pasku piersiowym.
Krok 3: Po kolei nałożyć paski na nogach wokół ud, ciągnąc je
od siebie do przodu.
Krok 4: Zapiąć po kolei klamry paska nożnego.
Krok 5: Zacisnąć paski nożne, pociągając za wolne końce
pasków, jak pokazano na rysunku 6 do momentu, kiedy szelki
bezpieczeństwa będą ciasno dopasowane do ciała.
Krok 6: Wykorzystać tylny pierścień D-ring lub klamrę
przednią połączoną zatrzaśnikiem jako punkt zaczepienia dla
systemów do ochrony przed upadkiem. Aby umieścić klamry
zaczepowe w szelkach bezpieczeństwa należy odszukać
metki przedstawiające literę A w ich pobliżu.
Pas pozycjonujący ( EN358: 1999 )
Krok 7: Umieścić pasy do ustalania pozycji przy pracy wokół
bioder umieszczając poduszkę na plecach oraz pierścień D
ring po bokach. Pociągnąć wolny koniec pasa aż do momentu
gdy pas będzie przylegał ściśle do ciała nie ograniczając
jednak ruchów, po czym należy zapiąć klamrę.
Pas jest wyłożony miękkim materiałem i wyposażony w dwa
boczne klamry zaczepowe, które są stosowane jako punkty
zaczepu do ustalania pozycji przy pracy. Wygodna podpora
stanowi doskonałe ergonomiczne wsparcie pleców. Pas jest
regulowany w taki sposób, że taśma może swobodnie ślizgać
się po podporze na plecy ułatwiając dostosowanie do rozmiaru
użytkownika. Pas posiada tekstylne pierścienie służące jako

uchwyty na narzędzia oraz metalowe pierścienie stanowiące
uchwyt do torby na narzędzia.
Szelki bezpieczeństwa wyposażone w pas do ustalania pozycji
przy pracy mogą być stosowane do utrzymywania użytkownika
w pozycji przy pracy (pozycjonowanie) lub do zabezpieczenia
przed osiągnięciem takiego punktu w którym spowodowany
może być upadek (powstrzymanie). Boczne klamry
zaczepowe nie powinny być używane do zabezpieczenia przed
upadkiem. Klamra zaczepowa powinna być umieszczona na
wysokości lub powyżej wysokości pasa użytkownika. Element
łączący powinien być napięty a swobodny ruch powinien być
ograniczony maksymalnie do 0,60m.
Uprząż siedzenia ( EN 813: 2008 )
Krok 8: Stosować pierścień grzbietowy D do ochrony przed
upadkiem, boczne pierścienie D do ustalenia pozycji przy
pracy oraz przedni pierścień D w części brzusznej.
Uprząż siedzenia jest przeznaczona do stosowania w
pozycjonowaniu roboczym, urządzeniach przytrzymujących i
systemach dostępu linowego, gdy wymagany jest dolny punkt
kotwiczenia. Pas ramieniowy stosowany jest do ustalania
pozycji przy pracy oraz jako układ ochronny w przypadku gdy
jest wymagany niższy punkt zaczepu.
Przed pierwszym użyciem należy przeprowadzić test
zawieszenia w bezpiecznym miejscu tak aby sprawdzić
czy szelki bezpieczeństwa są właściwego rozmiaru, czy są
odpowiednio dopasowane i czy są dostosowane do warunków
w jakich będą użytkowane.
Uprząż ratunkowa ( EN 1497: 2007 )
Krok 9: Pierścień „D” umieszczony na pasku ewakuacyjnym
lub tekstylne pierścienie ewakuacyjne na ramionach

służą wyłącznie do połączenia z zespołami ratowniczymi
podczas akcji ratunkowej. Nie powinien być stosowany jako
zabezpieczenie przed upadkiem. W przypadku pierścieni
tekstylnych należy przymocować pas ewakuacyjny (Boomer)
Uprząż ratunkowa jest przeznaczona do przeprowadzenia
podczas normalnej pracy, a użytkownik powinien
przeprowadzić test zawieszenia w bezpiecznym miejscu przed
pierwszym użyciem uprzęży ratunkowej, aby upewnić się, że
ma odpowiedni rozmiar, Ma wystarczające dopasowanie, a
jego poziom komfortu jest dopuszczalny do zamierzonego
zastosowania.
ROZMIAR
A
B
C
D

MATERIAŁ
Szelki bezpieczeństwa są wyprodukowane z 44 milimetrowej
taśmy poliestrowej.
OGRANICZENIE UŻYTKOWANIA
- Osobisty sprzęt zabezpieczający powinien stanowić
osobiste wyposażenie użytkownika.
- Zalecane jest by punkt kotwiczenia, do którego będzie
połączony system powstrzymywania spadania, znajdował się
powyżej użytkownika. Minimalna wytrzymałość statyczna
punktu kotwiczenia musi wynosić 12 kN (metal) i 18kN
(tekstylne). Punkt kotwiczenia powinien być zgodny z normą
EN 795:1996 / EN 795:2012.
- Osobisty sprzęt zabezpieczający nie powinien być
stosowany przez osoby, których stan zdrowia mógłby
stanowić wzrost zagrożenia przy normalnym zastosowaniu
sprzętu jak również w nagłych wypadkach.
- Z osobistego sprzętu zabezpieczającego korzystać mogą
jedynie osoby przeszkolone i kompetentne w jego
bezpiecznym użytkowaniu.
UWAGA
- Szelki bezpieczeństwa są jedynym urządzeniem które może
być stosowane w systemie ochrony przed upadkiem.
- System ochrony przed upadkiem musi być podłączony
do klamer zaczepowych szelek oznaczonych dużą literą A.
Oznaczenie ‘A/2’ oznacza potrzebę połączenia dwóch punktów
o takim samym oznaczeniu. Zabrania się łączenia systemu do
jednej klamry zaczepowej oznaczonego jako ‘A/2’.
- W przypadku szelek bezpieczeństwa wyposażonych w pas,
urządzenie do ustalania pozycji przy pracy musi być połączone
do bocznych pierścieni D na pasie.
Table of contents
Languages:
Other IRUDEK Safety Equipment manuals

IRUDEK
IRUDEK BDREAS HUB User manual

IRUDEK
IRUDEK SEKURBLOK User manual

IRUDEK
IRUDEK CTA14 User manual

IRUDEK
IRUDEK CTA User manual

IRUDEK
IRUDEK LIGHT PLUS 1 User manual

IRUDEK
IRUDEK TRIP1 User manual

IRUDEK
IRUDEK OREKA User manual

IRUDEK
IRUDEK KARBOR 3,5 User manual

IRUDEK
IRUDEK COVROP User manual

IRUDEK
IRUDEK TIGER 2,5 User manual

IRUDEK
IRUDEK BOREAS HUB User manual

IRUDEK
IRUDEK LIGHT PLUS P1 User manual

IRUDEK
IRUDEK 981 User manual

IRUDEK
IRUDEK LANYARD User manual

IRUDEK
IRUDEK Side Entry User manual

IRUDEK
IRUDEK X4 LITE User manual
IRUDEK
IRUDEK LIGHT PLUS P1 User manual
IRUDEK
IRUDEK Pro 7 User manual

IRUDEK
IRUDEK Hydro User manual

IRUDEK
IRUDEK SEKURBLOK User manual