manuals.online logo
Brands
  1. Home
  2. •
  3. Brands
  4. •
  5. jablotron
  6. •
  7. Security System
  8. •
  9. jablotron JA-60IR User manual

jablotron JA-60IR User manual

JA-60IR Wireless optical barrier MEB52803
1
The JA-60IR wireless optical barrier
The JA-60IR optical infrared barrier is designed to protect areas
such as doors, windows, balconies etc. within a range of 5 meters.
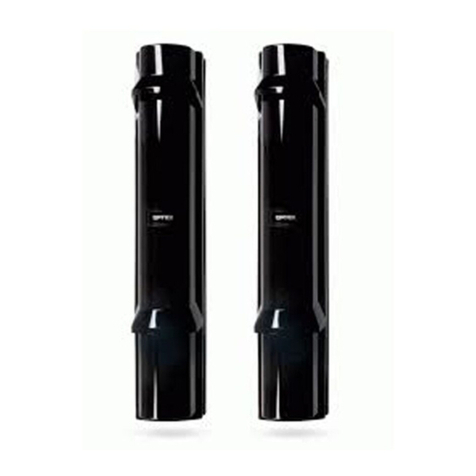
The detector consists of two electronic units and two IR bars. The IR
bars consist of an IR transmitter (TX) and an IR receiver (RX)
respectively with four infrared beams built-in, protecting the area
between them. A JA-60N transmitter is implemented in the RX part
for wireless communication with Jablotron systems series JA-6x,
receivers UC-216, 260 etc. The electronic units can be placed
directly on the bars or they can be placed separately (e.g. inside the
house).
Specification
IR barrier specification
Working range: 0.5m to 5 m
Number of the beams: 4 (3 + 1 Sync)
Detection time: 1 / 0.5 / 0.35 or 0.2 s
(according to the number of interrupted beams)
Optical ray ±10°at λ = 900 nm
Solar immunity ≥ 30 000 Lux at ± 5°
Power supply: 2 x lithium battery 3.6 V / 19 Ah
type ER 34615H
Battery lifetime: typically 3 year (activation 2 times a day)
Security grade 2 low to medium risk (EN 50131-1)
Environment class: IV. Outdoor general –25 to +60 °C (EN 50131-1)
Dimensions
Electronic box: 40 x 40 x 240 mm
IR bar: 25 x 25 x 1000 mm
JA-60N specification
Frequency: 433.92 MHz
Can be operated according to CEPT/ERC REC 70-03
Working range: up to 100 m open area
Package contents: 2 xIR bars (RX and TX), 2 x electronic units, 2 x
connecting cables, a built-in and connected JA-60N transmitter
JABLOTRON ALARMS a.s. hereby declares that
the JA-60IR is in a compliance with the relevant Union
harmonisation legislation: Directives No: 2014/53/EU,
2014/35/EU, 2014/30/EU, 2011/65/EU.
The original of the conformity assessment can be found at
www.jablotron.com - Section Downloads.
Installation
Open the electronic units (the TX unit is identified by a red mark and
the RX unit by a white mark). Be careful not to damage the JA-60N
transmitter which is in the cover of the RX unit.
The same identification is also used in the IR bars. To open the bars
simply slide down the top cover. When putting it back be careful not
to damage the tamper inside the bar.
The upper seals at the end of the bars are made from rubber and are
only used if the electronic units are not placed directly on the bars.
The lower seals are made from plastic with holes.
1. Choose the appropriate position to place both bars just opposite
each other and within a distance of 5 meters. Drill the holes on
the bottom parts of each bar and fix them using screws (the
connector inside the bars must point up). If necessary, it is
possible to make the bars shorter (being careful not to damage
beams or cabling) and adjust the beams according to the
specific needs of the application (by loosening the fixing
screws).
2. Fix the electronic units onto the desired place. They can be
placed directly on the top part of the bars or they can be placed
separately inside the secured premises (then seal the top part
of the bar by provided rubber padding). In the case of the RX
unit (white mark) it is also necessary to take into consideration
that the radio signal from the built-in transmitter should not be
shielded (by metal objects etc.).
3. Connect the bars to the correct electronic units (according to the
red and white marks) using the provided cable.
4. Based on the distance between the bars, set the RANGE
jumpers (see Figure 3) according to the following table:
Range
RX (white mark)
TX (red mark)
0.5 to 1.5 m
LOW
LOW
1.5 to 3 m
HIGH
LOW
More than 3 m
HIGH
HIGH
This setting also influences the battery lifetime. If the HIGH
option is set, then the consumption of the detector will be
slightly higher. But on the other hand it will increase immunity to
false alarms, especially during intense daylight.
TX IR transmitter
unit RX
IR receiver
unit
+ +
Always install the batteries
with + pole to the top
(as is shown on the picture)
Tx unit
red mark
Tx bar
Red mark
Rx unit
white mark
SYNC
Leave in
OPTO posit.
Rx bar
White mark
fixation
screws
instant
delay
Figure 1
5. To enroll the barrier to a Jablotron alarm system insert its
battery into the RX unit (white mark) while the receiver
(JA-63KR, UC-260 etc) is in enrollment mode (see also the
installation manual of the receiving unit). Set the reaction of the
barrier by DIP switch number 1 on the JA-60N transmitter (see
Figure 2):
Position ON = Instant reaction
Position 1 = delay reaction
Note: DIP switch number 2 has no influence on the function.
JA-60IR Wireless optical barrier MEB52803
2
instant
delay
Figure: 2 The JA-60N transmitter
6. Then power up the TX unit (red mark) by connecting its battery.
7. Press the SYNC TEST button in the TX unit (red mark). The
LED indicator will start flashing to confirm correct positioning of
the sync beam, if not it is necessary to adjust the relative
position of the bars.
8. To test the 3 remaining beams set the DIP switch in the RX unit
to B2 and press the BEAM TEST button. The LED indicator
must be flashing while the button is being pressed, otherwise
adjust the position of the beam B2. Repeat the procedure for
beams B3 and B4.
9. Using the AL DIP switch, set whether the alarm will be triggered
by the interruption of one beam (position 1 – standard false
alarm immunity) or two beams (position 2 – higher false alarm
immunity).
10. Test radio communication between the detector and the
receiving unit by briefly pressing (0.1 sec) the TEST-AL button
which will trigger the detector. To deactivate the detector press
the TEST-AL button again for about 1 second.
11. For correct functioning of the tamper positioned in the bars,
check that the ANTI-STRAPO jumper (see Figure 3) is in the
OFF position. A tamper of the RX unit is reported to the system
as a tamper alarm and a tamper of the TX unit is reported as
activation of the detector (instant or delay zone).
Note: A tamper alarm is activated 1 second after triggering the tamper
switch and it is terminated 10 seconds after its deactivation (during these
10 seconds any other possible activation of the tamper is ignored).
12. Test the function of the detector by interrupting the beams (for
example by stepping between the bars). The speed of the
reaction depends on the number of interrupted beams. After
activation of the detector, the JA-60N transmitter will add an
approximately 1 second delay before the signal is sent to the
receiving unit.
Battery testing and replacement
The detector automatically checks the condition of its batteries. If it is
necessary to replace the batteries, the detector will inform the control
panel about it. If a low battery is indicated the detector works as
normal but, batteries should be replaced as soon as possible (within
a week).
Before replacing the batteries, the control panel must be switched
into mode, which allows detectors opening (User mode or
Programming mode).
Note: Dispose of batteries safely depending on the type of the batteries and
local regulation. Although this product does not contain any harmful
materials we suggest you to return the product to the dealer or directly to
the producer after usage
Maintenance
No special maintenance is needed. The plastic cover can be cleaned
carefully to avoid any mechanical damage by non-abrasive materials.
We recommend regular testing of the JA-60IR along with other
components of the system.
Note: Although this product does not contain any harmful material we
suggest you to return the product to the dealer or directly to the
producer after usage.
RANGE
LOW
HIGH
TEST
Test B2
Test B3
Test B4
ONE
TWO
BEAM
INTERRUPTION
TEST - AL
BEAM TEST B2-B4
BATTERY
RX
unit
white mark
RANGE
LOW
HIGH
TAMPER
TEST - AL
SYNC TEST
BATTERY
TX
unit
red mark
TAMPER
TAMPER
TX
bar
red mark Leave in
position OFF
ANTI-STRAPO
Leave in
OPTO posit.
AL
2
1
SYNC
Figure 3

Other jablotron Security System manuals

jablotron OS-310 FORTE User manual

jablotron

jablotron OS-310 FORTE User manual

jablotron JK-84 Oasis User manual

jablotron

jablotron JK-84 Oasis User manual

jablotron OS-360A User manual

jablotron

jablotron OS-360A User manual

jablotron OS-311 FORTE User manual

jablotron

jablotron OS-311 FORTE User manual

jablotron JA-162A User manual

jablotron

jablotron JA-162A User manual

jablotron MAESTRO JA-65 User manual

jablotron

jablotron MAESTRO JA-65 User manual

jablotron CA-2103 Athos User manual

jablotron

jablotron CA-2103 Athos User manual

jablotron JA-152A User manual

jablotron

jablotron JA-152A User manual

jablotron 100+ User manual

jablotron

jablotron 100+ User manual

jablotron JA-63A User manual

jablotron

jablotron JA-63A User manual

jablotron JA-162A User manual

jablotron

jablotron JA-162A User manual

jablotron JA-162A-UK User manual

jablotron

jablotron JA-162A-UK User manual

jablotron Oasis RC-87 User manual

jablotron

jablotron Oasis RC-87 User manual

jablotron Azor User manual

jablotron

jablotron Azor User manual

jablotron JA-63 PROFI" User manual

jablotron

jablotron JA-63 PROFI" User manual

jablotron JA-151IR User manual

jablotron

jablotron JA-151IR User manual

jablotron JA-10 Series User manual

jablotron

jablotron JA-10 Series User manual

jablotron JA-16A RB User manual

jablotron

jablotron JA-16A RB User manual

jablotron JA-80-Oasis User manual

jablotron

jablotron JA-80-Oasis User manual

jablotron JA-151A User manual

jablotron

jablotron JA-151A User manual

jablotron JA-10 Series User manual

jablotron

jablotron JA-10 Series User manual

jablotron JA-114E User manual

jablotron

jablotron JA-114E User manual

jablotron JA-151IR User manual

jablotron

jablotron JA-151IR User manual

jablotron JA-163A Series User manual

jablotron

jablotron JA-163A Series User manual

Popular Security System manuals by other brands

Elk ELK-6040 Installation and setup guide

Elk

Elk ELK-6040 Installation and setup guide

Lorex SHS-2S7LD Series instruction manual

Lorex

Lorex SHS-2S7LD Series instruction manual

Rokonet WisDom user manual

Rokonet

Rokonet WisDom user manual

Agri Alert 9600 installation manual

Agri Alert

Agri Alert 9600 installation manual

STI Theft Stopper STI-6200 Series Install

STI

STI Theft Stopper STI-6200 Series Install

ST Engineering Electronics DigiSAFE DiskCrypt M10 user manual

ST Engineering Electronics

ST Engineering Electronics DigiSAFE DiskCrypt M10 user manual

ADEMCO LYNXR24 user guide

ADEMCO

ADEMCO LYNXR24 user guide

Kaba Saflok SAM RF Operation manual

Kaba

Kaba Saflok SAM RF Operation manual

0N3 X5 System user manual

0N3

0N3 X5 System user manual

Lorex SG17LD800 Frequently asked questions

Lorex

Lorex SG17LD800 Frequently asked questions

Nice HSCU1 Instructions and warnings for installation and use

Nice

Nice HSCU1 Instructions and warnings for installation and use

FireAngel CO-9X-10-EU user manual

FireAngel

FireAngel CO-9X-10-EU user manual

Honeywell ADEMCO VISTA-40 Installation and setup guide

Honeywell

Honeywell ADEMCO VISTA-40 Installation and setup guide

DA System Aplique 6/14COM installation guide

DA System

DA System Aplique 6/14COM installation guide

Carmanah R247-E user manual

Carmanah

Carmanah R247-E user manual

ADEMCO Ademco VISTA-40 user guide

ADEMCO

ADEMCO Ademco VISTA-40 user guide

Salto IQ2.0 installation guide

Salto

Salto IQ2.0 installation guide

LifeLink Prodigy LP2500 Operation manual

LifeLink

LifeLink Prodigy LP2500 Operation manual

manuals.online logo
manuals.online logoBrands
  • About & Mission
  • Contact us
  • Privacy Policy
  • Terms and Conditions

Copyright 2025 Manuals.Online. All Rights Reserved.