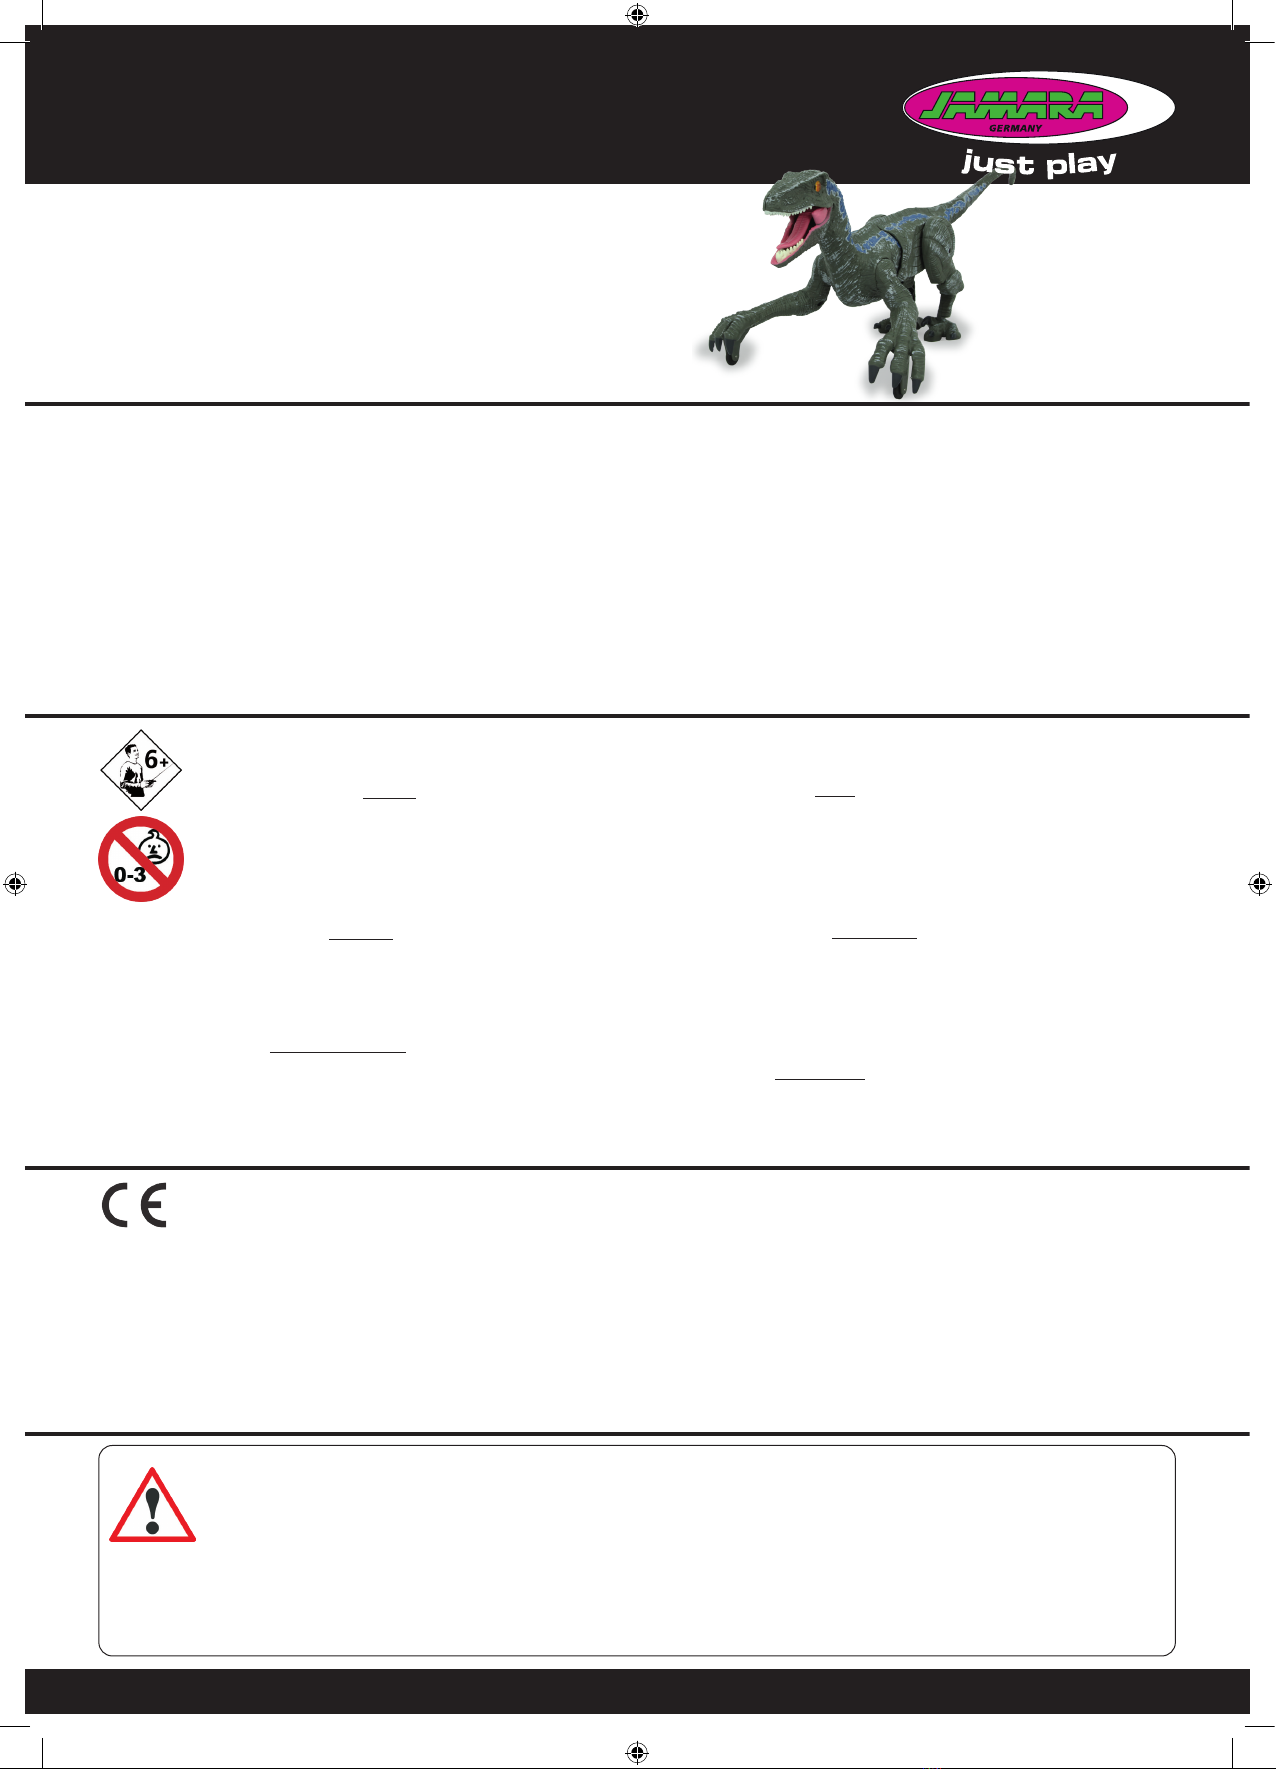
manuals.online logo
Brands
  1. Home
  2. •
  3. Brands
  4. •
  5. Jamara
  6. •
  7. Toy
  8. •
  9. Jamara Dinosaurier Velociraptor User manual

Jamara Dinosaurier Velociraptor User manual

No. 410153
Dinosaurier
Velociraptor
DE - Gebrauchsanleitung
GB - Instruction
FR - Mode d‘emploi
IT - Istruzioni per l’uso
ES - Instrucción
CZ - Návodkpoužití
DE - Allgemeine Hinweise
JAMARA e. K. übernimmt keine Haftung für Schäden, die an dem Produkt selbst oder durch dieses
entstehen, sofern diese auf falsche Bedienung oder Handhabungsfehler zurückzuführen sind. Der
Kunde allein trägt die volle Verantwortung für die richtige Bedienung und Handhabung; dies umfasst
insbesondere die Montage, den Ladevorgang, die Verwendung bis hin zur Wahl des Einsatzberei-
ches. Bitte beachten Sie hierzu die Bedienungs- und Gebrauchsanleitung, diese enthält wichtige
Informationen und Warnhinweise.
GB - General information
JAMARA e.K. is not liable for any damage caused to the product itself or through this, provided this
is due to improper operation or handling errors. The Customer alone bears the full responsibility for
the proper use and handling, including without limitation, the assembly, the charging process, the
use and choice of the operation area. Please refer to the operating and user instructions, it contains
important information and warnings.
FR - Consignes générales
La société JAMARA e. K. n‘assume aucune responsabilité des dommages subis par le produit ou
occasionnés par le produit si ces dommages résultent d‘un emploi ou utilisation incorrects. Le
Client est lui-même responsable de l‘emploi et utilisation corrects, ceci comprenant en particulier
le montage, le processus de chargement, l‘application et le champ d‘application. Il faut prendre
connaissance du contenu du mode d‘emploi qui contient des informations importantes et des indi-
cations d‘avertissement.
IT - Indicazioni generali
L’azienda JAMARA e. K. non risponderà dei danni causati al prodotto o dal prodotto, qualora esse
derivino dall‘uso o dall‘utilizzo non conforme. Il cliente sarà pienamente responsabile del cor-
retto uso e del corretto utilizzo. Ciò riguarda, in particolare, il montaggio, il processo di ricarica,
l‘applicazione, la scelta dell‘area di applicazione. A tal ne sarà necessario prendere conoscenza
delle istruzioni per l’uso, contenenti informazioni e avvertenze importanti.
ES - Información general
JAMARA K. no se hace responsable de los daños causados al producto en sí o por medio de
esto, a menos que esto se debe al mal funcionamiento o errores de manejo. El cliente solo tiene la
responsabilidad completa para el uso y manejo adecuado, incluyendo, sin limitaciones, el montaje,
el proceso de carga, el uso de hasta la elección de la zona de aplicación. Por favor, consulte las
instrucciones de uso y funcionamiento, contiene información y avisos importantes.
CZ - Obecné informace
Jamara e.K. a její distributoři nebo prodejci nenesou žádnou odpovědnost za jakékoliv poškození
produktu (modelu) nebo zranění osob špatným použitím nebo nesprávným zacházením. Zákazník
nese plnou odpovědnost za správné používání produktu bez omezení, včetně nabíjení produktu,
řízení, sestavení, výběru adekvátní plochy pro používání apod. Před prvním použítím produktu si
prosím pečlivě pročtěte návod k použití, který obsahuje kromě jiného důležitá upozornění a varo-
vání.
DE - Konformitätserklärung
Hiermit erklärt JAMARA e.K., dass das Produkt‚ „Dinosaurier Velociraptor, No.
410153“ den Richtlinien 2014/53/EU, 2011/65/EU und 2009/48/EG entspricht.
Der vollständige Text der EU-Konformitätserklärung ist unter der folgenden
Internetadresse verfügbar: www.jamara-shop.com/Konformitaet
GB-CerticateofConformity
Hereby JAMARA e.K. declares that the products „Dinosaurier Velociraptor, No. 410153“ comply with
Directives 2014/53/EU, 2011/65/EU and 2009/48/EC.
The full text of the EU Declaration of Conformity is available at the following Internet address:
www.jamara-shop.com/Conformity
FR - Déclaration de conformité
Par la présente, JAMARA e.K. déclare que les produits „Dinosaurier Velociraptor, No. 410153“ sont
conformes aux Directives 2014/53/UE, 2011/65/UE et 2009/48/CE.
Le texte intégral de la déclaration de conformité CE est disponible via l‘adresse suivante
Adresse Internet disponible: www.jamara-shop.com/Conformity
IT - Dichiarazione di conformità
Con la presente JAMARA e.K. dichiara che i prodotti „Dinosaurier Velociraptor, No. 410153“ sono
conformi alle Direttive 2014/53/UE, 2011/65/UE e 2009/48/CE.
Il testo integrale della dichiarazione di conformità UE è disponibile al seguente indirizzo Internet:
www.jamara-shop.com/Conformity
ES - Declaración de conformidad
Por la presente JAMARA e.K. declara que los productos „Dinosaurier Velociraptor, No. 410153“
cumplen con las Directivas 2014/53/UE, 2011/65/UE y 2009/48/CE.
El texto completo de la declaración de conformidad de la UE está disponible en la siguiente direcci-
ón de Internet:www.jamara-shop.com/Conformity
CZ-Prohlášeníoshodě
Společnost JAMARA e.K. tímto prohlašuje, že Produkt, „Dinosaurier Velociraptor, No. 410153“ od-
povídá směrnicím 2014/53/EU, 2011/65/EU a 2009/48/ES.
Úplné znění EU prohlášení o shodě je k dispozici na následující internetové adrese:
www.jamara-shop.com/Conformity
DE - Bitte lesen Sie die komplette Bedienungsanleitung und Sicherheitshinweise sorg-
fältig durch bevor Sie das Modell in Betrieb nehmen.
Achtung! Warnhinweise / Sicherheitshinweise unbedingt komplett lesen.
Diese dienen Ihrer Sicherheit und können Unfälle / Verletzungen vermeiden.
GB - Read the complete instructions and security instructions carefully before using
the model.
Caution!Pleasefullyandcarefullyreadwarnings/safetyinstructions.These
 areforourownsecurityandcanavoidaccidents/injuries.
FR - Avant de mettre en marche toute l‘unité il faut lire attentivement le mode d‘emploi.
Attention! La mise en garde et les consignes de sécurités sont à lire
entièrement pour votre sécurité et éviter tout accidents et blessures.
IT - Prima di avviare il modello, leggere attentamente tutte le istruzioni per l’uso.
Attenzione! Leggere completamente le avvertenze / istruzioni di sicurezza,
questi sono per la vostra sicurezza può prevenire incidenti / infortuni.
ES - Lea atentamente la instruccion completa y seguridad antes de poner el modelo
en funcionamiento
Atención! Leer completamente las notas de advertencia / instrucciones de
 seguridadestossonparasuseguridadypuedeevitaraccidentes/lesiones.
CZ - Před použitím tohoto modelu si pečlivě přečtěte návod k použití a bezpečnostní
upozornění.
 Upozornění!Varování/bezpečnostnípokynymusíbýtpřečtenyvplném
 rozsahu!Sloužívašíbezpečnostiamohouzabránitnehodám/zraněním.
42/20
Frequency bands: 2,4 GHz | Frequency range: 2410 MHz - 2475 MHz | EIRP: < 5 mW (max. power transmitted)
DE - Geeignet für Kinder ab 6 Jahren.
Achtung: - Für Kinder unter 36 Monaten nicht geeignet.
ERSTICKUNGSGEFAHR!
Enthält verschluckbare Kleinteile.
Von Kleinkindern unbedingt fernhalten.
- Dieses Modell ist nicht dafür bestimmt, durch Personen (einschließlich
Kinder) mit eingeschränkten physischen, sensorischen oder geistigen
Fähigkeiten oder mangels Erfahrung und/oder mangels Wissen benutzt zu
werden, es sei denn, sie werden durch eine für ihre Sicherheit zuständige
Person beaufsichtigt, wie das Gerät zu benutzen ist.
GB - Suitable for children over 6 years.
Warning: - Not suitable for children under 36 months.
RISK OF SUFFOCATION!
Contains small parts which can be swallowed.
Keep away necessarily from children.
- This device is not intended for use by individuals (Including children) with
reduced physical sensory, mental abilities, lack of experience and / or
knowledge, unless they are supervised in how the device is to be used.
FR - Produit à utiliser par les enfants de plus de 6 ans.
Attention: - Ne convient pas aux enfants de moins de 36 mois.
DANGER D‘ETOUFFEMENT!
Contient des pièces petites qui peuvent être avalées.
Ne pas laisser à la portée de petits enfants.
- L‘unité n‘est pas destinée aux personnes (cela concerne aussi les enfants)
aux capacités physiques, sensorielles ou intellectuelles limitées ou n‘ayant
pas d‘expérience/connaissances, à moins qu‘elles soient surveillées par
des personnes responsables de leur sécurité pendant l‘utilisation de
l‘équipement.
IT - Adatto ai bambini dal 6° anno di vita.
Attenzione: - Non adatto a bambini di età inferiore a 36 mesi.
RISCHIO DI SOFFOCAMENTO!
Contiene piccoli pezzi che possono essere ingeriti.
Tenere sempre fuori dalla portata dei bambini.
- Questo modello non è destinato all’uso da parte di persone (bambini
compresi) con abilità siche, sensoriali o cognitive limitate, nonché da parte
di soggetti privi dell‘esperienza e/o conoscenze necessarie, sempre che
non sia presente un soggetto responsabile della loro sicurezza nell’ambito
dell‘uso dell‘apparecchiatura.
ES-Aptoparaniñosmayoresde6años.
Atención: - No es recomendable para los niños menores de 36 meses.
RIESGO DE ASFIXIA!
Contiene piezas pequeñas.
Mantenga necesariamente lejosde los niños.
- Este dispositivo no debe ser utilizado por personas(incluidos niños) con
discapacidad física, habilidades sensoriales o mentales o la falta de
experiencia y / o conocimientos, porque son responsables de su propia
seguridad persona de supervisión sobre cómo se utiliza el dispositivo. O la
persona que son supervisados en cómo usar.
CZ-Určenoprodětiod6let!
Varování: - Nevhodné pro děti do 36 měsíců.
  NEBEZPEČÍUDUŠENÍ!
Obsahuje malé části.
Bezpodmínečně udržujte z dosahu malých dětí.
- Tento přístroj není určen k tomu, aby jej užívali osoby s omezenými
fyzickými, smyslovými či duševními schopnostmi (včetně dětí) a
nedostatečnými zkušenostmi a/nebo znalostmi, pokud nejsou pod dozorem
příslušné osoby, která dbá o jejich bezpečnost a sdělí instrukce, jak přístroj
používat.
410153_Dinosaurier Velociraptor.indd 1410153_Dinosaurier Velociraptor.indd 1 05.11.2020 13:58:1505.11.2020 13:58:15
2
DE - Achtung!
Vor dem Betrieb:
Erst Modell und dann den Sender einschalten.
● Beim gleichzeitigen Betrieb mehrerer Modelle immer zuerst
ein Modell und dann den dazu gehörenden Sender ein-
schalten. Dann das nächste Modell und den dazu gehören-
den Sender usw. Nicht mehrere Modelle oder Sender zum
gleichen Zeitpunkt einschalten da sonst mehrere Modelle auf
denselben Sender reagieren könnten.
Bei Beendigung:
Erst das Modell und dann den Sender ausschalten.
● Betreiben Sie Ihr Modell niemals in Distanzen die außerhalb
Ihrer Sichtweite liegen. Sowohl die maximale Sichtweite als
auch die max. Reichweite Ihres Modells hängen von vielen
Faktoren wie Witterung, Einsatzort und vorhandenen Stör-
frequenzen ab. Führen Sie deshalb vor jedem Einsatz mit
einer zweiten Person, die das Modell während des Tests
sicher xiert hält, einen Reichweitentest durch und prüfen Sie
auch wie sich das Modell während des Betriebs bei einem
Signalausfall wie z.B. bei leeren Senderbatterien oder
ausgeschaltetem bzw. ausgefallenem Sender verhält.
GB - Attention!
Before operating:
Switch the model on rst then the transmitter.
● In case several models are used at the same time rst switch
on the model and then the appropriate transmitter. Do not
switch on several models or transmitters at the same time
as multiple models could react to the same transmitter.
Whennisished:
First switch o󰀨 the model then the transmitter.
● Never operate your model beyond sight. Both the maximum
visibility as well as the max. range of your model will depend
on many factors such as weather, location and interfering
frequencies. Therefore, before each use perform a range test
with a second person securely holding the model and also
check how the model reacts if there is a signal failure e.g.
when empty transmitter batteries are installed.
FR - Attention!
Avant l’utilisation:
Allumez en premier l’modèle puis votre radiocommande.
● Au cas où plusieurs modèle sont en même en usage, il
faudra toujours activer d’abord l’modèle et ensuite l’émetteur
convenable. Puis un autre modèle et l’émetteur convenable
et ainsi de suite. Ne pas activer plusieurs modèle ou
plusieurs émetteurs en même temps puisque plus d’un
modèle pourront réagir à la commande d’un émetteur.
Après utilisation:
Arrêtez le modèle en premier puis votre radiocommande.
● N’utilisez jamais le modèle à une distance hors de votre
visibilité. La visibilité maximale ainsi que la portée maximale
dépendent de plusieurs facteurs tels que le temps, le lieu
d’utilisation et les présentes fréquences perturbatrices. Pour
cela, avant chaque usage, veuillez e󰀨ectuer un test de
visibilité et de portée avec une deuxième personne qui tient
le modèle xé et vériez les réactions du modèle en usage
en cas de pertes de signal due par exemple à des piles
usées ou à un émetteur éteint.
IT - Attenzione!
Prima dell‘uso:
Accendete prima il modello e poi la trasmittente.
● Usando vari modelli simultaneo sempre un modello e poi
accendere la radio associata. Poi il modello successivo e la
radio associate, ecc. Non accendere più modelli o radio
contemporaneamente, altrimenti i vari modelli possono
rispondere alla stessa radio.
Dopo l‘uso:
Spegnere prima il modello e poi la trasmittente.
● Non utilizzare il suo modello fuori della distanzia di vista. Sia
la visibilità come la portata massima del vostro modello
dipendono da molti fattori, come il tempo, disturbo di
frequenza e il luogo di utilizzo. Eseguire un test prima di ogni
utilizzo del modello con una seconda persona che tiene
ssato il modello. Con questa procedura potete testare come
reagisce il modello durante la perdita del segnale causato
per esempio da una batterie scarica oppure la radio spenta.
ES - ¡Atención!
Antes del uso:
Encender primero el modelo, y después la emisora.
● El uso de varios modelos simultáneo siempre un modelo y
despues encender la emisora asociada. A continuación, el
siguiente modelo y la emisora asociada, etc. No encender
más modelos o emisoras al mismo tiempo, de lo contrario los
varios modelos podrían responder a la misma emisora.
Después del uso:
Apagar primero el modelo, y después la emisora.
● No utilizar su modelo fuera de la distancias de visibilidad.
Tanto la visibilidad como la capacidad máxima de su modelo
depende de muchos factores, tales como el tiempo,
frecuencia de interferencia y el lugar de utilización. Realice
una prueba antes de cada uso del modelo con una segunda
persona que ja el modelo. Con este procedimiento se
puede comprobar cómo el modelo reacciona durante la
pérdida de señal causada por ejemplo por una batería
descargada o la emisora apagada.
CZ - Varování!
Přizapínání:
Nejdříve zapněte model a teprve potom dálkový ovladač.
● Při souběžném provozu více model vždy nejprve zapněte
jedno model a poté k němu patřící vysílačku. Potom další
model a jemu náležející vysílačku atd. Nezapínejte více
model nebo vysílaček ve stejnou chvíli, jelikož by jinak mohlo
více model reagovat na stejnou vysílačku.
Přivypínání:
Nejdříve vypněte model a teprve potom dálkový ovladač.
● Nikdy nepoužívejte váš model ve vzdálenostech mimo váš
dohled. Maximální viditelnost i dosah vašeho modelu je
závislá na mnoha faktorech, jako je počasí, místo provozu a
případné rušivé frekvence. Před každým použitím proto s
jinou osobou, která model během testu pevně přidrží,
proveďte test dosahu a vyzkoušejte si, jak se model chová
při výpadku signálu, např. při vybití baterie vysílačky nebo při
vypnutí/výpadku vysílačky.
2
3
4
1
8
5
6
7
9
DE - Funktionen
Sender
1. Power LED
2. Vorwärts
3. Rückwärts
4. Demoknopf
5. Rechts abbiegen
6. Links abbiegen
7. Ein-/Ausschalter
8. Batteriefachverriegelung
9. Batteriefach
Modell
A Ladeanschluß
B Ein-/Ausschalter
C Demoknopf
D LED
Leuchtet während den Bewegungen
GB - Components
Transmitter:
1. Power LED
2. Forward
3. Backward
4. Demo button
5. Turn right
6. Turn left
7. On/O󰀨 Switch
8. Battery compartment lock
9. Battery compartment
Model
A Charging port
B On/O󰀨 Switch
C Demo button
D LED
Lights up during movements
FR - Composants
Radiocommande:
1. Power LED
2. Avant
3. Arrière
4. Touche Démo
5. Tourner à droite
6. Tourner à gauche
7. Interrupteur On/O󰀨
8. Verrouillage du compartiment des
piles
9. Compartiment pour piles
Modèle
A Port de charge
B Interrupteur On/O󰀨
C Touche Démo
D LED
S‘allume pendant les déplacements
IT - Componenti
Trasmittente:
1. Power LED
2. Avanti
3. Indietro
4. Pulsante Demo
5. Girare a destra
6. Girare a sinistra
7. Interruttore On/O󰀨
8. Chiusura del vano batteria
9. Scompartimento di batteria
Modello
A Porta di ricarica
B Interruttore On/O󰀨
C Pulsante Demo
D LED
Si illumina durante i movimenti
ES - Componentes
Emisora:
1. Power LED
2. Delante
3. Atraz
4. Botón Demo
5. Gira la izquierda
6. Gira la derecha
7. Interruptor On/O󰀨
8. Cerradura del compartimento de
la batería
9. Compartimento de la batería
Modelo
A Puerto de carga
B Interruptor On/O󰀨
C Botón Demo
D LED
Se enciende durante los movimientos
CZ-Komponenty
Funkce:
1. LED
2. Dopředu
3. Dozadu
4. Demo funkce
5. Doprava
6. Doleva
7. Přepínač ON/OFF
8. Zámek krytu baterie
9. Krytka baterie
Model
A Vstup pro nabíjení
B Přepínač ON/OFF
C Demo funkce
D LED
A
B
C
D
410153_Dinosaurier Velociraptor.indd 2410153_Dinosaurier Velociraptor.indd 2 05.11.2020 13:58:1905.11.2020 13:58:19
3
DE - Batteriehinweis:
Nicht wiederauadbare Batterien dürfen nicht aufgeladen werden!
Nicht ö󰀨nen!
Nicht ins Feuer werfen!
Alte und neue Batterien nicht mischen!
Keine alkalischen, Standard-(Kohlensto󰀨-Zink) oder wiederauf-
ladbare Batterien mischen!
Auadbare Batterien sind aus dem Spielzeug herauszunehmen,
bevor sie geladen werden!
Auadbare Batterien dürfen nur unter Aufsicht Erwachsener
geladen werden!
Die Anschlussklemmen dürfen nicht kurzgeschlossen werden!
GB - Battery warning:
Non-rechargeable batteries are not to be recharged!
Do not open!
Do not dispose of in re!
Do not mix old and new batteries!
Do not mix alkaline batteries, standard (carbon-zinc) or
rechargeable batteries!
Rechargeable batteries are to be removed from the toy before
being charged!
Rechargeable batteries are only to be charged under adult
supervision!
The supply terminals are not to be short-circuited!
FR - Informations concernant l‘accumulateur:
Les batteries non rechargeables ne doivent pas être rechargées!
Ne pas ouvrir!
Ne pas jeter au feu!
Ne pas utiliser des piles neuves et usées à la fois!
Ne pas utiliser en même temps des piles alcalines, standard
(zinc-charbon) et des accumulateurs!
Les piles rechargeables doivent être retirées du jouet!
Les batteries rechargeables ne peuvent être rechargées que
sous la surveillance d‘un adulte!
Les connexions ne doivent pas être court-circuitées!
IT - Informazioni relative alle pile:
Le batterie non ricaricabili non devono essere caricate!
Non aprire!
Non gettare nel fuoco!
Non usare contemporaneamente pile nuove e pile usate!
Non usare contemporaneamente pile alcaline, standard (zinco-
carbone) e ricaricabili!
Le batterie ricaricabili devono essere rimosse dal giocattolo!
Le batterie ricaricabili possono essere ricaricate solo sotto la
supervisione di un adulto!
I morsetti di collegamento don devono essere cortocircuitati!
ES - Advertencia sobre las baterías:
Las baterías no recargables no se pueden cargar!
No abrir!
No arrojar al fuego!
No mezcle baterías nueva y viejas!
No mezcle baterías alcalinas, estándar (carbono-zinc) o baterías
recargables!
Las baterías recargables deben retirarse del juguete!
Las baterías recargables sólo pueden cargarse bajo la supervi-
sión de un adulto!
Los conectores de conexión no deben estar en cortocircuito!
CZ - Informace ohledně akumulátoru:
Nenabíjejte jednorázové baterie!
Neotvírejte!
Nevhazujte do ohně!
Nedávejte dohromady staré a nové baterie!
Nedávejte dohromady alkalické a standardní (carbon-zinc) nebo
nabíjecí baterie!
Před nabíjením vyjměte nabíjecí baterie z hračky!
Nabíjecí baterie lze nabíjet pouze pod dohledem dospělé osoby!
Nezkratujte připojovací svorky!
DE - Einlegen der Batterien
• Ö󰀨nen Sie die Verriegelung und nehmen Sie den Batterie-
fachdeckel ab.
• Legen Sie 2 x AA Batterien ein, achten Sie auf die richtige
Polung.
• Setzen Sie den Batteriefachdeckel wieder auf und verriegeln
ihn.
GB - Insert the batteries
• Slide the battery compartment lock and remove the battery
compartment cover.
• Fit the 2 x AA batteries, observe the correct polarity.
• Replace the battery hatch and slide the Battery compartment
lock
FR - Mise en place des piles
• Ouvrez le loquet et retirez le couvercle du compartiment des
piles.
• Insérer les piles 2 x AA, respectez la polarité.
• Remettez le couvercle de la pile en place et verrouillez-le.
IT - Inserimento delle batterie
1. Trasmittente
• Aprire il chiavistello e rimuovere il coperchio del vano
batteria.
• Inserire 2 x AA batterie nella giusta posizione, facendo
attenzione ai poli.
• Riposizionare il coperchio della batteria e bloccarlo.
ES - Colocar las pilas
1. Emisora
• Abre el pestillo y quita la tapa de la batería
• Coloque 2 x AA baterías, respetando la polaridad.
• Vuelva a colocar la tapa de la batería y ciérrela..
CZ-Vloženíbaterií
• Posuňte zámek prostoru pro baterie a sejměte kryt prostoru
pro baterie.
• Vložte 2 x AA baterie se správnou polaritou.
• Vyměňte poklop baterie a zasuňte přihrádku na baterie
zámek.
DE - Ladevorgang USB
• Verbinden Sie den USB-Stecker des Ladekabels mit dem
Modell.
• Stecken Sie den USB-Stecker des Ladekabels in die USB-
Buchse ihres PC`s.
• Leuchtet die rote LED am Modell ist der Ladevorgang
gestartet. Sobald die LED erlischt, ist der Ladevorgang
abgeschlossen.
Nach etwa 2 Std. ist der Ladevorgang abgeschlossen, die
Spielzeit bei vollgeladenen Akku beträgt ca. 60 min.
Wenn der Velociraptor mit einem Ton seine Funktionen be-
endet, bedeutet dies, dass er aufgeladen werden muss.
GB-ChargingbyUSB
• Connect the model with USB cable.
• Insert the USB plug from the USB cable into the USB socket
of your PC.
• The red LED light on the model is ON whilst charging and
turns OFF when charging complete.
The charging process should take approx. 2 hours and should
give you approx. 60 min. play time.
If the Velociraptor stops working with a sound, this means
that it needs to be charged.
FR - Processus de charge USB
• Connecter la modèle avec un USB du cordon de charge.
• Branchez la prise USB du cordon de charge dans la prise
USB de votre PC.
• Le chargement est mis en marche quand le rouge LED
lumière sur le modèle brille. Dès que la s‘éteigne, le
chargement est terminé.
La charge est complète après environ 2 heures et la durée de jeu
est de l‘ordre de 60 min.
Lorsque le Velociraptor cesse de fonctionner avec un son,
celasigniequ‘ildoitêtrerechargé.
IT - Caricamento attraverso USB
• Collegare il cavo USB con la modello.
• Collegare il cavo USB alla preso del PC.
• Se viene avviata la spia di carica rosso su modello. Non
appena il LED si spegne, la carica è completata.
La ricarica é completata in 2 ore e la durata il tempo di riproduzi-
one é me diamente di 60 min.
Se il Velociraptor interrompe le sue funzioni con un suono,
signicachehabisognodiesserericaricato.
ES - Cargamiento a través de USB
• Conecte el otro extremo al enchufe en el modelo.
• Enchufe el conector USB a un puerto USB de su ordenador.
• Cuando el LED rojo en modelo se brilla, se inicia el proceso
de carga. Cuando el LED se apaga, la carga está completa.
Tempo de carga: 2 horas
Tempo de juego: 60 min.
Cuando el Velociraptor deja de funcionar con un sonido, si-
gnicaquenecesitaserrecargado.
CZ-Vloženíbaterií
• Connect the model with USB cable.
• USB kabel připojte ke vstupu USB na Vašem počítači.
• Během nabíjení modelu bude svítit červená LED kontrolka.
Jakmile bude nabíjení dokončené LED dioda zhasne.
Nabíjení trvá přibližně 2 h, přičemž produkt nabijete na přibližně
60 min. provozu.
PokudVelociraptorpřestanevydávatzvuky,nabijtejej.
Open Close
2x AA
DE
Trennen Sie immer unmittelbar nach Beenden des Ladevorgangs das Modell vom Lade-
gerät. Trennen Sie das Ladegerät immer unmittelbar nach Abstecken des Modells von
der Spannungsversorgung. Ein eingesteckt lassen des Modells bzw. des Ladegeräts
nach Beenden des Ladevorgangs kann zu Beschädigungen am Modell, Ladegerät oder
der Spannungsversorgung führen (Brandgefahr).
GB
Always disconnect the model from the charger immediately after charging. Always dis-
connect the charger from the power supply immediately after disconnecting the model.
Inserting the rechargeable model or charger after charging will result in damage tothe
model, charger or the power supply (re hazard).
FR
Débranchez toujours après chaque arrêt la modèle du chargeur. Débranchez aussi tou-
jours le chargeur immédiatemment après avoir débranché la modèle de l´alimentation.
Laissez brancher la chargeur ou la modèle peuvent causer des dommages à la modèle,
à votzre chargeur ou câble d´alimentation (risque d´incendie).
IT
Dopo ogni carica e importante di: Scollegare sempre subito la batteria dal caricatore ed il
caricatore dalla rete elettrica. Se dopo la carica si lascia collegato l’uno o l’altro può cau-
sare danni alla batteria, al caricatore o addirittura alla rete elettrica (pericolo di incendio).
ES
Después de cada carga es importante de: Desconectar siempre la modelo del cargador
y el cargador de la fuente de alimentación. Si después de la carga se deja conectado a
uno o otra puede causar daños a la modelo, cargador.
CZ
Ihned po dokončení nabíjení odpojte model od nabíječky. Ihned po odpojení modelu
odpojte nabíječku od zdroje napájení. Pokud po dokončení model nebo nabíječka nebu-
dou odpojeny, může to způsobit poškození modelu, nabíječky nebo napájení (nebezpečí
požáru).
410153_Dinosaurier Velociraptor.indd 3410153_Dinosaurier Velociraptor.indd 3 05.11.2020 13:58:2105.11.2020 13:58:21
4
DE - Bedienung
GB - Operation
FR - Fonctionnement
IT - Funzionamento
ES - Funcionamiento
CZ - Obsluha
OFF ON
DE
1. ON/OFF
Schalten Sie erst den Velociraptor ein. Drücken Sie kurz den
Startknopf am Sender, die LED am Sender beginnt zu
leuchten. Der Velociraptor ist einsatzbereit.
Wenn Sie den Startknopf ca. 3 Sekunden drücken schaltet
sich der Sender aus.
GB
1. ON/OFF
Switch the velociraptor on. Press short the ON/O󰀨 switch on
the transmitter, the LED lightning. The velociraptor is ready
for use. If you press the start button for 3 seconds, the
transmitter switches o󰀨.
FR
1. ON/OFF
Allumez d‘abord le Velociraptor. Appuyez brièvement sur
le bouton de démarrage de l‘émetteur, la LED de l‘émetteur
s‘allume. Le vélociraptor est prêt à l‘emploi. Si vous
appuyez sur le bouton de démarrage pendant environ
3 secondes, l‘émetteur s‘éteint.
IT
1. ON/OFF
Prima accendere il Velociraptor. Premere brevemente il
pulsante di avvio della trasmittente, il LED della trasmittente
si accende. Il Velociraptor è pronto per l‘uso. Se si preme il
pulsante di avvio per circa 3 secondi, la trasmittente si
spegne.
ES
1. ON/OFF
Primero enciende el Velociraptor. Presione brevemente el
botón de inicio en la emisora, el LED de la emisora se
encenderá. El velociraptor está listo para su uso. Si presiona
el botón de inicio durante unos 3 segundos, la emisora se
apaga.
CZ
1. ON/OFF
Zapněte velociraptora. Krátce stiskněte tlačítko ON/Off na
ovladači. Rozsvítí se kontrolka a velociraptor je připraven k
použití. Pokud stisknete tlačítko ON/OFF na delší dobu než
3 vteřiny, vypne se.
DE
2. Vorwärts/rückwärts
Drücken Sie die „Vorwärts“ oder „Rückwärts“ Taste, läuft
der Velociraptor vorwärts bzw. rückwärts.
GB
2. Forward / Reverse
Pressing the „Forward“ or „Backward“ button on the
transmitter, the velociraptor is walking forward or backward.
FR
2. Marche avant/arriére
Si vous appuyez sur le bouton „Avancer“ ou „Reculer“, le
Velociraptor avance ou recule.
IT
2. Avanti/indietro
Se si preme il pulsante „Avanti“ o „Indietro“, il Velociraptor si
muove in avanti o indietro.
ES
2. Adelante/Atás
Presione el botón „Adelante“ o „Atrás“ para mover el
Velociraptor hacia adelante o hacia atrás
CZ
2. Dopředu/Dozadu
Pro pohyb dopředu stiskněte na ovladači tlačítko „Forward“ a
pro pohyb dozadu tlačítko „Backward“.
DE
3. Links/Rechts abbiegen
Drücken Sie gleichzeitig die „Vorwärts“ und „Links abbiegen“
Taste, bewegt sich der Velociraptor vorwärts nach links.
Drücken Sie die „Rechts abbiegen“ Taste, bewegt sich der
Velociraptor vorwärts nach rechts.
GB
3. Turn left/right
Pressing the „Forward“ and „Turn left“ button on the
transmitter at the same time, the velociraptor is walking
forward from the left side. Press the „Turn right button, the
velociraptor is walking from the right side.
FR
3. Tourner à droite ou à gauche
Si vous appuyez simultanément sur les boutons „Avancer“
et „Tourner à gauche“, le Velociraptor avance vers la gauche.
Appuyez sur le bouton „Tourner à droite“, le Velociraptor
avance vers la droite.
IT
3. Girare a sinistra o destra
Se si premono contemporaneamente i pulsanti „Avanti“ e
„Gira a sinistra“, il Velociraptor si muove in avanti a sinistra.
Premere il pulsante „Girare a destra“, il Velociraptor si muove
in avanti a destra.
ES
3. Giro a la izquierda o derecha
Si presionas los botones „Adelante“ y „Gira a la izquierda“
simultáneamente, el Velociraptor se mueve hacia la
izquierda. Presiona el botón „Gira a la derecha“, el
Velociraptor se mueve hacia la derecha.
CZ
3. Zatočenídoleva/doprava
Stisknutím tlačítka dopředu „Forward“ a zároveň tlačítka
doleva „Turn left“ půjde Velociraptor dopředu doleva. Pokud
stisknete podobným způsobem tlačítko doprava, půjde tímto
směrem.
DE
4. Demo-Taste
Drücken Sie die Demo-Taste am Sender oder am Kopf des
Velociraptors, der Velociraptor führt automatisch
verschiedene Manöver durch.
GB
4. Demo button
Press the „DEMO“ button on the Transmitter or on the head
of the velociraptor, the velociraptor will show di󰀨erent
walking performance automatically.
FR
4. Touche Démo
Appuyez sur le bouton de démonstration sur l‘émetteur ou
sur la tête du vélociraptor, le vélociraptor e󰀨ectue
automatiquement diverses manœuvres..
IT
4. Pulsante Demo
Premere il pulsante demo sulla trasmittente o sulla testa del
Velociraptor, il Velociraptor esegue automaticamente varie
manovre.
ES
4. Botón de demostración
Presiona el botón de demostración en la emisora o en la
cabeza del Velociraptor, el Velociraptor realiza
automáticamente varias maniobras.
CZ
4.TlačítkoDEMO
Stisknutím tlačítka „DEMO“, které se nachází na hlavě
Velicoraptora, předvede sérii nadenovaných pohybů.
1
2
3
4
410153_Dinosaurier Velociraptor.indd 4410153_Dinosaurier Velociraptor.indd 4 05.11.2020 13:58:2705.11.2020 13:58:27
5
DE - Bedienung
GB - Operation
FR - Fonctionnement
IT - Funzionamento
ES - Funcionamiento
CZ - Obsluha
OFF ON
DE
5. Standby-Modus
Wenn dem Velociraptor ca. 5 min. keine Befehle gesendet
werden, schaltet sich das Modell automatisch aus.
Um ihn neu zu starten, schalten Sie den Velociraptor aus
und wieder ein oder drücken Sie den Demoknopf oben am
Velociraptor.
GB
5. Standby-Mode
The velociraptor enter into the sleeping mode without any
operating in 5 minutes. To restart it, switch o󰀨 Velociraptor
and again or press the demo button at the top of the
Velociraptor.
FR
5. ModeStandby
Le vélociraptor entre en mode veille sans aucun fonctionnant
en 5 minutes. Pour le redémarrer, éteignez le Velociraptor et
à nouveau ou appuyez sur le bouton de démonstration en
haut de Velociraptor.
IT
5. Modalitàstandby
Se il Velociraptor non riceve comandi per più di 5 minuti, si
spegne automaticamente. Per riavviarlo, spegnere il
Velociraptor e di nuovo o premere il pulsante demo nella
parte superiore del Velociraptor
ES
5. Modo de espera
Si no le vas a dar mas de 5 minutos nigun comandos, el
modelo se apaga en automáticamente. Para reiniciarlo,
apague el Velociraptor y otra vez o presione el botón de
demostración en la parte superior del Velociraptor.
CZ
5. Pohotovostnírežim
Pokud Velicoraptora nepoužijete po dobu delší než 5 min
automaticky přejde do pohotovostního režimu. Abyste
jej mohli znovu používat, vypněte jej a znovu zapněte nebo
stiskněte tlačítko DEMO.
5
DE - Achtung!
Sofern Ihr Modell einen Ein/Aus-Schalter besitzt, schalten Sie das Modell immer unmittelbar
nach jedem Einsatz aus. Besitzt Ihr Modell einen herausnehmbaren Akku bzw. eine trennbare
Steckverbindung zum Akku, sollte unmittelbar nach jedem Einsatz der Akku vom Modell getrennt
werden. Durch versehentliches eingeschaltet lassen oder Akku angesteckt lassen kann der Akku
tiefenentladen werden. Durch Tiefenentladung verliert der Akku an Leistung bzw. kann so stark
beschädigt werden, dass ein Laden bzw. Entladen nicht mehr möglich ist bzw. der Akku beim
Lade- oder Entladevorgang selbstentzünden kann (Brandgefahr). Versuchen Sie niemals tiefen-
entladene Akkus zu Laden bzw. zu Entladen. Die Spannung des Akkus sollte niemals unter 3 Volt
fallen um eine Tiefenentladung zu vermeiden. Der vollständig geladene Akku hat eine Spannung
von ca. 4,2 Volt. Nach dem Gebrauch sollte der intakte Akku umgehend nach einer Abkühlphase
von min. 10 Minuten aber spätestens nach 12h vollgeladen werden um eine anschließende Tie-
fenentladung durch Selbstentladung zu vermeiden. Bei längerem Nichtbenutzen des Akkus bzw.
Einlagerung sollte der Akku min. alle 3 Monate auf Spannung (min. 3,9 Volt) bzw. Beschädigung
überprüft und gegebenenfalls aufgeladen bzw. entsorgt werden.
GB - Danger!
If your model has an on/ o󰀨 switch, always turn o󰀨 the model immediately after each use. If your
model has a removable battery or a disconnectable connector to the battery, the battery should
be disconnected from the model immediately after each use. The battery can be deep-discharged
by accidentally turning it on or by leaving the battery plugged in. By deep discharge the battery
it loses power, can be damaged so much that charging or discharging is no longer possible and
the battery can ignite itself during charging or discharging (re hazard). Never attempt to charge
or discharge deep-discharge batteries. The voltage of the battery should never be under 3 volt
to avoid a deep discharge. The fully charged battery has a voltage of 4,2 volt. After usage, the
intact battery has to be fully charged after a cooling phase of at least 10 min but not longer than
12 hrs. This is to avoid a deep discharge caused by a self-discharge. When not using or storing
the battery it has to be checked at least every three months for voltage (min. 3,9 volt) or damage
and if necessary charged or disposed.
FR - Attention!
Dans la mesure où votre modèle dispose d´un interupteur marche / arrêt, eteignez votre modè-
le aprés chaque utilisation. Si votre modèle dispose d´une batterie amovible et un connecteur
séparable pour la batterie, après chaque utilisation la batterie doit être déconnectée du mo-
dèle immédiatement. La batterie peut-être totalement déchargée si celui-ci reste allumé lors
du chargement et peut être contaminé. Une décharge profonde peut entrainer une perte de la
puissance de la batterie et peut ainsi endommagé celle-ci, une charge ou décharge est plus
possible lorsque la batterie est en charge ou peut entainer une combustion spontanné (risque
d´incendie). Ne tentez jamais de décharger profondément les batteries à charger ou à déchar-
ger. La tension de la batterie ne doit jamais être sous 3 Volt pour éviter une décharge profonde.
La batterie complètement chargée a une tension d‘environ 4,2 Volt. Après utilisation, la batterie
intacte doit immédiatement être complètement chargées après une phase de refroidissement
de min. 10 minutes, mais au plus tard au bout de 12 heures pour éviter une décharge profonde
travers l’auto-décharge. En cas d‘inutilisation de la batterie ou du stockage, est nécessaire de
vérier ou rechargés la batterie tous les 3 mois, tension (3,9 volts min.). En cas de dommages
disposer correctement.
IT - Attenzione!
Se il suo modello ha un interruttore On/O󰀨 e importante spegnere il modello direttamente dopo
ogni utilizzo. Se il modello ha una batteria rimovibile oppure un connettore alla batteria, si deve
scollegare subito dopo ogni utilizzo dal modello. Se la batteria rimane accesa oppure rimane
collegata essa si può scaricare. Una volta andata in sotto carica la batteria perde potenza o può
essere gravemente danneggiata. In questo caso la batteria non si lascia più caricare o scaricare
ed esiste il pericolo d’in ammazione (pericolo di incendio). Non provi mai a caricare o scaricare
delle batteria sotto carice. La tensione della batteria non deve mai essere sotto 3 Volt per evitare
la scariche profonda. La batteria completamente carica ha una tensione di circa 4,2 Volt. Dopo
l‘uso, la batteria intatta deve essere immediatamente completamente caricata, dopo una fase di
ra󰀨reddamento di min 10 minuti ma al più tardi dopo 12 ore, per prevenire la scarica profonda
attraverso l‘auto-scarica. Se la batteria non viene usata oppure messa in stoccaggio è necessario
controllare o ricaricata la batteria ogni 3 mesi, tensione (volt 3,9 min.). In caso di danneggiamento
della batteria smaltire correttamente.
ES - ¡Atención!
Si su modelo tiene un interruptor On/O󰀨 es importante apagar el modelo directamente
después de cada uso. Si el modelo tiene una batería extraible o un conector en la batería, se
debe desconectar inmediatamente después de cada uso del modelo. Si se deja encendida la ba-
tería o conectada, la batería se puede descargar. Una vez que está descargada la batería pierde
la potencía o se puede dañar grave. En este caso la batería ya no puede ser cargada o descar-
gada y hay un peligro de inamación (peligro de incendio). Nunca intentar de cargar o descargar
baterías descargadas profundamente. La tensione della batteria non deve mai essere sotto 3 Volt
per evitare la scariche profonda. La batteria completamente carica ha una tensione di circa 4,2
Volt. Dopo l‘uso, la batteria intatta deve essere immediatamente completamente caricata, dopo
una fase di ra󰀨reddamento di min 10 minuti ma al più tardi dopo 12 ore, per prevenire la scarica
profonda attraverso l‘auto-scarica. Se la batteria non viene usata oppure messa in stoccaggio
è necessario controllare o ricaricata la batteria ogni 3 mesi, tensione (volt 3,9 min.). In caso di
danneggiamento della batteria smaltire correttamente.
CZ - Pozor!
Pokud je model vybaven zapínáním / vypínáním, je třeba ho po každém použití vypnout. Pokud
je model vybaven odnímatelným akumulátorem nebo odpojitelným konektorovým připojením, po
každém použití je nutné odpojit akumulátor od modelu. Pokud model náhodou zůstane zapnutý
nebo pokud akumulátor nebude odpojen od modelu, akumulátor se zcela vybije. Úplné vybití
akumulátoru způsobí, že akumulátor ztrácí svůj výkon a může se poškodit do takové míry, že
nabíjení nebo vybíjení akumulátoru nebude možné, nebo během procesu nabíjení nebo vybíjení
se samovolně vznítí (nebezpečí vzniku požáru). Nikdy nenabíjejte nebo nevybíjejte zcela vybi-
té akumulátory. Aby se zabránilo úplnému vybití akumulátoru, jeho napětí by nemělo klesnout
pod 3 V. Plně nabitý akumulátor má 4,2 V Aby se zabránilo úplnému vybití, po každém použití
nechejte akumulátor nabít do plně nabitého stavu. Plné nabití by měla probíhat po čekací době
cca. 10 minut po použití a nejpozději do 12 hodin od momentu použití. Pokud akumulátor nebude
nepoužívaný delší dobu, je třeba ho zkontrolovat nejméně každé 3 měsíce ohledně správného
napětí (min. 3,9 V) a možných poškození. Pokud je to nutné, dobijte nebo zlikvidujte akumulátor.
410153_Dinosaurier Velociraptor.indd 5410153_Dinosaurier Velociraptor.indd 5 05.11.2020 13:58:2805.11.2020 13:58:28
6
DE - Halten Sie Ihre Hände von beweglichen
Teilen fern.
GB - Keep hands away from moving parts.
FR - Garder vos mains hors de portées des
pièces mobiles.
IT - Tenere le mani lontane dalle parti in
movimento.
ES - Mantenga las manos alejadas de las
piezas móviles.
CZ - Držte se v bezpečné vzdálenosti od
pohybujících se částí modelu.
DE - Benutzung nur unter unmittelbarer
Aufsicht von Erwachsenen.
GB - Use only under direct supervision of
an adult!
FR - Utiliser uniquement sous la surveillance
d’un adulte!
IT - Utilizzare solo sotto la diretta
sorveglianza di un adulto!
ES - Usado bajo la supervisión directa de
un adulto!
CZ - Použití jen pod přímýmdozorem
dospělých.
DE - Sind die Batterien leer, wechseln Sie
sie aus.
GB - The batteries are nearly, replace the
batteries.
FR - Si ce les piles sont vides, changez
ceux-ci.
IT - Controllare il stato delle batterie,
potrebbero essere scariche.
ES - Las pilas estarán agotadas, sustituya las
pilas por otras nuevas.
CZ - Pokud jsou baterie prázdné, vyměňte je.
DE - Auf Polarität achten!
GB - Pay attention to the polarity!
FR - Prêter attention aux la polarité!
IT - Prestare attenzione alla polarità!
ES - Preste atención a la polaridad!
CZ - Dbejte na polaritu!
DE - Auf die Frequenzen in Ihrem Umfeld
achten!
GB - Pay attention to the frequencies in your
environment!
FR - Faites attention aux fréquences dans
votre environnement!
IT - Prestare attenzione alle frequenze nel
proprio ambiente!
ES - Preste atención a las frecuencias en
su entorno!
CZ - Dávejte pozor na frekvence ve
Vašem okolí!
DE - Betreiben Sie das Modell nicht bei
Regen, Schnee, Nässe oder Sand.
GB - Do not drive in rain, snow, wetness or
sand.
FR - Ne pas conduire sous la pluie, la neige,
humidité ou sable.
IT - Non guidare sotto la pioggia, neve,
umidità o sabbia.
ES - No conduzca bajo la lluvia, la nieve,
humedad o arena.
CZ - Nepoužívejte model za deště, sněhu,
mokra nebo v písku.
DE - Nicht auf befahrenen Straßen und
Plätzen fahren.
GB - Never drive on roads or areas used by
real vehicles.
FR - Ne roulez jamais sur la voie publique ou
des endroits fréquentés.
IT - Non giocare sulle strade comuni.
ES - No utilice en calles o plazas transitadas.
CZ - Nejezděte na rušných ulicích a místech.
DE - Fahren Sie nie außerhalb der Reichweite
Ihrer Fernsteuerung.
GB - Never run out of the reach of you
remote control.
FR - Laissez jamais celle-ci sortir de la portée
de votre émetteur.
IT - Non utilizzare il modello fuori la portata
della trasmittente.
ES - No conduzca más allá del alcance de su
emisora.
CZ - Vždy mějte model v dohledu a nedovolte,
aby došlo ke ztrátě signálu.
DE - Nicht direkter Sonnenbestrahlung oder
Wärme aussetzen.
GB - Do not leave in very strong sunlight.
FR - N‘exposez jamais votre modèle
directement aux rayons du soleil.
IT - Non disporre il modello sotto il sole
oppure nel caldo.
ES - No exonga el modelo a los rayos solares
directos o fuentes de calor.
CZ - Pryč od přímého slunečního záření nebo
tepla vystavit.
DE - Verschmutzungen mit einem feuchten
Tuch entfernen.
GB - Clean by using a damp cloth.
FR - Essuyez la boue avec un tissu humide.
IT - l‘inquinamento possono essere rimossi
con un panno umido.
ES - Polución se puede eliminar con un paño
húmedo.
CZ - Znečištění odstraňujte vlhkým hadříkem.
DE - Batterien/Akku niemals im Modell lagern.
GB - Store batteries/battery packs separately
when not in use.
FR - La piles/accu ne doit jamais être stockée
dans la modèle.
IT - Conservare le batterie/accumulatore
separatamente quando non sono in uso.
ES - Sacar siempre las batería/acumulador y
guárdarlo por separado.
CZ - Baterie/Akumulátory nikdy neskladujte v
modelu.
DE - Sicherheitsmaßnahmen
GB -SafetyNotes
FR - Consignes de sécurités
IT - Precauzioni
ES - Recomendaciones de seguridad
CZ -Bezpečnostníopatření
X X X X
X
X

410153_Dinosaurier Velociraptor.indd 6410153_Dinosaurier Velociraptor.indd 6 05.11.2020 13:58:2805.11.2020 13:58:28
7
DE - Entsorgungshinweise
Batterien und Akkumulatoren dürfen nicht im Hausmüll entsorgt werden sondern müs-
sen getrennt entsorgt werden. Sie sind verpichtet, Altbatterien der fachgerechten
Entsorgung (getrennte Sammlung) zuzuführen. Nach Gebrauch können Sie Batterien
unentgeltlich im Handelsgeschäft zurückgeben. Nachdem Batterien Sto󰀨e enthalten,
die reizend wirken, Allergien auslösen können oder hochreaktiv sind, ist die getrennte
Sammlung und ordnungsgemäße Verwertung wichtig für die Umwelt und Ihre Gesund-
heit. Sofern die Batterien unterhalb der durchgestrichenen Abfalltonne auf Rädern mit
einem chemischen Zeichen Hg, Cd oder Pb gekennzeichnet ist, bedeutet dies, dass
diese mehr als 0,0005 % Quecksilber (Hg), mehr als 0,002 % Cadmium (Cd) oder mehr
als 0,004 % Blei (Pb) enthält.
GB - Disposal restrictions
Batteries and accumulators must not be disposed of in domestic waste. You are obliged to dispose
of batteries (seperate collection) appropriately. After use you can return batteries free of charge
to the retail store. As batteries contain substances that can be irritant, can cause allergy and are
highly reactive, separate collections and proper recycling is important to the environment and to your
health. If the batteries are marked with a chemical symbol Hg, Cd or Pb below the crossed-out waste
bin on wheels it refers to that more than 0.0005% of mercury (Hg), more than 0.002% of cadmium
(Cd) or more than 0.004% Lead (Pb) is included.
FR-Consignesderecyclage
Les piles et les accumulateurs ne doivent strictement pas être jetés avec les ordures ménagères,
mais doivent être jetés séparément. Vous êtes tenues de déposer vos piles usagés dans les cen-
tres communaux de collecte (collecte sélective). Après tout utilisation, vous avez la possibilité de
retourner vos piles gratuitement chez des commerçants. Dès lors que les piles contiennent des
substances qui peuvent causés des irritations et pouvant provoquer des allergies, il est recom-
mandé d´e󰀨ectuer la collecte et le recyclage comme recommandé, ce qui est très important pour
l´environnement et votre santé. Dans la mesure où vous visualiser un symbole de poubelle avec
roulettes et une croix, mis en évidence avec un symbole chimique Hg, Cd ou Pb, cela signie que
ces piles contiennent plus de 0,0005% de mercure (Hg), plus de plus de 0,002% de cadmium
(Cd),ou plus de 0,004% de plomb (Pb).
IT - Istruzioni per lo smaltimento
Batterie e gli accumulatori non devono essere smaltiti nei riuti domestici, ma devono essere smal-
titi separatamente. Siete obbligati di eseguire lo smaltimento professionale delle batterie vecchie
(raccolta di󰀨erenziata). È possibile restituire le batterie dopo l’uso gratuitamente nelle attività com-
merciali. Dato che le batterie contengono delle sostanze, che provocano irritazione, possono cau-
sare allergie o sono altamente reattivi, la raccolta di󰀨erenziata e il riciclaggio sono importanti per
l’ambiente e la sua salute. Se le batterie, a disotto del “bidone a ruote cancellato” sono segnati con
un simbolo chimico Hg, Cd o Pb, signica che questi contengono più di 0,0005 % Mercurio (Hg), più
di 0,002 % Cadmio (Cd) o piu di 0,004 % Piombo (Pb).
ES - Notas sobre el reciclado
Baterías y acumuladores no deben desecharse en la basura doméstica, pero se deben desechar
de forma separada. Usted está obligado, a realizar la eliminación profesional de las baterías viejas
(recogida selectiva). Es posible devolver las baterías después de su uso de forma gratuita en las
actividades comerciales. Dado que las baterías contienen sustancias que causan irritación, pueden
causar alergias o son altamente reactivos, la recogida selectiva y el reciclaje son importantes para
el ambiente y su salud. Si las baterías, por debajo del “bidón con ruedas borrado” están marcados
con un símbolo químico, Hg, Cd o Pb, signica que contiene más de un 0,0005 % de Mercurio (Hg),
más de 0,002 % de Cadmio (Cd) o más de 0,004 % de Plomo (Pb).
CZ-Informacetýkajícíselikvidace
Baterie a akumulátory se nesmí vyhazovat spolu s komunálním odpadem, ale je nutné je likvidovat
zvlášť. Uživatel je povinen likvidovat použité baterie v souladu s předpisy (samostatný sběr
odpadů). Po použití je možné baterie zdarma odevzdat v obchodě. Baterie obsahují látky, které
působí dráždivě, mohou způsobit alergické reakce a jsou velmi reaktivní, proto je samostatný sběr
a využití v souladu s předpisy velmi důležité pro životní prostředí a Vaše zdraví. Pokud baterie, pod
přeškrtnutým odpadkovým košem na kolečkách, jsou označeny chemickým symbolem Hg, Cd nebo
Pb, to znamená, že obsahují více než 0,0005% rtuti (Hg), více než 0,002% kadmia (Cd) nebo více,
než 0,004 % olova.
DE - Entsorgungshinweise
Elektrogeräte dürfen nicht im Hausmüll entsorgt werden, sondern müssen getrennt
entsorgt werden. Sie sind verpichtet, die Batterien – wenn möglich – herauszuneh-
men und das Elektroaltgerät bei den kommunalen Sammelstellen abzugeben. Sollten
sich personenbezogene Daten auf dem Elektroaltgerät benden, müssen diese von
Ihnen selbst entfernt werden.
GB - Disposal restrictions
Electrical appliances must not be disposed of in domestic waste and must be disposed of separately.
You are obliged to take out the batteries, if possible, and to dispose of the electrical equipment at
the communal collection points. Should personal data be stored on the electrical appliance you must
remove them by yourself.
FR-Consignesderecyclage
Les appareils électriques ne doivent strictement pas être jetés dans les ordures ménagères, mais
doivent être jetés séparément. Vous êtes tenues – dans la possibilité – de déposer vos piles et
appareils électriques dans les centres communaux de collectes. Si des informations personnelles
sont présents sur les appareils électriques, celles-ci doivent être retirés par vous-même avant tout
élimination du produit.
IT - Istruzioni per lo smaltimento
Apparecchi elettrici non devono essere smaltiti nei riuti domestici, ma devono essere smaltiti se-
paratamente. Siete obbligati di rimuovere le batterie e portare l´apparecchi elettrici vecchi ai punti di
raccolta comunali. Qualora ci sono dati personali sul apparecchio elettrico, devono essere rimossi
da voi stessi.
ES - Notas sobre el reciclado
Aparatos eléctricos no pueden desecharse en la basura doméstica, pero se deben desechar de
forma separada. Usted está obligado, a quitar las baterías y llevar los aparatos eléctricos viejos en
los puntos de recogida comunales. En caso de que hay datos personales en el aparato eléctrico se
deben remover de usted mismo.
CZ-Informacetýkajícíselikvidace
Elektrická zařízení se nesmí vyhazovat spolu s komunálním odpadem, ale musí být likvidována
zvlášť. Uživatel je povinen - pokud je to možné - odstranit baterii a odevzdat elektrické zařízení
do sběru odpadů. Pokud se na zařízení nacházejí osobní údaje, ty je nutné odstranit samostatně.
410153_Dinosaurier Velociraptor.indd 7410153_Dinosaurier Velociraptor.indd 7 05.11.2020 13:58:2905.11.2020 13:58:29
Irrtum und technische Änderungen vorbehalten. Copyright JAMARA e.K. 2020
Kopie und Nachdruck, auch auszugsweise, nur mit Genehmigung von JAMARA e. K.
All rights reserved. Copyright JAMARA e.K. 2020
Copying or reproduction in whole or part, only with the expressed permission of JAMARA e.K.
JAMARA e.K.
Inh. Manuel Natterer
Am Lauerbühl 5 - DE-88317 Aichstetten
Tel. +49 (0) 75 65/94 12-0 - Fax +49 (0) 75 65/94 12-23
[email protected] ●www.jamara.com
Service - Tel. +49 (0) 75 65/94 12-777
kundenservice@ jamara.com
DE - Servicehändler
GB - Service centre
FR - Revendeur de service
IT - Centro assistenza
ES - Servicio asistencia
CZ - Servisní partner
PL - Partner serwisowy
NL - Servicepartner
Reitter Modellbau Versand
Patricia Reitter
Degerfeldstrasse 11
72461 Albstadt
Tel 07432 9802700
Fax 07432 2009594
Mail [email protected]
Web www.modellbauversand.de
Modellbau-Zentral
Peter Hofer
Bresteneggstrasse 2
CH -6460 Altdorf,
Tel. +41 794296225
Fax +41 418700213
[email protected]
www.modellbau-zentral.ch
PenTec s.r.o.
distributor Jamara for Czech Republic and Slovakia
Veleslavínská 30/19
CZ -162 00 Praha 6
Tel +420 235 364 664
Mobil. +420 739 075 380
Mail servis@topdrony.cz
Web www.topdrony.cz
Bay-Tec
Martin Schaaf
Am Bahndamm 6
86650 Wemding
Tel 07151 5002192
Fax 07151 5002193
Mail [email protected]
Web www.bay-tec.de
DE DE
JAMARA e.K.
Manuel Natterer
Am Lauerbühl 5
DE-88317 Aichstetten
Tel +49 (0) 75 65/94 12-0
Fax +49 (0) 75 65/94 12-23
Mail [email protected]
Web www.jamara.com EU
CH CZ
410153_Dinosaurier Velociraptor.indd 8410153_Dinosaurier Velociraptor.indd 8 05.11.2020 13:58:2905.11.2020 13:58:29

This manual suits for next models

1

Other Jamara Toy manuals

Jamara Impulse Bug User manual

Jamara

Jamara Impulse Bug User manual

Jamara Mercedes-Benz Arocs User manual

Jamara

Jamara Mercedes-Benz Arocs User manual

Jamara Liebherr 2,4 GHz User manual

Jamara

Jamara Liebherr 2,4 GHz User manual

Jamara BMW M5 2in1 User manual

Jamara

Jamara BMW M5 2in1 User manual

Jamara Lucky User manual

Jamara

Jamara Lucky User manual

Jamara Mercedes Actros User manual

Jamara

Jamara Mercedes Actros User manual

Jamara Spy Copter 500 User manual

Jamara

Jamara Spy Copter 500 User manual

Jamara Spacewalker User manual

Jamara

Jamara Spacewalker User manual

Jamara Venezia User manual

Jamara

Jamara Venezia User manual

Jamara Jeep Wrangler JL Big Wheel User manual

Jamara

Jamara Jeep Wrangler JL Big Wheel User manual

Jamara largos XXL User manual

Jamara

Jamara largos XXL User manual

Jamara Fendt Former User manual

Jamara

Jamara Fendt Former User manual

Jamara Namib User manual

Jamara

Jamara Namib User manual

Jamara Mobil Board 2in1 User manual

Jamara

Jamara Mobil Board 2in1 User manual

Jamara Small City 460668 User manual

Jamara

Jamara Small City 460668 User manual

Jamara 40 4920 User manual

Jamara

Jamara 40 4920 User manual

Jamara Sporty User manual

Jamara

Jamara Sporty User manual

Jamara Agusta A 109 User manual

Jamara

Jamara Agusta A 109 User manual

Jamara Starlight The Little Raven Sock User manual

Jamara

Jamara Starlight The Little Raven Sock User manual

Jamara Beaver DHC 2 V2 User manual

Jamara

Jamara Beaver DHC 2 V2 User manual

Jamara 410175 User manual

Jamara

Jamara 410175 User manual

Jamara Fokker DVII User manual

Jamara

Jamara Fokker DVII User manual

Jamara Tractor Accessories Rake Twin Roto User manual

Jamara

Jamara Tractor Accessories Rake Twin Roto User manual

Jamara Snow Play Tally 70 cm User manual

Jamara

Jamara Snow Play Tally 70 cm User manual

Popular Toy manuals by other brands

Lionel 1-44 operating instructions

Lionel

Lionel 1-44 operating instructions

Viessmann 4518 Operation manual

Viessmann

Viessmann 4518 Operation manual

Plum 41108AA83 Assembly instructions

Plum

Plum 41108AA83 Assembly instructions

REVELL 04912 instructions

REVELL

REVELL 04912 instructions

Goblin 500S manual

Goblin

Goblin 500S manual

LEGO 4628 Building instructions

LEGO

LEGO 4628 Building instructions

REVELL Dassault-Dornier Alpha Jet E Assembly manual

REVELL

REVELL Dassault-Dornier Alpha Jet E Assembly manual

REVELL Lockheed Martin F-16 C TIGER MEET 2003 Assembly manual

REVELL

REVELL Lockheed Martin F-16 C TIGER MEET 2003 Assembly manual

LEGO Minions 40511 manual

LEGO

LEGO Minions 40511 manual

Eduard Zoom M5A1 Stuart manual

Eduard

Eduard Zoom M5A1 Stuart manual

Chicco 00005836000000 instruction manual

Chicco

Chicco 00005836000000 instruction manual

Mega Bloks Thomas & Friends Junior Builders FUN AT TIDMOUTH... Instruction

Mega Bloks

Mega Bloks Thomas & Friends Junior Builders FUN AT TIDMOUTH... Instruction

Mattel Disney PIXAR TOY STORY 4 BLAST-OFF BUZZ... instructions

Mattel

Mattel Disney PIXAR TOY STORY 4 BLAST-OFF BUZZ... instructions

Mega Construx HALO PRO BUILDERS UNSC SPARTAN III GLB76 manual

Mega Construx

Mega Construx HALO PRO BUILDERS UNSC SPARTAN III GLB76 manual

Super Flying Model Super Decathlon instruction manual

Super Flying Model

Super Flying Model Super Decathlon instruction manual

Mattel Polly Pocket BCY64 instructions

Mattel

Mattel Polly Pocket BCY64 instructions

marklin 55137 manual

marklin

marklin 55137 manual

AeroWorks SU-31 Assembly manual

AeroWorks

AeroWorks SU-31 Assembly manual

manuals.online logo
manuals.online logoBrands
  • About & Mission
  • Contact us
  • Privacy Policy
  • Terms and Conditions

Copyright 2025 Manuals.Online. All Rights Reserved.