manuals.online logo
Brands
  1. Home
  2. •
  3. Brands
  4. •
  5. KIKKA BOO
  6. •
  7. Car Seat
  8. •
  9. KIKKA BOO MULTISTAGE User manual

KIKKA BOO MULTISTAGE User manual

MULTISTAGE
0-36kg
INSTRUCTIONS FOR USE
ИНСТРУКЦИИ ЗА УПОТРЕБА - INSTRUCCIONES DE USO - INSTRUÇÕES DE USO - ISTRUZIONI PER L'USO - MODE D'EMPLOI -
GEBRAUCHSANWEISUNG - INSTRUCTIUNI DE FOLOSIRE - INSTRUKCJA UŻYCIA - UPUTSTVO ZA UPOTREBU -УПАТСТВО ЗА
УПОТРЕБА - ИНСТРУКЦИИ ПО ИСПОЛЬЗОВАНИЮ - ІНСТРУКЦІЇ З ВИКОРИСТАННЯ - UPUTE ZA KORIŠTENJE - NÁVOD
K POUŽITÍ - INŠTRUKCIE NA POUŽÍVANIE - HASZNÁLATI ÚTMUTATÓ - ΟΔΗΓΙΕΣ ΧΡΗΣΗΣ - KULLANIM İÇİN TALİMATLAR -
car seat
Group 0+/ I/II/III
1
2
3
5
6
4.2
4.1
7.6
7.4 7.5
7.1 7.2 7.3
7.7
8
9
8.1
9.2
9.1
9.3 9.4
8.2 8.3
8.4
10
10.1 10.2
10.3
10.5
10.4
11
12
11.1 11.2
11.3 11.5
11.6 11.7 11.8
11.4
14.1
14.2
14.3
13
14
15
16
17
БЪЛГАРСКИ
ENGLISH
Thankyouvery much forpurchasingour product.You havepurchasedahigh quality,fullycertied child safety childrestraint.This product is suitable for theuse of childrenweighing
UNDER36kg(approximately12 years old orunder). Carefully read this InstructionManual and followtheinstalling steps becausethisis the ONLY waytoprotectyourchild from an
accident,andtoprovidecomfort to your child while using this product.
Keepthis instruction manualfor future reference.Pleasekeeptheinstruction manualin the storagecompartment of therearcoverforfuturereference.
Makesurethatyourvehicleisequipped with 3-pointretractorsafety-belt.Seat belts maybedierentindesign and lengthaccordingtomaker,manufacturingdate,andtype ofthe
vehicle.This child restraintisonly suitable for usein the listedvehiclesttedwith 3-point retractor safety-beltsand approvedtoUNECE regulation16 and GB 14166.Thischildrestraint
isapprovedtoGB27887-2011 and UNECE regulation44, 04 seriesof amendments.
WARNINGS
•This child restraint is designed ONLY for child weighing under 36kg (approximately 12 years old or under).
•Any straps holding the restraint to the vehicle should be tight, that any straps restraining the child should be adjusted to the child's body, and that straps should not be
twisted.
•When use this child restraint in baby or toddler mode, the safety belt must be used correctly, and ensure that any lap strap is worn low down, so that the pelvis is rmly
engaged.
•The child restraint should be changed when it hasbeen subject to violent stresses in an accident. An accident can cause damage to the child restraint that you cannot
see.
•Concern the danger of making any alterations or additions to the device without the approval of theType Approval Authority, and a danger of not following closely the
installation instructions provided by the child restraint manufacturer.
•Please keep this child restraint away from sunlight, otherwise it may be too hot for the child's skin.
•Child is not left in the child restraint system unattended.
•Any luggage or other objects liable to cause injuries in the event of a collision shall be properly secured.
• The child restraint shall not be used without the soft goods.
•The soft goods should not be replaced with any other than the one recommended by the manufacturer, because the soft goods constiutes an integral part of the
restraint performance.
•DO NOT use any load bearing contact points other than those described in the instructions and marked in the child restraint.
• NO child restraint can guarantee full protection from injury in an acci- dent. However, proper use of this child restraint will reduce the risk of serious injury or death to
your child.
• DO NOT use forward facing mode before the child’s weight exceeds 9kg.
• DO NOT use or install this child restraint until you read and understand the instructions in this manual and in your vehicle owner's manual.
• DO NOT use this child restraint if it has damaged or missing parts.
• DO NOT have your child in untted clothes when use this child restraint in baby or toddler mode, because this may prevent your child from being properly and securely
fastened by the shoulder harnesses and the harnesses between thighs.
• DO NOT leave this child restraint unbelted or unsecured in your vehicle because unsecured child restraint can be thrown around and may injure occupants in a sharp
turn, sudden stop, or collision. Remove it if not in regular use.
• DO NOT place the child restraint in seating positions where an active frontal airbag is installed if your child is still in rear facing mode.
• NEVER use a second-hand child restraint or a child restraint whose history you do not know because they may have structural damage that endangers your child's
safety.
• NEVER use ropes or any other substitutes in place of seat belts in case of injuries from restraint.
• DO NOT use this child restraint as a regular chair as it tends to fall down and injure the child.
• DO NOT put anything other than the recommended inner cushions in this child restraint.
• DO NOT carry this child restraint with a child in it.
• DO NOT allow the child restraint harness or buckles to become trapped or caught in the vehicle seat or door.
•To avoid suocation, remove plastic bag and packaging materials before using this product.The plastic bag and packaging materials should then be kept away from
babies and children.
• Remove this child restraint from the vehicle seat when it is not in use for a long period of time.
• Consult the distributor for issues concerning maintenance, repair and part replacement.
• Frequently check the ISOFIX attachments guides for dirt and clean them if necessary.
Reliability can be eected by ingress of dirt, dust, food particles etc.
DONOTinstallthis child restraintunderthefollowing conditions:
1.Vehicleseatswith2-pointsafety belts.
2.Vehicleseatsfacingsidewardorrearwardwith respect tothe running direction of the vehicle.
3.Vehicleseatsunstableduring installation.
Readall the instructions in thismanual before using thisproduct.If in doubt,consulteither the child restraintmanufactureror the retailer.
ForInstallationwith3-point-belt or with ISOFIX (ISOFIX attachments and toptether:
1.Thisis a GroupO+/I/1/2/3(9-36KG)installed'Universal'child restraint.Itis approvedtoGB 27887-2011 and UN ECE regulation 44, 04series of amendments,forgeneral use in
vehiclesandit will fitmost,but not all,car seats.
2.A correct fitis likely if the vehiclemanufacturer has declared in the vehicle hand book thatthe vehicle is capableof accepting a 'Universal'childrestraintforthis age group.
3.Thischild restrainthas been classifiedas 'Universal' under morestringentconditionsthan those whichapplied to earlier designs which do not carry this notice.
4.If in doubtplease consult the child restraintmanufacturer or theretailer.
ForInstallationwithISOFIX (ISOFIX attachmentsandtoptether)
1.Thisis an Gr 1(9-18kg)installed ISOFIX CHILDRESTRAINT SYSTEM.Itis approvedtoGB 27887-2011 andRegulationNo.44,04series of amendmentsfor general use invehiclesfitted
withISOFIX anchorages systems. It issuitable for fixingintothe seat positions ofmost cars.
2.It will fitvehicleswith positions approvedas ISOFIX positions(as detailed in the vehicle handbook), depending on the category of thechild restraintand of thefixture.
3.TheISOFIX size class forwhich this deviceis intended is B1(9-18kg). For Installation with ISOFIXattachmentsand 3-point-beltThechildrestraintis
classifiedfor“Semi-Uni versal”useSeatpositionsin other carsmayalso be suitableto accept the childrestraint.Ifindoubt , consulteitherthe child restraintmanufactureror vehicle
manufacturer.
БЪЛГАРСКИ
ENGLISH
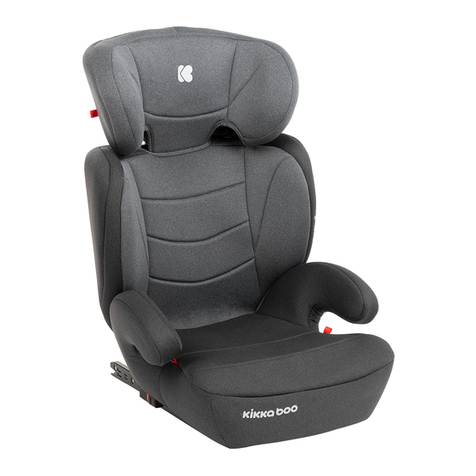
1.PARTSLIST:1.HeadSupport;2. Seat cover;3.Buckle; 4 .WebbingAdjuster;5.ISOFIXAttachmentsReleasing Button; 6. ReclineAdjustmentHandle ;
7.CrotchStrap;8. Shoulder Strap; 9. InfantInsert;10. Rear-facing Lock-off ;11. Group1 Lock-off Device 12.Head Support Adjustment Lever;
13.Tether StrapAdjuster;14.Tether Hook; 15TopTetherStrap;16.Instruction ManualStorage Compartment;17. Base;18. ISOFIX Attachments
Connector;19.SeatBelt Guiding;20. ISOFIX Attachments;
Makesureallpartsareavailablebeforeassembly.Ifanypartis missing,please contact local retailer.Notoolsarerequiredforassembly.
Soft goods includeHead Support,Seat Pad,ShoulderStrap,CrotchStrapandInfant Insert.
2.CONCERNSON INSTALLATION: SHOWSTHECORRECTWAY FOR INSTALLATION ONFIGURE 2
3.THIS CHILD SEAT OFFERS AVARIETY OF INSTALLATIONOPTIONS:Thefollowingtable indicatesthe typesof installation for respectivegroups: see Figure3.
4.RECLINE ADJUSTMENT
Pressthe recline adjustment handle,and adjustthe child restraintto the properposition.Figure4.1
The recline anglesare shown asThereis 3 reclineangles for rearfacingbaby mode. Figure4.2
Thereare four recline angles“1-4”for toddlermodeAngle indication: with topand bottom triangles aligned.Figure4.2
Thereis onereclineangle for 1 junior mode, it ismarkedas“1”redtriangle.Figure4.2
Makesurethatvehicleseat beltwill be tight whenadjusted in reclining position and viceversaif seat was already buckled up properly previously.
5. HEIGHT ADJUSTMENT FOR HEAD SUPPORT AND SHOULDER HARNESSES
Please adjust the headsupport andshoulder harnesses toproper height accordingtothe child's height. (Figure 5, 1 2 3)
When used in Group 0+,the shoulder harness height must be even with child’s shoulders.
When used in Group I,II, the shoulder harness height must be even with child’s shoulders.
When used inGroup III the shoulder belt guides must be even with child’s shoulders.
If the shoulder harnesses are not at proper height, the child may be thrown from the child restraint when there is an accident.
Squeeze the head support adjustment lever,meanwhile pull up orpush down the head support until it snaps into one of the11positions. (Figure 6)
7. INSTALLING IN GROUP 0+
(Rearward Facing Mode/for Child under 18kg)
Please install the child restraint on the rear vehicle seats and then put the child in the child restraint.(Figure 7.1)
Please adjust the child restraint to proper angle (3 positions). Angle indication: With top triangle and blue triangle aligned.Make sure the shoulder harness is adjusted
to proper height before installing this child restraint. When installing and adjusting the safety belts, make sure that both the shoulder belt and the waist belt are not
twisted and will not stop the safety belts from functioning properly.
1. Pass the waist belt over lap belt guidings, and then engage the vehicle buckle tongue into the buckle.(Figure 7.2)
2. Fasten the shoulder belt in the two shoulder-belt slots at the back of the child restraint.
Shoulder belt must pass through the Lock-o. Ensure the belt lock o cover is completely closed when not in use to prevent injury, or damage to vehicle upholstery.(Fig-
ure 7.3)
3. While pressing the child restraint, pull the belts to fasten the child restraint tightly and securely.(Figure 7.4) ! The child restraint can not be used if the
vehicle safety belt buckle (female buckle end) is too long to anchor the child restraint securely. (Figure 7.5) .Please check by moving the child restraint back and forth.
(Figure 7.6)
Correctly assembled vehicle belt is shown as (Figure 7.7)
•
Waist belt passes through the lap belt guidings.
•
Shoulder belt must passes through the shoulder-belt slots.
•
The vehicle buckle tongue is engaged with the buckle correctly.
8. SECURING YOUR CHILD IN THE CHILD RESTRAINT USE INFANT INSERT
8.1 We recommend using the full Infant insert while the baby is 0-9 months. The infant insert increases side impact protection.
8.2 Detach the snaps on the head support to remove the head portion of the insert.
8.3 Remove the head support portion of the infant insert when the child’s head no longer ts comfortably. Remove the body portion of the infant insert when the
shoulders no longer t comfortably.
8.4 Remove the infant insert cushion by detaching the snaps to allow more space when the infant does not t comfortably. The cushion can be used separately without
being attached to the insert tobolster the infant's back for more comfort.
9. HARNESS INSTALLATON IN GROUP 0+
9.1 While pressing the harness adjustment button, pull completely the two shoulder harnesses ofthe child restraint. (Figure 9.1)
9.2 Press the red button to unlock the buckle.(Figure 9.2)
9.3Place the child in the child restrainandpass both armsthroughthe harnesses. Engage thebuckle.(Figure9.3)
9.4.Pulldownthe adjustment webbing and adjust it to theproperlength to make sure your child issnugly secured.
Afterthechild is seated,recheck whether the shoulder harnesses are at theproperheight.Makesurethespace between the childand the shoulderharness is aboutthe thickness of
onehand.(Figure9.4)
10.INSTALLINGIN GROUP I,II (ForwardFacingMode/ for Childbetween 9-18kg)
Pleaseinstall the childrestraintonthe vehicle seat, and then put the child in the child restraint.
Pleaseadjust the childrestrainttoproperangle (4 positions).
Angleindication:Withtoptriangle and redtrianglealigned.
Pleaseadjust the shoulderharnesses to proper height beforeinstalling the child restraint.Wheninstalling and adjustingthe safetybelts,makesurethatboth the shoulder belt and
thewaist belt are not twisted and will not keep the safetybelts from being properly positioned.
Forinstallation with3-point-belt
10.1.Threadthesafety beltthroughtwo seat belt backslots at the backof the childrestraint.(Figure10.1)
10.2.Buckle the safety belt.(Figure10.2)
10.3.Open the lock-off device and insert thesafety beltthroughit.(Figure10.3)
10.4.While pressing the child restraint,pull the belts to fasten the childrestrainttightlyand securely.The child restraintcan notbe used ifthe vehicle safety belt buckle (female buckle
end)is too long toanchor the childrestraintsecurely.Please check by moving the child restraintback and forth. (Figure10.4)
БЪЛГАРСКИ
ENGLISH
11.FOR INSTALLATIONWITH ISOFIX (ISOFIX ATTACHMENTSANDTOPTETHER)
11.1.Fitthe ISOFIX attachmentsguideswith the ISOFIXattachmentsanchor points.The ISOFIX attachmentsguides can protect the surface of the vehicle seat from being torn.They
can also guide the ISOFIX attachments connectors.(Figure11.1)
11.2Extend the ISOFIX attachments connectors by depressingonthe release button whilst pullingon the connector.(Figure11.2)
11.3Makesurethatboth ISOFIX attachmentsconnectorsaresecurelyattached to their ISOFIXattachmentsanchor points.The colors of theindicatorson both ISOFIXattachments
connectorsshould be completelygreen.(Figure11.3)
11.4TheISOFIX attachments connectorsmust be attached and lockedontothe ISOFIX attachments anchor points.(Figure11.4)Check to make sure the childrestraintissecurely
installedby pulling on the both ISOFIX attachmentsconnectors.Select thedesiredreclineposition before moving back againstthe vehicle seat, as once thetop tether is attachedand
tensioned,the reclineanglewill not beable to change without adjustment to the toptether.
11.5.Pressthe ISOFIX attachments release button andpush the childrestraintback against the vehicle seat untiltight.(Figure11.5)
11.6 ToextendTopTetherfor use, pressbutton onTetherAdjusterand pull to lengthen.(Figure11.6)
11.7Connect the tetherhooksecurely to the anchoragefitting.(Figure 11.7) USETopTetherfor toddlermode installation if vehicle is equipped with aTetheranchoragefitting and
vehiclerequirementsaremet (see vehicleowner'smanual).
11.8.Correctlyassembled ISOFIX (ISOFIXattachmentsand top tether) is shown.Makesurethattether hook are securely attached totheanchorage fitting.Thecolors of theindicators
ontether strap adjuster should be completely green.(Figure11.8)
Ifreclineangle is adjusted,check thetension on thetoptether,orloosen to adjust angle then re-tension.
12.REMOVETHE ISOFIX.
12.1.Pressthe secondarylock button first andthen the buttonbeforepullon the ISOFIXattachmentsconnectors.TheISOFIX
attachmentsisfolded completely.
12.2.When not in use,TopTetherMUST beproperlystored.Tomake sure the top tetherisproperlystoredaway,removeanyslackin strap toavoidthe toptetherswinging around
whenthe vehicle is inprogress.
13.SECURINGYOURCHILD INTHE CHILD RESTRAINT
Wheninstalling the child restraintin the toddler mode, do notuse the infantinsert. While pressing the harnessadjustment button, pull completelythe two shoulder harnesses of
thechild restraint.Pressthe redbuttontodisengage the buckle. Placethechild in thechild restraintand engage thebuckle.Pull down the adjustmentwebbingand adjust it tothe
properlengthso that your child is snugly secured. After the child is seated,recheckwhetherthe shoulder harnessesareatproperheight.
Makesurethespace between the childand the shoulderharness is aboutthe thickness ofone hand.
14.INSTALLINGIN GROUP III (ForwardFacingMode /for Child 15–36kg)
Just use the vehicleseatbelt when installing the child restraint in the junior mode, do notuse the infantinsert or 5 point harness,pleasestoretheshoulder harnesses, buckle and
buckletongues in respective storage compartments.Pleaseadjust the shoulderharnesses to proper length beforestorethe shoulderharnesses and bucklein their storage
compartments.Adjustthe child restraintto proper angle Angleindication:Withtop triangle and redtrianglealigned. Wheninstalling and adjustingthe safety belts,makesurethat
boththe shoulder beltand the waistbelt are not twistedandwill not keepthesafety belts frombeing properly positioned.
14.1Pressthe red button to disengage thebuckle. (Figure14.1)
14.2Removethe infant insert and crotch pad. (Figure14.2) When installing the child restraintin the Junior mode,do not usethe infant insert.
14.3Detach thesnaps.
14.4Lift the upper flap upwardand pull thelowerflap forward,and then storethe shoulderharnesses and bucklein their storagecompartments.(Figure14.2)
14.5Pull the buckle tothe back ofthe seat pad, and thenstorethe buckle and buckle tongues in respectivestoragecompartments.(Figure14.2)
14.6Do reattachthe snapstorecoverthe seatpad.Thereassembledseatpad is shown.
15.SECURINGYOURCHILD INTHE CHILD RESTRAINT
Forinstallation with3-point-belt
1.Place the child in the child restraintand check whether the shoulder belt guides areatproperheight.
2.Positionshoulderbelt through shoulder beltguide. Fastenbuckle andpull the vehiclebelt totighten.
Shoulderbelt must passthroughshoulder belt guide. Waistbeltmust pass throughlapbelt guidings. Thevehiclewaist belt must crossthroughthemiddle ofthe crotch belt cover
andthen attach the loop and hook fasteners. Thechild restraintcan not beused if thevehiclesafety belt buckle is too long toanchor the child restraintsecurely.Donot use shoulder
beltloose or positionedunder arm. Do not useshoulder belt behindchild’sback. Do not allowchild to slide downin the child restraintin case of strangulation.
16. INSTALLATIONWITH 3-POINT-BELTAND ISOFIX ATTACHMENTS
16.1Installation with ISOFIX attachmentsisshow .
16.2Place the child in the child restraintand check whether the shoulder belt guides areatproperheight.
16.3.Installationwith 3-point-belt is show.
16.4Correctlyassembled 3-point-belt and ISOFIX attachmentsis show.Make sure that both ISOFIXattachmentsconnectors are securely attached to theirISOFIX attach ments anchor
points.Thecolors ofthe indicators on bothISOFIX attachments connectors shouldbe completely green. Check to makesurethechild restraintis securely installed bypulling on the
bothISOFIX attachments
connectors.Shoulderbelt must passthroughshoulder belt guide. Thevehicle waist belt must cross through the middle of the crotch belt coverand then attachthe loop andhook
fasteners.Waistbelt must pass throughlap belt guidings.The child restraintcannot be used if the vehicle safetybelt buckle is toolong to anchor thechild restraintsecurely.Do not
useshoulder belt looseor positioned underarm. Donot use shoulder belt behind child’sback. Donot allow child toslide down in thechild restraintin case ofstrangulation.
17.CLEANING
Detach Soft Goods 1. Pressthe redbuttontodisengage the buckle.2.Removethe infant insert and crotch strap.3.Detach the elastic on the head support,andthen removethe head
support. 4. Detach the snaps o n the seatpad,pull the buckletothe back of seat pad, and then removethe seatpad.Toassemble soft goods, reversethe steps above.Afterremoving
thefoam of infantinsert, please storeit somewherethatthe child cannot access it. Please washthe soft goodswith cold waterunder 30°C. Do not ironthe soft goods. Do not bleach
ordryclean the softgoods.Do notuse undiluted neutral detergents gasoline or other organic solventto wash the child restraint.It may causedamage to the child restraint.Donot
twist the softgoods to dry with greatforce.It may leavethe soft goods with wrinkles.Please hang drythe soft goods in the shade.Please removethechild restraintfromthe vehicle
seatif not in use for a longperiod of time.
БЪЛГАРСКИ
Благодаряви многоза закупуванетона тозипродукт.Закупилисте висококачествено,напълносертифицираностолчеза кола. Тозипродукт е подходящза използване
надеца с теглопод 36 кг(приблизителнона 12 илиповече години).Внимателнопрочетететази инструкцияи следвайтестъпките за инсталиране,защототова е начинът
да защититедететоси отзлополука и да осигурите комфортна дететоси. Съхранявайтетазиинструкция за бъдещасправкав отделениетоза съхранение назадния
капак . Уверетесе,че вашетопревозно средствоеоборудванос3-точковпредпазенколан. Предпазнитеколани могатда се различават по дизайн и дължинаспоред
производителя,дататана производство и видана превознотосредство. Тазисистемазаобезопасяване на деца е подходящаза използване само в изброенитепревозни
средства, оборудванис 3-точковипредпазни колани иодобренив Правила на ECE на ООН 16 и GB 14166. Тазисистемазаобезопасяване надеца е одобренанаGB
27887-2011и наредба на ЕECE на ООН 44, 04 серия отизменения.
ВНИМАНИЕ!
•Това столче за кола е проектираноСАМОза деца стеглопод 36кг (приблизително до 12години).
•Всички колани, придържащиобезопасителниустройствакъм превознотосредство, трябвада бъдатстегнати,всичкиколани, коитозадържатдетето,да бъдат
приспособеникъм тялотона дететои дане са усукани.
•Когатоизползватетовастолче за кола,предпазният колан трябва да се използваправилно и се уверете,четазовияколан е закопчанниско,така че тазътдае здраво
закрепен.
•Систематазаобезопасяване надеца трябва дабъдеподменена, когатоебила подложена на силни натоварванияпри злополука. Произшествиетоможеда причини
повреда на столчетоза кола, коятоне можетеда видите.
•Не праветепромени или допълнения настолчето,коитоне са одобрениот производителяна систематазаобезопасяване на деца.
•Моля, съхранявайтетова столчеза кола далеч отпряка слънчевасветлина,в противенслучайможеда се нагрееи да е прекалено горещоза кожатана детето.
•Не оставяйтедететов столчетоза кола без надзор.
•Всеки багаж или другипредмети, коитомогатда причинят наранявания в случайна сблъсък,трябвада бъдат добре обезопасени.
•Не използвайтестолчетоза кола безнеговататапицерия.
•Тапицериятане трябвада се заменяс друга,различнаот препоръчанитеотпроизводителя,тъй катотапицериятапредставляватнеразделна част от обезопасителната
система.
•НЕ използвайтеносещи контактни точки, различни от описанитев инструкциитеи обозначенив систематаза обезопасяванена деца.
•Нитоедна системаза обезопасяване не може дагарантирапълна защитаот нараняванияпри злополука. Въпрекитова,правилнотоизползванена това столчеза кола
щенамали риска отсериознинаранявания или смъртна вашетодете.
•НЕ монтирайтепопосока на движение предитеглотона дететода надвиши9 кг.
•НЕ използвайтеи неинсталирайтетовастолчеза кола, предида прочететеи разберетеинструкциитев това ръководство и в ръководствотона вашия автомобил.
•НЕ използвайтетова столчеза кола,ако има повредениили липсващи части.
•НЕ поставяйтедететоси в неподходящидрехи,когатоизползватетовастолче за кола,тъй катотоваможе дапопречи на вашето детеда бъдеправилно и сигурно
закопчаноотраменнитеколани и тазовияколан.
•НЕ оставяйтетовастолчеза колав свободно състояние въввашия автомобил,защотопри рязък завой, внезапно спиране или сблъсъкможеда нарани пътниците.
Извадетего, ако е негоденза употреба.
•НЕ поставяйтестолчетоза кола на местаза сядане,къдетоеинсталиранаактивнапредна челна въздушнавъзглавница.
•НИКОГАнеизползвайтестолчетазакола втораупотреба или такива,чиятоисторияне знаете,тъй катоможе даиматструктурни повреди, които застрашават
безопасносттанавашетодете.
•НИКОГАнеизползвайтевъжетаили другизаместителивместо предпазни колани.
•НЕ използвайтетова столчеза колакатообикновен стол,тъй катоима може дападнеи да нарани детето.
•НЕ поставяйтенищо другоосвен препоръчителнитевътрешни възглавницив товастолчетоза кола.
•НЕ носетестолчетозакола с детев него.
•НЕ позволявайте детскитепредпазни колани или катарами да се хванатили да пречатнаседалкатаили врататана автомобила.
•За даизбегнетезадушаване, извадетенайлонивия плик иопаковъчнитематериали,преди даизползватетозипродукт.Следтованайлоновия плик и опаковъчните
материалитрябва да сесъхраняватдалеч отбебетаи деца.
•Махнетестолчетоза кола от седалката на автомобила,когатоне се използваза дълъг период от време.
•Консултирайтесес производителяза въпроси, свързани с поддръжката,ремонтаи подмянатана части.
•Честопроверявайтеводачитена ISOFIXза закрепване зазамърсявания и гипочиствайте,ако е необходимо.Можеда попадане мръсотия,прах, хранителничастиции
т.н.
НЕинсталирайтетовастолче за кола при следнитеусловия:
1.Седалкиза превозни средствас 2-точковипредпазни колани.
2.Седалкитена превознотосредство,обърнати отстрани или назад по отношениена посоката на движение напревознотосредство.
3.Седалкиза превозни средстванестабилнипо времена монтажа.
Прочететевсичкиинструкции в товаръководство, преди даизползватетозипродукт.Акосесъмнявате,консултирайтесеили с производителяили стърговеца на
дребно.
За монтажс 3-точковколан или сISOFIX (ISOFIX приставки и горна връзка):
1.Това егрупаO + /I / II/III(9-36KG),инсталирана "универсална" система за обезопасяване на деца. Той е одобренвGB 27887-2011 иПравило 44 на04 на ECEна ООН,
серияотизменения, предназначени за общоползване в превознисредства ище пасне на повечето,но не всички автомобилниседалки.
2. Акопроизводителятна превознотосредствоедекларирал в ръководствотоза превознотосредство, чепревознотосредствоможеда приеме„универсална“ система
заобезопасяване на деца за тазивъзрастовагрупа,столчетовероятно ще пасне.
3.Тазисистемаза обезопасяване надеца е класифицирана като„универсална“при по-строгиусловия от тези,прилаганикъм по-раннитедизайни, които не носяттова
известие.
4.Ако иматесъмнения, моля, консултирайтесес производителяили търговецна дребно.
За инсталиранесISOFIX (ISOFIX прикаченифайлове и горнавръзка)
1.Това е група I(9-18kg)инсталиранаISOFIX обезопасителна система.Одобрен е вGB 27887-2011 иПравило № 44,серия от изменения за общоползване впревозни
средства, оборудванисъс системи за закрепванеISOFIX. Подходящ е зафиксиране в позициите на седалкитена повечетоавтомобили.
2.Столчетощепасне на превознисредства спозиции, одобрени като ISOFIX позиции (подробноописани в наръчниказа превознотосредство),взависимост от
категориятана детскатасистемаза обезопасяване и назакрепването.
3.Класътна ISOFIX, за койтое предназначенотоваустройство, еB1 (9-18 кг).Замонтажс ISOFIX приставкии3-точковколан
Защитнатасистемаза деца е класифицирана за употреба„Semi-Universal“. Позициитена седалкитев другиавтомобилисъщо могатда бъдатподходящи за монтиранена
столчето.Ако сесъмнявате, консултирайтес производителяна превознотосредство.
БЪЛГАРСКИ
1.СПИСЪК НАЧАСТИТЕ:1. Облегалка за главата;2. Тапицерияна столчето;3. Катарама;4. Регулаторна коланите; 5. Бутон за освобождаваненаприставкиISOFIX; 6. Дръжказа
регулиране на гърба;7. Тазовколан; 8. Раменниколани; 9. Възглавницаза бебе; 10. Задно заключванещо устройство;11.Заключващоустройство за група1;12. Лост за
регулиране на опоратана главата;13. Настройка загорнатакука; 14.Горна кука; 15. Колан нагорнатакука; 16.Отделениеза съхранние на инструкцията;17. Основа;18.ISOFIX
Конектори;
19.Водачза предпазния колан; 20.ISOFIX прикачени водачи;
Уверетесе,че всички частиса налични преди монтажа. Ако някоя част липсва, свържетесес търговеца.За монтажане са необходимиинструменти.
Тапицерията включваоблегалката заглава, подложка засядане, презрамкитеза рамо, възглавницатазабебета.
2.СЪОБРАЖЕНИЯЗА МОНТАЖ:Показва правилния начинзаинсталиранена фигура2
3.СТОЛЧЕТОЗА КОЛАПРЕДЛАГАРАЗЛИЧНИВЪЗМОЖНОСТИ ЗА МОНТАЖ:Следващата таблица показва типоветеинсталация за съответните групи:вижте Фигура 3.
4.РЕГУЛИРАНЕНА ОБЛЕГАЛКАТА
Натиснетедръжкатаза регулиране на облегалкатаи регулирайтестолчетоза колав подходящо положение.Фигура 4.1
Ъглитена наклона са показаникатоима3 ъгъланаотклоняване за група0+ назад.Фигура 4.2
Имачетириъгъла наотклонение 1-4 за режимза група I,II, индикация на ъгъл: Фигура 4.2
Имаедин ъгълнаотклонение за групаIII, тойе маркиранкато"1"червен триъгълник. Фигура4.2
Уверетесе,че предпазният колан на автомобилаще бъдестегнат,когатосе регулира влегналоположение и обратно, ако столчетовече е било закопчана правилно.
5.РЕГУЛИРАНЕНА ВИСОЧИНА ЗА ОБЛЕГАЛКАТА ЗА ГЛАВАТА И РАМЕННИТЕ КОЛАНИ
Моля,регулирайтеоблегалкатаза главатаи раменнитеколани,за да достигнетевисочина според височинатана детето.(Фигура 5, 12 3)
Когато сеизползва в група0 +,височинатана раменния колан трябвада е равна сраменетена детето.
Когато сеизползва в групаI, II,височинатана раменния колан трябвада е равна сраменетена детето.
Когато сеизползват в група III, водачитенараменния колан трябва да са равнис раменетена детето.
Акораменнитерколани неса на правилна височина,детето може дабъдеизхвърлено от столчето закола, когатоима инцидент.
Натиснете дръжкатаза регулиранена облегалкатаза главата,катомеждувременно издърпайтенагореили натиснете надолуоблегалкатаза глава, докатосе щракне в една
от11позиции. (Фигура 6)
7.МОНТАЖ В ГРУПА 0+(Монтиранепо посока обратна на движение/ задетепод 18 кг)
Моля,инсталирайтестолчетоза кола в превознотосредство и след товапоставете дететов столчетоза кола.(Фигура 7.1)
Моля,регулирайтестолчетоза колав правилен ъгъл (3 позиции). Индикацияна ъгъла:с подравненгорен,син триъгълник. Уверетесе,че раменнитеколаниса настроенина
правилнависочина,преди да инсталиратестолчето. Когатомонтирате ирегулиратепредпазнитеколани, уверете се, че и раменниятколан,и тазовия колан не саусукани.
1.Прекарайтеколана за таза над направляващия колани след товазакопчайтекатарамата(Фигура7.2)
2.Затегнете раменнияколан в дватаотворазараменния колан в заднатачастна столчето.
Раменниятколан трябва да преминепрез катарамата.Уверетесе, че отворът за колана езатвореннапълно,когатоне се използва,зада се предотвратинараняванеили
повреда на тапицериятана автомобила.(Фигура 7.3)
3.Докатопридържатестолчето за кола, дръпнетеколаните, за да закрепитездраво и сигурностолчето(Фигура7.4). Столчетоза кола не може дасеизползва, ако
закопчалкатана предпазнияколан на автомобила(женски крайна катарамата)е твърдедълга,за да се застопорибезопасно.(Фигура 7.5). Моля проверете, катодвижите
столчетоза коланапред и назад. (Фигура 7.6)
Правилносглобениятколан на превознотосредство е показанна (Фигура 7.7)
•Коланът на тазапреминавапрез направляващитеремъцина колана.
•Раменниятколан трябва даминава през прорезитеза раменнияколан.
•Езикът на катараматана автомобилае закрепен правилно с закопчалката.
8.ОСИГУРЯВАНЕ НАБЕЗОПАСТНОСТВСТОЛЧЕТО ЗА КОЛАСДОПЪЛНИТЕЛНА ВЪЗГЛАВНИЦА
8.1.Препоръчвамеда използватебебешкавъзглавница,докатобебетое на 0-9 месеца. Бебешкатавъзглавница увеличава защитатапри страниченудар.
8.2.Отстранетефиксаторите наопоратазаглава,за да премахнете горнатачаст.
8.3.Извадетечастта,коятоподдържа главата,когатоглаватана дететовече не приляга удобно.Извадетечасттаот тялотонавъзглавницата,когато раменетена детето вече
несе побират удобно.
8.4.Извадетевъзглавницата за бебета,катоотделите фиксаторите,за даосигуритеповечемясто,когатобебето не се побира удобно.Възглавницатаможе да сеизползва
отделно, за да подсилвагърба на бебето и повече комфорт.
9.ИНСТАЛИРАНЕНА ОБЕЗОПАСИТЕЛНИТЕ КОЛАНИ В ГРУПА 0+
9.1.Докатонатискате бутоназа регулиране наколаните,издърпайте изцялодватараменни коланана столчето. (Фигура 9.1)
9.2.Натиснетечервения бутон, за даотключитекатарамата (Фигура 9.2)
9.3.Поставетедетето в облегалкатаза децаи прекарайтедветему ръце през коланите. Закопчайтекатарамата. (Фигура 9.3)
9.4.Издърпайтелентатаза регулиране и я коригирайтена правилнатадължина,за да стесигурни, че дететови ездравозакрепено.
След катодетето ев столчето, проверетедали раменните колани са направилнатависочина.Уверетесе,че разстоянието междудетето и раменнитеколани е около
дебелинатана еднатаръка. (Фигура9.4)
10.МОНТАЖ В ГРУПА I,II (Монтиране в посока напред/ за детемежду 9-18 кг)
Инсталирайтестолчетоза колана седалкатана превознотосредствои следтовапоставетедететов столчето.Настройтеобезопасителнатасистемазадеца в правилния ъгъл
(4позиции). Индикация наъгъла: сподравненгорен,червентриъгълник.
Регулирайте раменнитеколани на подходящависочина,предида монтиратестолчето за кола. Когатоинсталиратеи регулиратепредпазнитеколани,уверетесе, че и
раменниятколан,и коланът натазане са усукани.
За монтажс3-точковколан
10.1.Прекарайтепредпазния колан през заднатачаст на столчето закола (Фигура 10.1)
10.2.Закопчайтепредпазния колан (Фигура 10.2)
10.3.Отворетеустройствотозазаключване ипоставетепредпазнияколан през него.(Фигура10.3)
10.4.Докатопридържатестолчето за кола,дръпнетеколаните, за да закрепитездраво и сигурностолчето(Фигура7.4). Столчетоза кола не може дасеизползва, ако
закопчалкатана предпазнияколан на автомобила(женски крайна катарамата)е твърдедълга,за да се застопорибезопасно.(Фигура 7.5). Моля проверете, катодвижите
столчетоза коланапред и назад.(Фигура10.4)
10.5.Столчетое инсталирано. (Фигура 10.5)
БЪЛГАРСКИ
БЪЛГАРСКИ
БЪЛГАРСКИ
11.ИНСТАЛАЦИЯС ISOFIX(ISOFIX кконектории горнакука)
11.1.Монтирайтеводачитена ISOFIX в точкитеза закрепване на ISOFIX. ISOFIX водачите могатда предпазятповърхността на седалкатана автомобилаотразкъсване. Те
могатда направлявати ISOFIXконекторите.(Фигура 11.1)
11.2.РазтеглетесъединителитезаISOFIX конекторите, катонатиснетебутоназа освобождаване,докатодърпатеконектора. (Фигура 11.2)
11.3.Уверетесе, че идватасъединителяза свързванена ISOFIX са надеждно закрепеникъм местатаим зазакрепване ISOFIX. Цветоветена индикаторитеи на двата
съединителя за свързване на ISOFIXтрябвада санапълнозелени (Фигура 11.3)
11.4.КонекторитезаISOFIX трябва да бъдатприкрепени ификсирани върху местата зазакрепване на ISOFIX. (Фигура 11.4) Проверете дали столчетоза кола енадеждно
инсталирано, като дръпнетеи дватасъединителязасвързванена ISOFIX. Изберете желанатапозиция налегнало положение, преди дасе придвижитеназад къмседалката
наавтомобила,тъйкатослед катогорнаталентае прикрепена и опъната,ъгълътна наклона назад няма да може да се промени,без да секоригира горнаталента.
11.5.Натиснетебутона за освобождаванена ISOFIX и натиснетестолчето за кола обратнодо седалкатана автомобил,докатосе инсталираплътно(Фигура 11.5)
11.6.За да разширитегорнатакука за употреба,натиснетебутонана регулиране на горната кука и издърпайте,за да удължите. (Фигура 11.6)
11.7Свържетенадеждно кукатакъм фиксатора за закрепване. (Фигура 11.7) Използвайтегорнатакуказа инсталиране,ако превознотосредство е оборудванос фиксатор
зазакрепване на такаваиса спазени изискванията за превозносредство (вижтеръководствотона превознотосредство).
11.8.Показано е правилно сглобяване на ISOFIX (ISOFIXконектори и горна кука).Уверетесе, че кукатае здравозакрепена. Цветовете наиндикаторитеза връзване на
лентата трябвада бъдатнапълно зелени. (Фигура11.8)
Акоъгълътна отклонениеерегулиран, проверете напрежениетонагорнатавръзка, или разхлабете,за да регулиратеъгъла, след коетоповторноопънете.
12.ДЕМОНТАЖ НА ISOFIX.
12.1.Първонатиснетебутона за вторичнозаключване иследтовабутона,преди да издърпатесъединителитеза свързване ISOFIX. ISOFIXконекторитесесгъват напълно.
12.2Когатоне се използва горнатакука,трябвада се съхранява правилно. За да стесигурни,че горниятвръзка е добре съхранявана настрани,отстранетевсички
провисналиленти,за да избегнетелюлеенетона горнатасвръзка, когатоавтомобилът е в движение.
13.ИНСТАЛИРАНЕНА ОБЕЗОПАСИТЕЛНИТЕ КОЛАНИ В ГРУПА I,II
Когато инсталиратестолчетоза кола в групаI, II не използвайте възглавницатаза бебе.Докатонатискатебутоназа регулиране наколан, издърпайтенапълнодвата
раменниколана на столчетоза кола ичрез лентатаза регулиране и я приспособетекъмправилнатадължина, такаче детето ви да бъдездраво закрепено. След като
детето е седнало,проверетедалираменнитеколани сана правилна височина.Уверете се,че разстоянието междудетето ираменнитеколани еоколо дебелината на едната
ръка.
14.ИНСТАЛИРАЙНЕВ ГРУПА III (Монтираневпосока напред /за дете15–36 кг)
Използвайтепредпазнияколан на автомобила,когато монтирате столчетоза кола в група III, неизползвайтевъзглавницатаза бебе или5-точковияколан.Моля,
съхранявайтераменнитеколани, катарамитеи закопчалкитев съответнитеотделенияза съхранение. Моля, коригирайтераменнитеколанина правилнатадължина,
предида ги съхранявате втехнитеотделенияза съхранение. Нагласетестолчетоза колас правилния ъгъл. Индикация наъгъла:Сподравнен горентриъгълник и червен
триъгълник. Когатоинсталиратеи регулирате предпазнитеколани, уверетесе,че и раменният колан, и коланът натазане са усукани.
14.1.Натиснетечервения бутон,за даосвободитекатарамата.(Фигура14.1)
14.2.Извадетевъзгланицата забебе и подложкатаза чатала.(Фигура 14.2) Когатоинсталирате столчетоза кола в тази група, не използвайтевъзглавницатаза бебе.
14.3.Отстранетефиксаторите.
14.4.Повдигнетегорния капак нагореи издърпайтедолния капакнапред,следкоетосъхранетераменните колани и закопчалкивотделение засъхранение.(Фигура 14.2)
14.5.Издърпайтеключалкатакъм гърбана столчето и следтовасъхранявайтеключалкитеи закопчалкитев съответните отделения за съхранение.(Фигура 14.2)
14.6.Поставете отново приспособленията,за да възстановитеподложкатана седалката. Седалкатаепоказана на фигурата.
15.ИНСТАЛИРАНЕНА ОБЕЗОПАСИТЕЛНИТЕ КОЛАНИ В ГРУПА III
За монтажс 3-точковколан
1.Поставете дететов столчетоза кола и проверетедали водачитенараменния колан са на правилна височина.
2.Поставете раменния коланпрез водача за раменнияколан.Затегнетезакопчалкатаииздърпайтеколана наавтомобила,за дасезатегне.
Раменниятколан трябва да преминава през водачана раменнияколан. Коланът затазатрябва да преминава през направляващитеколани. Систематазаобезопасяване
надеца не може дасеизползва, ако закопчалкатана предпазнияколан на превозното средство е твърде дълга,за да се закотви безопасно. Не използвайтераменния
колансвободенили поставенпод мишницата. Не използвайтераменния колан зад гърбанадетето. Не позволявайтена дететода се плъзганадолу в столчетоза кола,за
да избегнете задушаване.
16.МОНТАЖ с 3-точковколан и ISOFIX прикачени устройства
16.1.Показвано е сеинсталиранетос ISOFIX конектори.
16.2.Поставете дететов столчетоза кола и проверетедали водачитенараменния колан са на правилна височина.
16.3.Показван е монтажас 3-точковколан.
16.4.Показва правилно сглобените3-точковколан и ISOFIX прикачени файлове. Уверетесе, чеи дватасъединителя за свързванена ISOFIX са надежднозакрепени към
техните местаза закрепване ISOFIX.Цветовете наиндикаторитеи на дватасъединителязасвързванена ISOFIX трябва даса напълно зелени.Проверетедалистолчето за
колае здраво инсталирано,катодръпнетеи дватаISOFIX конектори. Раменниятколан трябва да преминавапрез водача за раменния колан.Коланът на тазанапревозното
средство трябва да сепресичапрез средата на колана и следтовада се прикрепят закрепващите контури и куки. Коланът на тазатрябва да преминава през
направляващитеколани наобиколката.Систематазаобезопасяване надеца не може дасеизползва, ако закопчалкатана предпазнияколан на превознотосредство е
твърдедълга,зада се закопчее безопасно.Не използвайтераменния колан свободенили поставен под мишницата.Не използвайтераменния колан задгърба надетето.
Непозволявайтенадетето да се плъзга надолу в столчетоза кола, зада избегнете задушаване.
17.ПОЧИСТВАНЕ
Свалянена тапицерията1. Натиснетечервения бутон, за даосвободитекатарамата.2. Извадетевъзгланицатаза бебе иколана. 3. Освободете ластика върхуоблегалкатаза
главата и след това яотстранете. 4.Отстранетефиксаторите на подложкатана седалката, издърпайтеключалкатадогърба наподложкатаи следтоваизвадете
подложката.Зада поставите тапицерията повторете стъпкитенаобратно.
Поддръжка:След отстраняване на възглавницата забебе, моля, съхранявайтея някъде, така, чедетето да няма достъп до нея.Перететапицерията със студена вода под
30° C.Не гладете мтапицерията.Неизбелвайтеине сушетев сушилня тапицерията.Не използвайтенеразреденнеутрален почистващпрепарат, бензин илидруг
органиченразтворител,зада измиете обезопасителнитеустройства за деца. Това може дапричиниповреда на систематаза обезопасяванена деца. Не изстисквайте
тапицерията с голямасила. Това можедая направи смачканаслед изсъхване. Сушете тапицериятана сянка. Моля,махнетестолчетоот седалкатана автомобила,ако несе
използва за дълъгпериодотвреме.
БЪЛГАРСКИ
ESPAÑOL
Muchasgraciaspor comprarnuestroproducto.Ha compradoun sistema de seguridad paraniños dealta calidad y totalmentecertificado.Este producto es adecuadopara el usodeniños que pesen
MENOSDE 36 kg(aproximadamente 12años o menos). Leaatentamenteeste Manual de instrucciones y siga los pasos de instalación, yaque estaesla ÚNICA manera de protegera su hijo de un
accidentey de brindarle comodidadmientras usa este producto.
Guardeeste manual de instruccionespara referenciafutura.Guardeelmanualde instruccionesen el compartimento de almacenamiento de la cubiertaposteriorparafuturasconsultas.
Asegúresede quesuvehículoestéequipadoconuncinturónde seguridad conretractor de 3 puntos. Loscinturonesde seguridad pueden serdiferentesen diseño y longitud según elfabricante,la
fechadefabricación y el tipo de vehículo.Este sistema de retención infantil solo es adecuado para su uso enlosvehículosenumeradosequipadosconcinturonesde seguridad con retractor de 3
puntosy aprobados por la norma ECE16de la ONU y GB 14166. Este sistema de retención infantil está aprobadosegún la norma GB 27887-2011 y la normaECE44, serie 04 de enmiendas.
Advertencias
•Estesistemaderetencióninfantil está diseñado SOLOpara niños quepesenmenos de 36 kg (aproximadamente12 años o menos).
•Lascorreasque sujetan elsistemaderetenciónal vehículo deben estar ajustadas, que las correas que sujetan al niño debenajustarseal cuerpo del niño y que lascorreasno deben retorcerse.
•Cuandouse estesistema de retención infantil en el modo de bebé o niñopequeño,el cinturóndeseguridad se debe usar correctamente y asegúresede que cualquier correade regazose use
haciaabajo,de modo que la pelvis quedefirmementeenganchada.
•Elsistemaderetencióninfantil debe cambiarse cuandohaya estado sujeto a tensiones violentas en un accidente.Un accidentepuede causardaños al sistema de retencióninfantilquenopuede
ver.
•Preocuparsepor elpeligrode realizar modificaciones o adicionesaldispositivosinlaaprobaciónde laAutoridadde homologacióndetipo,y el peligro de no seguir de cerca las instrucciones de
instalaciónproporcionadaspor el fabricante del sistema de seguridad para niños.
•Mantengaeste sistema de retención infantil alejado de la luz solar,de lo contrario puede estar demasiado caliente para la piel del niño.
•Nose deja al niño desatendido en el sistema de retencióninfantil.
•Cualquierequipaje uotrosobjetos que puedan causarlesiones encaso de colisión deberán estar debidamenteasegurados.
•Elasientode seguridadparaniñosnodebe usarse sin los productos blandos.
•Losproductos blandos no debenreemplazarsepor otrosque no sean losrecomendadospor el fabricante,porquelosproductosblandos constituyenuna parte integraldelrendimientode la
restricción.
•NO use ningún punto de contacto de carga que no sea el descrito en las instrucciones y marcado en el asientode seguridad para niños.
•NO el sistema de retencióninfantilpuede garantizarla protección total contralesiones enunaccidente.Sin embargo,el uso adecuadode estesistema de retención infantil reduciráelriesgo de
lesionesgraveso la muertedesu hijo.
•NO use el modo orientado hacia adelante antesde que el peso del niño supere los 9 kg.
•NO use ni instale este asiento de seguridad para niños hasta que lea y comprendalas instrucciones de este manual y del manualdelpropietariode suvehículo.
•NO use este asientodeseguridad para niños si tiene piezas dañadas o faltantes.
•NO coloque a su hijo en ropa no adecuada cuando useestesistemade retencióninfantil en el modo de bebé oniñopequeño,ya que esto puede evitar que su hijo se sujetede maneraadecuaday
seguraporlos arneses de hombro y los arneses entrelos muslos.
•NO deje este sistemade retencióninfantil sin cinturóno sin seguridad en suvehículoporque el sistema de retención infantil no asegurado puede ser arrojado y puede lesionar a los ocupantesen
unacurva cerrada, parada repentinao colisión. Quítelo si no está en uso regular.
•NO coloque el sistema de retencióninfantil en asientosdonde se instaleunairbag frontalactivosi su hijotodavíaestá en elmodoorientadohacia atrás.
•NUNCA use un sistema de retención infantilde segunda mano o un sistema de retención infantil cuyohistorialno conozcaporque pueden tener daños estructuralesque ponen enpeligrola
seguridadde su hijo.
•NUNCA use cuerdas ni ningún otro sustituto en lugar de los cinturones de seguridad en caso de lesionesporrestricción.
•NO use este sistemade retencióninfantil como una silla normal,ya que tiende a caersey lesionar al niño.
•NO ponga nada más que los cojines internos recomendadosen esteasientodeseguridadparaniños.
•NO lleveestesistemade retencióninfantil con un niño dentro.
•NO permita que el arnés de sujeción paraniños olashebillas quede atrapadoo atrapadoenelasientoolapuerta del vehículo.
•Paraevitar asfixia, retirela bolsa de plástico y los materiales de embalaje antes de usar este producto.La bolsa de plástico y los materialesde embalaje deben mantenersealejados de bebés y
niños.
•Retireeste asiento de seguridad para niños del asientodel vehículo cuando no estéen usoporun período prolongado.
•Consulteal distribuidor por cuestionesrelacionadascon el mantenimiento, la reparaciónyel reemplazode piezas.
•Revise con frecuencialasguías de accesorios ISOFIX en busca de suciedad y límpielassies necesario.
Lafiabilidadpuede verseafectada por la entrada de suciedad, polvo,partículasdealimentos,etc.
NOinstale estesistemaderetencióninfantil en las siguientescondiciones:
1.Asientosdevehículosconcinturonesde seguridad de 2 puntos.
2.Asientosdelvehículoorientadoshacialoslados o hacia atrás con respectoa la direccióndemarchadel vehículo.
3.Asientosdelvehículoinestablesdurantela instalación.
Leatodas las instrucciones en este manual antes de usar este producto.En caso deduda,consulteal fabricantedel sistemade retención infantil o al minorista.
Parainstalación con correade3 puntosoconISOFIX (accesoriosISOFIXy correasuperior:
1.Esteesun sistemade retencióninfantil 'Universal' instalado en el GrupoO+ / I / 1/2/3 (9-36KG). Está aprobadopor GB 27887-2011 y la norma ECE delaONU 44, 04 series de enmiendas, para
usogeneralen vehículosy se adapta a la mayoría,peronoatodos,los asientos de automóvil.
2.Es probablequehayaun ajuste correcto si el fabricante del vehículo ha declarado en el manualdelvehículoqueel vehículoes capaz de aceptar un sistema de retencióninfantil'Universal'para
estegrupodeedad.
3.Estesistemaderetencióninfantil se ha clasificado como"Universal"en condiciones más estrictas que las que se aplicaron a diseños anterioresque no llevan esteaviso.
4.Encaso de duda, consulte al fabricante del sistema de retencióninfantiloalminorista.
Parainstalación con ISOFIX (accesorios ISOFIX y correasuperior)
1.Esteesun SISTEMA DE RESTRICCIÓNPARA NIÑOS ISOFIX instaladoGr 1 (9-18 kg).Está aprobadoporGB 27887-2011 y el Reglamento No.44, 04 serie de enmiendasparausogeneralen vehículos
equipadosconsistemasdeanclajes ISOFIX. Es adecuado para fijar en las posicionesdelos asientosdela mayoríade los automóviles.
2.Se ajustará a vehículos con posiciones aprobadas comoposiciones ISOFIX (comose detalla en el manual del vehículo), dependiendo de la categoríadel sistema de retención infantil y del
dispositivo.
3.Laclase de tamaño ISOFIX para la que está destinadoestedispositivo es B1 (9-18 kg).ParainstalaciónconaccesoriosISOFIXycinturónde 3 puntosEl sistema de retención infantiles
clasificado parauso“Semi-Universal”Lasposiciones deasientoen otros automóviles también pueden ser adecuadas paraaceptar el sistemade retención infantil.Encaso de duda, consulte al
fabricantedel sistemade retencióninfantil o al fabricante del vehículo.
ESPAÑOL
1.LISTA DEPIEZAS: 1. Soportedecabeza;2. Fundadeasiento;3. Hebilla;4)Ajustadordecorreas;5. Botónde liberaciónde archivosadjuntosISOFIX; 6. Manija de ajuste de reclinación;
7.correade la entrepierna;8. correa para el hombro;9. Inserto infantil; 10. Bloqueo orientadohacia atrás;11. Dispositivode bloqueo del grupo 112.Palancade ajuste del soportedel cabezal;
13.Ajustadorde la correadesujeción; 14. Gancho de sujeción; 15 correa de sujeción superior; 16. ManualdeinstruccionesCompartimentodealmacenamiento;17. Base;18. AdjuntosISOFIX
Conector;19. Guíadel cinturónde seguridad;20.Archivosadjuntos ISOFIX;
Asegúresede quetodaslaspiezasesténdisponibles antesdel ensamblaje. Si falta algunapieza,comuníqueseconelvendedorlocal. No se requieren herramientasparaelmontaje.
Losproductos blandos incluyen soportepara la cabeza,almohadilladelasiento, correapara el hombro,correaparala entrepiernae inserto para bebés.
2.PREOCUPACIONES SOBRE LA INSTALACIÓN: MUESTRALA FORMA CORRECTA DEINSTALACIÓN EN LA FIGURA 2
3.ESTE ASIENTOPARA NIÑOS OFRECE UNAVARIEDADDE OPCIONES DE INSTALACIÓN:La siguientetablaindica los tipos de instalación para los grupos respectivos:vea la Figura 3.
4.AJUSTE DE RECLINACIÓN
Presionela palanca deajustede reclinacióny ajuste el sistema de retención infantil a la posición correcta. Figura 4.1
Losángulos de reclinaciónse muestran como Hay 3 ángulos de reclinación para el modo de bebéorientadohaciaatrás.Figura 4.2
Haycuatroángulos de reclinación "1-4" para el modo de niño pequeño Indicaciónde ángulo: con los triángulos superior e inferior alineados. Figura 4.2
Hayun ángulodereclinaciónpara1 modojunior, está marcado como "1" triángulo rojo.Figura 4.2
Asegúresede queelcinturónde seguridad delvehículoestéajustado cuandoestéajustadoen posición reclinabley viceversasi elasientoya estaba abrochado correctamente.
5.AJUSTE DE ALTURA PARA SOPORTEDE CABEZAY ARNÉS DE HOMBRO
Ajusteel arnésparalacabezay el hombroa la altura adecuada de acuerdo con la altura del niño.(Figura 5, 1 2 3)
Cuandose usa enelGrupo 0 +, la altura del arnés del hombro debe estar a laalturadelos hombrosdelniño.
Cuandose usa enelGrupo I, II, la altura del arnés del hombro debe estar a laalturadelos hombrosdelniño.
Cuandose usa enelGrupo III, las guías del cinturón de hombrodeben estar a la altura de los hombros del niño.
Si los arneses de hombro no están a la altura adecuada, elniñopuede ser arrojadodel sistemade retencióninfantil cuando seproduceun accidente.
Aprietela palancade ajustedel soporte para la cabeza, mientras tanto,tire hacia arriba o empuje hacia abajo elsoporte para la cabeza hasta que encajeenuna de las posiciones. (Figura6)
7.INSTALACIÓNEN GRUPO 0+
(Modoorientadohacia atrás/paraniñosmenoresde 18kg)
Instaleel sistemade retencióninfantil en los asientostraseros del vehículo y luego coloque al niño en el sistemade retencióninfantil (Figura7.1)
Ajusteel sistemade retencióninfantil al ángulo adecuado (3 posiciones).Indicación de ángulo: con el triángulo superior y el triánguloazulalineados.Asegúresede que el arnésdehombroesté
ajustadoa la altura adecuada antes de instalar este sistema de retencióninfantil.Al instalar y ajustarloscinturonesde seguridad, asegúrese de que tanto el cinturónde hombrocomoelcinturón
noesténtorcidosy que no impidanquelos cinturonesde seguridadfuncionencorrectamente.
1.Paseel cinturón sobrelas guías del cinturónderegazoy luego enganche lalengüetade la hebilla del vehículo en la hebilla (Figura 7.2)
2.Abrócheseel cinturónde hombro en las dos ranuras del cinturón de hombroen la parteposterior del sistema de retención infantil.
Elcinturónde hombro debe pasar por el bloqueo.Asegúresedequela cubiertadebloqueodel cinturónesté completamente cerrada cuando no esté en uso para evitar lesiones o dañosala
tapiceríadelvehículo(Figura7.3)
3.Mientraspresionael sistema de retención infantil,tirede loscinturonespara fijar el sistema de retención infantil de forma firme y segura (Figura 7.4). El sistema de retencióninfantilnopuede
utilizarsesi el
lahebilla del cinturóndeseguridaddel vehículo(extremode lahebilla hembra)es demasiado largaparaanclar el sistema de retencióninfantilde formasegura.(Figura7.5).Verifiquemoviendoel
sistemaderetencióninfantil de un lado a otro. (Figura 7.6)
Elcinturóndel vehículo correctamenteensamblado se muestra como (Figura7.7)
•Elcinturónpasa a través de las guías del cinturón de regazo.
•Elcinturónde hombro debe pasar a través de las ranuras del cinturóndehombro.
•Lalengüeta de la hebilla del vehículo está enganchada con la hebillacorrectamente.
8.ASEGURAR A SU HIJO EN LARESTRICCIÓN INFANTILUSE EL INSERTOINFANTIL
8.1Recomendamosusar el insertocompleto para bebés mientras el bebé tiene 0-9 meses. El insertoinfantil aumenta la protección contraimpactoslaterales.
8.2Separelosbrochesdelsoporte de la cabeza para quitar la parte de la cabeza del inserto.
8.3Retirela porciónde soporteparala cabeza del insertopara bebés cuando lacabezadelniño yano se ajuste cómodamente.Retire la partedel cuerpodel inserto infantil cuando loshombrosya
nose ajustencómodamente.
8.4Retireel cojíndelinserto para bebés separando los broches para dejar más espacio cuando elbebéno se ajuste cómodamente.El cojín se puede usar por separadosin estarunidoal inserto para
protegerla espalda del bebé paramayorcomodidad.
9.INSTALACIÓNDEL ARNÉS EN GRUPO 0+
9.1Mientraspresionael botón de ajustedel arnés, jale completamente los dos arneses de hombro del sistema de retención infantil.(Figura9.1)
9.2Presioneel botón rojo para desbloquear la hebilla (Figura 9.2)
9.3Coloqueal niño enel asientoinfantilypaseambos brazosporlosarneses.Engancharlahebilla.(Figura9.3)
9.4.Tirehacia abajo la cinta de ajuste y ajústelaa lalongitudadecuada para asegurarse de que su hijo esté bien ajustado.
Después de que el niño esté sentado,vuelva a verificar si los arneses delhombroestán alaalturaadecuada. Asegúresede que el espacio entre el niño y el arnés para hombros sea
aproximadamente delgrosorde una mano.(Figura9.4)
10.INSTALACIÓNEN GRUPO I, II (Modo deorientaciónhaciaadelante/ paraniños deentre9 y 18 kg)
Instaleel asientoinfantilenel asientodelvehículoyluegocoloqueal niño en el asiento infantil.
Ajusteel sistemade retencióninfantil al ángulo adecuado (4 posiciones).
Indicación de ángulo: con el triángulo superior y el triángulorojoalineados.
Ajustelos arnesesdelos hombrosala alturaadecuada antesde instalar el sistema de retencióninfantil.Al instalar y ajustarloscinturonesde seguridad, asegúrese de que tanto el cinturónde
hombrocomo el cinturón no estén torcidosyque no impidan que los cinturones de seguridad estén colocados correctamente.
Parainstalación con correade3 puntos
10.1Paseel cinturón de seguridad a travésdedos ranurastraserasdel cinturónde seguridad en laparte posterior del sistema de retencióninfantil(Figura10.1)
10.2Abrocheel cinturónde seguridad. (Figura10.2)
10.3Abraeldispositivodebloqueoe inserte el cinturón de seguridad a través de él.(Figura10.3)
10.4Mientraspresionael sistema de retencióninfantil,tirede loscinturonespara sujetar el sistema de retención infantil de forma firme y segura. El sistema de retencióninfantilno se puede usar si
lahebilla del cinturóndeseguridaddel vehículo(extremode lahebilla hembra)es demasiado largaparaanclarla de forma segura.Verifiquemoviendo el sistema de retención infantil de un lado a
otro. (Figura 10.4)
ESPAÑOL
11.PARA LAINSTALACIÓNCONISOFIX (ACCESORIOS ISOFIXYTOPTETHER)
11.1Ajustelasguíasde archivosadjuntos ISOFIX con los puntos de anclaje de archivos adjuntosISOFIX.Lasguías de accesoriosISOFIX pueden protegerlasuperficie del asientodel vehículo de ser
rasgado.También pueden guiar losconectoresde archivosadjuntosISOFIX. (Figura11.1)
11.2Extienda los conectoresde accesorios ISOFIX presionandoel botónde liberación mientrastiradelconector (Figura11.2)
11.3Asegúresedequeambos conectoresde archivosadjuntos ISOFIX estén conectados de forma segura a suspuntosde anclajedearchivosadjuntos ISOFIX. Loscoloresde los indicadoresen
ambosconectoresde archivosadjuntosISOFIX deben ser completamenteverdes(Figura 11.3)
11.4Losconectoresde los accesorios ISOFIX deben estar unidos ybloqueadosen los puntosde anclaje de los accesorios ISOFIX. (Figura11.4)Verifiquepara asegurarse de que el sistema de
seguridadparaniños estéinstalado de manera segura tirando de ambos conectores de accesoriosISOFIX. Seleccione la posición de reclinación deseada antes de retrocedercontra el asiento del
vehículo, yaque una vezque la correa superior está unida y tensada, el ángulo dereclinaciónno podrácambiarsin ajustarlacorreasuperior.
11.5Presioneel botón de liberación de accesoriosISOFIX y empujeelsistemaderetencióninfantil contra el asiento del vehículo hasta que quede apretado (Figura11.5)
11.6ParaextenderTopTether para su uso,presioneel botónenTether Adjuster y tireparaalargarlo(Figura 11.6)
11.7Conecteelganchode sujeción de forma segura al accesorio de anclaje. (Figura11.7) USETopTether para la instalación en modo paraniños pequeñossiel vehículoestá equipado con un
accesoriode anclajeTether y se cumplenlos requisitosdel vehículo (consulteelmanual del propietariodel vehículo).
11.8Se muestra ISOFIX correctamenteensamblado (archivosadjuntos ISOFIX y correa superior). Asegúrese de que el gancho de sujeción esté bien sujetoal accesorio de anclaje. Los coloresdelos
indicadoresen elajustadorde la correadesujeción deben ser completamenteverdes.(Figura11.8)
Si se ajusta el ángulo de reclinación, verifique la tensión en la correasuperior o afloje para ajustar el ángulo y luegovuelvaa tensar.
12.RETIRE EL ISOFIX.
12.1Presioneprimero el botón de bloqueo secundario yluegoel botónantesdetirardelos conectoresdearchivosadjuntos ISOFIX. El ISOFIX
Losarchivosadjuntosseplieganpor completo.
12.2.Cuandono estéen uso,TopTetherDEBE almacenarse correctamente.Paraasegurarse de que la correasuperior estécorrectamenteguardada, elimine cualquier holguraen lacorreapara
evitarque la correasuperiorse balanceecuando el vehículo esté en progreso.
13.ASEGURAR A SU HIJO EN LARESTRICCIÓN INFANTIL
Cuandoinstale el sistemade sujeción infantilenelmodo para niños pequeños,no use el insertopara bebés. Mientras presiona el botón de ajuste del arnés,jale completamentelos dosarnesesde
hombrodel sistema de retencióninfantil.Presioneel botón rojo para desactivar la hebilla. Coloque al niño en elsistemade retencióninfantil y enganche la hebilla.Tirehacia abajo de la cintade
ajusteyajústelaalalongitud adecuada para que su hijo esté bien ajustado.Después de que el niño esté sentado,verifique nuevamente si los arneses del hombro están a la altura adecuada.
Asegúresede queelespacio entreel niñoyel arnés para hombrossea aproximadamentedel grosorde una mano.
14.INSTALACIÓNEN EL GRUPO III (Modo orientadohacia adelante/ para niños de 15–36kg)
Simplementeuse elcinturónde seguridad del vehículocuandoinstale elasientode seguridad paraniñosenel modo junior, nouse el inserto para bebés o elarnés de 5 puntos,guarde los arneses
dehombro, lahebillay las lengüetas de la hebilla en los compartimentosde almacenamientorespectivos.Ajustelosarneses de hombroa la longitud adecuada antes de guardar los arneses de
hombroy abróchelos en sus compartimentosde almacenamiento. Ajuste el sistema de retencióninfantilal ángulo adecuado Indicación de ángulo: conel triángulosuperiory el triángulo rojo
alineados.Al instalar yajustarlos cinturonesde seguridad,asegúrese de que tanto el cinturónde hombrocomoelcinturónno estén torcidos y que no impidan que los cinturonesde seguridad
esténcolocadoscorrectamente.
14.1Presioneel botón rojo para desenganchar la hebilla. (Figura 14.1)
14.2Retireel inserto infantil y la almohadilla de la entrepierna.(Figura 14.2) Al instalar el sistema de retención infantilen el modo Junior,no utilice el insertoinfantil.
14.3Separar los broches.
14.4Levantela aleta superior hacia arriba y tirede la aleta inferiorhaciaadelante,y luego guarde los arneses de loshombrosy abróchelos en sus compartimentosde almacenamiento. (Figura
14.2)
14.5Tirede la hebillahaciala parte posterior de la almohadilla delasientoy luegoguardela hebilla ylas lengüetas de la hebilla en los compartimentosde almacenamientorespectivos (Figura
14.2)
14.6Vuelvaa colocar los broches para recuperarla almohadilla del asiento.Se muestra la almohadilla del asientoreensamblado.
15.ASEGURAR A SU HIJO EN LARESTRICCIÓN INFANTIL
Parainstalación con correade3 puntos
1.Coloqueal niño enel sistemade retencióninfantil y compruebe si las guíasdelcinturónde hombro están a la alturaadecuada.
2.Coloqueel cinturón de hombro a travésde laguíadel cinturónde hombro. Abroche la hebilla y tire del cinturón del vehículo para apretarlo.
Elcinturónde hombro debe pasar a travésde la guía del cinturón de hombro. Elcinturóndebe pasar porlasguías del cinturónderegazo. El cinturóndela cinturadel vehículodebe atravesarel
centrode la cubierta del cinturóndela entrepiernay luegocolocarlos sujetadoresdebucle y gancho.El sistema de retencióninfantilnose puede utilizar si la hebilla del cinturónde seguridad del
vehículoes demasiadolargapara anclarla deformasegura.Nouseel cinturónde hombrosuelto o colocado debajo del brazo. No use el cinturón de hombro detrás de la espalda del niño.No
permitaque el niño se deslice hacia abajo en el sistemade retencióninfantil en caso de estrangulamiento.
16.INSTALACIÓNCONCORREASDE 3 PUNTOSY ACCESORIOSISOFIX
16.1Se muestra la instalación con archivosadjuntosISOFIX.
16.2Coloqueal niño enel sistemade retencióninfantil y verifique si las guías delcinturónde hombro están a la altura adecuada.
16.3.Se muestra la instalación con cinturónde 3 puntos.
16.4Se muestra la correade 3 puntoscorrectamenteensamblada y losaccesoriosISOFIX. Asegúresede que ambosconectoresde archivosadjuntosISOFIXesténconectados de forma segura a sus
puntosde anclaje dearchivosadjuntos ISOFIX. Loscoloresde los indicadoresen ambos conectoresde archivos adjuntosISOFIXdeben ser completamenteverdes.Verifiquepara asegurarsede que
elsistemaderetencióninfantil esté instalado de manera segura tirando de los dosaccesoriosISOFIX
conectoresEl cinturón de hombro debe pasar a travésdelaguía del cinturóndehombro. El cinturón de la cintura del vehículo debe atravesarel centro de la cubiertadel cinturónde laentrepiernay
luegocolocarlos sujetadoresdebucle y gancho.El cinturóndebe pasar por las guías del cinturón de regazo.Elsistemaderetencióninfantil no se puede utilizarsila hebilla del cinturónde
seguridaddel vehículoes demasiado largaparaanclarlade forma segura. No use el cinturónde hombrosueltoocolocadodebajo del brazo. Nouseel cinturónde hombrodetrás de la espalda del
niño.No permita que el niño se deslice hacia abajoenel sistemade retencióninfantil en casode estrangulamiento.
17.LIMPIEZA
Separaciónde artículosblandos 1.Presioneel botón rojo para desenganchar la hebilla. 2. Retire el insertoinfantilyla correade laentrepierna.3. Separeel elástico del soporteparalacabezay
luegoretireel soporteparalacabeza.4.Separelos brochesdela almohadilla del asiento,tirede la hebilla hacia la parteposteriorde laalmohadilla del asientoy luego retirela almohadilla del
asiento. Paraensamblar productos blandos,invierta los pasos anteriores.Despuésde quitarla espuma del insertopara bebés, guárdelo en un lugar donde el niño nopuedaacceder. Lavelos
productosblandosconaguafría a menos de 30 ° C. Noplanchar losproductosblandos.No blanquear nilavaren seco los productos blandos. No use detergentesneutros sin diluir gasolina uotro
solventeorgánicoparalavarel sistema de retención infantil.Puedecausardaños alsistemaderetencióninfantil. No tuerza los productos blandos para que se sequencongranfuerza. Puededejar
losproductosblandosconarrugas.Por favor, cuelgue los productos suavesa la sombra. Retireel asientoinfantildelasientodel vehículosi nolousa duranteun períodoprolongado.
PORTUGAL
IMPORTANTE! GUARDE ESTAS INSTRUÇÕES PARA REFERÊNCIA
FUTURA.
PT
Muitoobrigadoporadquirir nosso produto.Você comprouum sistema de retenção para crianças,de alta qualidade e totalmente certificado para segurança infantil. Este produtoéadequadoparao
usode crianças com peso abaixo de 36 kg (aproximadamente12 anos ou menos). Leia atentamenteeste manual de instruções e siga as etapasdeinstalação,pois esta é a ÚNICAmaneirade proteger
seufilho de um acidente e de proporcionarconfortoaoseufilho enquantoestiverusando esteproduto.
Guardeeste manual de instruçõespara referênciafutura.Guardeomanualde instruçõesno compartimento de armazenamentodatampa traseiraparareferênciafutura.
Verifiquese o seu veículo está equipado com cinto de segurança retratorde 3 pontos. Os cintos de segurança podem ter design e comprimento diferentes,de acordocomofabricante,a data de
fabricação e o tipo de veículo.Este sistema de retenção para crianças é adequado apenas para uso nos veículoslistados, equipados com cintos de segurança retratoresde 3 pontos e aprovadospelas
normasUNECE 16 e GB 14166. Este sistema de retenção para crianças é aprovadopelas normasGB27887-2011 e UN ECE 44, 04 de emendas.
ADVERTÊNCIAS
•Estesistemaderetençãopara crianças foi projetado SOMENTE para crianças commenos de36kg(aproximadamente12 anosoumenos).
•Quaisquer correiasqueprendemosistemaderetençãoao veículo devem ser apertadas,que quaisquer correiasque prendem a criança devem ser ajustadas ao corpo da criançae que as correiasnão
devemser torcidas.
•Aousarestesistemaderetençãopara crianças no modobebêou criança pequena, o cinto de segurança deve ser usado corretamentee garantirque qualquer cintade segurançaestejadesgastada
parabaixo, de modo queapelvefiquefirmementeengatada.
•O sistemade retençãopara criançasdeve ser alterado quando estiver sujeito a tensões violentas em um acidente.Umacidentepodecausar danos ao sistema de retençãoinfantilque vocênão pode
ver.
•Preocupe-se com o perigo de fazer alteraçõesouadiçõesao dispositivosema aprovaçãoda autoridade de homologação eoriscode não seguir atentamenteas instruções de instalação fornecidas
pelofabricantedosistemaderetençãopara crianças.
•Porfavor, mantenha esta criança afastada da luzsolar, caso contrário pode estar muito quente para a pele da criança.
•A criança não é deixada no sistema de retenção infantil sem vigilância.
•Qualquer bagagem ou outros objetos que possam causar ferimentos em caso de colisão devem ser devidamente protegidos.
•O sistemade retençãopara criançasnão deveser usado semosprodutosleves.
•Os produtosleves não devem ser substituídos por outros que não os recomendadospelo fabricante,porqueosprodutosleves constituem parteintegrantedodesempenhoda restrição.
•NÃOuse nenhum pontode contatoque suporte carga além dos descritos nas instruções e marcados no sistema de retenção para crianças.
•NENHUMsistemaderetençãopara crianças pode garantirproteção total contralesõesem um acidente.No entanto,o uso adequado destesistema de retenção para crianças reduzirá o risco de
ferimentosgravesou morte do seu filho.
•NÃOuse o modovoltadopara a frente antesqueo peso da criança exceda9 kg.
•NÃOuse ou instaleestesistemade retençãopara crianças até ler e entender as instruções neste manual e no manual do proprietário do veículo.
•NÃOuse este sistema de retenção para crianças se houver peças danificadas ou ausentes.
•NÃOcoloque seu filho comroupas inadequadas ao usar estesistema de retenção para crianças no modo bebê oucriança, pois isso pode impedir que seu filho sejapresode formaadequadaesegura
peloscintosde ombroe cintos entre as coxas.
•NÃOdeixe este sistema de retençãoparacrianças sem cintoou desprotegidoem seu veículo, pois elepodeser arremessadoepode ferir os ocupantes em uma curvabrusca,paradasúbitaou colisão.
Remova-o se não estiver em uso regular.
•NÃOcoloque o sistema de retenção para crianças em posições sentadas, onde um airbag frontal ativoesteja instalado se oseufilho ainda estiverno modo voltadoparatrás.
•NUNCA use um sistema de retenção para crianças em segunda mão ou sistema de retenção para crianças cuja históriavocê não conheça, pois podem causar danosestruturaisquepõemem risco a
segurançadoseu filho.
•NUNCA use cordasou quaisquer outrossubstitutosnolugar dos cintosde segurança em caso de ferimentos provocadospor restrições.
•NÃOuse este sistema de retenção para crianças como cadeira regular, pois eletendeacair e ferir a criança.
•NÃOcoloque nada além dasalmofadasinternasrecomendadas neste sistema de retençãoparacrianças.
•NÃOcarregue este sistema de retençãoparacrianças com uma criança.
•NÃOpermita que oarnêsou as fivelasde retençãopara criançasfiquem presosou presos no assento ou na porta do veículo.
•Paraevitar asfixia, removaasacolaplástica e os materiais de embalagem antes de usar este produto. Osacoplásticoeosmateriaisde embalagemdevemser mantidos afastados debebêse crianças.
•Removaeste sistema de retenção para crianças do assento do veículo quando não estiver em uso por um longo períododetempo.
•Consulteo distribuidor para problemas relacionados à manutenção,reparoesubstituição de peças.
•Verifiquefrequentementeas guias dos anexos ISOFIX quanto a sujeira e limpe-as,se necessário.
Aconfiabilidadepode ser afetada pela entrada de sujeira, poeira, partículasdealimentosetc.
NÃOinstale este sistema de retenção para crianças nas seguintes condições:
1.Assentosdeveículoscomcintosde segurança de 2pontos.
2.Assentosdoveículovoltadospara o lado ouparatrásemrelaçãoà direçãode marcha do veículo.
3.Assentosdoveículoinstáveisdurantea instalação.
Leiatodas as instruções neste manual antes de usar este produto.Em caso de dúvida, consulte o fabricante do sistema de retenção paracrianças ou o revendedor.
Parainstalação com cinto de 3 pontos ou com ISOFIX (acessórios ISOFIX e cordão superior:
1.Esteéum sistemade retençãoparacrianças'Universal' do Grupo O +/I / 1/2/3 (9-36KG).Eleéaprovadopara GB 27887-2011 e para as regulamentações UN ECE 44, 04, série de emendas,para uso
geralemveículoseseráadequadoparaa maioria, mas não para todas,as cadeiras de carro.
2.É provável que hajaum ajustecorretose o fabricante do veículo tiver declarado no manual do veículo que o veículo é capaz deaceitarumsistemaderetençãopara crianças 'Universal'para essa
faixaetária.
3.Estesistemaderetençãopara crianças foi classificadocomo 'Universal' sob condições mais rigorosas do que aquelas aplicadas amodelosanterioresque não ostentam este aviso.
4.Emcaso de dúvida, consulte o fabricante do sistema de retençãoparacriançasou o revendedor.
Parainstalação com ISOFIX (anexos ISOFIX e cordãosuperior)
1.Esteéum sistemaISOFIX de restauraçãode crianças Gr 1 (9-18 kg) instalado.Foi aprovadopara GB 27887-2011 eRegulamentonº 44, série04 de emendas para uso geral em veículos equipados
comsistemasde fixaçãoISOFIX. É adequado para fixação nas posições dos assentos da maioria dos carros.
2.Cabemnosveículoscomasposiçõesaprovadascomo ISOFIX (conformedetalhado no manual do veículo), dependendo da categoria do sistema de retenção paracrianças e do dispositivo elétrico.
3.A classe de tamanho ISOFIX a que estedispositivo se destina é B1 (9-18kg).Parainstalação com acessórios ISOFIX e cinto de 3 pontos O sistema de retençãoparacriançasé
classificados parauso“Semi-universal”Asposiçõesdosassentosem outroscarros também podem ser adequadas paraaceitar o sistemade retenção para crianças. Em caso de dúvida, consulte o
fabricantedo sistemade retençãopara crianças ou o fabricantedo veículo.
PORTUGAL
IMPORTANTE! GUARDE ESTAS INSTRUÇÕES PARA REFERÊNCIA
FUTURA.
PT
1.LISTA DEPEÇAS: 1. Suportede Cabeça;2. cobertura de assento; 3. Fivela;4) Ajustadordecorreias;5. Botãode LiberaçãodeAnexosISOFIX; 6. Reclinar aalça de ajuste;
7.Alça de virilha; 8. alça de ombro; 9. Inserção infantil; 10. Bloqueio para a parte traseira; 11. Dispositivo de bloqueio do grupo 1 12. Alavanca de ajuste do suportedacabeça;
13.Ajustadorda correiade amarração;14.Gancho de amarração; 15 CorreiaTopTether;16. Manual de Instruções Compartimento de Armazenamento;17. Base;18.AnexosISOFIX
Conector;19. Guiado cintodesegurança;20. AnexosISOFIX;
Verifiquese todas as peças estão disponíveis antesda montagem. Se alguma peça estiver faltando,entre em contatocomorevendedorlocal. Não são necessárias ferramentas para a montagem.
Osprodutosleves incluem suporteparaa cabeça, almofada de assento,alça de ombro,alça de virilha einserçãoinfantil.
2.PREOCUPAÇÕESCOM A INSTALAÇÃO:MOSTRA A MANEIRA CORRETA DE INSTALAÇÃONA FIGURA 2
3.ESTA CRIANÇA OFERECEVÁRIASOPÇÕES DE INSTALAÇÃO: A tabela a seguir indicaos tiposdeinstalação para os respectivos grupos: vejaaFigura3.
4.RECLINAR O AJUSTE
Pressionea alça deajustede reclinaçãoe ajusteo sistema de retençãopara crianças na posição correta.Figura 4.1
Osângulos de reclinação são mostrados como Existem3 ângulos de reclinação para o modo bebê voltado para trás.Figura4.2
Existemquatroângulos de reclinação“1-4”para o modo criança Indicação doângulo:comostriângulos superior e inferior alinhados. Figura4.2
Háum ângulo de reclinação para 1 modo júnior,marcadocomo“1”triângulo vermelho. Figura 4.2
Certifique-se de que ocintode segurança doveículoesteja apertado quando ajustado na posição reclinada e vice-versa,se o assento já tiver sido apertadocorretamenteanteriormente.
5.AJUSTE DA ALTURA PARASUPORTE DACABEÇA E CHARNES DE OMBRO
Ajusteo apoiodacabeça e os arnês do ombro para a altura do operador de acordo com a altura da criança. (Figura 5, 1 2 3)
Quando usada no grupo 0 +, a alturado arnêsdeveestar niveladacom os ombros da criança.
Quando usada no grupo I, II, a alturado arnêsdeveestar niveladacom os ombros da criança.
Quando usadas no grupo III, as guias docintode ombro devem estar alinhadas com os ombros da criança.
Se os cintosdos ombrosnãoestiveremna altura adequada, a criançapoderá ser jogadadosistemaderetençãopara crianças quandoocorrerum acidente.
Aperte a alavanca de ajuste do apoio de cabeça e, enquanto isso,puxe ou empurre o apoio de cabeça atéencaixar em umadasposições.(Figura 6)
7.INSTALAÇÃO NOGRUPO0+
(Modovoltadoparatrás / paracriançasmenores de 18 kg)
Instaleo sistemade retençãopara criançasnos assentostraseiros do veículo e,em seguida, coloque a criança no sistema de retenção para crianças (Figura 7.1)
Porfavor, ajuste o sistema de retenção para crianças no ângulo adequado (3 posições). Indicaçãodo ângulo:Como triângulo superioreo triângulo azul alinhados.Verifiquese o cinto de ombro está
ajustadona altura adequada antesde instalar este sistemade retençãopara crianças.Ao instalar e ajustar os cintos de segurança, verifique se o cinto de ombro e o cinto não estão torcidose não
impedemo funcionamentoadequadodos cintosdesegurança.
1.Passeo cinto sobre as guias do cinto de segurança e, em seguida, engate a lingueta da fivela do veículo na fivela (Figura7.2)
2.Aperte o cinto de ombro nas duas ranhuras do cinto na partetraseira do sistema de retenção para crianças.
Ocintode ombrodeve passar pelo bloqueio.Certifique-se de que atampada travado cinto esteja completamentefechadaquando não estiverem uso para evitar ferimentosou danos ao
estofamentodo veículo (Figura 7.3)
3.Enquantopressiona o sistema de retenção para crianças,puxeos cintospara prendê-lo com firmeza e firmeza(Figura 7.4)! O sistema de retenção para crianças não pode ser usado seo
afiveladocintode segurança doveículo(extremidade da fivela fêmea) é muito longa para fixar o sistema de retenção para crianças com segurança. (Figura 7.5).Verifiquemovendo o sistema de
retençãopara crianças para frentee para trás.(Figura 7.6)
Ocintodo veículomontado corretamenteémostradocomo(Figura7.7)
•O cintopassapelas guias do cinto subabdominal.
•O cintodeombrodeve passar pelas fendas docinto.
•A lingueta da fivela do veículo está encaixada corretamentena fivela.
8.ASSEGURAR O SEU FILHO NA RESTRIÇÃOINFANTILUSAR INSERTOINFANTIL
8.1Recomendamoso uso do folheto infantil completoenquantoo bebê estiverde 0 a9meses.A inserçãoinfantil aumenta a proteção contraimpactos laterais.
8.2Solte os encaixesno suporte da cabeçapararemovera parte da cabeçada inserção.
8.3Removaa parte do suporteda cabeçada inserçãoinfantilquando a cabeça da criança não coubermaisconfortavelmente.Removaaparte do corpo da inserção infantil quando os ombros não se
ajustaremmais confortavelmente.
8.4Removaa almofadadeinserçãodobebê retirandoos encaixespara permitir mais espaço quando obebênão se encaixar confortavelmente. A almofada pode serusadaseparadamente,sem ser
presaao tobolster das costas da criança paramaior conforto.
9.INSTALAÇÃO DEARNÊSNO GRUPO 0+
9.1Enquantopressiona o botão de ajuste do arnês,puxe completamenteosdois arnês do sistema de retençãoparacrianças.(Figura9.1)
9.2Pressioneo botão vermelhopara destravara fivela(Figura9.2)
9.3Coloquea criançano coloepasseos dois braços pelos arreios.Engate a fivela. (Figura9.3)
9.4.Retirea correia de ajuste e ajuste-a nocomprimentoadequado para garantir que seu filho esteja bem preso.
Depois que a criança estiver sentada, verifique novamentese os cintos de ombro estão na altura adequada. Certifique-se de que o espaço entre a criança e o cinto de ombro seja da espessura de uma
mão.(Figura9.4)
10.INSTALAÇÃO NOGRUPOI, II (modo de frente/paracrianças entre9 e18kg)
Instaleo sistemade retençãopara criançasno assentodo veículo e, em seguida, coloque a criançano sistemade retençãopara crianças.
Porfavor, ajuste o sistema de retenção para crianças no ângulo adequado (4 posições).
Indicação de ângulo: Como triângulo superior e o triângulo vermelho alinhados.
Porfavor, ajuste os chicotes de ombro à altura adequada antesde instalar o sistema de retençãoparacrianças.Aoinstalar eajustaros cintosdesegurança,verifiqueseocintodeombroe ocintonão
estãotorcidose não impedemqueos cintosdesegurançasejam posicionados corretamente.
Parainstalação com cinto de 3 pontos
10.1Passeo cinto de segurança atravésde dois encaixestraseiros do cinto de segurança na partetraseira do sistema de retenção para crianças (Figura 10.1)
10.2Prendao cinto de segurança (Figura 10.2)
10.3Abraodispositivode travae insira o cinto de segurança nele. (Figura10.3)
10.4Enquantopressiona o sistema de retenção para crianças,puxeos cintospara prendê-lo com força e firmeza. O sistema de retenção para crianças não pode ser utilizadosea fiveladocintode
segurançadoveículo(extremidadeda fivela fêmea) for muito longa para fixar o sistemade retençãopara crianças com segurança. Porfavor, verifiquemovendoo sistema de retenção para crianças
parafrentee para trás.(Figura10.4)

Other KIKKA BOO Car Seat manuals

KIKKA BOO Vintage User manual

KIKKA BOO

KIKKA BOO Vintage User manual

KIKKA BOO ORBITAL User manual

KIKKA BOO

KIKKA BOO ORBITAL User manual

KIKKA BOO AMARO User manual

KIKKA BOO

KIKKA BOO AMARO User manual

KIKKA BOO SENIOR Simple manual

KIKKA BOO

KIKKA BOO SENIOR Simple manual

KIKKA BOO FERRIS User manual

KIKKA BOO

KIKKA BOO FERRIS User manual

KIKKA BOO RONDA User manual

KIKKA BOO

KIKKA BOO RONDA User manual

KIKKA BOO Jazzy User manual

KIKKA BOO

KIKKA BOO Jazzy User manual

KIKKA BOO 4 SAFE User manual

KIKKA BOO

KIKKA BOO 4 SAFE User manual

KIKKA BOO 4FIX User manual

KIKKA BOO

KIKKA BOO 4FIX User manual

KIKKA BOO SPORT User manual

KIKKA BOO

KIKKA BOO SPORT User manual

KIKKA BOO LITTLE TRAVELER User manual

KIKKA BOO

KIKKA BOO LITTLE TRAVELER User manual

KIKKA BOO AMICA car seat User manual

KIKKA BOO

KIKKA BOO AMICA car seat User manual

KIKKA BOO I-PRIME User manual

KIKKA BOO

KIKKA BOO I-PRIME User manual

KIKKA BOO VIAGGIO User manual

KIKKA BOO

KIKKA BOO VIAGGIO User manual

KIKKA BOO HOOD User manual

KIKKA BOO

KIKKA BOO HOOD User manual

KIKKA BOO ARMADILLO User manual

KIKKA BOO

KIKKA BOO ARMADILLO User manual

KIKKA BOO CRUZ User manual

KIKKA BOO

KIKKA BOO CRUZ User manual

KIKKA BOO ZIMPLA User manual

KIKKA BOO

KIKKA BOO ZIMPLA User manual

KIKKA BOO TWISTER Simple manual

KIKKA BOO

KIKKA BOO TWISTER Simple manual

KIKKA BOO 4 SAFE+ ISOFIX User manual

KIKKA BOO

KIKKA BOO 4 SAFE+ ISOFIX User manual

KIKKA BOO Groove User manual

KIKKA BOO

KIKKA BOO Groove User manual

KIKKA BOO ALVI/ VIVO User manual

KIKKA BOO

KIKKA BOO ALVI/ VIVO User manual

KIKKA BOO FELIX User manual

KIKKA BOO

KIKKA BOO FELIX User manual

KIKKA BOO GROOVY User manual

KIKKA BOO

KIKKA BOO GROOVY User manual

Popular Car Seat manuals by other brands

Heyner MultiFix TWIST instruction manual

Heyner

Heyner MultiFix TWIST instruction manual

Lorelli HARMONY Manual instruction

Lorelli

Lorelli HARMONY Manual instruction

Plebani 113 quick start guide

Plebani

Plebani 113 quick start guide

Link LK-EXP07PR installation manual

Link

Link LK-EXP07PR installation manual

Avionaut GLIDER user guide

Avionaut

Avionaut GLIDER user guide

CASUALPLAY VOLTA FIX instructions

CASUALPLAY

CASUALPLAY VOLTA FIX instructions

Special Tomato Soft-Touch 77 series manual 

Special Tomato

Special Tomato Soft-Touch 77 series manual 

RECARO Style operating instructions

RECARO

RECARO Style operating instructions

Koopers Toby instruction manual

Koopers

Koopers Toby instruction manual

asalvo VIRA-FIX instruction manual

asalvo

asalvo VIRA-FIX instruction manual

Cybex Silver ATON B i-SIZE user guide

Cybex Silver

Cybex Silver ATON B i-SIZE user guide

APRAMO EROS manual

APRAMO

APRAMO EROS manual

VERTBAUDET Triocity+ instruction manual

VERTBAUDET

VERTBAUDET Triocity+ instruction manual

Britax MAXI GUARDSICT8300 A 2013 series Instructions for installation & use

Britax

Britax MAXI GUARDSICT8300 A 2013 series Instructions for installation & use

Britax-Romer KIDFIX OEM User instructions

Britax-Romer

Britax-Romer KIDFIX OEM User instructions

Graco SnugRide Click Connect 40 owner's manual

Graco

Graco SnugRide Click Connect 40 owner's manual

CYBEX SIRONA Z i-SIZE user guide

CYBEX

CYBEX SIRONA Z i-SIZE user guide

Britax safe-n-sound maxi lite Instructions for installation & use

Britax

Britax safe-n-sound maxi lite Instructions for installation & use

manuals.online logo
manuals.online logoBrands
  • About & Mission
  • Contact us
  • Privacy Policy
  • Terms and Conditions

Copyright 2025 Manuals.Online. All Rights Reserved.