Odys S10L User manual

ODYS MP3-Player S10L
1
EN
Table of contents
1Contents of package ...............................................................2
2Introduction .............................................................................3
3Getting started.........................................................................4
3.1 Controls ........................................................................................ 4
3.2 Inserting the battery...................................................................... 5
3.3 LCD and symbols ......................................................................... 5
3.4 Battery status................................................................................ 6
3.5 Installing the driver........................................................................ 6
3.6 Installing the driver using Win 98.................................................. 7
3.7 Transferring files MP3 player - PC................................................ 8
3.8 Disable the MP3 Player from the PC .......................................... 10
4Operation ..............................................................................11
4.1 Switching the MP3 player on and off .......................................... 11
4.2 Music mode (Play Music)............................................................ 12
4.3 Mode Switch in the Main Menu................................................... 13
4.4 Folder function – playback and delete ........................................ 14
4.5 Voice recording mode (Record).................................................. 16
4.6 Voice playback mode (Voice) ..................................................... 17
4.7 System settings (Setting)............................................................ 18
4.8 Firmware Update ........................................................................ 21
5Troubleshooting ....................................................................22
6Specifications........................................................................23
7Safety instructions................................................................. 24
Warranty conditions ..............................................................30

ODYS MP3-Player S10L
2
EN
1 Contents of package
Please ensure that the following items are included in the box. If the
package is not complete, please contact your dealer:
ODYS MP3 player S10L
USB cable
Headphones
AAA battery
CD-ROM (driver and
application software)
User manual

ODYS MP3-Player S10L
3
EN
2 Introduction
Thank you for choosing our product. Please read this manual carefully
before use to make best use of all functions of the product and to
guarantee that it has a long service life. Please store the manual in a
safe place for later reference.
This product is a portable digital audio player which allows you to play
your MP3 and WMA tracks (multi-codec player) and make voice
recordings or save files of any kind. The modern, self-illuminating LCD
(Organic Light Emitting Display) displays information on the current
digital music file via the ID3 tag.
Caution
Please read the general safety instructions in chapter 7
before using the MP3 player. Pay particular attention to the
instructions on safely concluding the digital transfer between
the MP3 player and computer in chap. 3.8.
Support
URL: http://www.odys.de
See our website for the latest information on this MP3 player, on other
products by our company and on our company itself. Any firmware
updates for this MP3 player are also made available on our website. If
you have questions or problems, please read the FAQs on our website
ODYS MP3-Player S10L
4
EN
3 Getting started
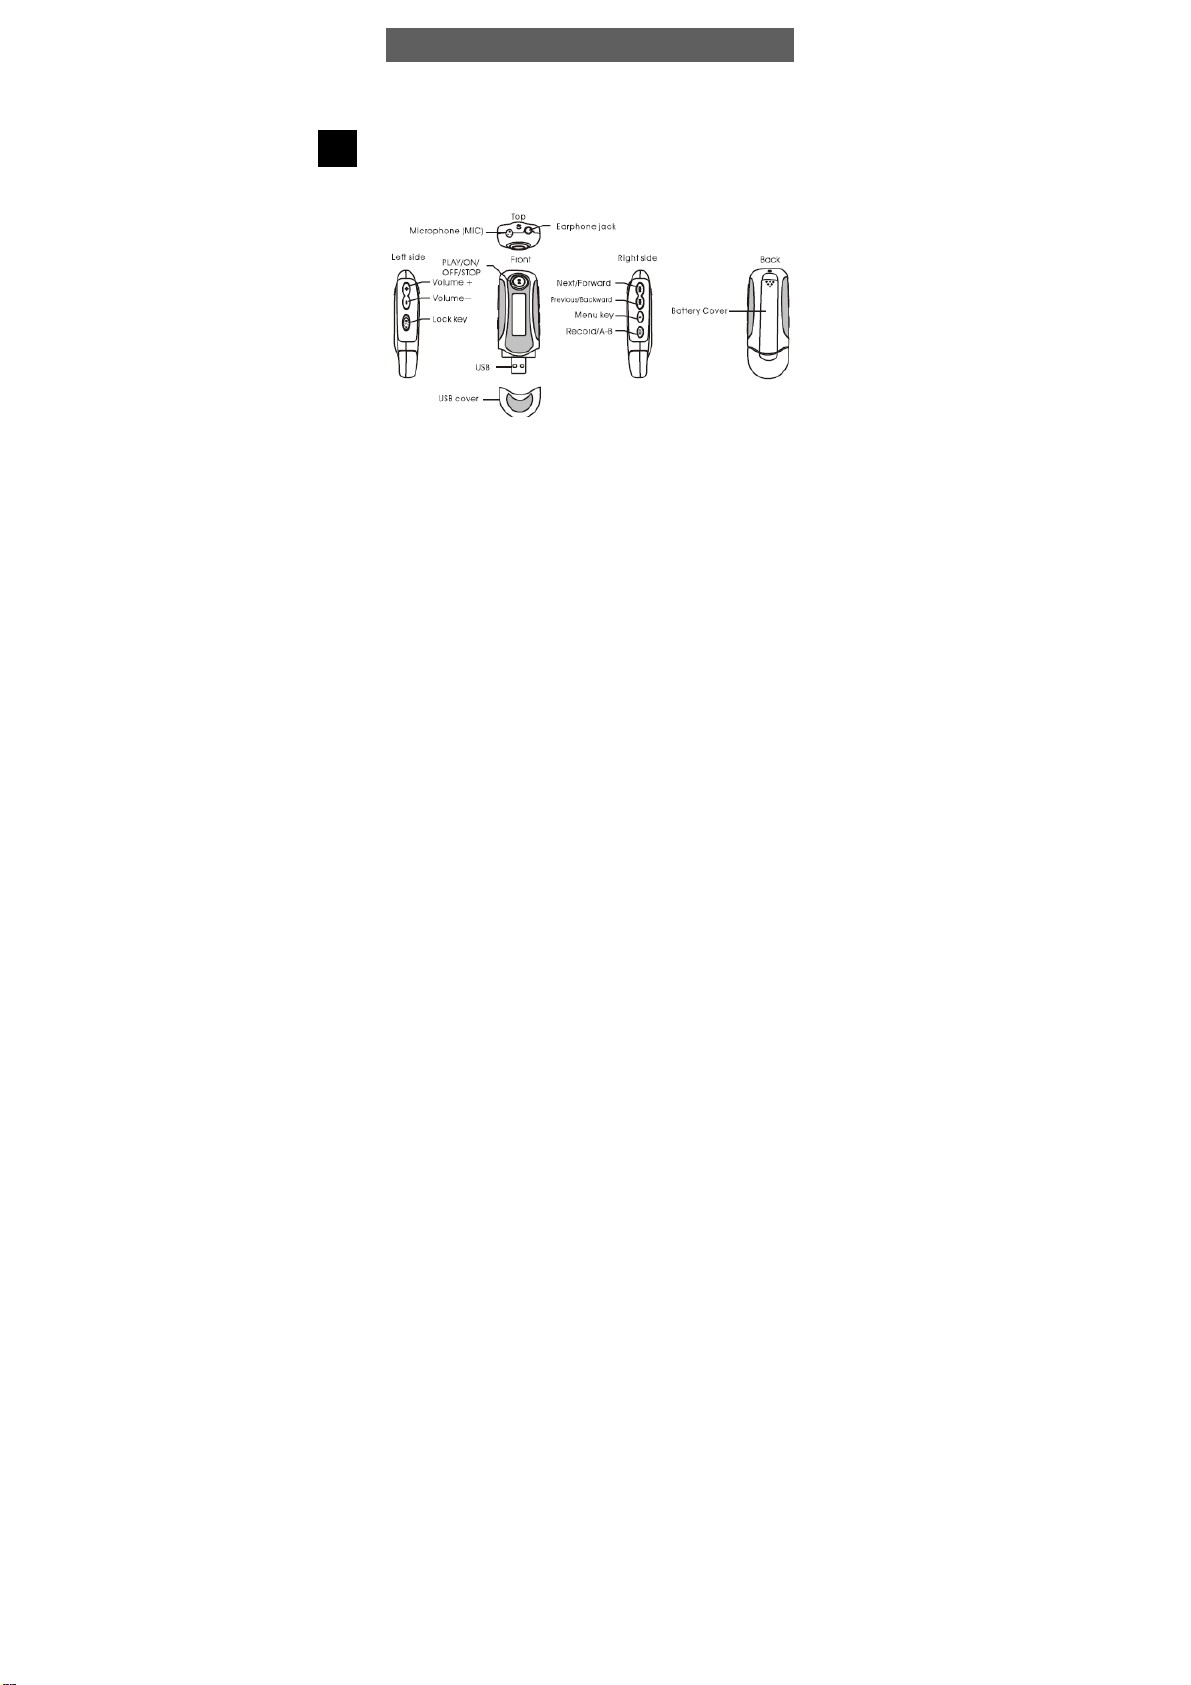
3.1 Controls
Familiarise yourself with the controls of your MP3 player before use.
ODYS MP3-Player S10L
5
EN
3.2 Inserting the battery
Use one AAA (micro) battery.
•Remove the USB cover and open the battery compartment.
•Insert the battery into the battery compartment and ensure that the
polarity is correct.
•Close the battery compartment replace the USB cover.
3.3 LCD and symbols
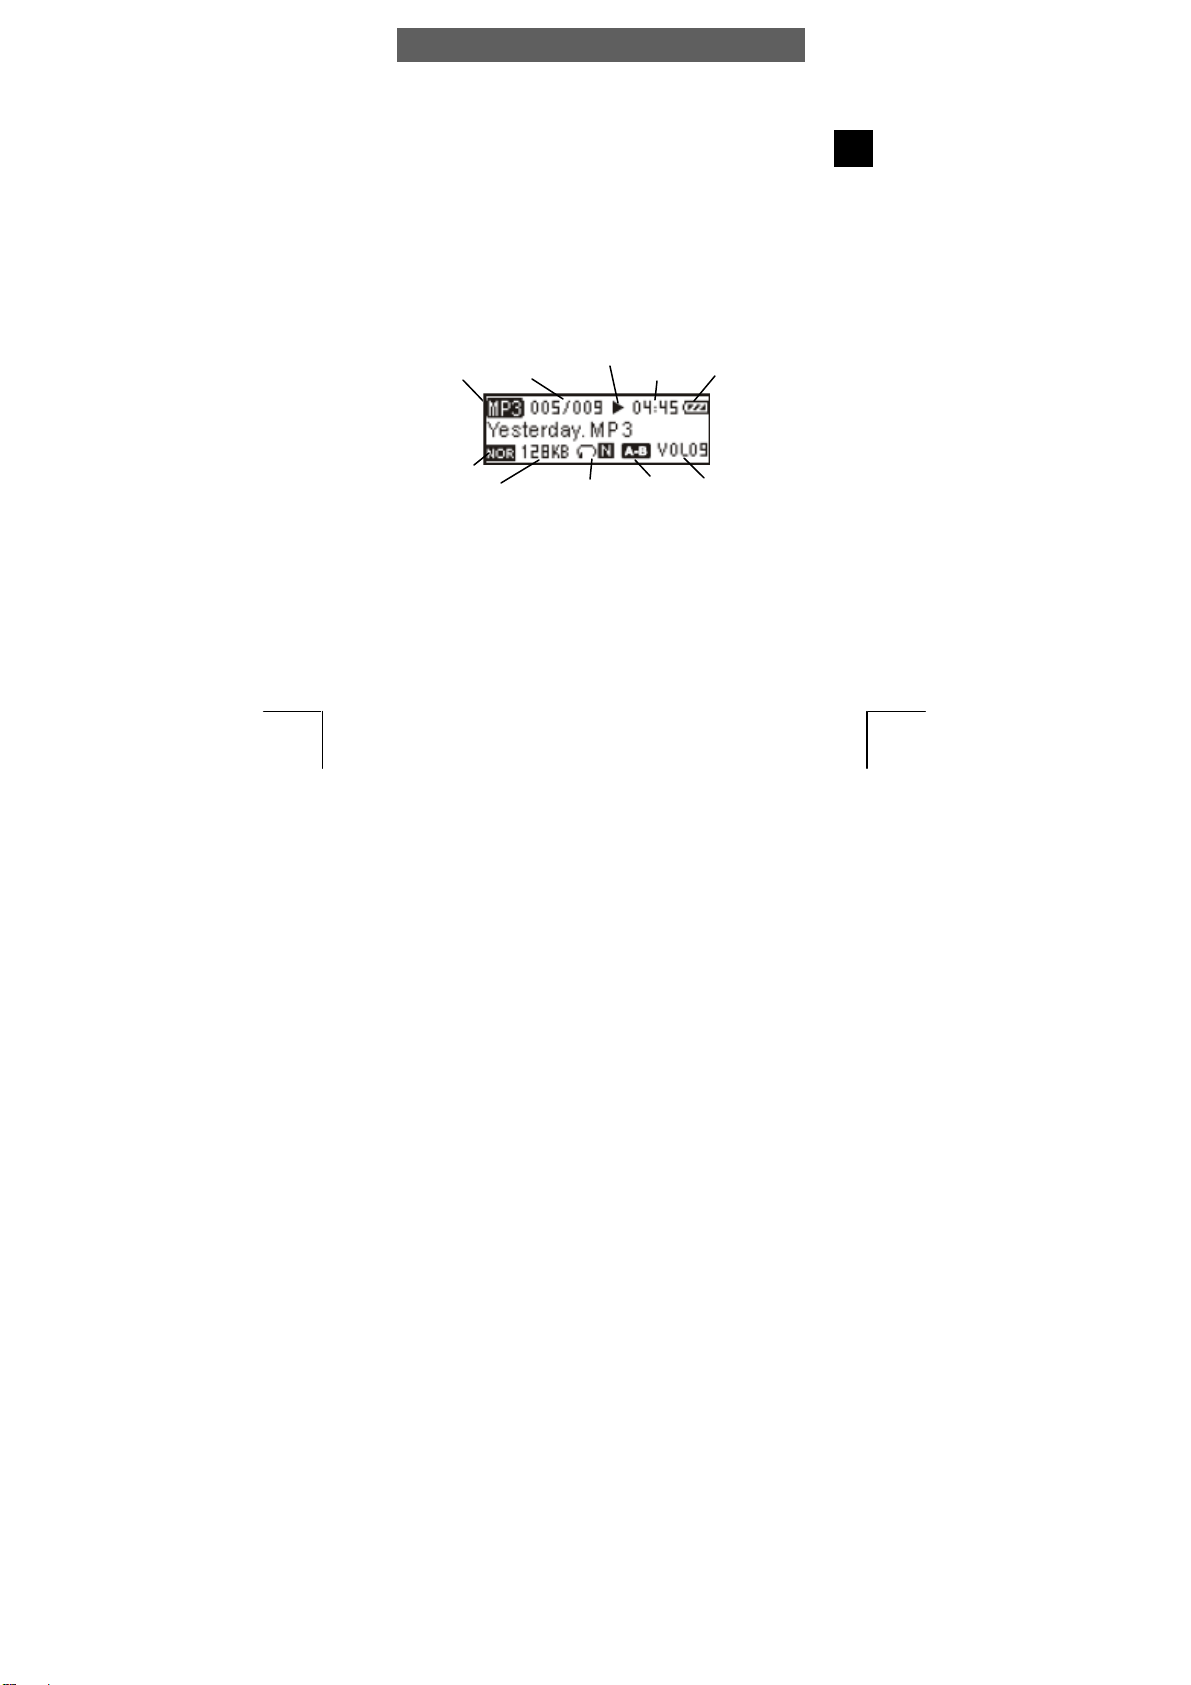
Overview of the LCD
The LCD shows a variety of information on the current track, the
running time and the system settings. The symbols are explained
below.
Volume
Repeat mode
A
/B
repeat
File
format
EQ
sound
Bit rate
Track number /
number of tracks
Playback
Battery
status
Playback
time
File name /
ID3 tag

ODYS MP3-Player S10L
6
EN
3.4 Battery status
The service life of the battery is approximately 8 hours. The service life
of the battery may vary depending on the battery manufacturer, the
age of the battery, and the conditions under which the MP3 player is
operated.
The charge state of the battery is indicated by various symbols to
enable you to estimate how long the player will operate:
full 66% 33% empty
Please replace the battery if an empty battery symbol is displayed.
Use rechargeable batteries with at least 800 mAh or alkaline batteries.
3.5 Installing the driver
When using Windows 98SE, you must first install the
correspondding driver found on the CD-ROM before
connecting the MP3 player to your computer. This is not
required when using Windows ME, 2000 and XP.
•Connect the MP3 player to your PC using the USB cable.
•The driver installation starts.
When using Windows ME, 2000
and XP, the PC recognizes a new
hardware device (mass storage
device / MSC mode) and automa-
tically installs the corresponding
driver.
•If an error occurs during installation, remove the USB cable, restart
the operating system and reconnect the USB cable to the PC.

ODYS MP3-Player S10L
7
EN
3.6 Installing the driver using Win 98
•Place the driver CD which is
included into your CD-ROM
drive and run "Setup.exe".
•Select your preferred setup
language, then click OK to run
the installation wizard.
•In the next window, click "Next" and select a different directory for
saving the file to, if required.
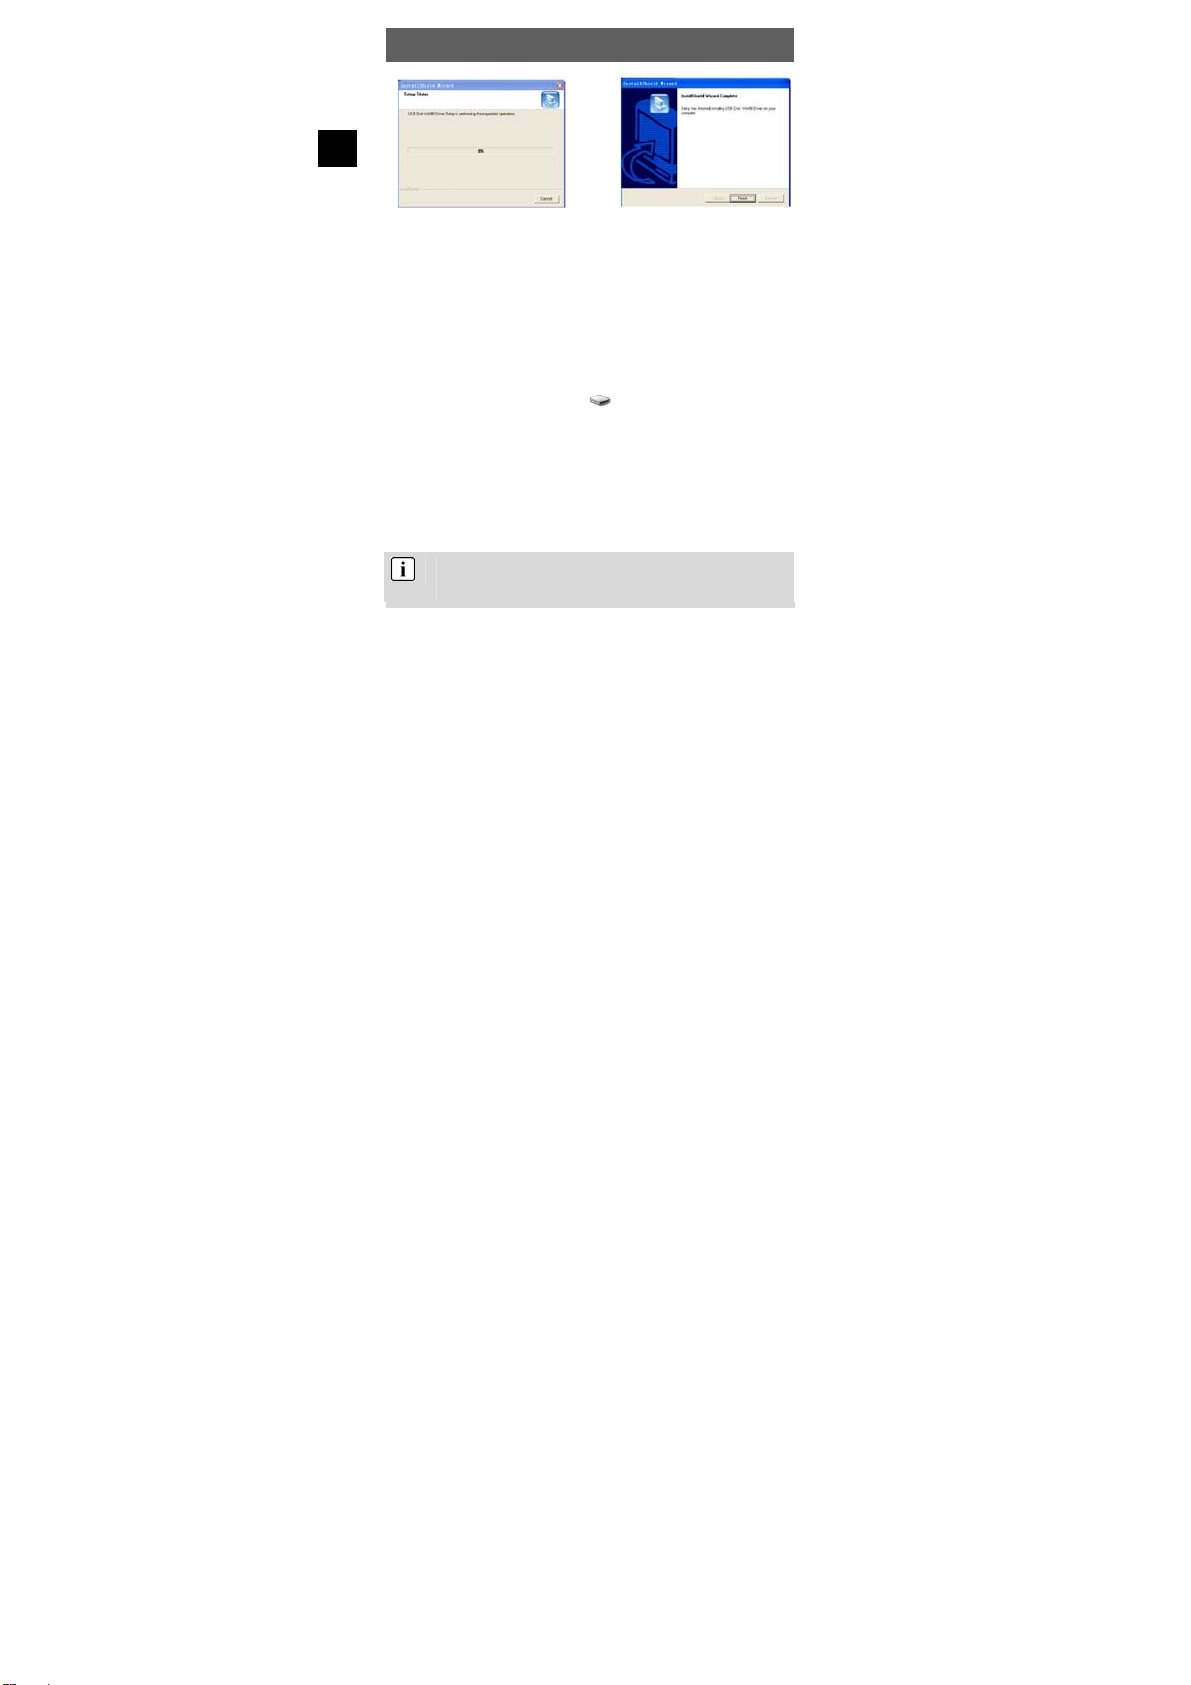
•Now click “Next”. Confirm the
suggested program folder and
begin the installation process by
clicking "Next" again.
ODYS MP3-Player S10L
8
EN
•End setup in the final window by clicking "Finish".
•Restart your computer's operating system.
3.7 Transferring files MP3 player - PC
•Connect the MP3 player to your PC using the supplied USB cable.
•Open the Windows Explorer or double-click My Computer.
•Select folders or files to be transferred and drag them to the
removable data storage symbol of the MP3 player (download
to root directory). It is possible to create different folders for the
classification of your file types in the player memory beforehand and
then to save the relevant files to them.
•Once the transmission is complete, click the MP3 player symbol and
check whether the files were completely copied.
•Following the same procedure, you can also copy files from the MP3
player to the PC (upload).
You can use your MP3 player to transport all types of files
(MSC mode / USB stick, switching between Online modes
see chap. 4.14).

ODYS MP3-Player S10L
9
EN
Never disconnect the USB cable from your MP3 player
during a data transfer or formatting.
PLease note that the device's main directory can only control a
maximun of 150 entries (Folders and Files). If you wish to save
more titels then you will have to create sub-folders. In these sub-
folders you can save as many files as you deem necessary.
The device creates automatically a folder using the file
format "DIR". Voice recordings which were created by the
device using the file format WAV can be found in this folder.
Please do not use this folder to save MP3 or WMA files.
Formatting the Flash Memory
Using the PC operating system:
Open Windows Explorer and right click on the player’s removable data
storage symbol. Then click on the Format option in the context menu.
Please note that only WAV files using IMADPCM coding can
be used when in the voice playback mode. Please use the
Music Playback mode to playback MP2 and WMA files.

ODYS MP3-Player S10L
10
EN
3.8 Disable the MP3 Player from the PC
•Disable the digital MP3 player from the operating system correctly
using the “Remove Hardware Safely” option .
•Click the task bar on the right-hand side below the symbol and
select the “Remove USB Mass Storage Device – Drive (X:)” in the
following dialog window.
•Then the message now appears that the hardware can be removed.
When using Windows 98SE, does not appear in the task
bar. Once the data has been completely transferred, simply
remove the USB cable.
Table of contents
Other Odys MP3 Player manuals


