manuals.online logo
Brands
  1. Home
  2. •
  3. Brands
  4. •
  5. Otto Bock
  6. •
  7. Medical Equipment
  8. •
  9. Otto Bock PAULA User manual

Otto Bock PAULA User manual

PAULA and MyoBoy® Guide
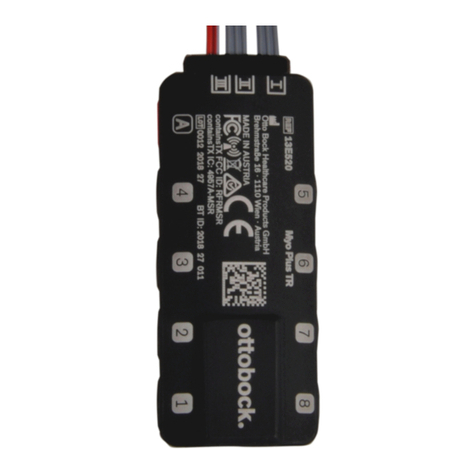
The testing system you will use to conduct a myoelectric evaluation consists of two parts: a software
program called PAULA (Prosthetist’s Assistant for Upper Limb Architecture) and hardware referred to as
MyoBoy®. Use the following steps to assemble the computer components, connect the PC to MyoBoy,
and launch PAULA
Myo Equipment Crate Contents
(3) MyoBoys
(3) Laptops
(3) Computer power cords
(3) Computer mouse
Step 1: Assemble Computers and MyoBoys
Each computer; power cord and MyoBoy is labeled with a number; Please only
combine equipment with the same numbers
1) Unpack contents of the equipment crate listed above
2) Plug power cord into each computer (Figure 1). Plug power cord into outlet
3) Plug computer mouse into a USB port
4) Turn on the Computer (Figure 2)
Figure 1
Figure 2
Step 2: Connect the laptop to the MyoBoy Hardware
1) Connect the USB cable to the MyoBoy and plug USB end into the laptop
2) Connect the Grounding Cable to the MyoBoy
3) Connect the Electrode Adapter to the MyoBoy and carefully tighten the finger screws
4) Connect the electrodes into port I and II on the Electrode Adapter
Grounding Cable
Electrode
Adapter
USB Cable
MyoBoy
Short
Instruction
Guide
2 electrodes
Carrying Case
Screw
Driver
Figure 3: MyoBoy components
Port I
Port II
Figure 4: Electrode Adapter
Figure 5: Complete Set up
Step 3: Launch the PAULA Software
1) Turn on the laptop (no password required)
2) Click on the “Ottobock Data Station 6” icon on the desktop (wait for the software to load)
3) Click “New Patient” and enter the information marked with a red asterisk
4) Click “New Job”
5) Click on Upper Limb, then “Transradial” , then PAULA
6) In the box: Un-check “Socket Design”
7) Check the “Myo Training Only” box
8) Click “OK”
9) The “Myo Test” screen will open automatically
12) Click the “Start” button and electrode signals will now be visible on the MyoTest screen.
You may begin your evaluation. Remember: Blue=Flexors and Red=Extensors
If you would like to jump ahead to only playing the game and using the simulation tab, you may
skip to the MyoSimulation tab now. However, you would like to use the Virtual Simulation of
the componentry, you must fill out the Specification and Component Selection tabs:
11) When the MyoBoy is
turned on and correctly
connected to the laptop,
the symbol in the lower
right corner of the myotest
screen will turn blue;
indicating the system is
operational. A flashing red
symbol indicates the
connection has not been
made; recheck the system
and all connections
10) Turn on the
MyoBoy by pressing
the “On” button on
the front. The light
bars on the left will
briefly illuminate, and
a solid red light will
illuminate above the
on button. A flashing
red light indicates the
9 volt battery needs
replacement
13) Click on the “Specification” Tab. Then, fill-out the patient information using the
numbers and other information as shown below:
14) Now that you’ve set up a mock patient; click on the “Component Selection” Tab.
Click on the two electrodes, Click on the 10S4=9E169 wrist, and Click on
the SensorHand Speed and choose program 1 from the drop down arrow (if necessary)
(If the patient has a wrist rotator, click on 10S17+13E205 box)
-click “Yes” for co-contraction ability
-choose either “man” or “woman”
-choose “left” or “right”
-click on “Socket” and make any choice in he
orange box
15) Click on the “MyoSimulation” Tab. Then click the “Game” Tab.
To start the game, click on the Start button. Practice improving your strength,
separation, endurance and coordination with the fish, car, or balloon. Practice with one and two
signals. (Be certain the MyoBoy is turned on. It will turn off automatically after 2 mins of no signals)
16) Next click on the “Video Simulation” Tab. Practice with the Virtual Hand.
Note the proportional control of opening and closing with the SensorHand Speed Program 1

This manual suits for next models

1

Other Otto Bock Medical Equipment manuals

Otto Bock 6A20-10 User manual

Otto Bock

Otto Bock 6A20-10 User manual

Otto Bock 50K90 Agilium Softfit User manual

Otto Bock

Otto Bock 50K90 Agilium Softfit User manual

Otto Bock 7E10 Helix 3D User manual

Otto Bock

Otto Bock 7E10 Helix 3D User manual

Otto Bock 7000P User manual

Otto Bock

Otto Bock 7000P User manual

Otto Bock AxonArm Hybrid 12K500 User manual

Otto Bock

Otto Bock AxonArm Hybrid 12K500 User manual

Otto Bock 17KO1 Series User manual

Otto Bock

Otto Bock 17KO1 Series User manual

Otto Bock 2C1 User manual

Otto Bock

Otto Bock 2C1 User manual

Otto Bock 1C66 Triton User manual

Otto Bock

Otto Bock 1C66 Triton User manual

Otto Bock 10A3 User manual

Otto Bock

Otto Bock 10A3 User manual

Otto Bock Kenevo 3C60 User manual

Otto Bock

Otto Bock Kenevo 3C60 User manual

Otto Bock 50A3 Epi Forsa Plus User manual

Otto Bock

Otto Bock 50A3 Epi Forsa Plus User manual

Otto Bock Genium X3 3B5-2 User manual

Otto Bock

Otto Bock Genium X3 3B5-2 User manual

Otto Bock 1E56 Axtion User manual

Otto Bock

Otto Bock 1E56 Axtion User manual

Otto Bock 3R60 User manual

Otto Bock

Otto Bock 3R60 User manual

Otto Bock 12R6 Series User manual

Otto Bock

Otto Bock 12R6 Series User manual

Otto Bock E-MAG Active 17B203 User manual

Otto Bock

Otto Bock E-MAG Active 17B203 User manual

Otto Bock C-Leg 4 User manual

Otto Bock

Otto Bock C-Leg 4 User manual

Otto Bock 4R72-32 User manual

Otto Bock

Otto Bock 4R72-32 User manual

Otto Bock Genium X3 Series User manual

Otto Bock

Otto Bock Genium X3 Series User manual

Otto Bock 4R57 ST User manual

Otto Bock

Otto Bock 4R57 ST User manual

Otto Bock 1D10 User manual

Otto Bock

Otto Bock 1D10 User manual

Otto Bock 743L500 3D L.A.S.A.R. Posture User manual

Otto Bock

Otto Bock 743L500 3D L.A.S.A.R. Posture User manual

Otto Bock 452A1 Series User manual

Otto Bock

Otto Bock 452A1 Series User manual
Otto Bock 21A35-1 User manual

Otto Bock

Otto Bock 21A35-1 User manual

Popular Medical Equipment manuals by other brands

Itamar Medical WatchPAT Operation manual

Itamar Medical

Itamar Medical WatchPAT Operation manual

PROTEOR 1P650 KNEE Assembling and adjustment instructions

PROTEOR

PROTEOR 1P650 KNEE Assembling and adjustment instructions

Liberate Medical VentFree user manual

Liberate Medical

Liberate Medical VentFree user manual

Dicarre DA20 user guide

Dicarre

Dicarre DA20 user guide

Stryker Medical M Series Operation manual

Stryker Medical

Stryker Medical M Series Operation manual

Invacare ScanBed 750 user manual

Invacare

Invacare ScanBed 750 user manual

Getinge Arjohuntleigh Nimbus 3 Professional Instructions for use

Getinge

Getinge Arjohuntleigh Nimbus 3 Professional Instructions for use

Mettler Electronics Sonicator 730 Maintenance manual

Mettler Electronics

Mettler Electronics Sonicator 730 Maintenance manual

Pressalit Care R1100 Mounting instruction

Pressalit Care

Pressalit Care R1100 Mounting instruction

Denas MS DENAS-T operating manual

Denas MS

Denas MS DENAS-T operating manual

bort medical ActiveColor quick guide

bort medical

bort medical ActiveColor quick guide

AccuVein AV400 user manual

AccuVein

AccuVein AV400 user manual
agiliti NP Trio user manual

agiliti

agiliti NP Trio user manual

Rocket Medical Rocket Digital Oocyte Aspiration Pump Service manual

Rocket Medical

Rocket Medical Rocket Digital Oocyte Aspiration Pump Service manual

Monteris Medical Neuroblate Instructions for use

Monteris Medical

Monteris Medical Neuroblate Instructions for use

Otto Block 8E33 7 manual

Otto Block

Otto Block 8E33 7 manual

ADVANCED HOME CARE Helios Guide

ADVANCED HOME CARE

ADVANCED HOME CARE Helios Guide

NeuLog NUL-208 Guide

NeuLog

NeuLog NUL-208 Guide

manuals.online logo
manuals.online logoBrands
  • About & Mission
  • Contact us
  • Privacy Policy
  • Terms and Conditions

Copyright 2025 Manuals.Online. All Rights Reserved.