manuals.online logo
Brands
  1. Home
  2. •
  3. Brands
  4. •
  5. Rapid
  6. •
  7. Glue Gun
  8. •
  9. Rapid LITHION BGX300 User manual

Rapid LITHION BGX300 User manual

LITHION BGX300
13/11/2012
2



2
1
3
4
5
6
7
8
8
8
7
6
9
10
11
12
Safety instructions:
Warning! Read carefully before using
the glue gun –hot melt applicator.
Failure to follow the warnings and
instructions listed below may result in
electric shock, fire and/or serious injury.
Save all warnings and instructions for
future reference.
Work area safety:
Keep work area clean and well lit. Cluttered or
dark areas invite accidents.
Do not operate tool in explosive atmospheres,
such as in the presence of flammable liquids,
gases or dust.
When applying at a height, take all the necessary
precautions to ensure that the glue does not run
onto the operator or onto any object.
When you have finished using the tool, wait until
it has cooled before to store it.
Electrical safety:
Do not use or store the tool in damp or
wet conditions. Do not expose it to
water or other fluid substances in any
way.
Never pull the cord to unplug the charger.
The appliance must be disconnected from the
supply means when removing the battery.
Do not use the tool if any part is damaged or
defective.
Personal safety:
Both the glue and the nozzle of the tool can reach
temperatures up to 200°C (400°F).
Avoid all skin contact. If burnt, plunge the burn
under cold water. Never attempt to remove
solidified glue from burnt skin without medical
assistance.
This appliance is not intended for use by persons
(Including children) with reduced physical,
sensory or mental capabilities, or lack of
experience and knowledge, unless they have been
given supervision or instruction concerning use of
the appliance by a person responsible for their
safety. Children should be supervised to ensure
that they do not play with the appliance.
Batteries safety:
Never attempt to open for any reason.
Do not expose the battery to water and any other
liquids.
Do not expose the battery to heat.
The battery is to be disposed of safely.
Do not store in locations where the temperature
may exceed 40°C.
Charge only at ambient temperature between 10°C
and 40°C.
Charge only using the charger provided with the
tool.
Charger safety:
The charger is double insulated;
therefore no earth wire is required.
Always check that the mains voltage
corresponds to the voltage on the rating
plate.
The charger is intended for indoor
use only.
Use your charger only to charge the battery in the
tool with which it was supplied. Other batteries
could burst, causing personal injury and damage.
Do not expose the charger to water.
Do not open the charger.
Replace the charger if the wire is damaged.
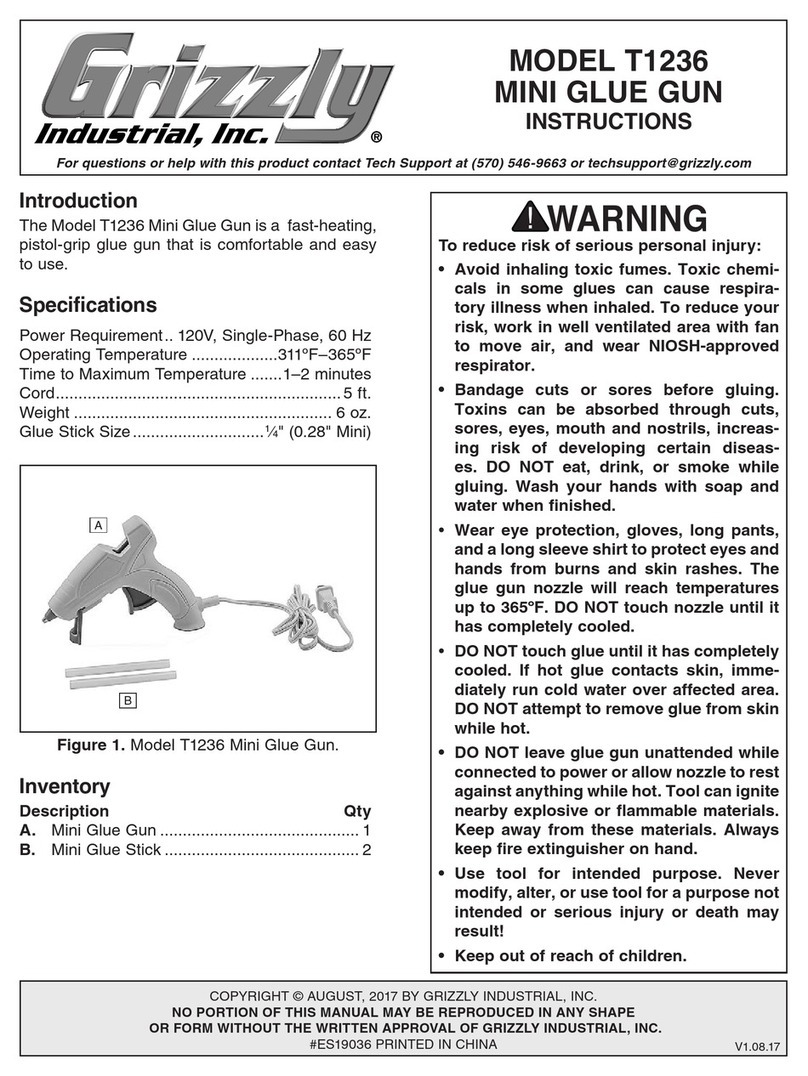
Technical features:
Specifications:
1 –Tool support
2 –Nozzle
3 –On/off switch
4 –Tool LED light
5 –Trigger
6 –Socket
7 –Battery unlocking button.
8 –Battery
9 –Plug
10 –Charger
11 –Charger LED
Tool:
Power rating: 30 W
Battery life: 1 hour
Battery:
Voltage: 7,4 V
Capacity: 2600 mAh
Time of charging: < 4 hours
Charger:
Input: 100-240V 50-60Hz
Output: 8,4 V cc
Intensity: 1000 mA
Glue: Rapid Ø12 mm

GB
13
Operating instructions of tool:
Removal and connection of the battery (8): To
remove the battery (8), press the unlocking
buttons (7) and slide the battery out of the
machine. To connect the battery; slide it in the
other direction until the connection clicks.
Stand the tool upright on his support (1) and the
battery (8). Never put the tool flat on a table.
Start-up: switch the "on/off switch" (3) on "I"
(on). The green LED (4) light come on.
Leave the tool warming up several minutes.
Feed glue sticks in to the rear of the tool.
Place the nozzle of the tool against the surface and
press gently on the trigger to extrude glue. Place
the second element in contact with the glue, if
need be adjust it and press parts together for an
average of 10 seconds.
Use only glue sticks recommended.
Never pull/remove a glue stick from the tool once

is has been fed into the tool. The resultant molten
glue could create irreparable damage to the tool.
Once finished, put the switch (3) on "0" (off).
When the battery is decharged, the green LED
light (4) will go out.
Operating instructions of charger:
Do not use the tool whilst.
Ensure the tool is switched in the "off" position
"0", or remove the battery out off the tool.
Connect the charging point (9) of the charger into
the socket (6) off the battery.
Connect the charger (10) to the mains. the LED
(11) on the charger will turn red during the charge.
When the battery is full charged, the LED (11) off
the charger turn green.
Disconnect the plug (9) out off the socket (6) and
unplug the charger (10) from the mains.
During the process of charging, the charger can
become warm: this is normal.
Protecting the environment:
Separate Collection. Do not dispose of
power tools into household waste!
According to the European Directive
2002/96CE on waste electrical and
electronic equipment
Should you find one day that your tool needs
replacement, or if it is of no further use to you, do
not dispose of it with household waste. Bring it to
a separate collection centre for recycling.
Battery: the batteries are recyclables.
The battery can be recharged many times. At the
end of their useful life, run the battery down
completely, then remove it from the tool, and take
it to a local recycling station.

Other manuals for LITHION BGX300

2

Other Rapid Glue Gun manuals

Rapid EG130 User manual

Rapid

Rapid EG130 User manual

Rapid EG360 User manual

Rapid

Rapid EG360 User manual

Rapid EG330 User manual

Rapid

Rapid EG330 User manual

Rapid EG380 User manual

Rapid

Rapid EG380 User manual

Rapid EG Point User manual

Rapid

Rapid EG Point User manual

Rapid EG313 User manual

Rapid

Rapid EG313 User manual

Rapid BGX7 User manual

Rapid

Rapid BGX7 User manual

Rapid HOBBY User manual

Rapid

Rapid HOBBY User manual

Rapid LCD 19 User manual

Rapid

Rapid LCD 19 User manual

Rapid EG130 User manual

Rapid

Rapid EG130 User manual

Rapid LITHION BGX300 User manual

Rapid

Rapid LITHION BGX300 User manual

Rapid EG310 Operating instructions

Rapid

Rapid EG310 Operating instructions

Rapid BGC500 User manual

Rapid

Rapid BGC500 User manual

Rapid EG111 Operating instructions

Rapid

Rapid EG111 Operating instructions

Rapid EG320 User manual

Rapid

Rapid EG320 User manual

Rapid G1000 User manual

Rapid

Rapid G1000 User manual

Rapid LITHION BGX300 User manual

Rapid

Rapid LITHION BGX300 User manual

Rapid BGX7 User manual

Rapid

Rapid BGX7 User manual

Rapid EG Point User manual

Rapid

Rapid EG Point User manual

Rapid BGX7 User manual

Rapid

Rapid BGX7 User manual

Rapid BGX500 User manual

Rapid

Rapid BGX500 User manual

Popular Glue Gun manuals by other brands

Ozito GGM-010 instruction manual

Ozito

Ozito GGM-010 instruction manual

STEINEL Gluematic 3002 operating instructions

STEINEL

STEINEL Gluematic 3002 operating instructions

Parkside PHP 500 A1 -  3 Operation and safety notes

Parkside

Parkside PHP 500 A1 - 3 Operation and safety notes

Metabo KE 3000 Original instructions

Metabo

Metabo KE 3000 Original instructions

Trotec PGGS 10-230V operating manual

Trotec

Trotec PGGS 10-230V operating manual

VITO PRO POWER VIBCPCQ20 instruction manual

VITO

VITO PRO POWER VIBCPCQ20 instruction manual

Sealey AK292 instructions

Sealey

Sealey AK292 instructions

SALKI 8500301ESK25W instruction manual

SALKI

SALKI 8500301ESK25W instruction manual

Westfalia KP40 Original instructions

Westfalia

Westfalia KP40 Original instructions

DeWalt DC547 instruction manual

DeWalt

DeWalt DC547 instruction manual

Facom 985940 instruction manual

Facom

Facom 985940 instruction manual

SURTECO Dollken Profiles HKP 220 Instruction handbook

SURTECO

SURTECO Dollken Profiles HKP 220 Instruction handbook

Loctite Hysol 175-SPRAY Operation manual

Loctite

Loctite Hysol 175-SPRAY Operation manual

VONROC GG501AC Original instructions

VONROC

VONROC GG501AC Original instructions

Parkside PHP 500 B2 Operation and safety notes

Parkside

Parkside PHP 500 B2 Operation and safety notes

STEINEL GluePRO 400 LCD Information

STEINEL

STEINEL GluePRO 400 LCD Information

Arrow GT30LI manual

Arrow

Arrow GT30LI manual

3M Scotch-Weld PG II LT owner's manual

3M

3M Scotch-Weld PG II LT owner's manual

manuals.online logo
manuals.online logoBrands
  • About & Mission
  • Contact us
  • Privacy Policy
  • Terms and Conditions

Copyright 2025 Manuals.Online. All Rights Reserved.