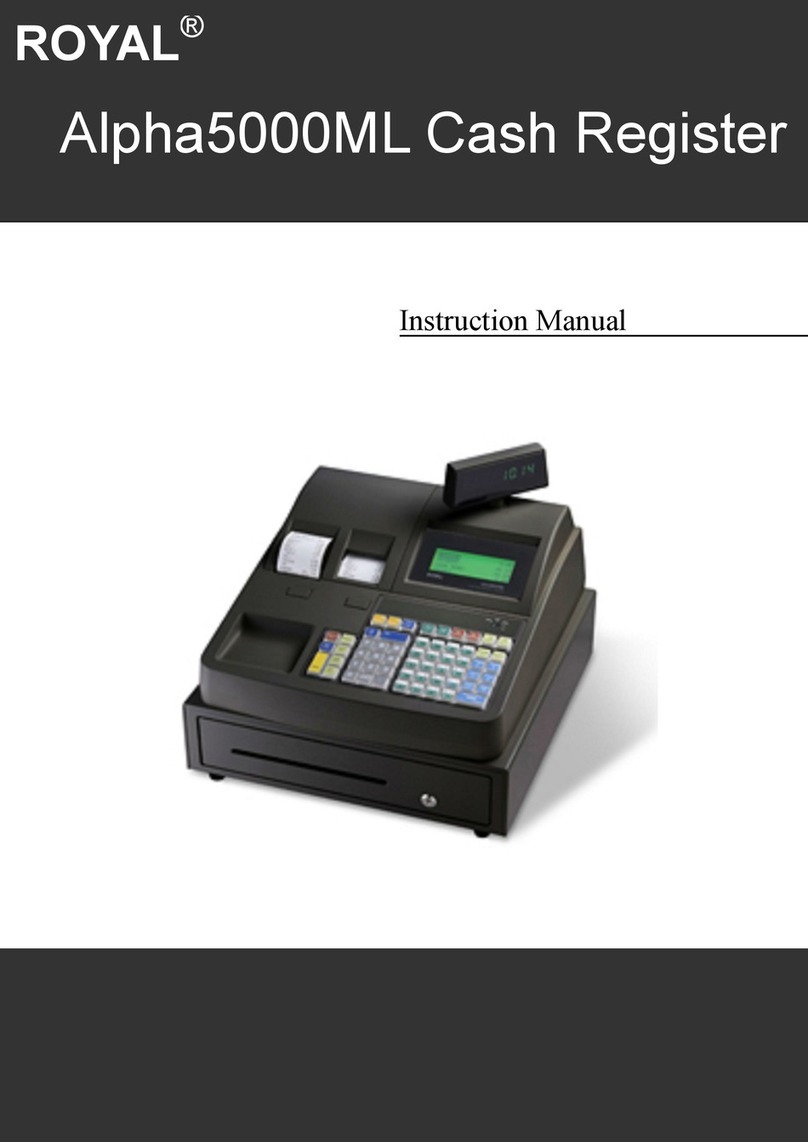
Royal 220DX User manual

220DX Operation Manual

Royal ECR 220DX Operation Manual
Introduction
Thank you for choosing the Royal-220DX electronic cash register.
Its functions are flexible and can preset a quality receipt for your clients, and
get detailed reports for your accounts. Works well in retail and hospitality.
We have included a PC software to help you get program ECR.
This operation manual comes in two sections:
1. How to program the register.
2. How to use the register.
User should read carefully to ensure optimum performance.
Note:
The register has max. 3 digits decimal; user can choose the decimal point
position in the system flag.
All examples in this operation manual use 2 digits decimal point.

Royal ECR 220DX Operation Manual
WARNING!
In order to ensure years of trouble-free operation, the following points
should be noted when handling the cash register.
1. Do not place the cash register where it will be subjected to direct
sunlight, high humidity, near water or other liquids, or high
temperature.
2. Make sure the voltage matches the power supplied in the area.
3. Do not insert or drop metal, flammable or other foreign objects into
the machine through the ventilation slits, as this may cause fire or
electric shock.
4. Never operate the cash register while your hands are wet.
5. When removing dirt stains, use only isopropyl alcohol. Never use
benzene, thinner, or any other volatile agent which may cause
damage to the plastic material.
6. Do not remove the cover, repair or modify the machine by yourself.
Please contact your dealer for help.
7. When the control key is in LOCK mode, the display is OFF and
keyboard is disabled however the ECR’s power is still ON. Make sure
the AC adapter cord is disconnected before opening the upper shell
or replacing any hardware equipment within the cash register to avoid
damages to the ECR.
The socket-outlet shall be installed near the equipment and shall
be easily accessible.
===Notes===================================================
1. The contents of this manual are subject to change without notice.
2. Our company cannot be held responsible if other products, which are not
approved by Our company, are used for options or expendable supplies

Royal ECR 220DX Operation Manual
I
CONTENTS
1 MAIN FEATURES ........................................................................................... 1
1.1 Hardware & Software Features ................................................................... 1
2 BEFORE USING .............................................................................................. 2
2.1 Model Selection ......................................................................................... 2
2.2 Key Layout ................................................................................................ 3
2.3 Keys Function ............................................................................................ 3
2.4 Display ....................................................................................................... 6
3 CLEAR MEMORY OPERATION................................................................... 7
3.1 Initial Clear ................................................................................................ 7
3.2 Clear the Reports Data................................................................................ 8
3.3 Clear the PLU stock ................................................................................... 9
4 MEMORY ALLOCATION .............................................................................10
5 WORKING TYPE CHOOSE .......................................................................... 11
5.1 Changing to Restaurant Mode ...................................................................11
5.2 Changing to Retail Mode .......................................................................... 12
6 THE SPECIAL INPUTTING ..........................................................................13
6.1 Regarding Decimal Point Inputting........................................................... 13
6.2 Descriptors Inputting ................................................................................ 13
7 PROGRAMMING ...........................................................................................16
7.1 Time and Date Preset ................................................................................ 16
7.2 Department Preset .................................................................................... 16
7.3 PLU Preset Parameter............................................................................... 19
7.4 System Option Preset ............................................................................... 21
7.5 TAX/VAT Rate Preset ............................................................................... 27
7.6 Welcome Message Preset ......................................................................... 29
7.7 Trailer Message Preset .............................................................................. 29
7.8 Clerk Programming .................................................................................. 29
7.9 Check/Charge Key Programming ............................................................. 30
7.10 - % Preset ................................................................................................. 30
7.11 Refund(-)Preset ................................................................................... 30
7.12 Printout the System Information Operation ............................................... 31
7.13 Miscellanous features in Prog Mode ......................................................... 31
8 RETAIL MODE ...............................................................................................32
8.1 Clerk Assign ............................................................................................. 32
8.2 Time Display ............................................................................................ 32
Royal ECR 220DX Operation Manual
II
8.3 Entering Starting Cash Amount (RA/PO).................................................. 33
8.4 Department Sale Entries ........................................................................... 33
8.5 PLU Operation ......................................................................................... 34
8.6 Finalizing a Transaction............................................................................ 37
8.7 Split price operation ................................................................................. 38
8.8 Return Merchandise (RM) Operation........................................................ 39
8.9 Refund Operation ..................................................................................... 40
8.10 Percentage (- %) OPERATION................................................................. 42
8.11 VOID Operation ....................................................................................... 43
8.12 Single Item Department or PLU Entry ...................................................... 45
8.13 Tax Operation ........................................................................................... 45
8.14 Reprint the Last Receipt ........................................................................... 48
8.15 No Sale Operations................................................................................... 48
8.16 Calculator Function .................................................................................. 49
8.17 Receipt ON/OFF ...................................................................................... 50
8.18 Post sale change calculation ..................................................................... 50
9 RESTAURANT MODE ...................................................................................51
9.1 Major Features ......................................................................................... 51
9.2 Table Preset .............................................................................................. 51
9.3 REG Mode Operation ............................................................................... 52
9.4 Active Table Report .................................................................................. 53
9.5 Table Report ............................................................................................. 53
10 TRAINING MODE ......................................................................................55
11 COMMUNICATIONS .................................................................................56
11.1 Serial Port Overview ................................................................................ 56
11.2 Communications with PC ......................................................................... 57
11.3 External Connecting Scanner .................................................................... 57
11.4 External Terminal Printer.......................................................................... 57
12 ELECTRONIC JOURNAL .........................................................................59
13 REPORTING AND BALANCING ..............................................................60
13.1 Taking Read and Reset Reports ................................................................ 60
13.2 Report Sample Format (VAT Version) ....................................................... 62
14 OTHER FUNCTIONS .................................................................................68
14.1 Power Failure ........................................................................................... 68
15 ERROR CODE CORRESPONDING LIST TABLE ..................................69

1
1 MAIN FEATURES
1.1 Hardware & Software Features
Standard Hardware
Customer display screen 8 digits large size numeric yellow/blue LED
Operator display screen 9 digits large size numeric yellow/blue LED
Printer 58mm wide 1 station thermal printer
Control lock 5- position control lock(P/R/X/Z/L)
Keyboard 36 keys with rubber
RS-232 Ports 1xDB-9 (male),1xRJ11
PS2 Port 1xPS2
Optional Hardware
External printer
Barcode scanner
Cash drawer
External PS/2 scanner
Software Features
No. of PLU(Max) Up to 500 Price Look Ups (PLUs)
No. of Dept(Max) Standard max. 16 departments
No. of Clerk(Max) Up to 10 clerks with name and password
No. of Table(Max) 40
Tax function 4 tax rates with Value–Added Tax (VAT)
4 tax rates with Add-on Tax
Payment TOTAL and check/charge tender functions
Electronic journal Electronic journal capability with 60000 lines
Logo 10 built-in logos & 1 user-defined
Line of welcome message 6
Line of trailer message 6
Training mode Supports training mode for new clerks
Other functions Void, Error Correct, Return Merchandise, Void all
transaction functions etc

2
2 BEFORE USING
2.1 Model Selection
There are 5 modes: Program mode, Registration mode, X report mode, Z report mode and
Lock mode.
Each mode has a specific function:
LOCK
The machine is locked without responding to the key input.
To exit this mode, just change the mode.
REGISTRATION (Reg)
Used to perform all sales transactions, paid out,
and received-on-account functions.
X
This type of report will not affect any sales data in the report memory. It can be
issued at any time.
Z
This type of report will clear all the resettable totals and counters in the report
memory after the report is issued. However, it should be issued only once at the
end of the day usually after closing the store.
PROGRAM (Prog)
All the programming is done in this mode.

3
2.2 Key Layout
The following is the standard keyboard layout, which was initially set at the factory.
dept
shift clerk
feed void
7 8 9
4/12 8/16 -% #/NS
RA Ref/-
4 5 6
3/11 7/15 tax
shift check
PO. PLU
1 2 3
2/10 6/14 sub
total charge
C qty/
time
0 00
1/9 5/13 amt tend
TOTAL
2.3 Keys Function
This chapter will introduce all the keys which the register provided; it includes the
keys that have already been installed on the standard keyboard layout and the
optional keys.
1) [0-9] keys
These keys are used to enter amounts, quantity, percentage, etc. The leading
zeros entered prior to a 1 to 9 are ignored.
2) [00] key
This key is used to enter “00” as numeric key.
If user opens the system flag: [00] is used as [.] key, The key is used for decimal
multiplication, when setting or entering fractional percentage discounts, or when
programming fractional tax rates. Do not use the decimal key when making
amount entries into DEPT or PLUs or tendering.
3) [feed](Paper Feed) key
Simply used for feeding paper. This key is operable in all except LOCK mode. If
user needs to feed paper continuously, depress this key and without release.
Standard Keyboard Layout

4
4) [#/NS](No Sale) key
The key is used to open the cash drawer without recording a sale or as a
reference number during a sale.
5) [C] (CLEAR) key
This key has two basic functions. One is to correct any numeric keys entry error
or incorrect command entry; another is to correct a machine error condition that
has caused the error tone to sound.
6) [qty/time] key
This key has two functions, straight multiplication and time displaying. When this
key is pressed in “Reg” mode and the machine is free, the time is displayed.
7) [- %] key
Use the key to register discount or surcharge.
Depending on programming, they can be added to an item or a subttl amount.
The rate can be preset or manually entered.
8) [ref/-]key
During the sale:
This key is used when an amount of money is subtracted from a sale. It is used
to give back to a customer for reason other than an item being returned from a
sale.
It can either work with a department(item)or off the total of the sale.
Out of the sale:
This key is used when an item sold by the store is returned for some reason and
the amount of the sale is given back to the customer.
9) [void] key
This key has two functions:
Press this key directly can cancel the registration of the last-registered item
which includes function key operation, such as %, (-), RM, etc.
This key can be used directly after the item has been entered incorrectly, or to
remove an item entered earlier in the sale.
Note: 00+ [VOID] can cancel the whole transaction.
10) [PLU](Price Look Up) key
PLU is the selling item coded with number. A PLU is usually associated with a
preset price. This key retrieves the preset price from the PLU table in the register
memory and records item. PLU price can also be opened, that is OPEN PLU.

5
11) [PO](Paid Out) key
This key is used when some amount of money is taken out from the register for
reason other than a sale transaction.
12) [RA](Received On Account) key
This key is used when some amount of money is received on account.
13) [RCPT/OFF](Receipt ON/OFF)key
When this key is pressed once, the register will stop issuing receipts. When this
key is pressed again, the register issues receipts. The mark “●” in the rightmost
digit on the display indicates the register is in the receipt off mode.
14) [check] key
Press to totalize a transaction paid by check.
15) [sub total](subttl) key
This key displays and prints the total of the sale including any tax calculation.
16) [amt tend/TOTAL](TOTAL) key
Press to totalize a transaction paid by cash. Also, if the cash amount tendered is
over the amount purchased, enter the amount of the tender, and then press the
TOTAL key. The drawer will open and the cash change will be computed.
17) [DEPTx] keys
The machine has 8 direct departments. Each department supports 2 layers that
can be extended via [dept shift] key to support 16 departments. Normally they are
used to manage all PLU.
18) [dept shift] key
This key is a conversion key. Press it in order to obtain the extended number of
department.
19) [tax shift] key
When this key is depressed before a department or PLU, the tax shift key
reverses the tax shift of the Department/PLU. i.e. a department with no tax status
could be preset with Tax1, Tax2, Tax3 or All.
20) [charge] key
Calculates the sale total including tax, finalizes the sale, and opens the cash
drawer.

6
2.4 Display
The Operator’s Display (front display) is located at the top of the register just above
the keyboard. The rear display is a 9 digits display that allows your operator to monitor the
transaction and view the sale total. The display has two types of display portions —
numeric display and message descriptors (status lamps).
Numeric Display:
DEPT /PLU (2 digits): Display the code that represents each DEPT key. It stays lit
when repeating the same department entry.
RPT (1 digit): Display the repeat count of the same count. The count is indicated from
the second entry on, and only the last digit will be displayed even if the
count exceeds nine.
AMOUNT: 8 digits for total display, and 7 digits for entries. When the subttl is
8-digits, the RPT digit is also used for amount display.
The Point Message:
DP 1: Illuminates when the dept shift key depressed one time.
TAX SF1 (TAX SHIFT 1): Indicates the TAX SHIFT 1 key is pressed.
TAX SF2 (TAX SHIFT 2): Indicates the TAX SHIFT 2 key is pressed.
TAX SF3 (TAX SHIFT 3): Indicates the TAX SHIFT 3 key is pressed.
TAX SF4 (TAX SHIFT4): Indicates the TAX SHIFT 4 key is pressed.
Decimal Position: The register has max.3 digits decimal.
RCPT OFF:Indicates that the register is in “Receipt Off” mode.
Decimal
Position
DP SF TAX
SF1
TAX
SF2 RCPT
OFF
TAX
SF3
TAX
SF4
Dept/PLU RPT Amount

7
3 CLEAR MEMORY OPERATION
3.1 Initial Clear
To Perform an All Clear:
The first way:
1. Switch the control lock to the Prog mode.
2. Enter the number “951” on the numeric keypad.
3. Press the [qty/time] key located on the default keyboard layout.
4. The message “InIt SUrE” will display momentarily.
5. Press the [subttl] key to confirm the initialization. (Other function keys to discard)
6. The message “InIt…” will be displayed.
7. When the initial clear is completed, it will print one receipt and the message
“0.00” will be displayed.
The second way:
1. Switch the control lock to Prog mode.
2. Turn the Power OFF.
3. Press and hold [1] [3] [7] [9] keys.
4. While continuing to hold the [1] [3] [7] [9] keys, turn the power ON.
5. The message “InIt SUrE” will display and then releasing these keys.
6. Press the [subttl]to confirm the initialization.(Other function keys to dircard)
7. The message “InIt…” will be displayed.
When the initial clear is completed, it will print one receipt and the message “0.00”
will be displayed.
The receipt format: (Retail Mode)
* * * * * * * ** * * ** * * ** * * ** * * ** *
Work mode RETAIL
Department Num 16
Clerk Num 10
PLU Num 500
All clear is completed!
* * * * * * * ** * * ** * * ** * * ** * * ** *
Note:
The operation will clear all data and make the register return to a factory default state.
Perform this operation only as necessary.

8
3.2 Clear the Reports Data
Operator can clear the reports data with the following shortcut mode, no need taking the
Z reports.
Procedure:
1. Switch the control lock to Z mode
2. (A) [TOTAL] (SUrE) …
a. press [subttl]to confirm
b. Press other key to discard
A: Represents the different operations order, as shown below table
A value Comments Note
26064550
Clear the whole reports data The NRGT is cleared too.
26064551
Clear the Daily and PTD sales report
26064552
Clear the Daily PLU report
26064553
Clear the Daily and PTD clerk report
26064554
Clear the hourly report
26064555
Clear the table report It is active in restaurant
mode only.
26064557
Clear the NRGT(Non-Resettable Grand Total)
①
Note: ①
It will print one receipt, which only including the NRGT has been cleared ※
without grand total amount.
※ The second way:
Operation:
Z mode (2003) [TOTAL] (SUrE)…
Press [subttl] key to confirm, it will print one receipt that including the NRGT
amount. Press other function keys will be discarded.
* * * * * * * ** * * ** * * ** * * ** * * ** *
NRGT 00000033822.75
The NRGT has been cleared!
* * * * * * * ** * * ** * * ** * * ** * * ** *
01-01-2011 Monday Time13:02

9
3.3 Clear the PLU stock
Condition:
The PLU stock function is active.
Switch the work mode to the Z mode
(1) Clear designated PLU’s stock
(0)[qty/time](PLU barcode)[PLU] by keyboard
(0)[qty/time]Scan PLU barcode by Scanner
(2) clear all PLU’s stock
(0)[qty/time][PLU]
Then the “SUrE” message will be displayed, to confirm, press [subttl] key, and otherwise
press other function key.

10
4 MEMORY ALLOCATION
Using this function, user can redefine the amount of department no. clerk no. table no.etc.
After this operation, the ECR will do the all clear operation automatically, so it is better to
print whole report before do it.
Procedure:
Switch the control lock to the Prog mode.
(501) [qty/time] (Redefine parameters)[subttl][check]
The parameters to redefine in Retail Mode and Restaurant Mode are as follows:
Retail Mode Restaurant Mode
Parameters Default Set Max. No. Parameters Default Set Max.No.
Department 16 16 ① Department 16 16 ①
Clerk 10 10 Clerk 10 10
PLU 500 *** ② Table 40 40
PLU 357 *** ②
Note:
① Department
There are 8 standard keys on the keyboard and can be extended via [dept
shift] key to support 16 departments.
② PLU ***
The total number of PLUs available values are allocated automatically, after
the previous items are decision. So it cannot enter manually.
Comments for steps:
1. Starting at the department’s field, enter the quantity of each memory variable. Press
[subttl] key, after each entry, and will move to the next variable.
2. If you press [TOTAL] key, at any parameter you will abort memory allocation
processes without making changes.
3. Continue filling each variable until complete. If you wish to implement the new
allocation you have entered, press [check] key.
4. The message “ALLOC SUrE” will be displayed.
5. Press [subttl]key to confirm.(Other function keys to discard)
6. The display will monitor the memory clear processes. When complete, it will print one
receipt, which shows the detail information.
Repeat to program next

11
5 WORKING TYPE CHOOSE
The machine has two working type, Retail Mode and Restaurant Mode.
After all clear, the Retail Mode is default.
Note:
After do the ECR work type change, the following will do automatically:
a. Clear all the report data, both daily and period to date
b. Initialize the department programming parameter to default
c. Initialize the PLU programming parameter to default
d. Initialize the table programming parameter to default
5.1 Changing to Restaurant Mode
The procedure for changing the register to Restaurant Mode:
Operation:
1. Switch the control lock to the Prog mode.
2. Enter “202” by numeric keypad, then press [qty/time] key.
3. The message “SUrE” will be displayed.
4. Press the [subttl] key to confirm. (Other function keys to discard)
5. Then user will do the memory allocation.
The following are the default quantity of the below items: (See "Memory
Allocation” for the detailed information)
a. Department Number
b. Clerk Number
c. Table Number
d. PLU Number (The total number of PLUs available values are allocated
automatically, so it cannot enter by manually.)
At the quantity field, after each entry, press [subttl] key and the next item will
appear, if user wants to keep the default value, directly press the [subttl] key to
skip.
6. After the set is completed, press [check] key to allocate the memory.
7. The message “ALLOC SUrE” is displayed.
8. Press [subttl]key to confirm (Other function keys to discard)
9. When completed, the register will print one receipt, which represents the quantity
for each item.
The receipt format:

12
* * * * * * * ** * * ** * * ** * * ** * * ** *
Work mode RESTAURANT
Department Num 16
Clerk Num 10
Table Num 40
PLU Num 357
Allocation is completed!
* * * * * * * ** * * ** * * ** * * ** * * ** *
5.2 Changing to Retail Mode
ECR automatically starts in Retail Mode after the initial clear procedure.
Procedure:
1. Switch the control lock to Prog Mode.
2. Enter “201” by numeric keypad, press [qty/time] key.
3. The message “SUrE” will be displayed.
4. Press [subttl] key to confirm. (Other function keys to discard)
5. User will do the memory allocation.
The following are the default quantity of the below items: (see “Memory
Allocation” for the detailed information)
a. Department Number
b. Clerk Number
c. PLU Number (The total number of PLUs available values are allocated
automatically, after the previous items are decision. So it cannot
enter manually.)
6. After the set is completed, press [check] key to allocate the memory.
7. The message “ALLOC SUrE...” is displayed.
8. Press [subttl]key to confirm (Other function keys to discard)
9. When completed, the register will print one receipt, which represents the quantity
for each item.
The receipt format:
* * * * * * * ** * * ** * * ** * * ** * * ** *
Work mode RETAIL
Department Num 16
Clerk Num 10
PLU Num 500
Allocation is completed!
* * * * * * * ** * * ** * * ** * * ** * * ** *

13
6 THE SPECIAL INPUTTING
6.1 Regarding Decimal Point Inputting
The Decimal Point Position is set in the System Flag Option. The system default value
is two digits decimal point.
When the Decimal Point is decided,at the transaction inputting the amount cannot be
entered with decimal.
E.g. user inputs the number “1234”, if the decimal has 2 digits, the register will deal with
it as “12.34”.
The point key can be used in the following operations:
1. The multiplication operation at Reg mode or Training mode.
2. The rate of -%, manual entries at Reg mode or Training mode.
3. The stock manually entries of PLU is programmed.
6.2 Descriptors Inputting
Descriptors are programmable for Departments, PLUs, Clerks and the Welcome
/Trailer Messages.
Note: Only the descriptors of welcome message/bottom message can be blank,
others cannot.
There are two methods available to program descriptors, by character keyboard
method or by character code method.
6.2.1 Using Character Code
Steps:
1. At a descriptor field, refer to the Characters Code Chart below and type the code.
2. Each character code will be displayed as it is entered.
3. Press [subttl] key when the descriptor is completed.
Example:
To program the descriptor "APPLE", type:
(51)
(92) (92) (52) (91)
A P P L E
Note:
The detailed usage of [C] key, [00]key, [subttl]key, and [TOTAL] key in Character
Code entering method, See the latter by Character Keyboard section.

14
Characters Code Chart
0 1 2 3 4 5 6 7 8 9 00
0 0 1 2 3 4 5 6 7 8 9 SP
1 - + # . SP A B C D E F
2 G H I J K L M N O P Q
3 R S T U V W X Y Z a b
4 c d e f g h i j k l m
5 n o p q r s t u v w X
6 y z Ä Ö Ü ξ Ň ª £ $ ¥
7 ( ) / % ! ” & * · Ⅱ :
8 ’ , < = > ? → Ⅲ Θ ↑ ;
9 ← @ ^ ↓ Å Æ \ β
€
Note:
1. The default is Character Keyboard inputting. Press [CODE] key once change to
character code inputting mode.
6.2.2 Using Character Keyboard
The characters layouts on the key layout are as follows:
ABC DEF
FONT
CAP
7 8 9
GHI J K L
M N
4 5 6
O P Q R
STU V
1 2 3
W X
sub total
SPACE
CLEAR
CODE
0 00
Y Z TOTAL
[CLEAR] key:
Backspace key, clear the last input character, also used in Character
Code entering method.
[CAP] key:
Pressing this key shift the character through the uppercase letter,
lowercase letter and return to the uppercase letter in sequences.
Alphabet (A (a)-Z (z)) keys:
Used input to characters.
1st
2nd

15
[Sub Total] key:
Accept the programmed characters.
[TOTAL] key:
Exit the character programming.
[FONT] key:
During entering the descriptors, press different times in this key can
specifies that the current line you input to a double size character, or be
able to combine Double & Single size characters. Also used in
Character Code entering method. Welcome Message and Trailer
Message support four formats. Only support normal and double width.
One time
Changing the character to double width
Two
times
Changing the character to normal format.
[Code] key:
During entering the descriptors, press different times in [Code] key can
chose characters code inputting or ordinary characters inputting.
Table of contents
Other Royal Cash Register manuals

Royal
Royal ALPHA9155SC User manual

Royal
Royal CMS-9160 Installation and maintenance instructions

Royal
Royal 482NT User manual

Royal
Royal 480nt User manual

Royal
Royal 425cx User manual

Royal
Royal CMS-482 Plus Owner's manual

Royal
Royal CMS-8160 User manual

Royal
Royal Alpha5000ML User manual

Royal
Royal 210DX User manual

Royal
Royal 225cx User manual