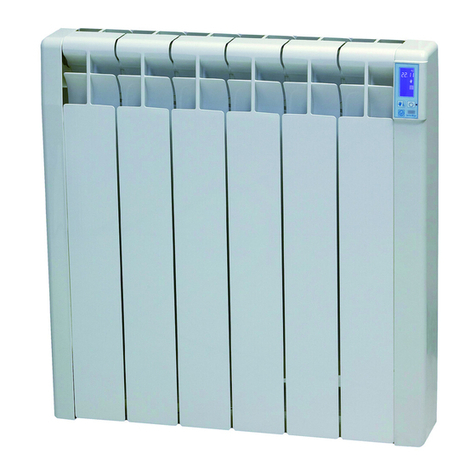
S&P PM-755 User manual

PM-755
PM-1005
PM-1505
PM-2005


3

4
230V AC 50/60Hz

ESPAÑOL
5
ESPAÑOL
Lea por favor detalladamente estas instrucciones antes de utilizar e instalar este PANEL
CONVECTOR, con el fin de evitar que ocurran daños y situaciones de riesgo. Cualquier uso
de este aparato que sea distinto al que está indicado en este manual, puede causar fuego,
cortocircuito o lesiones, y hará que la garantía queda nula y sin efecto.
La garantía no cubre ningún defecto, deterioro, pérdida, lesión o daño causados por un uso
incorrecto de este producto. Están garantizados todos los derechos legales a este respecto.
Ninguna condición de la garantía excluye o cambia las condiciones de garantía reguladas por
leyes del Estado, que no pueden ser excluidas o modificadas por ningún motivo.
Antes de la puesta en marcha, saque todos los embalajes cuidadosamente y verifique la inte-
gridad del aparato. Si se encuentra cualquier defecto o daño no lo instale, ni trate de reparar
el aparato. Por favor, contacte con el distribuidor.
No deje el embalaje al alcance de los niños y deposítelo cumpliendo las normas vigentes de
reciclaje.
1. ADVERTENCIAS DE SEGURIDAD
1. Este aparato ha sido diseñado como panel radiante de instala-
ción mural. Debe usarse como fuente de calor, y solo con este
fin.
2. El aparato NO debe funcionar en habitaciones o almacenes
donde el peligro puede surgir por la existencia de gases pro-
cedentes de pinturas, productos químicos, detergentes, disol-
ventes, barnices… etc, u otros materiales altamente inflama-
bles.
3. El aparato debe ser montado en una pared vertical y sólida,
asegurando que este queda totalmente nivelado, tanto vertical
como horizontalmente.
4. El aparato no debe ser montado sobre una pared con una su-
perficie inflamable, tal como: madera, plástico, moqueta, fi-
bra… etc.
5. Asegúrese que una vez instalado, se respetaran las distancias
mínimas de seguridad indicadas. (Véase FIGURA 2).
6. ATENCIÓN; Una vez instalado, no deben quedar objetos infla-
mables o que les afecte el calor (cortinas, muebles, toallas,

ESPAÑOL
6
plantas, mascota, etc…) a menos de 1 metro alrededor del
aparato.
7. Este aparato no debe de instalarse en un lugar encastrado
donde se interfiera en la libre circulación del aire.
8. No instale el aparato justo debajo de una toma de corriente.
9. Para la instalación eléctrica fija, deben ser incorporados me-
dios de desconexión de acuerdo con las reglamentaciones de
instalación, con una separación de contacto en todos los polos
que provea desconexión total bajo condiciones de categoría III
de sobretensión.
10.Este Panel convector es de Clase II (doble aislamiento eléctri-
co ) en consecuencia no requiere conexión a tierra.
11.Se deben observar exactamente las zonas de seguridad deter-
minadas en los estándares locales de instalación eléctrica, o
las normas de seguridad aplicables en su país. En cualquier
caso, si va instalado en un baño, NO lo instale nunca en las
áreas indicadas como ZONA 0, ZONA 1 o ZONA 2. Al ser un
aparato IP21, este sí puede ir instalado en la ZONA 3, siem-
pre que quede colocado de forma que el aparato, incluyendo
los mandos de control y el mismo cable de alimentación, NO
quede al alcance de nadie que esté en la bañera o en la ducha.
(Véase FIGURA 3).
12. PRECAUCIÓN: Algunas partes de este aparato pueden po-
nerse muy caliente y causar quemaduras graves. No lo toque,
incluso después de que haya estado funcionando. Debe poner-
se atención particular cuando los niños y las personas vulne-
rables estén presentes.
13.Antes de conectar el aparato, asegúrese que el voltaje de la
red eléctrica, coincide con el indicado en la placa de caracte-
rísticas.
14.Si el cable de alimentación está dañado, debe ser sustituido en
uno de nuestros Servicios Oficiales S&P o por personal cuali-
ficado.

ESPAÑOL
7
15. Para evitar sobrecalentamientos, NO CUBRIR el aparato.
16.No inserte ningún cuerpo rígido a través de las rejas de entra-
da, esto podría dañar el aparato, iniciar un fuego o un choque
eléctrico.
17.En espacios húmedos, la toma de alimentación debe estar
como mínimo, a 25 cm por encima del suelo. Asegúrese que el
cable no toque el suelo.
18.Asegúrese que el cable de alimentación no toca las partes más
calientes del aparato.
19.Los niños menores de 3 años deben mantenerse fuera del al-
cance del aparato a menos que sean continuamente supervi-
sados.
20.Los niños menores de 8 años NO pueden hacer funcionar el
aparato.
21.Este aparato solo pueden utilizarlo niños con edad de 8 años
y superior y personas con capacidades físicas, sensoriales o
mentales reducidas o falta de experiencia y conocimiento, si
se les ha dado la supervisión o formación apropiadas respecto
el uso del aparato de una manera segura y comprenden los
peligros que implica.
22.Los niños no deben jugar con el aparato.
23.Antes de realizar cualquier operación de limpieza o de man-
tenimiento, asegúrese que el aparato está desconectado de la
red eléctrica.
24.La limpieza y el mantenimiento a realizar por el usuario, no
deben realizarlos los niños.
25.No limpie el aparato mientras está funcionando y no lo sumer-
ja en agua.
26.No manipule el aparato con las manos mojadas.
27. Aparato diseñado para uso interno.

ESPAÑOL
8
2. DESCRIPCIÓN DEL APARATO / PANEL DE CONTROL (FIGURA 1)
a) Reja salida aire caliente.
b) Pantalla de control LCD.
c) Panel de control.
d) Interruptor general (ON / OFF).
e) Sonda termostato.
3. INSTALACIÓN (FIGURA 4)
ATENCIÓN: Antes de proceder a la instalación del aparato, lea atentamente todas las Ad-
vertencias de Seguridad indicadas en el apartado correspondiente.
En la medida de lo posible, debería instalar el Panel Mural debajo de una ventana, pero de
ningún modo en una zona con corrientes de aire.
3.1. Practique en la pared, mediante una broca de Ø 6mm, los tres agujeros (1-2-3) según las
medidas indicadas, seguidamente inserte los tacos (Fig. 4 A).
3.2. En los dos agujeros superiores, fije los dos soportes de pared en forma de gancho (Fig.
4 A).
3.3. Cuelgue el aparato en dichos soportes y seguidamente asegúrelo para que no se pueda
descolgar. Inserte el soporte en las ranuras centrales de la reja inferior y fíjelo a la pared
mediante el correspondiente tornillo (Fig. 4B).
4. CONEXIÓN ELÉCTRICA
ATENCIÓN: Antes de proceder a la conexión del aparato, compruebe que la tensión de ali-
mentación de la red coincide con la indicada en la placa de características del aparato.
4.1. Los aparatos son de doble aislamiento eléctrico , con lo cual NO requieren de cone-
xión a tierra. El cable de alimentación tiene tres cables de conexión, conéctelos según
se indica en la Figura 5. Los cables calor Marrón – Azul van conectados a la L – N de la
instalación eléctrica. El cable de color negro se utiliza para cuando queramos controlar
varios Paneles Murales mediante un Programador por cable piloto (Importante para
Francia). En el caso de no disponer de un Programador por cable piloto, deje el cable
correctamente aislado dentro de la misma toma de conexión sin conectarlo.
5. MODO DE EMPLEO
ATENCIÓN: Antes de proceder con el modo de empleo del aparato, lea atentamente todas
las Advertencias de Seguridad indicadas en el apartado correspondiente.
5.1. INTERRUPTOR ON / OFF
Actuar sobre el interruptor general ubicado en la parte lateral del aparato (ON/OFF) para
conectar / desconectar el aparato.
NOTA: Si el aparato no va ser utilizado durante un periodo largo de tiempo (verano), recomen-
damos desconectar el aparato mediante este interruptor general.

ESPAÑOL
9
5.2. PROGRAMACIÓN DEL DÍA / HORA
24c
3
22:04
Pulse la tecla (M) hasta que en pantalla aparezca el icono . Pulse
(OK) para confirmar. Seguidamente, y durante 3 segundos, pulse de nue-
vo la tecla (OK). El día de la semana parpadeará (1-Lunes …. 7 Domingo)
y lo podremos ajustar pulsando las teclas (+) o (-). Confirmaremos el
día pulsando (OK) y procederemos igualmente para ajustar la hora y los
minutos. Pulsando (OK) para finalizar la programación horaria.
5.3. MODOS DE FUNCIONAMIENTO
Modo ESPERA (STANDBY)
Pulse la tecla (M) hasta que en pantalla aparezca el icono . Cuando en pantalla aparezca
dicho icono, el aparato no calienta, está en modo de espera.
Modo COMFORT
24c
3
22:04
Pulse la tecla (M) hasta que en pantalla aparezca el icono .
Pulse (OK) para confirmar. La temperatura deseada en la habitación em-
pezará a parpadear y la podremos ajustar pulsando las teclas (+) o (-).
Confirmaremos pulsando tecla (OK) y en pantalla aparecerá la tempe-
ratura real de la habitación. Si la temperatura real de la habitación es
inferior a la temperatura deseada, el panel mural empezará a calentar,
indicado en pantalla en pantalla mediante el icono . Si de lo contra-
rio, la temperatura real de la habitación es superior a la temperatura
deseada, el aparato permanecerá en modo de espera.
NOTA: Si es una estancia de día (comedor / sala) recomendamos ajustar el termostato a una
temperatura de COMFORT de +22 / +23ºC.
Modo ECONÓMICO (ECO)
18 c
3
22:04
Pulse la tecla (M) hasta que en pantalla aparezca el icono .
Pulse (OK) para confirmar. El modo ECO está definido de fábrica, de ma-
nera que la temperatura de la habitación sea de 18ºC (no se puede mo-
dificar). Confirmaremos pulsando tecla (OK) y en pantalla aparecerá la
temperatura real de la habitación.
Si la temperatura real de la habitación es inferior a +18ºC, el panel mural empezará a calen-
tar, indicado en pantalla mediante el icono . Si de lo contrario, la temperatura real de la
habitación es superior a +18ºC, el aparato permanecerá en modo de espera.
Modo ANTI HIELO (DEFROST)
5 c
3
22:04
Pulse la tecla (M) hasta que en pantalla aparezca el icono .
Pulse (OK) para confirmar. El modo anti hielo está definido de fábrica,
de manera que la temperatura de la habitación nunca baje de los +5ºC
(no se puede modificar). Confirmaremos pulsando de la tecla (OK) y en
pantalla aparecerá la temperatura real de la habitación.

ESPAÑOL
10
Si la temperatura real de la habitación es inferior a +5ºC, el panel mural empezará a calen-
tar, indicado en pantalla mediante el icono . Si de lo contrario, la temperatura real de la
habitación es superior a +5ºC, el aparato permanecerá en modo de espera.
NOTA: Este modo de funcionamiento es sumamente útil, para cuando nos ausentemos du-
rante unos días o para segundas residencias, y no queremos que la temperatura de la vivien-
da baje de los +5ºC, con el riego que de que se hielen las tuberías de agua.
5.4. FUNCIONAMIENTO AUTOMÁTICO
Podremos programar el modo de funcionamiento deseado para los siete días de la semana,
y con franjas horarias de media hora.
•
1
1 2 3 4 5 6 7
00:00
1
Pulse la tecla (P) y en pantalla aparezca el icono , nuevamente
pulse (P) durante unos 3 segundos para entrar en el programa se-
manal. Los 7 días de semana se iluminaran, parpadeando solo el
día (1-lunes), la hora 00:00 y el icono .
• Mediante la tecla (M) Usted podrá definir el modo de funcionamiento deseado para las dis-
tancias horas del día: ( Modo Reposo // COMFORT // ECO // ANTI –HIELO).
• Mediante las teclas (+) y (-), podrá definir las franjas horarias de funcionamiento, para cada
modo (Franjas de media hora).
NOTA: Cada vez que cambie de modo de funcionamiento, en pantalla se va incrementando el
número informativo de cambios que estamos programado para cada día. En consecuencia,
cada día podríamos programar 48 modos de funcionamiento distintos, uno para cada ½ hora
del día.
Al llegar al final del día (23:30), pulse (OK) durante 5 segundos para saltar al siguiente día, y
volver a programar los modos de funcionamiento para dicho día.
IMPORTANTE: Si queremos copiar el mismo programa que el día anterior, para no tener que
repetir toda la operación, pulsamos de nuevo la tecla (OK) durante 5 segundos, y copiaremos
el programa del día anterior y saltando al día siguiente.
Al terminar la programación el domingo (7) a las 23:30, guardaremos el programa semanal
introducido, pulsando la tecla (P).
El aparato ejecutará el programa semanal, siempre que en pantalla tengamos el icono
activo. En todo momento se nos indicará en pantalla, qué modo de funcionamiento se está
ejecutando para cada ½ del día.
5.5. DETECCIÓN VENTANA ABIERTA
• Para evitar que el emisor de calor esté funcionando con una ventana / puerta abierta, in-
corpora una función de control ahorro energético.
• Presione para activar /desactivar esta función. En pantalla saldrá el correspondiente
icono para indicar que esta función de control está activada.
• Si la temperatura de la habitación cae 5ºC en 10 minutos, el aparato interpreta que tenemos
una ventana / puerta abierta y parará el funcionamiento del emisor durante 60 minutos.
ESPAÑOL
11
• En pantalla el icono de la ventana abierta parpadeará para informarnos que esta función
de ahorro energético se ha activado.
• Sí trascurridos los 60 minutos la temperatura sigue sin aumentar al menos 1ºC, el apa-
rato permanecerá parado otros 60 minutos, ya que entiende que la ventana / puerta sigue
abierta.
• Si la temperatura de la habitación ha aumentado un grado, respecto a la temperatura en
el momento previo al paro de los últimos 60 minutos, el calefactor seguirá funcionando
siguiendo el programa modo de funcionamiento previó.
• En cualquier momento podemos desactivar la función, presionando de nuevo .
NOTA: Esta funciona no se activa si tenemos el modo de funcionamiento ANTI-HIELO activado.
5.6. SISTEMA DE BLOQUEO
• Esta opción es muy útil para lugares públicos como Bibliotecas, hoteles… etc, donde queramos
que nadie pueda manipular el control del PANEL MURAL. Activando esta función, el aparato
funcionara según el modo que nosotros hayamos definido sin que nadie lo pueda manipular.
Pulse durante 5 segundos la teclas (+) y (-) simultáneamente, para activar / desactivar el
bloqueo del aparato. Cuando este esté bloqueado, en pantalla aparecerá el icono .
• Aunque se desconecte el aparato mediante el interruptor general, o desenchufando el
emisor de la red, la función bloqueo queda memorizada.
5.7. PROGRAMADOR POR CABLE PILOTO (PILOT-WIRE PROGRAMMER)
Si disponemos de un programador por cable piloto central y queramos controlar varios Pane-
les murales con el mismo programador, activaremos la función “Slave” .
NOTA: Véase el apartado 4 (Conexión eléctrica).
Mantenga presionado el botón (OK) durante 6 segundos, escuchará el sonido “Bi” y el aparato
ya estará conectado con el programador remoto. Para asegurar que está conectado correc-
tamente y puede funcionar bien, en la pantalla LCD aparecerá el ícono (Slave), así como
el modo de funcionamiento, el reloj y la temperatura ambiente.
Para desconectar el programador remoto, mantenga presionado el botón (OK) durante 6 se-
gundos, seguidamente escuchará 3 sonidos “Bi”, luego, el aparato volverá al modo “Standby”.
ATENCIÓN: Cuando el aparato se configura con el programador de cable piloto remoto, solo
el botón OK responde, los demás no funcionan.
5.8. MENSAJE DE ERROR
Si en la pantalla aparece el mensaje de error (E1) por favor contacte con la Red de Servicios
Post Venta si es en territorio español, o a su distribuidor habitual en el resto del mundo. Para
su localización puede consultar la página web: www.solerpalau.com

ESPAÑOL
12
6. MANTENIMIENTO
• Antes de iniciar cualquier operación de mantenimiento, no olvide dejar enfriar unos minu-
tos el aparato y desconectarlo totalmente de la red eléctrica.
• Este producto requiere de una limpieza periódica (mínimo una vez al año) para evitar la
acumulación de polvo en la parte inferior y en la reja superior, ya que podría ocasionar un
sobrecalentamiento.
• Descuelgue el aparato de la pared y limpie mediante una aspiradora el polvo acumulado.
• Con un trapo húmedo de agua, limpie el cuerpo exterior. No utilice detergentes ni otros
productos abrasivos que podrían deteriorar el acabado / color del plástico.
• No sumerja el aparato ni proyecte agua sobre el mismo.
7. PUESTA FUERA DE SERVICIO / RECICLAJE
La normativa de la CEE y el compromiso que debemos adquirir con las futuras ge-
neraciones, nos obligan al reciclado de materiales; le rogamos que no olvide depo-
sitar todos los elementos sobrantes del embalaje en los correspondientes contene-
dores de reciclaje, así como de llevar los aparatos sustituidos al gestor de Residuos
más próximos
8. INFORMACIÓN PERTINENTE PARA EL DESMONTAJE, RECICLADO
O ELIMINACIÓN DEL PRODUCTO AL FINAL DE LA VIDA ÚTIL
En el caso de desguace del aparato, hay que respetar las disposiciones correspondientes a la
eliminación o reciclaje de los materiales y componentes.
Listado de los principales materiales del PANEL MURAL:
• Cuerpo y reja de Plancha metálica.
• Laterales de plástico PP V0
• Placas Electrónicas con estaño.
• Cables eléctricos de cobre.
• Resistencia de tubo con aletas de aluminio.
9. ASISTENCIA TÉCNICA
La extensa Red de Servicios Oficiales S&P garantizan una adecuado asistencia técnica. En
caso de observar alguna anomalía en el funcionamiento del aparato, rogamos se ponga en
contacto con cualquier de los servicios mencionados, donde será debidamente atendido.
Cualquier manipulación, que no sea estrictamente necesaria para la instalación del aparato,
efectuada por personas ajenas a los Servicios Oficiales de S&P, nos obliga a cancelar su
garantía. Para aclarar cualquier duda con respecto a los productos S&P diríjase a la Red de
Servicios Post Venda si es en territorio español, o a su distribuidor habitual en el resto del
mundo. Para su localización puede consultar la página web: www.solerpalau.com

ENGLISH
13
Please read these instructions thoroughly to avoid damage and hazardous situations. Any
use of this CONVECTOR HEATER other than that stipulated in this instruction manual may
cause fire, electric shock or injury, and voids all warranties.
Warranty does not apply to any defect, deterioration, loss, injury or damage caused by, or
as a result of, the misuse or abuse of this heater. the rights dictated by State law are not
prejudiced. None of the terms of this warranty are to be taken as excluding any conditions or
warranties implied by State law, which cannot be excluded or modified.
Before any operation remove the packaging and check product integrity. In case of defects or
damages do not try to repair it yourself but contact your dealer.
Do not let children play with the packaging and protect the environment by disposing of the
packaging in accordance with the national regulations for waste processing.
1. SAFETY WARNINGS
1. This appliance has been designed as a radiation heater for wall
installation. It should be used as a source of heat and only for
this purpose.
2. The device should must not be positioned to operate in romos
or stores where a hazard can arise due to the presence of ga-
ses originating from paints, chemical products, detergents,
thinners, varnishes, etc., or other highly inflammable mate-
rials.
3. The device must be mounted on a solid, vertical wall, ensuring
that is perfectly levelled, both vertically and horizontally.
4. The device must not be mounted on a wall with an inflammable
surface, such as: wood, plastic, carpet, fibre, etc.
5. Make sure that the minimum safety distances are adhered to
once installed. (See FIGURE 2)
6. WARNING; Once installed, no inflammable objects or objects
affected by heat should be within 1 metre of the device (curta-
ins, furniture, towels, plants, pets… etc).
7. This device must not be installed in an enclosed place where
air cannot circulate freely, both at the entrance and the exit.
ENGLISH

ENGLISH
14
8. Do not install the device immediately underneath a power soc-
ket.
9. For fixed electrical installation, disconnection means should
be included in accordance with installation regulations, with
contact separation at all poles that provides total disconnec-
tion under Category III overvoltage conditions.
10.This heater is Class II (double-insulated ) and therefore does
not require an earth connection.
11.The safety zones required by the local electrical installation
standards or safety regulations applicable in your country must
be strictly observed. In any case, if it is going to be installed in
a bathroom, NEVER install it in the area indicated as AREA 0,
AREA 1 or AREA 2. As it is an IP21 rated device, it can be ins-
talled in AREA 3, provided it is placed so that it is NOT in reach
of anybody who is in the bathtub or shower, this including the
device’s power cord. (See FIGURE 3).
12. CAUTION: Some parts of this device may get very hot and
cause severe burns. Special care must be taken when children
and vulnerable persons are present.
13.Before plugging in the device, make sure the mains voltage
matches that indicated on the data plate.
14.If the power cord is damaged, it should be replaced at one of
our official S&P Service Centers or by a qualified professional.
15. To avoid overheating, DO NOT COVER the device.
16.Do not insert any rigid body through the bars, this could dama-
ge the device, start a fire or cause electric shock.
17.In humid rooms, the power cord must be at least 25 cm above
the ground. Make sure the cord doesn’t touch the ground.
18.Make sure the power cord doesn’t touch the hottest parts of
the device.
19.Children under 3 years old should be kept out of the reach of
the appliance unless they are continuously supervised.
20.Children under 8 years old may NOT operate the appliance.

ENGLISH
15
21.This device can be used by children from 8 years up and per-
sons with reduced physical, sensory or mental capacities or
lack of experience and knowledge if they have been given the
appropriate supervision and training on using the device in a
safe way and understand the dangers involved.
22.Children should not play with the appliance.
23.Before carrying out any cleaning or maintenance operation,
make sure the device is unplugged from the mains.
24.The cleaning and maintenance to be done by the user must not
be done by children.
25.Do not clean the device while it is working and do not immerse
it in water.
26.Do not handle the appliance with wet hands.
27. Device designed for internal use.
2. DESCRIPTION OF THE DEVICE / CONTROL PANEL (FIGURE 1)
a) Hot air outlet grille.
b) LCD control screen.
c) Control panel.
d) Main switch (ON / OFF).
e) Thermostat probe.
3. INSTALLATION (FIGURE 4)
CAUTION: Before installing the device, read all the Safety Warnings in the relevant section
of this manual carefully.
As far as possible, you should install this Wall Heater under a window, but never in a draughty
area.
3.1. With a Ø 6mm bit, drill the three holes (1-2-3) according to the measures indicated, then
insert the wall plugs (Fig. 4 A).
3.2. In the top two holes fix the hook-shaped wall supports (Fig. 4 A).
3.3. Hang the appliance on these supports and then secure it so it cannot come unfastened.
Insert the support in the central grooves of the bottom grille and fix it with the corres-
ponding screw (Fig. 4B).
4. ELECTRICAL CONNECTION
CAUTION: Before connecting the device, check the supply voltage of the electricity network
matches the one stated on the type label of the device.

ENGLISH
16
4.1. The appliances have double electrical insulation , so they do not require ground con-
nection. The power cord has three connection wires, connect them as indicated in
Figure 5. The Brown – Blue wires are connected to the L – N of the electrical installation.
The black wire is used when we want to control several Wall Heaters by means of a Pilot
wire programmer (Important for France). If you don’t have a Pilot wire programmer,
leave the wire correctly insulated in the same plug without connecting it.
5. INSTRUCTIONS FOR USE
CAUTION: Before proceeding with the device’s instructions of use, read all the Safety War-
nings in the relevant section of this manual carefully.
5.1. ON / OFF SWITCH
Press the main switch located on the side of the appliance (ON / OFF) to turn the appliance
on / off.
NOTE: If the appliance is not going to be used for a long period of time (summer), we recom-
mend disconnecting it using this main switch.
5.2. DAY / TIME PROGRAMMING
24c
3
22:04
Press the (M) until the icon appears on the screen. Then press (OK)
to confirm. Next, press (OK) again for 3 seconds. The day of the week will
flash (1-Monday …. 7-Sunday) and we can adjust it pressing the (+) or (-)
buttons. We set the day pressing (OK) and do the same to adjust the hour
and minutes. Pressing (OK) to finish programming the time.
5.3. OPERATING MODES
STANDBY mode
Press the (M) button until the icon appears on the screen. When this icon appears on the
screen, the appliance is not heating, it is in standby mode.
COMFORT mode
24c
3
22:04
Press the (M) button until the icon appears on the screen.
Then press (OK) to confirm. The desired temperature in the room will
start to flash and we can adjust it by pressing the (+) or (-) buttons. We
confirm by pressing (OK) and the actual room temperature will appear
on the screen. If the actual room temperature is below the desired tem-
perature, the wall heater will start heating, indicated on the screen with
the icon. If on the other hand the actual room temperature is above
the desired temperature, the appliance will stay in standby mode.
NOTE: If it is a day room (dining room / living room) we recommend setting the thermostat
at +22/+23 ºC.

ENGLISH
17
ECONOMY mode (ECO)
18 c
3
22:04
Press the (M) button until the icon appears on the screen.
Then press (OK) to confirm. ECO mode is factory-set, so the room tem-
perature is 18ºC (this cannot be changed). We confirm pressing (OK) and
the actual room temperature will appear on the screen.
If the actual room temperature is below +18ºC, the wall heater will start heating, indicated
on the screen with the icon. If on the other hand the actual room temperature is above
+18ºC, the appliance will stay in standby mode.
DEFROST mode
5 c
3
22:04
Press the (M) button until the icon appears on the screen.
Then press (OK) to confirm. Defrost mode is factory-set, so the room
temperature never falls below +5ºC (this cannot be changed). We con-
firm by pressing (OK) and the actual room temperature will appear on
the screen. If the actual room temperature is below +5ºC, the wall heater
will start heating, indicated on the screen with the icon. If on the
other hand the actual room temperature is above +5ºC, the appliance
will stay in standby mode.
NOTE: This operating mode is very useful when we are going to be away for a few days or for
second homes, and we don’t want the house temperature to fall below +5ºC with the risk of
the water pipes icing up.
5.4. AUTOMATIC OPERATION
We can set the desired operating mode for the seven days of the week, with half-hour time
bands.
•
1
1 2 3 4 5 6 7
00:00
1
Press the (P) button and the icon appears on the screen, press
(P) again for 3 seconds to get into the weekly program. The 7 days of
the week will light up, only the day (1-Monday), the time 00:00 and
the icon flashing.
• With the (M) button we can define the desired operating mode for the day’s time distances:
( Standby // COMFORT // ECO // DEFROST).
• With the (+) and (-) buttons you can define the operating time bands for each mode (Half-
hour bands).
NOTE: Every time we change operating mode, the informative number of changes we are
programming for each day on the screen increases. So, every day we can set 48 different
operating modes, one for each ½ hour of the day.
At the end of the day (23:30), press (OK) for 5 seconds to skip to the next day and set the ope-
rating modes again for this day.
IMPORTANT: If we want to copy the same program as the previous day, so as not to have to
repeat the entire operation, we press the (OK) button again for 5 seconds and copy the pro-
gram from the previous day and skip to the next.

ENGLISH
18
When we have finished setting Sunday (7) at 23:30, we save the weekly program entered,
pressing the (P) button.
The device will execute the weekly program, provided we have the icon activated on the
screen. The screen will indicate what operating mode is running for each ½ hour of the day.
5.5. OPEN WINDOW DETECTION
• To avoid the heater working with the window open, the heater incorporates an energy sa-
ving control function.
• Press to activate / deactivate this function. The corresponding icon will come up on the
screen to indicate the control feature has been activated.
• If the room temperature falls 5ºC in 10 minutes, the heater detects that we have a window /
door open and the heater will stop working for 60 minutes. On screen the open window icon
will flash to inform us that this function is active.
• If after the 60 minutes the temperature still hasn’t risen at least 1ºC, the heater will stay off
for another 60 minutes, as it understands that the window / door is still open.
• If the temperature of the room has increased one degree with respect to the temperature
prior to the 60 minutes it has been turned off, the heater will continue to work in the pre-
vious operating mode.
• We can always deactivate the feature by pressing again.
NOTE: This feature does not activate if we have DEFROST operated mode activated.
5.6. LOCKING SYSTEM
• This option is very useful for public places such as libraries, hotels, etc., where we don’t
want anyone to be able to manipulate the WALL HEATER. By activating this feature, the
appliance will work in the mode we have set and nobody will be able to manipulate the
controls. Press the (+) and (-) buttons simultaneously for 5 seconds to activate/deactivate
the appliance’s locking system. When it is locked, the icon will appear on the screen.
• Even if the heater is switched off by pressing the main switch or by unplugging it from the
mains, the locking system remains saved.
5.7. PILOT-WIRE PROGRAMMER
Connect the signal with the remote pilot wire programmer (4 orders) Long press OK button 6s,
you will hear the “Bi” sound and the machine is already connected with the remote program-
mer (to ensure that the programmer 4 order has been connected and can work well), LCD
screen display icon (slaver) as well as working status, clock and ambient temperature.
If disconnect the remote programmer, long press OK button 6S, you will hear 3 “Bi” sound,
then, the machine will setback to the “Stand By” mode.
Attention: When the machine is set with the remote pilot wire programmer, only OK button
still workable, others button do not work.
5.8. ERROR MESSAGE
If the error message (E1) appears on the screen, please contact the After Sale Services Net-
work if in Spain or your usual dealer in the rest of the world. To fi nd out where this is, you can
go to the WEBSITE: www.solerpalau.com

ENGLISH
19
6. MAINTENANCE
• Before starting any maintenance operation don’t forget to let the device cool down for a few
minutes and unplug it from the mains.
• This product requires regular cleaning (at least once a year) to avoid dust build-up at the
rear (air inlet), as this could cause overheating.
• Unhook the device from the wall and clean the dust built up at the air inlet with a vacuum
cleaner.
• Clean the body of the device with a wet cloth. Do not use detergents or other abrasive pro-
duct that could damage the finish / colour of the plastic.
• Do not immerse the device or spray water onto it.
7. TAKING IT OUT OF SERVICE / RECYCLING
EEC legislation and our consideration of future generations mean that we should
always recycle materials where possible; please do not forget to deposit all packa-
ging in the appropriate recycling bins. If your device is also labeled with this symbol,
please take it to the nearest Waste Management Plant at the end of its servicable
life.
8. RELEVANT INFORMATION FOR THE DISMANTLING, RECYCLING OR DISPOSAL
OF THE PRODUCT AT THE END OF ITS OPERATING LIFE
If the appliance is scrapped, the necessary provisions for the disposal or recycling of the
materials and components must be followed.
List of the main materials in the WALL HEATER:
• Iron panel body and grille.
• PP V0 plastic sides.
• Electronic tin plates.
• Electrical copper cables.
• Tube resistor with aluminium fins.
9. TECHNICAL ASSISTANCE
S&P’s large Technical Service network will guarantee adequate technical assistance.
If a fault is observed in the unit, please contact any of the mentioned technical service offices
and they will attend to your problem.
Any manipulation of the appliance by personnel not belonging to the Official S&P Services will
result in your guarantee being void.
For any queries regarding S&P products please contact any branch of our After Sales Service
network if you are in Spain, or your regular dealer in the rest of the world. To find your nearest
dealer, visit our website at www.solerpalau.com

FRANÇAIS
20
Lire attentivement ces instructions avant d’utiliser et d’installer ce PANNEAU CONVEC-
TEUR, afin d’éviter les possibles risques et les situations dangereuses. Toute utilisation
de l’appareil différente de celle indiquée dans ce manuel, peut provoquer un incendie, un
court-circuit ou des blessures, et annulera la garantie.
La garantie ne couvre aucun défaut, aucune détérioration, perte, blessure ou dommages cau-
sés par une utilisation incorrecte de ce produit. Tous les droits légaux à cet effet sont garantis.
Aucune condition de la garantie n’exclut ou ne modifie les conditions de garantie établies par
les lois de l’État, qui ne peuvent jamais être exclues ou modifiées.
Avant le démarrage de l’appareil, retirer soigneusement tous les emballages et vérifier
l’intégrité de l’appareil. Si un défaut ou un vice de fabrication est détecté, ne pas installer
l’appareil et ne pas essayer de le réparer. Contacter le distributeur.
Ne pas laisser l’emballage à la portée des enfants et le jeter en respectant les normes de
recyclage en vigueur.
1. AVIS DE SÉCURITÉ
1. Cet appareil a été conçu comme un panneau rayonnant
d’installation murale. L’appareil doit seulement être utilisé
comme une source de chaleur.
2. L’appareil NE doit pas être utilisé dans des pièces ou entrepôts
où existe un danger lié à la présence de gaz provenant de pein-
tures, produits chimiques, détergents, dissolvants, vernis, etc.
ou d’autres matériaux hautement infl ammables.
3. L’appareil doit être monté sur un mur vertical et solide, en
s’assurant qu’il est monté de niveau, aussi bien verticalement
qu’horizontalement.
4. L’appareil ne doit pas être installé sur un mur avec une super-
ficie inflammable tels que: bois, plastique, moquette, fibre, etc.
5. A l’installation s’assurer que les distances minimales de sécu-
rité sont respectées (Voir FIGURE 2).
6. ATTENTION, une fois installé, aucun objet inflammable ou sen-
sible à la chaleur (rideaux, meubles, serviettes, plantes, ani-
maux de compagnie, etc.) ne doit être placés à moins d’1 mètre
de l’appareil.
FRANÇAIS
Other manuals for PM-755
1
This manual suits for next models
3
Table of contents
Languages:
Other S&P Heater manuals

S&P
S&P SAHARA Series User manual

S&P
S&P TOWER-2000 PTC User manual

S&P
S&P Quadro-250 Technical manual

S&P
S&P TL-40 User manual

S&P
S&P TL-32 Technical Document

S&P
S&P CAIB - BC User manual

S&P
S&P TL-18 PTC Technical Document

S&P
S&P HE-PD Series User manual

S&P
S&P SPLIT-2000 PTC User manual

S&P
S&P EC-3N User manual