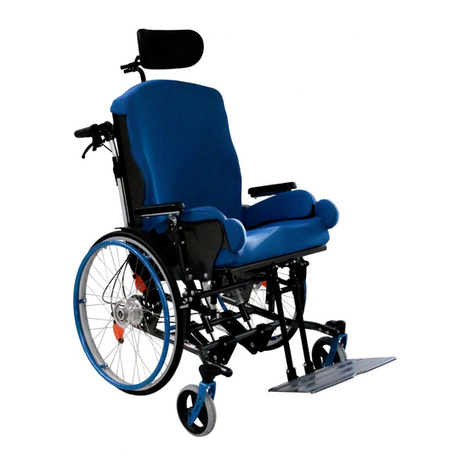
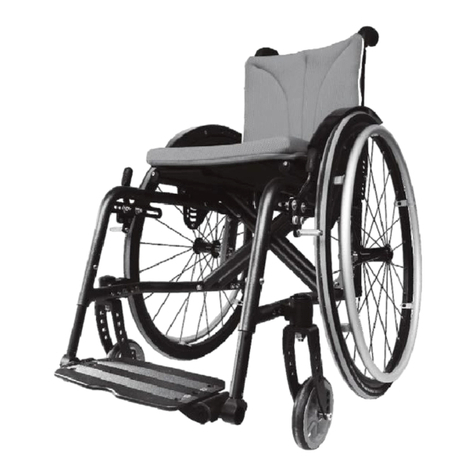
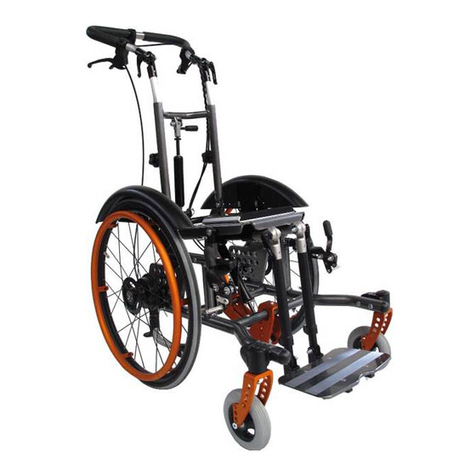
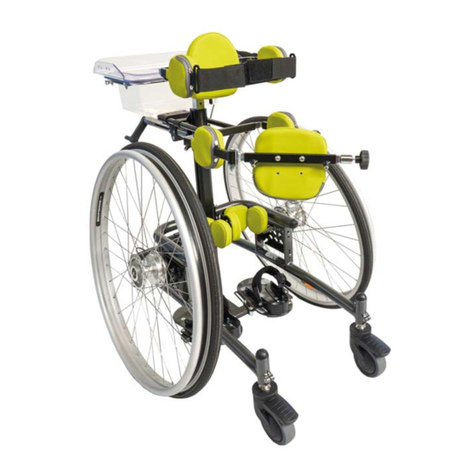
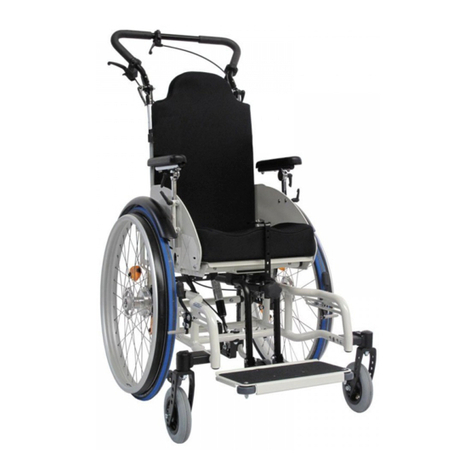
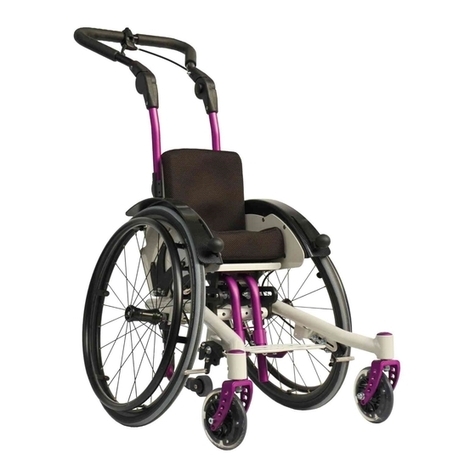
SORG Loop 802 Service manual

service record
1
Service record
for the rehab technician
Loop
Type 802
SORG

LoopSORG
2
IMPRINT
SORG Rollstuhltechnik GmbH+Co.KG
Benzstraße 3-5
D-68794 Oberhausen-Rheinhausen
Germany
Tel. +49 7254-9279-0
Fax +49 7254-9279-10
E-mail info@sorgrollstuhltechnik.de
Web www.sorgrollstuhltechnik.de
REVISION STATUS
Revision: 2018-09-25
TECHNICAL STATUS
Technical changes and misprints reserved. The pictures in
this user manual can – depending on the individual equip-
ment – differ from the actual equipment components. How-
ever, a corresponding conduction is possible.
rehaKIND
We are a member of rehaKIND e.V.
International association
child and adolescent rehabilitation
COPYRIGHT
© by SORG Rollstuhltechnik GmbH + Co. KG Benzstraße
3-5, 68794 Oberhausen-Rheinhausen.
All texts and pictures in this user manual underlie the
international copyright protection and are not allowed to be
published without our consent – not even in excerpts!
CERTIFICATION
Our Quality Management System is certied according to
the ISO 9001:2015 under the certicate no. 12 100 20070
TMS.

service record
3
IMPRINT 2
REVISION STATUS 2
TECHNICAL STATUS 2
rehaKIND 2
COPYRIGHT 2
CERTIFICATION 2
Wheelchair Overview 4
1 PREAMBLE 5
1.1 GENERAL INFORMATION 5
1.2 SIGN EXPLANATION 5
1.3 RECEPTION 5
1.4 SERVICE AND MAINTENANCE 5
1.5 DOCUMENTATION 6
1.6 ACCESSORY AND ATTACHMENT
DRIVES 6
1.7 ADJUSTMENTS ON THE WHEELCHAIR 6
1.8 TIGHTENING TORQUE AND TOOLS 6
2. ADJUSTMENTS 7
2.1 ASSEMBLY GROUP REAR WHEELS 7
2.1.1 Position 7
2.1.2 Displacing the wheels WITHOUT
a camber adapter (20”, 22”, 24”) 7
2.1.3 Displacing the wheels WITH
a camber adapter (20”, 22”, 24”) 7
2.1.4 12” wheels 8
2.1.5 Camber 8
2.1.6 Wheel base extension for 20” + 22” 9
2.1.7 Wheel base extension for 24” 9
2.1.8 Casters 10
2.1.9 Casters with closed frame arch 10
2.2 ASSEMBLY GROUP FRAME 11
2.2.1 Frame arch for closed frames 11
2.2.2 Widening the frame 12
2.2.3 Additional crossbar 12
2.3 ASSEMBLY GROUP SEAT 13
2.3.1 Adjusting the tilting direction 13
2.3.2 Displacing the seat plate
horizontally 14
2.3.3 Displacing the seat plate vertically 14
2.3.4 Position wedge adapter 15
2.3.6 Position push bar 15
2.3.7 Double gas spring 16
2.4 ASSEMBLY GROUP BACK 20
2.4.1 Setting back depth 20
2.4.2 Setting height of the push bar 20
2.4.2 Setting back angle 20
2.4.3 Adjustment of back guide 20
2.4.4 Conversion from back angle setting
to back angle adjustment 21
2.4.5 Changing the basic setting of
the push height 21
2.5 ASSEMBLY GROUP LEG SUPPORT 22
2.5.1 Positioning the leg supports 22
2.5.2 Leg supports: standard or
angle adjustable 23
2.5.3 Leg supports which swing to the side24
2.5.4 Leg support can be elevated with
a physiological turning point 25
2.5.5 Multidirectional leg support 26
2.6 ASSEMBLY GROUP BRAKES 27
2.6.1 Drum brake 27
2.6.2 Knee lever brake 28
2.6.3 Knee lever brake attachment 28
2.7 ASSEMBLY GROUP
FRAME EQUIPMENT 29
2.7.1 Anti-tipper 29
2.7.2 Tipping lever 29
2.7.3 Outdoor Front End
(pushing aid for outside) 29
3. SERVICE AND INSPECTION 30
3.1 CHECK LIST 30
3.2 TECHNICAL DATA 30
3.3 TYPE LABEL 31
3.4 DECLARATION OF CONFORMITY 31
3.5 YOUR SPECIALIZED RETAILER 32

LoopSORG
4
Wheelchair Overview
1. height adjustable push bail
2. control lever for drum brake
3. eccentric clamp to adjust the angle of the push
bail
4. gas spring to adjust the angle of the back
5. star knob screw to adjust the height of the push
bail
6. wheel cover
7. wedge and wedge adapter
8. seat plate for wedge adapter
9. adapter for knee lever brake
10. brake lever for knee lever brake
11. brake pressing bolt of the knee lever brake
12. leg support tube
13. caster adapter
14. caster fork
15. caster fork
16. footrest
17. gas spring for seat tilting
18. rear wheel
19. handrim
20. anti tipper caster
21. lever for the anti tipper
22. hub of the light weight drum brake wheel
23. hole plate
1. height adjustable push bail
2. release lever for seat tilting
3. control lever for drum brake
4. eccentric clamp to adjust the angle of the push
bail
5. control lever to adjust the angle of the back
6. star knob screw to adjust the height of the push
bail
7. gas spring to adjust the angle of the back
8. wheel cover
9. locking pin to remove the gas spring
10. handrim
11. brake pressing bolt of the wheel lock
12. caster adapter
13. caster fork
14. caster
15. suspension element to widen the frame
16. footrest (foldable backwards)
17. universal adapter to connect seat shell wedge
18. gas spring for seat tilting
1 2 3 4 6 7
10
9
11
12
13
14
15
16
171819
5
1 2 3
4
7
8
9
10
11
12
13
1516
17
20
18
21
22
23
8
14
5
6
Overview LoopSORG

service record
5
1 PREAMBLE
1.1 GENERAL INFORMATION
�INDICATION
This service book contains instructions on how to correct-
ly adjust the wheelchair based on the individual speci-
cations of a user. First and foremost, this is for the rehab
technician.
ATTENTION
All of the listed work is to be done by a qualied rehab
technician due to safety reasons.
All of our wheelchairs fulll the guidelines and require-
ments according to 93/42/EWG, 2007/47/EWG and
EN12183:2009. SORG Rollstuhltechnik is also certied ac-
cording to the quality management system ISO 9001. With
this, the quality of our wheelchairs are guaranteed and doc-
umented in each step from development to assembling.
If you have any questions, our qualied team would be hap-
py to help you (+49 7254 9279-0).
1.2 SIGN EXPLANATION
ATTENTION
This is how individual related safety aspects of utmost im-
portance are indicated.
�INDICATION
This is how possible indications of utmost importance are
labeled.
INFORMATION
This is how INFORMATION on mounting and adjustment
work is labeled.
READ
This refers to additional material.
BOLD PRINT
Text in bold print highlights important passages or remarks.
1.3 RECEPTION
DELIVERY
Each wheelchair is mounted, tested for functionality and
correctness in our works and packaged into special card-
board boxes by our shipping experts.
FORWARDING COMPANY
RECEIVING
�INDICATION
For liability reasons we have to ask you to check the
wheelchair IMMEDIATELY after receiving it and IN THE
PRESENCE of the deliverer (forwarding company) for pos-
sible damages that may have occurred during transpor-
tation.
CONFIRMATION OF RECIEPT
�INDICATION
Only sign the conrmation receipt after you have thor-
oughly checked the wheelchair for defects.
�INDICATION
In case of damages, note on the conrmation receipt that
you have received a damaged wheelchair.
TRANSPORTATION DAMAGES
In case of damages, please proceed as follows:
• write a short record of the damage and review of
events, if possible include pictures clearly showing
the damage,
• get the personal information of the bearer (driver’s
license etc.),
• inform us immediately.
�INDICATION
According to the valid law, damages reported late can
neither be asserted to us nor to the forwarding company.
1.4 SERVICE AND MAINTENANCE
READ
According to § 33 subparagraph 1, clause 4, [German]
SGB V, the responsibility of maintenance, repairs and
replacement lies with the benefactor. After agreement
with your benefactor, be sure to have all safety relevant
inspections, maintenance work and if necessary repairs
conducted in order to make the wheelchair functional.
c
ATTENTION
Only original parts are to be used for all service and main-
tenance work.
ATTENTION
Be careful with all movable parts since there is a
RISK of crushing ngers and other body parts.
INFORMATION
Proceed according to the maintenance plan in the
user manual.
LoopSORG
6
1.5 DOCUMENTATION
�INDICATION
Keep this service record in a safe place. Have all work/
repairs done on your wheelchair documented by the med-
ical supply store in the maintenance plan. If applicable,
hand it back to your benefactor along with the wheelchair.
�INDICATION
In the event of the wheelchair being reused, the service
book is an important source of information for you bene-
factor. It provides evidence of regular inspections which
might be relevant in the event of warranty claim.
1.6 ACCESSORY AND ATTACHMENT DRIVES
ATTENTION
The addition of these accessory and attachment drives
is done by either the manufacturer or the sanitary house
and solely in their responsibility
1.7 ADJUSTMENTS ON THE WHEELCHAIR
ATTENTION: DANGER OF CRUSHING
When operating the adjustable parts (back rest, side
guard, leg support, wheel lock, positioning aids etc.) as
well as xation and reparation work, there is an injury risk
or of crushing body parts in the pivoting range.
ATTENTION
All wheelchairs are to be handled with care. Removable
parts are not to be thrown or dropped!
ATTENTION
Before repairs or adjustments are made, clean/disinfect
the wheelchair and secure it from tipping over and/or fall-
ing down.
ATTENTION
Only use original spare parts.
ATTENTION
Safety nuts are only to be used once. After rst removal
the safety nut must be replaced by a new one.
1.8 TIGHTENING TORQUE AND TOOLS
INFORMATION
Technical changes reserved.
Screws
• M5: 5 Nm;
• M6: 7 Nm;
• M6: (hole plate) 10 Nm,
• M8: 20 Nm;
• M10 (Nut): 25Nm (caster)
• Fitting of quick-release axle: 35Nm
Tools needed:
• torque wrench (5-50 Nm)
• open end wrench
• ex ratchet handle with socket wrench inserts
• hexagon screw driver
• Phillips screw driver
• at head screw driver
• plastic mallet
• side cutter
• threadlocker (uid)
• bicycle inner tube repair kit
• work bench/jaw vise with rubber pads
Word explanation
Loosen screw:
means to only loosen the screw so that the parts are still
held together but (e.g.) can be moved around along a slot-
ted hole.
Remove screw:
means to completely remove the screw from where it was
attached so that the parts are no longer connected.

service record
7
2. ADJUSTMENTS
2.1 ASSEMBLY GROUP REAR WHEELS
2.1.1 Position
ATTENTION
Check the tilt stability of Loop while fully tilted and with
the patient, after all positioning adjustments of the rear
wheels have been made and, if necessary, modify the po-
sition!
(1) We mount:
• 24” wheels in row (A),
• 22” wheels in row (B),
• 20” wheels in row (C),
• the adapters for 12” wheels are mounted in row
(D).
Position 1is the most passive (most stable), position 5is
the most active (most wobbly). The wheels are factory-set
in position 2. In this position, you receive a horizontal frame
position with corresponding caster. Other constellations
are possible. The horizontal frame position can be reached
through the adjustment of the casters.
2.1.2 Displacing the wheels WITHOUT a cam-
ber adapter (20”, 22”, 24”)
• (2) Remove the wheels,
• remove the hexagon nut (A) of the quick-release
axle tting (B),
• place the tting (B) in the new hole (see 2.1.1),
• put the hexagon nut (A) back on, tighten it and
• place the wheels back on.
ATTENTION
Correct the position of the knee lever brake and be sure
that it functions properly.
2.1.3 Displacing the wheels WITH a camber
adapter (20”, 22”, 24”)
• (3) Remove the wheels,
• remove the hexagon nut (A) of the quick-release
axle tting (B),
• remove the nut (C) from the brake arm (D) includ-
ing the inner shell,
• remove both camber adapters (E) and place them
in front of the new position.
• Fixate both camber adapters (E) with the tting (B)
and the shell in the new position,
• replace the hexagon nut (A) and tighten it,
• replace and tighten the nut (C) from the spacer.
ATTENTION
The camber adapters must always be mounted opposite.
At 0°: Inner surface = thick end facing down.
Outer surface = thick end facing up
ATTENTION
Correct the position of the knee lever brake and be sure
that it functions properly.
(A)
(A)
(B)
(B)
(C)
(D)
1 2 3 4 5
(1)
(2)
(3)
(A)
(C)
(D)
(E)
(B)

LoopSORG
8
2.1.4 12” wheels
Changing to 12” wheels subsequently:
• (1) Remove the big wheels including the
brake pad, tting and drum brake arm,
• mount the adapter (A) for the 12” wheels with
the screws (B) in the bottom hole row (C)
(also see 2.1.1, Picture 1D),
• mount the screw (D) with the delivered discs in
the proper hole.
• Mount the quick-release axle tting (E) (see
2.1.2) with the brake pad and the drum brake
arm (F)
analogously as described above and
• put the 12” wheels on.
ATTENTION
Be sure that the drum brake functions properly and if nec-
essary establish its functionality (see drum brake).
ATTENTION
When using a knee lever brake, this must be displaced
(see knee lever brake). Correct the position and be sure
that it functions properly.
�INDICATION
In order to change the camber to 0°, please proceed as
described.
2.1.5 Camber
�INDICATION
To change the camber with a wheel base extension,
please proceed as described here.
Changing the camber subsequently:
• (2) remove the rear wheels,
• remove the hexagon nut (A) of the quick-release
axle tting (B),
• remove the nut (C) from the drum brake arm in-
cluding the inner surface shell.
• Place both camber adaptors (D+E) in front of the
position wanted: (D) thick end down; (E) thick end
up-
• Fixate both with the tting (B) and the shell from
the drum brake spacer in the new position,
• replace the hexagon nut (A) and tighten it,
• replace the nut (C) of the drum brake arm and
tighten it.
ATTENTION
Be sure that the drum brake functions properly and if nec-
essary, establish its functionality (see drum brake).
ATTENTION
Correct the position of the knee lever brake and be sure
that it functions properly (see knee lever brake).
(B)
(C)
(D)
(E)
(F)
(A)
(2)
(1)
(A)(C)
(D)
(E)
(B)

service record
9
(1)
(2)
(A)
(C)
(B)
(A)
(3)
(D)
(B)
(C)
(D)
(A)
(E)
(C)
(B)
(F)
2.1.6 Wheel base extension for 20” + 22”
Preparing to extend the wheel base:
• remove the wheels on both sides including brake
pads, ttings etc.
• remove the wheel cover holder completely,
• remove, if necessary, the anti-tipper completely.
To extend the wheel base on 20” and 22” wheels:
• (1) mount the wheel base extension (A) with the
screws (B) in the holes, position 1 and 4 (see 2.1.1
A or B),
• mount the quick-release axle tting (C) in the ap-
propriate hole and
• adjust the drum brake spacer (D) in the appropri-
ate hole.
To displace the skirt guard holder:
• (2) put the holder (A) with the screwing (B) through
the positions 1 and 4 of the hole plate and xate
this with a plate (C) on the hole plate’s inner sur-
face.
Adjusting the skirt guard:
• (4) Replace the wheels and adjust the skirt guard
on the given holes (A) and slotted holes (B).
ATTENTION
Be sure that the drum brake functions properly and if nec-
essary establish its functionality (see drum brake).
ATTENTION
Correct the position of the knee lever brake and be sure
that it functions properly (see knee lever brake).
�INDICATION
In order to change the camber to 0°, please proceed as
described.
2.1.7 Wheel base extension for 24”
To prepare proceed as described above.
• (3) Mount the wheel cover adapter (A) with the
screws (B) in the holes on the wheel base exten-
sion (C),
• mount the wheel base extension (C) with the
screws (D) in the hole position 1 and 4 (see 2.1.1
C),
• mount the quick-release axle tting (E) as de-
scribed above, in the appropriate holes and adjust
the drum brake arm (F) in the appropriate hole.
Adjusting the skirt guard:
• (4) Place the wheels back on and adjust the skirt
guard on the given holes (A) and slotted holes (B).
ATTENTION
Be sure that the drum brake functions properly and, if
necessary, establish its functionality (see drum brake).
ATTENTION
Correct the position of the knee lever brake and be sure
that it functions properly (see knee lever brake).
�INDICATION
In order to change the camber to 0°, please proceed as
described.
(4)
(A)
(B)

LoopSORG
10
2.1.8 Casters
To adjust the caster adapters:
• (1) loosen all four screws (A), also the ones on the
frame inner surface, that connect the adapter and
the frame pipe together on both sides,
• loosen both screws (B),
• bring the adapter in an exact vertical position
by turning the adjustment plate (C) (with a slot
screwdriver),
• check the position by using an angle.
• Tighten all screws again; screws (A) with 9 Nm,
screws (B) with 7 Nm
ATTENTION
After every change made on the casters the steering head
tendency must be newly adjusted.
ATTENTION
Safety nuts can only be used once. Once removed, the
safety nuts must be replaced by new ones.
�INDICATION
A falsely xated steering head tendency can cause disrup-
tive and hindering “ascend and descend drive” through
the caster while driving around bends.
2.1.9 Casters with closed frame arch
If you would like to add a frame arch so that the frame is
closed in the front and more resilient:
• (2) Remove the caster adapters from both sides
(A) including the half shells (B),
• put the frame arch (C) on and attach it from the
top with the screws (D),
• move the caster adapters (A) out of the old holes
(E+F) into the new holes (F+G),
• mount the adapters (A) including half shells (B)
with the screws (H) in the new position and adjust-
--as described above---the casters in an absolute
vertical position.
ATTENTION
The casters MUST be mounted in the new position, so
that the screws (E) for the caster adapter on the frame
arch are attached to the frame.
A VARIANT POSITION IS NOT ALLOWED AND HIGHLY DAN-
GEROUSE!!
ATTENTION
Correct the position of the knee lever brake and be sure
that it functions properly (see knee lever brake).
ATTENTION
After every change made on the casters the steering head
tendency must be newly adjusted.
(1)
(B)
(frame inner
surface)
(C)
(A)

service record
11
(A) (B)
(C)(D)(E) (F)
(G)
(A)
(E) (F) (G)
(H)
(B)
2.2 ASSEMBLY GROUP FRAME
2.2.1 Frame arch for closed frames
In order to add the frame arch for a closed frame in the
front, proceed on both sides of the frame in the same man-
ner as follows:
• (1) Remove the caster adapters on both sides (3A)
including the half shells (3B) as described in 2.1.9,
if necessary,
• remove the knee lever brakes (see chapter
“brakes”)
• and remove the caps on the end of the frame pipes
(A) and (B).
• (2) Guide the delivered shell (C) from the front in
the frame pipe and screw it on with the screw (D)
in the suitable hole (E).
• Place the frame arch on the mounted shell (C) and
at the same time, guide the tappet (F) in the bot-
tom frame pipe.
• Screw the frame arch together at the top with the
screw (G) in the shell (C).
• Check the tight t of the screws (D and G).
• (3) Displace the caster adapters (A) and the half
shells (B) as described in 2.1.9 out of the old
holes (E+F) and in the new holes (F+G),
• Mount the adapter (A) including the half shell (B)
in the new position (F+G) with the screws (H)
• and adjust the caster as described in 2.1.8 in an
absolute vertical position.
• If necessary, you have to remount and readjust the
knee lever brakes (see chapter “brakes”).
ATTENTION
THE CASTERS MUST BE MOUNTED IN THE NEW POSITION
SINCE THE FRAME ARCH IS ATTACHED TO THE FRAME
WITH THE SCREWS (H) FOR THE CASTER ADAPTERS.
(1)
(2)
(3)

LoopSORG
12
2.2.2 Widening the frame
To widen the frame:
• (1+2) remove both wheels,
• remove the screwing (A) from the crossbars (B)
completely on one side,
• (2) remove the screwing (C) from the seat board
including the shell (D) completely.
• Displace both crossbars (1B) in the necessary size
along the prepared holes on the crossbar adapters
1 or 2 cm by putting the screws (1A) loosely back
in.
• Place one or two shells (2E) on the outer side (1
shell=1 cm, 2 shells=2 cm),
• place the screwing (2C) back through the shell.
• Tighten all screw connections (1A and 2C).
• Precede the same with the screw connections (1A
and 2C) on the other side.
� INDICATION
Please regard the next chapter if your LOOP has an addi-
tional crossbar.
ATTENTION
Both crossbars must be displaced in the same distance
on both sides. An asymmetrical assembly is dangerous
and not allowed!
2.2.3 Additional crossbar
To xate the additional crossbar under the seat:
• (3) remove both wheels,
• then remove the screw connections, completely
on one side, of the bottom crossbar as described
above,
• on the same side, remove the screw connections
(A) for the seat board,
• place the crossbar adapter (B) for the top crossbar
(C) in and screw it onto the frame pipe with the
screw (D).
• Place the top crossbar (C) in the wanted hole of
the crossbar adapter (B),
• with the screws (E), screw them together in the
same hole as the bottom crossbar,
• place or displace the shells from the seat screwing
(A) as described above,
• put the screws (A) back into the seat board and
tighten them rmly.
• Precede the same way on the opposite side.
ATTENTION
The crossbars must be displaced in the same distance on
both sides. An asymmetrical assembly is dangerous and
not allowed!
(1)
(3)
(2)(2)
(A)
(C)
(C)
(B)
(D)
(B)
(C)
(D)
(E)
(E)
(A)

service record
13
2.3 ASSEMBLY GROUP SEAT
2.3.1 Adjusting the tilting direction
(1) The tilting direction is determined by the position of the
gas spring at the bottom of the carrier (A) and on top on the
holders under the seat board (B) as well as by the horizontal
(C) and vertical (D) position of the seat.
We mount standardly as follows:
For tilting from -5° to +35°:
• (2) with frame size 1 and 2,
• (3) with frame size 3.
For tilting from +2,5° to +40°:
• (4) with frame size 1 and 2,
• (5) with frame size 3.
ATTENTION
AFTER EVERY CHANGE MADE ON THE SEAT AND/OR THE
TILTING, THE TILT BEHAVIOR OF THE LOOP MUST BE NEW-
LY TESTED AND PRACTICED WITH A PASSENGER AND THE
HELP OF AN EXPERIENCED AND STRONG PERSON.
(2)
(3)
(4)
(5)
(1)
(A)
(B)
(C)
(D)

LoopSORG
14
2.3.2 Displacing the seat plate horizontally
In order to displace the seat plate by 2 cm with the same
tilting direction (only possible with frame sizes 2 and 3):
• (1) remove the screws (A) from the seat plate (B)
on both sides including the inner shells (see chap-
ter 2.2.2, picture 2E) completely.
• (2) Remove the screws (F and D) from the gas
spring (E) completely,
• move the seat plate (1B) to the alternative posi-
tion,
• replace the shells,
• replace the screws (1A) through the shell
• and retighten the screw connections (1A).
• Place the gas spring (2E) in the alternative posi-
tion (2F and 2D),
• replace the screw
• and tighten it.
ATTENTION
AFTER EVERY CHANGE MADE ON THE SEAT AND/OR THE
TILTING, THE TILT BEHAVIOR OF THE LOOP MUST BE NEW-
LY TESTED AND PRACTICED WITH A PASSENGER AND THE
HELP OF AN EXPERIENCED AND STRONG PERSON.
� INDICATION
If the Loop is equipped with two gas springs then please
precede the same.
2.3.3 Displacing the seat plate vertically
In order to displace the seat plate by 2 cm with the same
tilting direction:
• (3) loosen both screws (C) from the guide clip on
both sides and
• remove both screws from the screw connection
(A) of the seat unit including the half shells (B) on
both sides completely.
• (4) Remove the screw connections of the gas
spring (F) including the shells completely.
• (3) Move the seat unit with the carriers (D) to the
desired measurements in the holes (E) (each hole
is ± 2 cm),
• (4) Displace the gas spring in the holes (G) (each
hole is ± 2 cm) in the same measurement.
• Place the screws (3A) with the half shells (3B) in
the new position and tighten them rmly.
• Place the screws (4F) with the shells in the con-
nection of the gas spring and tighten them rmly.
ATTENTION
AFTER EVERY CHANGE MADE ON THE SEAT AND/OR THE
TILTING, THE TILT BEHAVIOR OF THE LOOP MUST BE NEW-
LY TESTED AND PRACTICED WITH A PASSENGER AND THE
HELP OF AN EXPERIENCED AND STRONG PERSON.
ATTENTION
If you do not displace the seat unit and the gas spring
parallel, a different tilting direction and a different seat
adjustment will result.
(1)
(2)
(3)
(4)
(A)
(D)(F)
(E)
(A)
(C)
(D)
(E)
(B)
(G)
(F)
(B)
(C)

service record
15
(A)
(C)
(B)
2.3.4 Position wedge adapter
You can adjust the seat position as described in the chapter
before, horizontally and vertically through the seat plate. In
addition, you can change the position of the wedge adapter.
In order to change the position of the wedge adapter:
• (1) loosen all four screws (A),
• push the wedge in the wanted position
• and retighten all four screws (A).
ATTENTION
AFTER EVERY CHANGE MADE ON THE SEAT AND/OR THE
TILTING, THE TILT BEHAVIOR OF THE LOOP MUST BE NEW-
LY TESTED AND PRACTICED WITH A PASSENGER AND THE
HELP OF AN EXPERIENCED AND STRONG PERSON.
2.3.5 Release lever- seat wedge
(2) The red release lever (A) of the wedge adapter should
stick out of the seat plate about 1 cm.
To change the position:
• (2) loosen both screws (B),
• guide the release lever in the wanted position and
• retighten the screws (B).
� INDICATION
With certain tilt adjustments “collisions” between gas
spring and release lever can occur. In this case, be sure
that the gas spring has enough room when the max. tilt
angle is in use; see chapter 2.3.1 tilting.
2.3.6 Position push bar
If, for example, you have a great structure depth of the seat
shell on the back, the structure depth can be compensated
through the position of the push handles.
For this:
• (3) loosen the four screws (A) of the push bar
adapter (B),
• push the ends of the pipes from the push bar in
the wanted position, forward or backward
• and retighten all four screws (A).
ATTENTION
AFTER, IT IS IMPORTANT THAT YOU CHECK THE TILT BE-
HAVIOR OF THE LOOP WITH FULL STRAIN (WITH A PAS-
SANGER) AND THE HELP OF AN EXPERIENCED AND
STRONG PERSON.
IF NECESSARY, THE CENTRE OF GRAVITY MUST BE
CHANGED (WHEELBASE EXTENSION) AND THE POSITION
OF THE ANTI-TIPPER MUST BE RENEWED.
ATTENTION
Regularly check if the spring buttons (C), at the end of the
push bar pipes, functions properly
(3)
(1)
(A)
(2) (A)
(B)
~ 1 cm

LoopSORG
16
2.3.7 Double gas spring
The components involved:
(1) (A) seat plate
(B) top adapter for gas spring
(C) top mounting points for gas spring
(D) bottom adapter for gas spring
(E) bottom mounting points for gas spring
(F) release lever for gas spring
(G) Bowden cables (with release lever on the push
bar)
(H) gas spring
(I) frame traverse
(J) frame half
An oversight of the individual steps to apply a second gas
spring in short form:
1. Remove control lever of the gas spring and
wedge adapter,
2. move the already available gas spring,
3. take off frame half,
4. attach new gas spring adapter,
5. put frame back together,
6. mount the top adapter under the seat plate,
7. attach new gas spring to the top adapter,
8. attach new gas spring to the bottom adapter,
9. mount the release lever for the double gas spring
on the bar,
10. determine the max. length of the new Bowden
cable and install it, cut the Bowden cables,
11. bring the back of the Loop into an upright posi-
tion,
12. mount the Bowden cable on the respective re-
lease mechanism of both gas springs,
13. xate the traction of the release mechanisms,
14. if necessary, retighten wedge adapter,
15. test the tilting with max. strain and if necessary,
adjust.
(1) (A)
(E)
(F)
(H)
(G)
(I)
(I)
(D)
(B)
(C)
(J)

service record
17
Step 1: control lever
• (1) Remove both screws (A) from the control lever
and the spiral cable shell from the Bowden cables
and
• remove the control lever of the seat wedge (see
chapter 2.3.5) under the seat plate.
Step 2: moving the gas spring
• (2) Loosen the four screws (A) and
• adjust the wedge adaptor so that the front of
the three screws (B) of the top adapter is visible
through the mount hole (C).
• With the screws (B), remove the top adapter of the
gas spring.
�INDICATION
With frame size 1, there are only the back two screws (B),
where in this case you do not have to remove the wedge
adapter.
• (3) Remove both screws (A).
• Displace the adapter (B) including gas spring (C) in
the alternative holes (D).
• (4) Displace the top adapter (A) in the alternative
holes (B) and xate the gas spring back in the top
adapter with the screw (C) as in the same mount-
ing point as before.
• (5) Remove the inner cable of the Bowden cable
(A) on the release mechanism of the gas spring by
loosening the clamp (B) and the adjusting screw
(C) and/or the lock nut (D) and remove the com-
plete Bowden cable (A).
Step 3: removing half of the frame
• Remove one half of the frame as described in
chapter 2.2.2.
Step 4: applying the new adapter
• (6) Guide the second adapter (A) of the gas spring
on the traverses (B) and connect the adapter with
the screws (C) tightly in the prepared holes of the
traverses (see also picture 3D).
Step 5: putting the frame together
• Screw the frame (as described in chapter 2.2.2)
on the traverses back together.
•
INFORMATION
Be sure to check that the traverse adapters are put on
symmetrical (right and left side in the same hole!).
(1) (A)
(A)
(C)
(B)
(D)
(D)
(3)
(2) (C)
(A)
(B)
(5) (A)(C) (D) (B)
(4)
(A)
(B)
(B)
(C)
(C)
(B) (A)(A)
(C)
(C)
(6)

LoopSORG
18
Step 6: mounting the top adapter
• (1) Both alternative mounting possibilities of the
gas spring are shown in picture 1.
• Attach the second top adapter (A) of the gas spring
by screwing it on with the three screws (B) under-
neath the seat plate in the prepared holes.
Step 7: mounting the new gas spring on the top
• (1) Screw the gas spring on to the top adapter (A)
with the screw (C).
Step 8: mounting the new gas spring on the bottom
• (2) Both alternative mounting possibilities of the
gas spring are also shown in picture 2.
• Screw the gas spring in the bottom adapter with
the screw (A) in the prepared holes (B).
INFORMATION
Both gas springs must be mounted in the same mounting
points of the adapter.
INFORMATION
Use the same mounting point as before. Otherwise you
will receive a different tilt direction. For comparison: see
chapter 2.3.1 tilting.
Step 9: attaching the control lever again
• Mount the new control lever for the gas spring on
the push bar as described in step 1 and
• (3) mount the control lever of the seat wedge with
both screws (A) under the seat plate.
Step 10: installing the maximum length of the Bowden
cables
• Place the push bar in the maximum push height,
• (4) fold the back of the Loop forward and
• lie the push bar forward toward leg support (see
picture), so that maximum length for the Bowden
cables is reached.
• Now guide the new Bowden cable from the release
lever over the seat to the back and then back to
the front underneath the Loop to each release le-
ver of the gas springs.
• Fold the back of the Loop back in an upright posi-
tion and
• cut the ends of both Bowden cables to the needed
measurements.
Step 11:
• (4) Fold the back of the Loop back in an upright
position.
(1)
(A)
(A)
(A)
(B)
(C)
(C)
(2)
(B) (B)
(A) (A)
(3)
(4)

service record
19
(2)
(1)
(A)
(B)
(C) (D) (E)
(B) (C)
(A)
(3)
(A)
Step 12: mounting the Bowden cables
• (1) Mount the ends (A) of both inner cables on the
release mechanism of the gas spring.
• Guide the inner cables (B) rst through the ad-
justing screw (C), then through the hole (D) of the
clamp (E).
• With a thumb, push the release lever (A) SLIGHTLY
upward toward the adjusting screw (C).
• While pushing the adjusting screw up, tighten the
clamp (D) by turning it.
• (2) Shorten the excess piece of Bowden cable (A)
just far enough so that you can adjust the release
moment, if necessary, with the clamp.
Step 13:
• Be sure that the release mechanism functions
properly and adjust the release moment with the
adjusting screw (2B) and the lock nut (2C).
Step 14:
• Replace the back upright.
Step 15:
• (3) Push the wedge adapter back in the wanted po-
sition and retighten the four screws (A) for xating
the wedge adapter.
ATTENTION
AFTER EVERY CHANGE MADE ON THE SEAT AND/OR THE
TILTING, THE TILT BEHAVIOR OF THE LOOP MUST BE NEW-
LY TESTED AND PRACTICED WITH A PASSENGER AND THE
HELP OF AN EXPERIENCED AND STRONG PERSON.

LoopSORG
20
2.4 ASSEMBLY GROUP BACK
2.4.1 Setting back depth
To xate the back depth see chapter 2.3.6 Position push
bar.
ATTENTION
TILT STABILITY (see there)
2.4.2 Setting height of the push bar
The basic setting of the height adjustable push bar can be
changed as follows:
• (1) Remove both star knob screws (A) from the
bush bar,
• push the push bar up or down in the guide slots (B)
until the alternative hole (C) is visible.
• There, place the star knob screws (A) in and tight-
en them.
2.4.2 Setting back angle
If you have a seat shell with a xed back angle you can ad-
just the back angle of the Loop to it as follows:
• (2) place the seat shell with the wedge on the
wedge adapter and be sure that the shell snaps
in tightly.
• Remove both screws (A),
• bring the back of the Loop and the back of the seat
shell in a parallel position,
• xate this position by placing both screws (A) in the
alternative holes (B) and
• retighten the screws (A).
2.4.3 Adjustment of back guide
(3) To add the back guide:
• place the clamping part (A) including the connec-
tion part (B) on the traverse (C) of the back pipes,
• place the back pipes of the Loop as close as need-
ed to the back of the seat shell.
To change the distance between shell and back you have
three options:
1. Displace the back of the Loop (see chapter 2.3.6
position push bar),
ATTENTION TILT STABILITY
2. displace the wedge adapter (see chapter 2.3.4 po
sition wedge adapter),
ATTENTION TILT STABILITY
3. displace the wedge under your seat shell.
• After, mark the four holes (D) of the connection
part with a marker (also on the opposite side, here
not visible),
• remove the seat shell out of the wedge adapter
• place the holes on the back of the seat shell and in
that, screw the connection part (B).
Put the seat shell in and test if the lock element is tight in
the connection part and if necessary correct it with the four
screws (E) of both runners (F).
(1)
(2)
(3)
(B)
(B)
(A)
(A)
(A)
(B)
(C)
(E)
(E)
(D)
(C) (C)
Other manuals for Loop 802
1
Table of contents
Other SORG Wheelchair manuals

SORG
SORG Jump alpha User manual

SORG
SORG kika User manual

SORG
SORG Jump alpha Service manual

SORG
SORG Vector User manual

SORG
SORG Dynamis MV 793 User manual

SORG
SORG Vector Service manual

SORG
SORG MIO MOVE Service manual

SORG
SORG Jump beta User manual

SORG
SORG Loop Service manual

SORG
SORG Tilty vario User manual