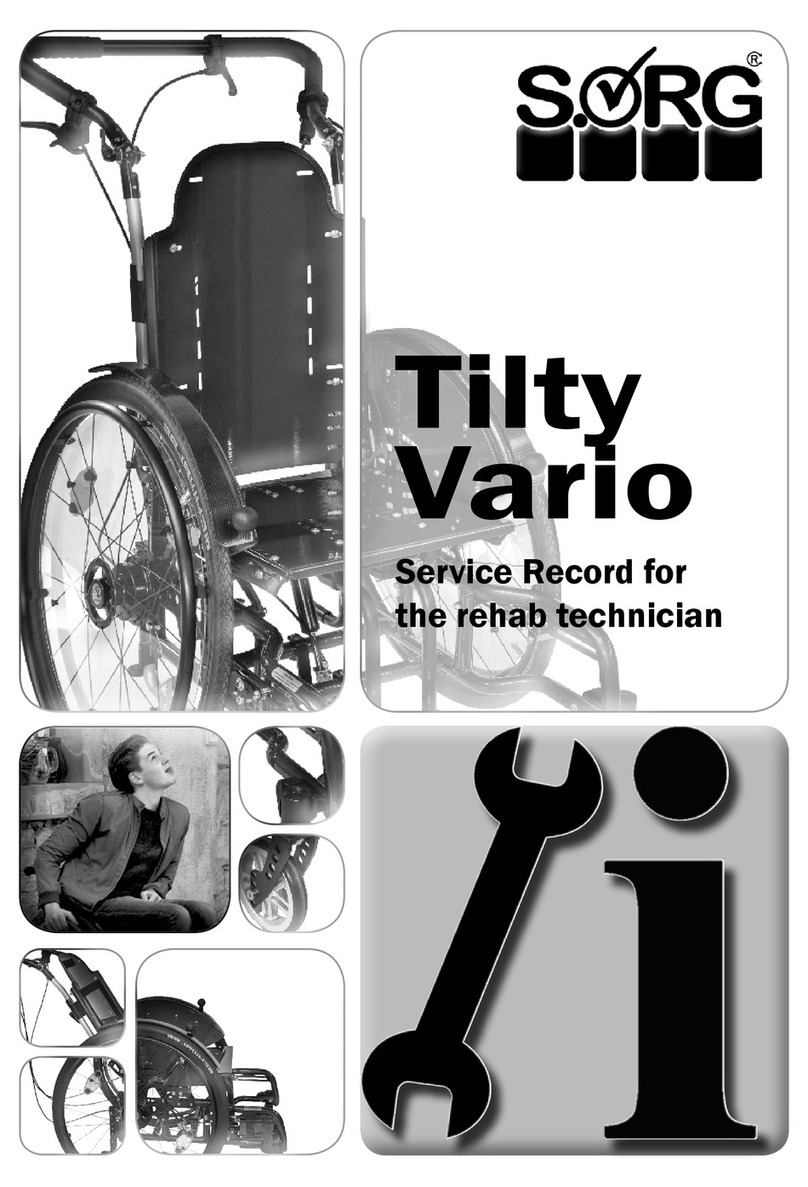
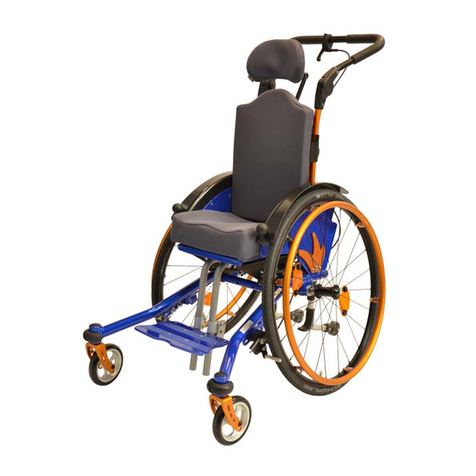
SORG Tilty vario User manual

User Manual
& Servic Book
Tilty vario

Page 2 of 58 User Manual Tilty vario
We are a company-member of rehaKind e.V.
International Support Group for the
Rehabilitation of Children and Adolescents
Imprint:
Technical collaborator: Manfred Ball
Editing and layout: Bernhard Wendel
As at 05/2012
Technical alterations and misprints excepted.
V.i.S.d.P.
SORG Rollstuhltechnik GmbH + Co.KG
Bernhard Wendel
Benzstraße 3-5
68794 Oberhausen-Rheinhausen
Fon 07254 - 9279.0
Fax 07254 - 9279.10
Mail info@sorgrollstuhltechnik.de
Web www.sorgrollstuhltechnik.de
© by SORG Rollstuhltechnik GmbH + Co.KG
Benzstraße 3-5, 68794 Oberhausen-Rheinhausen.
All texts and pictures are subject to copyright and
may not be published - not even in extracts! -
without the explicit authorisation of SORG
Rollstuhltechnik Gmbh + Co. KG.

User Manual Tilty vario Page 3 of 58
Table of Contents
1. General References ...........................4
1.1 Preamble............................................... 4
1.2 Reception .............................................. 4
1.3 Specifications ....................................... 5
1.4 Application ............................................ 6
1.5 Accessory and attachment drives ..... 6
2. Safety Instructions .............................7
2.1 General Security Advice ...................... 7
2.2 Before Every Use .................................. 7
2.3. How to Avoid Tipping .......................... 8
2.4 Coping with Obstacles ......................... 9
2.5 Heat & Water........................................ 9
2.6 Driving in Road Traffic......................... 9
3. Adjustments .....................................10
3.1 Leg Support Adjustments .................10
3.1.1 Undivided Leg Support.............. 10
3.1.2. Hinged Leg Support (optional). 11
3.1.3. Leg Support with Support Pad
(optional) ............................................. 13
3.2 Seat Heights........................................14
3.3 Centre of Gravity.................................15
3.4 Back Height.........................................16
3.5 Back Extension with Head Pad (optional)
.....................................................................17
3.6 Pelvic Belt (optional)..........................17
3.7 Back Angle ..........................................18
3.8 Side guard, clothing guard................19
3.9 Arm Pads (optional)...........................20
3.10 Adjustment of Caster and Rear Wheel
.....................................................................20
3.11 Locking brake...................................21
3.11.1 Standard Knee-lever Brake .... 21
3.11.2 Drum Brake (optional) ............ 22
3.12 Anti-tippers .......................................22
3.12.1 Anti-tipper (opt.) ...................... 23
3.13 Head Rest (optional) .......................24
3.14 Lateral Truss Pads (optional).........24
3.15 Abduction Wedge (optional) ..........24
3.16 Push Handles ...................................25
3.16.1 Extendable Push Handles (optional)
............................................................. 26
3.16.2 Push Bar (optional) ................. 27
3.16.3 Push Bar for up to 30 cm SW
(optional) ............................................. 27
3.17 Growth Adaption (opt.)....................28
3.17.1 Seat Depth Extension ............. 28
3.17.2. Seat Width Adjustment.......... 29
4 General Handling ..............................30
4.1 Getting in and out ..............................30
4.2 Push Handles......................................31
4.2.1 Push Bar (optional) ....................32
4.3 Tilt, Back Angle Adjustment and -
Extension ....................................................33
4.3.1 Tilt ...............................................33
4.3.2 Back Angle Adjustment..............34
4.3.3 Folding the Back to the Front....34
4.4 Anti-tipper ......................................35
4.5 Wheels with Quick-release-axles .....36
4.6 Leg Supports....................................... 37
4.6.1 Leg Support................................37
4.6.2 Leg Support, Hinged (optional) .37
4.7 Locking Brake.....................................38
4.7.1 Locking Brake, standard ...........38
4.7.2 Attendant Brake (optional)........38
4.7.3 Drum Brakes (optional) .............38
4.8 Loading and Transportation .............39
4.9 Safety of Transportation ...................39
4.10 Transportation of a wheelchair as
Seat in a Passenger Car........................... 40
5 Maintenance......................................41
5.1 Cleaning and Attendance .................41
5.2 Disinfection .........................................41
5.3 Inspection............................................ 42
5.4 Checklist and Maintenance.............. 43
5.5 Checklist Yearly Inspection ..............45
5.6 Reparations.........................................46
5.7 Service .................................................46
5.8 Replacement Parts............................ 46
5.9 Disposal ...............................................46
5.10 Reuse.................................................46
5.11 Tyre Change......................................47
6 Technical Data...................................48
6.1 Measures and Dimensions ...............48
6.2 Meaning of Labels.........................49
7 Warranty ............................................50
e.g. for constructional changes etc.8
Warranty Form......................................53
8 Warranty Form ..................................54
9 Life Cycle Record...............................55
9.1 User Chronology .................................55
9.2 Service Book ....................................... 56
Retailer Information.............................58
Page 4 of 58 User Manual Tilty vario
1. General References
1.1 Preamble
Tilty vario will be your child’s reliable companion in
their everyday life. For this purpose, your child has to
familiarise with the wheelchair because, as any other
technical device, it may hold manifold dangers if
used inappropriately.
The following user manual is divided up into 5
function-specific chapters: 1. Preamble, 2. Safety
Instructions, 3. Adjustments, 4. General Handling, 5.
Maintenance. Chapters 6-8 discuss technical data
and warranty conditions.
Chapters 2 and 4 are supposed to acquaint you and
your child with the wheelchair and to explain its daily
handling. Chapter 3 is directed EXCLUSIVELY to
your rehabilitation engineer since this chapter deals
unexceptionally with safety-relevant points. So
please, in your own interest, leave the adjustment
work to a qualified medical supply store.
Looking back on our long-standing experience as
one of the leading manufacturers in childhood
rehabilitation, we work most carefully and thoroughly
during all stages of development and construction.
This enables us to guarantee you the highest
standard of quality, individuality and safety. Through
our certification according to ISO 9001:2008 we
commit ourselves to continuously extending this
quality standard.
All materials used for the wheelchair are flame-re-
sistant.
For reasons of simplification, in the following
chapters we will only refer to you; however the
information given is all the more vital for your child
since it contains important safety instructions.
ATTENTION As the current owner of the
wheelchair, please keep this manual in a safe place
and make sure all work done on your wheelchair by
your medical supply store is documented in detail in
the respective chapter at the end of this manual.
In case of a reuse of the wheelchair, this manual
serves as an important source of information for your
health insurance fund. Additionally, it provides the
verification of regular inspections, which might be
important in the event of a warranty claim.
Therefore, please keep this manual with the
wheelchair and hand it back to your health insu-
rance in case of return of your Tilty vario.
PLEASE NOTE This user manual is intended
for both you and your rehabilitation engineer. It
contains instructions on the correct adjustment of
the medical aid which may exclusively be
conducted by a qualified member of the
specialised trade (cf. chapter 3).
Moreover, it is supposed to help you get ac-
quainted with the handling of your new Tilty vario
and to avoid accidents (cf. chapter 4). This
manual covers all possible equipment options that
might be installed on a Tilty vario and thus may
contain chapters that do not conform to your
particular configuration.
ATTENTION Please read and mind this user
manual with its general safety instructions
carefully before putting Tilty vario into service for
the first time.
If you have any questions, the sanitary trade of
your confidence or our competent team will be
glad to help you.
Service line +49 07254 / 9279-0
We appreciate your trust!
1.2 Reception
Each SORG wheelchair is mounted and tested for
functional efficiency and freedom from defects by
our specialists and is then packaged in special
paperboard containers by our shipping experts.
Thus every SORG wheelchair leaves our factory
in a flawless condition. The wheelchair has been
constructed according to your ordering informati-
on; the technical factory delivers your wheelchair
ready for use and adjusted to your needs.
PLEASE NOTE For judicial reasons, we
nevertheless need to ask you to check your
wheelchair IMMEDIATELY after reception and in
the presence of the bearer for any damage that
might have occurred during transport. Please note
that, according to the legal situation, belatedly
recorded damage cannot be asserted, neither to
the forwarding company nor to us!

User Manual Tilty vario Page 5 of 58
Please do not sign the acknowledgement of receipt
of the forwarding company before careful inspection.
The necessary steps and measures for individual
adjustments are stated in chapter 3 “Adjustments”.
ATTENTION For safety reasons, all adjustments
described are to be conducted exclusively by a
specialised trade member qualified for this purpose.
PLEASE NOTE For ecological reasons, we kindly
ask you to keep the packaging in case
transportation becomes necessary at a later point.
1.3 Specifications
Tilty vario is a compact tiltable children's
wheelchair with a rigid frame and firm wheel
base. The entire seat-back-unit is tiltable by
27° via the gas pressure spring, and the back
angle may be adjusted by 40° backwards or
folded frontwards. Thanks to its light weight,
its outstanding handling characteristics, as
well as the custom-fit adjustment options of
the ergonomically ideal grip point, Tilty vario
may also be used as an activity wheelchair.
Tilty vario is indexed for children with a seat
width from 28 cm (approx. 11 in) and a weight
load of up to 90 kg (approx. 198 lbs). It
supports early and careful activation. The
tilting and back angle adjustment contribute to
shifting strains and thus to training the entire
tonicity as well as stimulating the
cardiovascular system, the metabolism and
digestive tract. An upright position of the pelvis
and a good decubitus-prophylaxis are being
supported. Tilty vario aids in developing reflex
control and perception, prevents scolitotic
processes and supports the development of
controlled muscular tonicity. These
possibilities conform to the following disease
patterns:
Spinal muscle atrophy
Spina Bifida
Craniocerebral injury
Cerebral palsies
All forms of paraplegia
Infantile cerebral palsy (ICP)
Paralysis
Athetosis
Ataxia
Unstable circulation and metabolism
Risk of decubitus
Difficulties in obtaining/maintaining an
upright position
Pathological pattern of movement
Distorition of perception
Asymmetries
Lack of body and head control
From SW 28 cm and up to a maximum
payload of 90 kg, there are 2 different frame
sizes available; frame size 1 (SD 30-34),
frame size 2 (SD 36-40).

Page 6 of 58 User Manual Tilty vario
Tilty vario is not suitable for use in the
following cases:
Tonicity disregulation (hyper- and
hypotonicity)
Epilepsy/spasticities
Inability to be seated
The intended maximum payload must not be
exceeded.
1.4 Application
Tilty vario is suitable for both indoor and
outdoor use. It is designed exclusively for the
walking impaired or abatic child or adolescent
to whom the wheelchair has been adjusted by
a qualified specialist, for individual use in self-
transportation or transportation with an
assistant.
ATTENTION
The transportation of a person may only be
conducted on solid surface and using a
seat unit or a seat shell. The wheelchair
does not serve as a means of
transportation for goods or the like. It is
not intended to be used as a seat in a
motor vehicle.
1.5 Accessory and
attachment drives
Accessory or attachment drives may only be
mounted on models which we have released
for this purpose.
ATTENTION
The mounting of additional drives is to be
conducted by the producer of the respective
system or by the medical supply store charged
with this purpose - and entirely on their
responsibility.

User Manual Tilty vario Page 7 of 58
2. Safety Instructions
2.1 General Security
Advice
Please make sure to read this user manual and the
safety instructions very carefully before taking your
new Tilty vario into service. It is of utmost importance
that both the user and the assistant are able to both
understand and realise all instructions. Since it is not
possible to list all dangers that may possibly occur
under different circumstances, please make good
use of caution and mind whenever you are using
your wheelchair!
Please use Tilty vario exclusively according to the
specifications described in chapters 1.3 and 1.4. If
used otherwise and/or inappropriately, the
wheelchair may endanger you and your
surroundings considerably. Furthermore, this may
lead to the expiry of our guarantee and product
liability!
Please make yourself and your child acquainted with
the respective functions, specific characteristics, and
the operation of your wheelchair. Take sufficient time
for this and please make sure to conduct your first
driving practices with the support of an experienced
assistant.
It is very important that –in the presence of an
experienced assistant –you test the stability of your
new wheelchair to both sides, to the front, and to the
back. To do this, please slowly lean as far as you
can to each side, front, and back while sitting in your
wheelchair in order to, for instance, pick up an object
from the ground. Attentively observe when exactly
the wheelchair starts tipping over and memorize this
point well.
To keep your wheelchair permanently safe and
functional, please consider the instructions on
handling (chapter 4) and maintenance (chapter 5).
Do not ever leave your wheelchair unattended –
neither empty nor occupied! The brakes might
loosen unintentionally and endanger you, your child,
and your surroundings considerably. Always
position your wheelchair against a wall or a corner
so it cannot roll away.
Please do not by any means conduct adjustments,
maintenance and/or repair work by yourself, but
always turn to the medical supply store of your
confidence whose trained staff has been
introduced proficiently to the conduction of this
work and is equipped with the necessary tools.
For functional reasons, your hands are placed on
rotating parts (i.e. the rear wheels) while driving
your wheelchair.
To avoid injuring your hands, please make sure
not to reach into the spokes of the rear wheels or
the space between rear wheel and lever brake.
Profile wheels with integrated handrims or spoke
covers (optional devices) reduce the risk of finger
injuries.
2.2 Before Every Use
The functional efficiency of the locking brake
(cable brake and attendant brake) is dependent
on:
• correct inflation pressure
• intact bowden wire
• non-worn-out braking bolts
Please check the braking effect of the cable brake
before every use. The cable brake can only
function properly with sufficient air pressure and
flawless tyre profile of the rear wheels.
Check the cables of the cable brakes for damages
before every use. Damaged cables are to be
exchanged immediately.
Check the correct tyre inflation pressure according
to the indication on the tyre equipment. By the
way: it will be a lot easier to drive and manoeuvre
your wheelchair with the correct air pressure of
caster and rear wheels.
Please check the safe and firm fit of the quick-
release-axles: If the quick-release-axle button is
not pressed, the rear wheels or casters must not
be removable. The axles need to be cleaned from
dust and fluff regularly.
Please conduct a general visual inspection to duly
discover and repair possible damage that might
lead to endangerment.

Page 8 of 58 User Manual Tilty vario
2.3. How to Avoid Tipping
Avoid using the foot rest when getting in or out of
your wheelchair for it might tip forward. If possible,
please fold the foot rest to the side or to the back in
order to get closer to the wheelchair. And make sure
that you only conduct this action on firm, even
ground and with the locking brake tightened.
Under certain circumstances it might be
therapeutically necessary that the child does use
the foot rest to get in or out of the wheelchair. In
this case, please turn the rear wheels forward to
improve the wheelchair’s resistance against
tipping and do not let your child get in or out
without supervision and assistance.
At first, practice all driving techniques on even
ground and only with the support of an experienced
assistant. Only after that should you try and tackle
downgrade and upgrade paths –again, with the
support of an experienced assistant.
Avoid putting your wheelchair into bank positions on
uneven or sloping ground to prevent it from tipping
sidewards! Always drive in right angle from the
hillside/the obstacle, never diagonally.
Please avoid extreme adjustments of your
wheelchair with a high seat inclination and place the
seat back as far at the front as possible to gain
safety from tipping. Extreme configurations
combined with a disadvantageous posture may
provoke the wheelchair to tip, even on level ground.
Please drive downgrade or upgrade paths ex-
clusively with the anti-tipper feature activated. When
driving on upgrade paths and offsets, bend the
upper part of your body forward as far as possible
and drive ramps and upgrades with a pitch or incline
of more than 7% (4°) only with the support of an
assistant. When driving downgrade paths, please
bend your upper body as much to the back as
possible.
Adjusting the casters incorrectly or driving too fast
(especially on downgrade paths) may lead the
casters to judder, which may result in a dangerous
and abrupt braking of the wheelchair. Hence, do not
change the pre-adjusted position of the casters in
the caster fork, drive downgrade paths very slowly
and bend the upper part of your body backwards
while doing so.
In order to reach for objects on the sides or in
front of your wheelchair, please remember your
initial stability test and do not lean out too far. If
you feel insecure, you may use a reacher.
ATTENTION The locking brake cannot usually
be used to brake during driving since this
might make your wheelchair halt abruptly with
the risk of falling out for the passenger. It is
only to be used in that way very limitedly and
only by very experienced drivers.
We strongly recommend using anti-tippers to
inexperienced and young wheelchair drivers.
Depending on the body measurements specific to
the user, it might be possible that adjustments of
seat and wheel positions beyond the tipping sa-
fety limits can be realised on your wheelchair. In
this case, the safety from tipping must be valued
over the handling characteristics!

User Manual Tilty vario Page 9 of 58
2.4 Coping with Obstacles
To surmount level
differences ramps or lifts
should be used whenever
possible.
We strongly advise you to
surmount stairs only with
the aid of two experienced
assistants. For this
purpose, the safety wheel
needs to be deactivated.
Please mind that the
wheelchair may be held,
carried or lifted only on metal parts which are
firmly bolted to the frame.
Do not use escalators in any case not even
with assistants!!! Department stores and public
buildings with escalators should always have
suitable lifts available.
Do not rapidly drive towards offsets (e.g. kerb
stone edges) as this entails an increased danger
of tipping! Do not jump from stairs or offsets with
your wheelchair! This does not conform to the
intended usage of the wheelchair, puts you and
your surroundings in serious danger, and may
damage your wheelchair heavily.
Please remember to fold your anti-tippers to the
inside while using lifts and lifting plates and
while surmounting offsets.
Before pulling a person seated in a wheelchair
backwards over an obstacle via the push
handles, please check the push handles in their
bracket and the rubber pads on the push handle
pipes for firm fit.
2.5 Heat & Water
Handrims heat up through strong friction,
especially by braking during fast driving or along
downgrade paths. Therefore, if you have
sensitive skin, we recommend you to wear
gloves like those used in race-cycling (with
leather palm protection but never woollen
gloves) or special wheelchair gloves.
Using the wheelchair in damp locations or in
water should be avoided as this may lead to
the corrosion of components, which, in turn,
affects the driving quality and service life of
your wheelchair negatively.
ATTENTION Textile components of the
wheelchair, such as cushion or plastic are
inflammable. Therefore, please keep any
ignition sources, particularly lighted cigarettes,
away from the wheelchair.
ATTENTION Exposed to direct solar radiation,
dark surfaces of the wheelchair (seat, back,
clothing guards, etc.) may heat up strongly. To
avoid burns, place the wheelchair in a shady
place or protect it from direct solar radiation
with a blanket (or a similar object).
2.6 Driving in Road Traffic
Keep in mind that as a driver/passenger in
o respect
the road traffic regulations.
Since your wheelchair does not count as a
motor vehicle according to legal regulations,
you may use pavements if you are driving at
walking pace.
In the dark, wear light-coloured clothes or
clothes with reflectors whenever possible.
Avoid driving on road surface or bicycle paths.
Your wheelchair is provided with reflectors on
the sides and on the back. Check regularly
whether they are clean and clearly visible.
To use your wheelchair as a seat in a
passenger car, only use means of
transportation approved for the transportation
of wheelchairs.
Transporting a person sitting in a wheelchair
in a vehicle entails a considerable safety risk
for all people involved. We therefore strongly
recommend not using the wheelchair as a

Page 10 of 58 User Manual Tilty vario
A
seat in a passenger car and sitting down on a
conventional car seat instead.
During a ride in a vehicle (including public
transport), you must not be seated in your
wheelchair without a restraint system for a
passenger.
ATTENTION If using your wheelchair as a
passenger seat in a vehicle cannot be avoided,
the regulations according to DIN 75078-2 have
to be fulfilled! Please make sure to read chapter
3. Adjustments
The following indications on the adjustments of
Tilty vario affect its usage safety! Therefore, we
are pointing out explicitly that all adjustments,
reparations, and any other sorts of changes are
to be conducted exclusively by the rehab
technicians of your medical supply store who
have been qualified by us!
The instructions relevant for you and the daily
handling of your wheelchair are described in
.
If no other specifications are indicated, the
following torques are valid for screw joints:
M5: 5 Nm
M6: 7 Nm
M8: 20 Nm
M10 (si-nut): 25 Nm (caster)
quick-release-axle fitting: 35 Nm
ATTENTION A wheelchair is a medical aid which
must be adjusted to the individual situation of
your child by your rehab technician in order to
obtain the highest therapeutic benefit possible.
But every technical device inherits safety risks in
everyday usage. Therefore, we are pointing out
explicitly that all adjustments, reparations, and
any other sorts of changes are to be conducted
exclusively by the rehab technicians of your
medical supply store who have been qualified by
us!
Otherwise, you may endanger yourself, your
surroundings, and especially children
considerably, and, moreover, lose our warranty
claim!
ATTENTION When conducting any
adjustments, please make sure to maintain
distances between all movable parts (e.g. truss
pads, abduction wedge, etc.) and fixed parts in
order to prevent human body parts from
clamping in between them.
Guidance values for this purpose are:
Finger area: <5 mm or >25 mm
Foot area: <25 mm or >45 mm
Head area: <60 mm or >250 mm
3.1 Leg Support
Adjustments
3.1.1 Undivided Leg Support
The leg support is ideally adjusted if the
complete thigh rests (with a two finger
distance between seat and hollow of knee)
evenly on the seat cushion/shells while the
leg is standing on the foot rest in a right angle.
A foot rest positioned too high leads to a
permanently buckled position in the pelvic
area. If it is adjusted too low, unpleasant
congestions in the thighs might occur.
ATTENTION Please make sure not to use the
leg support to get in or out of the wheelchair in
order to avoid the danger of tipping!
Pos 2
Pos 1

User Manual Tilty vario Page 11 of 58
Adjustment of the lower leg length
loosen screws (pos. 2) on both sides
choose desired position, tighten screws
(pos. 2)
tighten screws (pos. 2), making sure that
the foot rest can still be hinged
upwards
Adjustment of the depth
loosen screws (pos. 1)
place leg support bracket into desired
position
retighten screws
Adjustment of the angle
ATTENTION By changing the distance between
the footrest and the carrier pipes (pos. 1), you
may change the angle of the footrest by ± 10°.
Screw pos. 1 to the desired lenght,... .
Locking device (optional)
pull out the spring bolts (A) on both
sides, then turn the spring bolt by 90°
hinge footrest backwards
again, turn both spring bolts by 90° until
they engage into the slot
to open the interlock, please proceed
analogically
ATTENTION Do not start your ride until you have
made sure that the spring bolt is engaged firmly!
ATTENTION Please make sure not to lean too
far out of the wheelchair when (un-)locking your
footrest for you may fall out! Please have
someone assist you.
3.1.2. Hinged Leg Support
(optional)
The hinged leg support is available in one piece
or divided: The leg supports can be altered in
their angles up to a horizontal position (180°).
This way the legs can be elevated in the tilted
seat position to improve blood circulation.
Adjustment of the depth
is conducted on the fixation below the seat
plate (pos. 1).
Adjustment of the lower leg length
loosen screws (pos. 2) on both sides
choose desired position on the axle
plate
tighten screws (pos. 2) firmly
to hinge, loosen locking bolt (pos. 3)
on both sides and let it snap into the
desired hole
Pos.1
A

Page 12 of 58 User Manual Tilty vario
Pos.1
Pos.2
Pos.3

User Manual Tilty vario Page 13 of 58
1
A
1
2
B
3.1.3. Leg Support with
Support Pad (optional)
If you choose a leg support with support pad, the
opposite side is supplemented with a divided
swing-up leg support. The side with the pad does
not have a foot rest!
Adjustment of the support pad
loosen the clamping lever (pos. 1) on the
lower side of the pad
choose desired position on the axle plate
(A)
tighten clamping lever (pos. 1) firmly
Swinging up the leg support
loosen clamping lever (pos. 2)
place leg support into desired position
tighten clamping lever (pos. 2) firmly
Angle adjustment of the support pad
loosen screw joint (B)
adjust desired angle
tighten screw joint
ATTENTION Please make sure to turn away the
grip parts of the clamping levers (pos. 2)
backwards so they cannot injure or inhibit your
child.
PLEASE NOTE If your wheelchair is equipped
with a support pad on both sides, please
conduct adjustments analogically.

Page 14 of 58 User Manual Tilty vario
3.2 Seat Heights
Usually, the seat height at the back is adjusted to
be approx. 2-3 cm (0.8-1.2 in) lower than at the
front in order to obtain a secure and comfortable
sitting position with even distribution of the seat
pressure and to straighten up the pelvis.
(Differing adjustments may also make sense in
individual cases.)
In the case of Tilty vario, the entire seat unit may
be altered via the gas pressure spring (there is
no other option for this purpose). Therefore the
best way to obtain the desired seat inclination is
by using the tilting mechanism.
ATTENTION When adjusting the seat height on
the front, you should always make sure that you
can access tables easily without your knees
hitting their edges. Corresponding to the position
of the foot rest, the casters must be free to
rotate 360°.
Adjustment of the seat height
By modifying the seat carrier plate, you may alter
the seat height by up to 2.5 cm (1 in) differing
from the height adjusted when the wheelchair is
leaving our factory.
remove screw joints (pos. 1) on the front
and back completely
mount seat carrier angle (pos. 2) into
desired position
retighten screw joints firmly
Pos 1
Pos 2

User Manual Tilty vario Page 15 of 58
X
3.3 Centre of Gravity
You may change the centre of gravity of the
wheelchair (X) by moving the seat plate (pos. 2)
in relation to the seat carrier part. When leaving
our factory, the wheelchair is preadjusted into a
tipping stable position. The further back the
seat is mounted, the more the wheelchair tends
to tip backwards. However, it may also be tilted
back on 2 wheels more easily. This facilitates,
for experienced wheelchair users, to quickly and
easily surmount obstacles, as the wheelchair’s
agility is effectively improved.
ATTENTION Even if the anti-tipper is activated
and there is actually no danger, a beginner may
be unsettled or even demotivated if the
tipping!
ATTENTION Please work carefully, gradually,
and only with the aid of an experienced assistant
towards the maximum degree of tipping
proneness desired for by the user! Read the
SAFETY INSTRUCTIONS carefully (p. 7 2ff).
loosen screws (pos. 1) and place seat
(pos. 2) into desired position
retighten screws firmly
test new adjustments with the securing
support of an assistant!

Page 16 of 58 User Manual Tilty vario
3.4 Back Height
Height adjustment by 5 cm:
remove screw joint (B) of the back pipes
on the angle adjustment device
place back pipes into desired position
retighten screw joint
PLEASE NOTE
You can adjust the entire back angle adjustment
device via the lower screws (A) in 2.5 cm steps.
While doing so, however, please keep in mind
that you are also altering the turning point of the
back adjustment (which may be of advantage if
e.g. a thicker cushion is being used).
Height adjustment by 2.5 cm:
loosen screw joint (A) on both sides
pull out back and screw it onto new
position
make sure to insert the screws properly
into their thread and to secure them
with screw locks
A
A
B
B

User Manual Tilty vario Page 17 of 58
3.5 Back Extension with
Head Pad (optional)
We strongly recommend this back extension in
order to make sure your child is able to decide
when they want to drive actively or rest. It
provides the same comfort as a buggy and
supports the head (white not inhibiting its
movement) when the wheelchair is tilted.
Activating and deactivating the back extension
remove the head pad (A)
loosen star knobs (pos. 1) on both sides
pull up the back extension
(be careful not to wedge the extension
plate)
tighten star knobs (pos. 1) firmly
attach the head rest onto the other side
with the aid of the Velcro strips
provided
3.6 Pelvic Belt (optional)
Mounting of the pelvic belt:
Pull the free ends of the belt on both sides
through the space between the side part and
back adapter. Screw together the ears of the
belt ends into two of the bolts on the back
adapter. Screw the eyes of the belt ends onto
the bottom cross-brace in between the frames.
A

Page 18 of 58 User Manual Tilty vario
3.7 Back Angle
Put the back into the desired position by pulling
the string (A) on the ring on the back of the seat
downwards until the locking bolts (B) unlock on
both sides of the back angle plate.
Then, let go of the ring with the string and make
sure that the locking bolts have snapped firmly
into the bores of the back angle plate. For
transportation, the back may be folded onto the
seat and locked in that position.
B
A

User Manual Tilty vario Page 19 of 58
3.8 Side guard, clothing
guard
Tilty vario's side guards and clothing guards are
pre-adjusted in relation to its wheel size.
However, you may adjust the side guard and
clothing guard in their sizes, independently from
each other. For the side guard, the screw-in-
adapter (A; here in combination with the drum
brake) must be loosened. Loosen screws (pos.
1) as well so the side guard can be placed 2.5
cm up or down.
The clothing guard (B) can also be adjusted to
the wheel size by loosening the screws (pos. 2).
For both steps, please make sure that the
screws are retightened firmly afterwards and
that the gap between clothing guard and wheel
coat is no more than 5 mm.
The lever for the locking brake (if present) is
integrated into the clothing guard.
A
Pos. 1
B
Pos. 2

Page 20 of 58 User Manual Tilty vario
3.9 Arm Pads (optional)
The arm pads, too, are firmly screwed onto the
side guards so no further adjustments need to
be done. You may adjust the height of the pads
via a clamping screw on the retainer of each
arm pad.
3.10 Adjustment of Caster
and Rear Wheel
When all adjustment work on the seat
inclination has been done, it is important to
readjust the inclination of the steering head
because all changes of the centre of gravity,
the wheel base, on the caster axle, etc.
directly influence the inclination of the
steering head.
To adjust the caster adapter, please loosen
both screws (A) which connect the adapter
and the frame. Place the adapter into a
perfectly vertical position by turning the
adjusting washer (B) (with an Allen key size
4) - you may check this by taking an angle.
Make sure to tighten all screws after
finishing your adjustment work!
A
A
B
Other manuals for Tilty vario
4
Table of contents
Other SORG Wheelchair manuals

SORG
SORG Siro II User manual

SORG
SORG Tilty vario User manual

SORG
SORG Loop 802 Service manual

SORG
SORG Vector User manual

SORG
SORG Loop RS User manual

SORG
SORG Loop Service manual

SORG
SORG Jump alpha User manual

SORG
SORG Dynamis TSD Service manual

SORG
SORG Tilty vario Service manual

SORG
SORG Mio Carbon Service manual

SORG
SORG MIO MOVE Service manual

SORG
SORG Loop RS Service manual

SORG
SORG Loop 802 User manual

SORG
SORG Jump beta User manual

SORG
SORG Vector User manual

SORG
SORG Tilty vario Service manual

SORG
SORG Mio Move 604 User manual

SORG
SORG Dynamis MV Service manual

SORG
SORG Vector Service manual

SORG
SORG Dynamis TSD User manual