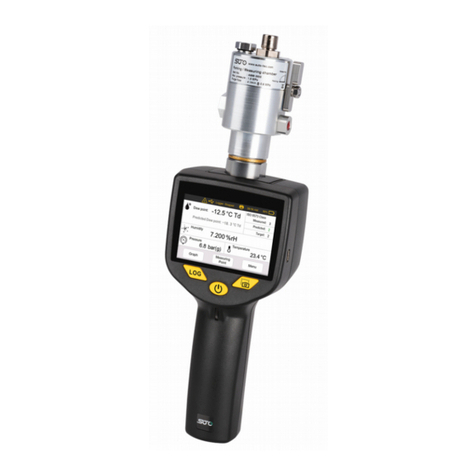
SUTO S505 Manual

English
Instruction and operation manual
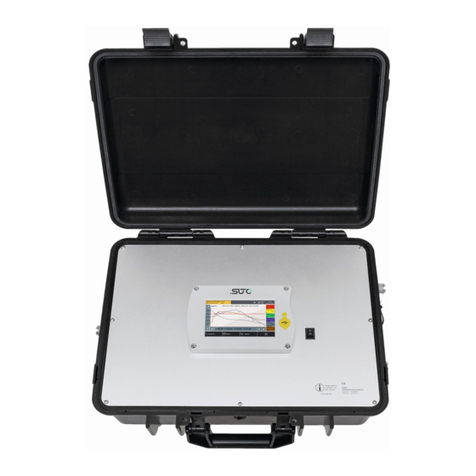
S505
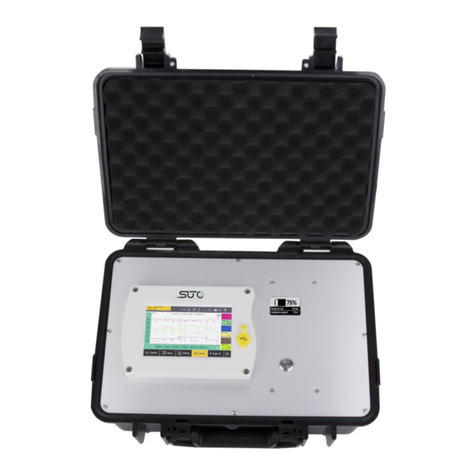
Dew point meter (portable)

Dear Customer,
Thank you for choosing our product.
Please read the operating instructions in full and carefully observe it
before starting up the device. The manufacturer cannot be held liable
for any damage that occurs as a result of non-observance or non-
compliance with this manual.
Should the device be tampered with in any manner other than a
procedure that is described and specified in the manual, the warranty is
cancelled and the manufacturer is e empt from liability.
The device is designed e clusively for the described application.
SUTO offers no guarantee for the suitability for any other purpose.
SUTO is also not liable for consequential damage resulting from the
delivery, capability or use of this device.
2 S505

Table of contents
1 Safety instructions......................................................................4
2 Registered trademarks.................................................................6
3 Application.................................................................................6
4 Features....................................................................................7
5 Technical data.............................................................................7
5.1 General................................................................................7
5.2 Electrical data.......................................................................8
5.3 Accuracy .............................................................................8
6 Dimensional drawing..................................................................10
7 Installation ..............................................................................11
7.1 Installation procedure .........................................................11
7.2 Electrical connection ..........................................................13
8 Operation ................................................................................14
8.1 Buttons and connectors........................................................14
8.2 Symbols on screen..............................................................15
8.3 Main screen .......................................................................16
8.4 Basic operations .................................................................16
8.5 Data logger.........................................................................17
8.6 File menu ..........................................................................18
8.7 Print menu .........................................................................18
8.8 Bluetooth menu ..................................................................18
9 Application software .................................................................19
9.1 S4A...................................................................................19
9.2 S4C-Handheld.....................................................................19
10 Optional accessories................................................................20
10.1 Portable bluetooth printer CS2.............................................20
10.1.1 Paper loading..............................................................20
10.1.2 Basic operations..........................................................21
10.2 Measuring chambers for the S505........................................22
10.2.1 Standard measuring chamber (A699 3500).....................22
10.2.2 By-pass measuring chamber (A699 3501).......................22
10.3 4G SD card.......................................................................23
11 Calibration..............................................................................23
11.1 Dew point calibration..........................................................24
11.2 Pressure calibration ...........................................................25
12 Maintenance...........................................................................25
13 Disposal or waste....................................................................26
S505 3

Safety instructions
1 Safety instructions
Please check if this instruction manual matches with the
product type.
Please observe all notes and instructions indicated in this
manual. It contains essential information which must be
observed before and during installation, operation and
maintenance. Therefore this instruction manual must be read carefully
by the technician as well as by the responsible user / qualified
personnel.
This instruction manual must be available at the operation site of the
dew point meter at any time. In case of any obscurities or questions,
regarding this manual or the product, please contact the manufacturer.
ARNING!
Compressed air!
Any contact with quickly escaping air or bursting
parts of the compressed air system can lead to
serious injuries or even death!
•Only use pressure tight installation material.
•Avoid that persons get hit escaping air or bursting parts of the
instrument.
•The system must be pressureless during maintenance work.
ARNING!
Voltage used for supply!
Any contact with energized parts of the product, may
lead to a electrical shock which can lead to serious
injuries or even death!
•Consider all regulations for electrical installations.
•The system must be disconnected from any power supply during
maintenance work.
•Any electrical work on the system is only allowed by authorized
qualified personal.
4 S505

Safety instructions
ATTENTION!
Permitted operating parameters!
Observe the permitted operating parameters, any
operation exceeding this parameters can lead to
malfunctions and may lead to damage on the
instrument or the system.
•Do not e ceed the permitted operating parameters.
•Make sure the product is operated in its permitted limitations.
•Do not e ceed or undercut the permitted storage and operation
temperature and pressure.
General safety instructions
•It is not allowed to use the product in e plosive areas.
•Please observe the national regulations before/during installation
and operation.
Remarks
•It is not allowed to disassemble the product.
•Always use spanner to mount the product properly.
ATTENTION!
Measurement values can be affected by malfunction!
The product must be installed properly and
frequently maintained, otherwise it may lead to
wrong measurement values, which can lead to
wrong results.
Storage and transportation
•Make sure that the transportation temperature of the dew point
meter is between -30 ... +70°C.
•For transportation it is recommended to use the packaging that
comes with the sensor.
•Please make sure that the storage temperature of the sensor is
between -40 ... +65°C.
•Avoid direct UV and solar radiation during storage.
•For the storage the humidity must be <95% rH, no condensation.
S505 5

Registered trademarks
2 Registered trademarks
SUTO®
Registered trademark of SUTO iTEC
MODBUS®
Registered trademark of the Modbus Organization, Hopkinton, USA
HART®
Registered trademark of the HART Communication Foundation, Austin,
USA
PROFIBUS®
Registered trademark of the PROFIBUS User Organization, Karlsruhe,
Germany
3 Application
The S505 is a dew point meter which is designed to monitor the dew
point in industrial application within the permissible operating
parameters. These parameters can be found in the technical data
section.
The S505 can measure and display the following values:
•Dew point of the compressed air or gas.
•Temperature of the compressed air or gas.
•Pressure of the compressed air or gas.
The default factory settings are: dew point in °C Td. temperature in °C,
and pressure in bar.
The S505 dew point meter is mainly used in compressed air systems in
industrial environment.
The S505 dew point meter is not developed to be used in e plosive
areas. For the use in e plosive areas please contact the manufacturer.
6 S505

Features
4 Features
•Measures dew point, temperature and pressure.
•3 sensor solution available:
◦Sensor Q: -100 ... -30°C Td for trace moisture applications
◦Sensor P: -50 ... +50°C Td for standard applications.
◦Sensor Q+P: Covering the full range of dew point
measurement.
•Fast response time.
•Modern colour touch screen interface.
•Data logger, USB interface, Bluetooth connection to portable
printer.
•Measuring / parking chamber, designed for fast sensor response.
•Application software included.
5 Technical data
5.1 General
Parameters Standard unit dew point: °C Td
Standard unit temperature: °C
other units: °F, K
Standard unit humidity: % rH
Standard unit pressure: bar
Principle of measurement Capacitive method, Oscillating crystal
Sensor Sensor Q: QCM technology
Sensor P: Polymer
Measuring medium Non-corrosive gases
Measuring range Sensor Q: -100 ... -30°C Td
Sensor P: -50 ... +50°C Td
Pressure: -0.1 ... 1.5 MPa
Temperature: -30 ... +50°C
Operating temperature 0 ... 50°C
Operating pressure -0.1 ... 1.6 MPa *
S505 7

Technical data
Relative humidity 0 ... 90% rH
Casing material PC + ABS
Charging time 7 h (if switched on), 4 h (if switched off)
Protection class IP65
Dimensions See dimensional drawing on the page 10
Display 2.8” colour graphic display
Weight 0.7 kg (with measuring chamber), 0.45 kg
(without measuring chamber)
* At least 0.3 MPa is needed for the measuring chamber supplied with
the instrument. For low-pressure measuring below 0.3 MPa, choose the
optional bypass measuring chamber A699 3501.
5.2 Electrical data
Power supply USB charger: 5 V, 2 A
5.3 Accuracy
Accuracy Dew point: ± 2°C Td @ -50°C
Temperature:± 0.3°C
Pressure:± 0.005 MPa
Repeatability ± 0.5°C
Stated accuracy at Ambient/process temperature: 23°C ± 3°C
Ambient humidity: 0 ... 80% rH, no
condensation
Accuracy:
8 S505

Installation
7 Installation
Please make sure that all components listed below are included in your
package.
Qty Description Item No.
1 Handheld meter with data logger
and S4A software
P560 0505
1 Sensor unit with ordered option
(sensor unit Q, sensor unit P, or
sensor unit Q+P)
S699 0502 / S699 0503
1 Parking / Measuring chamber A699 3500
1 Teflon hose with quick connector A554 0003
1 USB charger with USB cable A554 0018
1 Transport case A554 0019
1 Calibration certificate No P/N
1 Instruction manual No P/N
7.1 Installation procedure
The following steps e plain the procedure of an appropriate installation.
1. Define the proper sensor module
which is used for the
measurement. This depends on the
e pected measurement value.
•Use the sensor module Q for
e pected dew point below
-50 °C Td.
•Use the sensor module P for
e pected dew point above
-50°C Td.
2. To change the sensor modules
just open the 2 screws at the back
of the instrument
S505 11

Installation
3. Pull the sensor module out. It is
recommended to place the
protection cap onto the unused
sensor module for storage.
Remark
The parking measuring chamber is mounted permanently on the sensor
head to keep the sensor dry. To measure, the handle on the chamber
must be turned into the “Measuring” position.
After finishing the measurement, please return it to the “Park” position.
Measuring position Parking position
12 S505

Installation
ARNING!
Do not remove or touch the sinter cap !
The sinter cap protects the sensor element from dust
and particles. rong handling may effect or even
destroy the sensitive sensor element!
4. Connect the teflon hose with the
measuring chamber. The hose is
connected to the 6 mm connector
at the chamber.
5. Connect the tip of the teflon
hose with a quick connector. The
teflon hose with quick connector is
used to connect the measuring
chamber to the process.
Remark
•Please ensure that the teflon hose remains dry and clean. Wet and
contaminated hoses can effect the measurement and should be
e changed.
7.2 Electrical connection
Please recharge the dew point meter if the battery is empty. For this use
the charger which is included in your delivered package.
S505 13

Operation
8.2 Symbols on screen
The symbol shows the battery status in % of available
energy.
The calibration is e perted. It is recommended to re-
calibrate the sensor unit. For this pleas contact the
manufacturer.
General error indication. Please note down the error
code and contact the manufacturer.
Bluetooth is active and ready to connect.
USB connection is established.
A connection to the printer is established.
The data logger is active.
The SD card is inserted
S505 15

Operation
8.3 Main screen
8.4 Basic operations
The operation is easy and similar. Please try the functions through the
touch screen and e perience the features of this production.
On the left side of the screen the menu is shown. It includes the follow
menu items:
•Settings
•Logger
•Files
•Print
•Bluetooth
•Calibration
•Service
16 S505

Operation
8.5 Data logger
Description of the function:
Start / Stop Start and stop of the logger.
Sample rate Set the time interval the samples will be recorded. For
e ample 10 sec: The logger will record the measured
values every 10 seconds.
Average For greater sampling rates, you can choose to record the
average values instead of the present value.
Logger status When logger is running it shows some status information.
Tester name User input for additional information about the person
performing the measurement.
Tester name, location and company names can be entered or modified
by selecting one entry and keep it pressed for 2 seconds. A window will
pop-up where you can choose between edit, new, delete and chancel.
The S505 has two different logger functions. One is the continuous
logging with sampling rate and the other one is a single value logging,
where you just store the current values on the screen in a file. For this
purpose the “Save” button on the main screen must be used.
S505 17

Operation
8.6 File menu
The file menu is used to view all recorded data. We distinguish between
two data files:
•Single record data file ( can be printed with CS2).
•Multiple record data file (can be analysed with S4A).
8.7 Print menu
The print menu looks very much the same as the file menu but it will
list only single recording files. Only this files can be printed with the
wireless printer.
8.8 Bluetooth menu
The BT menu is used to establish the connection with the portable
printer. In order to establish a connection The S505 and the printer
need to be paired.
1. Turn on the printer.
2. Select the S505 menu and tick "Connect to printer"
3. S505 will start to search for the printer. After a few seconds the
spinning wheels on the screen should disappear and the printer
symbol should be shown at the top of the screen.
4. Click the printer name "CS2_3631".
5. View the printer screen. If the upper left Bluethooth icon displays
the word "CON". The printer has been paired with S505
successfully.
18 S505

Application software
9 Application software
S505 is provided with two free software: S4A and S4C-Handheld. You
can download them from http://www.suto-itec.com.
9.1 S4A
S4A enables you to collect and analyze measurement data from SUTO
devices such as S505.
After downloading and installing the S4A on a computer, connect the
S505 to the computer via the USB port. :
•To detect an S505 and view its online measurement data, click the
Detect button.
•To read the S505 data files to local folders, click the Read button.
•To display the S505 measurement values recorded in the data files
in an intuitive graphical or tabular view, click the Files button.
9.2 S4C-Handheld
S4C-Handheld is the configuration software for the S505. Using the
software, you can manage data of the users, which can be assigned to
data logging files. You can manage and download the following data to
the S505 and finally print it on the portable printer:
•Location names and descriptions.
•Tester name: Identification who performed the measurement.
•Customer name and address.
•Service company name and address.
•Service company logo.
•Firmware update in S505: Please download the latest firmware
from our web page.
S505 19

Optional accessories
10 Optional accessories
10.1 Portable bluetooth printer CS2
Using the optional bluetooth printer, you can print out the measurement
values, location names and date / time.
The printer is delivered with one free paper roll. You can order more if
needed.
Power : 100 ... 240V BT
transmission
distance
:≤10 m
Automatic sleep : 5 seconds Width : 58 mm paper roll,
48mm print area
10.1.1 Paper loading
1. Remove the seal on the paper.
2. Press the "OPEN" button to open the cover.
3. Put the paper in the paper bin, and then the cover with small piece
of paper e posed.
20 S505
Other manuals for S505
1
Table of contents
Other SUTO Measuring Instrument manuals
Popular Measuring Instrument manuals by other brands

Extech Instruments
Extech Instruments HD450-NIST user guide

BANTE inststruments
BANTE inststruments 210 instruction manual

Azbil
Azbil MagneW Plus+ Series user manual

ThermoWorks
ThermoWorks BlueTherm IR operating instructions

Siemens
Siemens SITRANS L APPLICATION EXAMPLES

Dickey-John
Dickey-John C-2000 manual