3
• ACHTUNG! Funktionsbedingte scharfe Kanten
und Spitzen.
• ACHTUNG! Sollte ein Schaden an einem
Fahrzeug des Zuges aufgetreten sein, darf
das beschädigte Fahrzeug nicht mehr weiter
verwendet werden.
2.1 Wichtige Hinweise
• Die Bedienungsanleitung ist Bestandteil des Pro-
duktes und muss deshalb aufbewahrt sowie bei
Weitergabe des Produktes mitgegeben werden.
• Märklin Schaltnetzteile dürfen nur in Verbin-
dung mit Produkten der Marken Märklin, Trix
und LGB verwendet werden.
• Für Reparaturen oder Ersatzteile wenden Sie
sich bitte an Ihren Trix-Fachhändler.
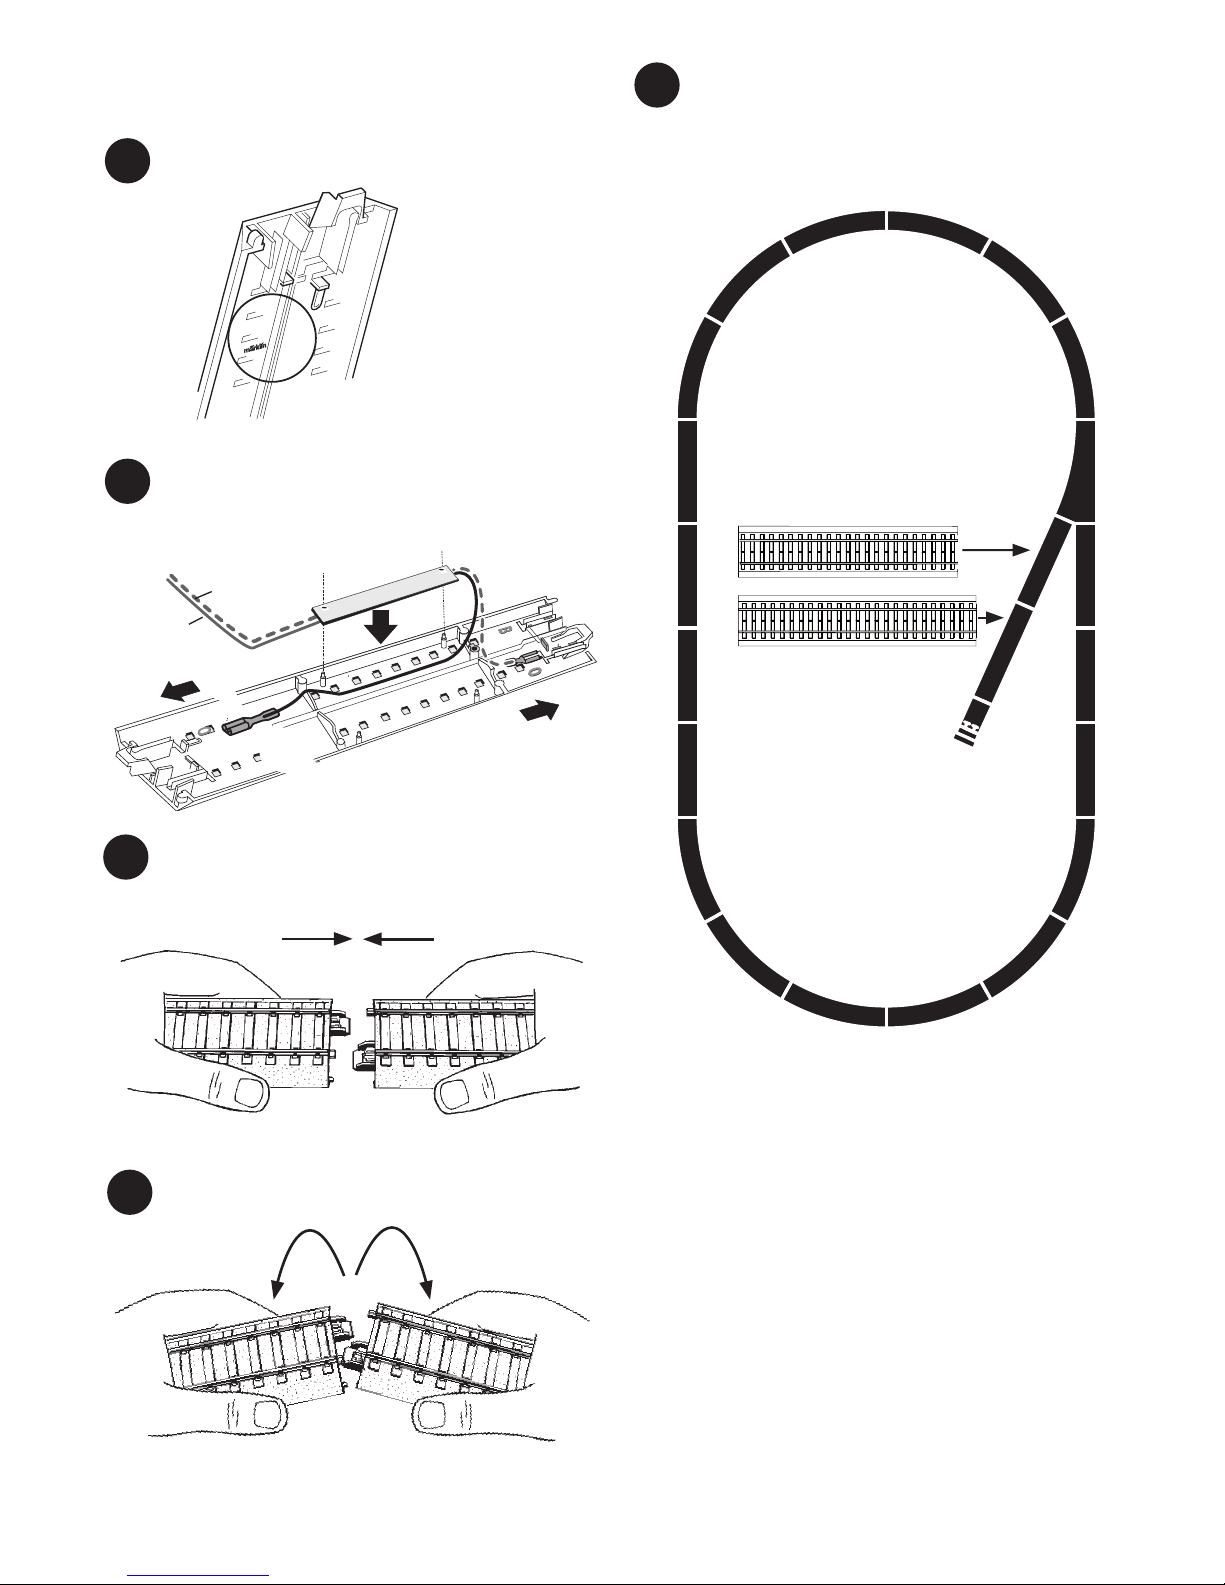
3. Lieferumfang
Zug 4-teilig
12 gebogene C-Gleise 62130
4 gerade C-Gleise 188 mm 62188
5 gerade C-Gleise 172 mm 62172
1 Weiche links 62611
1 Prellbock 62977
1 Schaltnetzteil
1 Controller
1 Entstörelektronik 611655
1 Bastelbogen „Container“
1 Beutel „Steine“
Bedienungsanleitung
Bedienungsanleitung
Garantieurkunde
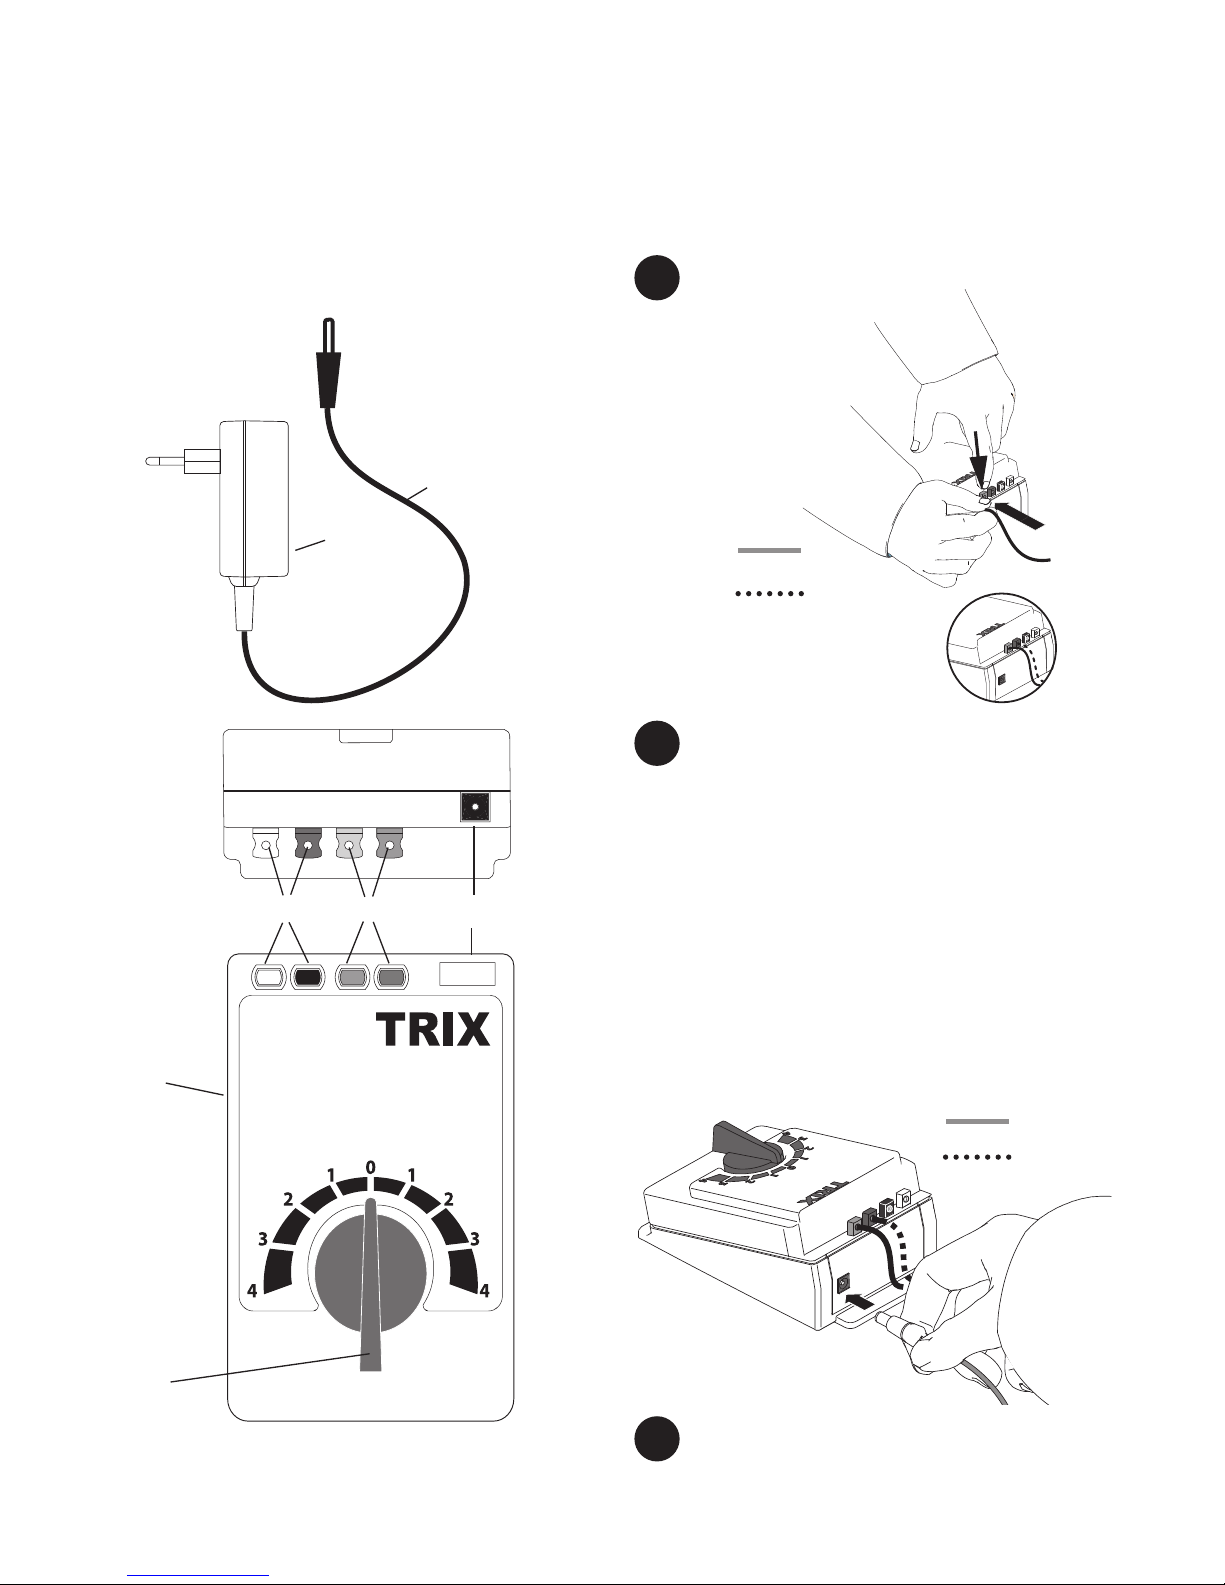
4. Technische Daten
Schaltnetzteil: Eingang 230V AC,
Ausgang 18 V DC/18 VA
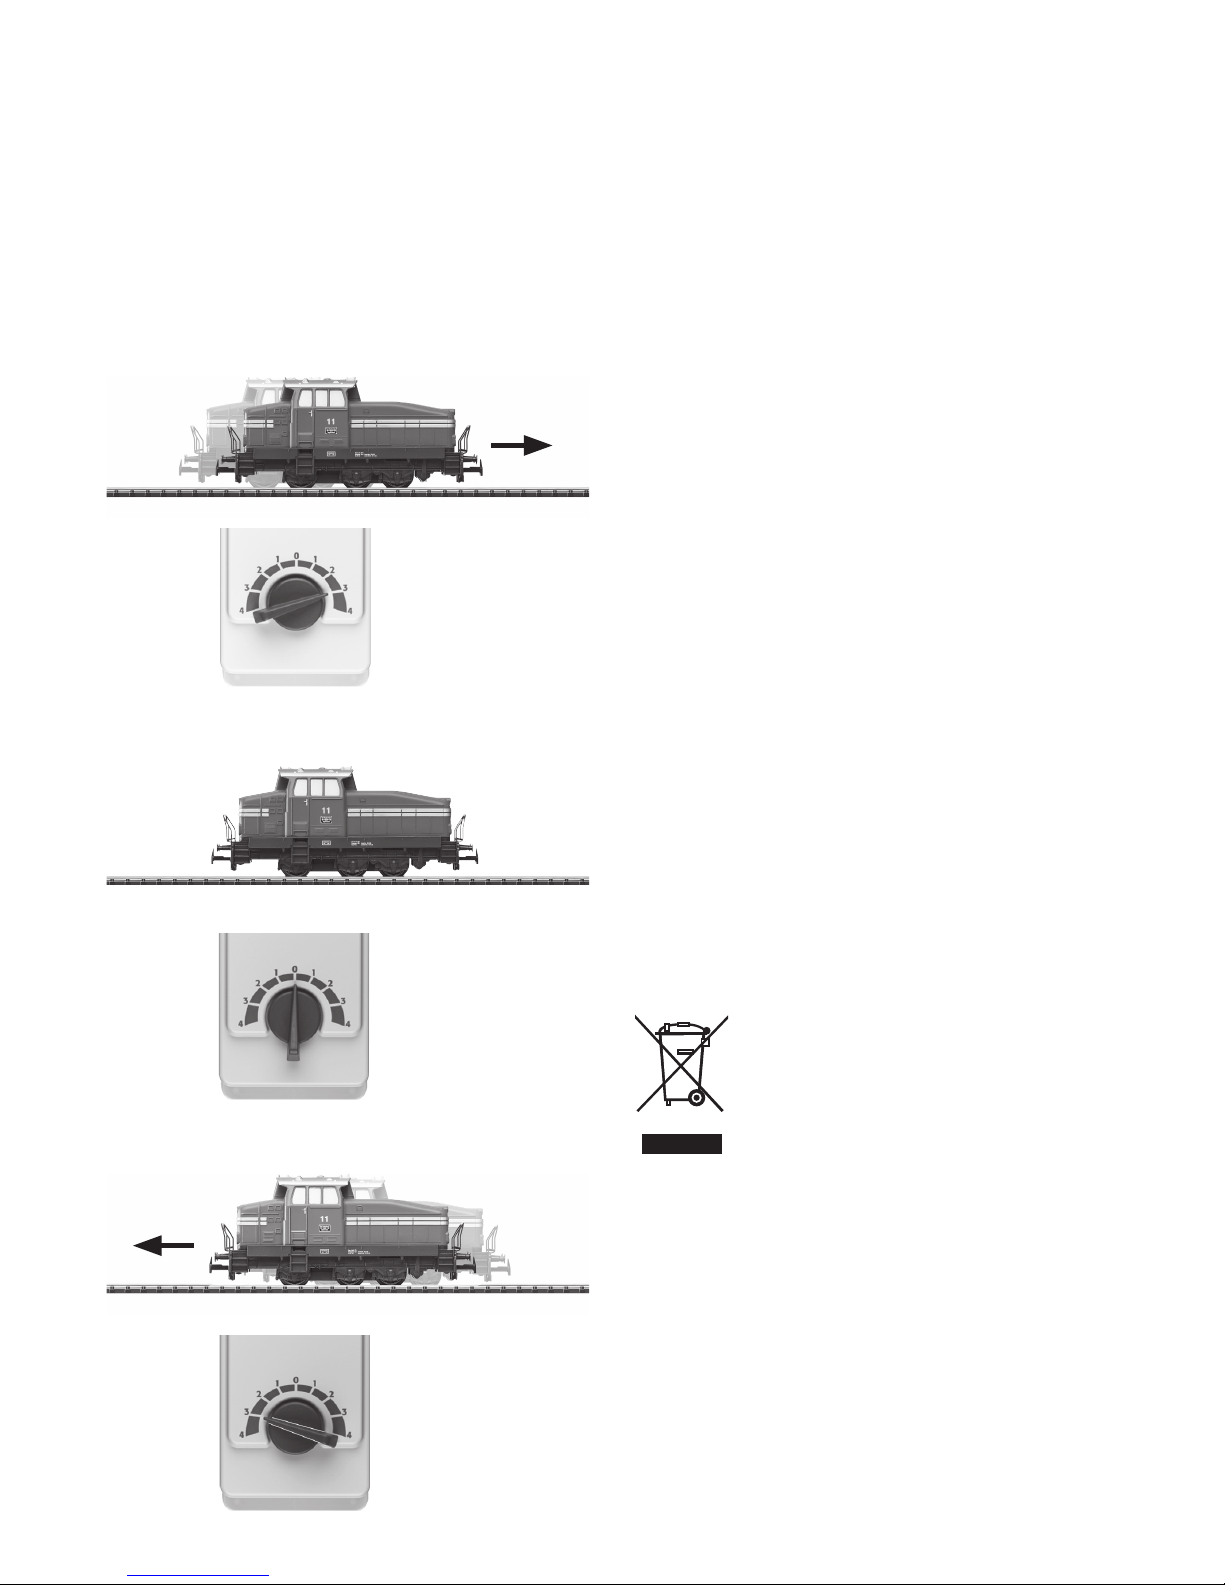
Fahrgerät: Eingang max. 24 V DC,
Ausgang Schiene max.14 V DC,
Ausgang Schalten max.24 V DC,
Spannungsversorgung Lokomotive: max. 14 V DC
Spurweite H0 (Maßstab 1:87)
5.
Hinweise zur ersten Inbetriebnahme
• Schaltnetzteil darf noch nicht in die Netzsteck-
dose eingesteckt werden.
• Anlage gemäß Punkt 6 aufbauen.
1. Bestimmungsgemäße Verwendung
Dieses Produkt ist eine Modelleisenbahn für Kinder
ab 15 Jahren in der Spurweite HO (Maßstab 1:87).
• Der Zug kann auf Modellbahnanlagen, welche
mit dem Trix-C-Gleis (siehe Packungsinhalt)
ausgestattet sind, betrieben werden.
2. Sicherheitshinweise
Lesen Sie unbedingt die folgenden Sicherheitshin-
weise vor dem ersten Einsatz eines Trix-Produktes.
Schaltnetzteile für Spielzeuge sind nicht dazu
geeignet, als Spielzeug benutzt zu werden.
Die Benutzung muss unter ständiger Überwa-
chung der Eltern erfolgen.
• Weisen Sie Ihre Kinder unbedingt darauf hin,
das Schaltnetzteil nur entsprechend seiner
Bestimmung zu verwenden.
• Weisen Sie Ihre Kinder unbedingt auf die
Gefahren des Haushaltsstromnetzes hin.
• Überprüfen Sie optisch in regelmäßigen
Abständen (je nach Häufigkeit des Spielbe-
triebes) wenigstens 1 x pro Woche das Schalt-
netzteil und seine Anschlussleitung im vom
Haushaltsstromnetz getrennten Zustand auf
Beschädigung. Beim geringsten Verdacht einer
Beschädigung darf das Schaltnetzteil erst nach
der Reparatur durch den Märklin-Reparatur-
Service weiterverwendet werden.
• Das Schaltnetzteil darf nur an eine Netzsteck-
dose mit der auf dem Typenschild des Schalt-
netzteils angegebenen Netzspannung ange-
schlossen werden.
• Das Schaltnetzteil ist ausschließlich zum Ge-
brauch in trockenen Räumen bestimmt.
• Das Schaltnetzteil ist kein Spielzeug. Es dient zur
Stromversorgung der Modellbahnanlage.
• Beim Transport des Schaltnetzteiles darf dieses nie
am Anschlusskabel gehalten werden.
• Das Produkt darf nur in geschlossenen Räumen
verwendet werden.
• Setzen Sie das Produkt keiner direkten Sonnen-
einstrahlung, starken Temperaturschwankun-
gen oder hoher Luftfeuchtigkeit aus.
• Lagern Sie das Produkt nicht unter direkter
Sonneneinstrahlung, starken Temperatur-
schwankungen oder hoher Luftfeuchtigkeit.
• Die Lok darf nur aus einer Leistungsquelle
versorgt werden.
D