manuals.online logo
Brands
  1. Home
  2. •
  3. Brands
  4. •
  5. Velux
  6. •
  7. Window Blind
  8. •
  9. Velux RHL User manual

Velux RHL User manual

Fix brackets
Zubehörträger montieren
Installer les pattes-supports
Bærebeslagene monteres
Contents of packaging
Inhalt der Verpackung
Contenu de l’emballage
Pakkens indhold
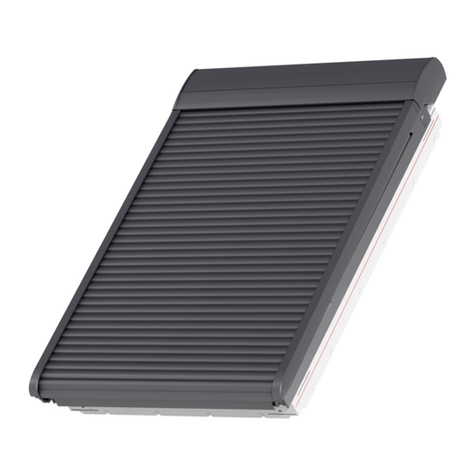
RHL
Roller blind
Rollo
Store rideau
Rullegardin
450438
B
English:
: Blind
: Not to be used in connec-
tion with these instructions
: Stops, nails and screws
: Brackets, end caps and
nails
Deutsch:
: Rollo
: Nicht zu verwenden in Ver-
bindung mit dieser Anleitung
: Haltekrallen, Nägel und
Schrauben
: Zubehörträger, Abdeck-
kappen und Nägel
Français :
: Store
: À ne pas utiliser dans le
cas présent
: Taquets, clous et vis
: Pattes-supports, caches
latéraux et clous
Dansk:
: Gardin
: Skal ikke bruges i forbind-
else med denne vejledning
: Holdekroge, søm og skruer
: Bærebeslag, endebrikker
og søm
A
B
C
1
A
B
C
1
1
A
BC
A
B
C
1
A
B
C
1English: Use brackets supplied in bag C. If brackets from
previous installations or cover caps are fitted, always
remove them.
Deutsch: Es sind die mitgelieferten Zubehörträger aus
Beutel Czu verwenden; sind Zubehörträger oder Abdeck-
kappen bereits am Fenster vorhanden, diese immer entfernen.
Français : Utiliser les pattes-supports fournies dans le
sachet C. Si des pattes-supports ou des caches latéraux
sont déjà installés sur la fenêtre, les retirer et installer les
nouvelles pattes-supports.
Dansk: De medleverede bærebeslag i pose Cskal altid
bruges. Er der monteret bærebeslag eller dækpropper i
vinduet, skal disse altid fjernes først.
C
2 3
Fix stops
Haltekrallen montieren
Fixation des taquets
Holdekroge monteres
English: Pull down blind and mark positions of stops on opposite
side and then fix stops. Use spacer supplied in bag Bas shown
to ensure correct distance from glass when positioning stops.
Deutsch: Rollo waagerecht nach unten ziehen und so die Positio-
nen der gegenüberliegenden Haltekrallen bestimmen und anzeich-
nen. Haltekrallen montieren. Den Steg aus Beutel Bwie dargestellt
zur Bestimmung des richtigen Abstandes zwischen Scheibe und
Haltekrallen benutzen.
Français : Accrocher le store à chaque taquet puis marquer
de l’autre côté la position du taquet correspondant. Utiliser la barrette
fournie dans le sachet Bcomme indiqué, pour positionner
les taquets à la bonne distance du vitrage. Clouer ainsi les taquets.
Dansk: Gardinet trækkes ned. Placering af holdekroge i den
modsatte side markeres. Holdekrogene monteres. Afstanden mellem
holdekrogene og ruden bestemmes ved hjælp af gitteret fra pose B
som vist.
B
6
Fix stops
Haltekrallen montieren
Fixation des taquets
Holdekroge monteres
English: Start by fixing three stops to the left hand side as
shown. Use spacer supplied in bag Bas shown to ensure
correct distance from glass when positioning stops.
Deutsch: Zuerst drei Haltekrallen wie dargestellt montie-
ren. Den Steg aus Beutel Bwie dargestellt zur Bestimmung
des richtigen Abstandes zwischen Scheibe und Halte-
krallen benutzen.
Français : Commencer par la fixation de trois taquets
sur un côté, contre le vitrage comme indiqué. Utiliser la
barrette fournie dans le sachet Bcomme indiqué, pour
positionner les taquets à la bonne distance du vitrage.
Dansk: Først monteres tre holdekroge op mod ruden som
vist. Afstanden mellem holdekrogene og ruden bestemmes
ved hjælp af gitteret fra pose B som vist.
B
1/3
1/3
1/3
5
Fit the blind
Rollo montieren
Installer le store
Gardinet monteres
English: Slide blind onto brackets (1) and fix with screws
supplied in bag B(2).
Deutsch: Rollo auf die Zubehörträger schieben (1) und an
beiden Seiten mit den Schrauben aus Beutel B festschrau-
ben (2).
Français : Glisser et emboîter le store sur les pattes-
supports (1) et le fixer à l’aide des vis fournies dans le
sachet B (2).
Dansk: Gardinet skubbes ind på bærebeslagene (1) og
skrues fast med skruer fra pose B(2).
12
B
4
Fix end caps
Abdeckkappen montieren
Fixer les caches latéraux
Endebrikker monteres
English: Fix end caps supplied in bag Cto fascia. The
blind is now ready for use.
Deutsch: Abdeckkappen aus Beutel Can der Blende
befestigen. Das Rollo ist jetzt fertig montiert.
Français : Mettre en place les caches latéraux fournis
dans le sachet C. Le store est alors prêt à l’utilisation.
Dansk: Endebrikkerne fra pose Cmonteres på dæklisten.
Gardinet er nu færdigmonteret.
C
7
Bevestigingsblokjes aanbrengen
Installare le placchette di montaggio
Fije los soportes
Nederlands: Gebruik altijd de bijgeleverde bevestigings-
blokjes uit zakje C. Indien bevestigingsblokjes of afdek-
dopjes voorgemonteerd zijn, dient u deze te verwijderen.
Italiano: Utilizzare le placchette di montaggio contenute
nel sacchetto C. Se le placchette o i tappi sono già fissati
alla finestra, toglierli sempre.
Español: Use siempre los soportes incluidos en la bolsa C.
Si la ventana ya tiene soportes o tapones instalados, hay
que retirarlos primero.
3
C
De inhoud van de verpakking
Contenuto dell’imballo
Contenido del paquete
2
Nederlands:
: Het rolgordijn
: Niet te gebruiken in combi-
natie met deze instructies
: Vergrendelingshaakjes,
spijkertjes en schroeven
: Bevestigingsblokjes, afdek-
kapjes en spijkertjes
Italiano:
: Tenda
: Non devono essere usate
con queste istruzioni
: Ganci, chiodi e viti
: Placchette di montaggio,
tappi di copertura e chiodi
Español:
: La cortina
: No se utiliza con estas
instrucciones
: Ganchos, clavos y tornillos
: Soportes, tapas laterales y
clavos
A
B
C
1
A
B
C
1
A
B
C
1
1
A
BC
RHL
B
Rolgordijn
Tenda rotolante
Cortina de resorte
© 1998, 2001 VELUX Group ® VELUX and VELUX logo are registered trademarks
Installation instructions for roller blind RHL. Order no. VAS 450438-0201
Plaats het rolgordijn
Inserire la tenda
Coloque la cortina
Bevestig de vergrendelingshaakjes
Fissare i ganci
Fije los ganchos
Bevestig de vergrendelingshaakjes
Fissare i ganci
Fije los ganchos
Nederlands: Schuif het gordijn in de bevestigingsblokjes
(1) en schroef het vast met de schroeven uit zakje B (2).
Italiano: Inserire la tenda nelle placchette di montaggio
(1) e fissarla con le viti che si trovano nel sacchetto B (2).
Español: Inserte la cortina en los soportes (1) y atorníllela
con los tornillos de la bolsa B (2).
Nederlands: Trek het rolgordijn naar beneden en markeer
de juiste hoogte aan de tegenoverliggende zijde. Spijker
de vergrendelingshaakjes vast. Gebruik de sleutel uit
zakje B, zoals afgebeeld, voor het bepalen van de juiste
afstand tussen glas en vergrendelingshaakje.
Italiano: Abbassare la tenda per individuare il posiziona-
mento dei ganci di fissaggio sul lato opposto; quindi fis-
sarli. Utilizzare il distanziatore contenuto nel sacchetto B
come illustrato, per dare la giusta distanza dal vetro.
Español: Tire de la cortina y marque la posición de los
ganchos en el lado opuesto. Fije los ganchos. Utilice la
plantilla de la bolsa Bcomo se indica para ajustar la
separación entre el gancho y el cristal.
Nederlands: Bevestig eerst de drie vergrendelingshaakjes
aan de linkerkant van het glas zoals afgebeeld. Gebruik
de sleutel uit zakje B, zoals afgebeeld, voor het bepalen
van de juiste afstand tussen glas en vergrendelingshaakje.
Italiano: Fissare i tre ganci accostandoli alla vetrata come
illustrato. Utilizzare il distanziatore contenuto nel sacchet-
to Bcome illustrato, per dare la giusta distanza dal vetro.
Español: Fije los tres ganchos contra el cristal. Utilice la
plantilla de la bolsa Bcomo se indica para ajustar la
separación entre el gancho y el cristal.
4 5 6
12
BB
1/3
1/3
1/3
B
Bevestig de afdekkapjes
Fissare i tappi di copertura
Fije las tapas laterales
Nederlands: Monteer de afdekkapjes uit zakje Cop de
afdeklijst. Het gordijn is nu klaar voor gebruik.
Italiano: Posizionare i tappi di copertura contenuti nel sac-
chetto Ccome illustrato. La tenda è ora pronta per l’uso.
Español: Fije las tapas laterales de la bolsa Cal embelle-
cedor. La cortina está lista para su uso.
7
C

Other Velux Window Blind manuals

Velux INTEGRA FMG User manual

Velux

Velux INTEGRA FMG User manual

Velux INTEGRA FMK User manual

Velux

Velux INTEGRA FMK User manual

Velux KSX 100K User manual

Velux

Velux KSX 100K User manual

Velux ZIL User manual

Velux

Velux ZIL User manual

Velux VELUX INTEGRA Solar MSL User manual

Velux

Velux VELUX INTEGRA Solar MSL User manual

Velux Solar SSS Operating manual

Velux

Velux Solar SSS Operating manual

Velux ZOZ 157 User manual

Velux

Velux ZOZ 157 User manual

Velux FMF User manual

Velux

Velux FMF User manual

Velux RHL User manual

Velux

Velux RHL User manual

Velux RMM A User manual

Velux

Velux RMM A User manual

Velux CVP + ISD User manual

Velux

Velux CVP + ISD User manual

Velux RMM Operating manual

Velux

Velux RMM Operating manual

Velux SMG User manual

Velux

Velux SMG User manual

Velux ZOZ 213K User manual

Velux

Velux ZOZ 213K User manual

Velux FPL User manual

Velux

Velux FPL User manual

Velux FHU User manual

Velux

Velux FHU User manual

Velux DSD User manual

Velux

Velux DSD User manual

Velux FSLC Series User manual

Velux

Velux FSLC Series User manual

Velux MSG Manual

Velux

Velux MSG Manual

Velux RFU User manual

Velux

Velux RFU User manual

Velux DML User manual

Velux

Velux DML User manual

Velux Z0V Series User manual

Velux

Velux Z0V Series User manual

Velux DML User manual

Velux

Velux DML User manual

Velux MML User manual

Velux

Velux MML User manual

Popular Window Blind manuals by other brands

LuxaFlex M25T manual

LuxaFlex

LuxaFlex M25T manual

YewdaleDefiant C40-60 Manufacturing Instructions

YewdaleDefiant

YewdaleDefiant C40-60 Manufacturing Instructions

MHZ SKALAR MINI installation instructions

MHZ

MHZ SKALAR MINI installation instructions

WAREMA Venetian 2.25/35.17 Operating and maintenance instructions

WAREMA

WAREMA Venetian 2.25/35.17 Operating and maintenance instructions

Levolor Roman Shades manual

Levolor

Levolor Roman Shades manual

Plissees DF Comfort 20 Assembly and operating instructions

Plissees

Plissees DF Comfort 20 Assembly and operating instructions

EkoOkna RAFF-I Series Assembly instruction

EkoOkna

EkoOkna RAFF-I Series Assembly instruction

YewdaleDefiant C40-90T Manufacturing Instructions

YewdaleDefiant

YewdaleDefiant C40-90T Manufacturing Instructions

Raffvorhangtechniken Makom Assembly and operation instructions

Raffvorhangtechniken

Raffvorhangtechniken Makom Assembly and operation instructions

Motion CMD-02-P Setup guide

Motion

Motion CMD-02-P Setup guide

The Shann Group URBAN TRACK Care Instructions

The Shann Group

The Shann Group URBAN TRACK Care Instructions

Levolor Sheer Shadings Installation operation care

Levolor

Levolor Sheer Shadings Installation operation care

Griesser Solomatic II operating instructions

Griesser

Griesser Solomatic II operating instructions

Dometic DB3H Installation and operating manual

Dometic

Dometic DB3H Installation and operating manual

HunterDouglas Duette Honeycomb Shades Installation

HunterDouglas

HunterDouglas Duette Honeycomb Shades Installation

Silent Gliss 4907 Operating and installation instructions

Silent Gliss

Silent Gliss 4907 Operating and installation instructions

SUNFLEX SWISH VALANCE Fitting instructions

SUNFLEX

SUNFLEX SWISH VALANCE Fitting instructions

HunterDouglas Skyline Installation operation care

HunterDouglas

HunterDouglas Skyline Installation operation care

manuals.online logo
manuals.online logoBrands
  • About & Mission
  • Contact us
  • Privacy Policy
  • Terms and Conditions

Copyright 2025 Manuals.Online. All Rights Reserved.