manuals.online logo
Brands
  1. Home
  2. •
  3. Brands
  4. •
  5. VENETA
  6. •
  7. Window Blind
  8. •
  9. VENETA Smartfit Single Cell Honeycomb Blind Instruction sheet

VENETA Smartfit Single Cell Honeycomb Blind Instruction sheet

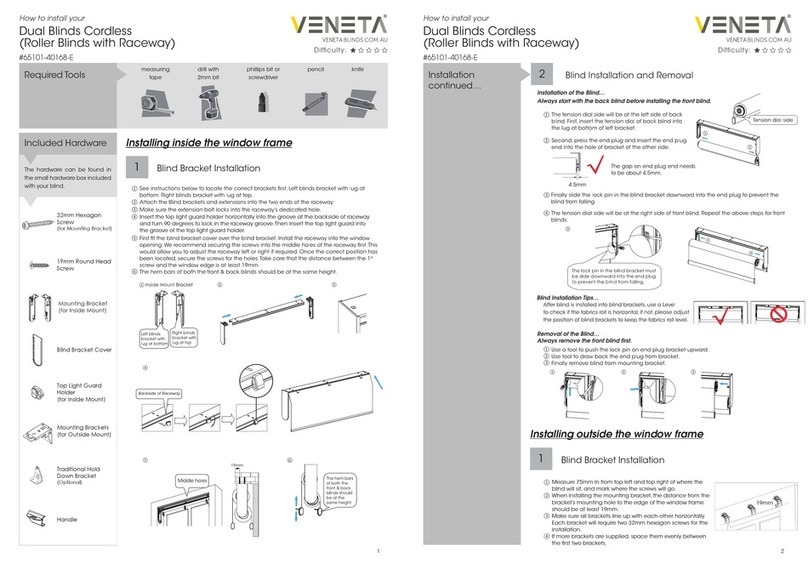
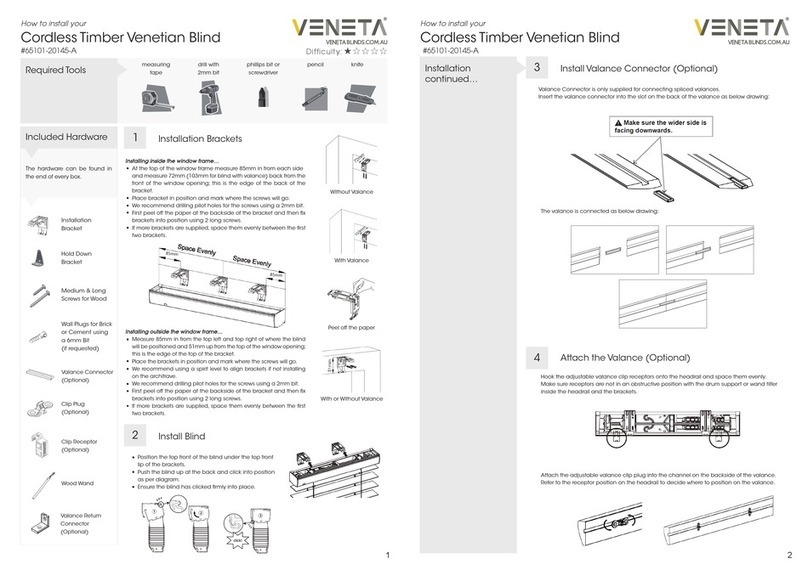
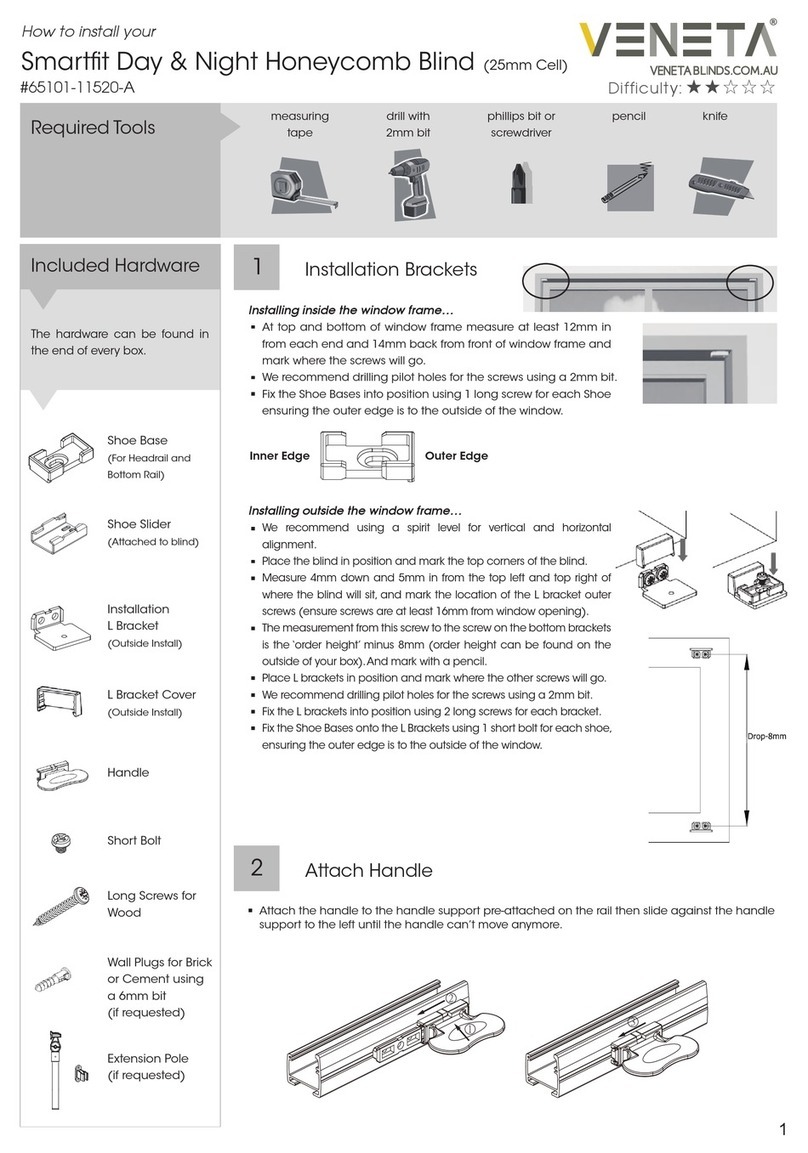
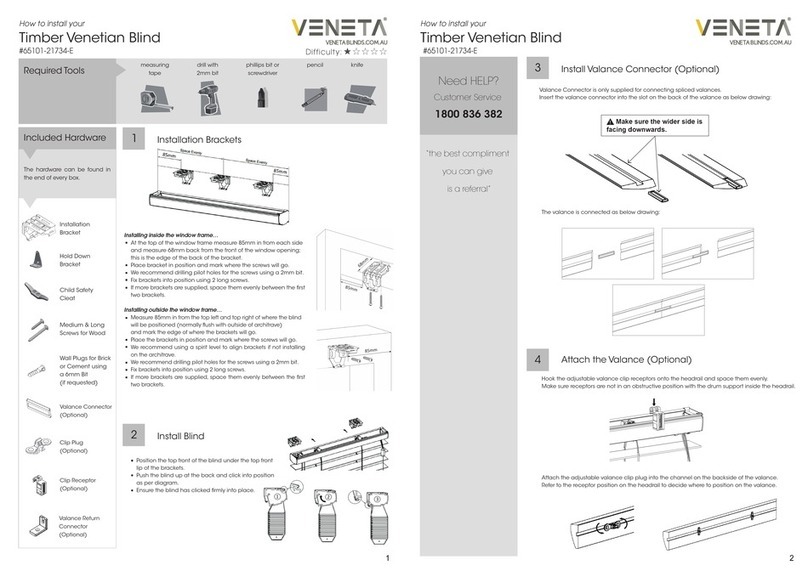
How to install your
Smartfit Single Cell Honeycomb Blind
Included Hardware
measuring
tape
drill with
2mm bit
phillips bit or
screwdriver
pencil knife
The hardware can be found in
the end of every box.
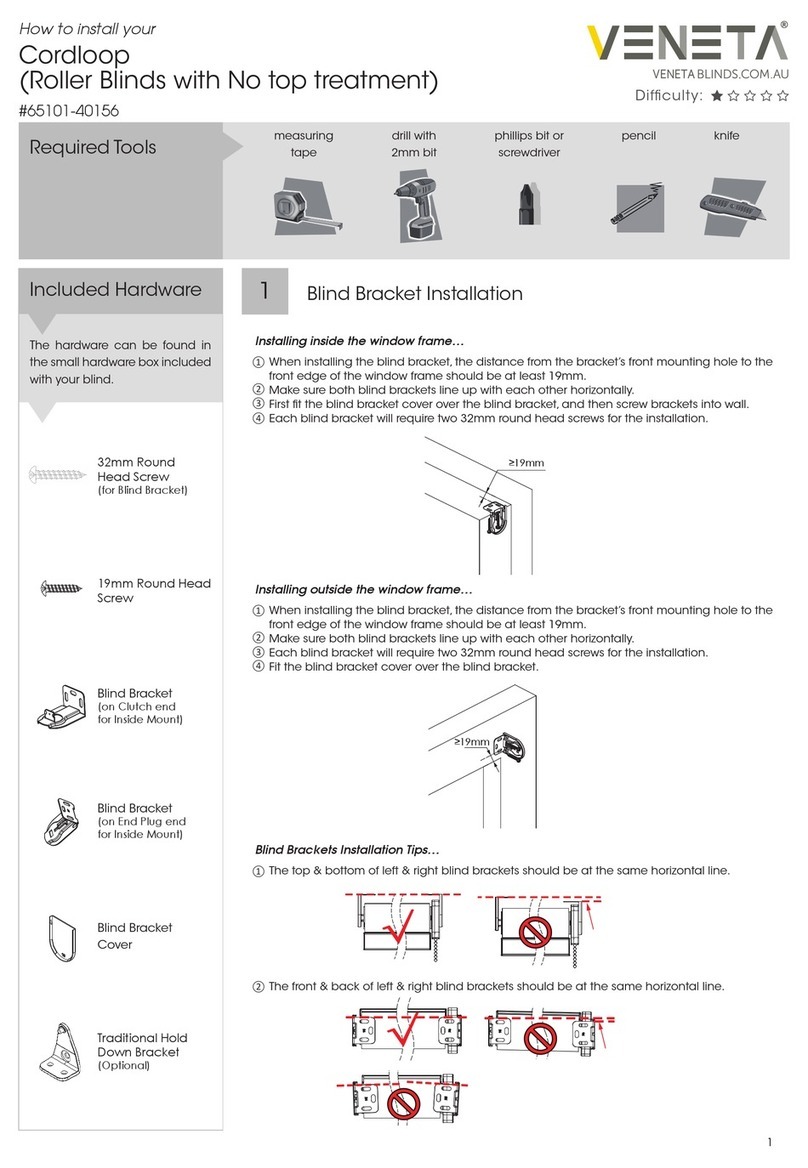
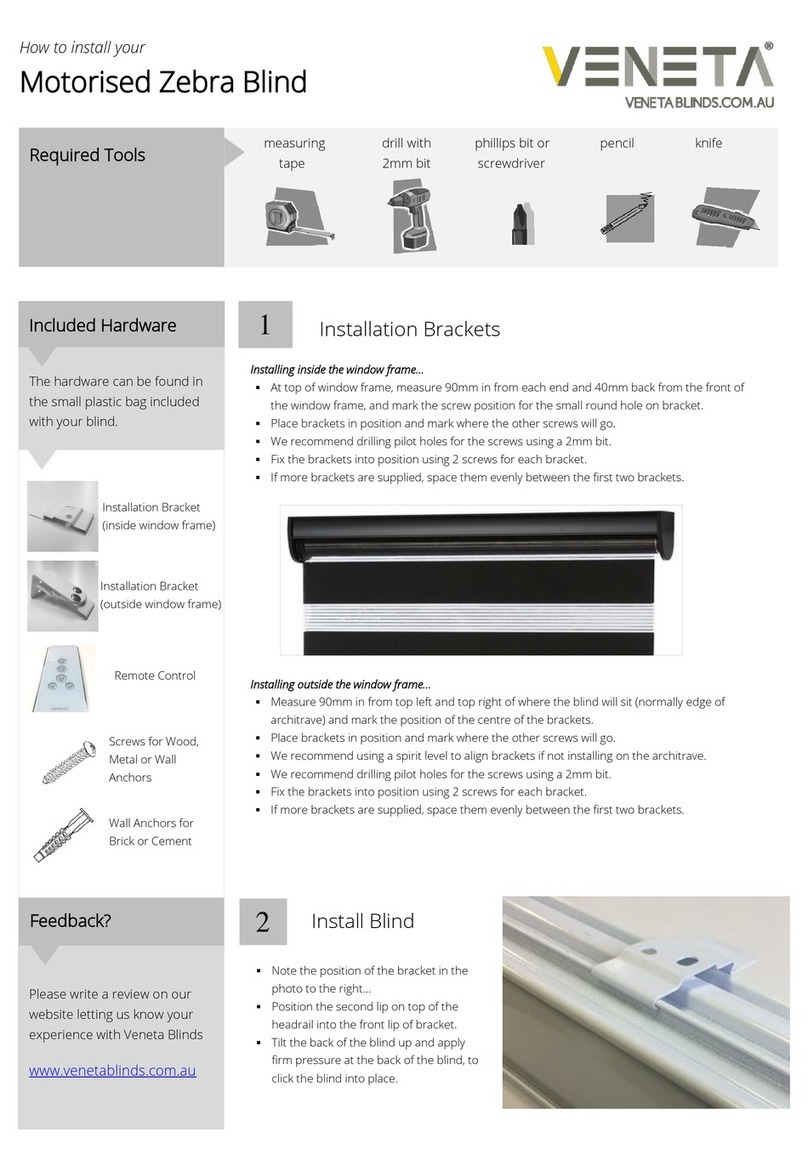
1Installation Brackets
Installing inside the window frame…
At top and bottom of window frame measure at least 12mm in from
each end and 13mm back from front of window frame and mark
where the screws will go.
We recommend drilling pilot holes for the screws using a 2mm bit.
Fix the Shoe Bases into position using 1 long screw for each Shoe
ensuring the outer edge is to the outside of the window.
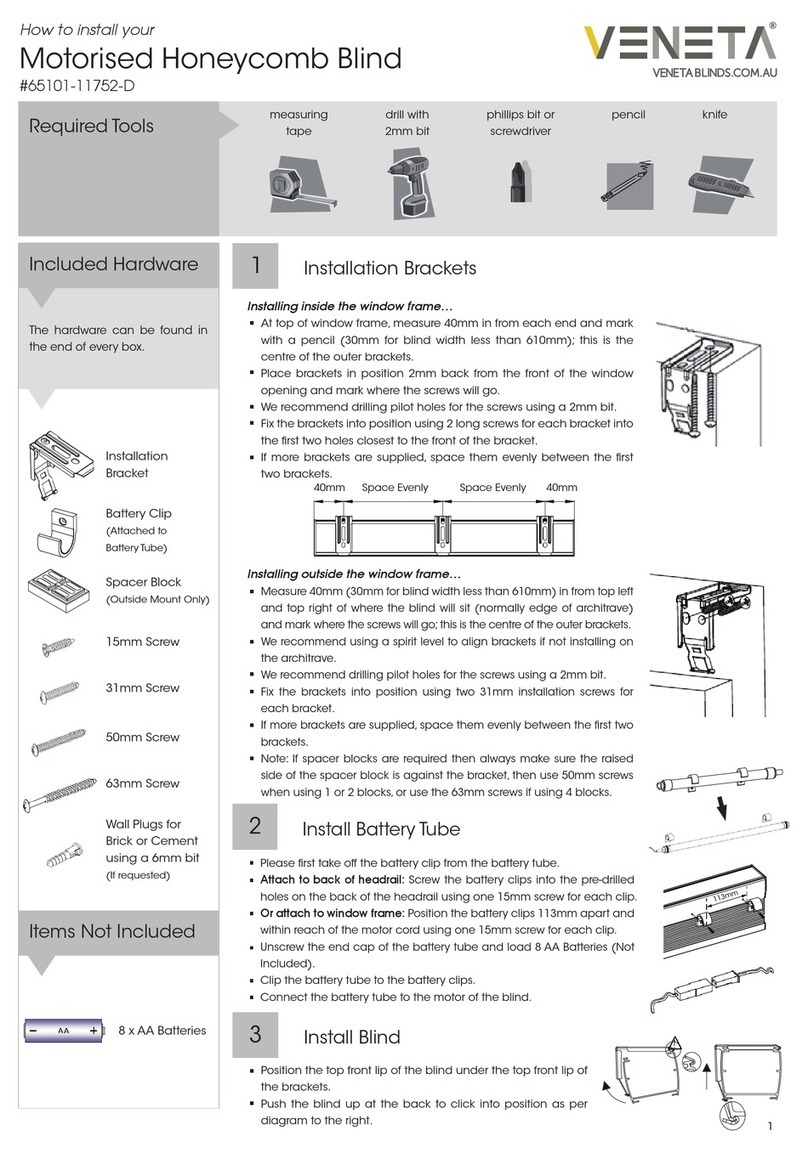
Installing outside the window frame…
We recommend using a spirit level for vertical and horizontal alignment.
Place the blind in position and mark the top corners of the blind.
Measure 4mm down and 5mm in from the top corners and mark the
location of the L bracket outer screws (ensure screws are at least 16mm
from window opening).
The measurement from this screw to the screw on the bottom brackets is
the ‘order height’ minus 8mm (order height can be found on the outside
of your box). And mark with a pencil.
Place L brackets in position and mark where the other screws will go.
We recommend drilling pilot holes for the screws using a 2mm bit.
Fix the L brackets into position using 2 long screws for each bracket.
Fix the Shoe Bases onto the L Brackets using 1 short bolt for each shoe,
ensuring the outer edge is to the outside of the window.
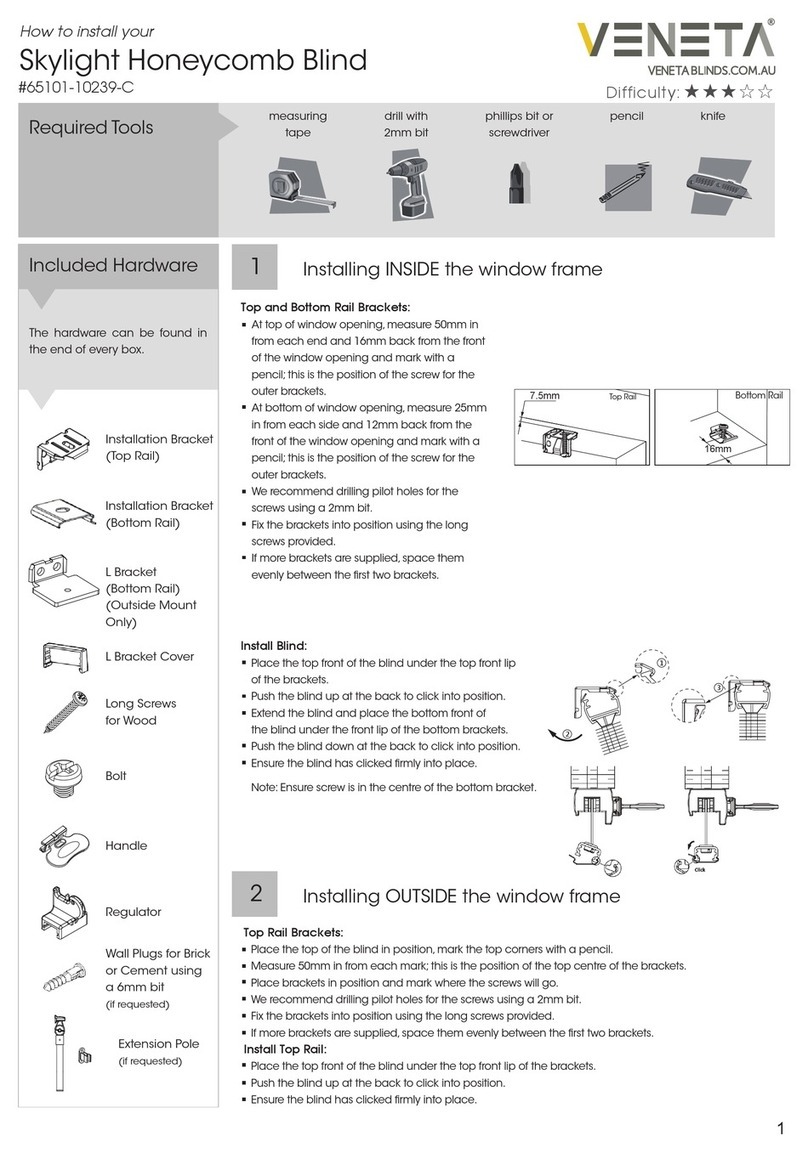
Installing inside the window frame…
Mark the centre of the window opening at top and bottom and mark 13mm back
from front of window frame.
Measure 9mm to the left and 9mm to the right of the centre mark,
this is the position of the screws for the centre Shoe Bases.
We recommend drilling pilot holes for the screws using a 2mm bit.
Place Shoe Bases into position ensuring the outer edges meet in the centre.
Fix the Shoe Bases into position using 1 long screw for each Shoe.
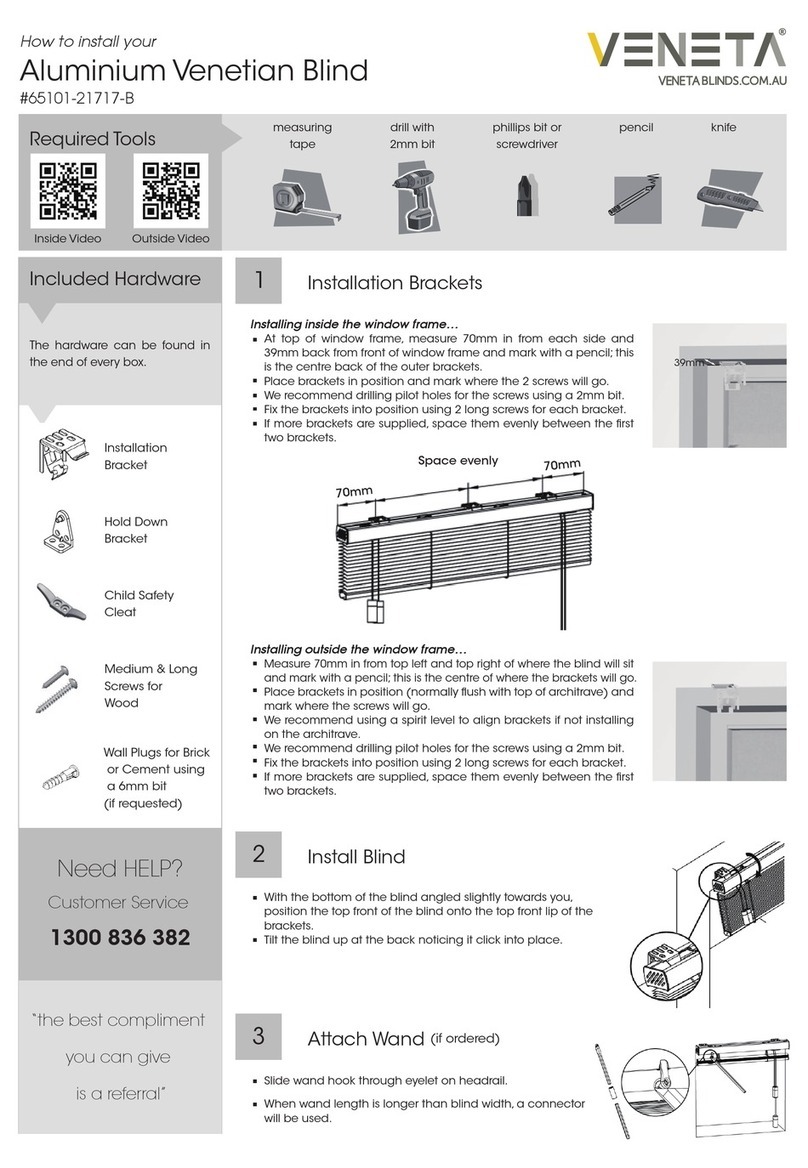
Installing outside the window frame…
Mark the centre of the window opening at the top and bottom of the window frame.
Measure 5mm to the left and 10mm to the right of the centre mark, this is the position
of the inner screws for the centre L brackets.
Place L brackets in position and mark where the outer screws will go.
We recommend drilling pilot holes for the screws using a 2mm bit.
Fix the L brackets into position using 2 long screws for each bracket.
Fix the Shoe Bases onto the L brackets using 1 short bolt for each
Shoe ensuring the outer edges of Shoes meet in the centre.
Slide bracket covers over the bracket screws.
2Support Brackets (only for blinds over 1270mm)
Wall Plugs for Brick
or Cement using
a 6mm bit
(if requested)
Inside Video Outside Video
Required Tools
Shoe Base
Installation
L Bracket
(Outside Install)
L Bracket Cover
(Outside Install)
Handle
Short Bolt
Long Screws for
Wood
inner
edge
outer
edge
centre of
window
bottom centre of window
centre of
window
bottom centre of window
Shoe Slider
(Attached to blind)
#65101-10235-F
Wand
(if requested)
Please note all blind cords are interconnected.
Ensure the cords are not crossed or tangled.
Place Shoe Sliders into centre of Shoe Bases
and slide towards the outer edge of Shoe as
per diagram to the right.
4Install Blind
Please write a review on our
website at…
www.venetablinds.com.au
Feedback?
We would love to know how you
went with your installation…
Installation
continued…
How to install, operate and maintain your
Smartfit Single Cell Honeycomb Blind
Great Job… Enjoy your new Veneta Blinds!
Operating your
Blind
Lower and raise the blind using the handles on the top and bottom rails.
Note the blind will close firmly at the top utilising the inbuilt magnets.
Maintaining your
Blind
1Dusting
Dust can be removed using a feather duster or vacuum with brush attachment on low suction.
2Spot Cleaning
Use a warm damp cloth or a mild detergent for tougher stains.
Dab the affected area, but do not rub the fabric. Finish with just a warm damp cloth.
Allow the fabric to dry in the lowered position.
3Ultrasonic
If ultrasonically cleaning the blind please specify that a mild solution must be used.
Note the rails should never be immersed in liquid.
Slide handle onto the top and bottom rails.
3Attach Handle
The Light Guard is to be placed at the front and the back of the blind
at either side as per image.
Note: all 4 Light Guards are identical.
Note: try to leave a 2mm gap between the blind (bottom rail) and the
Light Guard to prevent scraping.
Note: use the double sided tape on the short side of the Light Guard
to attach to the window frame.
Place the front Light Guards in position and mark the edges with a pencil.
Remove the double sided tape and carefully place the Light Guard in position.
Place the rear Light Guards in position and mark the edges with a pencil.
Remove the double sided tape and carefully place the Light Guard in position.
5Install Light Guard (optional)

Other VENETA Window Blind manuals

VENETA 65101-20145-A Instruction sheet

VENETA

VENETA 65101-20145-A Instruction sheet

VENETA 65101-50725-D Instruction sheet

VENETA

VENETA 65101-50725-D Instruction sheet

VENETA Skylight Honeycomb Blind User manual

VENETA

VENETA Skylight Honeycomb Blind User manual

VENETA Smartfit Honeycomb Blind User manual

VENETA

VENETA Smartfit Honeycomb Blind User manual

VENETA 65101-21717-B Instruction sheet

VENETA

VENETA 65101-21717-B Instruction sheet

VENETA 65101-10242-G User manual

VENETA

VENETA 65101-10242-G User manual

VENETA Smartfit Day & Night Honeycomb User manual

VENETA

VENETA Smartfit Day & Night Honeycomb User manual

VENETA 65101-21734-E Instruction sheet

VENETA

VENETA 65101-21734-E Instruction sheet

VENETA 65101-40168-E Instruction sheet

VENETA

VENETA 65101-40168-E Instruction sheet

VENETA Vertical Honeycomb Blind User manual

VENETA

VENETA Vertical Honeycomb Blind User manual

VENETA Zebra Blind User manual

VENETA

VENETA Zebra Blind User manual

VENETA Cordloop Instruction sheet

VENETA

VENETA Cordloop Instruction sheet

VENETA 65101-40160-D Instruction sheet

VENETA

VENETA 65101-40160-D Instruction sheet

VENETA 65101-11752-D Instruction sheet

VENETA

VENETA 65101-11752-D Instruction sheet

VENETA 65101-40159 Instruction sheet

VENETA

VENETA 65101-40159 Instruction sheet

Popular Window Blind manuals by other brands

Cosiflor DF Comfort 20 quick start guide

Cosiflor

Cosiflor DF Comfort 20 quick start guide

IKEA KADRILJ manual

IKEA

IKEA KADRILJ manual

Hella TOP FOAM Installation instructions and instructions for use

Hella

Hella TOP FOAM Installation instructions and instructions for use

Benthin P8700 manual

Benthin

Benthin P8700 manual

Project Source 94665 manual

Project Source

Project Source 94665 manual

Dometic Rollerblind PrecisionRise Installation and operating manual

Dometic

Dometic Rollerblind PrecisionRise Installation and operating manual

sun collection FALTSTORE UP & DOWN Assembly instructions

sun collection

sun collection FALTSTORE UP & DOWN Assembly instructions

woundwo Rollo Series Instructions for use

woundwo

woundwo Rollo Series Instructions for use

Benthin ROMAN quick start guide

Benthin

Benthin ROMAN quick start guide

3 Day Blinds VINYL BLINDS Getting started

3 Day Blinds

3 Day Blinds VINYL BLINDS Getting started

Robinson Partition Assembly instructions

Robinson

Robinson Partition Assembly instructions

EkoOkna RAFF-I Assembly instruction

EkoOkna

EkoOkna RAFF-I Assembly instruction

Allen + Roth 54825 quick start guide

Allen + Roth

Allen + Roth 54825 quick start guide

skandia Vertical Blinds Installation

skandia

skandia Vertical Blinds Installation

Dometic Oceanair Romanblind Installation and operating manual

Dometic

Dometic Oceanair Romanblind Installation and operating manual

terrysfabrics Cassette Roman Blind Kit How to use

terrysfabrics

terrysfabrics Cassette Roman Blind Kit How to use

WAREMA Venetian 2.25/35.17 Operating and maintenance instructions

WAREMA

WAREMA Venetian 2.25/35.17 Operating and maintenance instructions

Mottura Basic 441 quick start guide

Mottura

Mottura Basic 441 quick start guide

manuals.online logo
manuals.online logoBrands
  • About & Mission
  • Contact us
  • Privacy Policy
  • Terms and Conditions

Copyright 2025 Manuals.Online. All Rights Reserved.