manuals.online logo
Brands
  1. Home
  2. •
  3. Brands
  4. •
  5. VENETA
  6. •
  7. Window Blind
  8. •
  9. VENETA Zebra Blind User manual

VENETA Zebra Blind User manual

How to install your
Motorised Zebra Blind
measuring drill with phillips bit or pencil knife
tape 2mm bit screwdriver
Required Tools
2
▪Note the position of the bracket in the
photo to the right…
▪Position the second lip on top of the
headrail into the front lip of bracket.
▪Tilt the back of the blind up and apply
firm pressure at the back of the blind, to
click the blind into place.
Install Blind
1
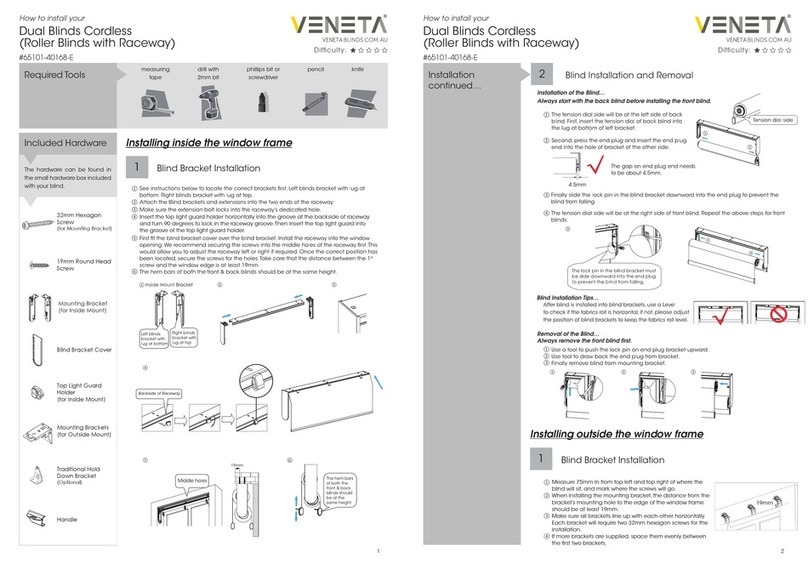
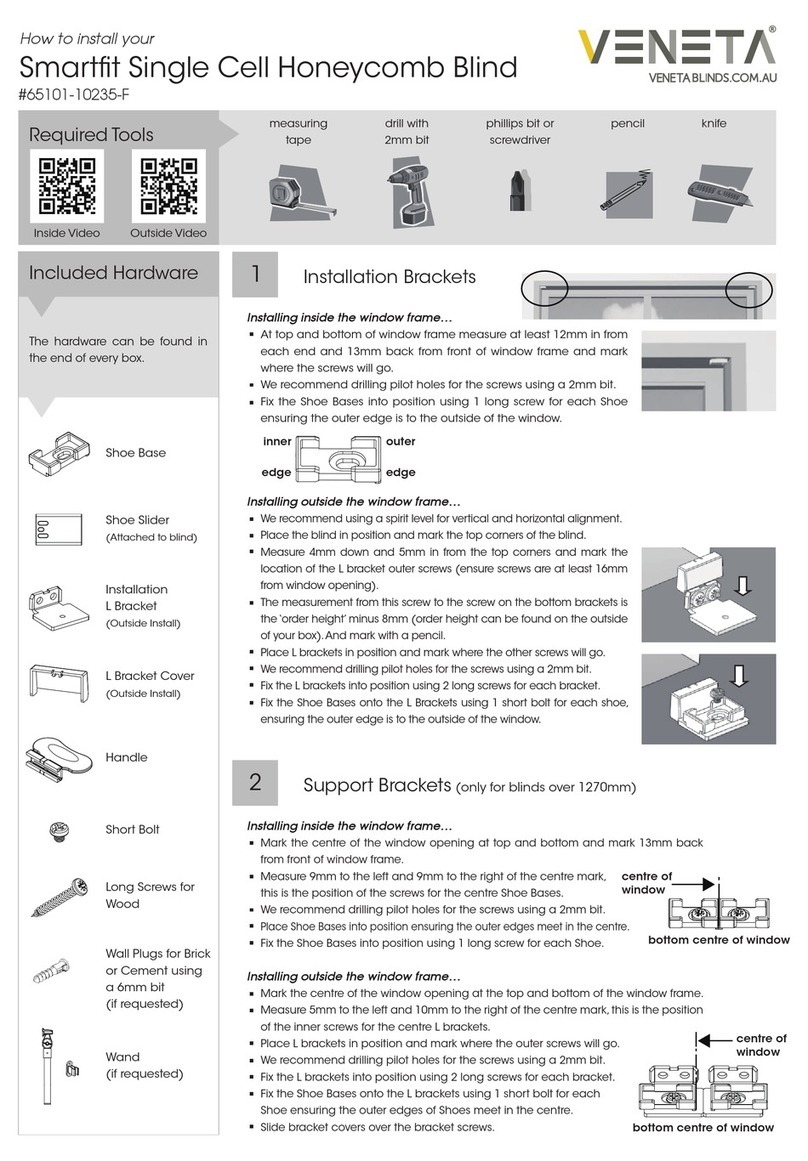
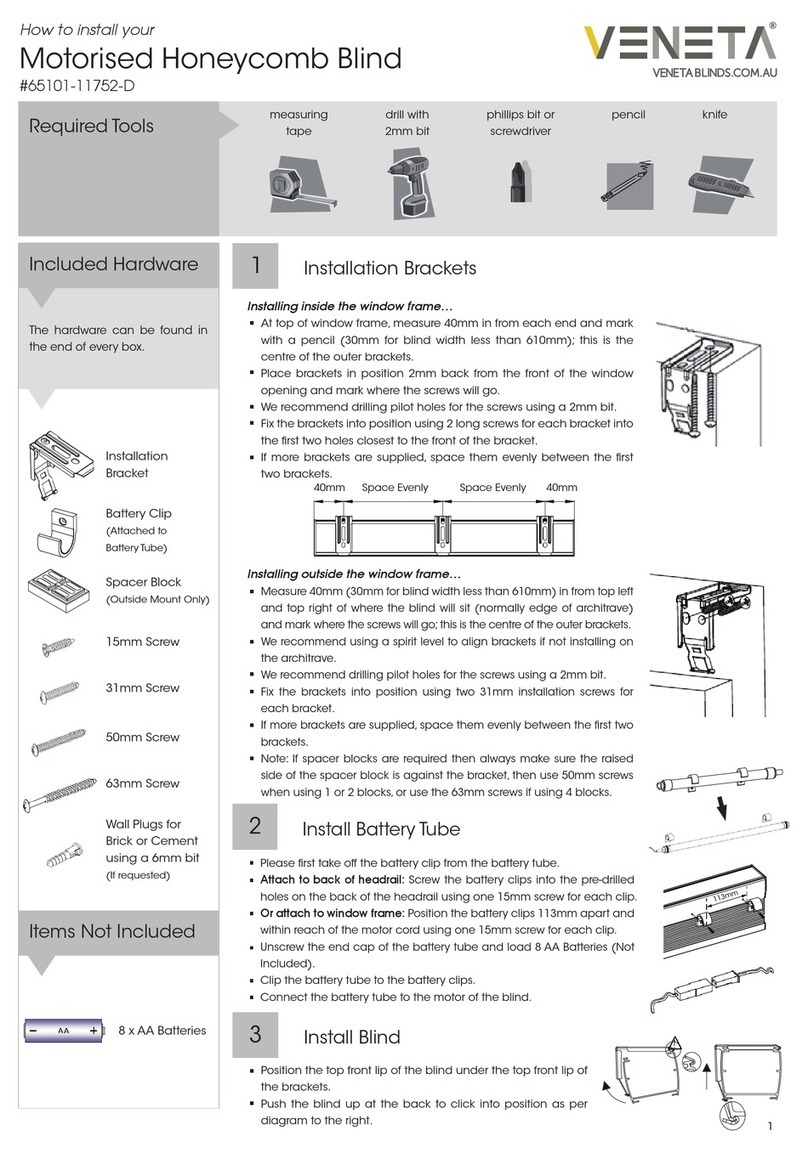
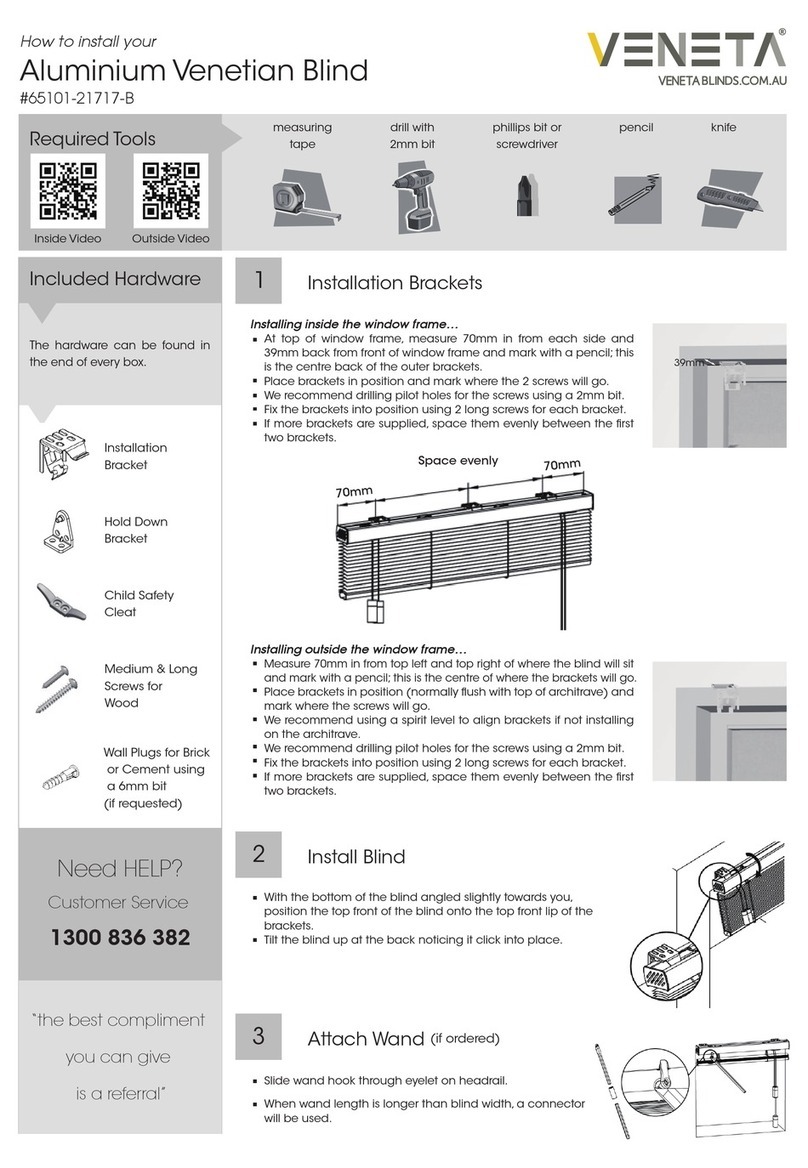
Installation Brackets
Installing inside the window frame…
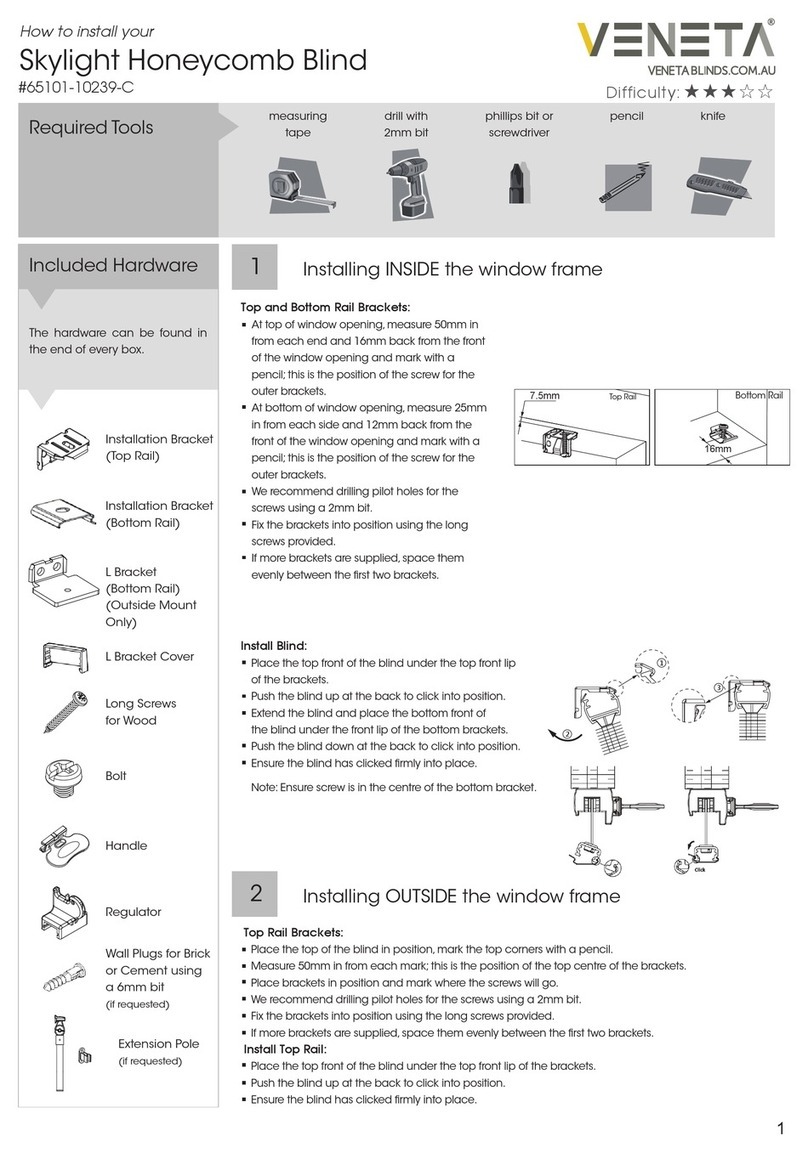
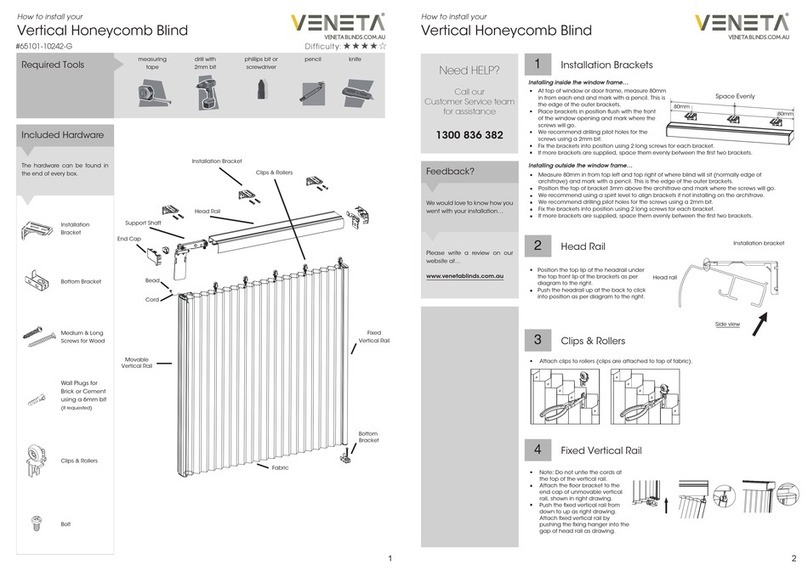
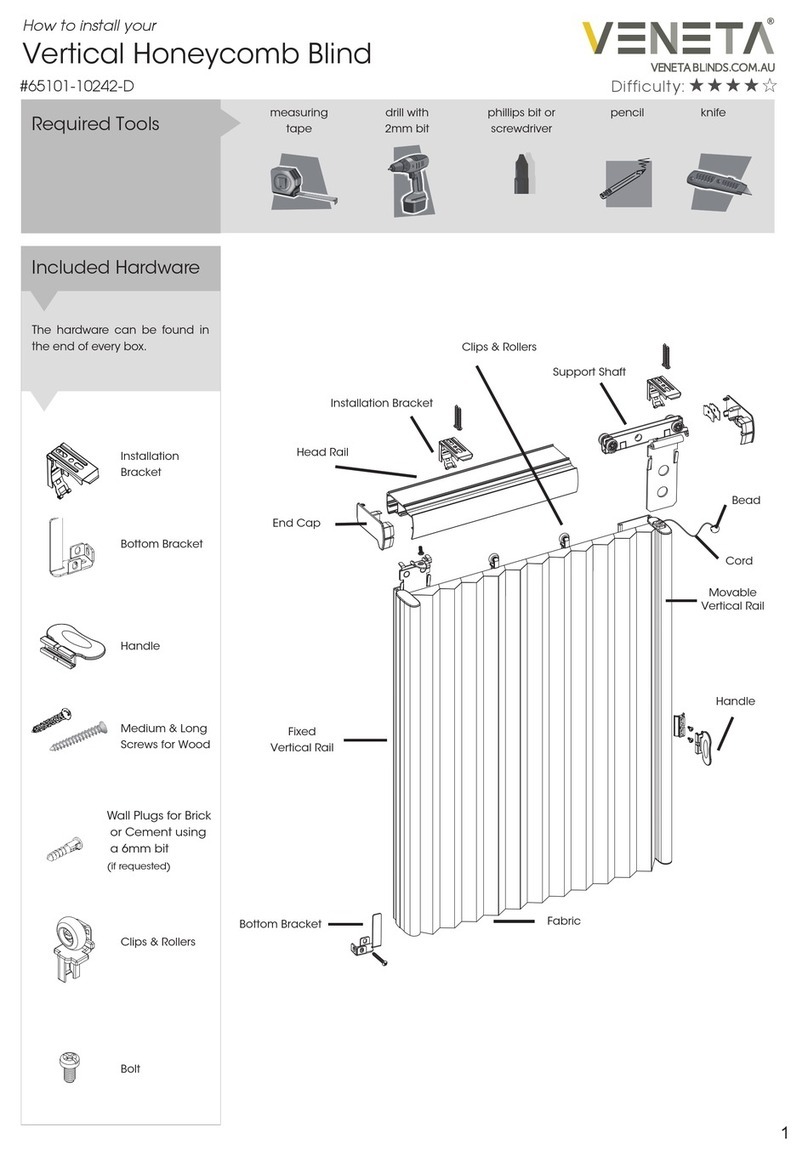
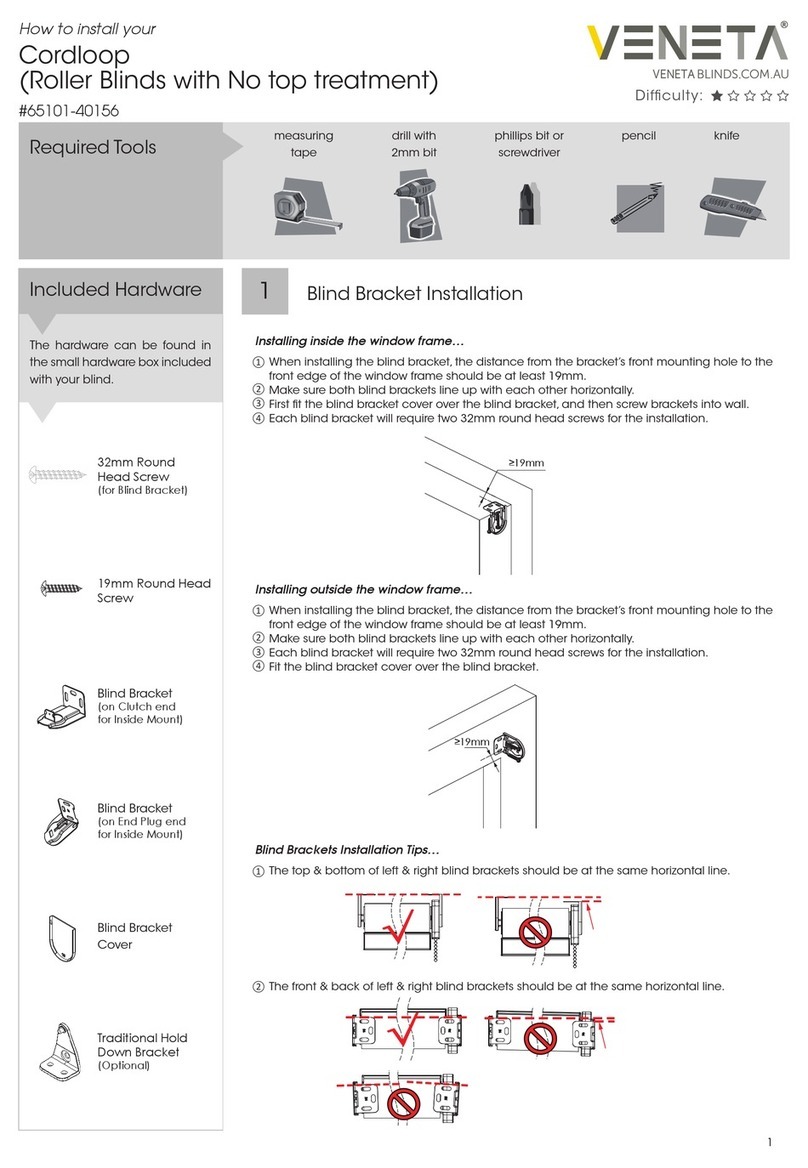
▪At top of window frame, measure 90mm in from each end and 40mm back from the front of
the window frame, and mark the screw position for the small round hole on bracket.
▪Place brackets in position and mark where the other screws will go.
▪We recommend drilling pilot holes for the screws using a 2mm bit.
▪Fix the brackets into position using 2 screws for each bracket.
▪If more brackets are supplied, space them evenly between the first two brackets.
Installing outside the window frame…
▪Measure 90mm in from top left and top right of where the blind will sit (normally edge of
architrave) and mark the position of the centre of the brackets.
▪Place brackets in position and mark where the other screws will go.
▪We recommend using a spirit level to align brackets if not installing on the architrave.
▪We recommend drilling pilot holes for the screws using a 2mm bit.
▪Fix the brackets into position using 2 screws for each bracket.
▪If more brackets are supplied, space them evenly between the first two brackets.
The hardware can be found in
the small plastic bag included
with your blind.
Included Hardware
Installation Bracket
(inside window frame)
Please write a review on our
website letting us know your
experience with Veneta Blinds
www.venetablinds.com.au
Feedback?
Installation Bracket
(outside window frame)
Screws for Wood,
Metal or Wall
Anchors
Wall Anchors for
Brick or Cement
Remote Control
How to install, operate and maintain your
Motorised Zebra Blind
Great Job… Enjoy your new Veneta Blinds!
3
▪240 Volt Rechargeable: Plug the charger unit into the 240-volt wall socket and insert the connector into the end of the blind tube to
charge. Charge time approx. 5-6 hours. Ensure you fully charge the motor for first use.
▪Battery Pack: Position the battery pack in a suitable position and install the brackets using the screws provided.
▪Place the battery pack into the clips and connect the battery tube to the blind.
▪The remote is pre-programmed to the blind and ready to go.
Power Supply
▪Use the remote to move the blinds up and down.
▪Select left and right on the remote to change channels to operate a different blind.
Operating your Blind
▪Dusting: Dust can be removed using a feather duster or vacuum with brush attachment on low
suction.
▪Spot Cleaning: Use a warm damp cloth or a mild detergent for tougher stains.
▪Dab the affected area, but do not rub the fabric. Finish with just a warm damp cloth.
▪Allow the fabric to dry in the lowered position.
Maintaining your Blind
▪Note: the remote control is already programmed to your blind and will work out of the box.
▪If, however you need to re-connect or set the limits, follow the instructions below…
▪Connect Remote to Blind: Hold down the RED setting button at the end of the blind tube.
▪The blind will move up and down slightly, then release button.
▪On back of remote, press the ‘C’ button.
▪The blind will move up and down slightly and is now connected to the motor.
▪Reverse Direction of Blind: Hold both the ‘L’ button on the back of the remote and the ‘STOP’
button on the front of the remote at the same time.
▪The blind will move up and down slightly and has now changed direction.
▪Setting Bottom Limit: On the back of the remote, press and hold the ‘L’ button.
▪The blind will move up and down slightly and then move up and down slightly again, now it is
ready to set the limit and you can release the button.
▪Press the ‘DOWN’ button on the remote.
▪Allow the blind to run until you reach where you want to set the lower limit and press the
‘STOP’ button.
▪On the back on the remote press the ‘C’ button.
▪The blind will move up and down slightly.
▪The lower limit is now set.
▪Setting Upper Limit: Press the ‘UP’ button on the remote.
▪Allow the blind to run until you reach where you want to set the upper limit and press the
‘STOP’button.
▪On the back of the remote press the ‘C’ button.
▪The blind will now move up and down slightly.
▪The upper limit is now set.
Remote Control

Other VENETA Window Blind manuals

VENETA 65101-10242-G User manual

VENETA

VENETA 65101-10242-G User manual

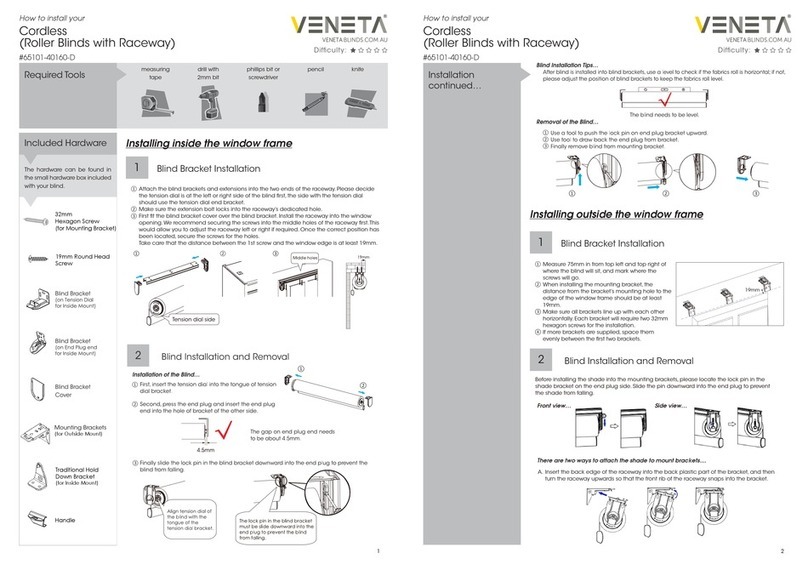
VENETA 65101-40160-D Instruction sheet

VENETA

VENETA 65101-40160-D Instruction sheet

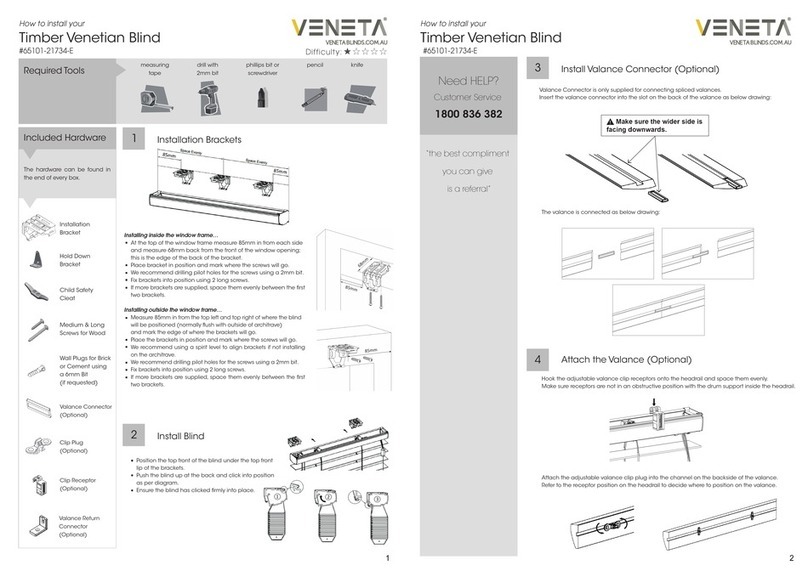
VENETA 65101-21734-E Instruction sheet

VENETA

VENETA 65101-21734-E Instruction sheet

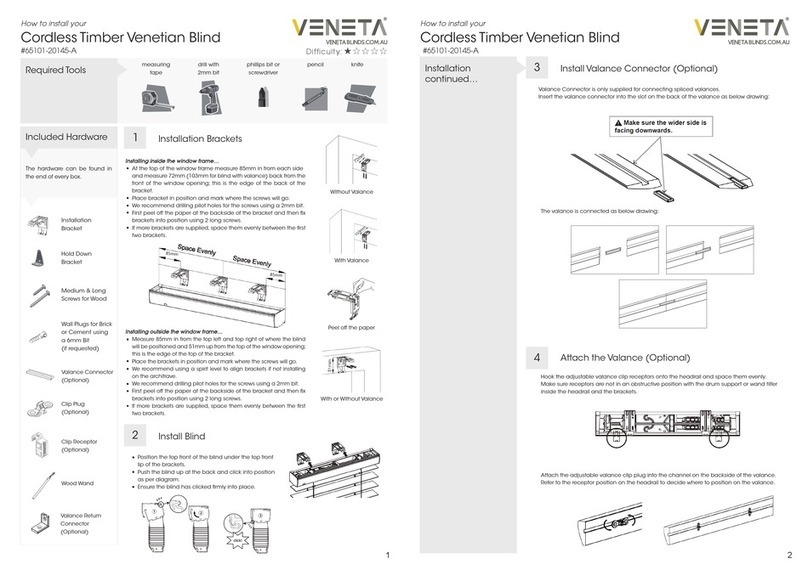
VENETA 65101-20145-A Instruction sheet

VENETA

VENETA 65101-20145-A Instruction sheet

VENETA 65101-40168-E Instruction sheet

VENETA

VENETA 65101-40168-E Instruction sheet

VENETA 65101-40159 Instruction sheet

VENETA

VENETA 65101-40159 Instruction sheet

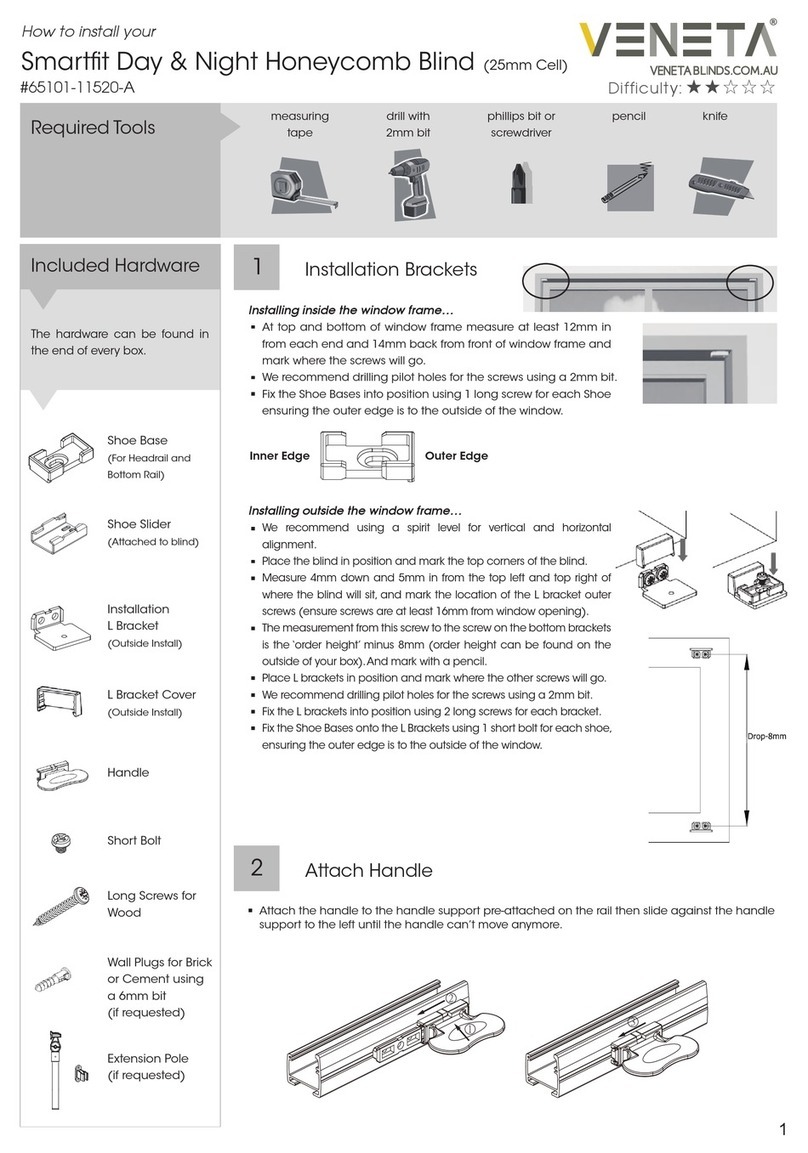
VENETA Smartfit Single Cell Honeycomb Blind Instruction sheet

VENETA

VENETA Smartfit Single Cell Honeycomb Blind Instruction sheet

VENETA Skylight Honeycomb Blind User manual

VENETA

VENETA Skylight Honeycomb Blind User manual

VENETA 65101-50725-D Instruction sheet

VENETA

VENETA 65101-50725-D Instruction sheet

VENETA 65101-11752-D Instruction sheet

VENETA

VENETA 65101-11752-D Instruction sheet

VENETA Vertical Honeycomb Blind User manual

VENETA

VENETA Vertical Honeycomb Blind User manual

VENETA 65101-21717-B Instruction sheet

VENETA

VENETA 65101-21717-B Instruction sheet

VENETA Smartfit Honeycomb Blind User manual

VENETA

VENETA Smartfit Honeycomb Blind User manual

VENETA Smartfit Day & Night Honeycomb User manual

VENETA

VENETA Smartfit Day & Night Honeycomb User manual

VENETA Cordloop Instruction sheet

VENETA

VENETA Cordloop Instruction sheet

Popular Window Blind manuals by other brands

Victoria M PLISSEE Original assembly instructions

Victoria M

Victoria M PLISSEE Original assembly instructions

SelectBlinds CORDLESS INSTALLATION & CARE INSTRUCTIONS

SelectBlinds

SelectBlinds CORDLESS INSTALLATION & CARE INSTRUCTIONS

MV LINE EVO ZIP installation instructions

MV LINE

MV LINE EVO ZIP installation instructions

SunSetter EasyShade Vertical Roll up manual

SunSetter

SunSetter EasyShade Vertical Roll up manual

Hella VN Installation instructions and instructions for use

Hella

Hella VN Installation instructions and instructions for use

MHZ 11-8110 Installation and operation instruction

MHZ

MHZ 11-8110 Installation and operation instruction

Marinello TENDE Nassau 70 installation manual

Marinello TENDE

Marinello TENDE Nassau 70 installation manual

brel-motors BLE 20 installation manual

brel-motors

brel-motors BLE 20 installation manual

Velux ZIL installation instructions

Velux

Velux ZIL installation instructions

Roomy Thermo-Rollo Assembly instructions

Roomy

Roomy Thermo-Rollo Assembly instructions

Victoria M MINI ROLLO installation instructions

Victoria M

Victoria M MINI ROLLO installation instructions

Coolaroo EASY RELEASE Assembly & operating instructions

Coolaroo

Coolaroo EASY RELEASE Assembly & operating instructions

Griesser Metalunic V operating instructions

Griesser

Griesser Metalunic V operating instructions

Cosiflor DF Comfort 20 quick start guide

Cosiflor

Cosiflor DF Comfort 20 quick start guide

Renson Fixscreen Minimal installation instructions

Renson

Renson Fixscreen Minimal installation instructions

LF Style Selections 70628-70649 manual

LF

LF Style Selections 70628-70649 manual

ConceptBlindsDirect Deluxe Roman blind operating instructions

ConceptBlindsDirect

ConceptBlindsDirect Deluxe Roman blind operating instructions

Cosiflor F Slope 1 manual

Cosiflor

Cosiflor F Slope 1 manual

manuals.online logo
manuals.online logoBrands
  • About & Mission
  • Contact us
  • Privacy Policy
  • Terms and Conditions

Copyright 2025 Manuals.Online. All Rights Reserved.