Universal Cord Tensioner
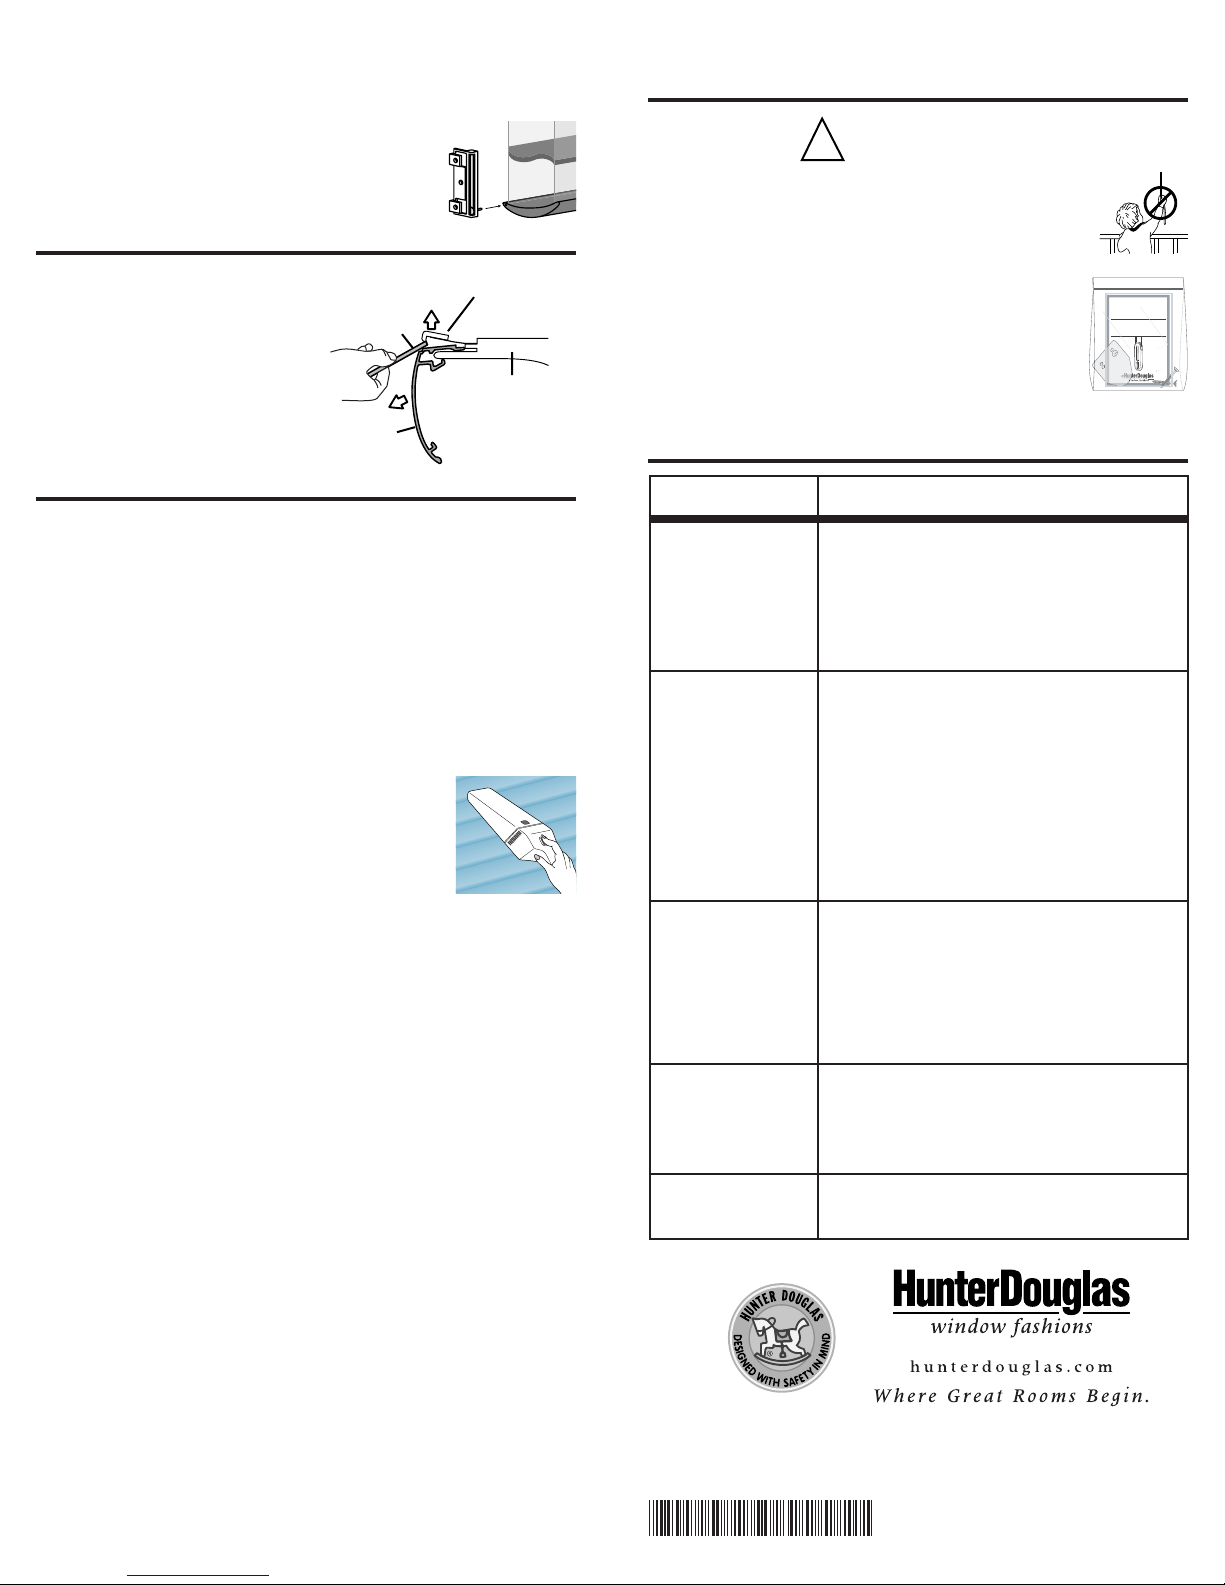
Flush Mount Bracket
Installation
Instructions
Headrail
Installation
Bracket
Lift LockingTabTo
Release Headrail
Insert Card
Between
Headrail And
Locking Tab
• Mark the mounting hole locations on the mounting surface.
• Center the hold-down brackets over the mounting hole
locations and check their alignment. Attach using two screws.
NOTE: Disconnect the bottom rail from the
hold-down brackets to raise the shading.
Remove the Shading
• Fully raise the shading.
• Use the quick release card
to release the locking tab on
the mounting brackets and
remove the shading from
the brackets.
Care and Cleaning
Nantucket™window shadings are made of 100% polyester,
which means they are inherently durable and resilient.
However, care must be taken to avoid wrinkling the fabric,
particularly where the vanes meet the facings.
Dusting
Regular light dusting with a feather duster is all the cleaning
that is needed in most circumstances.
Vacuuming
Use a low suction, hand-held vacuum for more thorough dust
removal.
Forced Air
Blow away dirt and debris between the vanes
using a can of clean, compressed air or a hair
dryer set on a “cool” setting.
Spot-Cleaning
Do not spot-clean Nantucket window shadings.
Ultrasonic Cleaning
Nantucket window shadings can be ultrasonically cleaned by a
professional, with the exception of Misty Harbor™light-
dimming fabric..
..
.
• Specify that a mild detergent solution be used.
• Never immerse the headrail in the solution.
• Dry the shading completely in the lowered position.
Electrostatic Cleaning
Do not use electrostatic cleaning devices such as Swiffer™or
Pledge Grab-it™on any Nantucket window shadings.
For more comprehensive cleaning instructions, call the
Hunter Douglas Customer Information Center toll free at:
1-888-501-83641-888-501-8364
1-888-501-83641-888-501-8364
1-888-501-8364
A Note About Textiles
As with all textiles, Nantucket fabric is subject to some variations.
Slight wrinkling, puckering, or bowing are inherent to this textile
product and should be considered normal, acceptable quality. These
characteristics are not usually visible from the front or rear, but may
be visible from a side angle.
Precautions should be taken to reduce exposure to harsh
environmental elements, such as salt air. Continuous exposure
through open windows and doors will accelerate the fabric
deterioration.
6
Child Safety
WARNING
To avoid entanglement and strangulation, keep
cords out of the reach of young children. Also:
• Move cribs and furniture away from the
shading cords.
• Install the enclosed safety cord tensioning
device to reduce access to the cords.
Installation instructions and components
required for securing the cord tensioner are
included with each shading.
Troubleshooting
7
!
© 1998, 2004 Hunter Douglas Inc. ® Registered trademark of Hunter Douglas Inc.
™Trademark of Hunter Douglas Inc.
Patented in the U.S. and foreign countries. U.S. and foreign patents pending.
Swiffer™ is a trademark of Procter & Gamble.
Pledge Grab-It™ is a trademark of SC Johnson.
PCN 5107127000 rev. 5/04
8
9
PROBLEMPROBLEM
PROBLEMPROBLEM
PROBLEM SOLUTIONSOLUTION
SOLUTIONSOLUTION
SOLUTION
Vanes do not align
on side-by-side
shadings.
Check that the shading is installed correctly on an
inside mount. Make sure there is clearance
between the ends of the shading and the window
casement.
Check that the mounting brackets are level. Shim
to level if necessary.
If hold-down brackets are used, make sure they
have been released.
Make sure the fabric is not caught on anything.
The shading is hard
to raise or lower, or
will not raise or
lower.
Vane alignment is only guaranteed to within 1/4"
when shadings are ordered at the same time, at
the same height, with the same color, and when
specified on the order form.
Check that the windows are square and the same
height.
The shading raises or
lowers unevenly, or
the bottom rail is
uneven when fully
raised.
Check that the window is square by measuring
the diagonals.
Check that the mounting brackets are level. Shim
to level if necessary.
Adjust the bottom rail weight following the
instructions in Step 4.
The shading will not
snap into the
mounting brackets.
Check that the mounting brackets are aligned and
level.
Check that the locking tab on the mounting
bracket slides over the headrail. See Step 2.
The shading rolls up
backward.
Make sure the limit stops are 51/2" in from the ends
of the headrail. See “Bracket Placement” in Step 1.