manuals.online logo
Brands
  1. Home
  2. •
  3. Brands
  4. •
  5. Ingenico
  6. •
  7. Touch Terminal
  8. •
  9. Ingenico AMEX iCT220 User manual

Ingenico AMEX iCT220 User manual

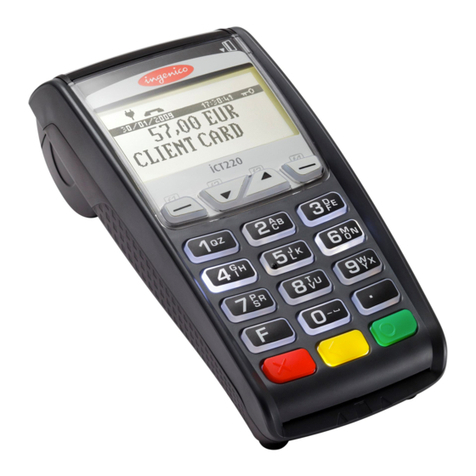
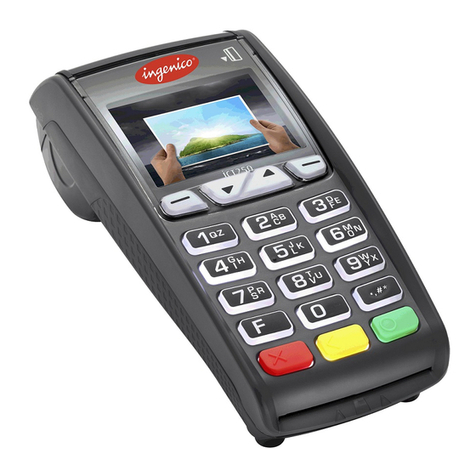
AMEX iCT220 Terminal
Installation
AMEX iCT220 Terminal –Installation.
List of Parts:
Please find enclosed this AMEX iCT220 terminal with:
Telephone Cable
Terminal power supply
Rolls of paper
Terminal Installation:
Magic Box
1. Connect the Telephone Cable (using the clear plastic end) if you will process Dial Up transactions, into the
communication port marked on the Magic Box (do not use the port marked ‘RS232’). The other plastic end
of the Telephone Cable connects into your telephone socket.
2. Connect the Ethernet Cable (not included), if you will process transactions via IP, into the communication port
marked ETH on the Magic Box. The opposite end of the Ethernet cable will plug into a spare Ethernet socket on
your broadband router/switch or computer network.
3. Connect the Power Cable to the Magic Box in the port marked . Insert the electric plug into a power socket.
AMEX iCT220 Terminal –How to change a Paper Roll.
1. Open the paper compartment by lifting the catch located at the rear of the terminal.
2. Pulls the cover to the rear of the terminal.
3. Insert the paper roll in the compartment following the directions shown on the figure above.
4. Pull the paper up to the top of the terminal and hold it in this position. Maintain the paper and close the lid.
Paper Roll Info.:
Product Specs
Color
White
Style
Thermal
Width
58mm
Diameter
40 mm max
Size
2- 1/4" x 50'
Management Functions - AMEX Terminal (iCT220 model).
The following are frequently used management functions. To active a function, press the Fkey , followed by
the appropriate numeric key(s); then press the green [Enter] key and follow the prompts.
F1 (Scrolls through transactions)
This option shows on the screen each transaction the machine has (including voids transactions).
Press f2/f3 buttons for scrolling.
F4 (Lock)
Lock the terminal keypad.
F5 (Transaction Counter)
Display the numbers of sale and refund transactions in the batch.
F29 (Last message response)
Display the last message response received from the host.
F73 (Reprint ROC)
Reprints any specified receipt by entering the ROC number (Record of Charge).
F74 (Reprint SOC)
Reprints up to the last five SOCs (Summary of Charges).
F79 (Greetings)
Allow you to enter personalized message on the receipt (Header and/or Footer).
F82 (Print Test)
Verify if the printer is working properly printing the merchant information, initialization phone numbers, PABX,
terminal connection type (Dial or IP) and TID assigned.
F97 (Enable/Disable password to options)
Use to enable/disable password for the following type of transactions: Void, Refund, Offline transactions and
manual entry.
Car Rental –User Quick Reference Guide –Administrative Reports.
.
REPRINT BATCH* (up to the last five previous Batches)
1. On main screen press f3/▲button to go “Administrative Menu”.
2. Press ENTER or press 0button.
3. Scroll with f2/f3▼/▲ buttons and select the batch to be reprinted. Press ENTER.
4. Wait for terminal to process transaction and print receipt.
*This option will not appear as part of the list if there is not previous batch closed.
REPRINT (Merchant or Customer copy Receipt)
1. On main screen press f3/▲button to go “Administrative Menu”.
2. Scroll with f2/▼ button and select REPRINT then press ENTER or press the number besides of this option.
3. Enter the ROC NUMBER (shown in the receipt of 6 digits) then Press ENTER.
4. Press 1 for Merchant Copy or press 1for Customer Copy.
5. Wait for terminal to print a receipt.
REPORTS
PENDING Reports (Authorization transactions –Car Rental)
1. On main screen press f3/▲button to go “Administrative Menu”.
2. Scroll with f2/▼ button and select REPORTS then press ENTER or press the number besides of this option.
3. Select PENDING Press ENTER or press 0button.
4. For TOTAL REPORT Press ENTER or press 0button, this prints a summary of Car Rental transactions.
5. For DETAIL REPORT press 1button, this prints each Car Rental transactions, a summary of totals will be print at the
end of this report.
6. For TOTAL DISPLAY press 2button, this shows on the screen the summary of Car Rental transactions, press f2/f3▼/▲
buttons for scrolling.
7. For DETAIL DISPLAY press 3button, this shows on the screen each Car Rental transaction, press f2/f3▼/▲ buttons for
scrolling.
SUBMISSION Reports (Transactions to be deposited for payment)
1. On main screen press f3/▲button to go “Administrative Menu”.
2. Scroll with f2/▼ button and select REPORTS then press ENTER or press the number besides of this option.
3. Scroll with f2/▼ button and select SUBMISSION or press 1button.
4. For TOTAL REPORT Press ENTER or press 0button, this prints a summary of transactions (total amount) to be deposited.
5. For DETAIL REPORT press 1button, this prints each transactions to be deposited like Rental Return, Refunds and
offline transactions, a summary of totals will be print at the end of this report.
6. For TOTAL DISPLAY press 2button, this shows on the screen the summary of all the transactions to be deposited like
Rental Return, Refund and offline transactions, press f2/f3▼/▲ buttons for scrolling.
7. For DETAIL DISPLAY press 3button, this shows on the screen each transaction to be deposited, press f2/f3▼/▲
buttons for scrolling.
AUDIT DISPLAY (To view all the transactions)
1. On main screen press f3/▲button to go “Administrative Menu”.
2. Scroll with f2/▼ button and select REPORTS then press ENTER or press the number besides of this option.
3. Scroll with f2/▼ button and select AUDIT DISPLAY or press 2button, this shows on the screen each transaction the
machine has in the memory (including voids transactions). Press f2/f3▼/▲ buttons for scrolling.
1/3
Car Rental –User Quick Reference for AMEX Terminal (iCT220 model).
.
CAR RENTAL (Authorization)
1. On main Screen, swipe, insert customer card or manually enter card number (15 digits).
2. If swiped, enter the 4DBC* (4-digit secure code in front of the card). If it is manually then enter the expiration date
(MMYY) and the 4DBC*. Press ENTER.
3. Enter base amount. Press ENTER.
4. Enter rental date (MMDD). Press ENTER. For “today date” only press ENTER.
5. Enter agreement number. Press ENTER.
6. If is a Chip Card and PIN is required, enter the PIN # and press ENTER.
7. Wait for terminal to process transaction and print receipt. Press ENTER to print a customer copy.
RENTAL RETURN
1. On main screen press f2/▼ button to go “Transactions Menu”.
2. Scroll with f2/▼ button and select RENTAL RETURN then press ENTER or press 1button.
3. Press 0 for ROC NUMBER or press 1for Agreement Number.
4. Enter the information according you selected on step 3. Press ENTER then ENTER again to confirm.
5. Enter Return date (MMDD). Press ENTER. For “today date” only press ENTER.
6. Enter final amount. Press ENTER.
7. If a reauthorization is required, press ENTER to proceed.
8. Wait for terminal to process transaction and print receipt. Press ENTER to print a customer copy.
GAS FEE
1. On main screen press f2/▼ button to go “Transactions Menu”.
2. Scroll with f2/▼ button and select GAS FEE then press ENTER or press 2button.
3. Swipe, insert the customer card or manually enter the card number (15 digits).
4. If swiped, enter the 4DBC*(4-digit secure code in front of the card). If it is manually then enter the expiration date
(MMYY) and the 4DBC*. Press ENTER.
5. Enter amount. Press ENTER then ENTER again to confirm.
6. Enter rental date (MMDD) and press ENTER. For “today date” only press ENTER.
7. Enter returned date (MMDD) and press ENTER. For “today date” only press ENTER.
8. Enter agreement number. Press ENTER.
9. If is a Chip Card and PIN is required, enter the PIN # and press ENTER.
10. Wait for terminal to process transaction and print receipt. Press ENTER to print a customer copy.
LATE RETURN FEE
1. On main screen press f2/▼ button to go “Transactions Menu”.
2. Scroll with f2/▼ button and select LATE RETURN FEE then press ENTER or press 3button.
3. Swipe, insert the customer card or manually enter the card number (15 digits).
4. If swiped, enter the 4DBC*(4-digit secure code in front of the card). If it is manually then enter the expiration date
(MMYY) and the 4DBC*. Press ENTER.
5. Enter amount. Press ENTER then ENTER again to confirm.
6. Enter rental date (MMDD) and press ENTER. For “today date” only press ENTER.
7. Enter returned date (MMDD) and press ENTER. For “today date” only press ENTER.
8. Enter agreement number. Press ENTER.
9. If is a Chip Card and PIN is required, enter the PIN # and press ENTER.
10. Wait for terminal to process transaction and print receipt. Press ENTER to print a customer copy.
*4DBC is a four-digit, (non-embossed) number that is printed above the Cardmember Account Number on the face of the Card.
2/3
Car Rental –User Quick Ref. for AMEX Terminal iCT220 model (continued).
DROP FEE
11. On main screen press f2/▼ button to go “Transactions Menu”.
12. Scroll with f2/▼ button and select DROP FEE then press ENTER or press 4button.
13. Swipe, insert the customer card or manually enter the card number (15 digits).
14. If swiped, enter the 4DBC*(4-digit secure code in front of the card). If it is manually then enter the expiration date
(MMYY) and the 4DBC*. Press ENTER.
15. Enter amount. Press ENTER then ENTER again to confirm.
16. Enter rental date (MMDD) and press ENTER. For “today date” only press ENTER.
17. Enter returned date (MMDD) and press ENTER. For “today date” only press ENTER.
18. Enter agreement number. Press ENTER.
19. If is a Chip Card and PIN is required, enter the PIN # and press ENTER.
20. Wait for terminal to process transaction and print receipt. Press ENTER to print a customer copy.
VOID TRANSACTION
1. On main screen press f2/▼button to go”Transactions Menu”.
2. Scroll with f2/▼button and select VOID then press ENTER or press 5button.
3. Enter password, if transaction is password protected. Press ENTER.
4. Press 0 for ROC NUMBER or press 1for Agreement Number (**).
5. Enter the information according you selected on step 4. Press ENTER then ENTER again to confirm.
6. Verify the amount and receipt number to be voided. Press ENTER to confirm.
7. Terminal displays: “TRANSACTION ACCEPTED” and a receipt prints. Press ENTER to print a customer copy.
(**)If there are more transactions with the same agreement number, press the CANCEL key to find the transaction to be voided then press ENTER to proceed.
REFUND (Credit)
1. On main screen press f2/▼ button to go “Transactions Menu”.
2. Scroll with f2/▼ button and select REFUND then press ENTER or press 6button.
3. Enter password if transaction is password protected. Press ENTER.
4. Swipe customer card or manually enter card number (CHIP cards are not allowed for Refunds). Press ENTER.
5. Enter 4DBC*(4-digit secure code in front of the card) and if is manually, the expiration date (MMYY). Press ENTER.
6. Enter refund amount. Press ENTER then ENTER again to confirm.
7. Terminal displays: “TRANSACTION ACCEPTED” and a receipt prints. Press ENTER to print a customer copy.
OFFLINE TRANSACTIONS
CAR RENTAL OFFLINE:
1. On main screen press f2/▼button to go “Transactions Menu”.
2. Scroll with f2/▼ button and select OFF-LINE TRANS. then press ENTER or press 7button.
3. Enter password, if transaction is password protected. Press ENTER.
4. Select CAR RENT.OFFLINE then Press ENTER or press 0button
5. Swipe customer card or manually enter card number (CHIP cards are not allowed for Offline Trans.). Press ENTER.
6. Enter 4DBC*(4-digit secure code in front of the card) and if is manually, the expiration date (MMYY). Press ENTER.
7. Enter amount. Press ENTER then ENTER again to confirm.
8. Enter rental date (MMDD) and press ENTER. For “today date” only press ENTER.
9. Enter returned date (MMDD) and press ENTER. For “today date” only press ENTER.
10. Enter agreement number. Press ENTER.
11. Enter approval code. Press ENTER.
12. Terminal displays: “TRANSACTION ACCEPTED” and a receipt prints. Press ENTER to print a customer copy.
*4DBC is a four-digit, (non-embossed) number that is printed above the Cardmember Account Number on the face of the Card.
3/3
Car Rental –User Quick Ref. for AMEX Terminal iCT220 model (continued).
OFFLINE TRANSACTIONS
GAS FEE OFFLINE:
1. On main screen press f2/▼button to go “Transactions Menu”.
2. Scroll with f2/▼ button and select OFF-LINE TRANS. then press ENTER or press 7button.
3. Enter password, if transaction is password protected. Press ENTER.
4. Select GAS FEE OFFLINE then Press ENTER or press 1button
5. Swipe customer card or manually enter card number (CHIP cards are not allowed for Offline Trans.). Press ENTER.
6. Enter 4DBC*(4-digit secure code in front of the card) and if is manually, the expiration date (MMYY). Press ENTER.
7. Enter amount. Press ENTER then ENTER again to confirm.
8. Enter rental date (MMDD) and press ENTER. For “today date” only press ENTER.
9. Enter returned date (MMDD) and press ENTER. For “today date” only press ENTER.
10. Enter agreement number. Press ENTER.
11. Enter approval code. Press ENTER.
12. Terminal displays: “TRANSACTION ACCEPTED” and a receipt prints. Press ENTER to print a customer copy.
LATE RETURN FEE OFFLINE:
1. On main screen press f2/▼button to go “Transactions Menu”.
2. Scroll with f2/▼ button and select OFF-LINE TRANS. then press ENTER or press 7button.
3. Enter password, if transaction is password protected. Press ENTER.
4. Select LATE RET.OFFL then Press ENTER or press 2button
5. Swipe customer card or manually enter card number (CHIP cards are not allowed for Offline Trans.). Press ENTER.
6. Enter 4DBC*(4-digit secure code in front of the card) and if is manually, the expiration date (MMYY). Press ENTER.
7. Enter amount. Press ENTER then ENTER again to confirm.
8. Enter rental date (MMDD) and press ENTER. For “today date” only press ENTER.
9. Enter returned date (MMDD) and press ENTER. For “today date” only press ENTER.
10. Enter agreement number. Press ENTER.
11. Enter approval code. Press ENTER.
12. Terminal displays: “TRANSACTION ACCEPTED” and a receipt prints. Press ENTER to print a customer copy.
DROP FEE OFFLINE:
1. On main screen press f2/▼button to go “Transactions Menu”.
2. Scroll with f2/▼ button and select OFF-LINE TRANS. then press ENTER or press 7button.
3. Enter password, if transaction is password protected. Press ENTER.
4. Select DROP FEE OFFL then Press ENTER or press 3button
5. Swipe customer card or manually enter card number (CHIP cards are not allowed for Offline Trans.). Press ENTER.
6. Enter 4DBC*(4-digit secure code in front of the card) and if is manually, the expiration date (MMYY). Press ENTER.
7. Enter amount. Press ENTER then ENTER again to confirm.
8. Enter rental date (MMDD) and press ENTER. For “today date” only press ENTER.
9. Enter returned date (MMDD) and press ENTER. For “today date” only press ENTER.
10. Enter agreement number. Press ENTER.
11. Enter approval code. Press ENTER.
12. Terminal displays: “TRANSACTION ACCEPTED” and a receipt prints. Press ENTER to print a customer copy.
CLOSE THE BATCH
1. On main screen press f3/▲button to go “Administrative Menu”.
2. Scroll with f2/▼button and select CLOSE BATCH or press the number besides of this option.
3. Enter password and press ENTER.
4. Confirm the sales total and press ENTER.
5. The terminal will prompt to confirm the refund total. If it is ok then Press ENTER, if not press CANCEL.
6. The printer will print the batch reports; confirming the batch was received successfully by the processor.
*4DBC is a four-digit, (non-embossed) number that is printed above the Cardmember Account Number on the face of the Card.
1/4
Lodging –User Quick Reference for AMEX Terminal (iCT220 model).
.
CHECK IN (Authorization)
1. On main Screen, swipe, insert customer card or manually enter card number (15 digits).
2. If swiped, enter the 4DBC* (4-digit secure code in front of the card). If it is manually then enter the expiration date
(MMYY) and the 4DBC*. Press ENTER.
3. Enter base amount. Press ENTER.
4. Enter arrival date (MMDD). Press ENTER. For “today date” only press ENTER.
5. Enter folio number. Press ENTER.
6. If is a Chip Card and PIN is required, enter the PIN # and press ENTER.
7. Wait for terminal to process transaction and print receipt. Press ENTER to print a customer copy.
CHECK OUT
1. On main screen press f2/▼ button to go “Transactions Menu”.
2. Scroll with f2/▼ button and select CHECK OUT then press ENTER or press 1button.
3. Press 0 for ROC NUMBER or press 1for Folio Number.
4. Enter the information according you selected on step 3. Press ENTER then ENTER again to confirm.
5. Enter Departure date (MMDD). Press ENTER. For “today date” only press ENTER.
6. Enter final amount. Press ENTER.
7. If a reauthorization is required, press ENTER to proceed.
8. Wait for terminal to process transaction and print receipt. Press ENTER to print a customer copy.
NO SHOW
1. On main screen press f2/▼ button to go “Transactions Menu”.
2. Scroll with f2/▼ button and select NO SHOW then press ENTER or press 2button.
3. Swipe, insert the customer card or manually enter the card number (15 digits).
4. If swiped, enter the 4DBC*(4-digit secure code in front of the card). If it is manually then enter the expiration date
(MMYY) and the 4DBC*. Press ENTER.
5. Enter amount. Press ENTER then ENTER again to confirm.
6. Enter folio number. Press ENTER.
7. If is a Chip Card and PIN is required, enter the PIN # and press ENTER.
8. Wait for terminal to process transaction and print receipt. Press ENTER to print a customer copy.
ROOM DEPOSIT
1. On main screen press f2/▼ button to go “Transactions Menu”.
2. Scroll with f2/▼ button and select ROOM DEPOSIT then press ENTER or press 3button.
3. Swipe, insert the customer card or manually enter the card number (15 digits).
4. If swiped, enter the 4DBC*(4-digit secure code in front of the card). If it is manually then enter the expiration date
(MMYY) and the 4DBC*. Press ENTER.
5. Enter amount. Press ENTER then ENTER again to confirm.
6. Enter arrival date (MMDD) and press ENTER. For “today date” only press ENTER.
7. Enter departure date (MMDD) and press ENTER. For “today date” only press ENTER.
8. If is a Chip Card and PIN is required, enter the PIN # and press ENTER.
9. Wait for terminal to process transaction and print receipt. Press ENTER to print a customer copy.
VOID TRANSACTION
1. On main screen press f2/▼button to go”Transactions Menu”.
2. Scroll with f2/▼button and select VOID then press ENTER or press 4button.
3. Enter password, if transaction is password protected. Press ENTER.
4. Press 0 for ROC NUMBER or press 1for Folio Number.
5. Enter the information according you selected on step 4. Press ENTER then ENTER again to confirm.
6. Verify the amount and receipt number to be voided. Press ENTER to confirm.
7. Terminal displays: “TRANSACTION ACCEPTED” and a receipt prints. Press ENTER to print a customer copy.
*4DBC is a four-digit, (non-embossed) number that is printed above the Cardmember Account Number on the face of the Card.
2/4
Lodging –User Quick Ref. for AMEX Terminal iCT220 model (continued).
REFUND (Credit)
1. On main screen press f2/▼ button to go “Transactions Menu”.
2. Scroll with f2/▼ button and select REFUND then press ENTER or press 5button.
3. Enter password, if transaction is password protected. Press ENTER.
4. Swipe customer card or manually enter card number (CHIP cards are not allowed for Refunds). Press ENTER.
5. Enter 4DBC*(4-digit secure code in front of the card) and if is manually, the expiration date (MMYY). Press ENTER.
6. Enter refund amount. Press ENTER then ENTER again to confirm.
7. Terminal displays: “TRANSACTION ACCEPTED” and a receipt prints. Press ENTER to print a customer copy.
RETAIL TRANSACTION
1. On main screen press f2/▼ button to go “Transactions Menu”.
2. Scroll with f2/▼ button and select RETAIL TRANS. then press ENTER or press 6button.
3. Swipe, insert the customer card or manually enter the card number (15 digits).
4. If swiped, enter the 4DBC*(4-digit secure code in front of the card). If it is manually then enter the expiration date
(MMYY) and the 4DBC*. Press ENTER.
5. Enter amount. Press ENTER then ENTER again to confirm.
6. If is a Chip Card and PIN is required, enter the PIN # and press ENTER.
7. Wait for terminal to process transaction and print receipt. Press ENTER to print a customer copy.
RESTAURANT TRANSACTIONS
RESTAURANT SALE
1. On main screen press f2/▼ button to go “Transactions Menu”.
2. Scroll with f2/▼ button and select RESTAURANT TRANS. then press ENTER or press 7button.
3. Select RESTAURANT SALE then Press ENTER or press 0button
4. Swipe, insert the customer card or manually enter the card number (15 digits).
5. If swiped, enter the 4DBC*(4-digit secure code in front of the card). If it is manually then enter the expiration date
(MMYY) and the 4DBC*. Press ENTER.
6. Enter amount. Press ENTER.
7. Enter tip amount. Press ENTER then ENTER again to confirm.
a. If tip is not known, press ENTER then ENTER again to confirm.
8. If is a Chip Card and PIN is required, enter the PIN # and press ENTER.
9. Wait for terminal to process transaction and print receipt. Press ENTER to print a customer copy.
RESTAURANT ADJUSTMENT
1. On main screen press f2/▼ button to go “Transactions Menu”.
2. Scroll with f2/▼ button and select RESTAURANT TRANS. then press ENTER or press 7button.
3. Select ADJUSTMENT then Press ENTER or press 1button
4. Enter 6 digits receipt number (ROC#). Press ENTER then ENTER again to confirm.
5. Enter tip amount. Press ENTER then ENTER again to confirm.
6. Terminal displays: “ADJUST APPROVED.”
*4DBC is a four-digit, (non-embossed) number that is printed above the Cardmember Account Number on the face of the Card.
3/4
Lodging –User Quick Ref. for AMEX Terminal iCT220 model (continued).
OFFLINE TRANSACTIONS
CHECK IN OFFLINE:
1. On main screen press f2/▼button to go “Transactions Menu”.
2. Scroll with f2/▼ button and select OFF-LINE TRANS then press ENTER or press 8button.
3. Enter password, if transaction is password protected. Press ENTER.
4. Select CHECK-IN OFFLINE then Press ENTER or press 0button
5. Swipe customer card or manually enter card number (CHIP cards are not allowed for Offline Trans.). Press ENTER.
6. Enter 4DBC*(4-digit secure code in front of the card) and if is manually, the expiration date (MMYY). Press ENTER.
7. Enter amount. Press ENTER then ENTER again to confirm.
8. Enter arrival date (MMDD) and press ENTER. For “today date” only press ENTER.
9. Enter departure date (MMDD) and press ENTER. For “today date” only press ENTER.
10. Enter folio number. Press ENTER.
11. Enter approval code. Press ENTER.
12. Terminal displays: “TRANSACTION ACCEPTED” and a receipt prints. Press ENTER to print a customer copy.
NO SHOW OFFLINE:
1. On main screen press f2/▼button to go “Transactions Menu”.
2. Scroll with f2/▼ button and select OFF-LINE TRANS then press ENTER or press 8button.
3. Enter password, if transaction is password protected. Press ENTER.
4. Select NO SHOW OFFLINE then Press ENTER or press 1button
5. Swipe customer card or manually enter card number (CHIP cards are not allowed for Offline Trans.). Press ENTER.
6. Enter 4DBC*(4-digit secure code in front of the card) and if is manually, the expiration date (MMYY). Press ENTER.
7. Enter amount. Press ENTER then ENTER again to confirm.
8. Enter folio number. Press ENTER.
9. Enter approval code. Press ENTER.
10. Terminal displays: “TRANSACTION ACCEPTED” and a receipt prints. Press ENTER to print a customer copy.
ROOM DEPOSIT OFFLINE:
1. On main screen press f2/▼button to go “Transactions Menu”.
2. Scroll with f2/▼ button and select OFF-LINE TRANS then press ENTER or press 8button.
3. Enter password, if transaction is password protected. Press ENTER.
4. Select ROOM DEP.OFFLINE then Press ENTER or press 2button
5. Swipe customer card or manually enter card number (CHIP cards are not allowed for Offline Trans.). Press ENTER.
6. Enter 4DBC*(4-digit secure code in front of the card) and if is manually, the expiration date (MMYY). Press ENTER.
7. Enter amount. Press ENTER then ENTER again to confirm.
8. Enter arrival date (MMDD) and press ENTER. For “today date” only press ENTER.
9. Enter departure date (MMDD) and press ENTER. For “today date” only press ENTER.
10. Enter approval code. Press ENTER.
11. Terminal displays: “TRANSACTION ACCEPTED” and a receipt prints. Press ENTER to print a customer copy.
RETAIL OFFLINE:
1. On main screen press f2/▼button to go “Transactions Menu”.
2. Scroll with f2/▼ button and select OFF-LINE TRANS then press ENTER or press 8button.
3. Enter password, if transaction is password protected. Press ENTER.
4. Select RETAIL OFFLINE then Press ENTER or press 3button
5. Swipe customer card or manually enter card number (CHIP cards are not allowed for Offline Trans.). Press ENTER.
6. Enter 4DBC*(4-digit secure code in front of the card) and if is manually, the expiration date (MMYY). Press ENTER.
7. Enter amount. Press ENTER then ENTER again to confirm.
8. Enter approval code. Press ENTER.
9. Terminal displays: “TRANSACTION ACCEPTED” and a receipt prints. Press ENTER to print a customer copy.
*4DBC is a four-digit, (non-embossed) number that is printed above the Cardmember Account Number on the face of the Card.
4/4
Lodging –User Quick Ref. for AMEX Terminal iCT220 model (continued).
OFFLINE TRANSACTIONS
RESTAURANT OFFLINE:
1. On main screen press f2/▼button to go “Transactions Menu”.
2. Scroll with f2/▼ button and select OFF-LINE TRANS then press ENTER or press 8button.
3. Enter password, if transaction is password protected. Press ENTER.
4. Select REST. OFFLINE then Press ENTER or press 4button
5. Swipe customer card or manually enter card number (CHIP cards are not allowed for Offline Trans.). Press ENTER.
6. Enter 4DBC*(4-digit secure code in front of the card) and if is manually, the expiration date (MMYY). Press ENTER.
7. Enter amount. Press ENTER.
8. Enter tip amount. Press ENTER then ENTER again to confirm.
a. If tip is not known, press ENTER then ENTER again to confirm.
9. Enter approval code. Press ENTER.
10. Terminal displays: “TRANSACTION ACCEPTED” and a receipt prints. Press ENTER to print a customer copy.
CLOSE THE BATCH
1. On main screen press f3/▲button to go “Administrative Menu”.
2. Scroll with f2/▼button and select CLOSE BATCH or press the number besides of this option.
3. Enter password and press ENTER.
4. Confirm the sales total and press ENTER.
5. The terminal will prompt to confirm the refund total. If it is ok then Press ENTER, if not press CANCEL.
6. The printer will print the batch reports; confirming the batch was received successfully by the processor.
*4DBC is a four-digit, (non-embossed) number that is printed above the Cardmember Account Number on the face of the Card.
Lodging –User Quick Reference Guide –Administrative Reports.
.
REPRINT BATCH*(up to the last five previous Batches)
1. On main screen press f3/▲button to go “Administrative Menu”.
2. Press ENTER or press 0button.
3. Scroll with f2/f3▼/▲ buttons and select the batch to be reprinted. Press ENTER.
4. Wait for terminal to process transaction and print receipt.
*This option will not appear as part of the list if there is not previous batch closed.
REPRINT (Merchant or Customer copy Receipt)
1. On main screen press f3/▲button to go “Administrative Menu”.
2. Scroll with f2/▼ button and select REPRINT then press ENTER or press the number besides of this option.
3. Enter the ROC NUMBER (shown in the receipt of 6 digits) then Press ENTER.
4. Press 1 for Merchant Copy or press 1for Customer Copy.
5. Wait for terminal to print a receipt.
REPORTS
PENDING Reports (Authorization transactions –Check In)
1. On main screen press f3/▲button to go “Administrative Menu”.
2. Scroll with f2/▼ button and select REPORTS then press ENTER or press the number besides of this option.
3. Select PENDING then Press ENTER or press 0button.
4. For TOTAL REPORT Press ENTER or press 0button, this prints a summary of Check In transactions.
5. For DETAIL REPORT press 1button, this prints each Check In transactions, a summary of totals will be print at the end
of this report.
6. For TOTAL DISPLAY press 2button, this shows on the screen the summary of Check In transactions, press f2/f3▼/▲
buttons for scrolling.
7. For DETAIL DISPLAY press 3button, this shows on the screen each Check In transaction, press f2/f3▼/▲ buttons for
scrolling.
SUBMISSION Reports (Transactions to be deposited for payment)
1. On main screen press f3/▲button to go “Administrative Menu”.
2. Scroll with f2/▼ button and select REPORTS then press ENTER or press the number besides of this option.
3. Scroll with f2/▼ button and select SUBMISSION or press 1button.
4. For TOTAL REPORT Press ENTER or press 0button, this prints a summary of transactions (total amount) to be deposited.
5. For DETAIL REPORT press 1button, this prints each transactions to be deposited like Check Outs, Refunds and offline
transactions, a summary of totals will be print at the end of this report.
6. For TOTAL DISPLAY press 2button, this shows on the screen the summary of all the transactions to be deposited like
Check Out, Refund and offline transactions, press f2/f3▼/▲ buttons for scrolling.
7. For DETAIL DISPLAY press 3button, this shows on the screen each transaction to be deposited like Check Outs,
Refunds and offline transactions, press f2/f3▼/▲ buttons for scrolling.
AUDIT DISPLAY (To view all the transactions)
1. On main screen press f3/▲button to go “Administrative Menu”.
2. Scroll with f2/▼ button and select REPORTS then press ENTER or press the number besides of this option.
3. Scroll with f2/▼ button and select AUDIT DISPLAY or press 2button, this shows on the screen each transaction the
machine has in the memory (including voids transactions). Press f2/f3▼/▲ buttons for scrolling.
Retail –User Quick Reference Guide –Administrative Reports.
.
REPRINT BATCH*(up to the last five previous Batches)
1. On main screen press f3/▲button to go “Administrative Menu”.
2. Press ENTER or press 0button.
3. Scroll with f2/f3▼/▲ buttons and select the batch to be reprinted. Press ENTER.
4. Wait for terminal to process transaction and print receipt.
*This option will not appear as part of the list if there is not previous batch closed.
REPRINT (Merchant or Customer copy Receipt)
1. On main screen press f3/▲button to go “Administrative Menu”.
2. Scroll with f2/▼ button and select REPRINT then press ENTER or press the number besides of this option.
3. Enter the ROC NUMBER (shown in the receipt of 6 digits) then Press ENTER.
4. Press 1 for Merchant Copy or press 1for Customer Copy.
5. Wait for terminal to print a receipt.
REPORTS
SUBMISSION Reports (Transactions to be deposited for payment)
1. On main screen press f3/▲button to go “Administrative Menu”.
2. Scroll with f2/▼ button and select REPORTS then press ENTER or press the number besides of this option.
3. Scroll with f2/▼ button and select SUBMISSION or press 0button.
4. For TOTAL REPORT Press ENTER or press 0button, this prints a summary of transactions (total amount) to be deposited.
5. For DETAIL REPORT press 1button, this prints each transactions to be deposited like Sales, Refunds and offline
transactions, a summary of totals will be print at the end of this report.
6. For TOTAL DISPLAY press 2button, this shows on the screen the summary of all the transactions to be deposited like
Sales, Refund and offline transactions, press f2/f3▼/▲ buttons for scrolling.
7. For DETAIL DISPLAY press 3button, this shows on the screen each transaction to be deposited, press f2/f3▼/▲
buttons for scrolling.
AUDIT DISPLAY (To view all the transactions)
1. On main screen press f3/▲button to go “Administrative Menu”.
2. Scroll with f2/▼ button and select REPORTS then press ENTER or press the number besides of this option.
3. Scroll with f2/▼ button and select AUDIT DISPLAY or press 1button, this shows on the screen each transaction the
machine has in the memory (including voids transactions). Press f2/f3▼/▲ buttons for scrolling.
Retail/Restaurant –User Quick Reference for AMEX Terminal (iCT220 model).
.
SALE (Authorization and Capture)
1. On main Screen swipe, insert the customer card or manually enter the card number (15 digits).
2. If swiped, enter the 4DBC*(4-digit secure code in front of the card). If it is manually then enter the expiration date
(MMYY) and the 4DBC*. Press ENTER.
3. Enter base amount of bill (amount before tip, if applicable). Press ENTER then ENTER again to confirm.
4. Enter tip amount, if available, then press ENTER then ENTER again to confirm.
a. If tip is not known, press ENTER then ENTER again to confirm.
5. If is a Chip Card and PIN is required, enter the PIN # and press ENTER.
6. Wait for terminal to process transaction and print receipt. Press ENTER to print a customer copy.
ENTRY OF TIP AT A LATER TIME (for Restaurant ONLY)
1. On main screen press f2/▼ button to go “Transactions Menu”
2. Scroll with f2/▼ button and select ADJUST then press ENTER or press 1button.
3. Enter 6 digits receipt number (ROC#). Press ENTER then ENTER again to confirm.
4. Enter tip amount. Press ENTER then ENTER again to confirm
5. Terminal displays: “ADJUST APPROVED.”
VOID TRANSACTION
1. On main screen press f2/▼button to go”Transactions Menu”.
2. Scroll with f2/▼button and select VOID then press ENTER or press 2button.
3. Enter password, if transaction is password protected. Press ENTER.
4. Enter 6 digits receipt number (ROC#). Press ENTER.
5. Verify the amount and receipt number to be voided. Press ENTER to confirm.
6. Terminal displays: “TRANSACTION ACCEPTED” and a receipt prints. Press ENTER to print a customer copy.
REFUND (Credit)
1. On main screen press f2/▼ button to go “Transactions Menu”.
2. Scroll with f2/▼ button and select REFUND then press ENTER or press 3button.
3. Enter password, if transaction is password protected. Press ENTER.
4. Swipe customer card or manually enter card number (CHIP cards are not allowed for Refunds). Press ENTER.
5. Enter 4DBC*(4-digit secure code in front of the card) and if is manually, the expiration date (MMYY). Press ENTER.
6. Enter refund amount. Press ENTER then ENTER again to confirm.
7. Terminal displays: “TRANSACTION ACCEPTED” and a receipt prints. Press ENTER to print a customer copy.
OFFLINE TRANSACTION
1. On main screen press f2/▼button to go “Transactions Menu”.
2. Scroll with f2/▼ button and select OFF-LINE TRANS then press ENTER or press 4button.
3. Select SALE then Press ENTER.
4. Enter password, if transaction is password protected. Press ENTER.
5. Swipe customer card or manually enter card number (CHIP cards are not allowed for Offline Trans.). Press ENTER.
6. Enter 4DBC*(4-digit secure code in front of the card) and if is manually, the expiration date (MMYY). Press ENTER.
7. Enter amount. Press ENTER then ENTER again to confirm.
8. Enter tip amount, if available, then press ENTER then ENTER again to confirm.
a. If tip is not known, press ENTER then ENTER again to confirm.
9. Enter approval code. Press ENTER.
10. Terminal displays: “TRANSACTION ACCEPTED” and a receipt prints. Press ENTER to print a customer copy.
CLOSE THE BATCH
1. On main screen press f3/▲button to go “Administrative Menu”.
2. Scroll with f2/▼button and select CLOSE BATCH or press the number besides of this option.
3. Enter password and press ENTER.
4. Confirm the sales total and press ENTER.
5. The terminal will prompt to confirm the refund total. If it is ok then Press ENTER, if not press CANCEL.
6. The printer will print the batch reports; confirming the batch was received successfully by the processor.
*4DBC is a four-digit, (non-embossed) number that is printed above the Cardmember Account Number on the face of the Card.
Restaurant –User Quick Reference Guide –Administrative Reports.
.
REPRINT BATCH*(up to the last five previous Batches)
1. On main screen press f3/▲button to go “Administrative Menu”.
2. Press ENTER or press 0button.
3. Scroll with f2/f3▼/▲ buttons and select the batch to be reprinted. Press ENTER.
4. Wait for terminal to process transaction and print receipt.
*This option will not appear as part of the list if there is not previous batch closed.
REPRINT (Merchant or Customer copy Receipt)
1. On main screen press f3/▲button to go “Administrative Menu”.
2. Scroll with f2/▼ button and select REPRINT then press ENTER or press the number besides of this option.
3. Enter the ROC NUMBER (shown in the receipt of 6 digits) then Press ENTER.
4. Press 1 for Merchant Copy or press 1for Customer Copy.
5. Wait for terminal to print a receipt.
REPORTS
SUBMISSION Reports (Transactions to be deposited for payment)
1. On main screen press f3/▲button to go “Administrative Menu”.
2. Scroll with f2/▼ button and select REPORTS then press ENTER or press the number besides of this option.
3. Scroll with f2/▼ button and select SUBMISSION or press 0button.
4. For TOTAL REPORT Press ENTER or press 0button, this prints a summary of transactions (total amount) to be deposited.
5. For DETAIL REPORT press 1button, this prints each transactions to be deposited like Restaurant Sales, Transactions
Adjusted, Refunds and Offline Transactions, a summary of totals will be print at the end of this report.
6. For TOTAL DISPLAY press 2button, this shows on the screen the summary of all the transactions to be deposited like
Restaurant Sales, Transactions Adjusted, Refunds and Offline Transactions, press f2/f3▼/▲ buttons for scrolling.
7. For DETAIL DISPLAY press 3button, this shows on the screen each transaction to be deposited, press f2/f3▼/▲
buttons for scrolling.
AUDIT DISPLAY (To view all the transactions)
1. On main screen press f3/▲button to go “Administrative Menu”.
2. Scroll with f2/▼ button and select REPORTS then press ENTER or press the number besides of this option.
3. Scroll with f2/▼ button and select AUDIT DISPLAY or press 1button, this shows on the screen each transaction the
machine has in the memory (including voids transactions). Press f2/f3▼/▲ buttons for scrolling.

Other Ingenico Touch Terminal manuals

Ingenico AXIUM EX4000 User manual

Ingenico

Ingenico AXIUM EX4000 User manual

Ingenico iSMP4 User manual

Ingenico

Ingenico iSMP4 User manual

Ingenico Moby/M100 User manual

Ingenico

Ingenico Moby/M100 User manual

Ingenico IWL220 GPRS User manual

Ingenico

Ingenico IWL220 GPRS User manual

Ingenico iWL250B User manual

Ingenico

Ingenico iWL250B User manual

Ingenico Tetra Move/5000 User manual

Ingenico

Ingenico Tetra Move/5000 User manual

Ingenico i5100 User manual

Ingenico

Ingenico i5100 User manual

Ingenico FLEX IPP320 User manual

Ingenico

Ingenico FLEX IPP320 User manual

Ingenico iWL252 User manual

Ingenico

Ingenico iWL252 User manual

Ingenico iWL258 User manual

Ingenico

Ingenico iWL258 User manual

Ingenico Link 2500 User manual

Ingenico

Ingenico Link 2500 User manual

Ingenico iCT220, iCT250 Reference guide

Ingenico

Ingenico iCT220, iCT250 Reference guide

Ingenico DESK/3500 User manual

Ingenico

Ingenico DESK/3500 User manual

Ingenico AXIUM D7 User manual

Ingenico

Ingenico AXIUM D7 User manual

Ingenico iUI120 Quick setup guide

Ingenico

Ingenico iUI120 Quick setup guide

Ingenico Link/2500 Instruction Manual

Ingenico

Ingenico Link/2500 Instruction Manual

Ingenico DESK/3500 User manual

Ingenico

Ingenico DESK/3500 User manual

Ingenico iwl255 User manual

Ingenico

Ingenico iwl255 User manual

Ingenico iWL250 WIFI User manual

Ingenico

Ingenico iWL250 WIFI User manual

Ingenico AXIUM RX5000 User manual

Ingenico

Ingenico AXIUM RX5000 User manual

Ingenico Tetra Move/5000 User manual

Ingenico

Ingenico Tetra Move/5000 User manual

Ingenico APOS A8 User manual

Ingenico

Ingenico APOS A8 User manual

Ingenico iCT Series User manual

Ingenico

Ingenico iCT Series User manual

Ingenico Telium User manual

Ingenico

Ingenico Telium User manual

Popular Touch Terminal manuals by other brands

Pioneer BD-V1000 Series operating instructions

Pioneer

Pioneer BD-V1000 Series operating instructions

PSC Falcon 510 user guide

PSC

PSC Falcon 510 user guide

Allen-Bradley PanelView 2711P-RW1 installation instructions

Allen-Bradley

Allen-Bradley PanelView 2711P-RW1 installation instructions

takepayments Your A920 Pro Installation and user guide

takepayments

takepayments Your A920 Pro Installation and user guide

C2STek FL-2000G user manual

C2STek

C2STek FL-2000G user manual

Wincor Nixdorf BEETLE installation guide

Wincor Nixdorf

Wincor Nixdorf BEETLE installation guide

takepayments Desk 3500 installation guide

takepayments

takepayments Desk 3500 installation guide

First Data VeriFoneVX820 Duet Quick setup guide

First Data

First Data VeriFoneVX820 Duet Quick setup guide

Mitsubishi Electric GT1685 Connection manual

Mitsubishi Electric

Mitsubishi Electric GT1685 Connection manual

Advantech HIT-W101C Quick start manual

Advantech

Advantech HIT-W101C Quick start manual

Carel pGD Series user manual

Carel

Carel pGD Series user manual

StarTech.com DuraView RACKCONS1708 user manual

StarTech.com

StarTech.com DuraView RACKCONS1708 user manual

Tellermate T-iX Series user guide

Tellermate

Tellermate T-iX Series user guide

CopperOptics Pairain PG-Plus PCS-719 manual

CopperOptics

CopperOptics Pairain PG-Plus PCS-719 manual

Burkert FreeLINE 8645 Supplementary instructions

Burkert

Burkert FreeLINE 8645 Supplementary instructions

Telic NT910G user manual

Telic

Telic NT910G user manual

Clearfield YOURx-Aerial installation manual

Clearfield

Clearfield YOURx-Aerial installation manual

Custom Audio Electronics Vision15 Turbo user manual

Custom Audio Electronics

Custom Audio Electronics Vision15 Turbo user manual

manuals.online logo
manuals.online logoBrands
  • About & Mission
  • Contact us
  • Privacy Policy
  • Terms and Conditions

Copyright 2025 Manuals.Online. All Rights Reserved.