manuals.online logo
Brands
  1. Home
  2. •
  3. Brands
  4. •
  5. iPECS
  6. •
  7. IP Phone
  8. •
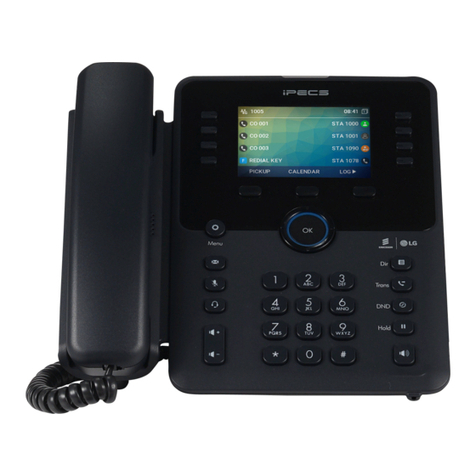
  9. iPECS 1080i User manual

iPECS 1080i User manual

1080i Quick Installation Guide
Before Starting
About this Guide
This guide is intended for the LIP/IP Phone users and only provides installation about the 1080i. You can download the complete user
guide here: www.ericssonlg-enterprise.com.
Unpacking the Phone
Carefully unpack your phone, be sure you have received each item in the following list:
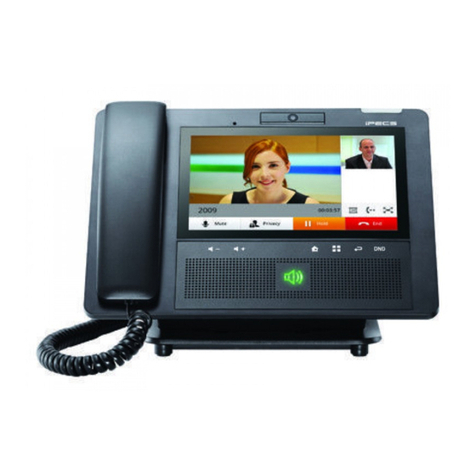
1080i Phone, Stand, Handset and Handset cord, 1.5m CAT5E Ethernet cable
Installation
Preparation
Your phone should be placed on a level surface near an electrical outlet, such as a desk or tabletop.
The phone can be powered by either AC Adapter or Power over Ethernet. (PoE Class 4)
To use AC power, use only the Ericsson-LG Enterprise Approved AC power Adapter, which you can order separately. To use PoE, your
connected LAN must support PoE.
CAUTION: Use either PoE or AC Adapter, not both, for the power supply of your phone
Handset and Headset
1) Connect one end of the handset cord with the short straight section to the handset.
2) Connect the other end of the handset cord with the long straight section to the handset jack marked with the symbol.
3) Connect the headset cord to the headset jack marked with the symbol.
NOTE: Please read "Information about compatibility headset" before connecting the headset to ensure safe and proper use.
4) Thread all cords through the channel to prevent damaging the cord during use.
5) The 1080i supports USB Headset. If a USB Headset is plugged in, the Headset function operates as a USB Headset.
NOTE: If you plug in or unplug the USB headset during a call, it will operate from the next call. The USB and EHSA headset cannot
be used together. Only one item must be connected.
Information about Compatibility Headset
We cannot guarantee other headsets except the headset list posted on the web site. Regarding Headset compatibility, refer to
"Headset list for IP phone" on the web site. We will update the compatibility list if we finish testing the new one anytime.
Network and Power
1) Plug one end of the supplied LAN cable into the LAN-Ethernet port on the back of your phone marked with the symbol.
2) Plug the other end of the cable into your LAN-Ethernet connection. (Do not extend the LAN Ethernet cable to the outside
of the building.)
3) (Optional) If you connect your PC Ethernet through the phone, plug one end of the LAN Ethernet cable into the PC
Ethernet port on the back of your phone marked with the symbol.
4) (Optional) Plug the other end of the cable into your LAN Ethernet connection of your PC.
NOTE: Skip the following procedures from 5) to 6) if PoE is used for your phone's power supply.
5) (Optional) Connect the AC power adaptor (not supplied) to the AC adaptor jack on the back of your phone. Fasten the
cord with a hook to prevent it from being disconnected.
6) (Optional) Plug the AC power Adapter into the nearest AC power outlet. The phone will startup.
Connecting a peripheral device & Camera Setting
Before you begin, remove the cover from the phone.
USB
Connect USB devices to the port marked with "USB." You can use various USB devices, such as a keyboard, mouse, memory stick,
and headset. Also you can do USB charging. If your phone does not detect your USB device while connected, we advise you to check if
the USB cable is connected correctly.
USB-C
Connect a USB type-C device to the port marked with "USB-C." This port can be used in DEBUG mode by a Certified Engineer. Also it
can be used to USB type-C Headset connection. You cannot do USB charging.
HDMI Cable
Connect an HDMI cable (not included) to the port marked with "HDMI." This HDMI port can be supported to connect your phone to your
TV using an HDMI cable to stream anything you like from your phone to your HDTV.
Camera Setting
The front camera provides a rotation function(Camera angle controller) to adjust the camera view angle and lock the camera lens for
security purposes.
Stand Attaching & Wall Mounting
Stand Attaching
The phone's angle is set by the attachment of the provided stand in one of two positions (35° or41.5°, 50°). If you install the phone on a
wall, do not attach the stand.
1) Choose the desired angle for the phone.
2) Align the tabs on the stand with the notches in the base of the phone.
3) Push the stand upward in the slot as far as it can go until properly attached.
Wall Mounting(Optional)
1080i phone can be wall-mounted as needed. The following instructions describe how to perform a wall mount installation.
1) Align the wall-mount bracket (not included) over the back of the phone as below picture
2) Fit the lower hooking points. (2 places) and then press the upper hooking points. (2 places)
3) Mark and drill two 7mm holes for plastic wall anchors (not included).
4) Insert the two anchors into the holes and insert and tighten the two screws (not included), leaving about 2.5 mm (1/8-inch)
exposed.
5) Slide 1080i phone over the screws and assure the phone is secure.
6) Reverse the handset hook and re-install in the phone so that the hook catches the groove in the handset receiver.
7) Hang the handset up on the handset hook.
8) Complete all wiring.
This document's contents are subject to revision without notice due to continued progress in methodology design and manufacturing.
Ericsson-LG Enterprise shall have no liability for any error or damage of any kind resulting from the use of this document.
Posted in Korea
https://ericssonlg-enterprise.com/
© Ericsson-LG Enterprise Co., Ltd. 2021
Regulatory Notes
[EU] European Union Declarations of Conformity
Ericsson-LG Enterprise Co., Ltd. declare that the equipment specified in this document bearing the "CE" mark conforms to the
Electromagnetic Compatibility Directive(EMCD,2014/30/EU) and Low Voltage Directive(LVD, 2014/35/EU).
Copies of these Declarations of Conformity (DoCs) can be obtained by contacting your local sales representative.
[USA/CSA] FCC/IC Interference Statement
This equipment has been tested and found to comply with a Class B digital device's limits, according to part 15 of the FCC Rules.
These limits are designed to provide reasonable protection against harmful interference in a residential installation. This device
complies with part 15 /RSS-GEN of the FCC/IC rules. Operation is subject to the following two conditions:
(1)This device may not cause harmful interference; and (2)This device must accept any interference received, including interference
that may cause undesired operation.
(1)l'appareil ne doit pas produire de brouillage, et (2)l'utilisateur de l'appareil doit accepter tout brouillage radioélectrique subi, même si
le brouillage est susceptible d'en compromettre le fonctionnement.
This equipment generates, uses, and can radiate radio frequency energy and, if not installed and used in accordance with the
instructions, may cause harmful interference to radio communications. However, there is no guarantee that interference will not occur in
a particular installation.
If this equipment does cause harmful interference to radio or television reception, which can be determined by turning the equipment off
and on, the user is encouraged to try to correct the interference by one or more of the following measures:
Reorient or relocate the receiving antenna.
Increase the separation between the equipment and receiver.
Connect the equipment into an outlet on a circuit different from that to which the receiver is connected.
Consult the dealer or an experienced radio/TV technician for help.
This Class B digital apparatus meets the requirements of the Canadian Interference-Causing Equipment Regulations, CAN
ICES-3(B)/NMB-3(B)
Cet appareil numérique de la classe B respecte toutes les exigences du Règlement sur le matériel brouilleur du Canada.
CAUTION: Any changes or modifications in the construction of this device that are not expressly approved by the party responsible for
compliance could void the user's authority to operate the equipment.
ATTENTION: Tout changement ou modification dans la construction de cet appareil qui ne sont pas expressément approuvé par la
partie responsable de la conformité pourraient annuler l'autorité de l'utilisateur à utiliser l'équipement.This Class B digital apparatus
complies with Canadian ICES-003.

Other iPECS IP Phone manuals

iPECS LIP-7008D User manual

iPECS

iPECS LIP-7008D User manual

iPECS LIP-9002 User manual

iPECS

iPECS LIP-9002 User manual

iPECS LIP-9000 Series User manual

iPECS

iPECS LIP-9000 Series User manual

iPECS LIP-8012D User manual

iPECS

iPECS LIP-8012D User manual

iPECS LIP-8008D User manual

iPECS

iPECS LIP-8008D User manual

iPECS 1040i Owner's manual

iPECS

iPECS 1040i Owner's manual

iPECS LIP-9000 Series User manual

iPECS

iPECS LIP-9000 Series User manual

iPECS 1030i User manual

iPECS

iPECS 1030i User manual

iPECS LIP-8004D User manual

iPECS

iPECS LIP-8004D User manual

iPECS 1020i Specification sheet

iPECS

iPECS 1020i Specification sheet

iPECS 1000i Series User manual

iPECS

iPECS 1000i Series User manual

iPECS LDP-9008D User manual

iPECS

iPECS LDP-9008D User manual

iPECS LIP-8002E User manual

iPECS

iPECS LIP-8002E User manual

iPECS 9071 Setup guide

iPECS

iPECS 9071 Setup guide

iPECS LIP-7024LD User manual

iPECS

iPECS LIP-7024LD User manual

iPECS 1040i Specification sheet

iPECS

iPECS 1040i Specification sheet

iPECS LIP-8040E User manual

iPECS

iPECS LIP-8040E User manual

iPECS LIP-9070 User manual

iPECS

iPECS LIP-9070 User manual

iPECS LDP-9240D Owner's manual

iPECS

iPECS LDP-9240D Owner's manual

iPECS 1020i Specification sheet

iPECS

iPECS 1020i Specification sheet

iPECS LIP-9010 User manual

iPECS

iPECS LIP-9010 User manual

iPECS LDP-9008D User manual

iPECS

iPECS LDP-9008D User manual

iPECS LDP-9240 User manual

iPECS

iPECS LDP-9240 User manual

iPECS 1000i Series User manual

iPECS

iPECS 1000i Series User manual

Popular IP Phone manuals by other brands

Mitel 6869i Quick reference guide

Mitel

Mitel 6869i Quick reference guide

Dynamix 201 user manual

Dynamix

Dynamix 201 user manual

Yealink Telkom W52P manual

Yealink

Yealink Telkom W52P manual

Masergy Poly CCX 400 overview

Masergy

Masergy Poly CCX 400 overview

Sterling Communications Sterling Voice IP230 User training guide

Sterling Communications

Sterling Communications Sterling Voice IP230 User training guide

Panasonic T-Mobile KX-HDV130 user guide

Panasonic

Panasonic T-Mobile KX-HDV130 user guide

Nitsuko ONYX user guide

Nitsuko

Nitsuko ONYX user guide

TIPTEL IP 280 Quick installation guide

TIPTEL

TIPTEL IP 280 Quick installation guide

Yealink Yealink SIP-T46G user guide

Yealink

Yealink Yealink SIP-T46G user guide

Mitel Networks 5312 IP Phone user guide

Mitel

Mitel Networks 5312 IP Phone user guide

Yealink SIP-T53W Quick reference guide

Yealink

Yealink SIP-T53W Quick reference guide

XONTEL XT-16W quick start guide

XONTEL

XONTEL XT-16W quick start guide

Yealink VP530 manual

Yealink

Yealink VP530 manual

LG IP 8815 quick start guide

LG

LG IP 8815 quick start guide

Avaya E169 manual

Avaya

Avaya E169 manual

AudioCodes C450HD quick guide

AudioCodes

AudioCodes C450HD quick guide

Grandstream Networks GXP16 Series user guide

Grandstream Networks

Grandstream Networks GXP16 Series user guide

GUANGZHOU ESCENE COMMUNICATION ES220P Technical manual

GUANGZHOU ESCENE COMMUNICATION

GUANGZHOU ESCENE COMMUNICATION ES220P Technical manual

manuals.online logo
manuals.online logoBrands
  • About & Mission
  • Contact us
  • Privacy Policy
  • Terms and Conditions

Copyright 2025 Manuals.Online. All Rights Reserved.